How to View Other Users Emails as a G Suite Admin
You may need to access another user’s emails for security purposes, to perform an email audit, or perhaps when collaborating with a colleague. There are a number of ways you can do this as a Google Workspace admin, for example, by creating a shared inbox or using security tools.
Here we’ll guide you through each method step by step.
Method 1: Delegated Account
A delegated account is a shared inbox that up to 10 users (delegates) can access. Each delegate can send or receive emails from the account, and you can keep the account organized using labels and filters.
You may wish to use this kind of account for customer service or a joint project, for example. A delegated account means everybody has access to all of the relevant information and communications. Plus, each user can see what messages have already been sent so no work or messages are repeated.
Here’s how to add delegates to a Gmail account:
Step 1: Open Gmail on your computer. (This process doesn’t work on the Gmail app).
Step 2: Click the Settings button, then See all settings.
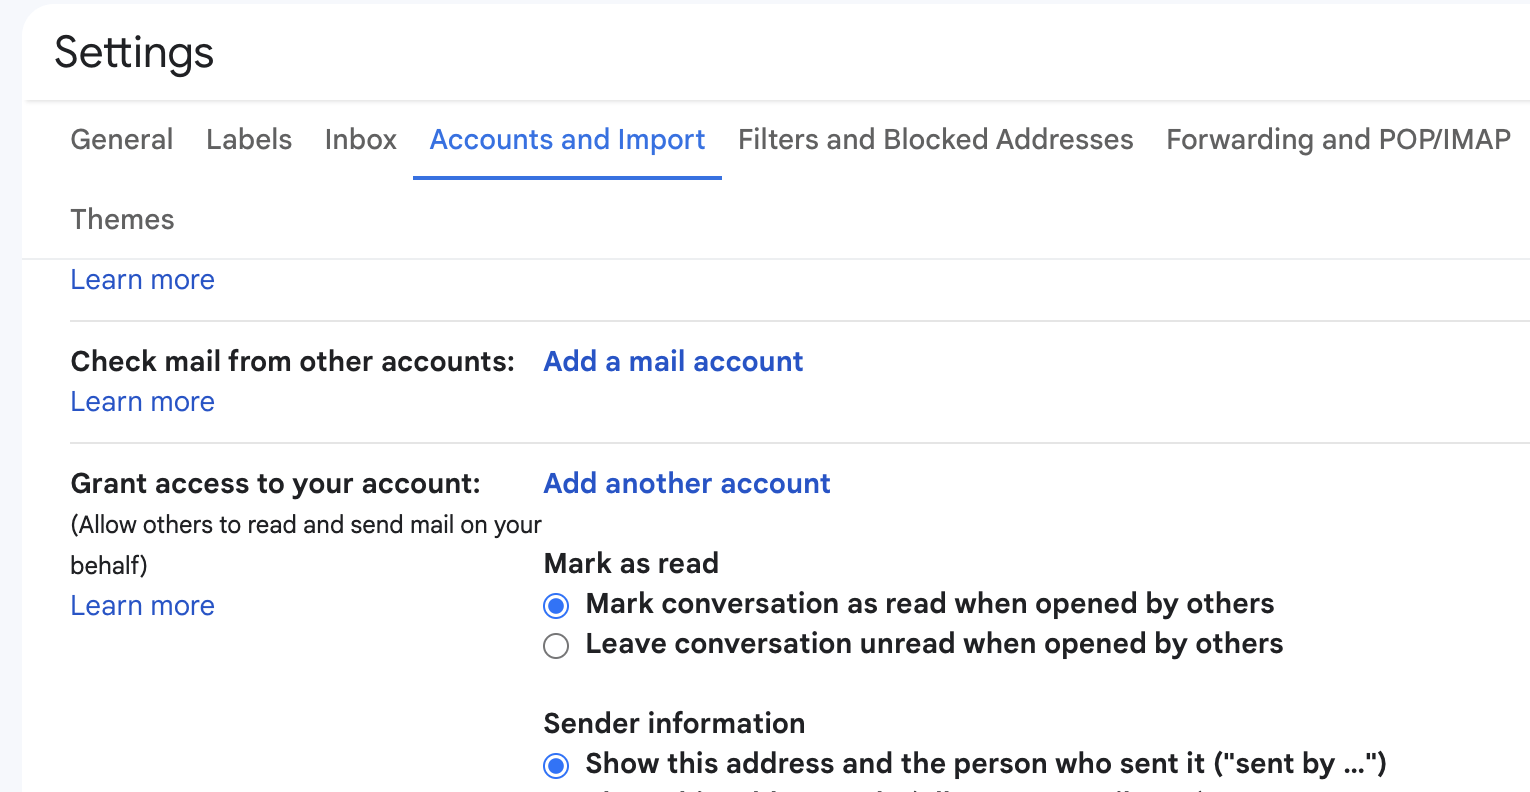
Step 3: Select the Accounts and Import or Accounts tab.
Step 4: Go to the section labeled Grant access to your account and click Add another account.
Step 5: Enter the delegate’s email address.
Step 6: Click Next Step then Send email to grant access.
The recipient will receive an invitation within 24 hours. They have a week to confirm, after which the invitation expires.
Need to remove a delegate from the account? Here’s how to do it:
Step 1: Open Gmail on your computer.
Step 2: Go to Settings > See all settings.
Step 3: Click on the Accounts and Import tab.
Step 4: Find the user you want to remove in the Grant access to your account section. Click Delete next to that user.
Method 2: Collaborative Inbox
A collaborative inbox is slightly different from a delegated account. It’s a type of group you can set up via Google Groups. It has its own email address which users can utilize to send and receive messages.
It’s a good idea to set up a collaborative inbox for project management purposes. This is because users are also able to track conversations as tasks and assign conversations to one another.
You can create a new group within Google Groups to use as a collaborative inbox or turn an existing group into a collaborative inbox by switching on the relevant features. If you’re setting up a new group then, as the admin, you’ll need to make sure you turn on Groups for Business first.
Here’s how you can use a group as a collaborative inbox:
Step 1: Go to Google Groups and select the name of the group.
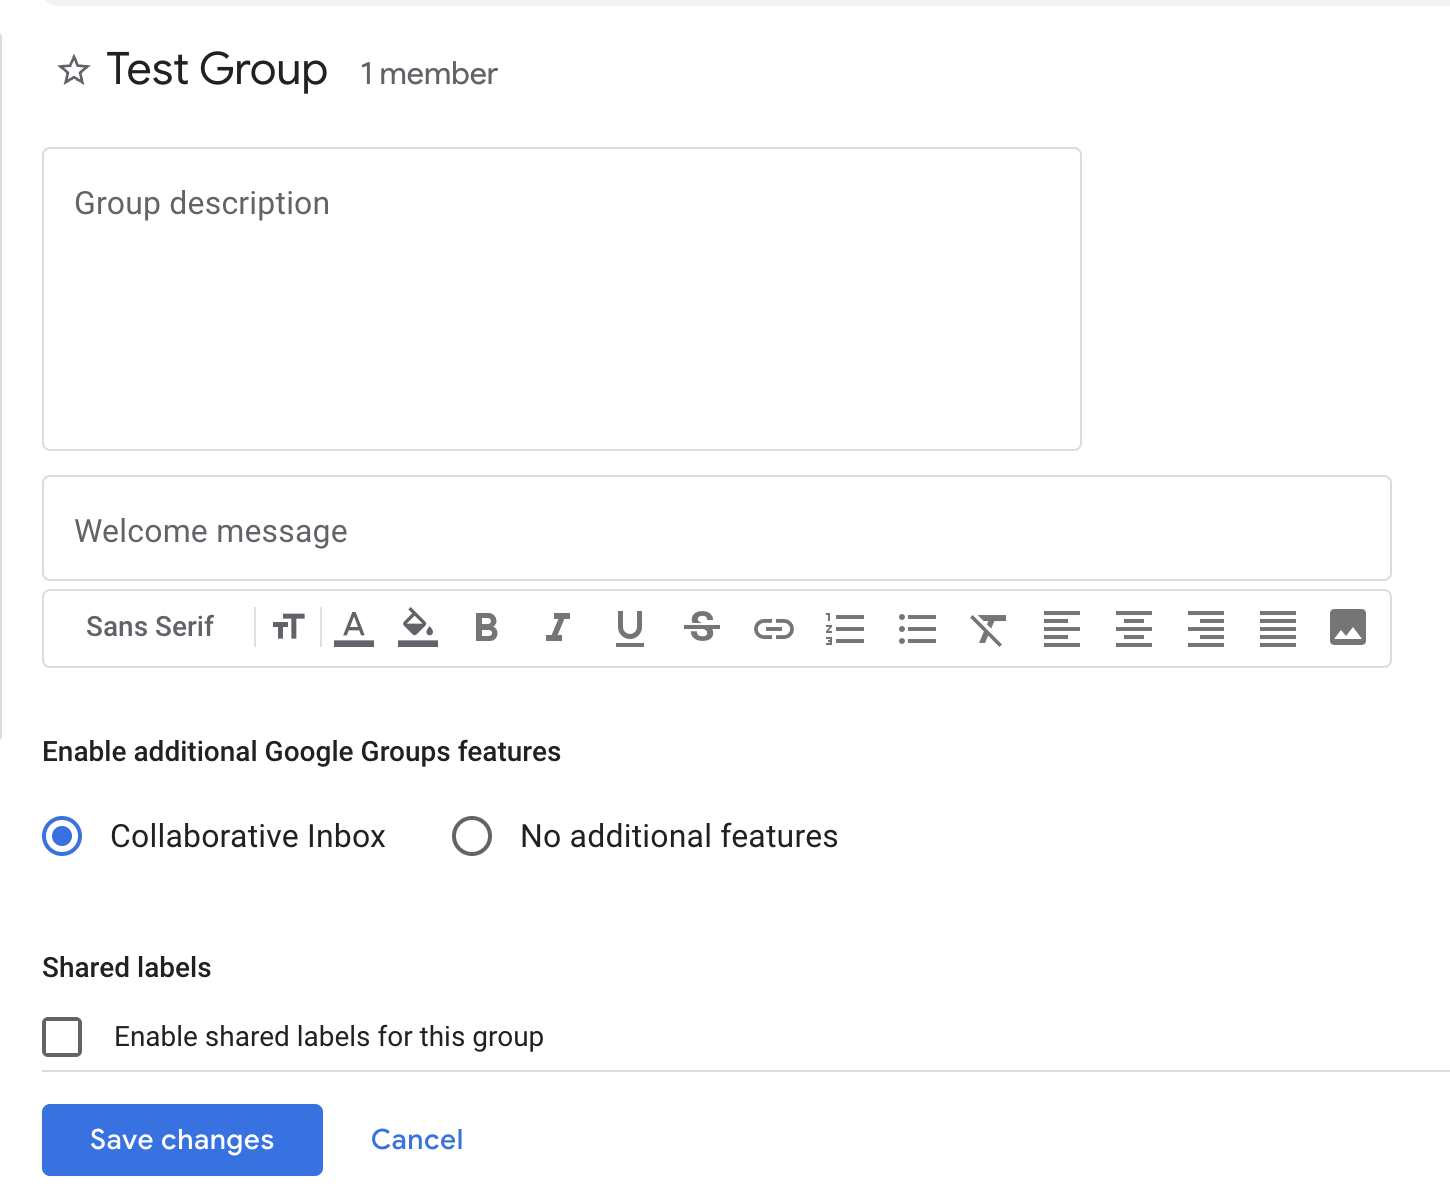
Step 2: Click Group settings.
Step 3: Find Enable additional Google Groups features and select Collaborative inbox.
Step 4: Assign permissions to group members so that users can view, participate in, and manage conversations.
Step 5: Click Save changes.
Method 3: Investigation Tool
Google Workspace’s security investigation tool allows super administrators to access a wide range of data and information related to the organization’s account. This includes access to data about Gmail messages as well as email content. Please note that to use the investigation tool, companies need an Enterprise Plus, Education Standard, Education Plus, or Enterprise Essentials Plus plan.
The purpose of the tool is to investigate and remedy any security or privacy issues. Here’s how to use it to view other users’ emails:
Step 1: Log in to the Admin Console using your administrator account.
Step 2: Go to Security > Security Center > Investigation tool.
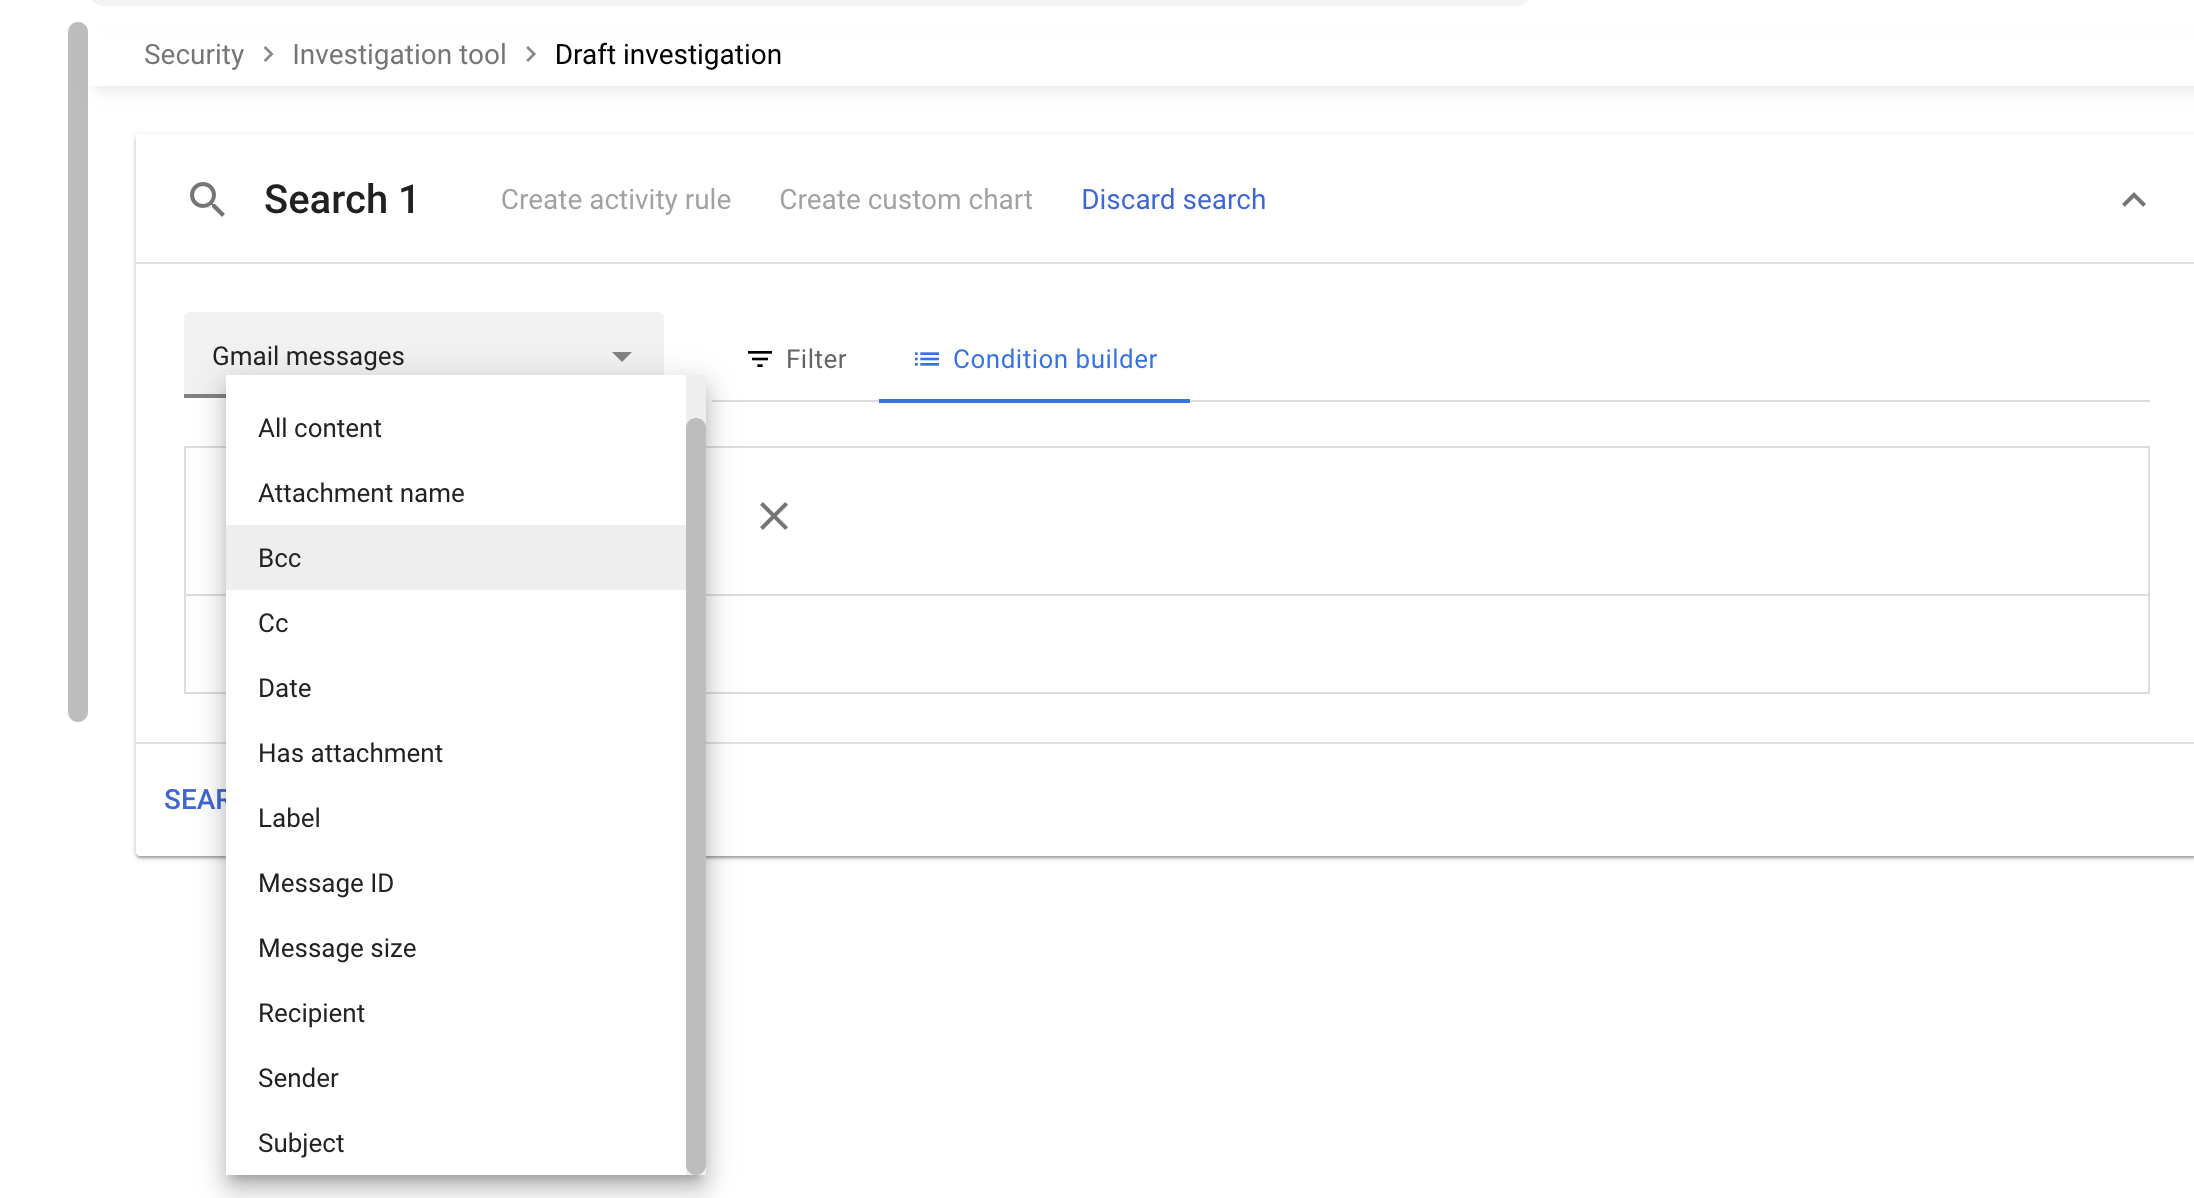
Step 3: Select Gmail messages from the Data source menu.
Step 4: Click Add Condition. You can choose from a list of various attributes including “Date” or “Sender.”
Step 5: Search for the email(s) you want to view. You can narrow down your search using the condition builder.
Step 6: Click Search and locate a message you want to view then click the message ID or subject of the message.
Step 7: Click Message at the top of the message header.
Step 8: Enter the reason why you want to view the contents of this message. This reason is recorded in the Admin audit log.
Step 9: Click Confirm.
You’ll now be able to view the contents of the message and take any further actions you need to. For example, you may wish to mark the message as spam or send it to quarantine.
Method 4: Content Compliance
As an admin, you can use content compliance rules to essentially flag any emails that may be cause for concern. Messages that meet certain conditions can be sent to an admin quarantine. From there you can view the email and modify it before it’s sent or choose to reject it.
You may want to do this to prevent sensitive information from being shared outside of the company.
Here’s how to set up and use content compliance rules:
Step 1: Sign in to Admin Console using your admin account.
Step 2: Go to Apps > Google Workspace > Gmail > Compliance. Alternatively, you may need to go to Apps > Google Workspace > Gmail > Advanced Settings.
Step 3: Go to the Compliance section and hover over Content compliance then click Configure.
Step 4: Enter a description for the setting.
Step 5: Check the boxes of the emails you want the rule to apply to – inbound, outbound, and/or internal messages.
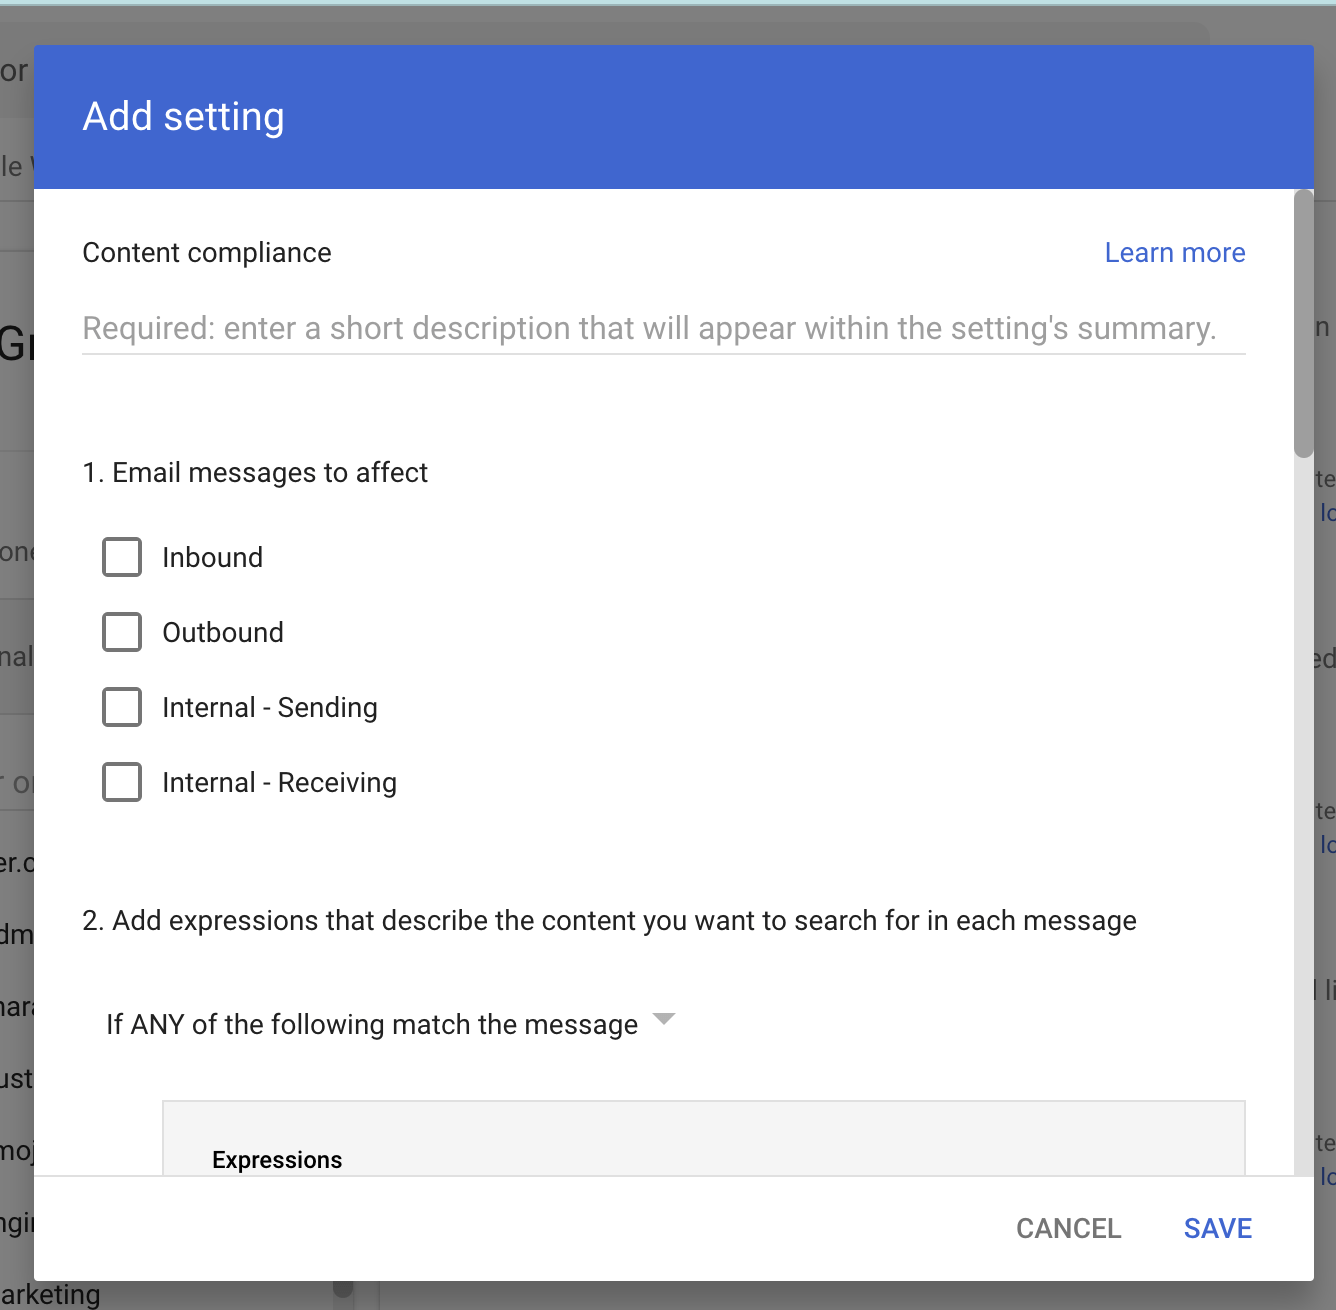
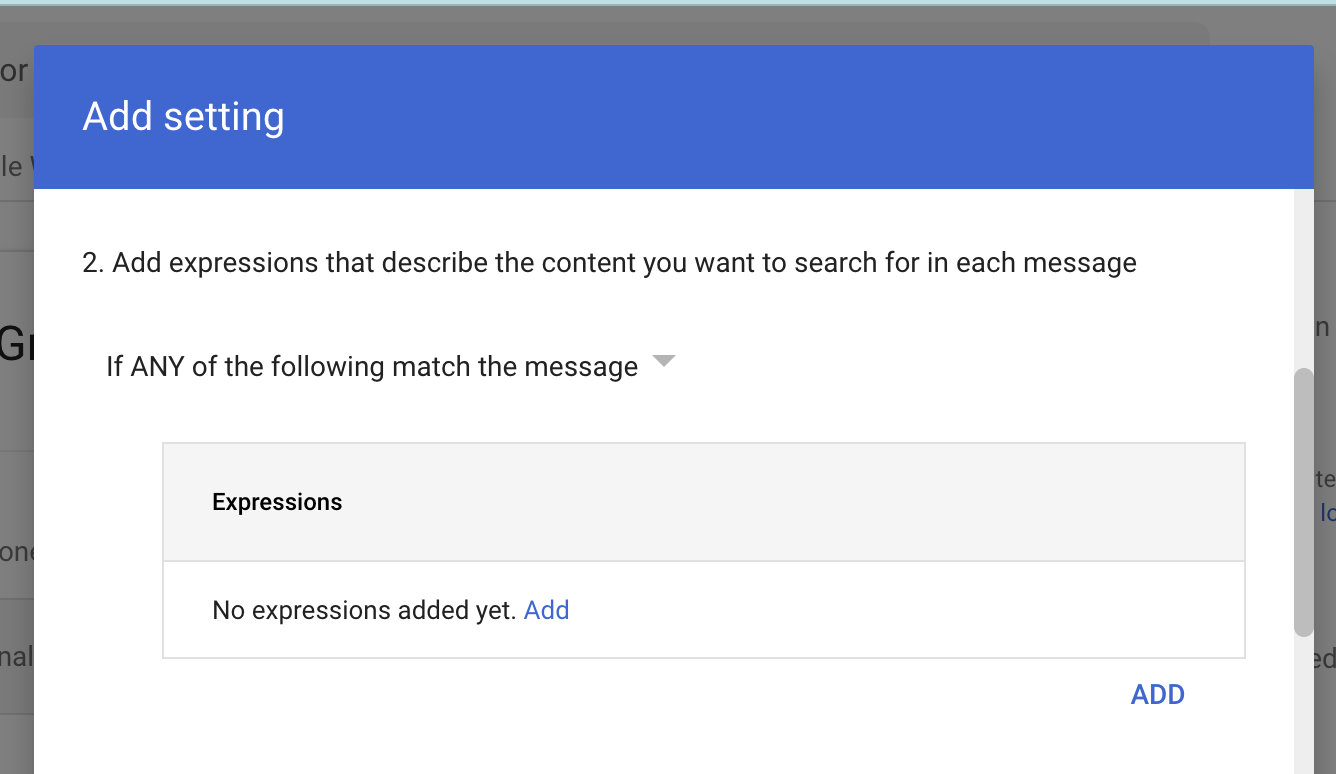
Step 6: Add up to 10 expressions you want to be flagged and select whether ANY or ALL conditions must be met to trigger an action.
Step 7: Choose whether you require a Simple content match, Advanced content match, Predefined content, or Metadata match for the expression. Then click Save.
Here’s a quick explanation of what each of these content match types means:
- Simple content match – Any expression that contains the words you enter will be flagged. For example, if you type “confidential document”, a message that contains “this document is confidential” will also be flagged
- Advanced content match – This flags expressions that are an exact match to the ones you entered. So if you enter “confidential document”, only messages with the phrase “confidential document will be flagged.
- Predefined content match – This flags particular sets of sensitive information, for example, messages that contain a credit card, passport, or social security number.
- Metadata match – Certain metadata attributes can be flagged. For example, if the size of the email is too big, it hasn’t been encrypted, or the source IP isn’t within your defined range.
Step 8: Choose whether the message will be modified, rejected, or quarantined if there’s an expression match. Configure options for the action and Click Save the configuration.

Method 5: Google Vault
If you have a Business Plus, Enterprise, Enterprise Essentials, Education Fundamentals Plus, or G Suite Business account, you can use Google Vault. If you have another type of account you can purchase an additional Google Vault license.
The Vault allows you to save, search, and export your users’ Google Workspace data. This includes Gmail messages, Google Chat messages, Google Meet recordings, Google Groups messages, and Classic Hangouts messages.
So, essentially, you can access any type of user message via Google Vault as well as users’ emails. However, admins must set Vault retention rules for this to work.
You can make it so a copy of Gmail messages remains in the Vault even if the user deletes the message and empties their Trash.
Furthermore, you can set a custom rule for Vault so that only certain messages are saved or a default retention rule where all messages are retained.
Here’s how to set up the default retention rule for Gmail:
Step 1: Sign in to Google Vault.
Step 2: Click Retention.
Step 3: Select Gmail.
Step 4: Specify how long you’ll retain messages by selecting Indefinitely or Retention period then entering the number of days you want to keep the messages.
Step 5: If you specify a retention period you’ll have to determine what to do with messages after the retention period. You have the option to purge all messages or only messages that have been deleted.
Step 6: Click Save and you’ll be asked to confirm you understand the effects of the rule. Check the relevant boxes then click Accept.
Common Problems When Viewing Other Users’ Emails as a G Suite Admin
Here are the resolutions to some of the most common issues encountered when using the above methods:
Problems with a Delegated Account
There are a few common problems that admins seem to run into with a delegated account.
First, if you find there’s a delegate on the account that you didn’t add, you must change the password for the account straight away. This is because they may be an attacker who accessed the account through phishing or malware.
Did you try to add a delegate to the account and fail? Note that you can only add members of your school, company, or another type of organization as delegates.
If they are a part of the organization and you still can’t add them, you’ll need to set up MX records for your Google Workspace email. This involves verifying your domain and making Gmail your professional email provider.
Another issue you might run into is that a delegate you added can’t access the account. This will likely be because you chose the option Require user to change password at the next sign-in when you added the delegate. So, the user must change their password to access the delegated account. Alternatively, you can disable the option which requires users to change their password.
An Admin Can’t Use the Investigation Tool
If a Workspace admin finds that they can’t use the investigation tool it may be because they haven’t been granted the relevant privileges. Here’s what you’ll need to do:
Step 1: In Admin Console go to Admin roles.
Step 2: Point to the admin and click View privileges then click Open privileges.
Step 3: Go to the Services section and click the Security Center privileges.
Step 4: Click on This user has full administrative rights for Security Center to expand the section.
Step 5: Check the boxes for Investigation Tool privileges. Here you can choose what kind of data they’re able to access when using the investigation tool.
It’s also important to note that with the investigation tool, you can only investigate data going back 180 days. For tooling that goes back to the first day an event happens in a company’s Google Workspace, visit here.
Deleted Users and Google Vault
One problem you may run into with Google Vault is missing messages or data. The thing is, when you delete a user from Google Workspace, all of their associated messages and data are deleted from Google Vault, too.
You may be able to recover data for the deleted user by restoring their account. But you can’t recover any data that has already been expunged.
If you don’t want this problem to occur in the future, don’t delete a user, even if they leave the organization.
You have a couple of alternative options. First, you can assign an Archived User (AU) license to the user which means their data will be retained in the Vault. Or you can suspend the account, which means they won’t be able to use any Google Workspace services but their data will be preserved.
Is Viewing Other Users’ Emails Legal?
Another thing you may want to know is whether reading employee emails breaks any laws.
According to Nancy Flynn, founder and executive director of The ePolicy Institute:
“The federal Electronic Communications Privacy Act makes clear that workplace e-mail [is] the property of the employer, and employees should not expect privacy when sending, receiving, downloading, uploading, printing or otherwise transmitting electronic messages.”
But, just because you can legally read employee emails doesn’t necessarily mean you should be doing it left, right, and center. Ensure that there’s a valid reason for reading user emails, such as to protect company data, employees, and/or the company’s reputation.
It’s also a good idea to outline that the company can and may need to check user emails in company policies. This is to make sure employees are aware of the practice and the consequences they may face if they use email for inappropriate or malicious reasons.

