Top Google Admin Privileges For Shared Drives
Our customer success manager recently said, “We’re getting a lot of questions about shared drives in Google Workspace.”
We’re used to these types of questions. Many admins aren’t sure what privileges they have or how they can control them in their Admin console. They want to know how they can confidently secure their shared drives, without tons of wasted time or resources.
We’ll go over the top privileges Google admins should be aware of, why they matter, and how to manage them quickly and efficiently.
For a deeper dive on shared drive security, download our full ebook.
In this article, we’ll explore:
- How to turn shared drive creation on or off for your organization
- How to manage shared drive users
- How to control default sharing of shared drive content
- How to manage access for an existing shared drive
- How to allow users to move content to a shared drive.
What Admin Privileges Should You Be Aware of in Shared Drives?
Supported editions for this feature: Business Standard and Plus; Enterprise; Education Fundamentals, Standard, Teaching and Learning Upgrade, and Plus; Nonprofits; G Suite Business; Essentials.
Admins with the “Drive and Docs” settings privilege have lots of control in shared drives.
Remember that when users create shared drives, the new drives automatically inherit Google Drive sharing settings from the top-level organizational unit, which overrides an individual user’s organizational unit settings.
For example, let’s say an employee is in a child organizational unit that has external sharing restrictions turned off. However, your company’s parent organizational unit has external sharing turned on.
When the employee is added to a shared drive, they will be able to share documents in the shared drive with external people outside of your organization, unless you restrict them.
Let’s dig deeper into admins’ privileges in shared drives:
How to turn shared drive creation on or off for your organization
What is it?
As an admin, you can allow people to create shared drives for specific organizational units. For example, someone wants to create a shared drive for just the Sales team.
You can also turn this feature off for child organizational units. However, let’s say you have a child organizational unit for Engineering that has shared drive creation turned off, but someone in the Engineering unit needs to be added to a shared drive that’s owned by the Product team.
People outside of the Engineering organization may still add the Engineering employee to the Product shared drive. And the same is true even if it’s a shared drive that’s outside of your company.
Why it matters
Shared drives aid with ease of collaboration and the ability to quickly find the right documents. Rather than having a lot of individual files floating around that are owned by one account and stored in their My Drive, a shared drive keeps all of a group of people’s or a department’s documents in one centralized place. That’s why it’s so important to make sure that the right accounts have the proper permissions in their shared drives.
How to do it
- In your Admin console, go to “Apps” > “Google Workspace” >”Drive and Docs.”
- Double-check that Drive is turned on for your organization.
- Click “Sharing settings.”
- To apply the setting to everyone, leave the top organizational unit selected. Otherwise, select a child organizational unit.
- Click “Shared drive creation.”
- Check or uncheck the “Prevent users in your organization from creating new shared drives” box.
- Click “Save.”
How to manage shared drives users
What is it?
You have several options when managing shared drives. You can manage the members of the shared drive by removing members or changing their access levels. You can also add new members to shared drives and then set their access levels.
Why it matters
Being able to easily manage members and having visibility into who is sharing what and when is one of the best tools when combatting Access-Risk. You’ll be able to quickly remove a member who no longer needs access or change the access-level permissions of current members. For example, if an employee transfers departments within the company and should no longer be able to access the shared drive for their old department.
How to do it
- “Apps” > “Google Workspace” > “Drive and Docs.”
- Go to “Service status” and double-check that Drive is turned on. The status should read “ON for everyone.”
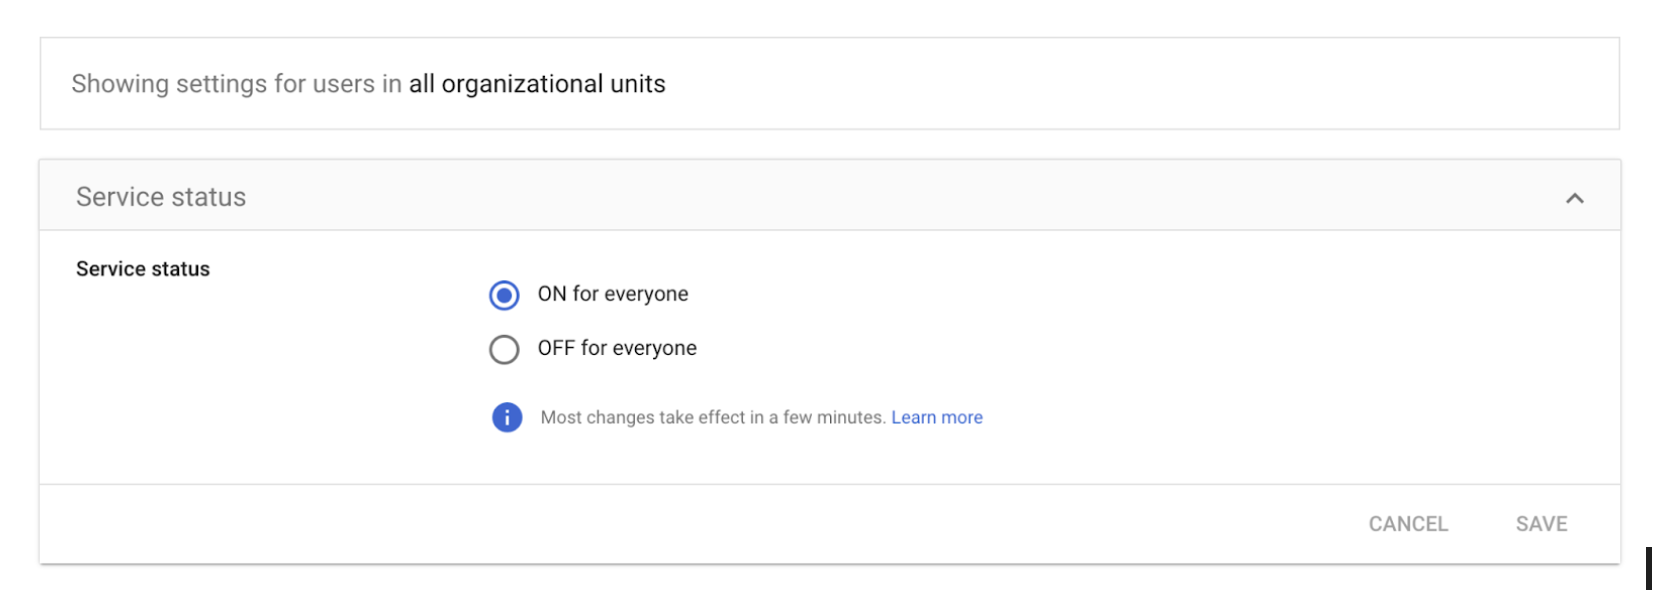
3. Click “Manage shared drives.”
Choose a shared drive and click “Manage members.”
Here’s where you have several options:
- You can remove a member from the shared drive or change their access levels, by clicking the down arrow and choosing an option.
- You can also add new members to the shared drive:
-
-
- Click “Add people and groups” and enter the names or email addresses of the people or groups you want to add. If you want to add more members than your limits will allow, it’s a good idea to add Groups rather than every individual email account.
- Set access levels by clicking the “Down arrow” and choosing an access setting.
-
Remember by default, shared drive members can upload, edit, and delete files and invite other members.
-
- In the Message field, you can enter a custom message for the email notification. Or you can uncheck the “Notify people” box to forgo the welcome message with a link to the shared drive.
- Click “Send.”
How to control default sharing of shared drives content
What is it?
You have several options when you define the default sharing restrictions for shared drives. These are the default restrictions when you first create a shared drive, but can easily be changed or overridden if needed.
As an admin, you can keep employees from creating new shared drives or making changes to existing shared drive settings. You can also keep external users, as well as people in your company who are not members of the shared drive, from accessing shared drive files.
If you move a file into a shared drive, the file will retain its original sharing permissions and user roles. For example, if the document was able to be edited by anyone in the company, then it still will be.
However, the shared drive’s restrictions do come into play. For example, if a shared drive restricts people outside the organization from accessing the shared drive’s content, external users will be removed from files in that shared drive in the future.
Why it matters
The ability to control who has access to your files in shared drives, as well as the shared drive settings themselves, gives admins an added tool to boost their company’s document security.
Something as simple as changing the default sharing restrictions can help employees from accidentally giving access to sensitive information.
For example, someone may be a full-access member in your shared drive, but you still wouldn’t want them to be able to change the shared drive settings or allow them to override any of the default restrictions for individual shared drives.
It’s important to be aware of what happens to files when shared drive restrictions are set or changed, and what user permissions might still remain unchanged.
How to do it
- In your Admin console, go to “Apps” > “Google Workspace” > “Drive and Docs.”
- Select “Sharing settings.”
- To apply the setting to everyone, leave the top organizational unit selected. Otherwise, select a child organizational unit or a configuration group.
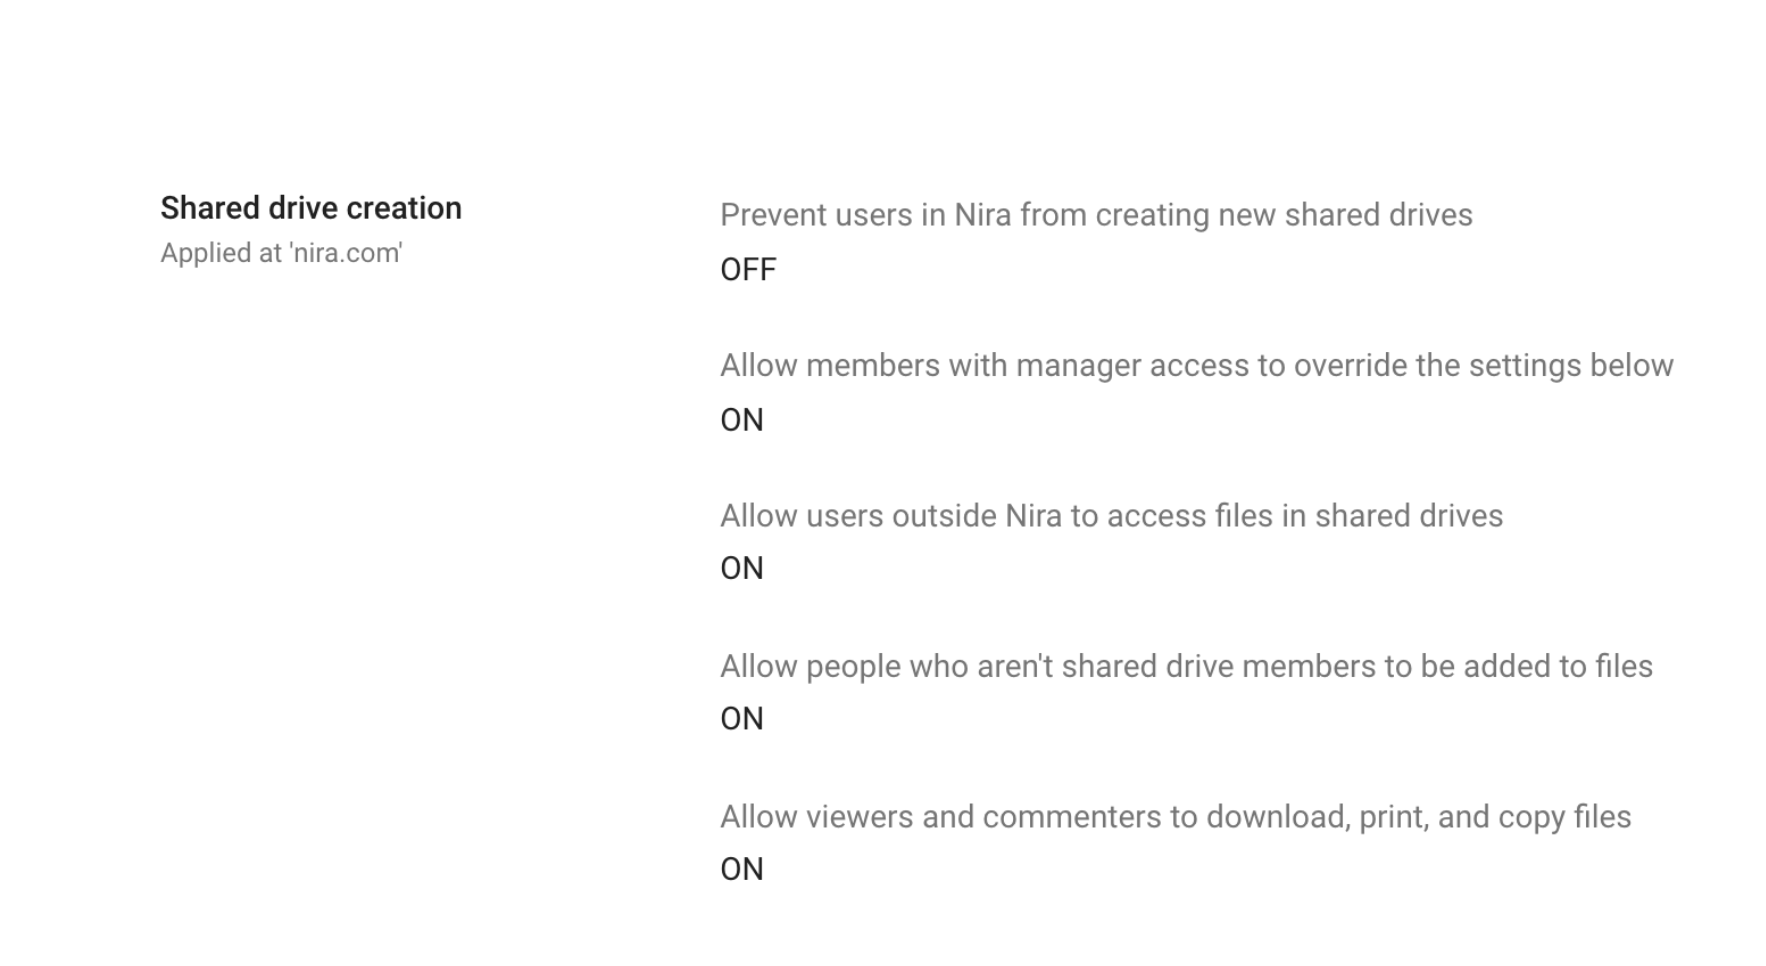
- Next to Shared drive creation, select the default restrictions for all new shared drives:
- Prevent users in your organization from creating new shared drives
- Prevent full-access members from modifying the shared drive’s settings
- Prevent people outside your organization from accessing files in the shared drive
- Prevent non-members of the shared drive from accessing files in the shared drive
- Prevent commenters and viewers from downloading, copying, and printing files in the shared drive
How to manage access for an existing shared drive
What is it?
As an administrator, you have certain shared drive settings you can manage. You can:
- Allow shared drive members with Manager permissions to modify shared drive settings.
- Decide if outside people who are not members of the shared drive can be added to files.
- Control if viewers and commenters can download, print, or copy files.
Why it matters
You’ve set up all your shared drive settings just the way you want them for best security practices. You’re feeling confident that your sensitive files are safe and protected from negligent or unauthorized access.
And then you realize that Managers of shared drives can modify your settings without your knowledge, or people who are outside of your organization can be added to files by other members.
This may be necessary to keep workflows running smoothly and efficiently. However, depending on your policies and the level of security needed, you might want to turn off some of these settings for better control over who can change access permissions or be added to files.
How to do it
- Go to “Apps”> “Google Workspace”> “Settings for Drive and Docs”>”Manage Drives and Docs.”
- Hover over the shared drive, and click “Settings.”
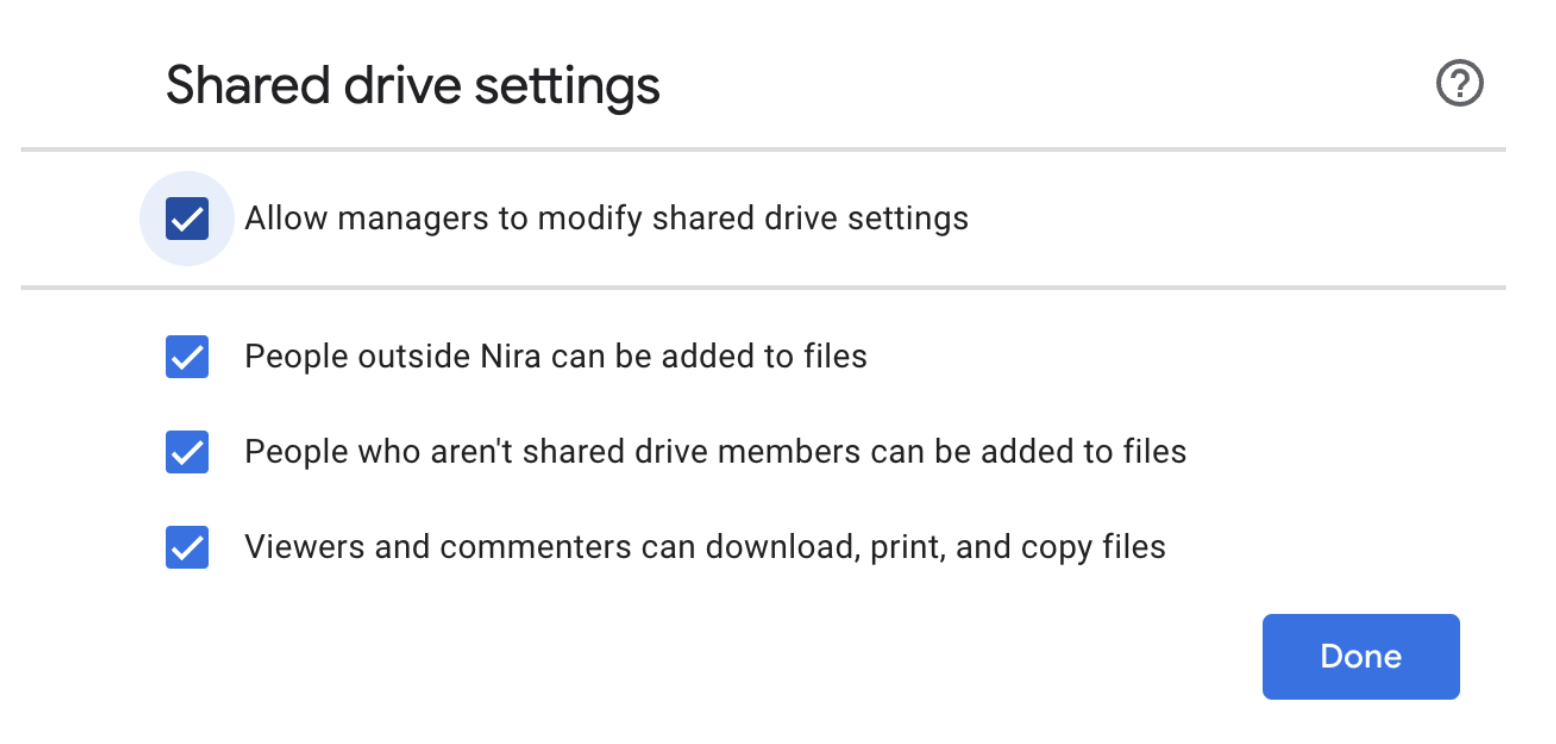
- Admins can now choose whether to allow managers to modify shared drive settings:
- Allow managers to modify shared drive settings: This prevents full-access members from modifying shared drive settings. It keeps people from overriding the default settings for the shared drive.
If admins select this option, they can go further and control the following:
- People outside the company can be added to files: Allow or prevent external people from accessing files in the shared drive.
- People who aren’t shared drive members can be added to files: Allow or prevent shared drive members from giving non-members access to files in the shared drive.
- Viewers and commentators can download, print, and copy files: Allow or prevent commenters and viewers from downloading, copying, and printing files in the shared drive.
How to allow users to move content to a shared drive
Please note that only these editions are supported for this feature: Business Standard and Plus; Enterprise; Education Fundamentals, Standard, Teaching and Learning Upgrade, and Plus; Nonprofits; G Suite Business; Essentials.
What is it?
Admins can allow users in their organization with Editor access to move content. They may be able to move content from their My Drive to a shared drive. Or from one shared drive to another shared drive.
There are several points to consider before allowing users to move content to and from shared drives. First is the concept of Ownership. When a user creates a file, they are automatically the owner of that file.
But when they move that file to a shared drive, they lose this ownership. Now, your organization “owns” the file.
When the file is moved, access levels may also change, as we went over in the section on Shared drive access levels. Who can move content and where they can move it depends heavily on these access levels.
If you want to allow users to move files from My Drive to a shared drive:
- The user must have Edit access to the file they are trying to move. They must also be a Contributor, Content manager, or Manager in the shared drive they want to move the file to.
- The owner of the file must be a member of the shared drive where they are moving it.
- Please note that this may conflict with sharing permissions you set up to control how content is shared outside your organization.
If users want to move files from one shared drive to another:
- They must have Manager access in the shared drive they’re moving content from, and Contributor, Content manager, or Manager access in the shared drive they’re moving content to.
It’s also vital to be aware of who has access to the file that was moved. When a file is moved, everyone in the shared drive now has access as well as the people it was directly shared with before the file was moved.
Let’s say the original owner of the file is not in the shared drive. They would lose ownership of the file but still be able to access and edit the file as its creator.
What about if you’re dealing with users outside of your organization?
Admins cannot move files owned by external users to a shared drive even if that user is a member of the destination shared drive. Meanwhile, external users can move individual files to shared drives in your organization if they have the necessary permissions.
Why it matters
Moving content around at any time has its risks. However, moving content to shared drives where users may not be thinking about who already has access, or who could have access in the future, can open the organization to all sorts of security issues.
It’s important to be aware of who can share content in your organization’s shared drives, and what permissions they need. For example, users will need Edit access for any files they want to move.
Also, to move files from one shared drive to another shared drive, users need to have Manager access in the shared drive they’re moving content from, and Contributor, Content manager, or Manager access in the shared drive they’re moving content to.
How to do it
- In your Admin console, go to “Apps” > “Google Workspace” > “Drive and Docs.”
- Click “Migration settings.”
- To apply the setting to everyone, leave the top organizational unit selected. Otherwise, select a child organizational unit or a configuration group.
3. Next to “User options,” select “Allow users to migrate files to shared drives.”
Remember users who are moving files from My Drive to a shared drive must have Edit access on the files they are moving, and they must have Contributor, Content Manager, or Manager access in the shared drive they are moving the files to. Finally, the owner of the file must be a member of the destination shared drive.
4. Click “Save.”

How to keep your confidential documents secure
Controlling your company’s shared drives can be tricky for admins, but with the right tools and education, you can greatly reduce access risks and keep your company secure.
As an admin, you have lots of privileges including turning shared drive creation on or off for your organization, controlling default sharing of shared drive content, and allowing users to move content to a shared drive, among others.
Through your Admin tools, you can better mitigate your company’s Access-Risk. However, for complete visibility into who has control of your company’s documents, you’ll need a cloud document security system.
To learn more about your risks in shared drives or how to keep your company’s confidential data safe, request a demo.

