How to Use Notion: A Beginner’s Guide
Notion is a tool that defies conventional categorization.
Instead of being a tool for this purpose or that, it’s a tool you can use for nearly anything to do with manipulating digital data. You can use it to write a simple text document, create large, complex knowledge bases, take notes from a university lecture, or build interlocking Kanbans to manage multiple engineering projects.
In this post, all will become clear about how this versatile tool works—for notes, creating documents, tracking tasks and projects, and much more.
What is Notion?
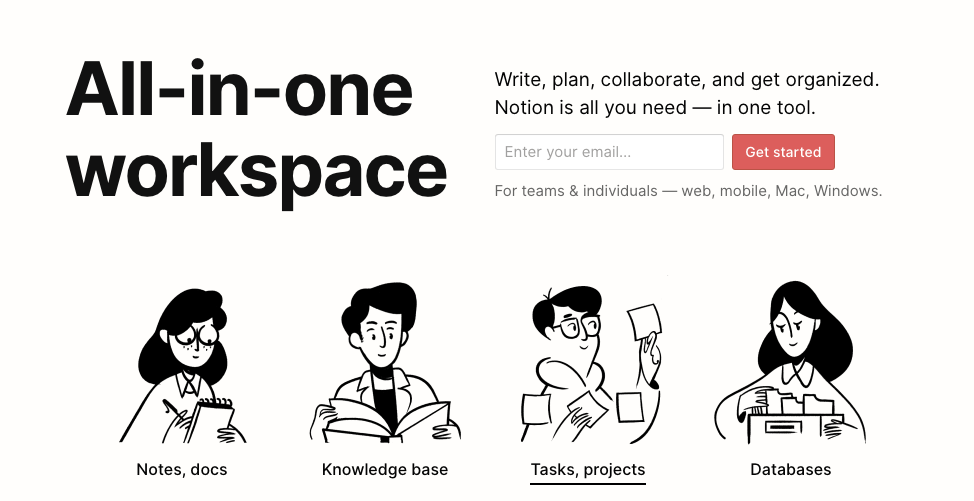
Notion describes itself as an “all-in-one workspace.”
There are desktop apps for Mac and Windows, but you can access and use Notion through your browser too.
Notion has four membership types:
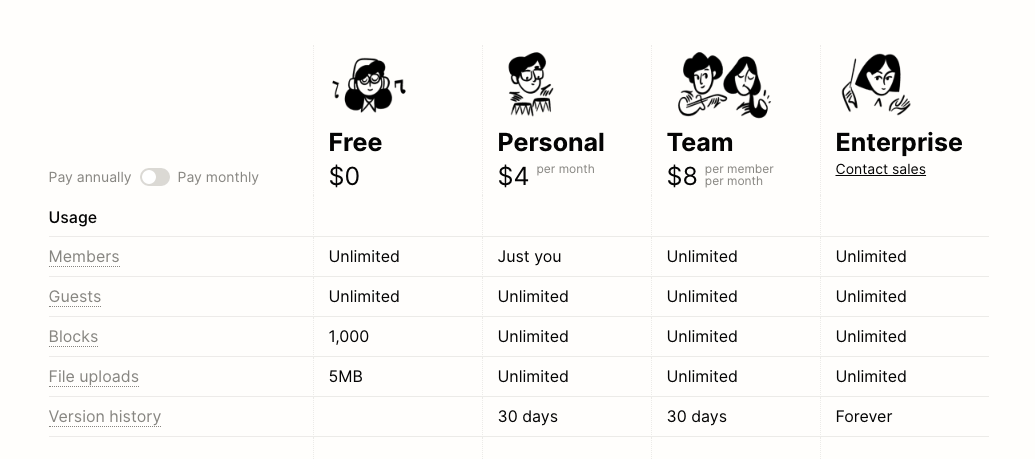
Pay monthly and the Personal plan is $5, while the Team plan is $10.
Even the Team plan is significantly cheaper than many competitors—Trello is $12.50 a month per seat, with a restricted free version; G Suite is $6 a month for the Basic plan; Evernote Premium is $7.50 a month and up. More important, Notion lets you actually integrate nearly all the functionality of these tools together.
It’s important to know going in that Notion defies traditional categorization. Rather than being several tools bundled together, it’s really one big, endlessly customizable digital space that has readymade templates to make it easier to create documents, plan work, track and manage projects, create knowledge bases and structure notes and clippings.
There’s no really clear demarcation between these areas of functionality.
On the other hand, that very great flexibility means it’s initially less intuitive than more standard app bundles.
It’s confusing at first to find, for instance, that Notion will let you create a database in the middle of a document. Unlike a spreadsheet, it’s a true database in which every cell is its own Notion page. You can put whatever you want in those pages, including project management tools, calendars, content of all types, and even other databases.
Maybe the best thing to do is start at the beginning.
Blocks, pages, and templates: The key to understanding Notion
Notion is based on blocks. A block can be a paragraph of text or an image. It can also be a calendar or Kanban chart. There are more than 50 types of blocks available in Notion and more are constantly being added.
What’s important about Notion is that all its functionality is available anywhere. Want a Kanban chart? It’s a block. You can just drop it straight into a document. Want a calendar? What about a to-do list with checkboxes? Maybe call out a team member, make a comment, or build a table? Yes, all of the above. But they barely scratch the surface of what Notion can do.
In Notion, pages are like new documents, except that they can be an instance of anything you like.
Here, I’m opening a new page and checking out the templates on offer. How about a CRM?
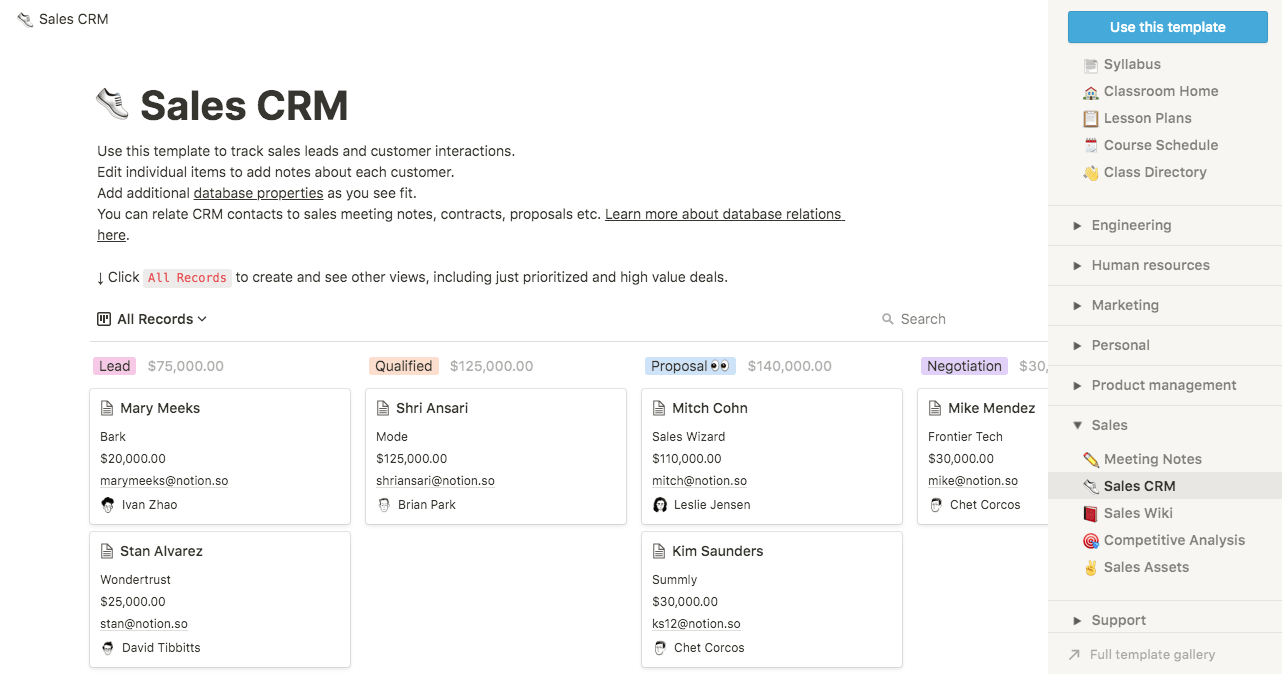
You can just open this in a new Page inside Notion, then use it. Each card can contain anything Notion can do: embedded audio and video (so you can save whole sales calls), documents and sales collateral, notes, images…
Or suppose you want to create a knowledge base:
Open the template in Engineering in Notion, then fill it in.
How is Notion able to do all this?
Notion’s function-agnosticism is a consequence of its inception as a codeless app builder. A page on Notion is actually a web app. And the blocks are really readymade blocks of code (don’t like them? You can drop your own code in too) that let you determine the functionality of that app.
People are still using Notion for this. There’s a website, Notion Pages, dedicated to offering custom Notion templates for everything from bullet journals through employee handbooks to curriculum managers.
Look around and you’ll find guides to doing everything from API documentation to setting up a Notion homepage.
And if you still can’t find what you’re looking for, both Notion and the wider Notion community will be happy to show you how to build it yourself.
For now, we’re going to focus on using Notion for its core functions: Docs, Notes, Projects, Tasks, and Wikis.
Once again: these aren’t five separate apps. They’re five different ways to use Notion.
Let’s dive in.
How to use Notion for documents
Notion’s default blank page is easy to use for composing documents.
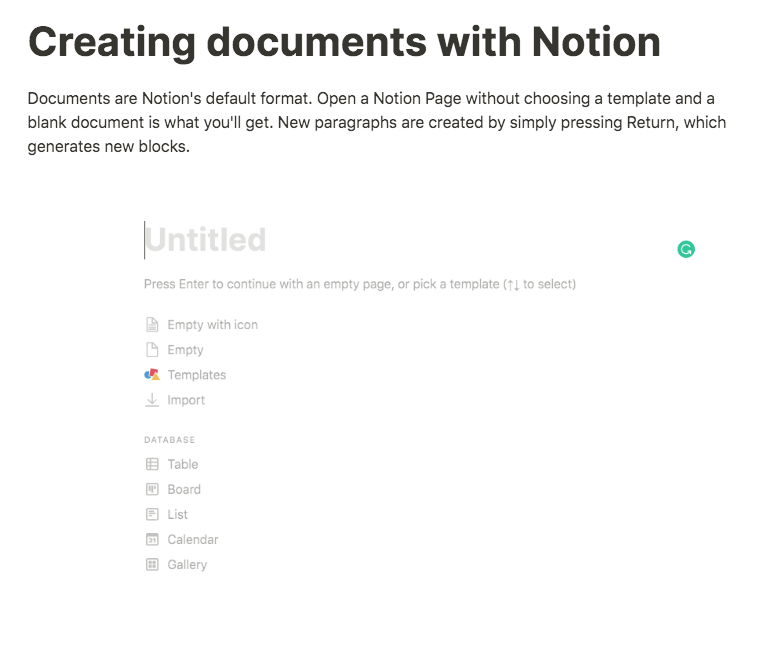
Once you’ve begun a page this way, you can add images, format text, add tables, and change blocks around by clicking and dragging.
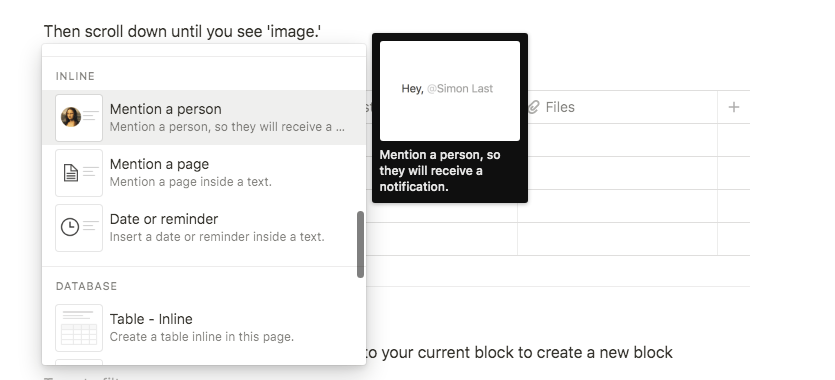
Adding images to your Notion document
Images can be added to Notion documents through the block menu. Open a new block, scroll down to Images in the Media section of the block menu and select it:
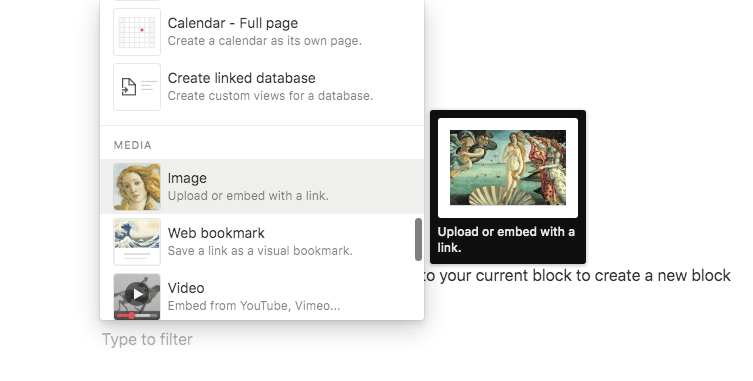
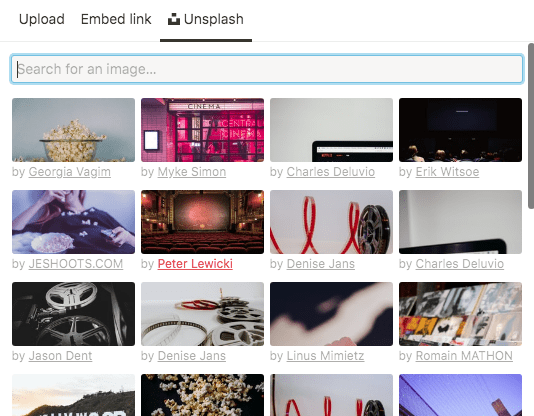
You can upload an image, embed one using a link or choose one from Unsplash, a free image repository, directly from the block menu.
Formatting text in your Notion document
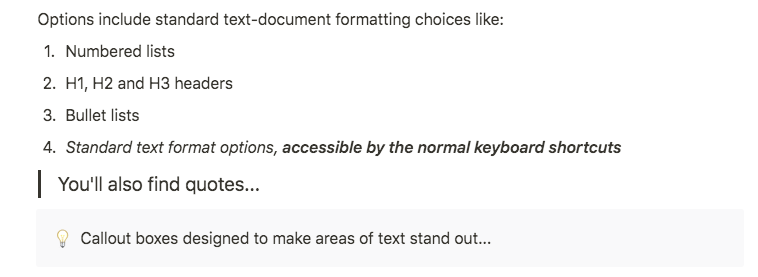
Text formatting in Notion documents works from the block menu too. Open a new block and at the top of the menu, you’ll see header options:
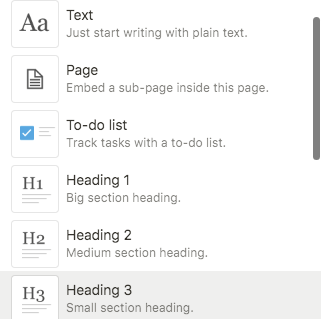
You only get plain text and h1 through h3 in the block menu. If you want anything further, you can use standard keyboard shortcuts—to an extent. (Ctrl/Cmnd+I for italic and Ctrl/Cmnd+B for bold both work, but Ctrl/Cmnd+U for underline doesn’t and neither do the standard shortcuts for strikethrough text, superscript, and subscript.)
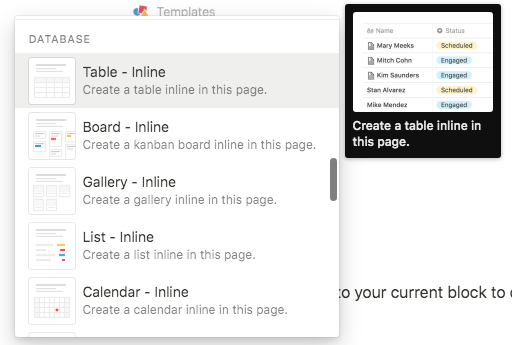
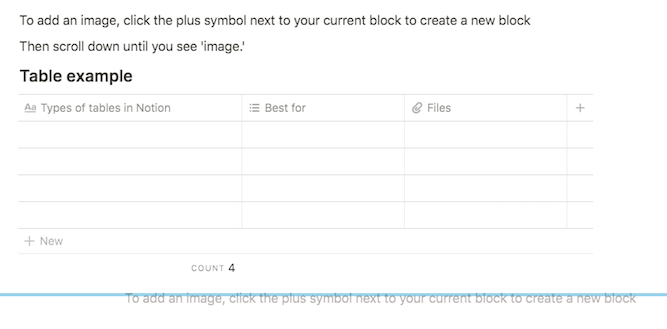
Adding tables in your Notion document
Tables can be added in Notion and then filled in. Or you can drop tables from other Notion documents into the one you’re working on.
You’ll find tables in the block menu:
Unlike in solely text-oriented tools like Google Docs or Microsoft Word, Notion tables come packed with a lot of functionality. The downside is, you may not want or need it if you really just want to present basic information to the reader.
Here’s a dummy Notion table, opened with the default settings from the block menu:
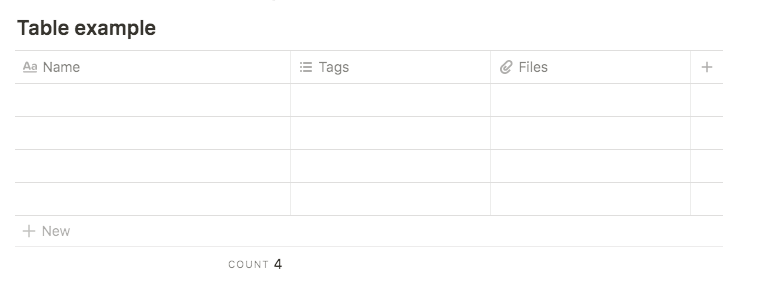
Those headers—Name, Tags, Files—make sense if you want to use this as the index for a database. But if you want to compare three different kinds of car based on speed and fuel consumption, this is way more power than you need. You really just want boxes to put text in.
When you’re in that position you can click on the column headers and change their labels. You’ll also get a menu that lets you change the type of information stored in that column.
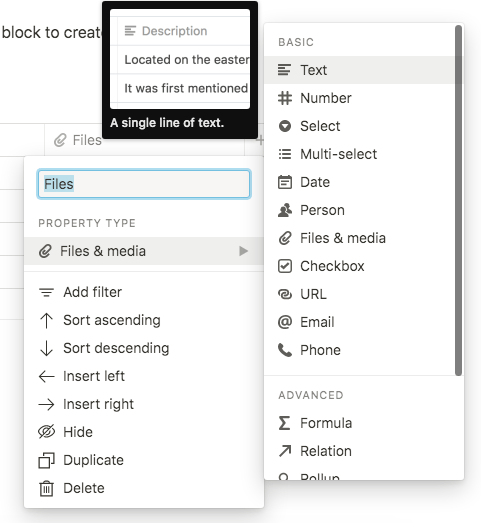
Set all your columns for Text and you can display basic information in the way you would in Docs or Word.
Moving blocks around in your Notion document
When you want to move text in your Docs or Word document, you copy or cut the text you want to move, then paste it where you want it.
Notion is simpler. To move a paragraph, just pick it up by the “handle”—the square next to the plus symbol at the side of each block—and drag and drop it.
Here you can see me dragging a block down the page. The blue line indicates where that block will land if I drop it, and the block itself is still visible, just greyed out.
Comments, reminders, and mentions
Notion lets you make comments on the text and mention/call out other users. The catch is you can’t call out non-Notion users, so to get the best from this everyone needs an account.
Mentioning a person will make Notion ping them on your behalf with the mention—a process familiar from other collaborative document-creation tools.
Comments are found, not in the standard block menu, but by clicking on the block itself.
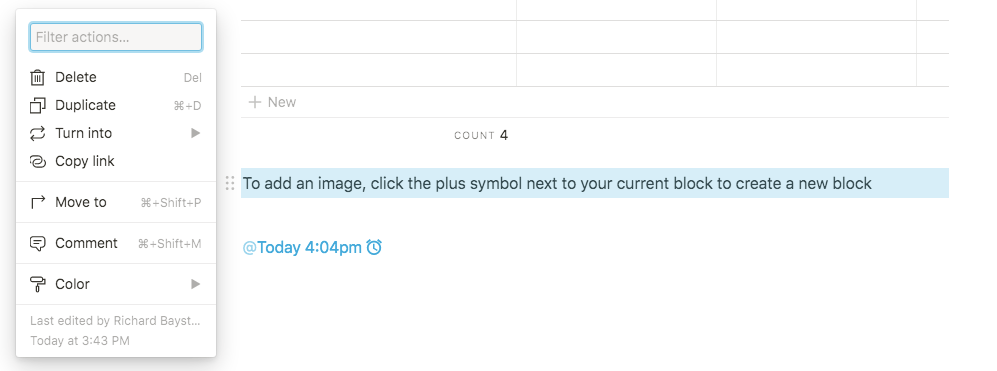
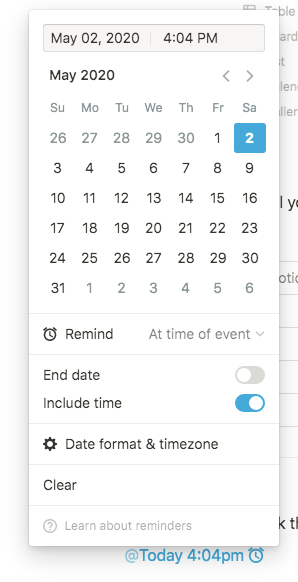
You can also set reminders, including times as well as dates. Notion will ping you in the desktop app if it’s open, and will also email you, text you, and send you a desktop push notification if you have those options enabled.
How to use Notion Notes
Notion can also be used as a note-taking app. There’s a browser extension that’s advertised as a Web Clipper, but is actually a route into the whole Notion world.
You can get it for Chrome here, and for Firefox here.
Once installed, Notion Web Clipper lives in your browser’s bookmarks bar. Open it from there, and it will save the page you’re on to your Notion workspace. It will also give you the chance to open the page in Notion direct from the extension window in your browser.
When you do that you can immediately access the saved version of the page you were on, and Notion automatically converts it into a Notion document, in which you can add and edit text and other content, mention people, set reminders, move text and images around, and more.
But you can also use Notion for making class, book, or meeting notes. These notes can be shared with others, so long as they have Notion accounts too. And full-powered Notion accounts are available free if you have an academic email address (it doesn’t have to be a .edu address).
Here’s how to do it.
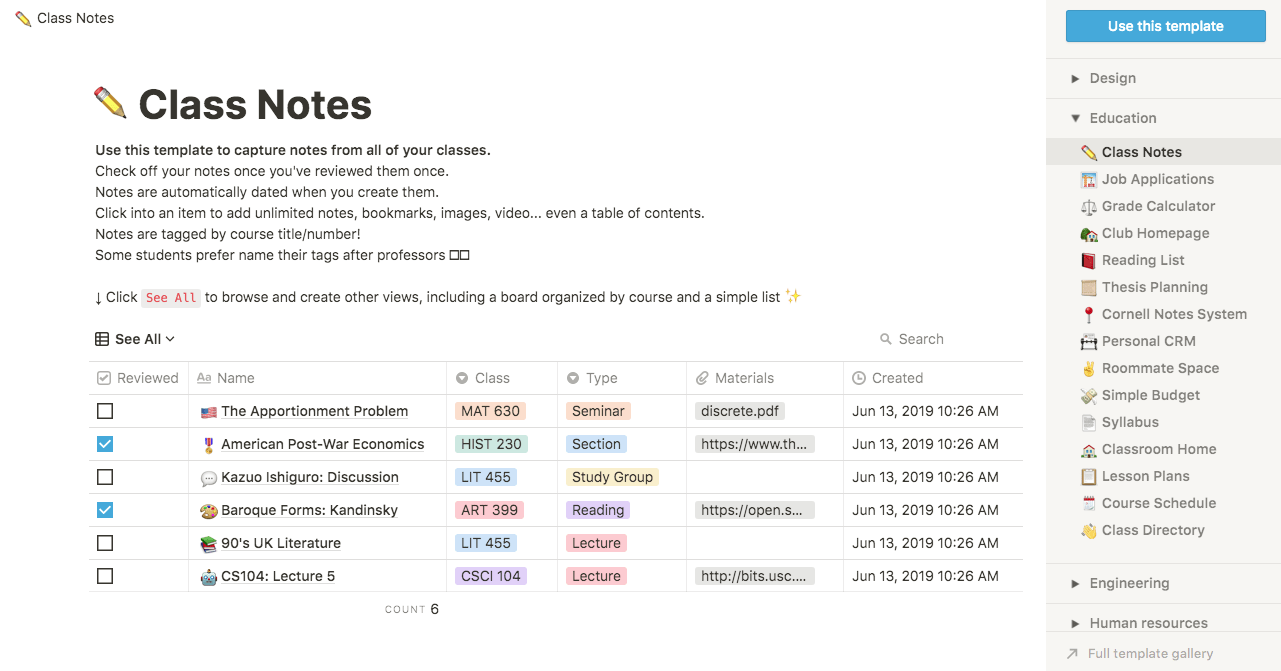
Open Notion and start a new Page. In the Page menu, go to “Templates” and open the Education menu. There, you’ll find “Class Notes” as a template. Select that and this page will work as a central repository for all your notes, or all your notes in a given subject.
(There’s a “Meeting Notes” template in the Marketer’s home workspace too. You’re welcome.)
The template comes with enough content to start you off using it, including dummy supporting materials and dummy note pages accessible from the template.
There’s a checklist to let you monitor whether you’ve reviewed each page or not, and you can add reminders, scheduling, and checklists to individual notes pages or to the master notes list.
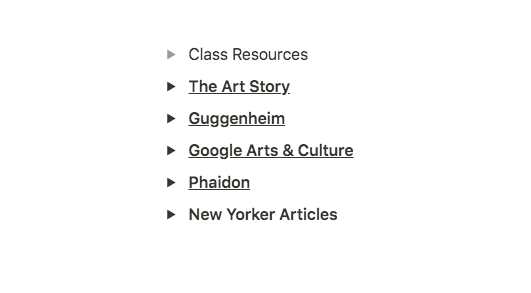
Click through to the dummy notes on Kandinsky—you have to hover over the title until an “open as page” option appears, as clicking on the title lets you change it but not access the page—and you can see an example of how to use Notion specifically to arrange notes.
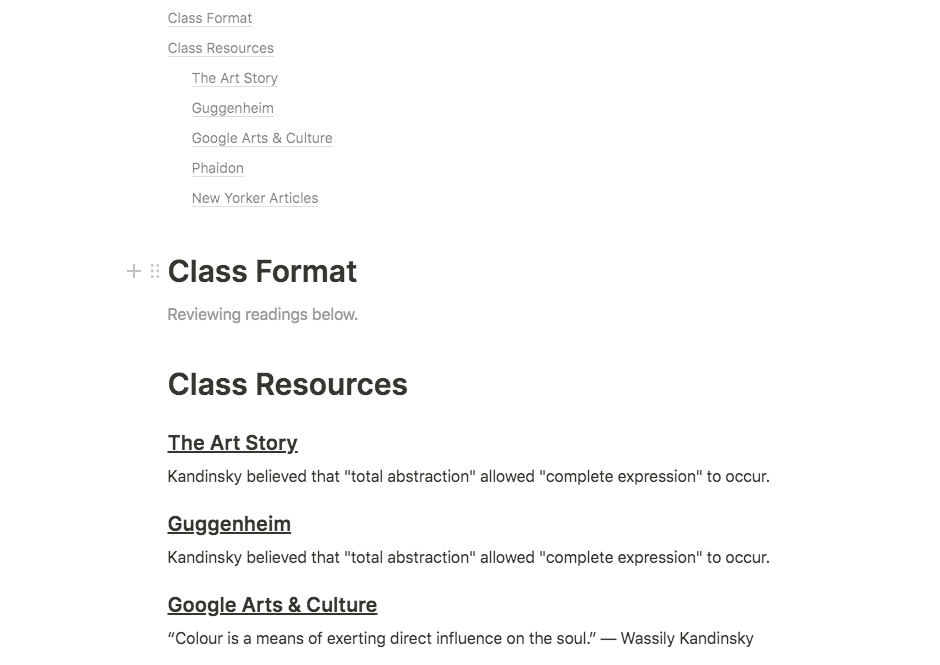
At the top is a table of contents for the current page. Under it are subheadings. Here, you can see simple reminders of the basics of the subject. Further down this page is a list of links to supporting articles.
If you want to arrange your notes differently—if you’re studying a subject that requires you to take extensive, complex notes, rather than these simple reminders—you can use toggle lists to organize them.
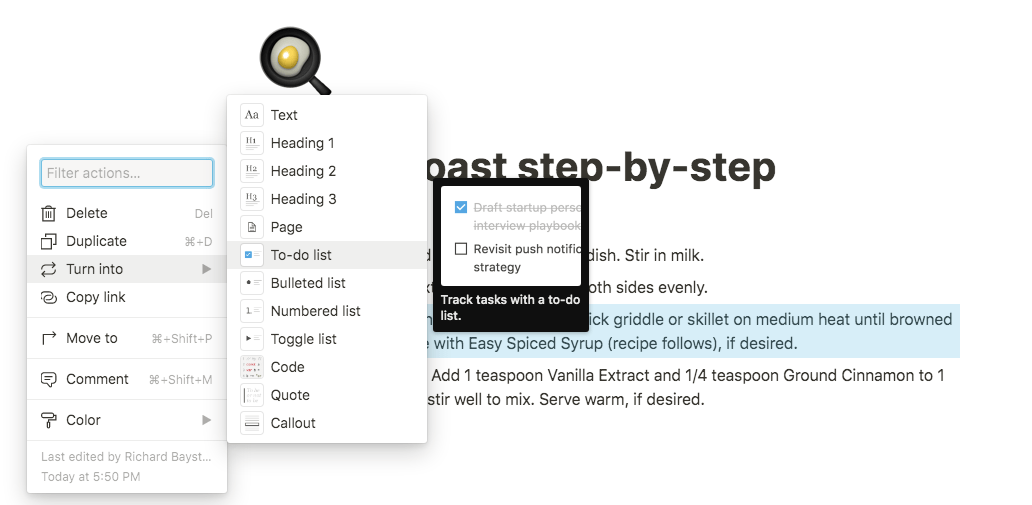
Obviously you can do this with new blocks on a blank page if you’re starting from scratch, but I’m working inside the Notions dummy page, so I’m using the “Turn into” feature in the block menu to turn these subheadings into toggle lists.
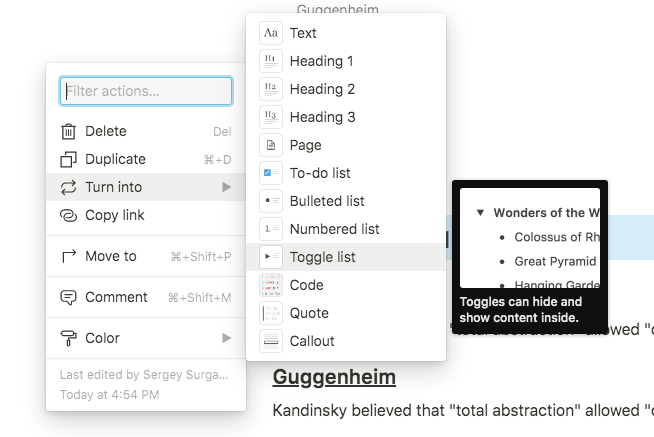
Once you’ve turned the headings into toggle lists, you can drop the content under them by picking them up by their handles.

The result will look something like this:
Simpler and clearer. When I open the New Yorker Articles toggle, here’s what I get:
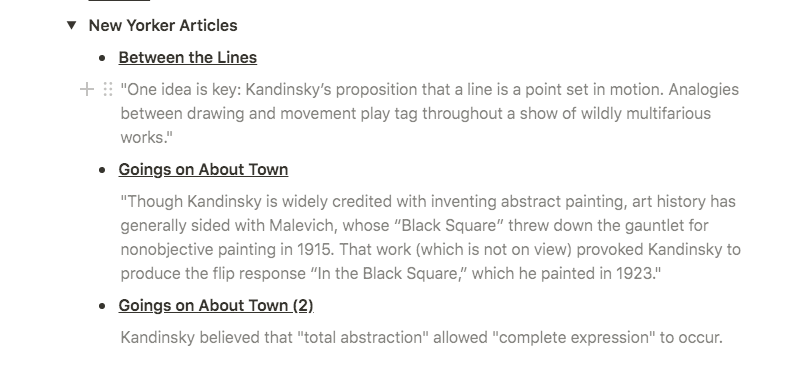
I can tidy this up too. In each case, there’s an article title which is also a link out to the magazine article, and a brief description. I can make these toggle lists as well.
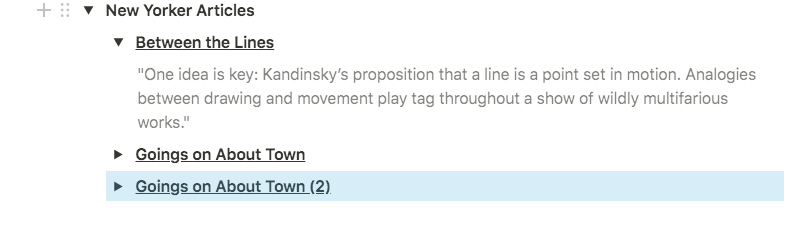
The links still work fine, but the content is neater. This functionality isn’t available in other note-taking applications like OneNote or Evernote.
If you’re taking notes and suddenly realize that you haven’t fully understood the structure of the lecture or presentation, it’s not uncommon to find your notes missing structure as well. Or maybe you strike a subject area where you need some extra depth for your own subject understanding.
When that happens—when you realize you’ve written notes that really belong elsewhere or are tangential to the main thrust of the topic—you can simply make a new Page in Notion, drop those notes into them, and even link to the page from your main notes page.
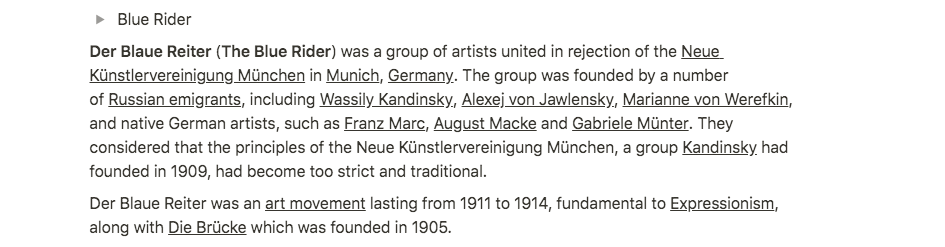
For instance, here I’ve copy-pasted the introduction to Wikipedia’s page on the Blaue Reiter group—Kandinsky was a member, but it’s really a separate topic.
So I don’t want to leave all this here. What I can do instead is turn the toggle switch into a new page:
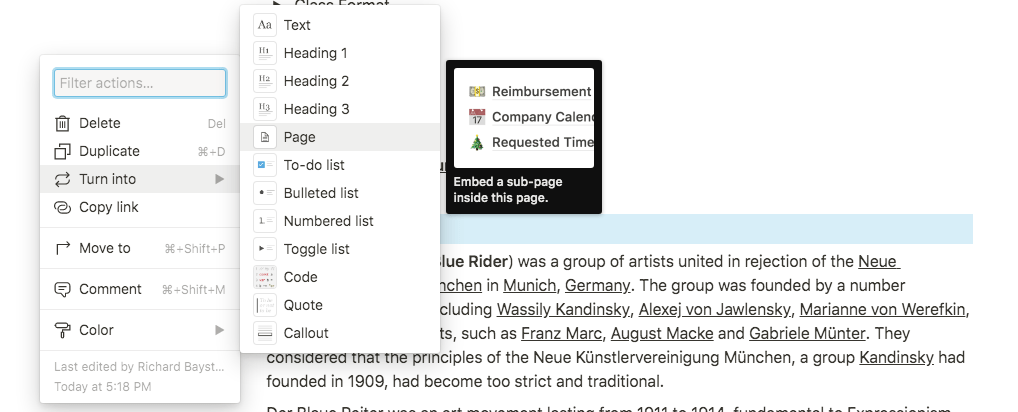
Now I can drag and drop all that text into the new page, and leave the link to the new page sitting there in my notes or move it over to the Workspaces menu, depending on what makes most sense. Again, this agility isn’t a feature of any other note-taking applications on the market. It’s one of the key ways that Notion scores over the mighty Evernote even on its home ground.
How to use Notion Projects
Notion gives you barebones project management tools—calendars, Kanban, to-do lists, and collaboration tools—straight out of the box. You can set these up as blocks inside an existing page, or as pages in their own right.
Additionally, you can modify and nest all these elements. If you want to create a Kanban with each card having a checklist and calendar on its back, you can. If you want a table showing different project elements, with each cell containing a calendar and a Kanban, you can. All you have to do is select them from the block menu and then drag and drop them. Every element of every block is customizable.
Not everyone wants to spend forever familiarizing themselves with, and then customizing, a new tool, though. That’s a project in itself! What if you want to plug and play?
The good news is that Notion comes equipped with several project management options as readymade templates inside the New Page template menu.
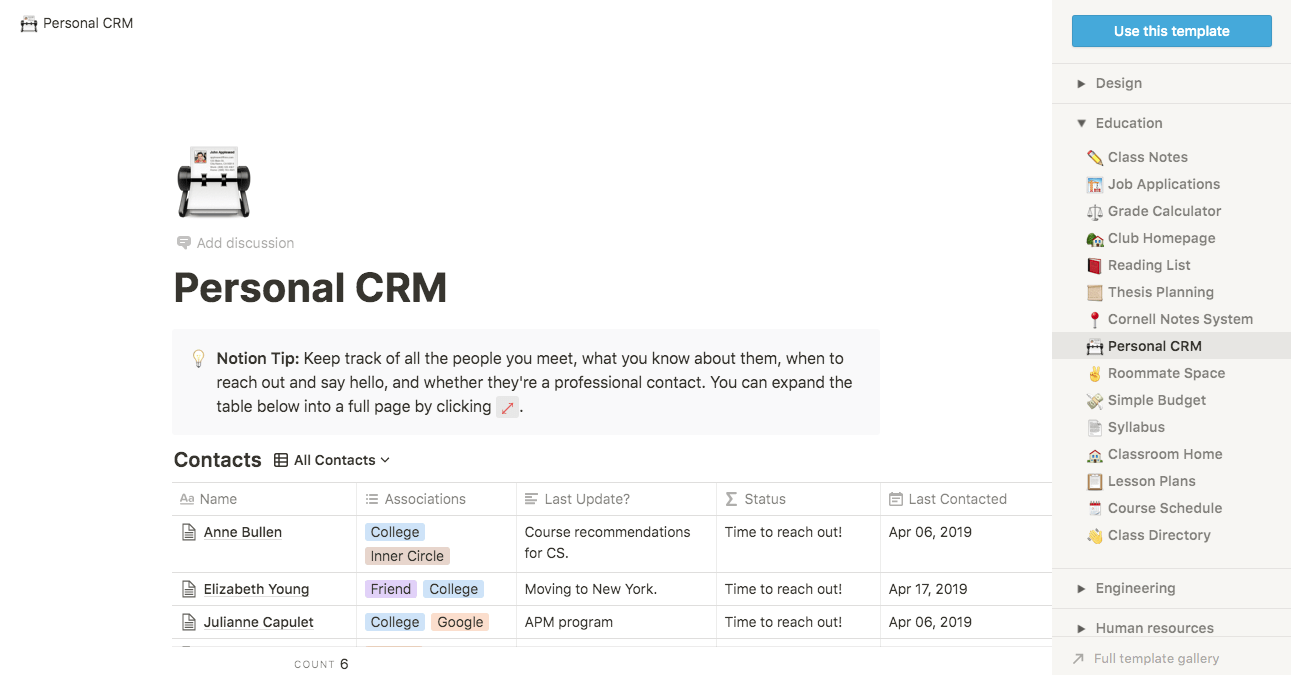
The basic Kanban functionality has been modified to create a Personal CRM, for students, in the Education menu:
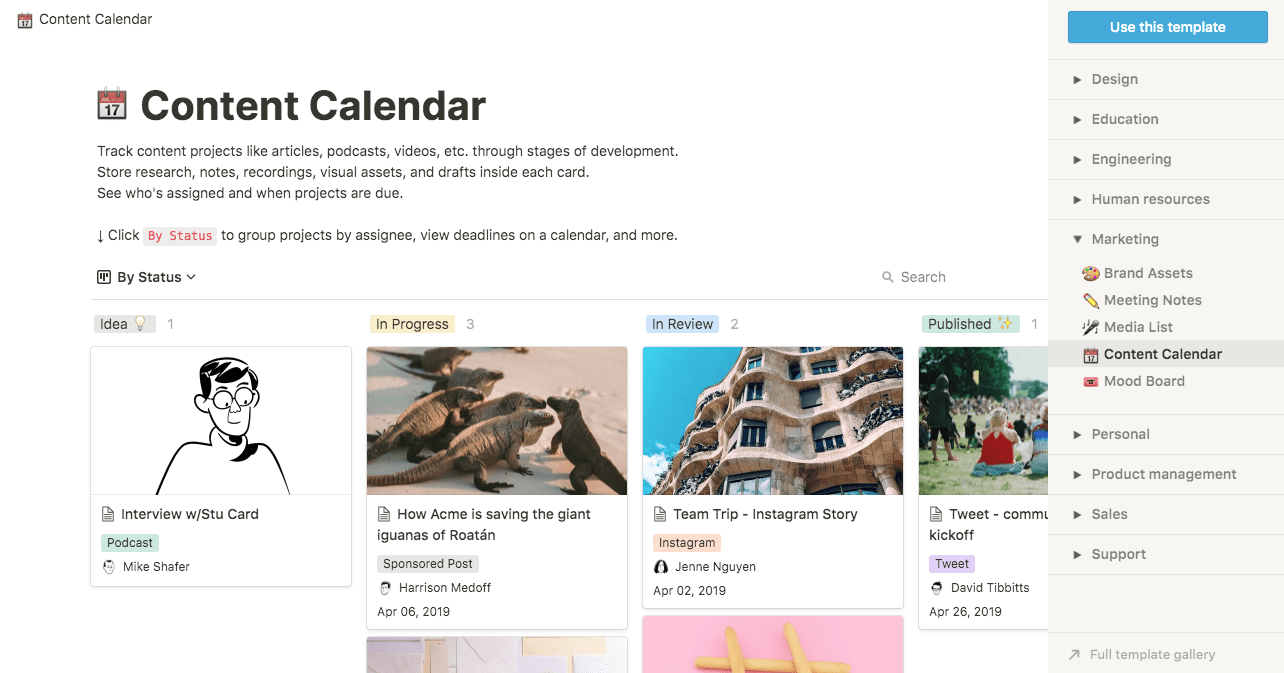
A content calendar for marketers, in the Marketing menu:
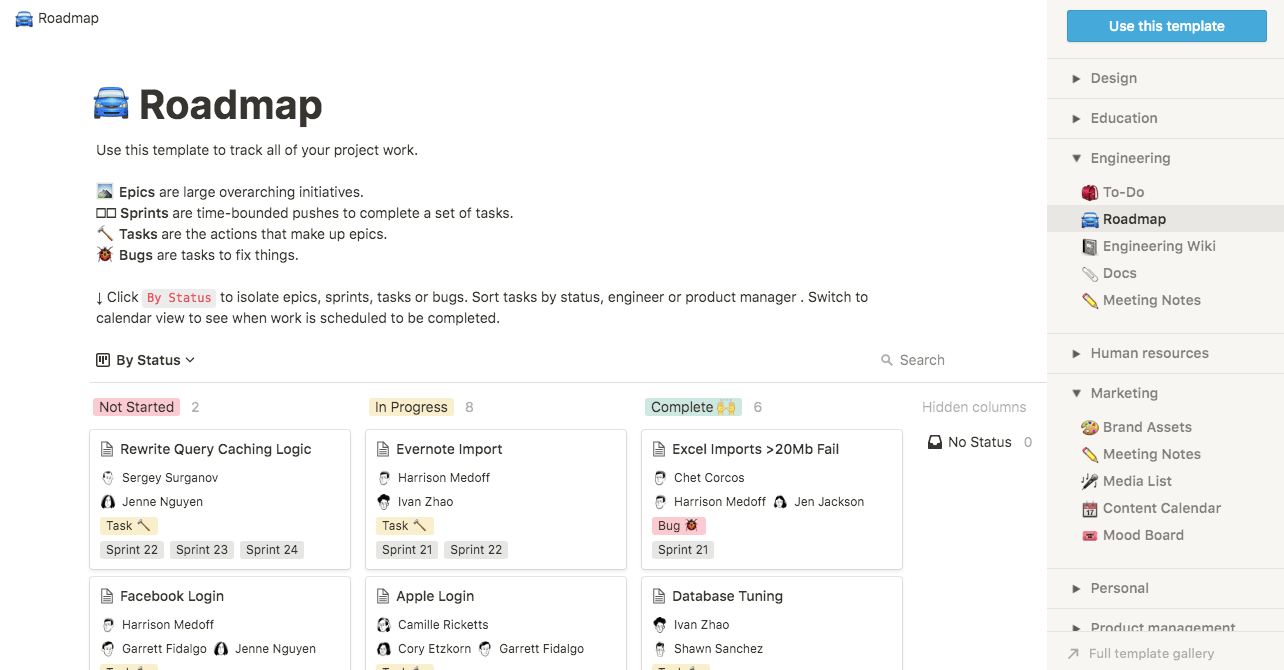
And a Roadmap tool in the Engineering menu:
There’s a simple, effective, and endlessly-customizable sales CRM option as well.
Most of these use the more intuitive, flexible Kanban structure. But what if you have a ton of them?
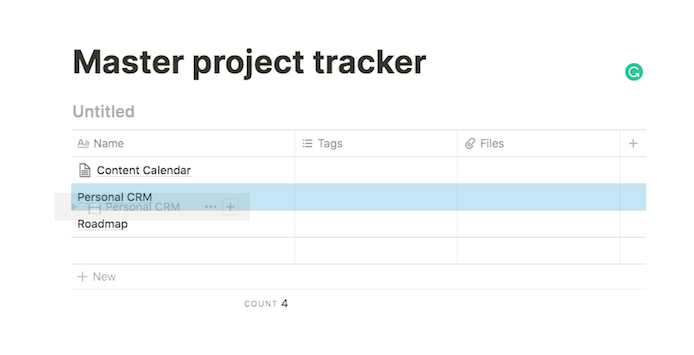
Here, I’ve used the default Table page to collect all three examples above in a table that I can view at a glance. I’ve typed in the names of the various trackers I’m using, then dragged and dropped them into the name cells to turn those names into links that will open the pages.
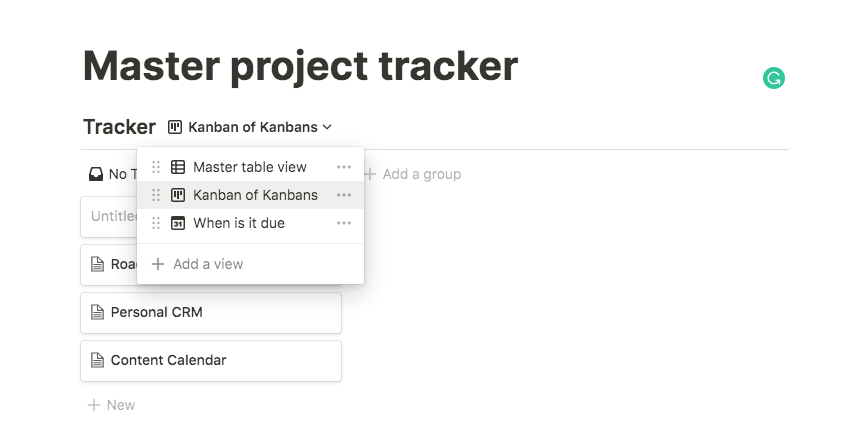
You can “Add a view” in the table header. This feature lets you name the type of view you’re using as well as select from multiple view types including calendars, lists, and Kanban boards.
That’s useful if you’re using Notion for tasks or projects. For instance, I’ve created a master table view, a Kanban view, and a calendar view of the same information here. I can toggle between them in the menu at the top:
This is also useful if you’re tracking your own tasks.
How to use Notion Tasks
Notion gives you powerful tools to track and manage tasks, as distinct from projects or as a part of managing one or more projects.
For instance, suppose I want to take a recipe for French toast and turn it into a task list.
I open a new page and then select “To-do list” from the block menu:
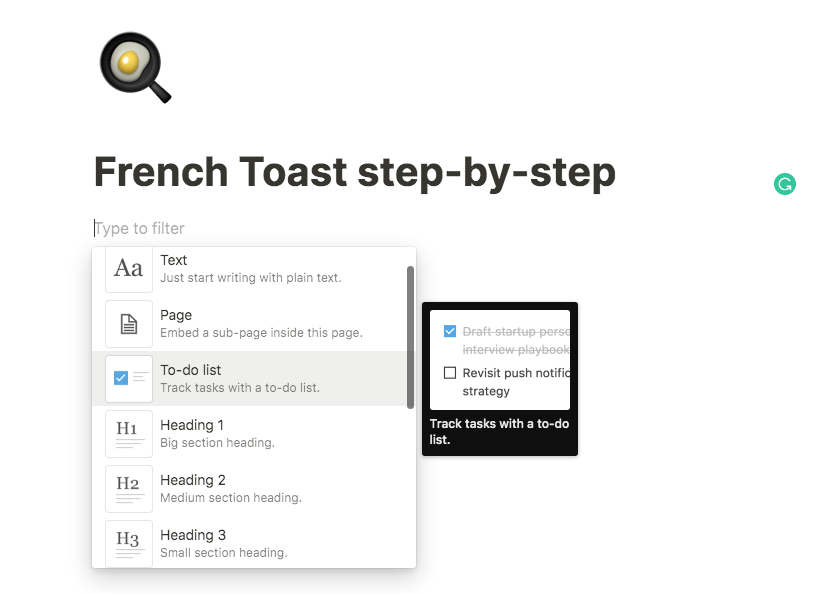
I copy-pasted these instructions. Notion automatically turned each paragraph into a block; then I turned each block into a to-do.
You can simply check off your tasks as you go down the list.
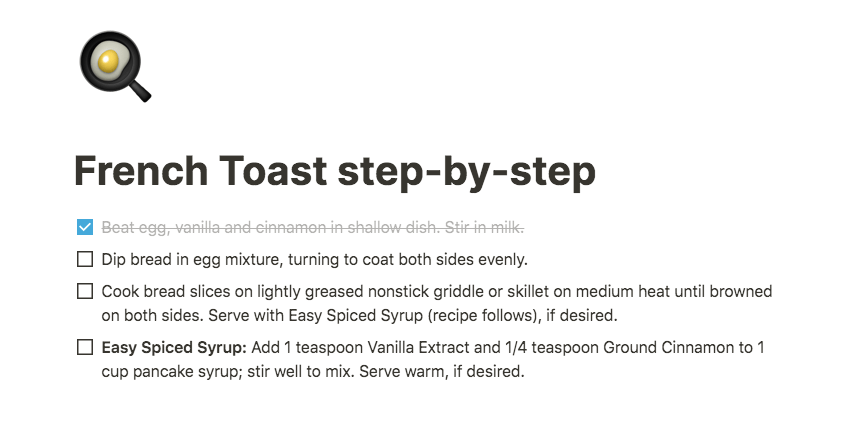
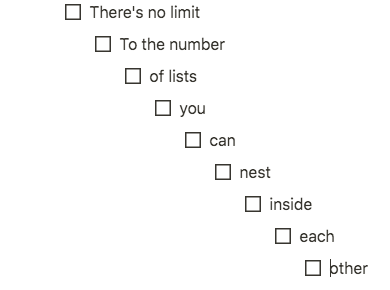
If you’re writing your own task list you can just hit “Return” to create a new checklist. You can nest checklists too. Just pick up a new to-do by its handle and drag and drop it into the list you want to nest it inside.

You can do this as many times as you like.
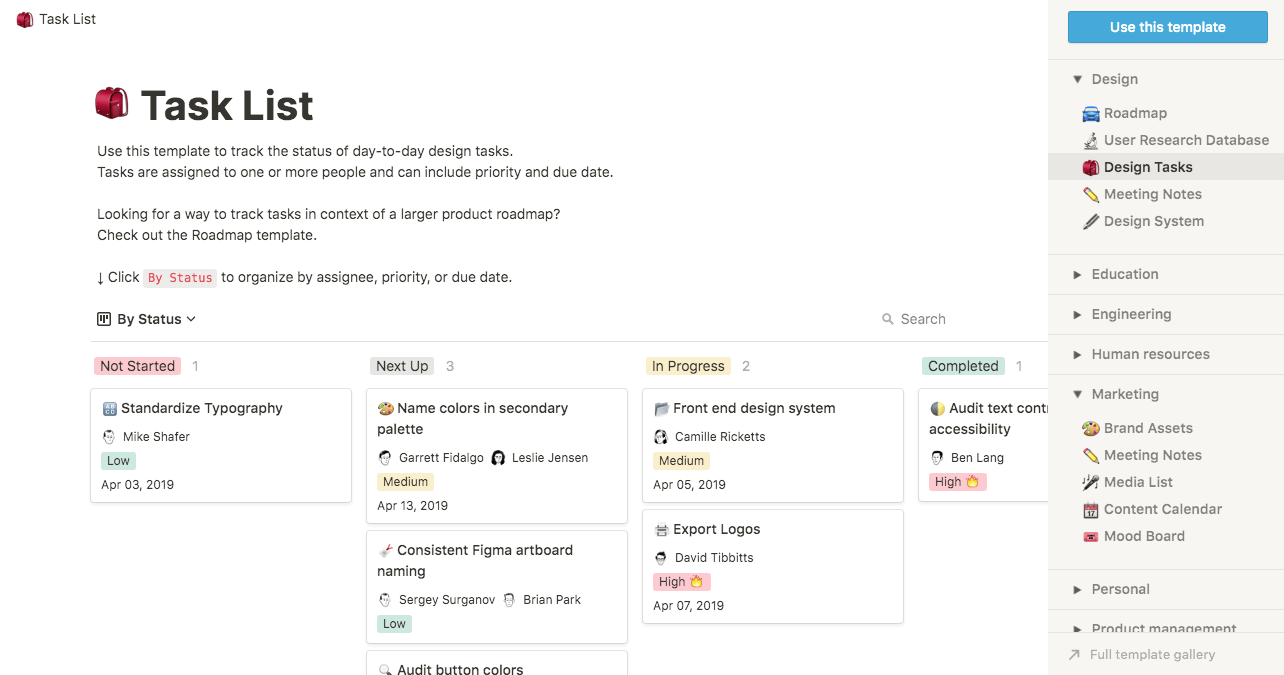
What’s more, there are task management templates available readymade. This task list from the Engineering menu comes as a template:
You can integrate task management with project management easily, giving other users or yourself control over specific task lists. Notion offers permissioned individual and group access.
How to use Notion Wikis
Notion lets you build interactive knowledge base pages, or wikis. Multiple users can participate in their creation, and Notion’s ability to nest pages inside pages means you can create complex FAQ and knowledge base tools that users can manage their own journeys through.
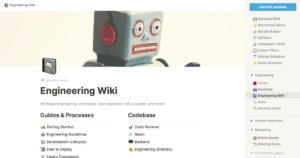
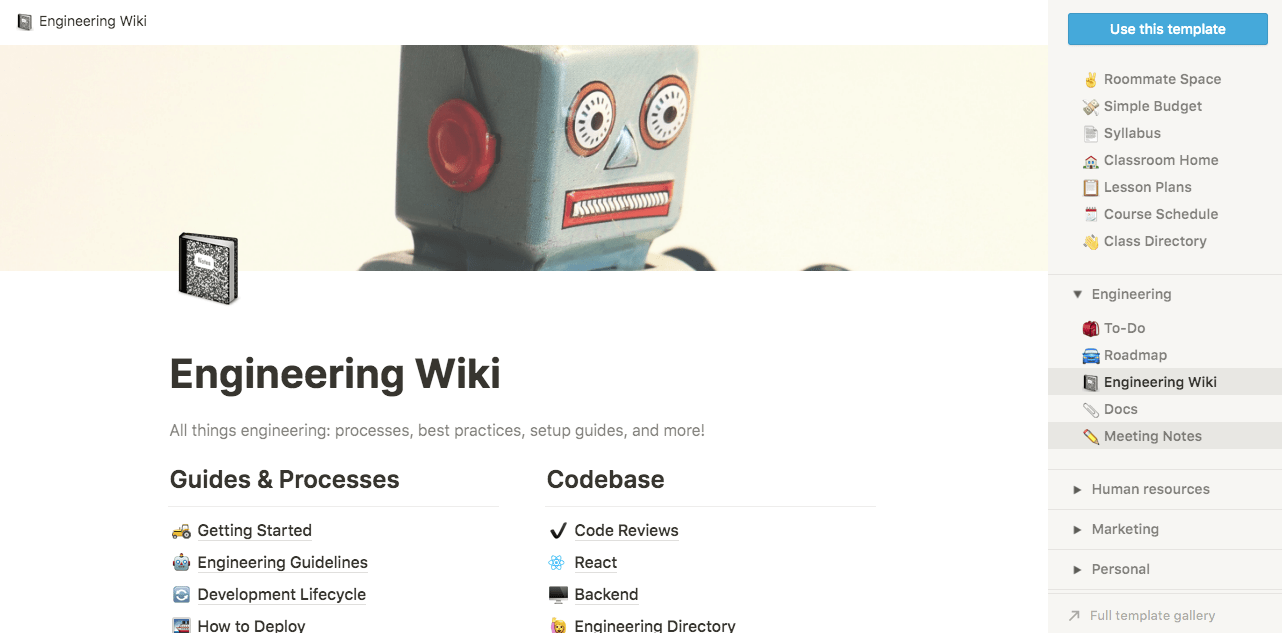
You can create these from scratch yourself, or you can use the template available through the Engineering menu:
As ever, if you don’t see the templates you want in the basic templates menu there’s a full template gallery and a community dedicated to creating aftermarket templates. The Notion template gallery has additional wiki options:
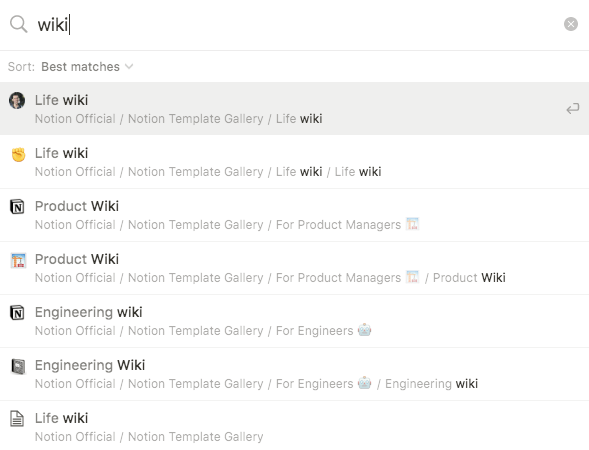
But we’re going to use the Engineering one.
Creating a wiki in Notion is identical to creating a body of documents. It uses the exact same toolkit, it’s just for a different purpose.
Check out the Getting Started section of the Engineering wiki:
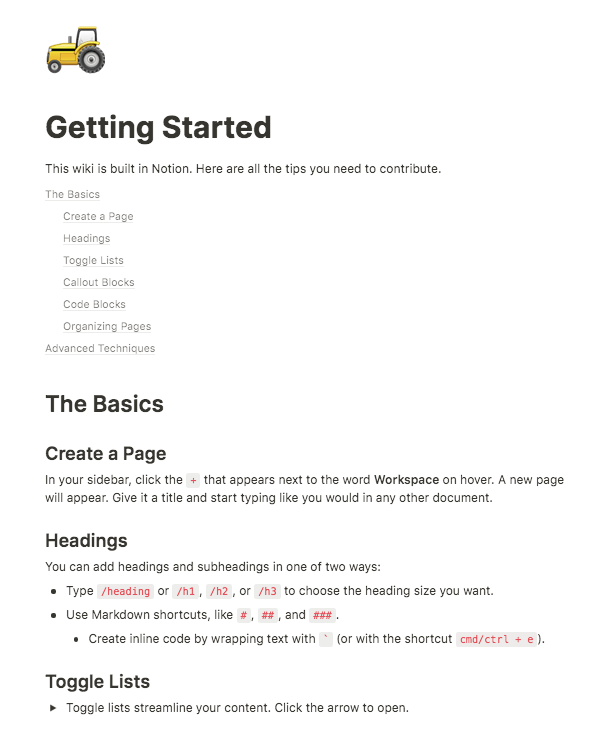
These are the exact same instructions that we’ve covered in the earlier parts of this post. That’s for a reason: Notion isn’t a note-taking app, or a project management app, or a wiki app. It’s a comprehensive set of tools, and you can pick and choose what you use them for.

