The Ultimate Manual to Zoom Breakout Rooms
Maximizing team productivity is always the ultimate goal. However, large meetings can often turn unproductive because not every member gets enough time to communicate and exchange ideas.
Zoom offers the perfect solution to this problem, allowing users to join breakout rooms to discuss specific tasks in private or with smaller groups and more effectively.
This Nira guide will go into detail on how you can use Zoom breakout rooms to make meetings productive again.
What Are Zoom Breakout Rooms Anyway?
Zoom breakout rooms are private sessions set up from your main Zoom meetings. As the host of the main meeting, you can select participants to allocate into separate sessions (breakout rooms) and then bring these groups back together to resume the large group meeting.
This way, participants can have smaller group discussions that are completely separate from the main session, boosting productivity and saving time. Each participant has full video, audio, and screen sharing capabilities to ensure the break room meeting can continue to its full effect.
How Zoom Breakout Rooms Work
Anyone with a Zoom account can participate in breakout meetings for free—all they have to do is sign in to their profile and enable the feature. But as a host, you’ll have to pay monthly subscription charges of $49 or about $499 annually, along with $41.58 for each room monthly.
You can split up your main meeting into up to 50 separate rooms at a time—either manually or automatically—and can switch participants between sessions. Here are the number of participants possible for large meetings when you create breakout rooms during a meeting:
- 20 breakout rooms — Up to 500 meeting participants
- 30 breakout rooms — Up to 400 meeting participants
- 50 breakout rooms — Up to 200 meeting participants
Before you do this, one must meet a few requirements:
- Breakout rooms can only be created if you’re using Zoom’s desktop software. You cannot create or manage a breakout room using your phone, but you can still attend them.
- The breakout room feature must be enabled.
- The host has to send an invite to individuals since only they can start a breakout room meeting.
Once the host has created a breakout room, participants cannot hear audio or see video from the main Zoom session. If the host wishes to communicate to everyone at once, they can “broadcast” a text-based message to all participants. If the participants in a breakout room would like help from the host, they can use the ‘”Ask for Help” option to request the host to join that specific breakout.
The host can either wait in the main session while participants work or they can enter and leave separate breakout rooms to provide guidance and listen to participants communicating. They can also end the breakout rooms, bringing all participants back to the main Zoom meeting, and then can send participants back to the same breakout groups or create new breakout groups.
As you can see, there’s a lot of flexibility to make virtual meetings as productive as possible.
Example 1: Ice Breakers
Ice breaker sessions can help team members form a tight-knit community or just to get to know each other in a stress-free way, which can be a great initiative to facilitate better collaboration and smooth communication. As a host, you can also use prompts to direct icebreakers in any way you desire. This can be particularly useful when onboarding new employees.
Example 2: Pitch Feedback
You can create randomly generated breakout rooms comprising 5-7 team members, and ask each member to pitch ideas to drive company growth. This can be an excellent tactic to encourage team members to brainstorm ideas together and discover new opportunities to boost sales and revenue.
How to Get Started With Zoom Breakout Meetings
Now that we’ve discussed what Zoom breakout rooms are and how you can use them, let’s take a look at how to get started with them.
1. Enabling Zoom Breakout Rooms
As mentioned, before you start creating Zoom breakout sessions, you have to enable the feature from the Zoom desktop. Here’s how to get started:
-
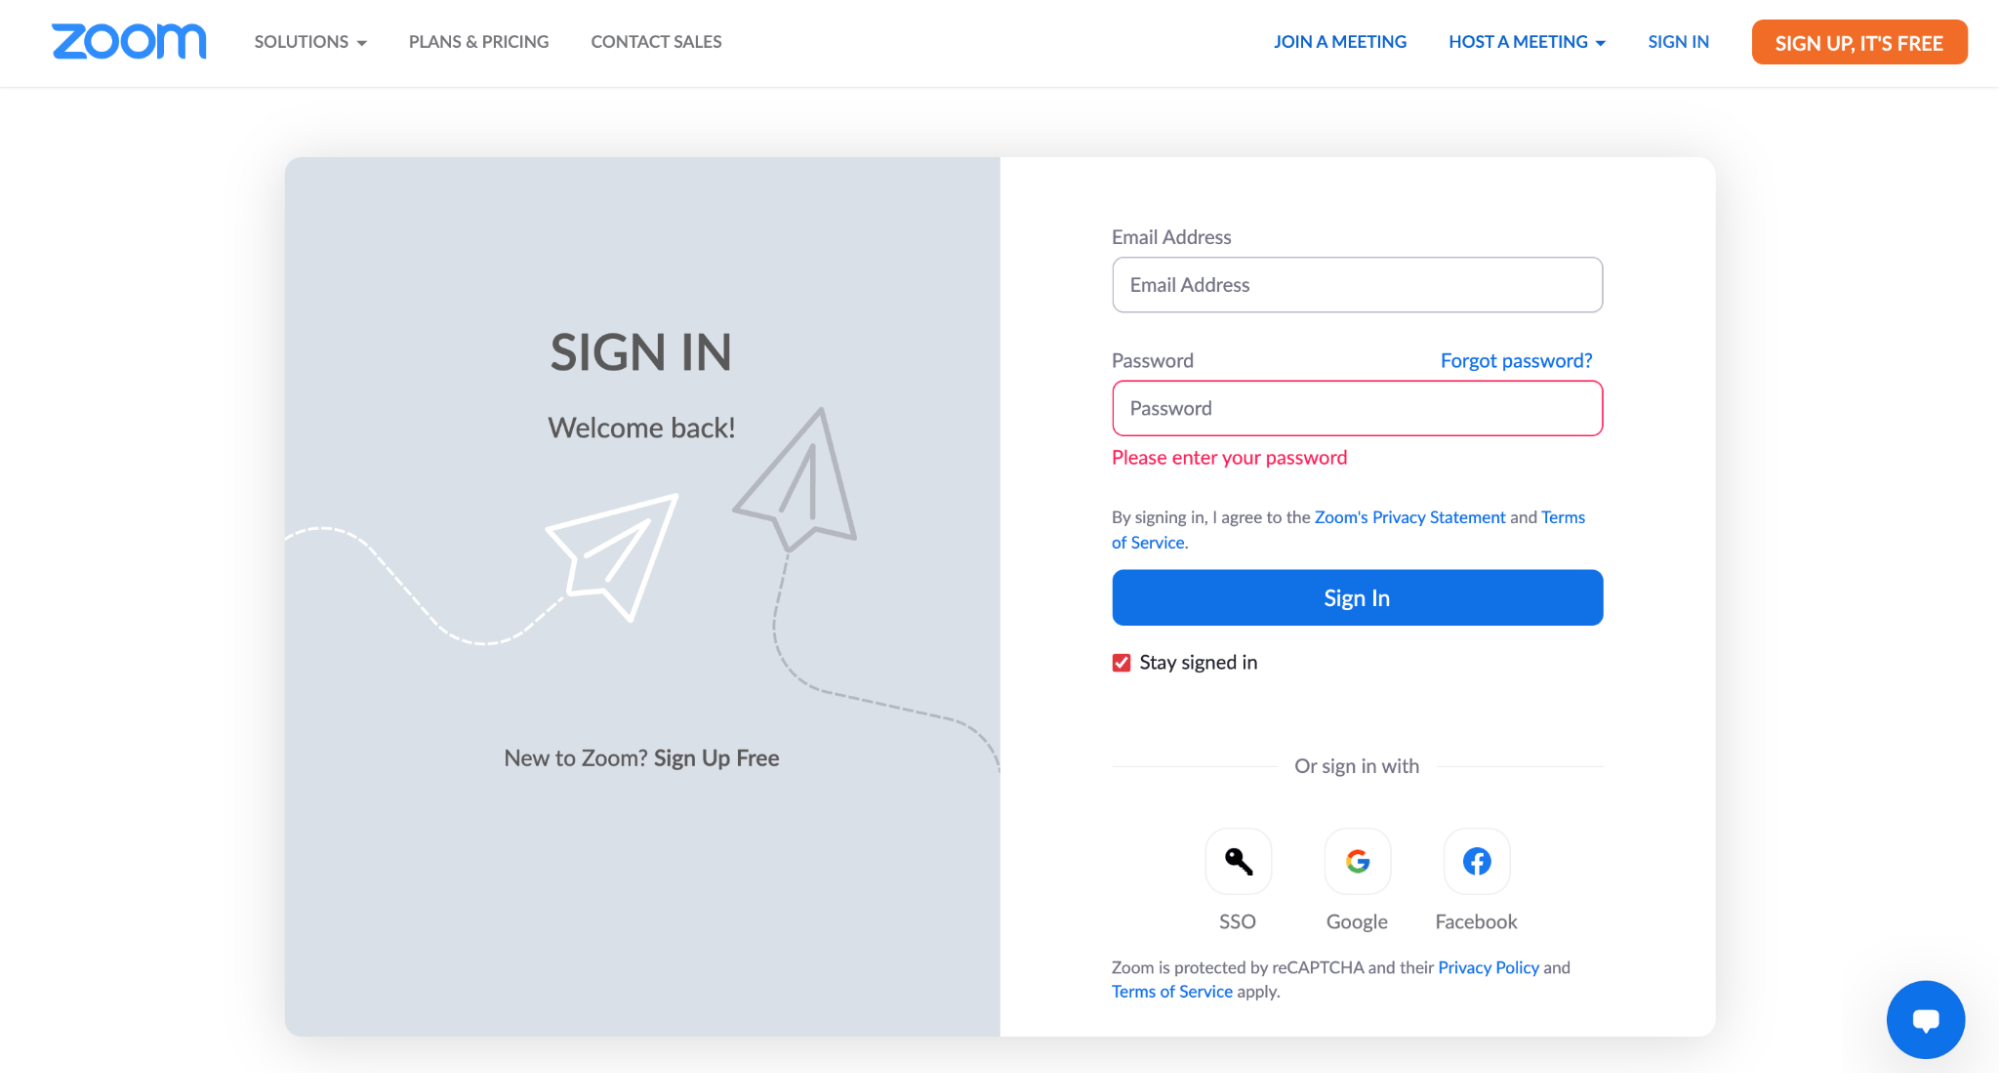
- Sign in to your Zoom account. Make sure you’re signing in to the website and not the Zoom mobile app.
-
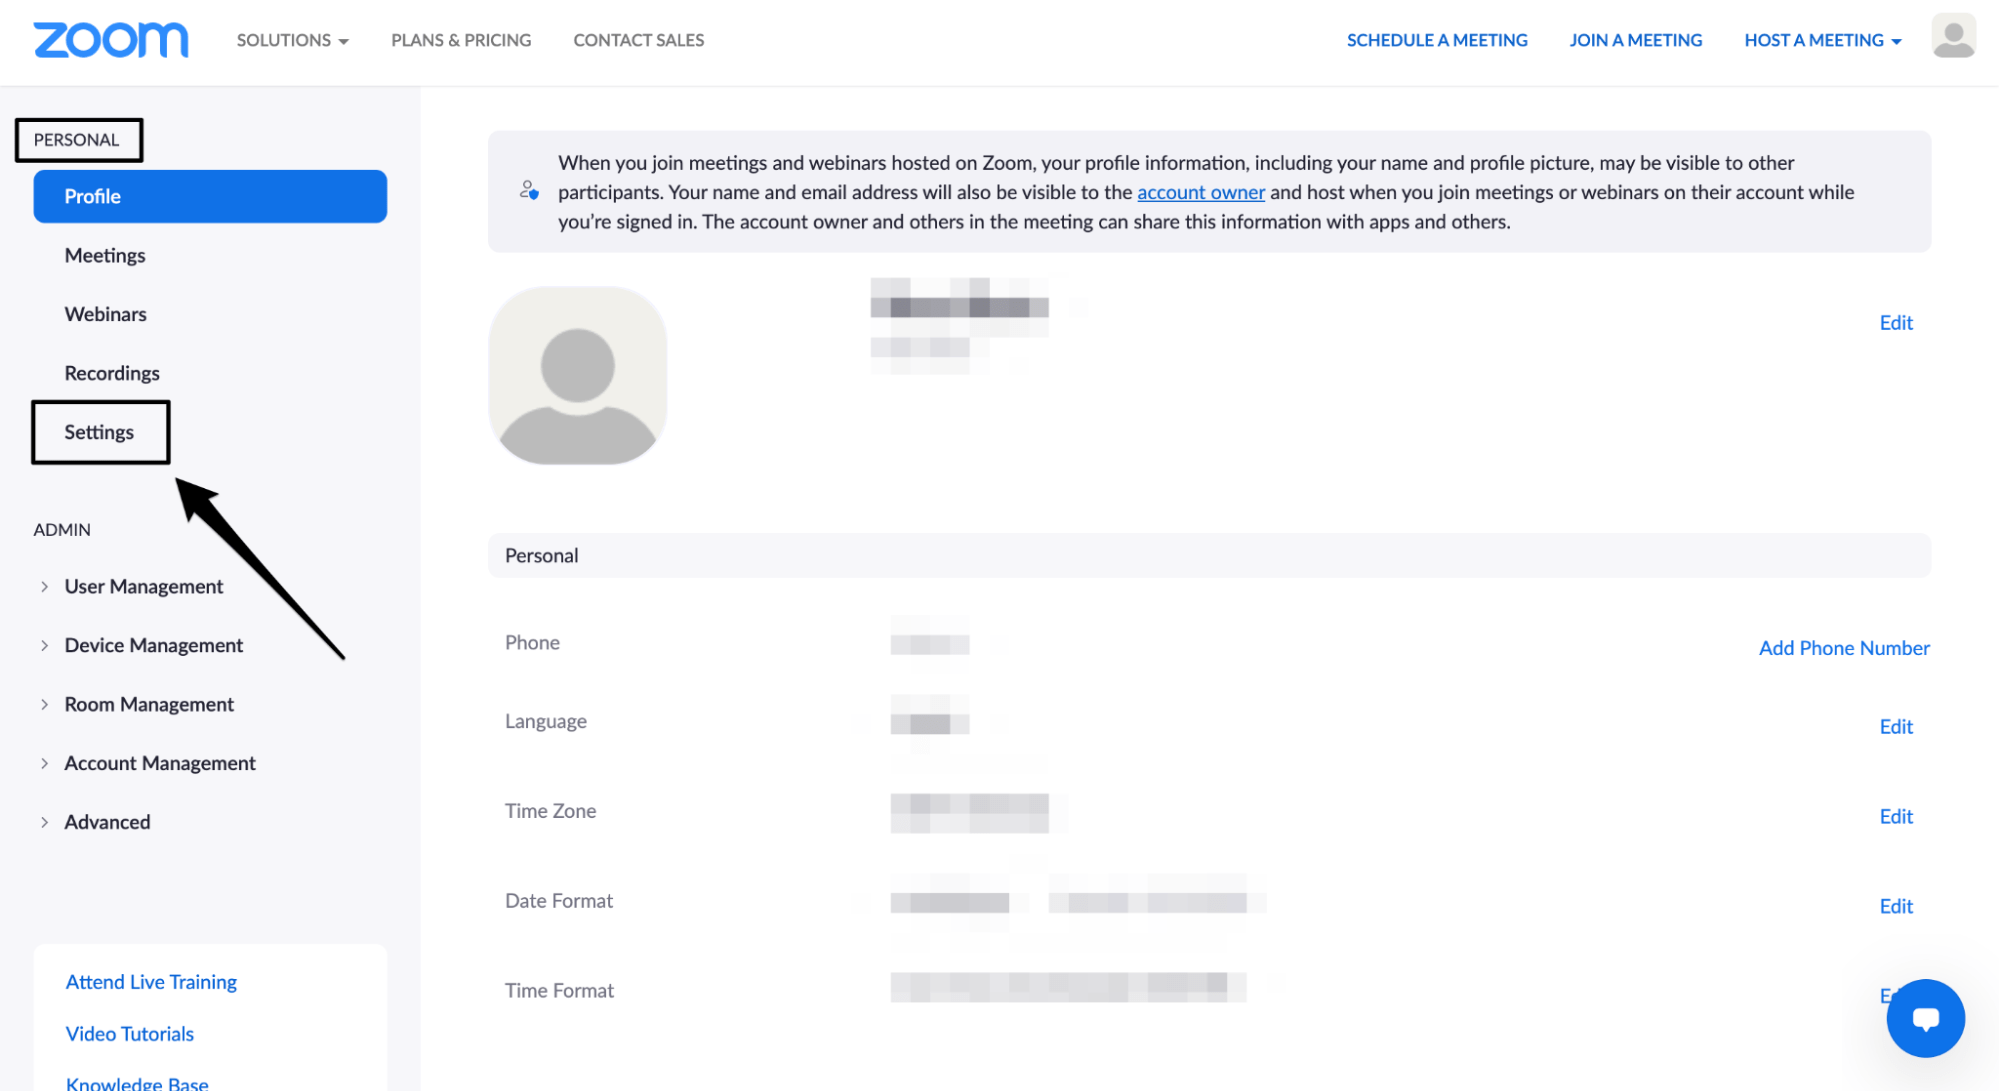
- On your left sidebar, select Settings under the Personal section.
-
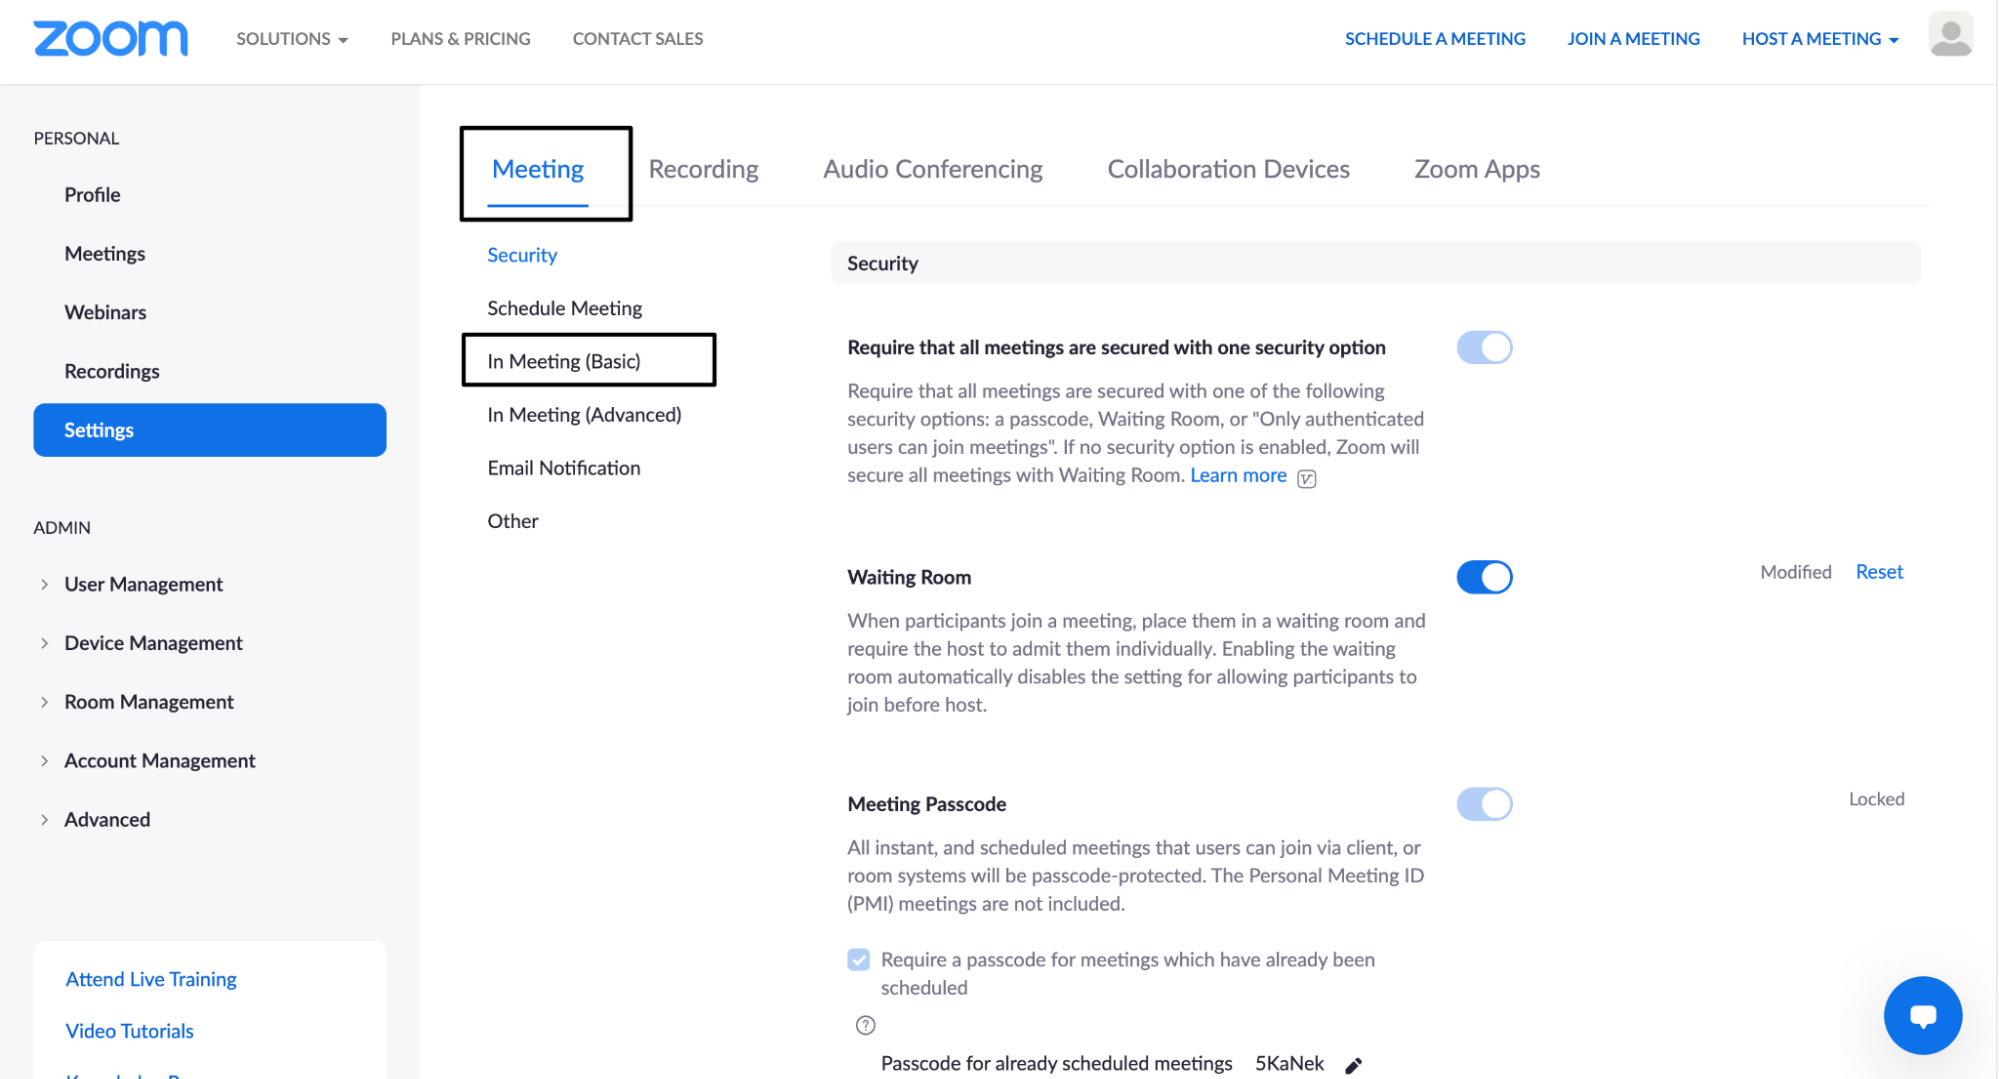
- Under the Meeting tabs in the top menu bar, scroll below till you see the Breakout room option. Alternatively, you can click on In Meeting (Advanced) or use Command + F (for Mac users) or Control + F (for Windows users) as a shortcut.
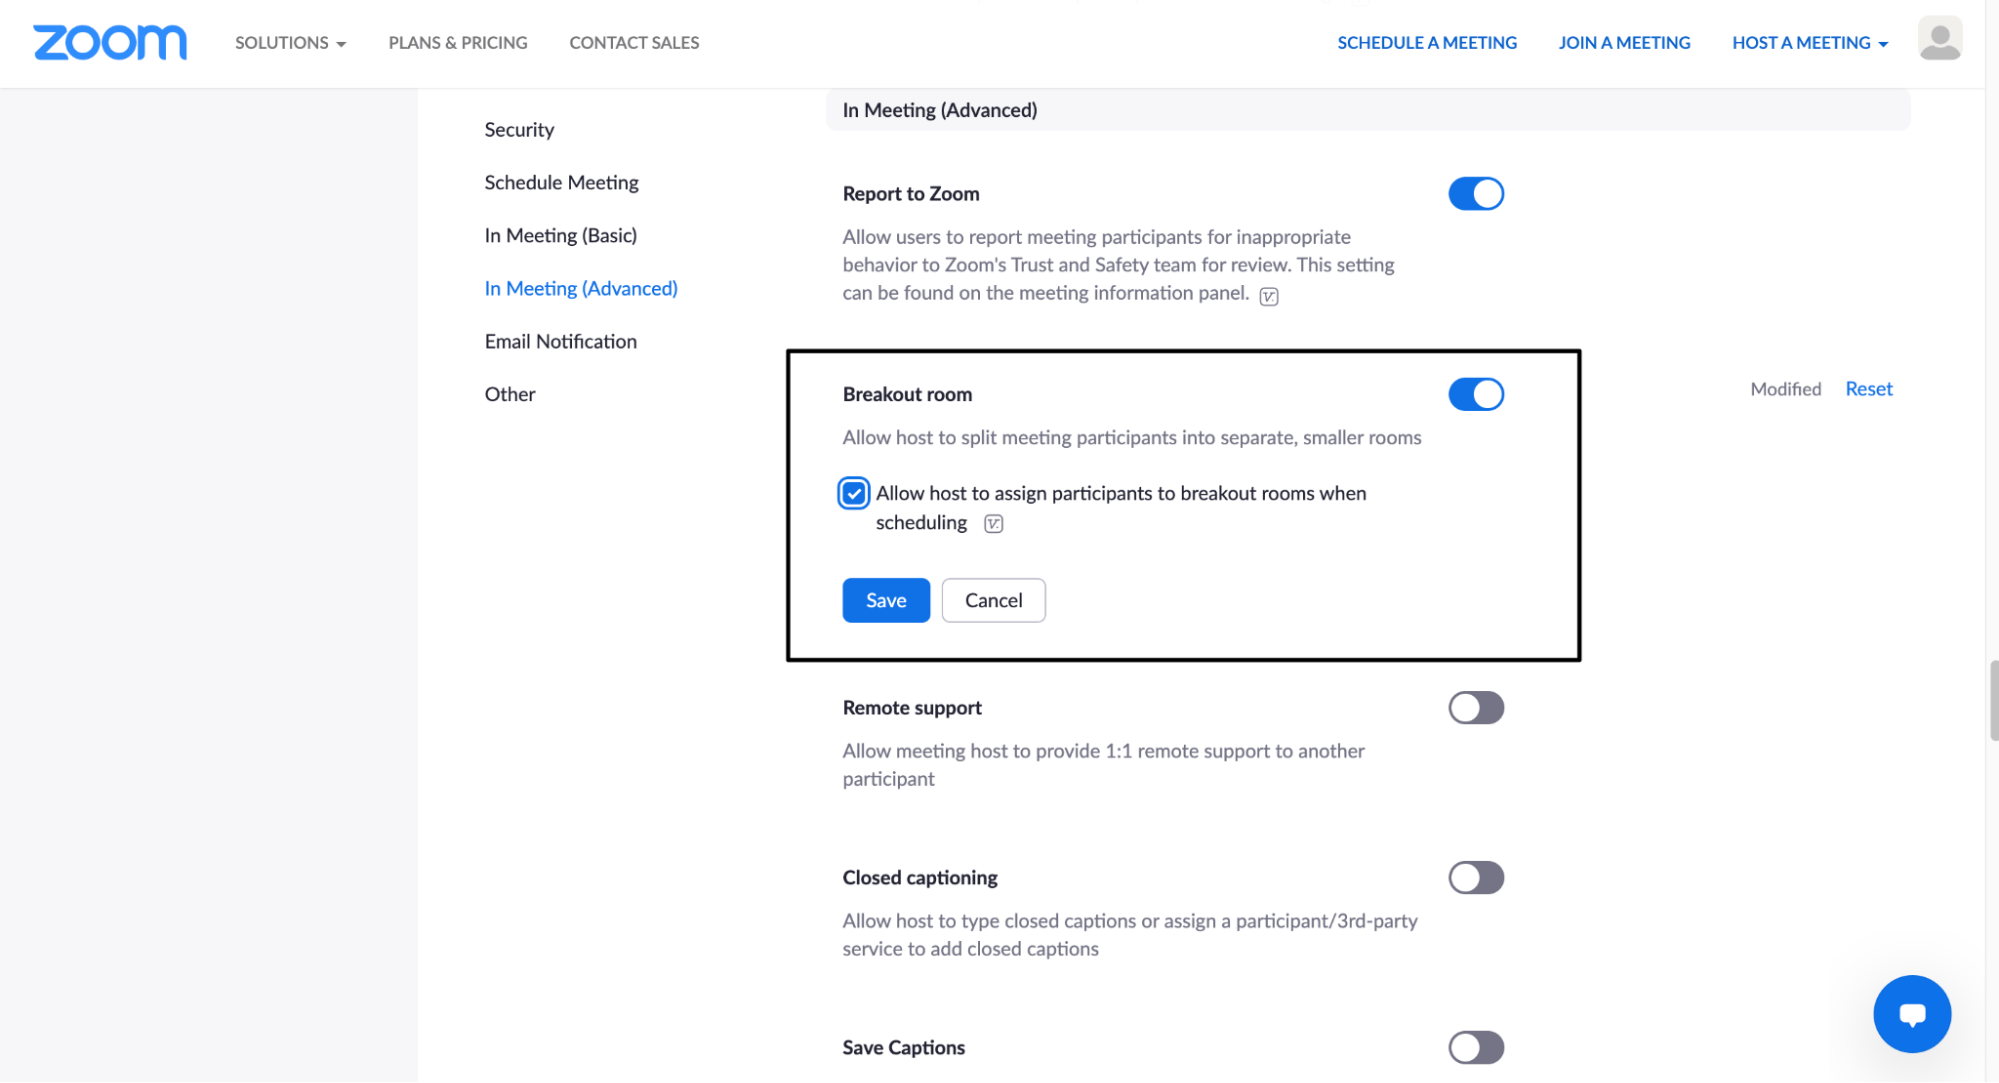
- Click on the toggle to enable Breakout room. You can also check the option to “Allow most to assign participants to breakout rooms when scheduling.” Select Save.
2. Creating Breakout Rooms in Your Zoom Call
After enabling Zoom breakout rooms, you can create breakout sessions whenever you host a main meeting. Below, we have created a step-by-step rundown of how to create breakout rooms in your Zoom call.
-
- Open the Zoom application on your laptop or desktop.
- You can either schedule or create a new meeting. Remember, you have to be the main host to create breakout rooms.
- Once you begin a meeting, click Breakout Rooms in the bottom toolbar.

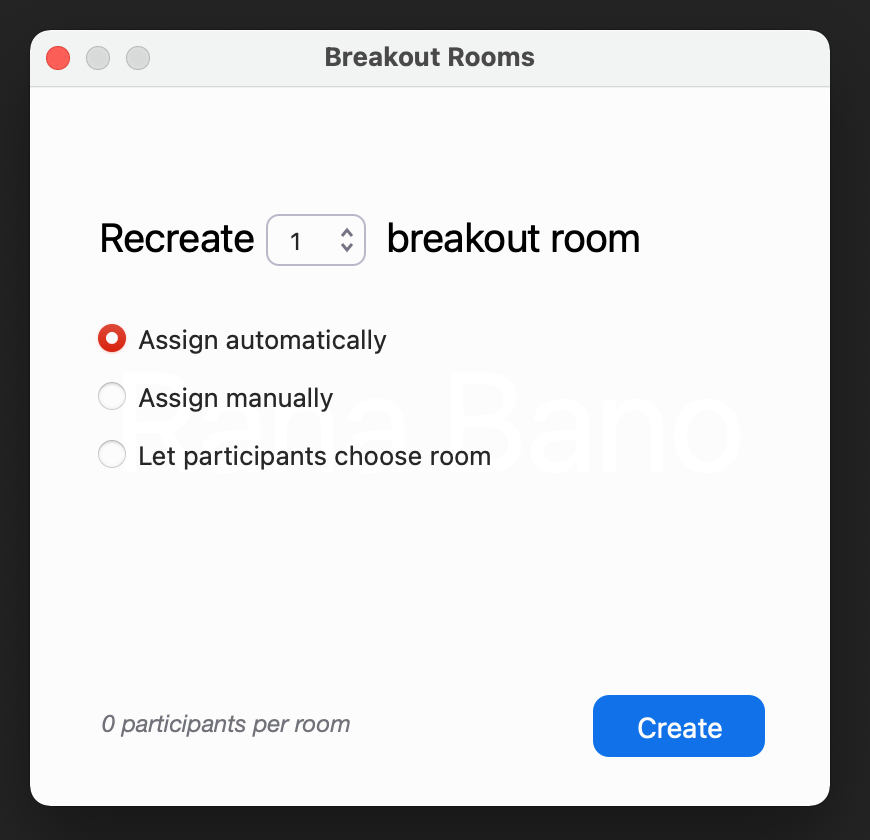
- Decide whether you want to start Zoom to sort your breakout room participants into the number of rooms you select automatically. Alternatively, you can also allocate participants into rooms manually during your main Zoom meeting. You can choose whatever suits you best.
- After selecting your desired settings—automatic or manual—select Create.
3. Pre-assigning Participants Into Breakout Rooms
When it comes to pre-assigning participants, you can either do it manually or use a CSV file import feature, which is better when you’re handling a bigger group of people. We’ll discuss both methods in more detail below.
Method 1: Pre-Assign Participants Manually
-
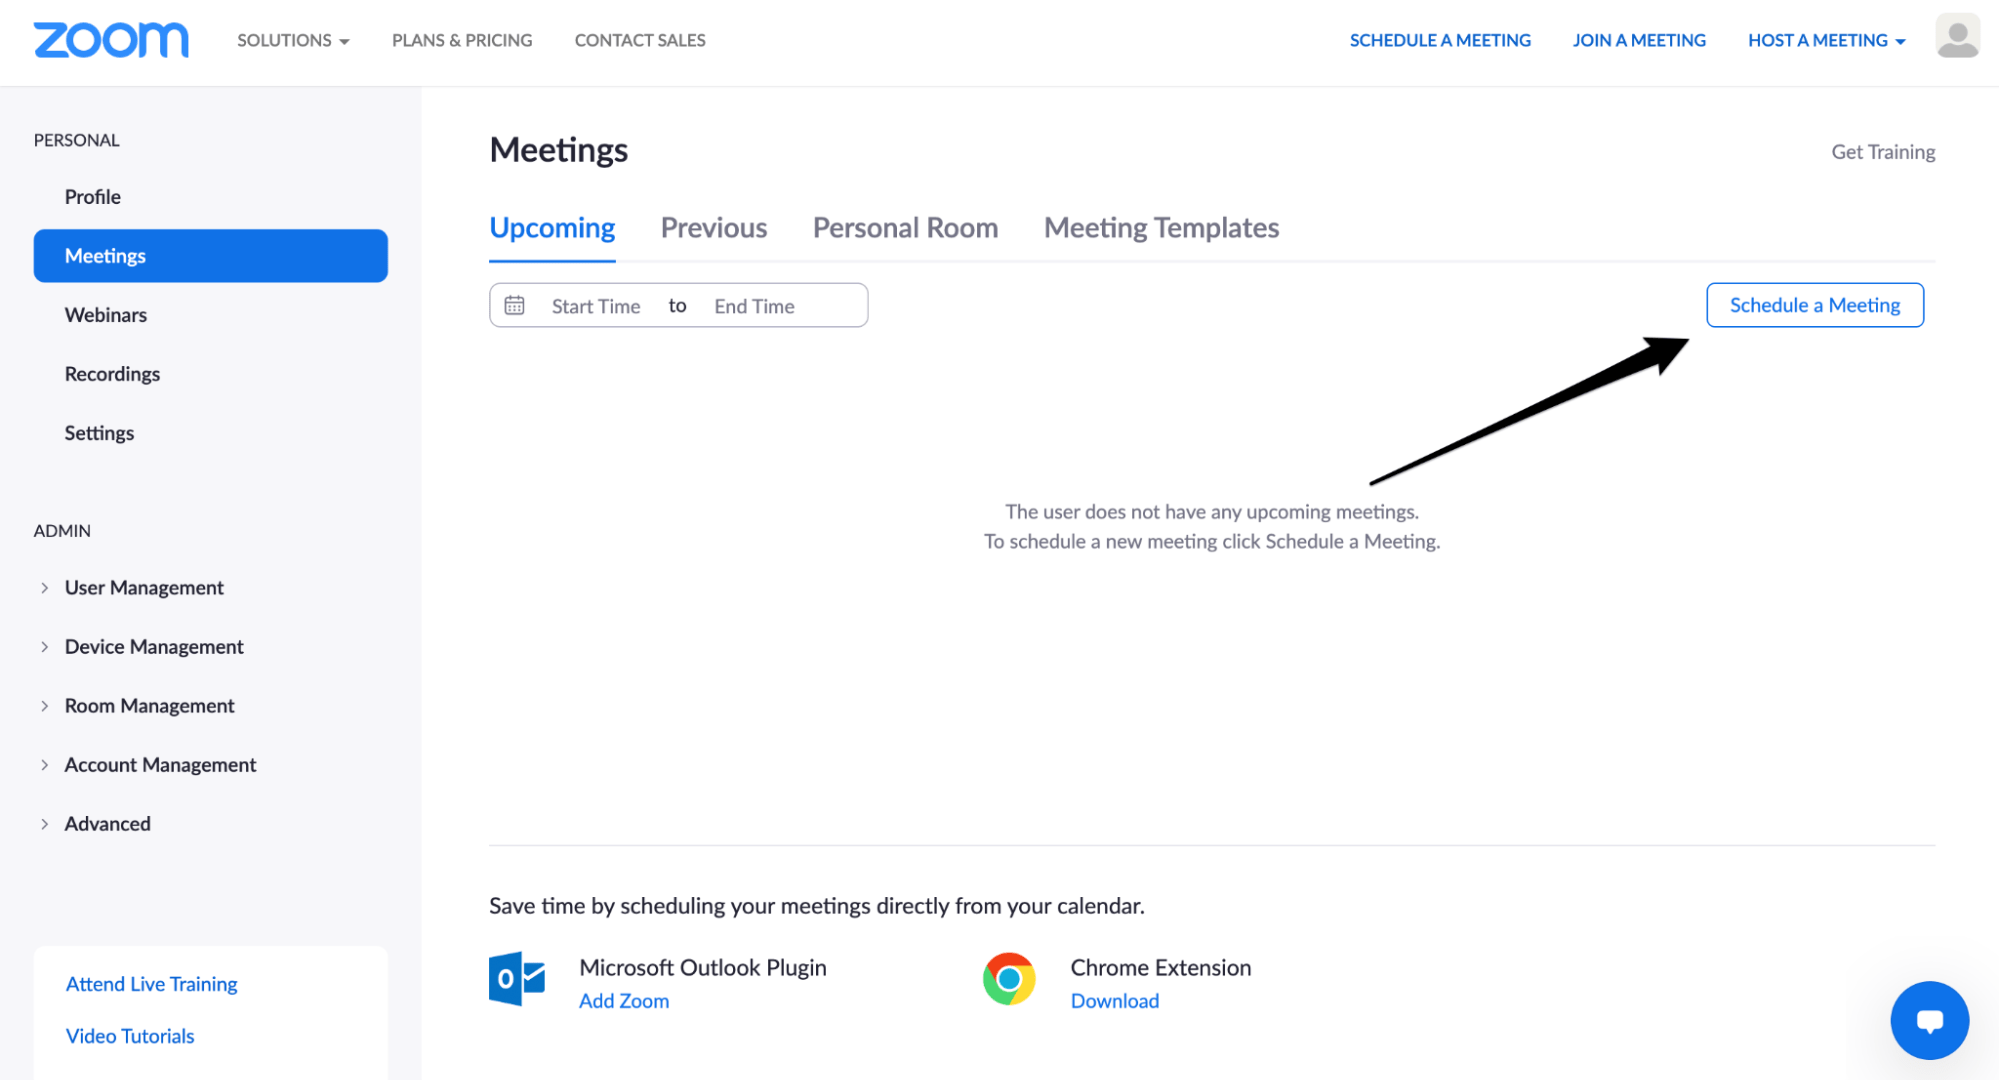
- Make sure you’re signed into the web portal with your username and password.
- Select Meetings, followed by Schedule a meeting.
-
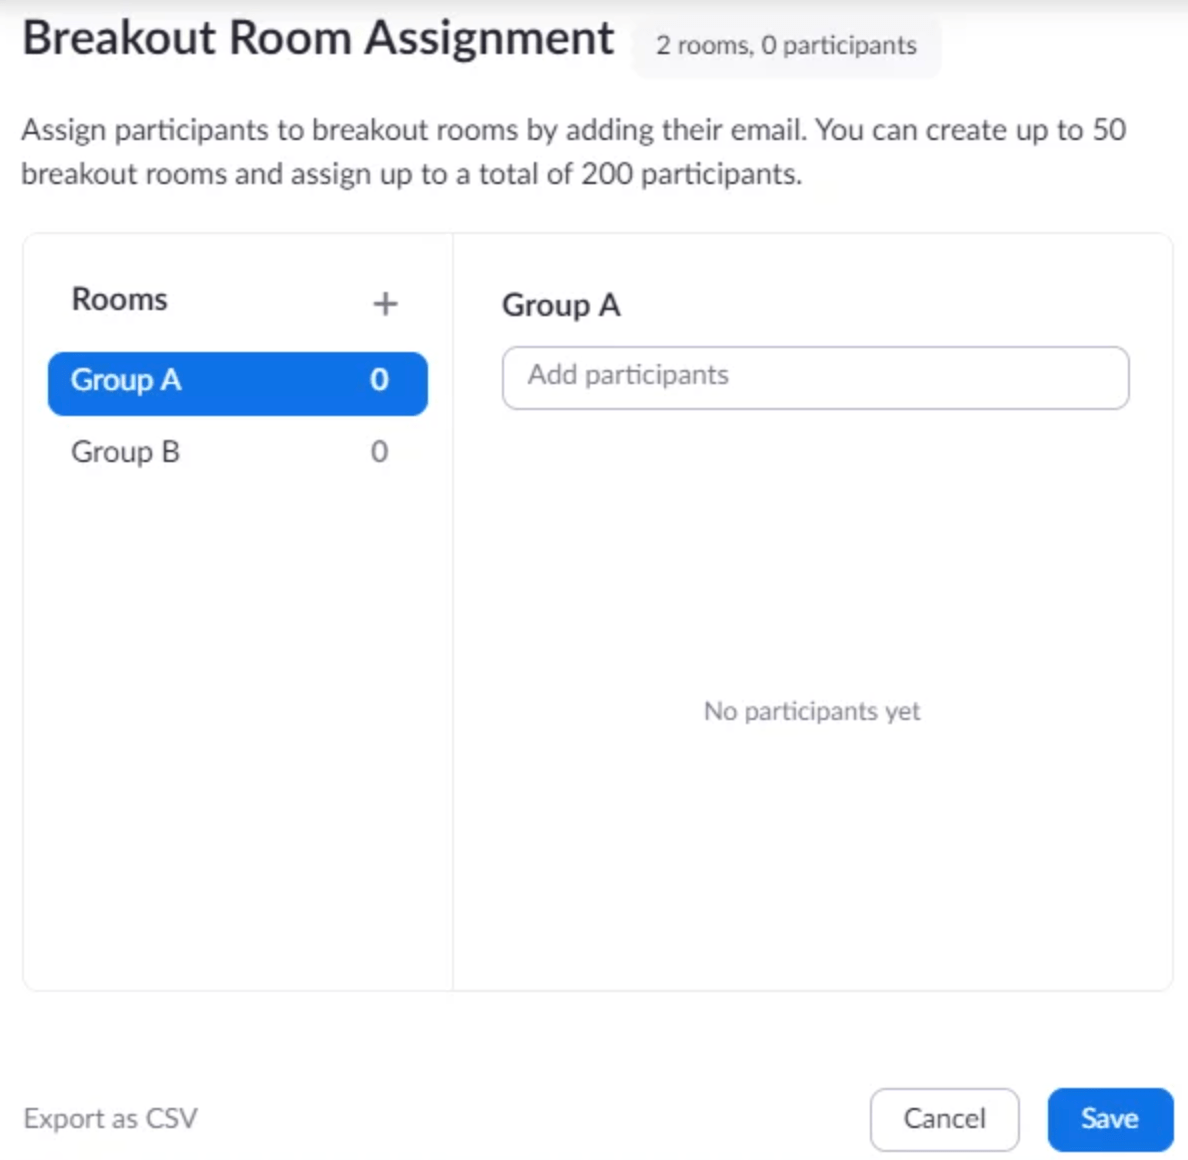
- Go to the Meeting Options section, and select Breakout Room pre-assign checkbox. Click Create Rooms.

- Right next to Rooms, select the + sign to add breakout rooms.
- Over your cursor over the default breakout room name. A pencil icon will appear. Click on it to rename the breakout room.
- To add people to a specific breakout room, type in the person‘s name or email address. You’ll see this in the Add participants text box.
Method 2: Assign Participants Using CSV File Import
We get it: the manual method is time-consuming and tedious. Luckily, you can choose an easier option for pre-assigning participants. Here’s how you can create pre-assigned breakout rooms:
-
- After signing into your Zoom account, click on the Meetings tab and schedule a meeting.
- In the Meeting Options, select Breakout Room Pre-Assign followed by Import from CSV.

-
- Click on download to get a sample CSV file that you can fill out later.
- Open the CSV file in Excel (or other similar spreadsheet software) and fill out the Pre-assign Room Name column with the names you want for a specific breakout room. Fill out the email addresses of the individuals in the assigned Email Address column. Save the completed file.
Note: Remember, you can only assign a maximum of 200 participants in your CSV file.
- Drag and drop the completed CSV file in the Zoom web portal.
4. Managing a Zoom Breakout Account
At this stage, you know how to enable, create, and assign people to zoom breakout rooms. Next, we’ll discuss how to manage breakout rooms efficiently to boost productivity and save time.
-
- Start an instant or schedule a meeting.
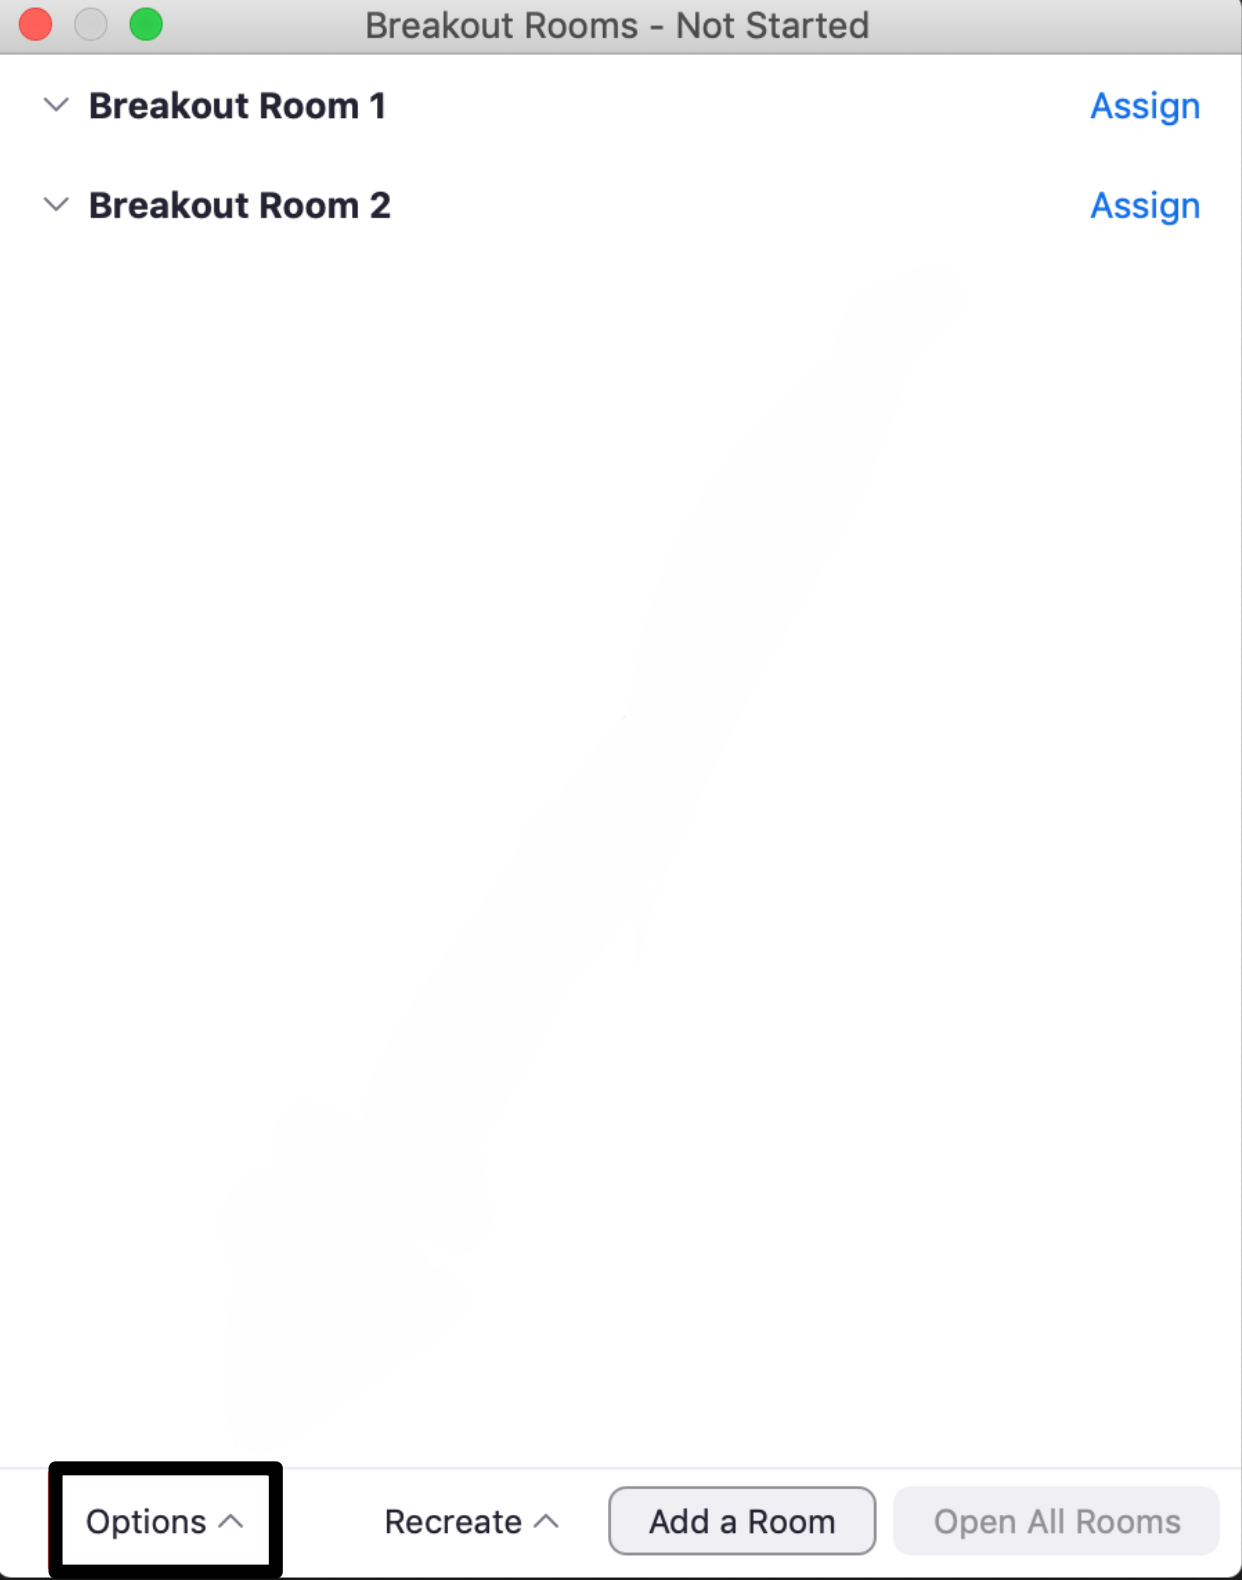
- From the main meeting option, choose Open All Rooms to officially begin your breakout session.
- When you create rooms, each breakout room will be shown in a dialog box. You can click on every individual room to see who’s in it.
-
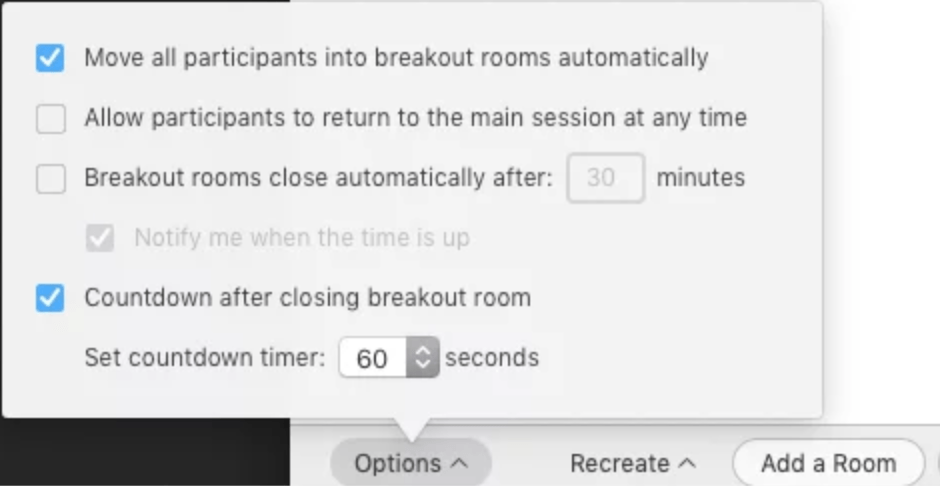
- Breakout room options and meeting settings. Here, you can:
- Set breakout rooms to close after a specific time period
- Decide how much control participants will have over their time in these sessions
- Create a countdown timer to inform participants of the time remaining in a session. Every participant will be notified whenever the session time expires or when the host closes it
- Breakout room options and meeting settings. Here, you can:
.
- Select Close all rooms to close the session. This will give participants exactly one minute to wrap up discussions. After the rooms are closed, all participants will return to the main room screen.
From the Participant’s Viewpoint: How to Operate When Participating in a Zoom Breakout Room
The features are slightly different when you join a breakout room as a participant.
- Self-Select Your Zoom Breakout Room: You can choose which breakout room you’d like to join—provided the host has enabled this feature. Moreover, you can go freely between breakout rooms without involving the host. Keep in mind that both the meeting host and you will have to be on Zoom 5.3.0 or later to enjoy this feature.
- In-Meeting Chat: You can use the chat function to communicate with other participants via messages. Additionally, you can share links, content, and ideas for a productive brainstorming session.
- Screen Sharing: You can share your screen in a breakout room as you would in a regular Zoom meeting. However, the meeting host has to permit participants to share their screens.
- Ask the Host for Help: A unique breakout room feature, you can contact the host and let them know you need their help within your breakout room. The host can then respond by either joining the breakout room or messaging other participants to join your breakout room when they become available.
And that’s it—that’s all you need to know to start using Zoom breakout rooms and maximize your team productivity. For a video demonstration, you can watch this video created by Zoom.

