The Ultimate Manual to Zoom Background Images
Millions of people took to Zoom to work from home during the pandemic. Despite vaccines rolling out, it seems that Zoom is still the preferred way to hold meetings.
However, attending meetings virtually isn’t just about the conversations you have—your backdrop also makes an impact.
Our busy schedules may not always give you enough time to ensure a spotless room or office. Other times, you may not be comfortable with the idea of showing your personal space to your colleagues or clients.
Luckily, Zoom has rolled out its newest feature that allows users to avoid this problem: background images.
What Are Zoom Background Images, and Why Are They Important?
Background images are a feature that lets you display any image (or video) of your choice as your background during a Zoom meeting.
While ideally owning your real background is easiest, having a background image looks nicer (and neater) than showing meeting participants your messy office or bedroom.
Think of it this way: you’re unlikely to wear a dirty shirt when attending a professional meeting. In the same way, you don’t want your backdrop to take the focus away from your meeting or feel self-conscious about what the other participants may think about your backdrop.
To give you more insight, here are some of the more prominent advantages of using Zoom background images during meetings:
No Mess to Worry About
Having to organize your home office or bedroom is one of the biggest remote meeting woes.
Not everyone has the time to clean their space before starting a meeting–especially a last-minute one. Other times, users can feel uncomfortable or embarrassed about showing their personal space.
But with a background image in place, you don’t have to worry about any mess. Ever.
You can choose a simple white background or a beautiful sunset to ensure nothing distracts from the content of your meeting. Or you can simply blur out your surroundings to put the focus on you.
Easy to Set Up
Adding a virtual background to your next Zoom call is also incredibly easy. Once you learn how to do it, you can change your background in a few seconds flat.
After logging into your account, all you have to do is enable the virtual background option. It’s really that easy! Once the background is enabled, you can either select from the available templates or upload any image you like for a more customized touch.
Adds a Professional Touch to Meetings
Poor lighting is a common issue with even the best-decorated homes. But what makes matters worse is inadequate lighting can affect your meeting with potential clients—and not in a good way.
Additionally, your meeting participants might find your wall hangings, furniture, or shelving appropriate and make assumptions about you. Therefore, to make things work-appropriate and professional, it’s best to use a respectable background image.
What’s more, you can create a Zoom background image using your brand colors or logo in a step-and-repeat pattern. This will help build brand recognition and trust and create a unique visual presence.
Allows You to Be Creative and Have Fun
You will find tons of exciting and fun Zoom background images available to express yourself. You can be creative and explore different images, depending on the nature of the meeting.
For instance, you can choose a fun background to lighten the mood during a stressful day. Or have a silly or ridiculous background when holding icebreakers and introducing new hires to the rest of the company.
Of course, your background choice should always be respectful of company guidelines and co-workers. While it’s okay to experiment, you don’t want to offend other meeting participants or be too silly when everyone else is trying to be serious.
How Zoom Background Images Work
Zoom applies the default settings to every video call, regardless of whether you use the software from your desktop or mobile phone. All you have to do is open the app, enable the Backgrounds and Filters feature, and Zoom will implement your chosen background image for every future call.
How to Add a Zoom Background Image Before Your Meeting
Adding a virtual background before you start a meeting is recommended practice to avoid taking the other participants by surprise. This isn’t a hard requirement since you can change the background during an ongoing meeting, but taking the initiative to add a virtual background before your meeting on Zoom is more likely to work in your favor.
Below, we’ve given a step-by-step rundown of how to add a Zoom background image before a meeting.
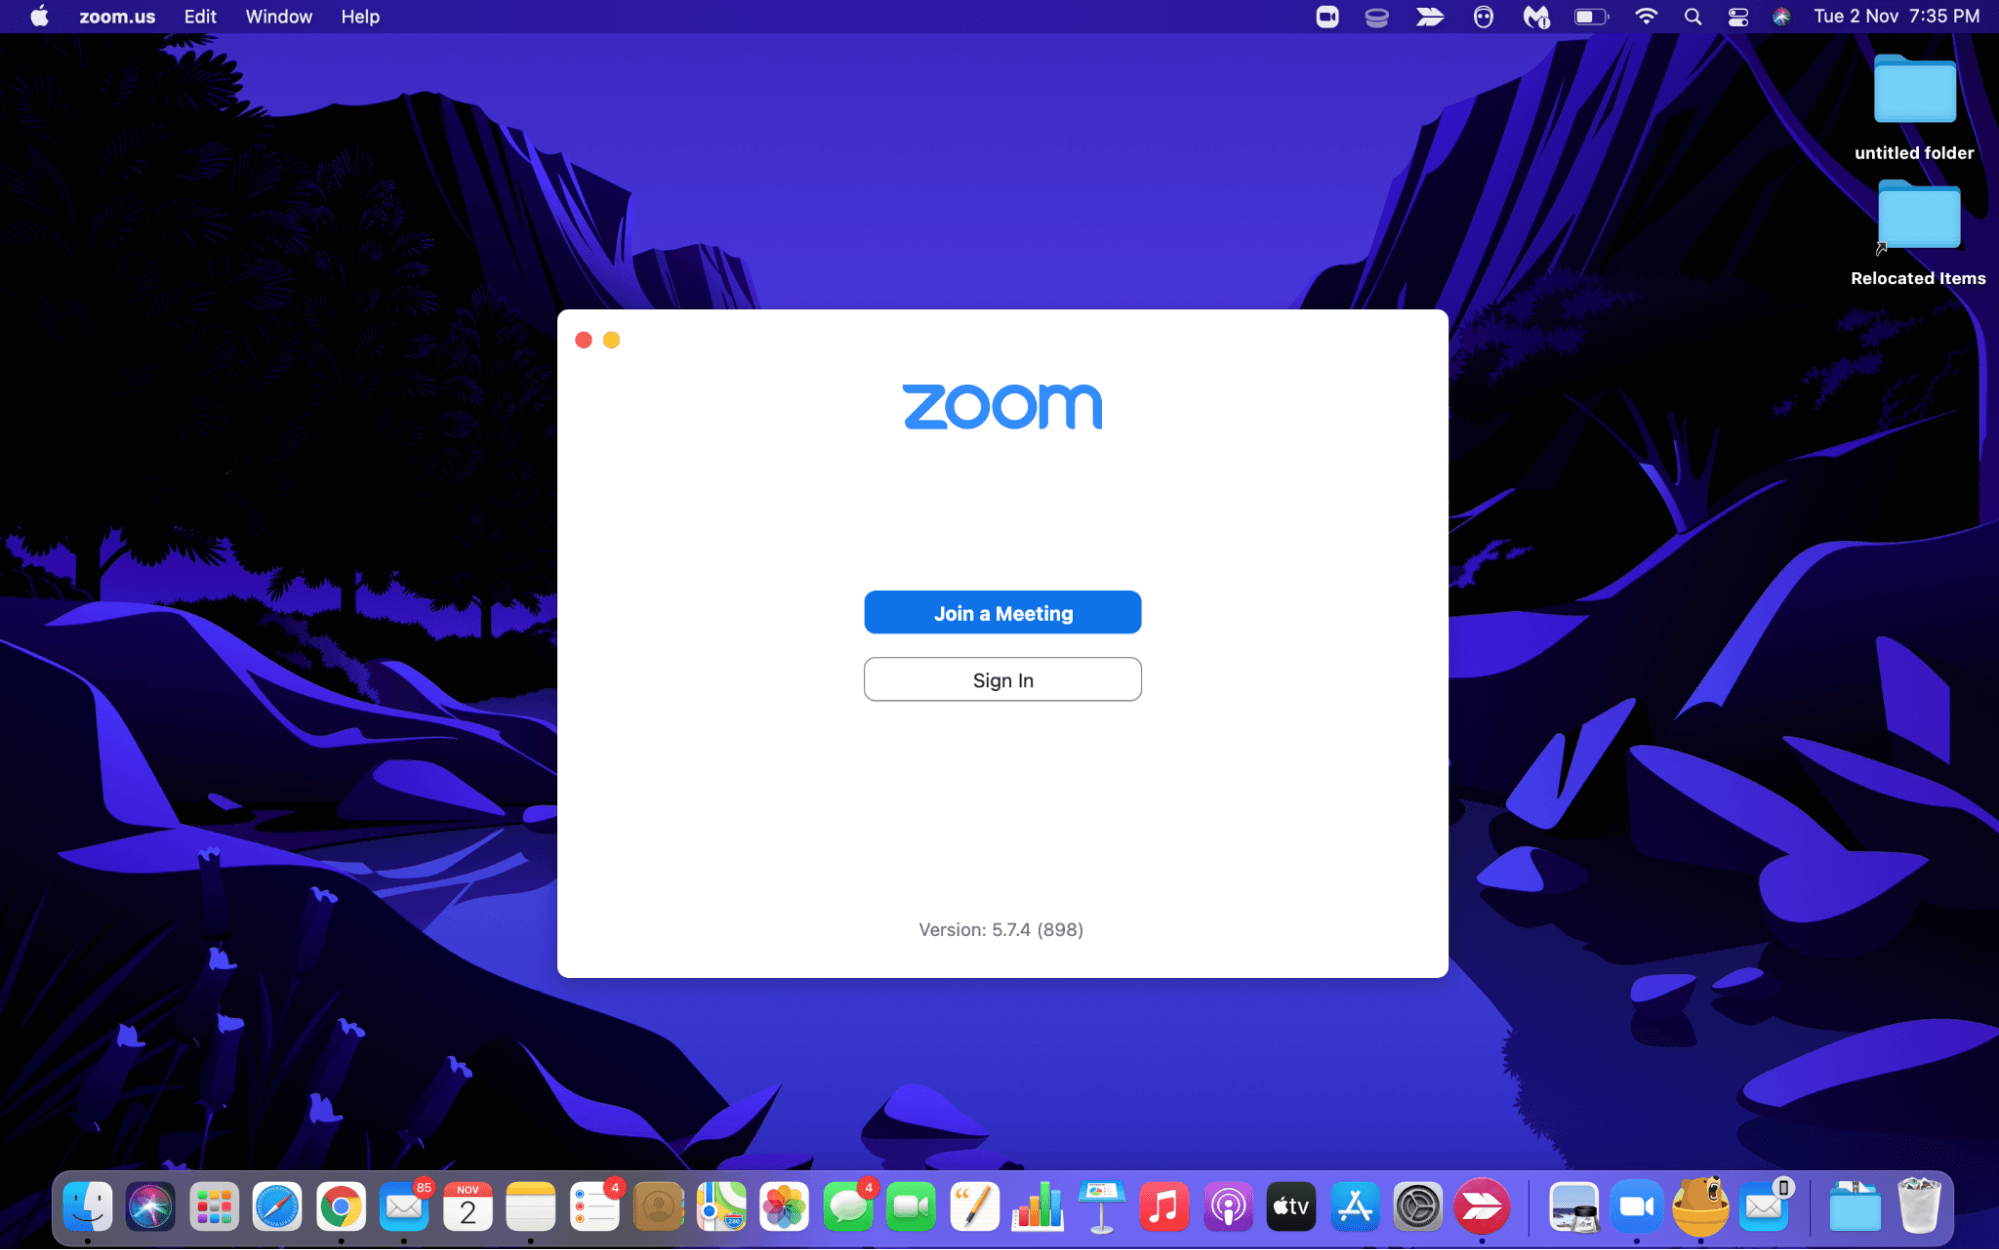
Step 1: Open the Zoom app on your desktop, and sign in to your account. If you don’t already have the desktop app, you can download it from here.
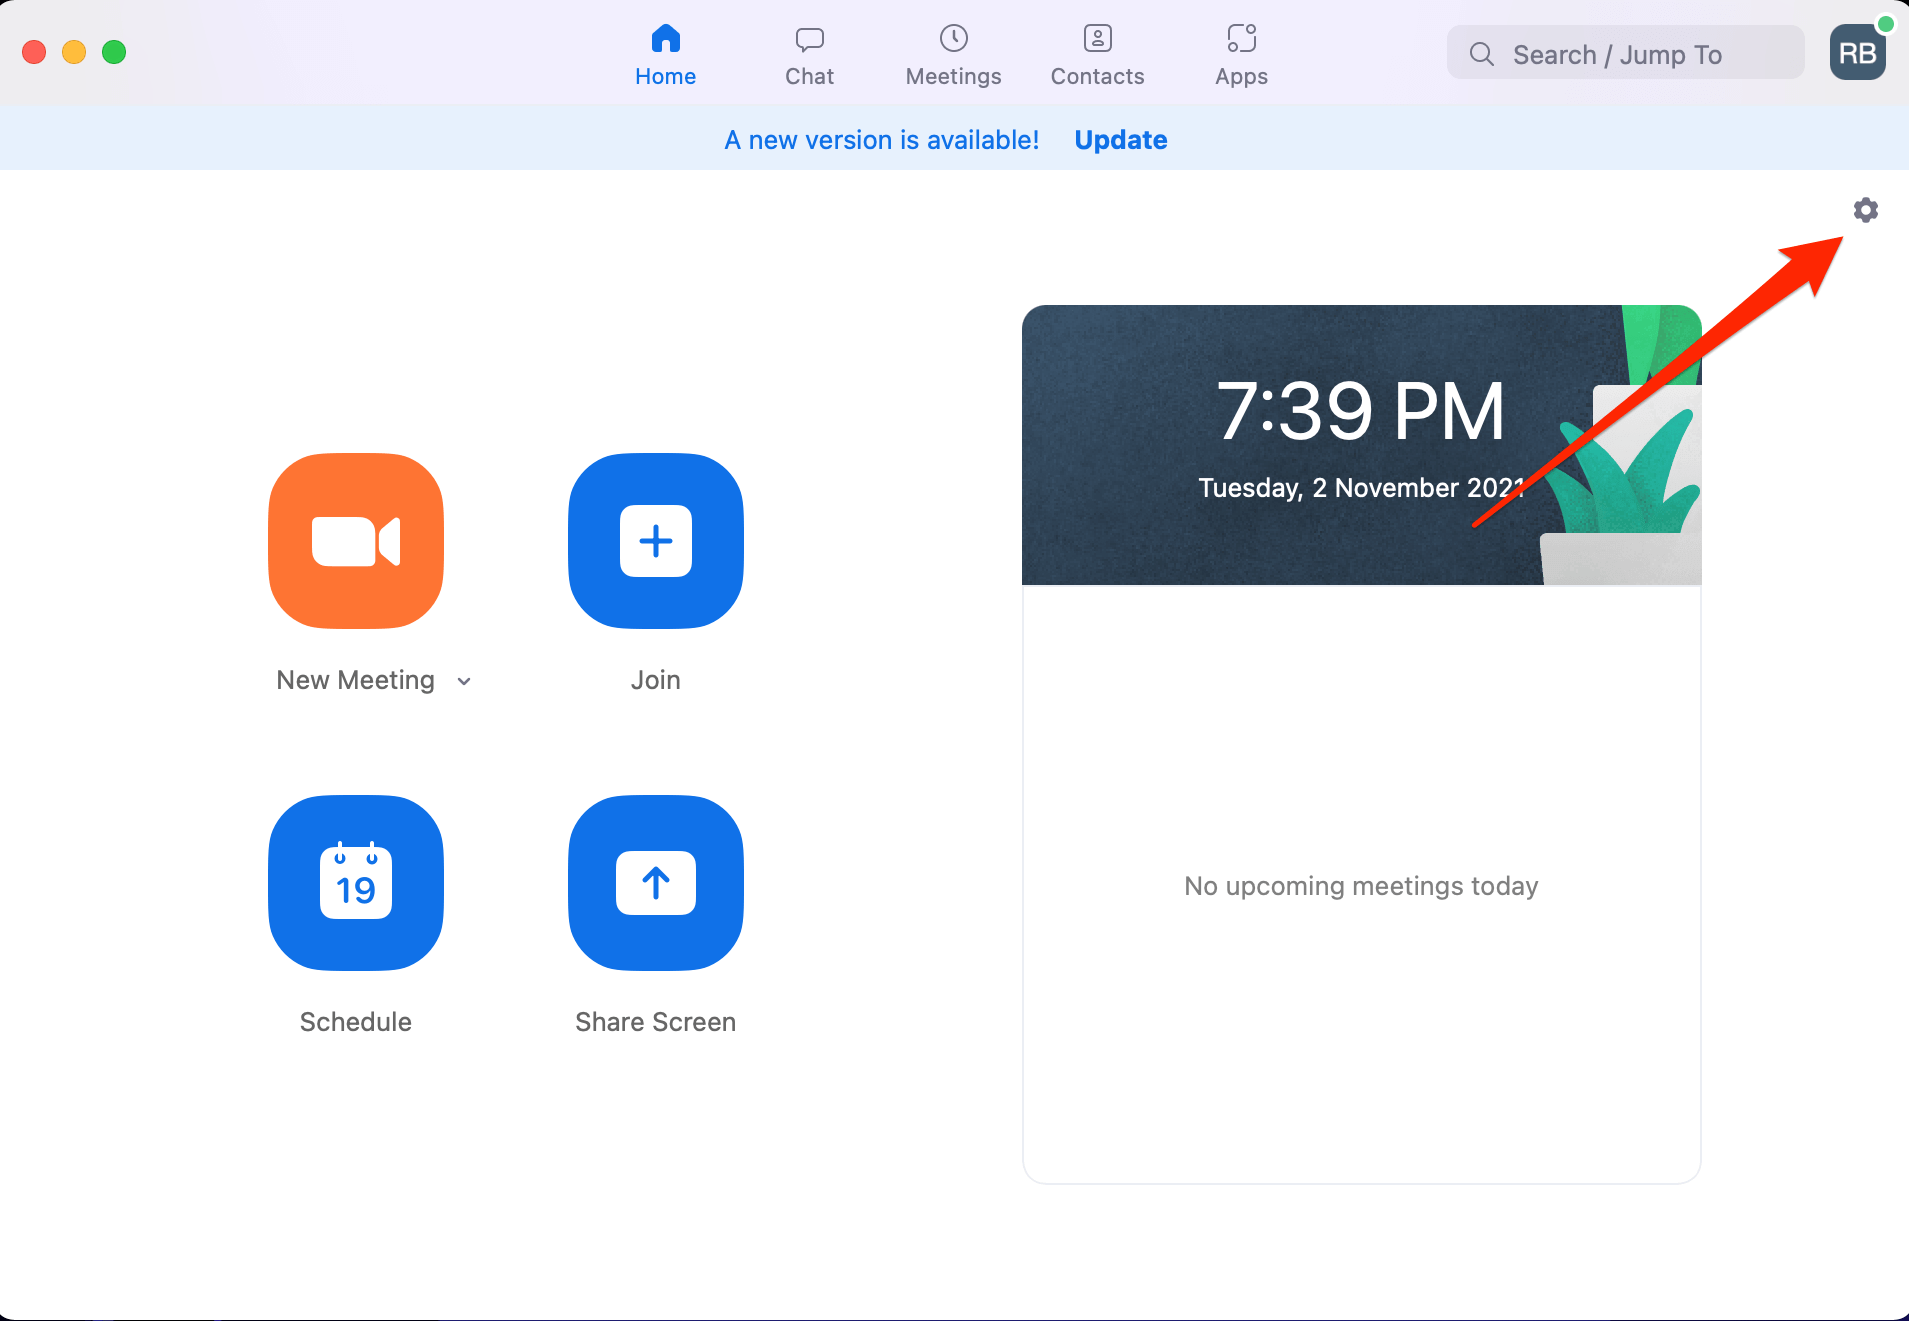
Step 2: Click on the small gear icon located in the top right-hand corner of your window. A Settings pop-up will appear on your screen.
Step 3: Click on Background and Filters from the list of displayed options.
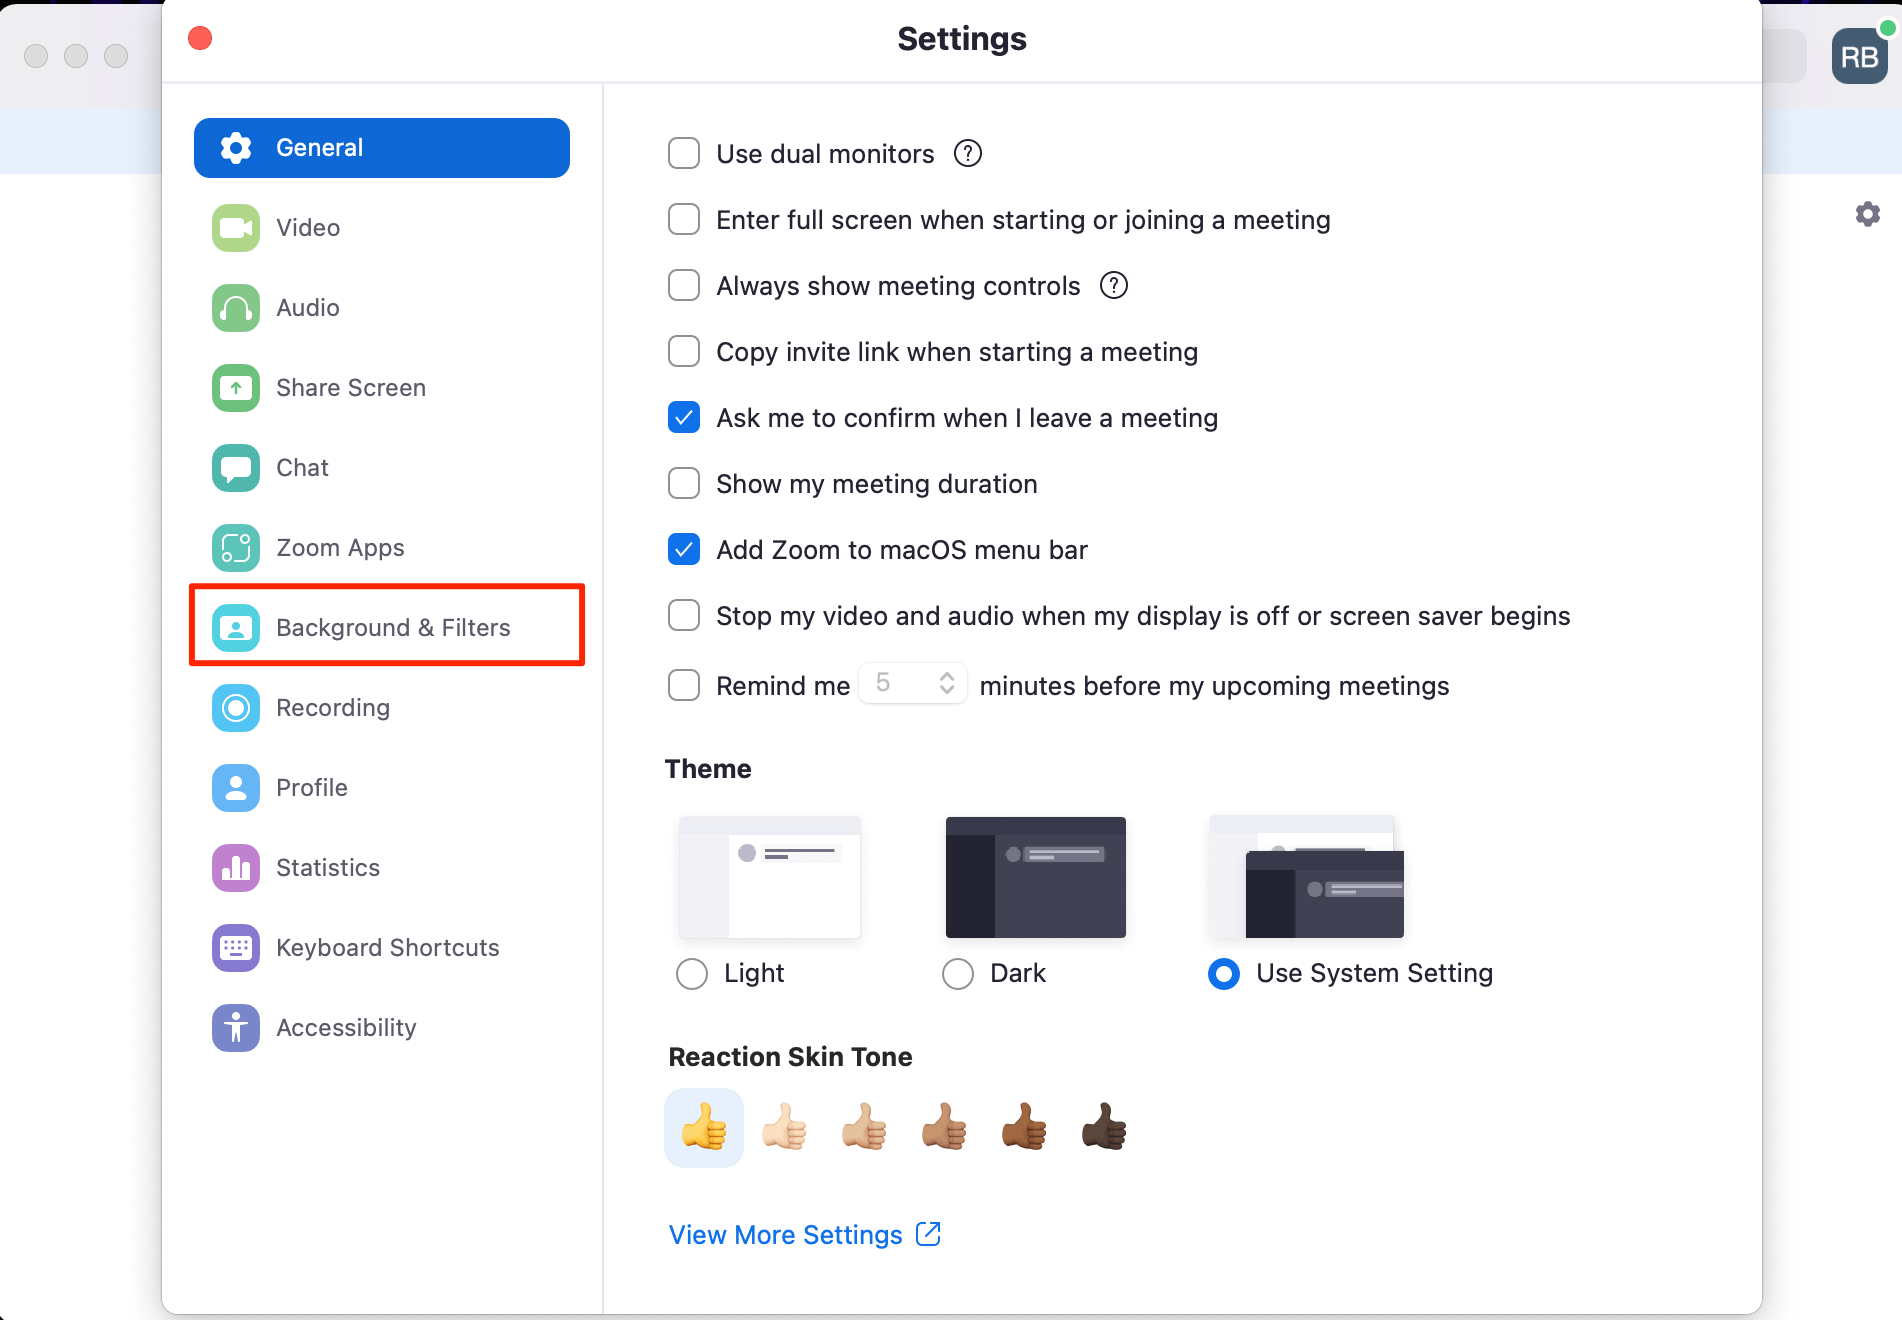
In case you don’t see this option, go to Zoom.us/profile/setting and sign in to your account. Select Settings from the left sidebar and scroll down to Virtual background under the In Meeting (Advanced) section. Click on the slider to the right to enable it. Also, you can check the box and a virtual background to enable a video background.
Step 4: Choose a Zoom background image from the displayed options of your liking.
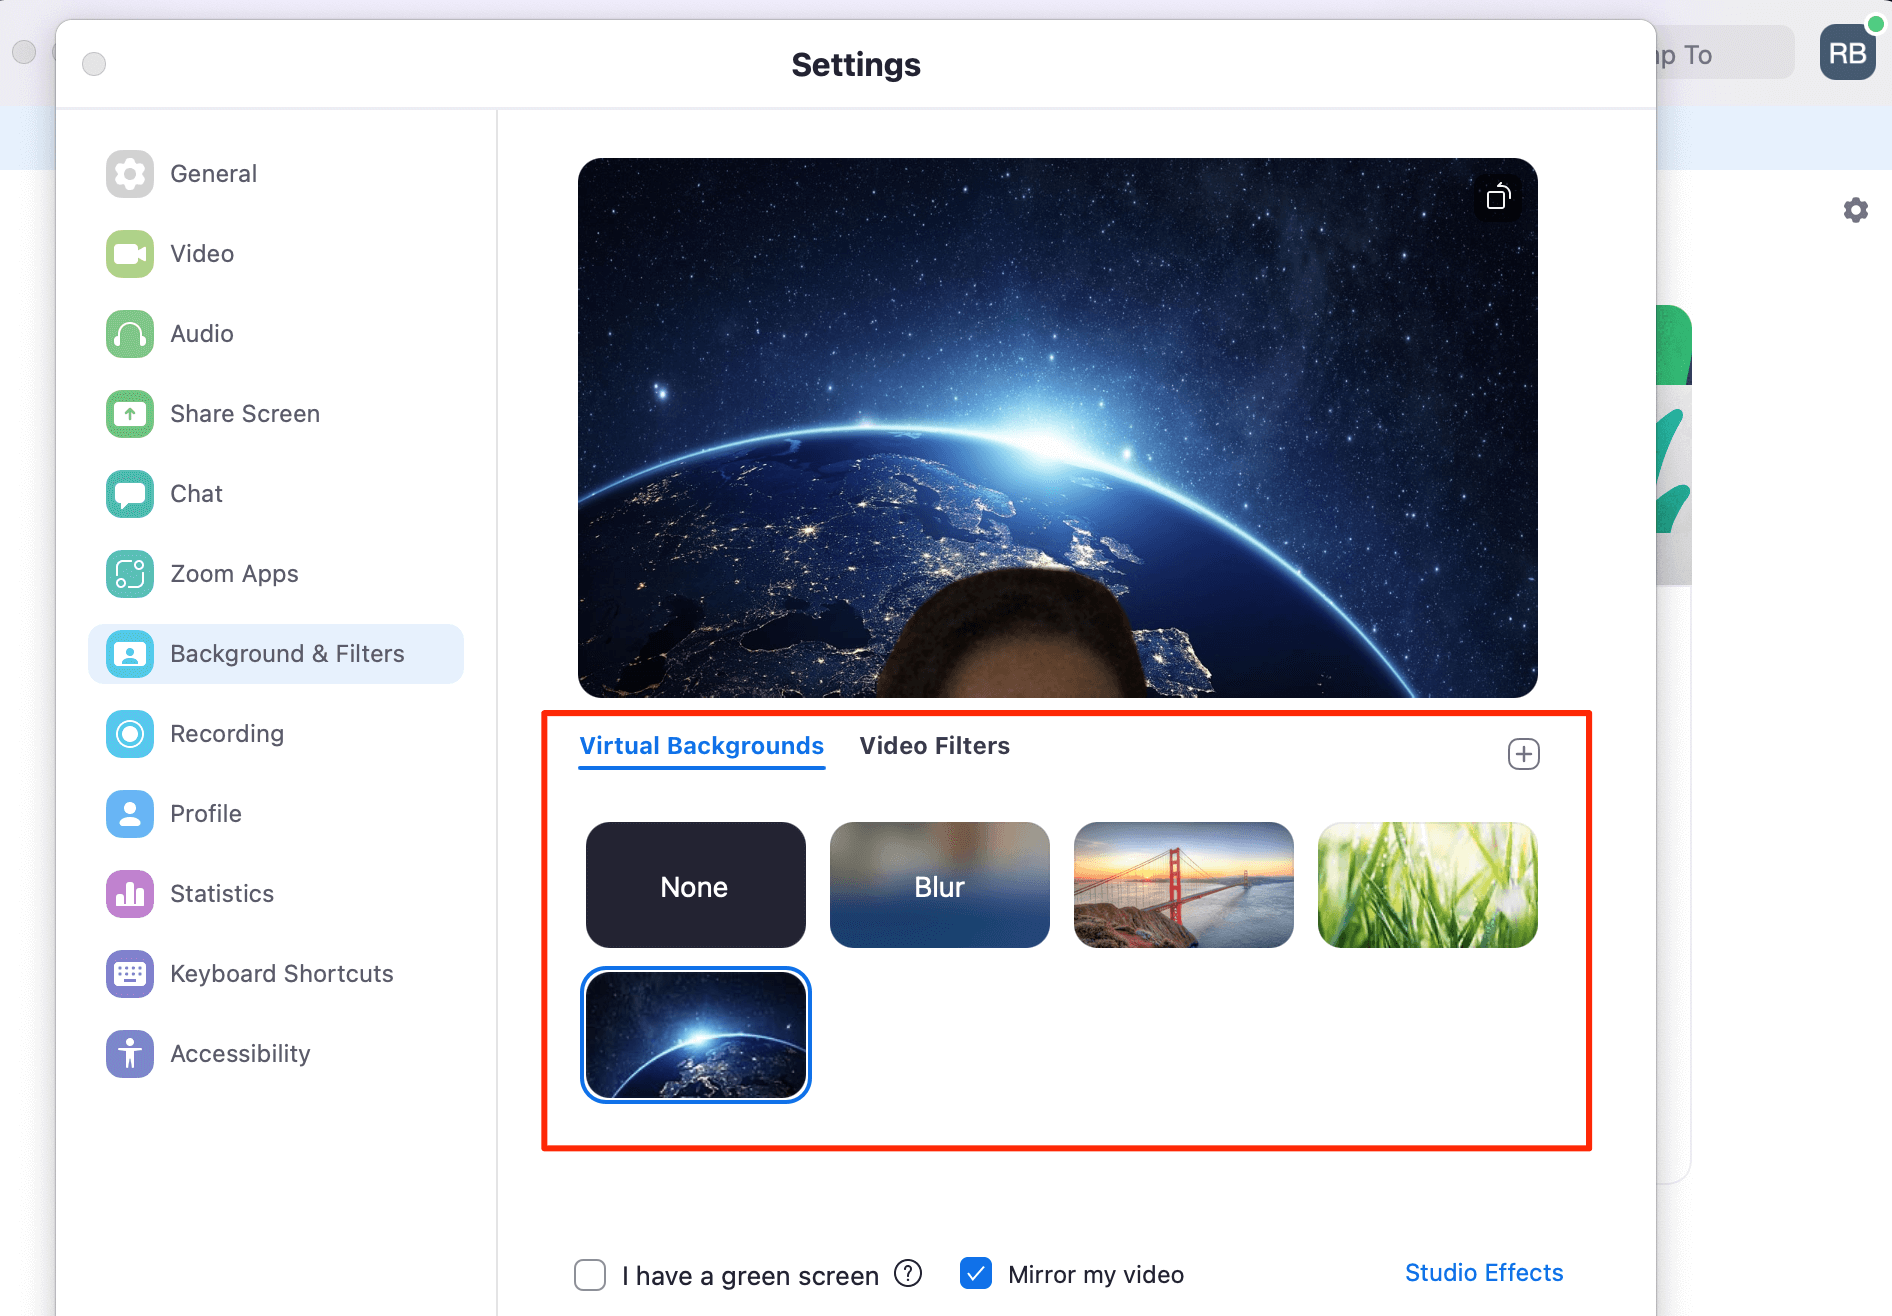
If you don’t want to distract participants from the meeting, you can simply select blur to hide your background without having to change it. Remember this will also blur out any objects that are too close or far from your camera, including any objects you hold.
Step 5: Alternatively, you can click on the plus sign to upload your own image too.
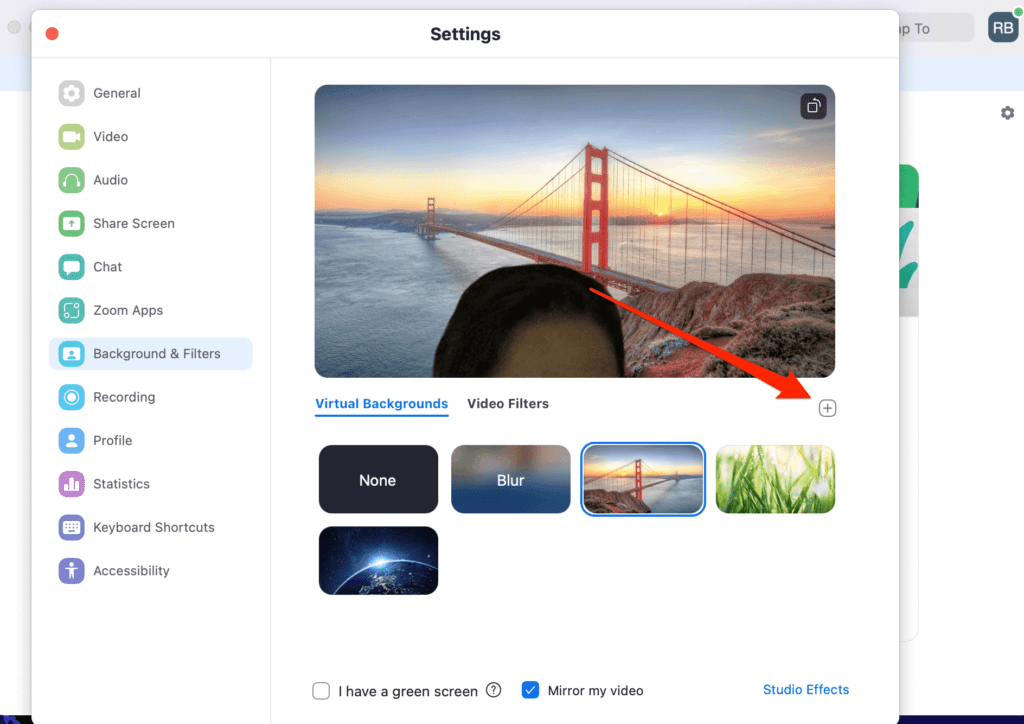
This can come in handy since Zoom admittedly offers limited background image options. You can add an image that’s already saved on your desktop, and once you upload it, all images will be there the next time you open the app.
Note: If a background isn’t working properly or is bleeding into your clothes—or has too many empty spaces—you can try unchecking the I have a green screen box.

How to Add a Zoom Background Image During a Meeting
As mentioned, you can change your background during a Zoom meeting as well. And don’t worry, this is just as simple as enabling it for the first time.
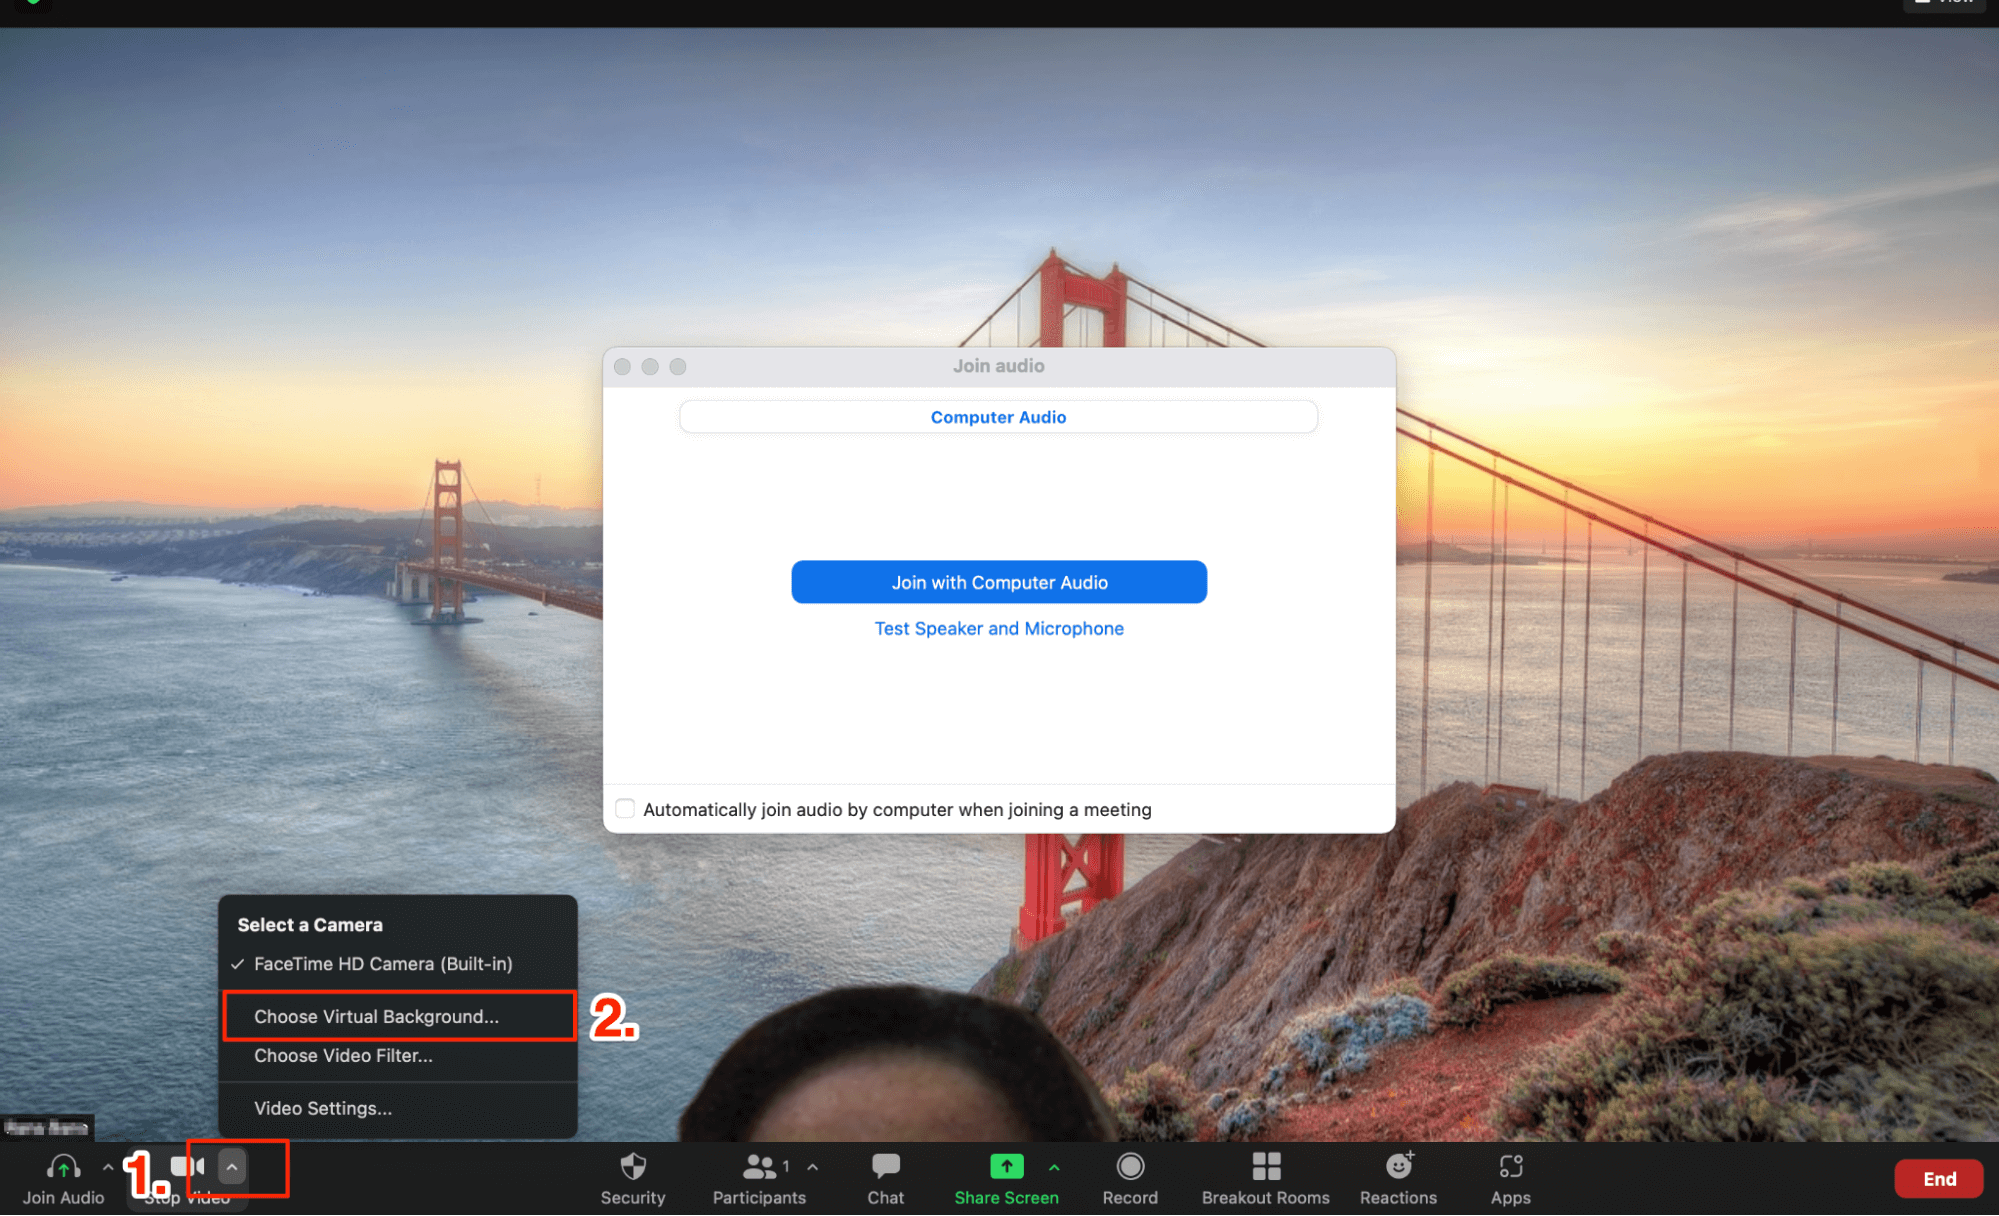
To do it, click on the upward-facing arrow icon right next to the icon camera at the bottom left corner of your screen. From the displayed menu, select Choose Virtual Background. You can then select the background you want to use.
How to Change Your Zoom Background Image on Zoom Mobile App
You can easily change your zoom background image on your iOS or Android phone. In this guide, we’ll show you how to change your background image on iOS. You can follow the same steps if you’re an Android user, too, as the whole process is very similar.
Here’s how to go about it:
-
- Download the Zoom app for your mobile phone.
- Open the app and sign in to your account.
- Join an ongoing meeting.
- Tap on the three dots located at the bottom right-hand corner of the screen. This will open the More menu.
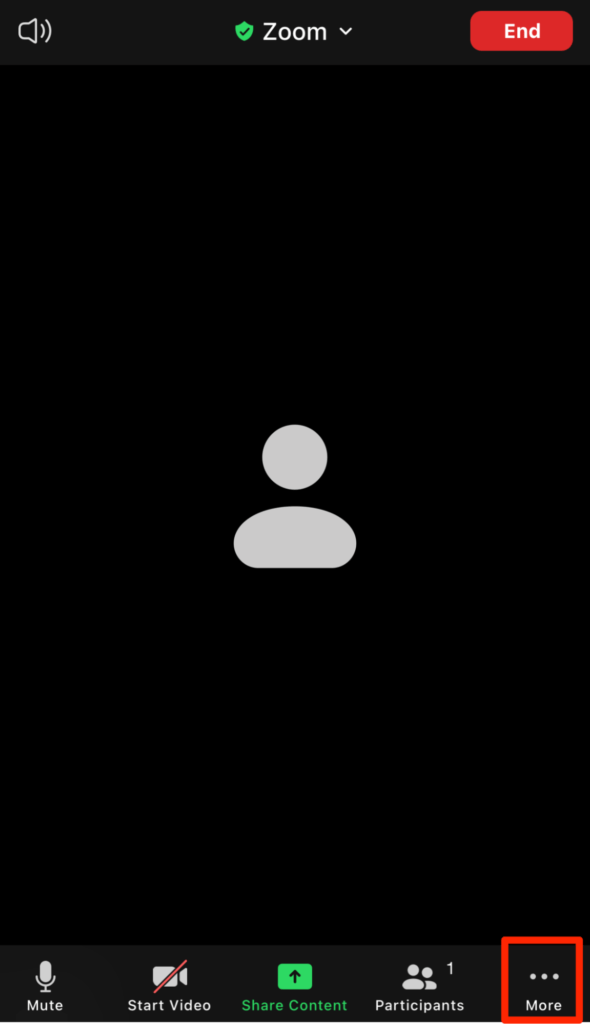
- Tap on Virtual Background.
- Select any one of the default background images or upload your own.
And that’s it! You’ve now set a virtual background for your Zoom meeting.
How to Get Started With Zoom Background Images
Below, we’ll go through some best practices for Zoom background images to help you avoid missteps and ensure a successful meeting.
Step 1: Prepare Your Real Background
Zoom recommends using high contrast, solid color backdrops—even better if you can set up a green screen. This will help you achieve a matte, non-reflective background that keeps the focus on you while simultaneously camouflaging your real background.
Additionally, make sure your background surface is close to you and avoid wearing clothing that is the same color as your real background and virtual background.
Step 2: Inspect Your Camera
You want an obstructed and smudge-free camera, regardless of whether you’re using Zoom on your computer or phone. Of course, the higher quality of your camera, the better the virtual background, so if you don’t have the latest devices, you can use an external webcam.
Step 3: Check the Lighting
Next, you want to keep the lighting uniform across your shot so that it isn’t too bright or too dim. Avoid attending a meeting while sitting next to windows as the sun will move during daytime meetings, which can create problems with your background.
We recommend positioning a lamp in front of you to achieve a more professional look. You can also consider investing in an LED ring light to get a fresh, spotless appearance.
Step 4: Upload High-Quality, High-Resolution Background Images
If you want to upload your own Zoom background image, make sure your chosen image is high-quality and has a high resolution.
Zoom recommends using background images with an aspect ratio of 16:9 and a minimum resolution of 1280 x 720 pixels. If you want to use a background video, stick to an MP4 or MOV file with a minimum resolution of 480 x 360 pixels (360p) and a maximum resolution of 1920 x 1080 pixels (1080p).
Remember, if your background image includes text, be sure to uncheck the “Mirror my video” option in your video settings.

