4 Super Easy Ways to Send Large Files by Email
You’ve finally completed your marketing presentation. All the relevant material and images are ready in a video format. But when you hit the Send button to mail it to your client, you see the dreaded, “Sorry. File too large.“
You must be wondering what went wrong.
Well, our email accounts don’t have as much storage as you might think. Gmail, for instance, has a file capacity of up to 25MB only.
So does this mean you’ll have to physically deliver your presentation in a thumb drive? Absolutely not.
In this guide, we’ll show you four easy and cheap ways of sending large files by email.
Ready? Let’s begin.
Method 1: Uploading Your Files to a Cloud Storage Space
Cloud storage spaces like Dropbox, OneDrive, and Google Drive are excellent ways to send large files through email.
It’s particularly useful for sending high-quality images and graphics and very long text-heavy documents. Precisely why this option would work best for freelancers, students, writers, and for official use.
Depending on your email provider, you can use a corresponding cloud storage service (for example, Google Drive for Gmail and OneDrive for Outlook.com). If you decide to use Dropbox, you’ll have to first upload the large files on the platform, and then share the web link.
Sounds daunting? Don’t worry, it really isn’t. Here’s how to go about it:
Sending Large Files Through Google Drive
If you already have the file uploaded to Google Drive, you can select it when composing the email. If the file is saved on your computer instead, you’ll have to first upload it on Google Drive and then send it via email.
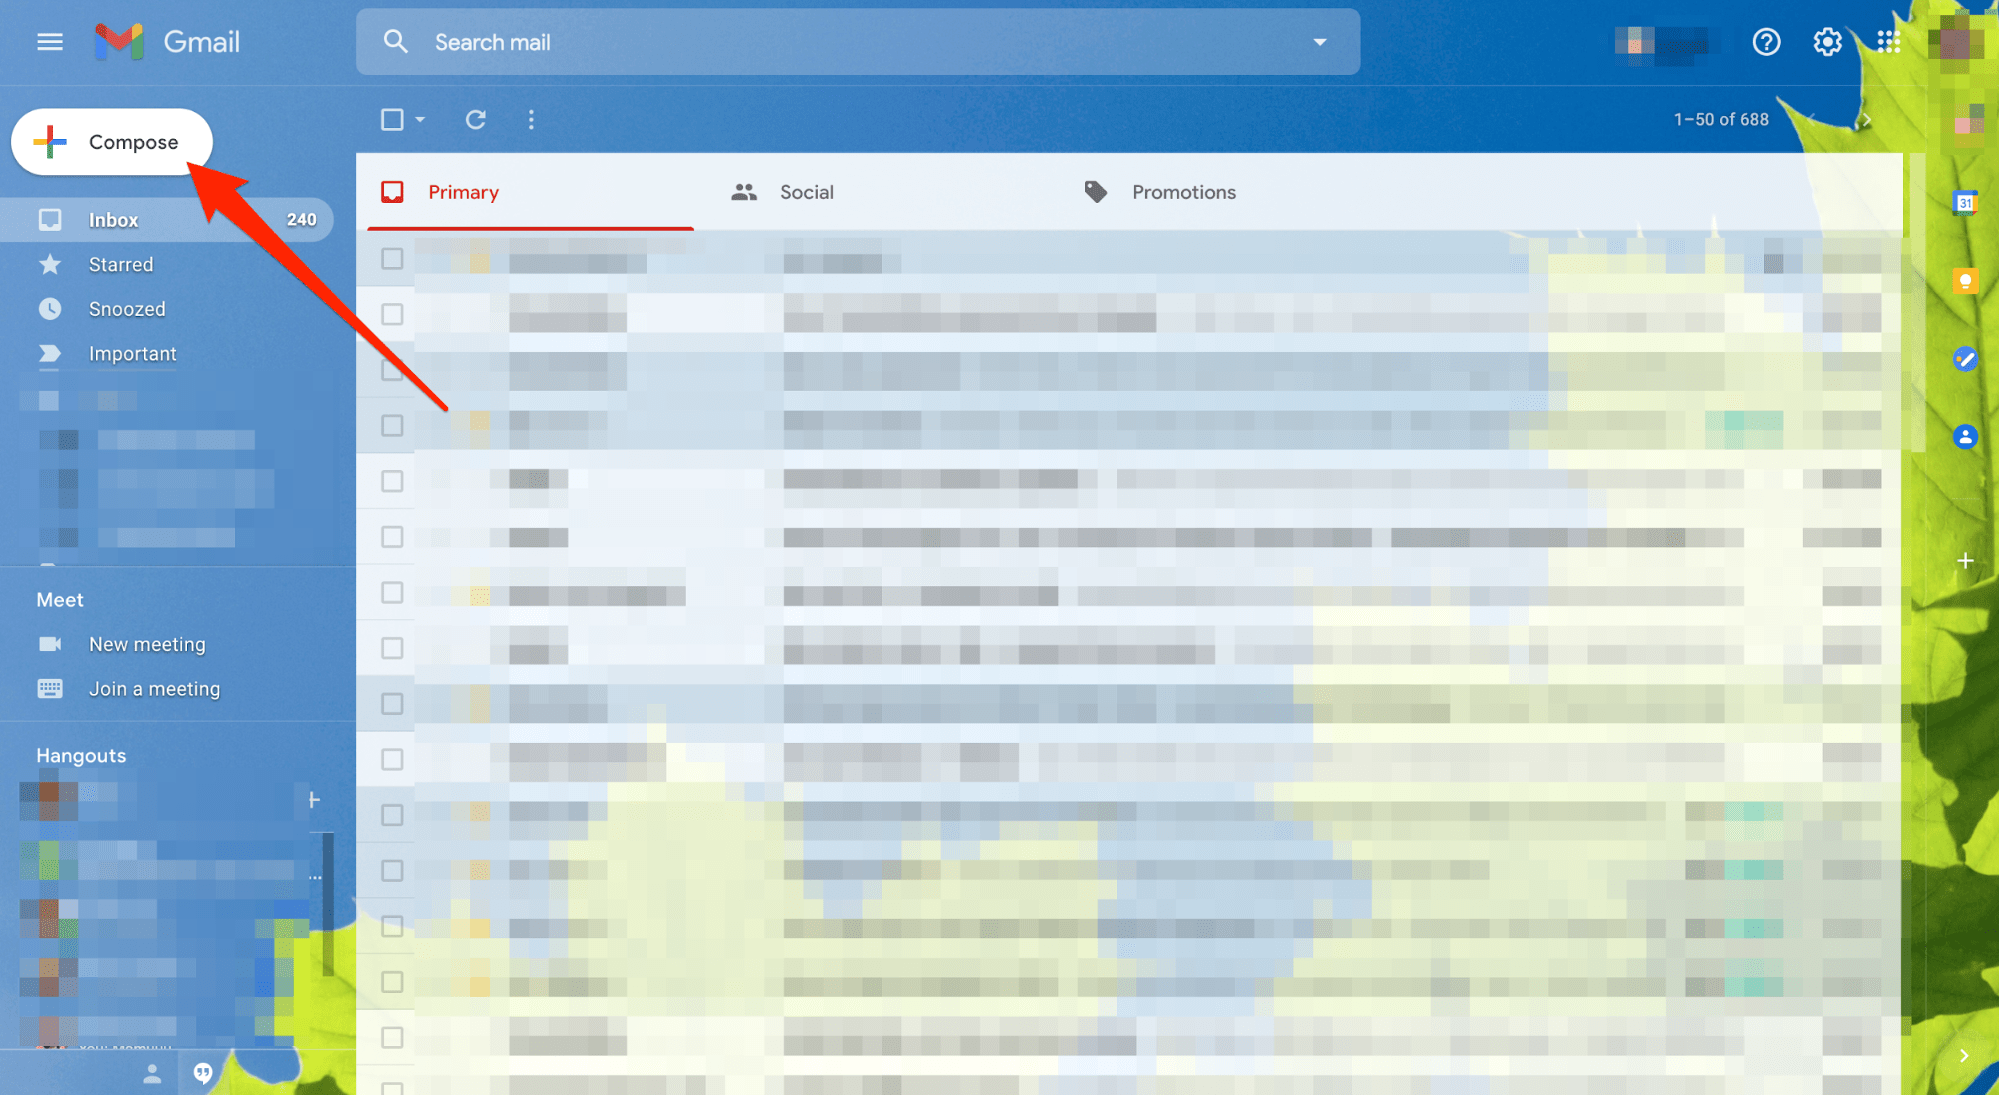
Step #1 Open your Gmail mailbox. Click on the Compose button located on the top left-hand side of the screen. A New Message pop-up will appear on your screen.
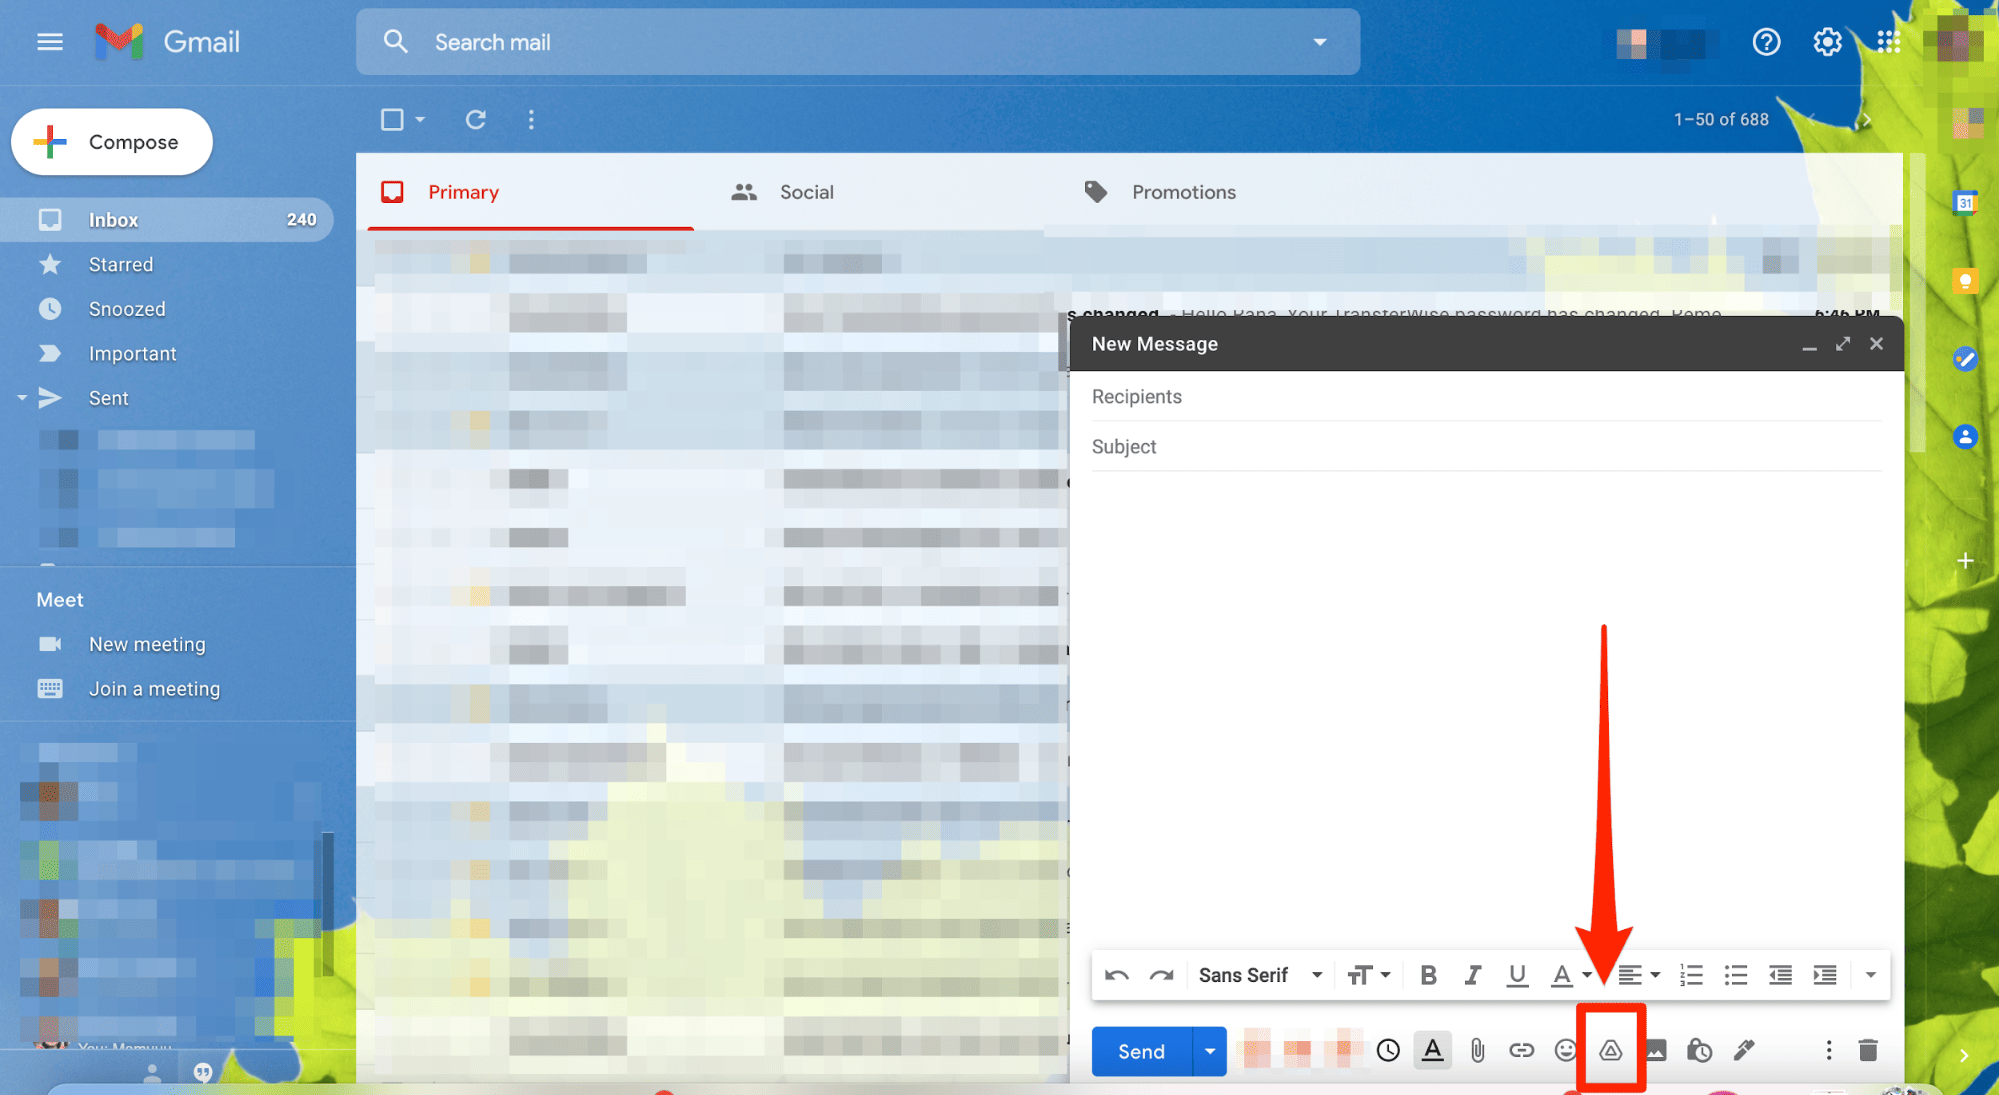
Step #2 Click on the Google Drive icon. You’ll now see an Insert file using Google Drive dialogue box on your screen.
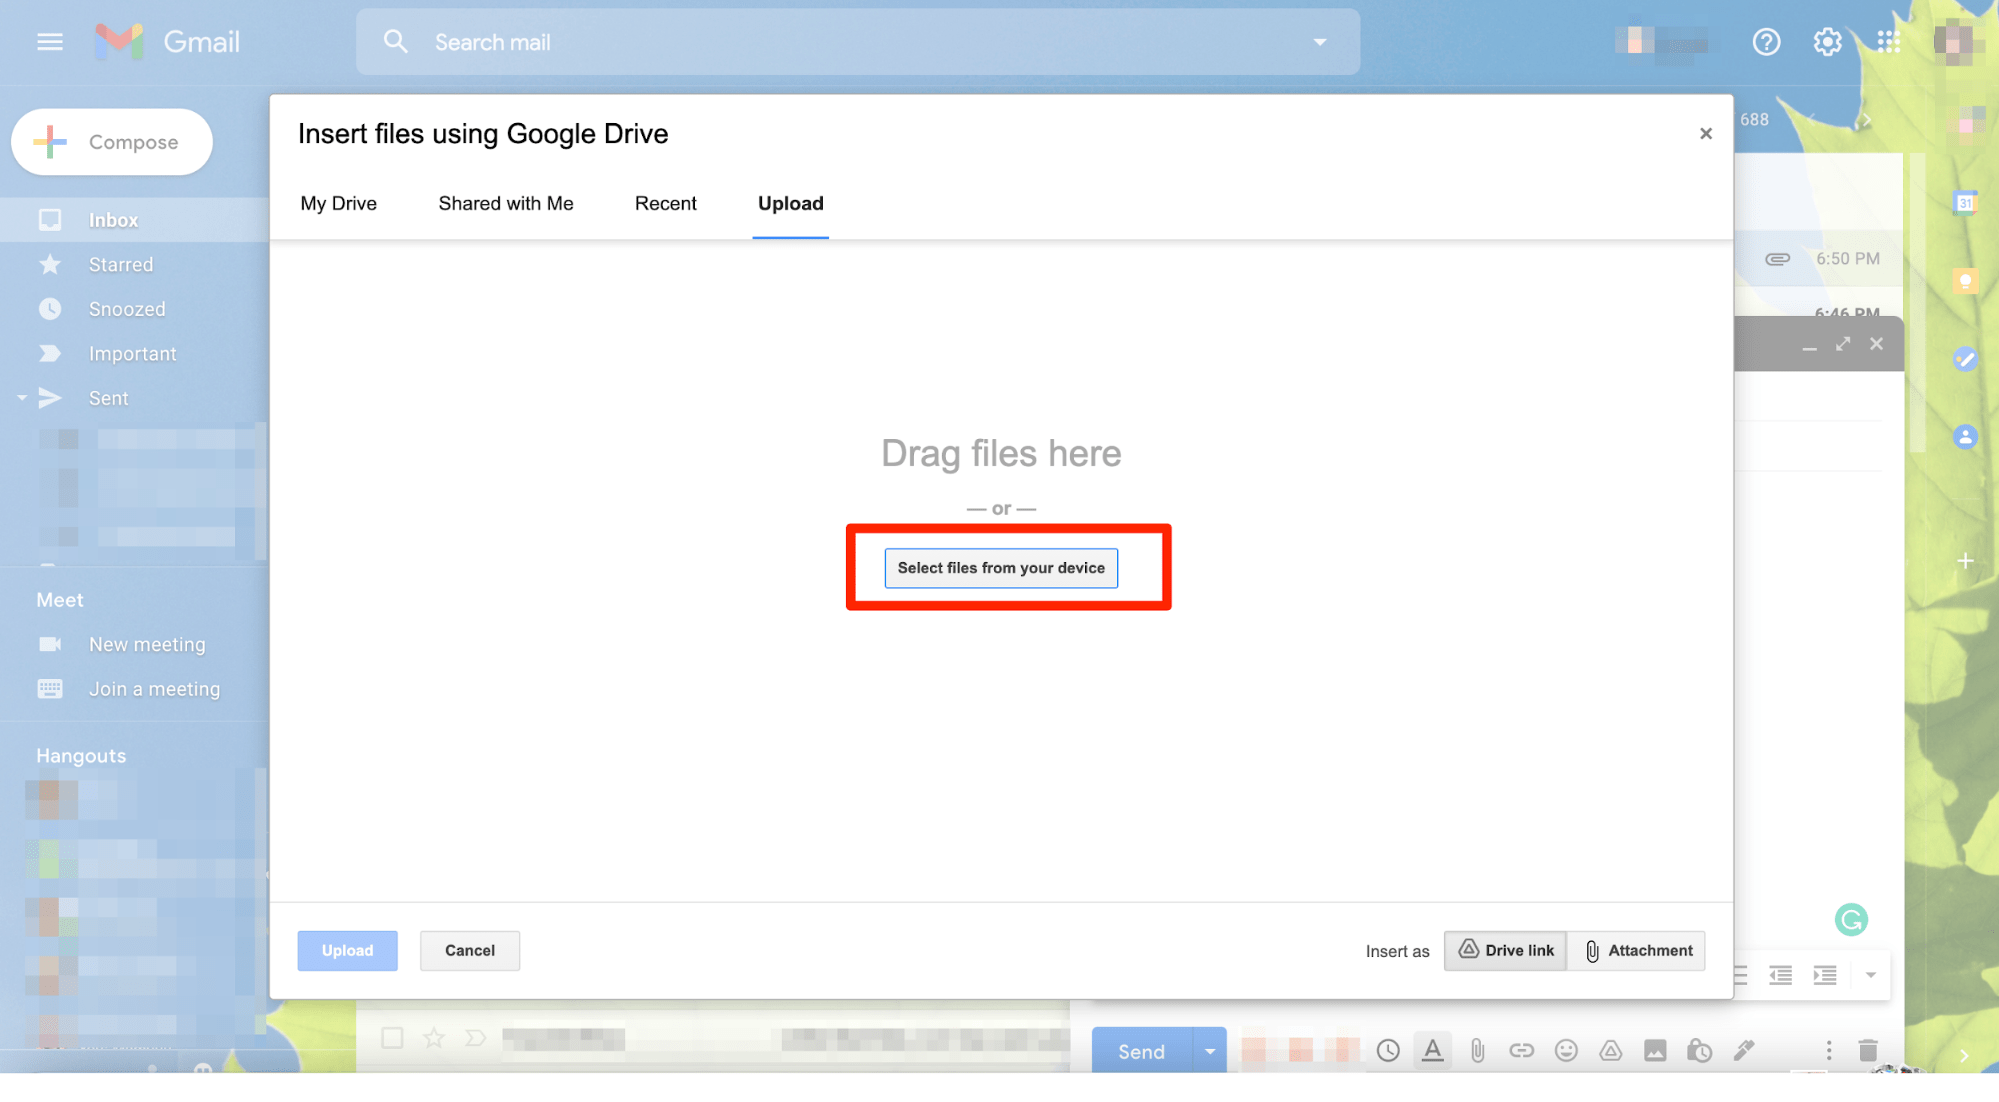
Step #3 If you’ve already uploaded the large file to your Google Drive account, look for the file in your Drive and click on the Insert button.

If you haven’t, click on the Upload tab from the top menu, and click on Select files from your device. Select Upload to add the file to your Google Drive account after selecting it.
You’ll now see the Google Drive link added to your mail. Set the permissions as you want to – viewer, commenter, and editor – before sending the email.
Sending Large Files Through Dropbox
Dropbox is one of the best cloud storage solutions and is commonly used by businessmen and professionals to send all kinds of files.
Just like Google Drive, sending large files via Dropbox is super simple and hardly takes a few minutes.
Step #1 Type in www.dropbox.com in your web browser. Log in to your account by typing in your email and password.
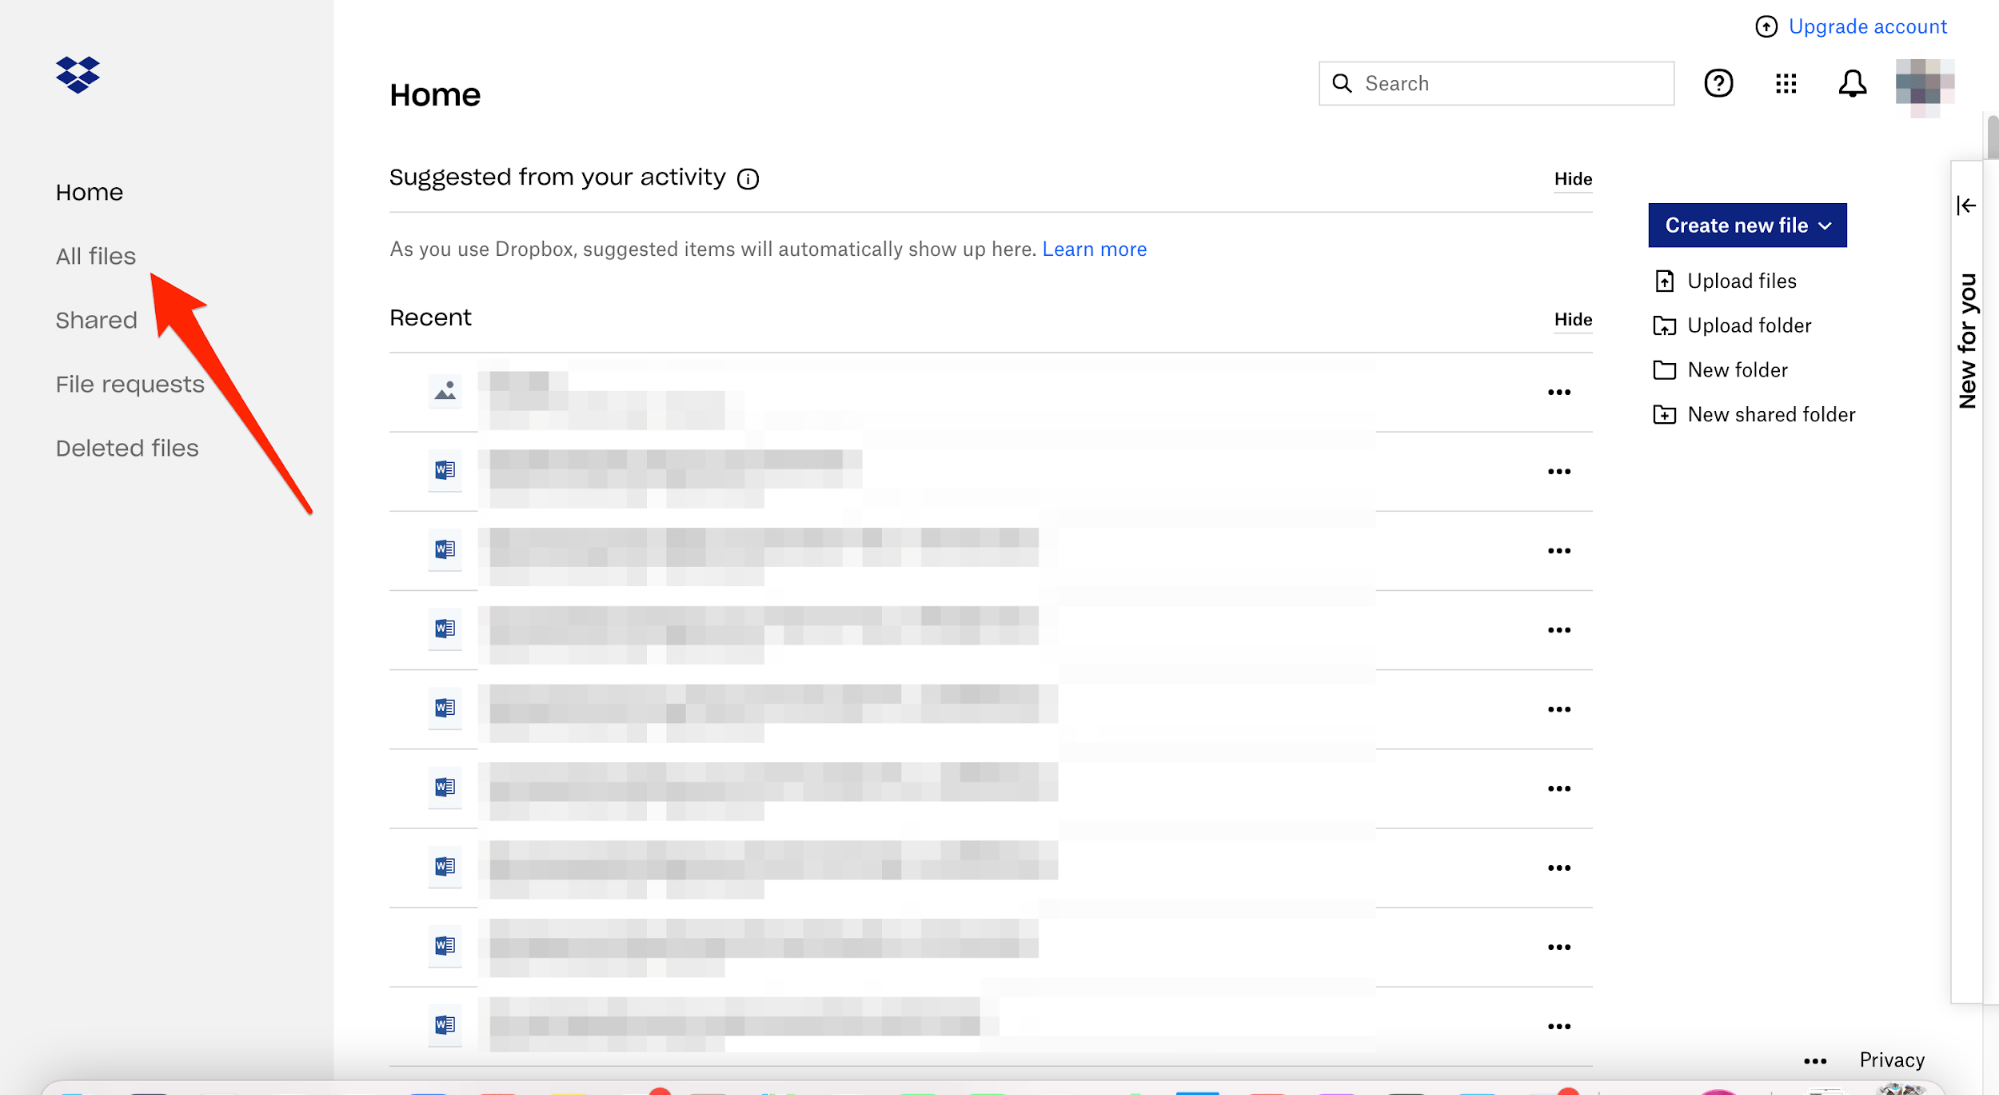
Step #2 Click on All files located on the side menu bar towards the left-hand side of your screen. A complete list of all your files and folders on the platform is displayed.
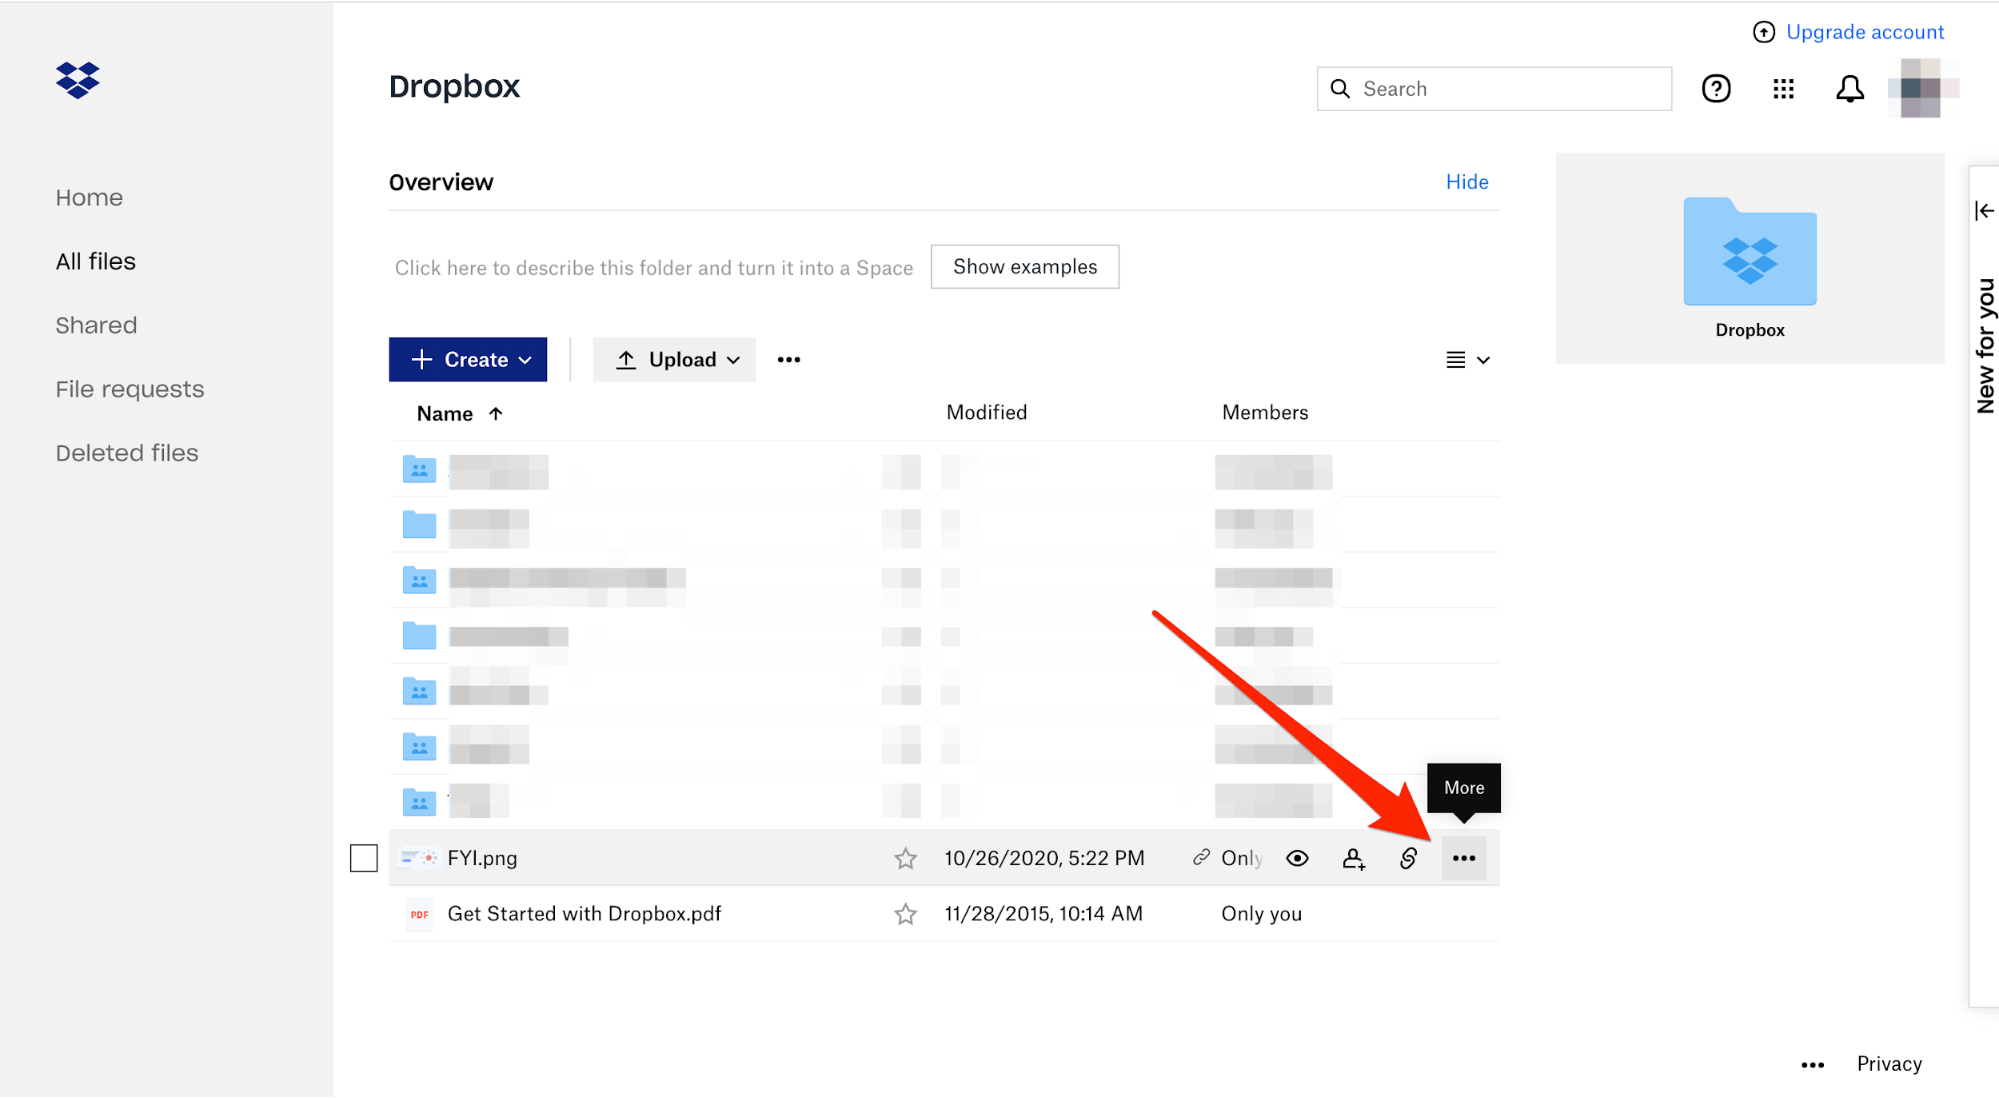
Step #3 Look for the file that you want to share via email. Hover the mouse over the specific file. Click on the three horizontal dots (this is the More icon).
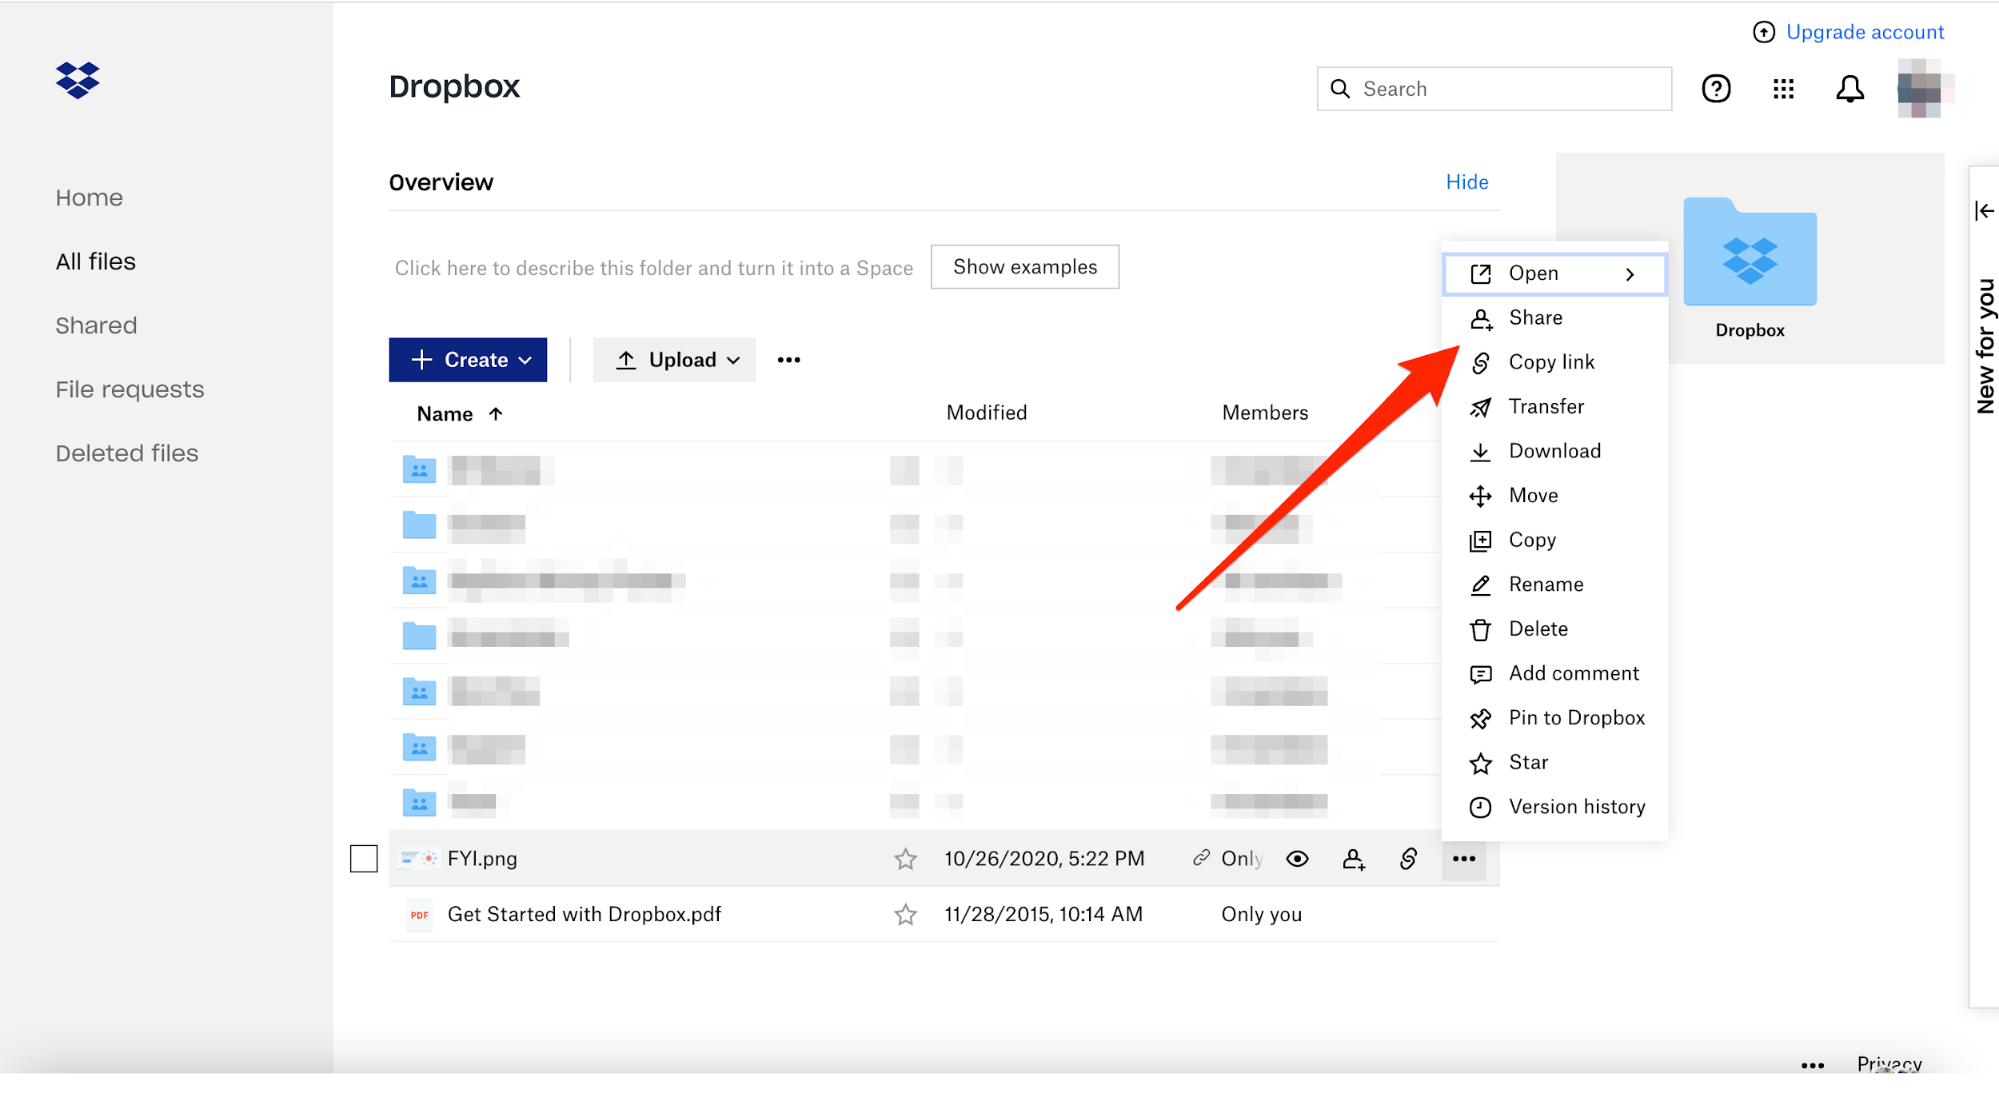
Step #4 Click on Share from the dropdown menu.
Step #5 You can share the file with specific people by adding their respective email addresses in the Add an email or name field.
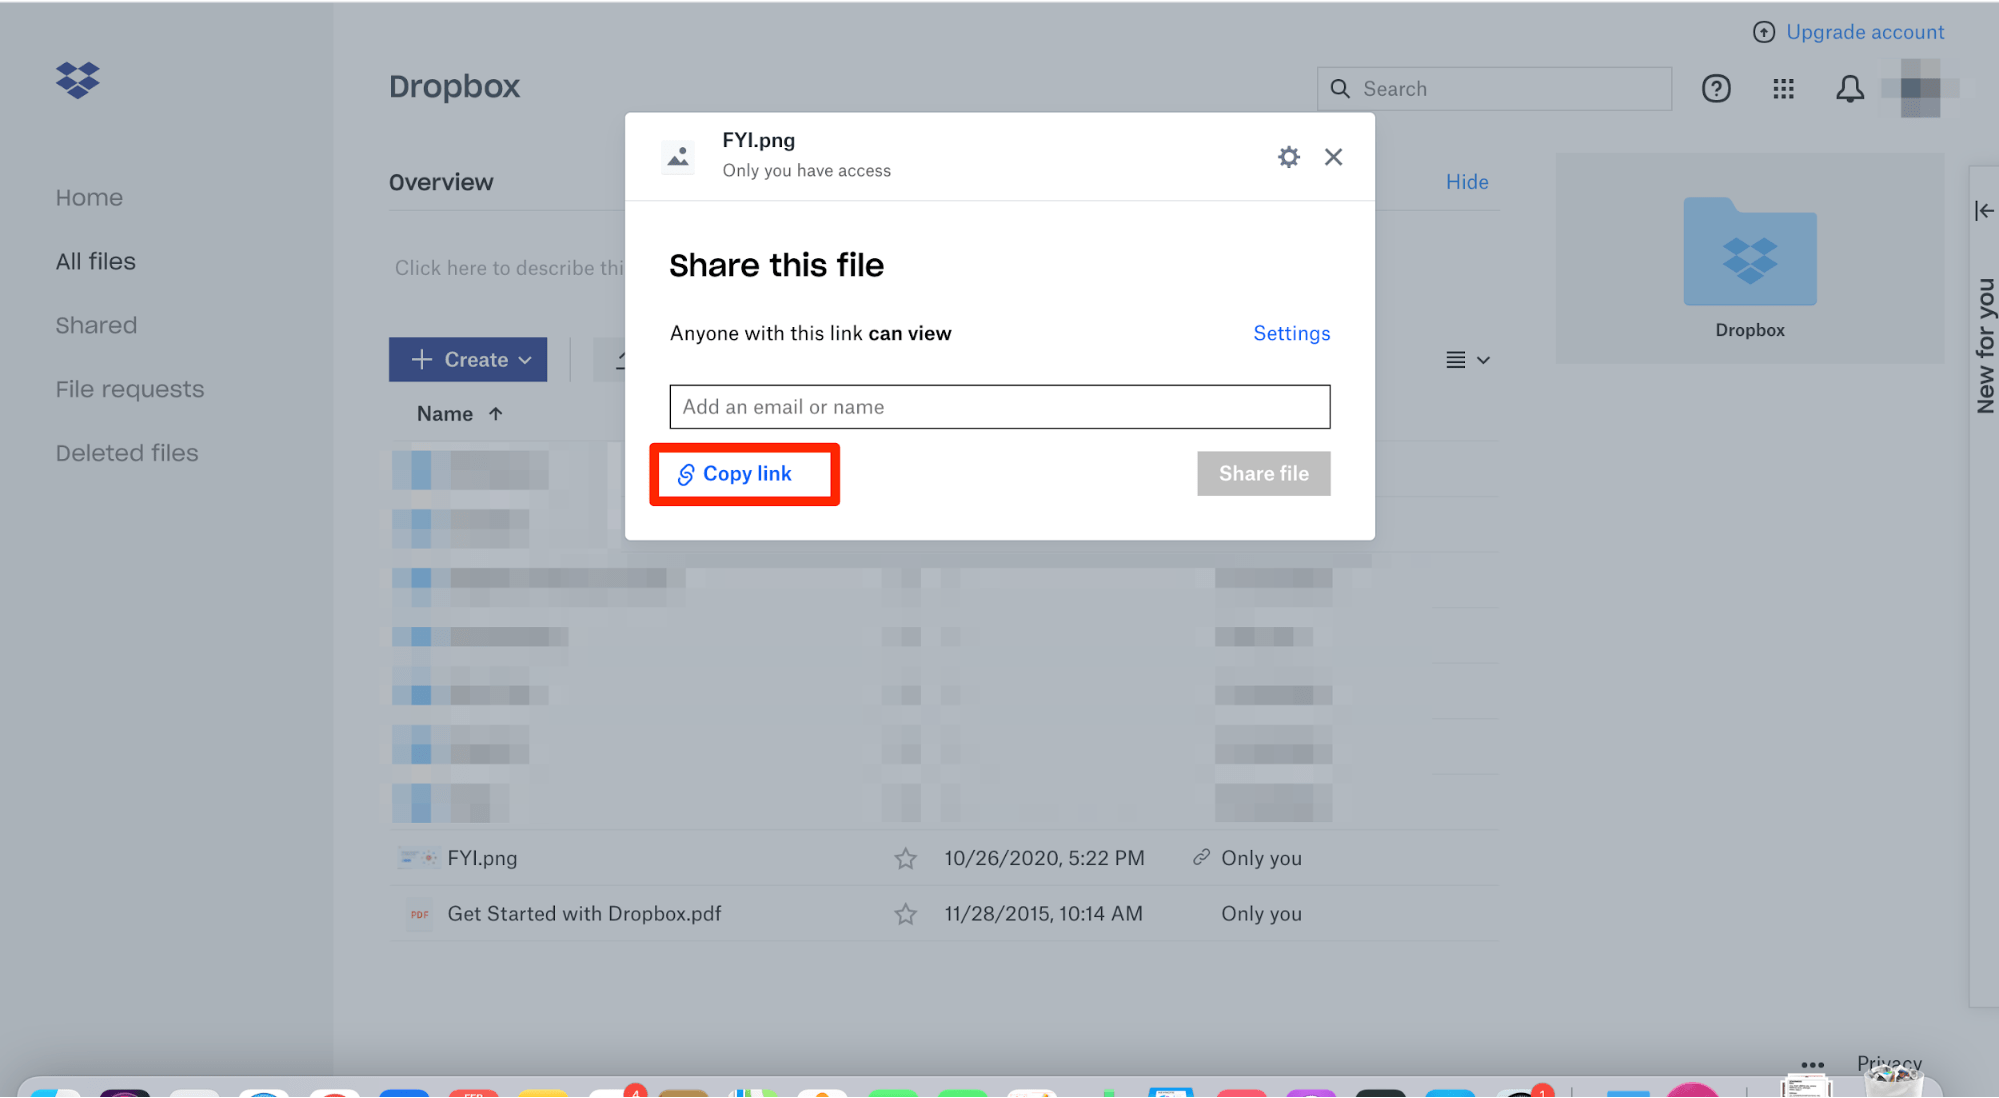
Step #6 You can also change sharing permissions by giving them either editing or viewing access before generating the link.
Alternatively, you can also share the link manually by selecting the Copy link. Once you see the pop-up message notifying you about the share link being copied, you can then paste it on whichever platform you plan to share it through.
You can also get the shareable link from the Dropbox app that’s downloaded on your phone or desktop.
Sharing Large Files Through OneDrive
OneDrive is an excellent solution for Outlook users to send large files. Keep in mind that you’ll have to first save your file to OneDrive for Business before sharing it.
Step #1 Sign in to your OneDrive account.
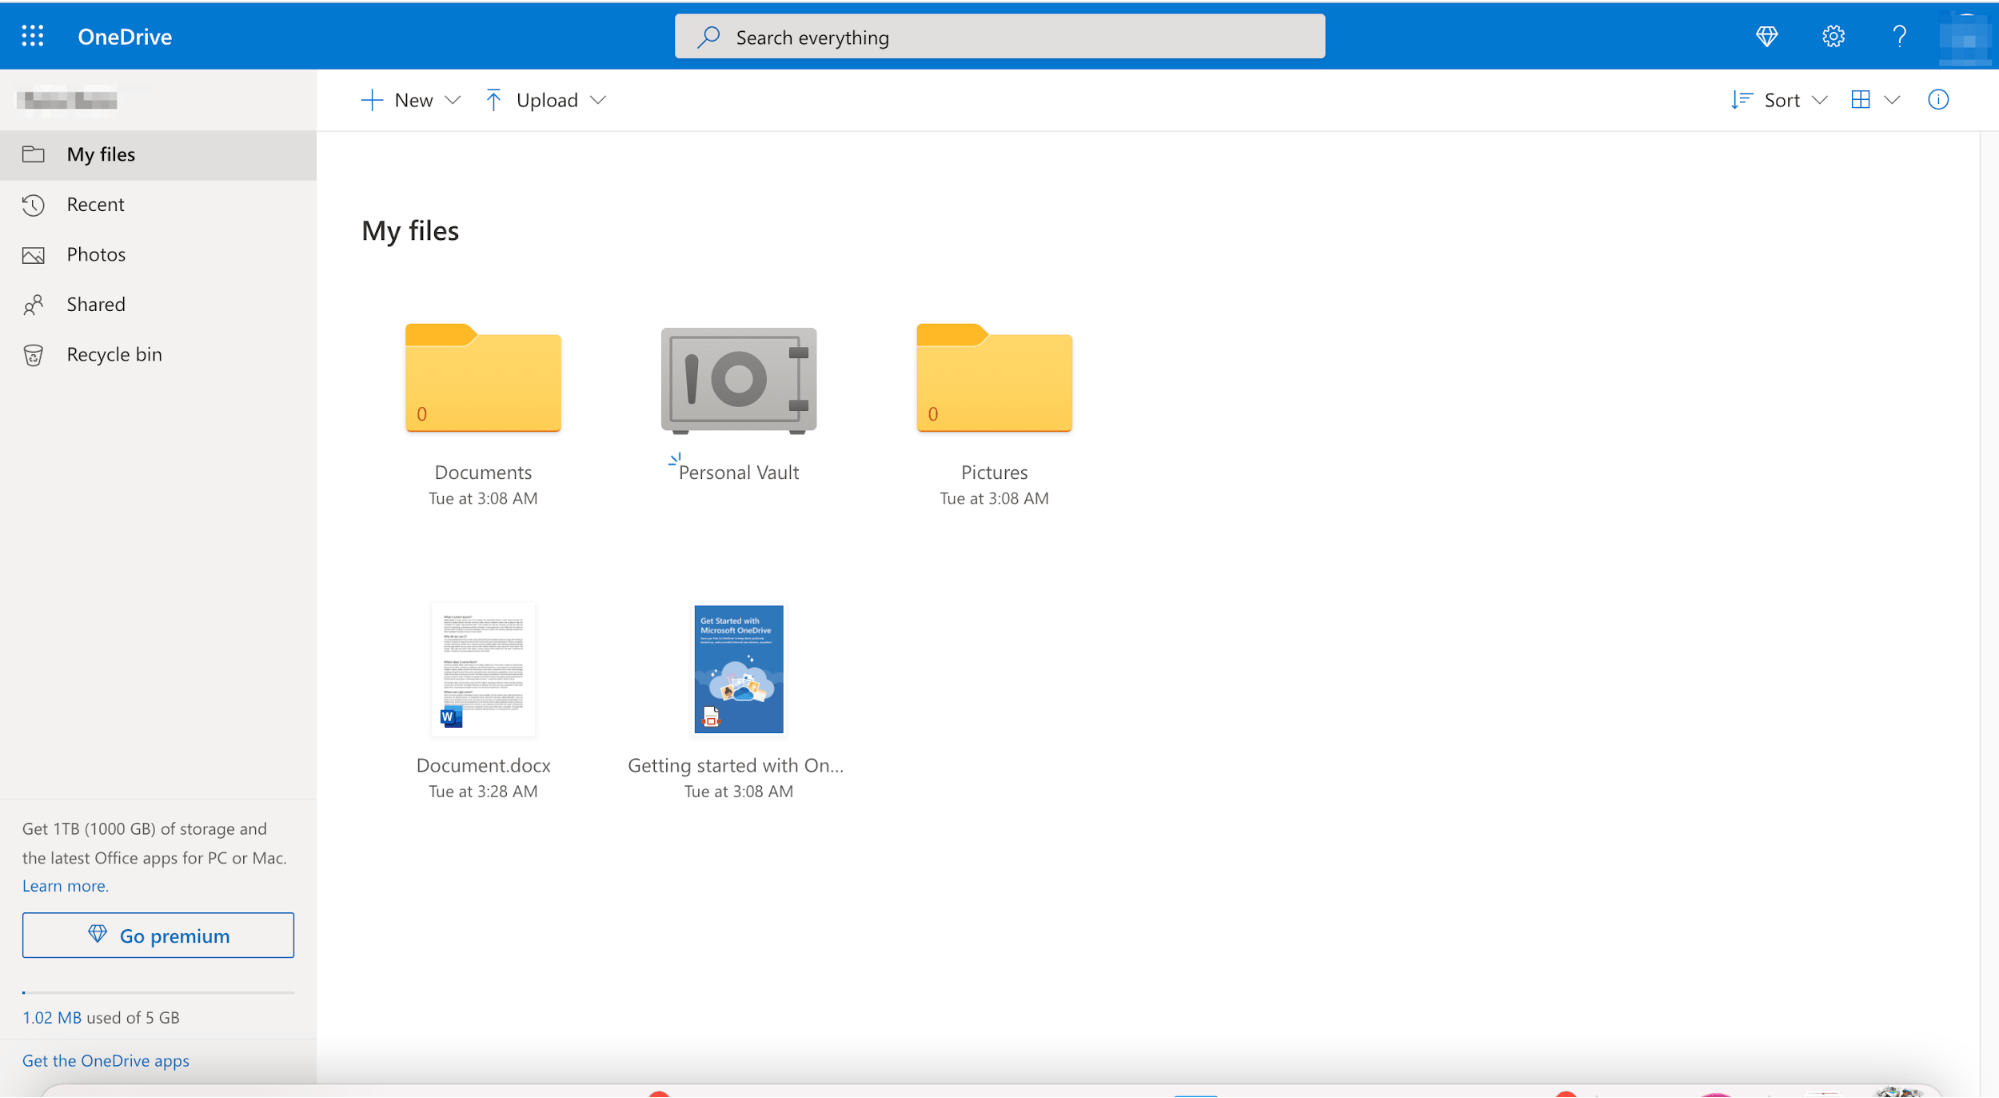
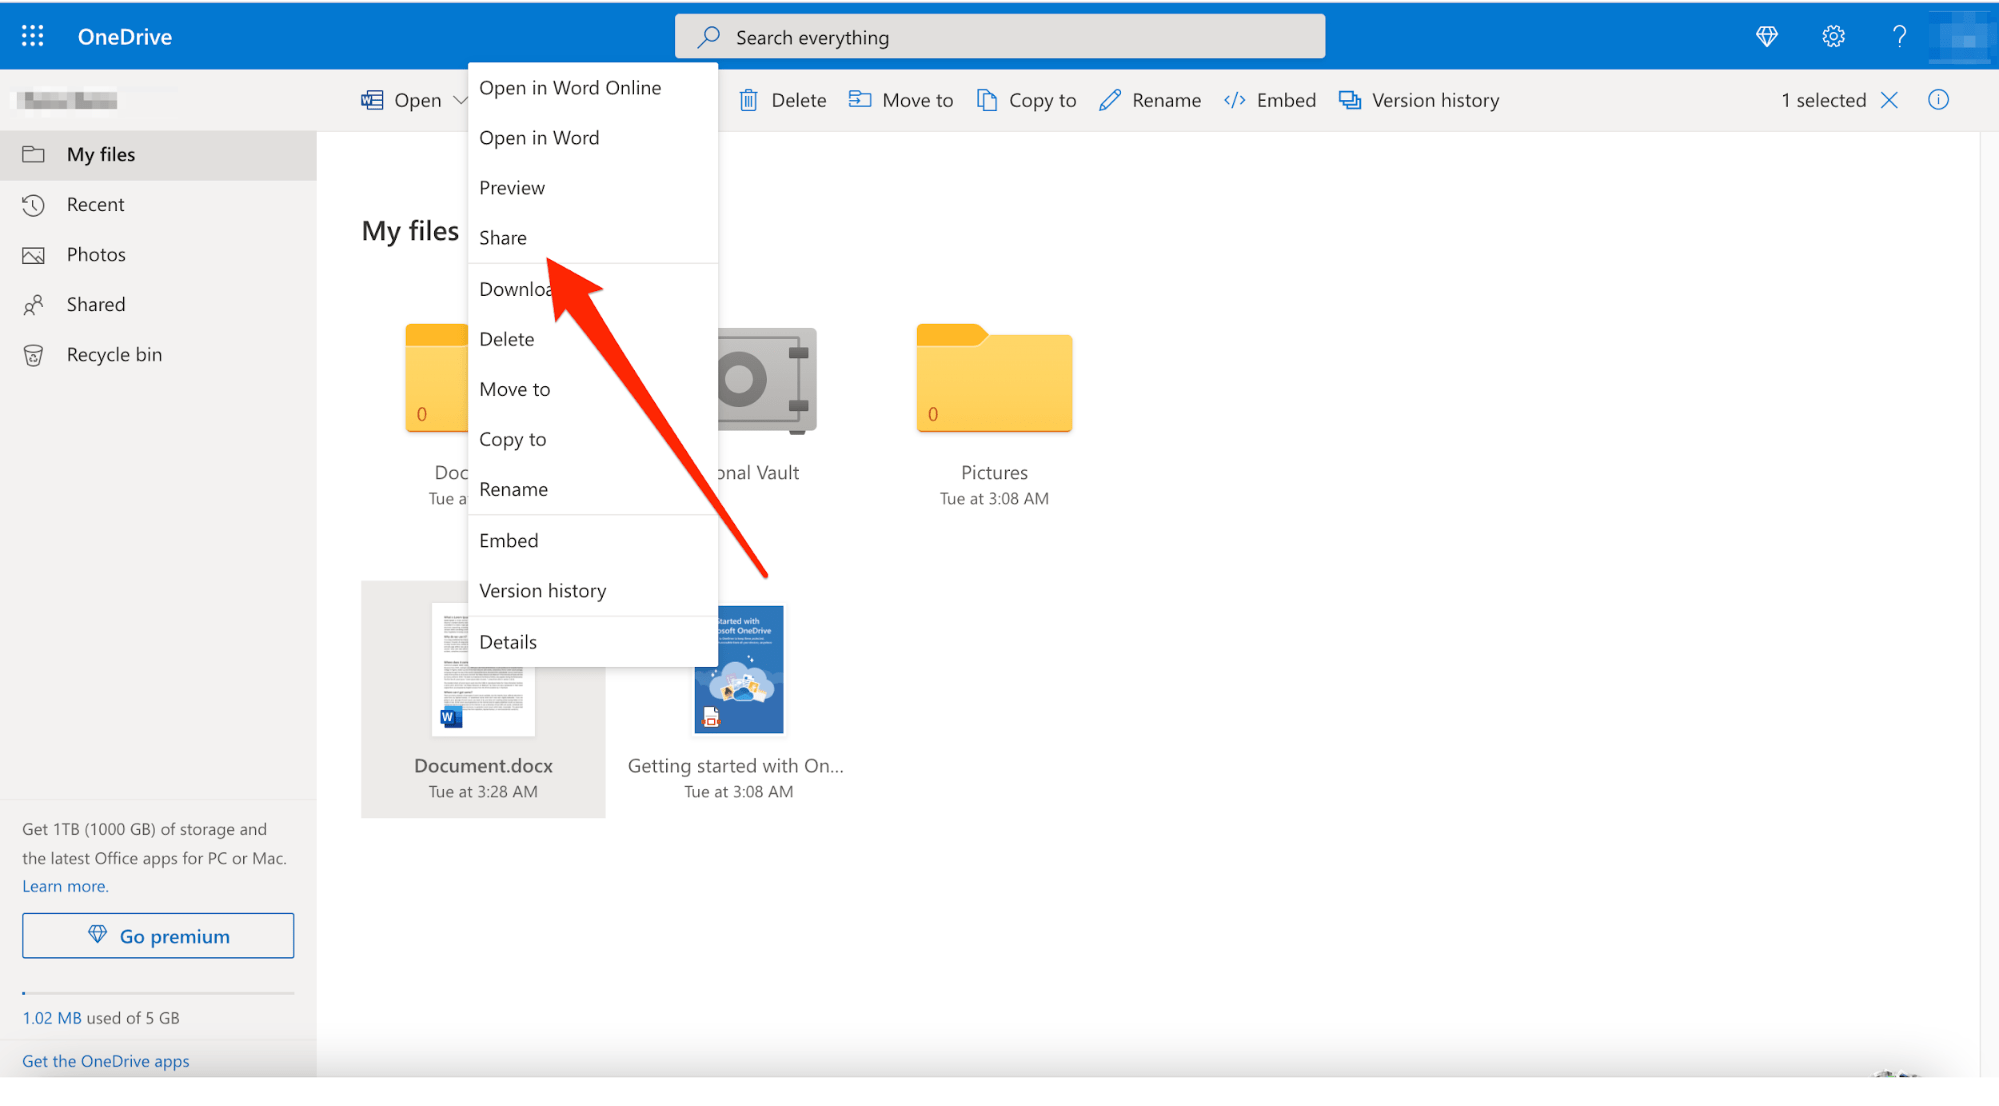
Step #2 Right-click on the file you want to share. A dropdown menu will appear on your screen. Select Share.
Step #3 Enter the email addresses of the people that you want to share the large file with. You can also set your desired editing permissions and add a message before sending an email invite.
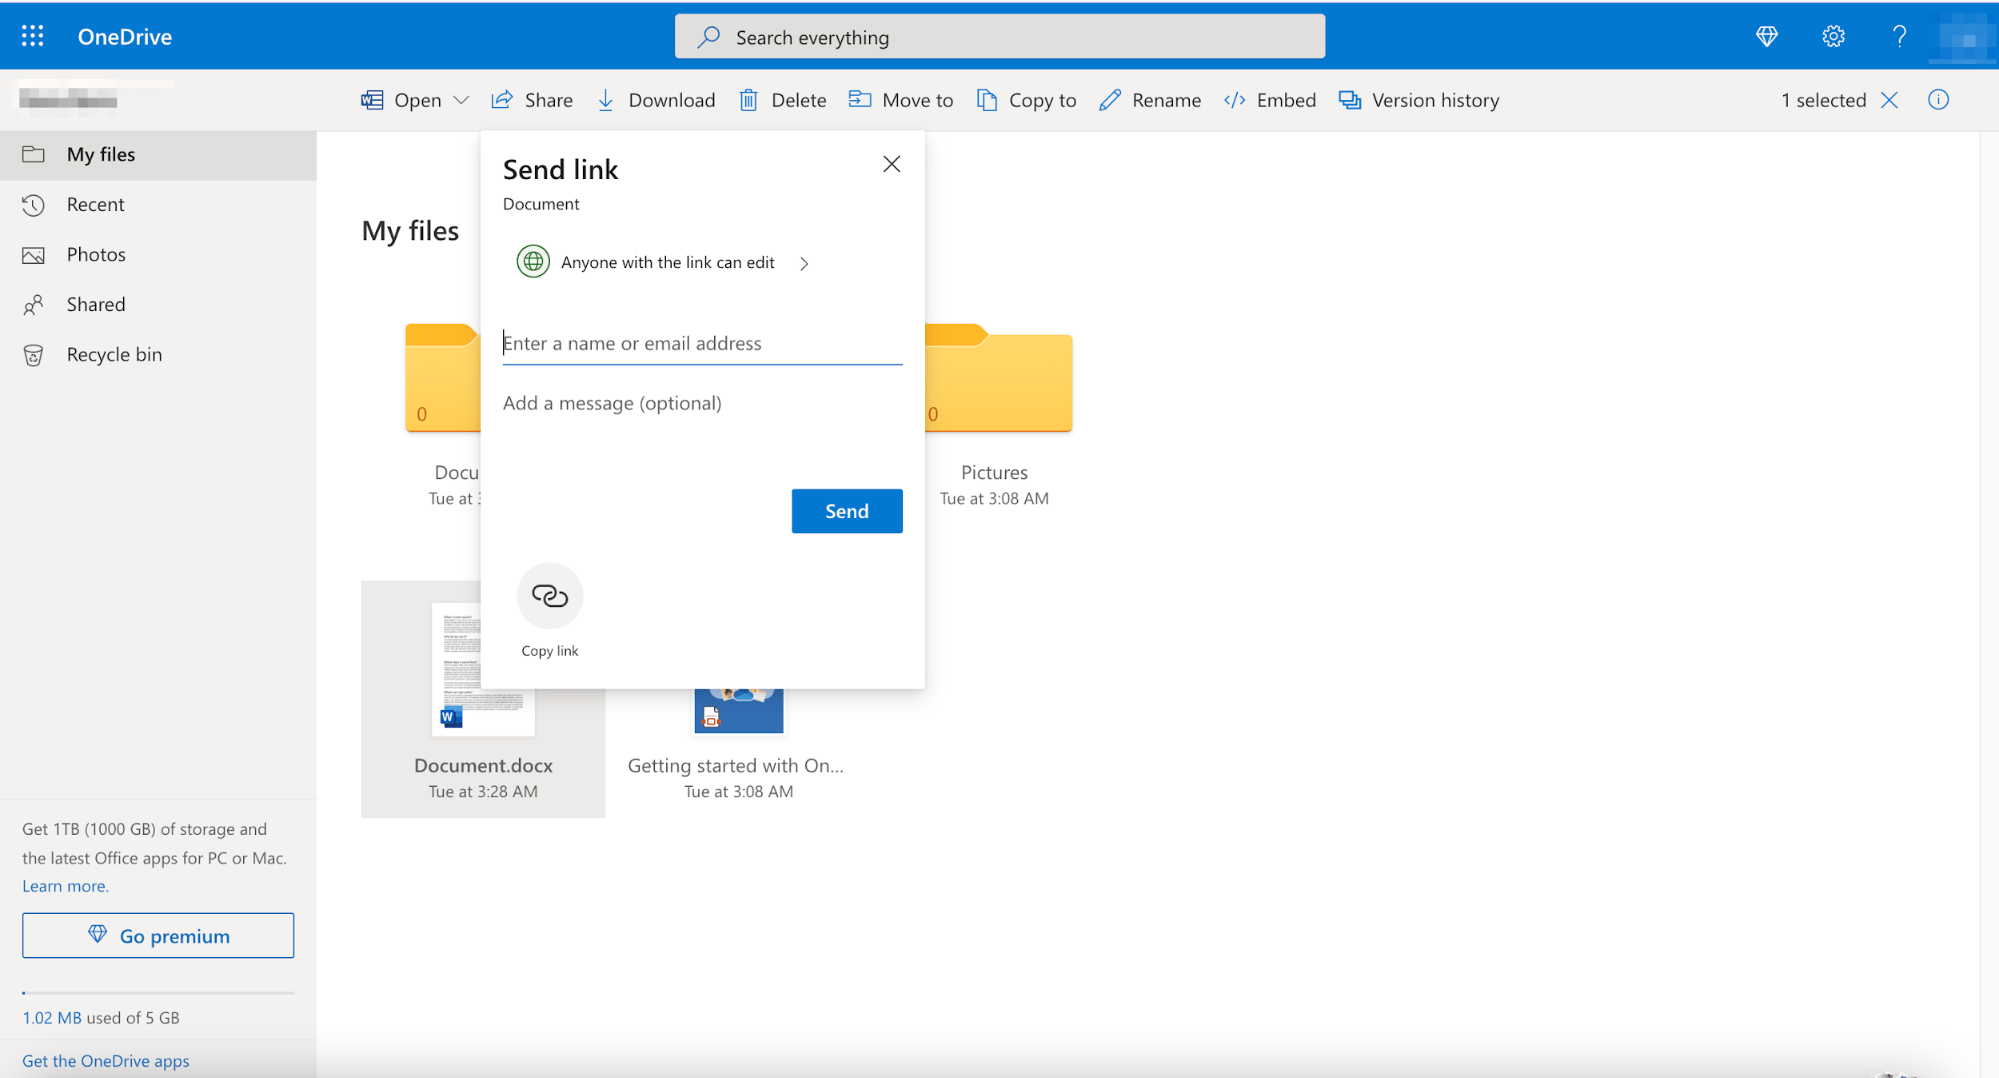
All your intended recipients will soon receive an email with the link to view the large file. You can also generate the link manually and copy and paste it on a platform of your choice like email or Whatsapp – whatever you prefer.
Method 2: Using a File Compression Software
When you want to send multiple files at a go, it’s better to use a file compression software tool instead of a cloud storage link. They’re just more time-saving as you can send a folder of files at once. The fact that you can save tons of space is another advantage.
While you can use third-party applications for this purpose, compressing the file directly on your computer is also possible.
We’ll discuss how you can compress a file or folder by converting it into a ZIP version. Here’s what you need to do:
Step #1 Right-click on the large file that you want to email. A dropdown box will appear.
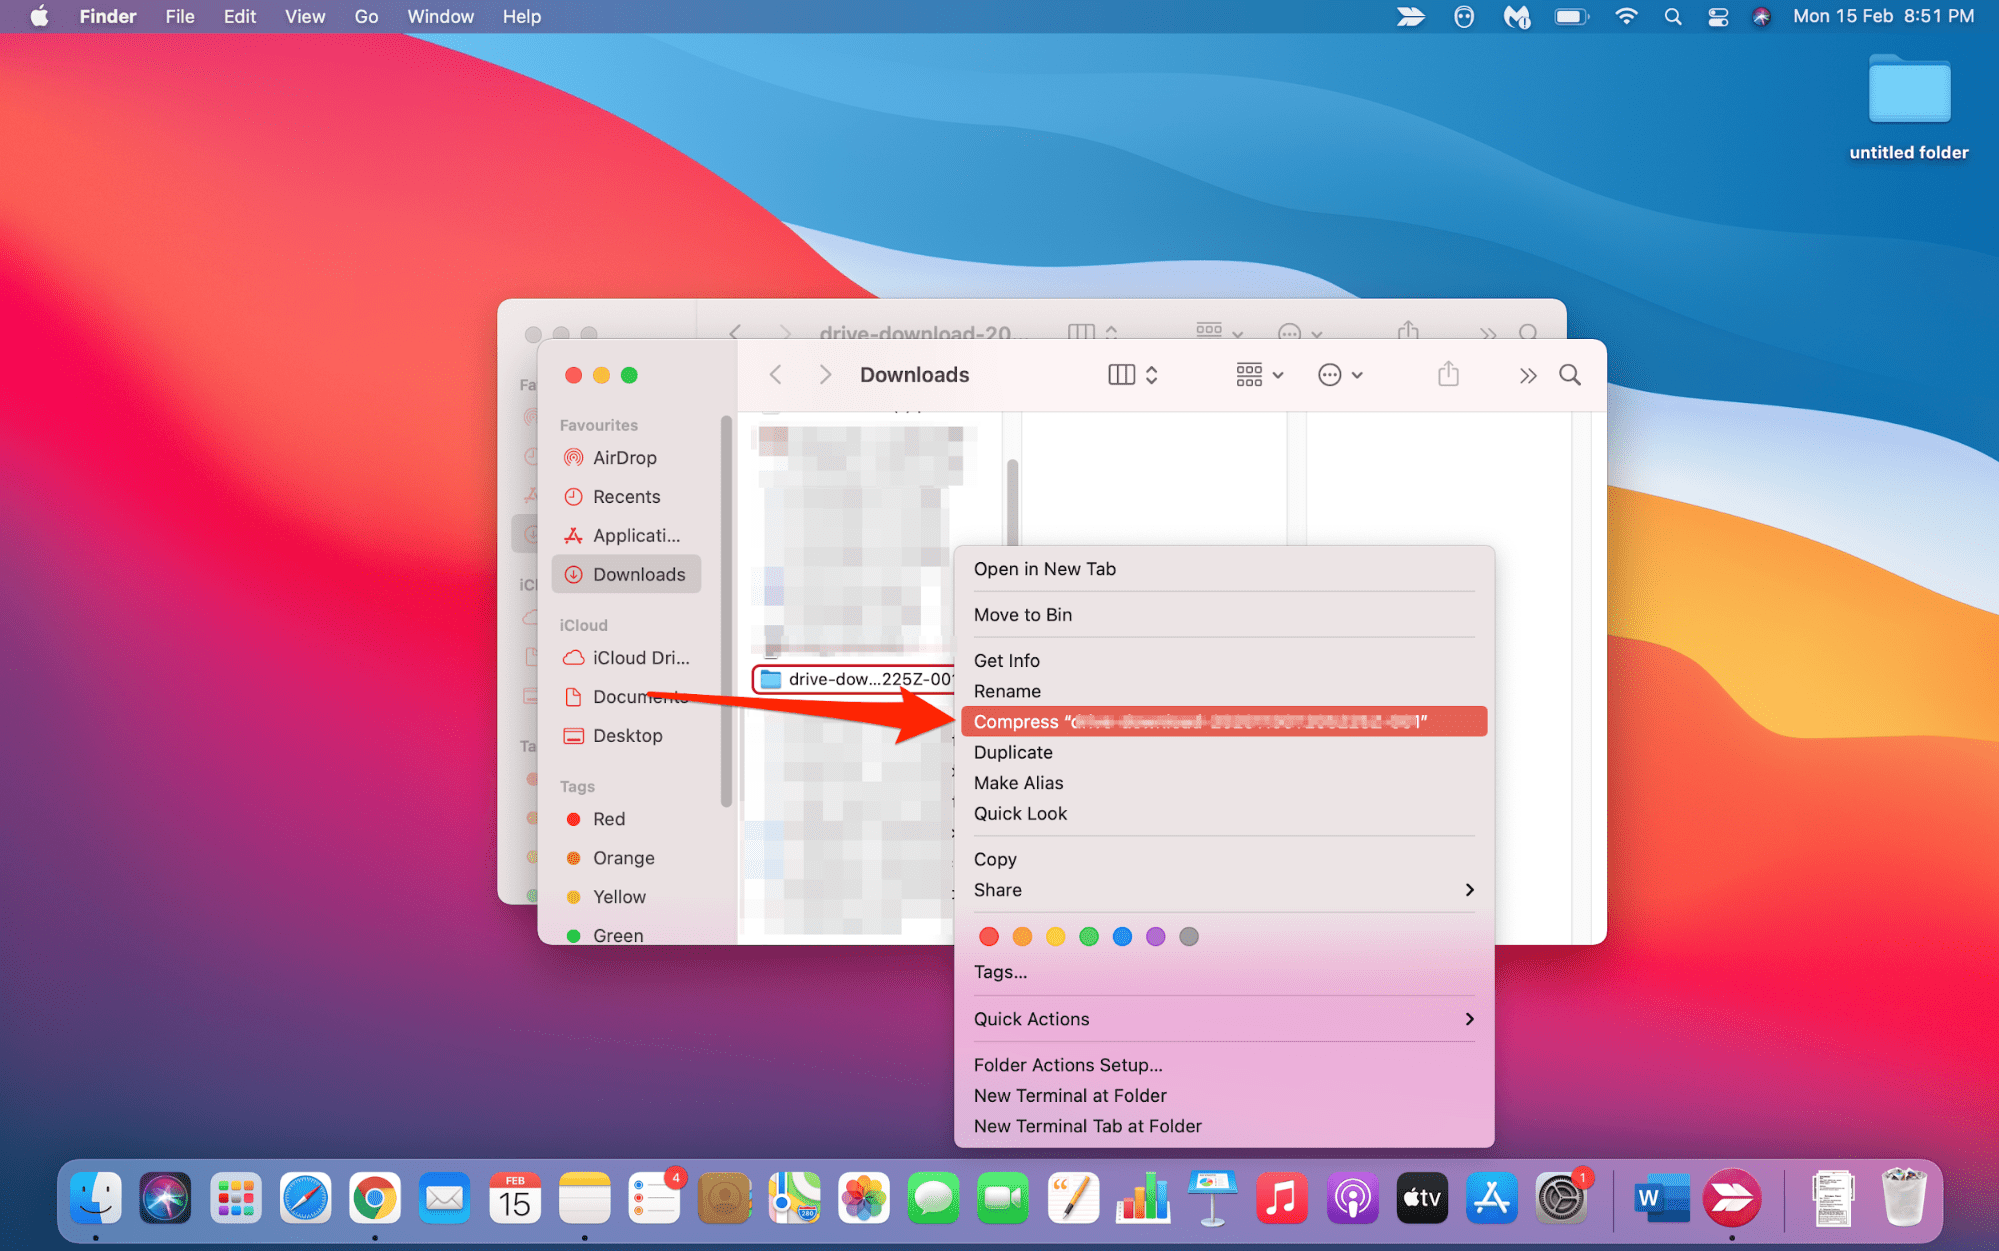
Step #2 Click on Compress “document-file-name.”
And that’s it!
Generally, the files that have been compressed into a ZIP file reduce in size from anything from 10% to 75%. It’s definitely a vast range, but that’s because the compression depends on how much space is available within the file data for the compression algorithm to do its magic.
Once your folder is compressed, along with its files, you can simply mail it to your intended recipients as you normally would.
Method 3: Using a Free Online Service
You can send large files over email through a free online service – provided the files aren’t confidential or sensitive in nature.
There are plenty of free online services that allow you to upload your large files and then email them to your colleagues or friends. Jumpshare, for instance, lets its users use up to 250MB of files with a free account. If you want to send even larger files, you have to sign up with their paid plans.
Here’s how you can send large files through Jumpshare to your email recipients:
Step #1 Sign up for a free Jumpshare account.
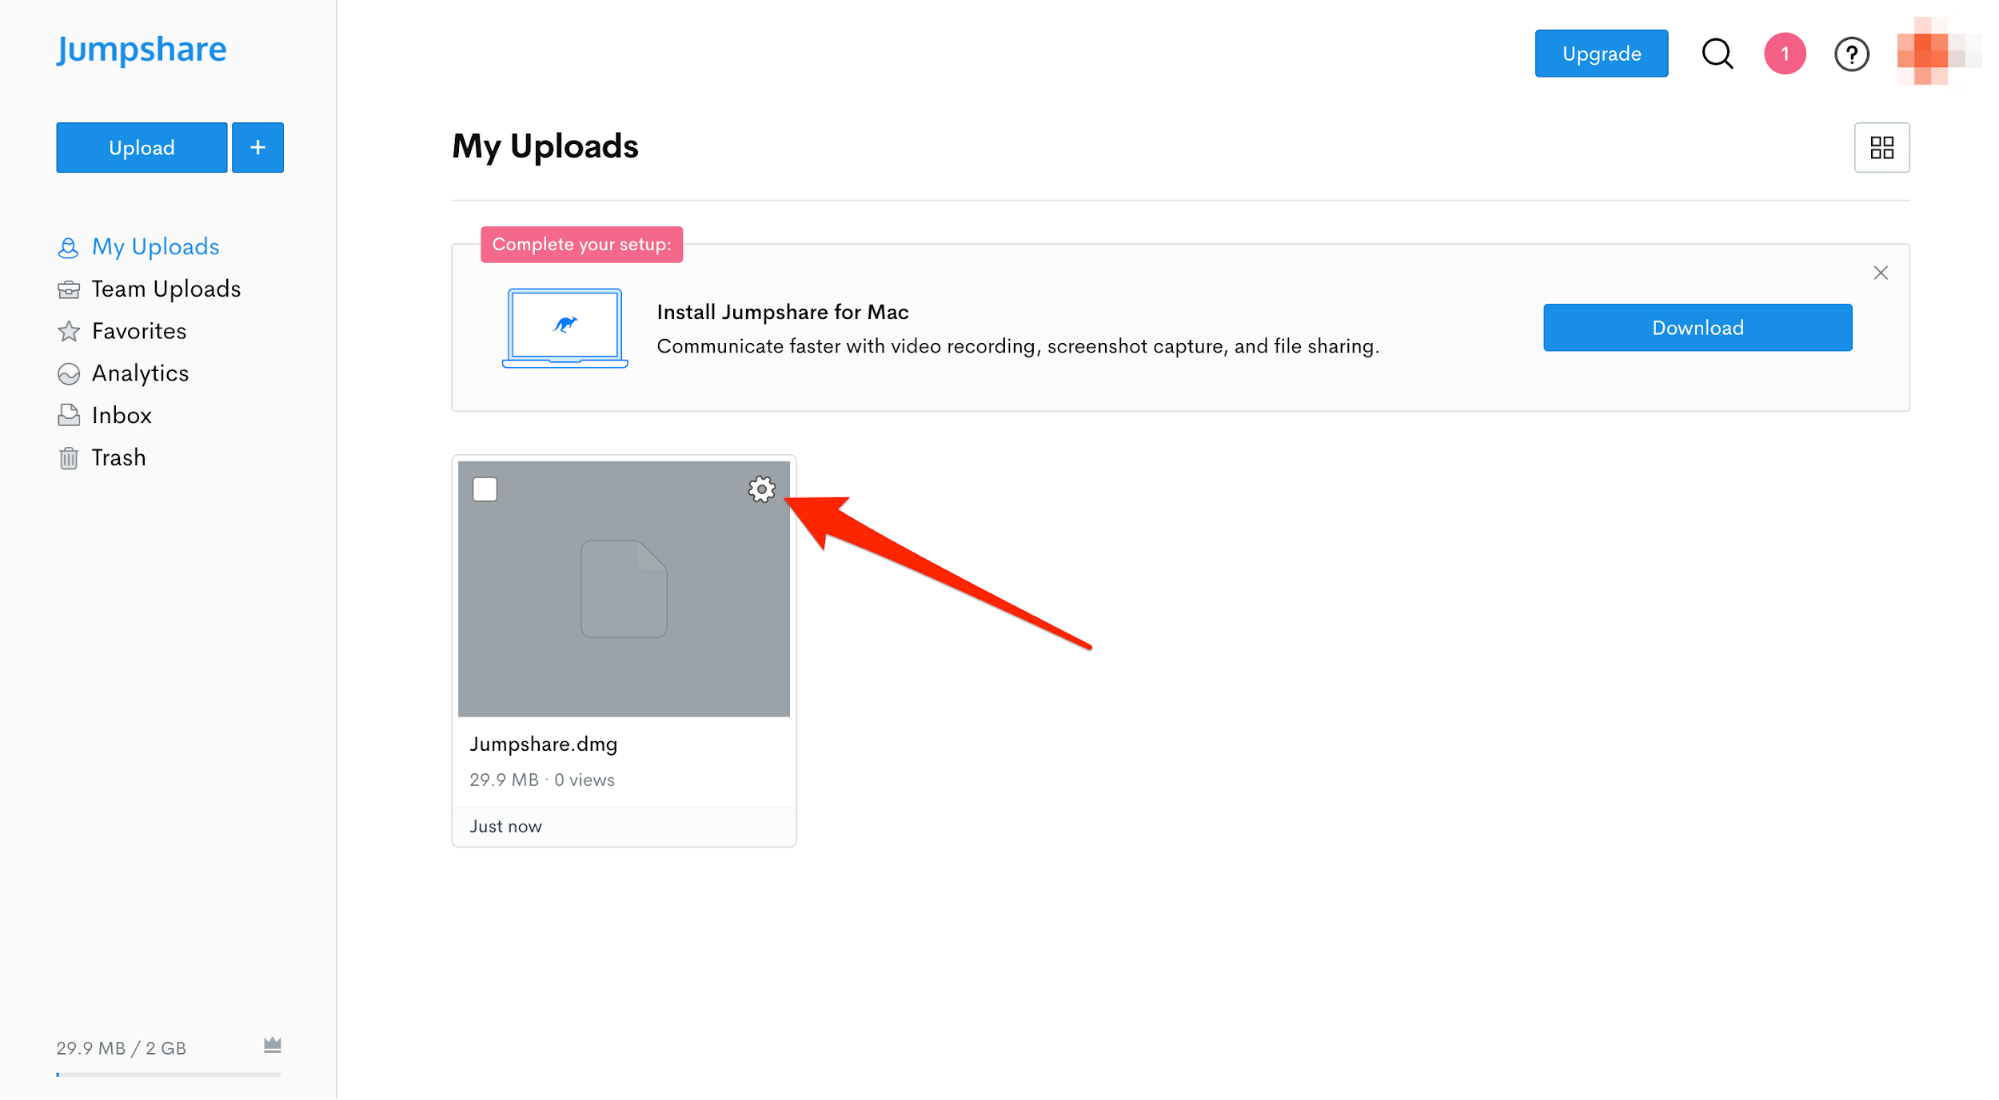
Step #2 Once your account is set, click on Upload to upload your large files on the platform.
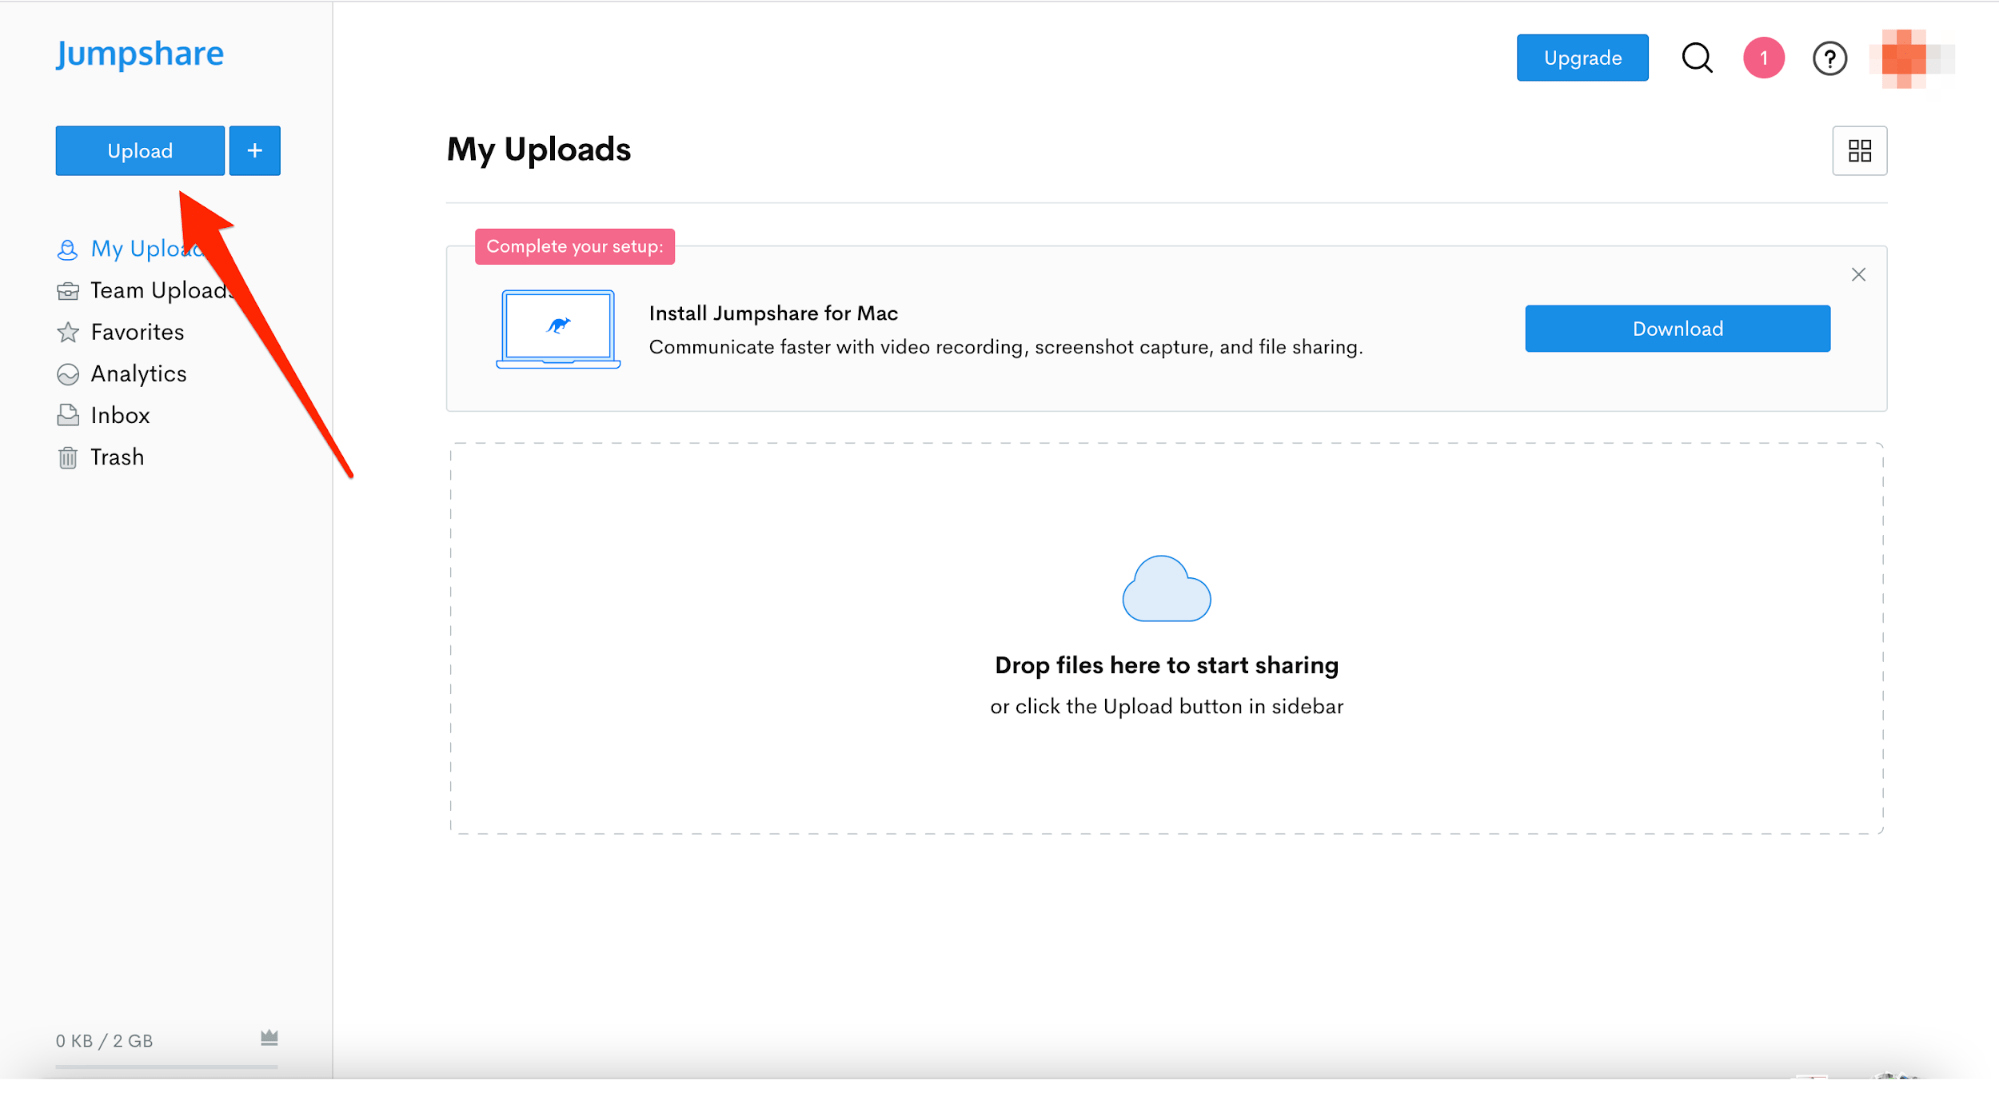
Step #3 Hover your cursor over the file once the uploading is complete. You’ll see a cogwheel icon – click on it.
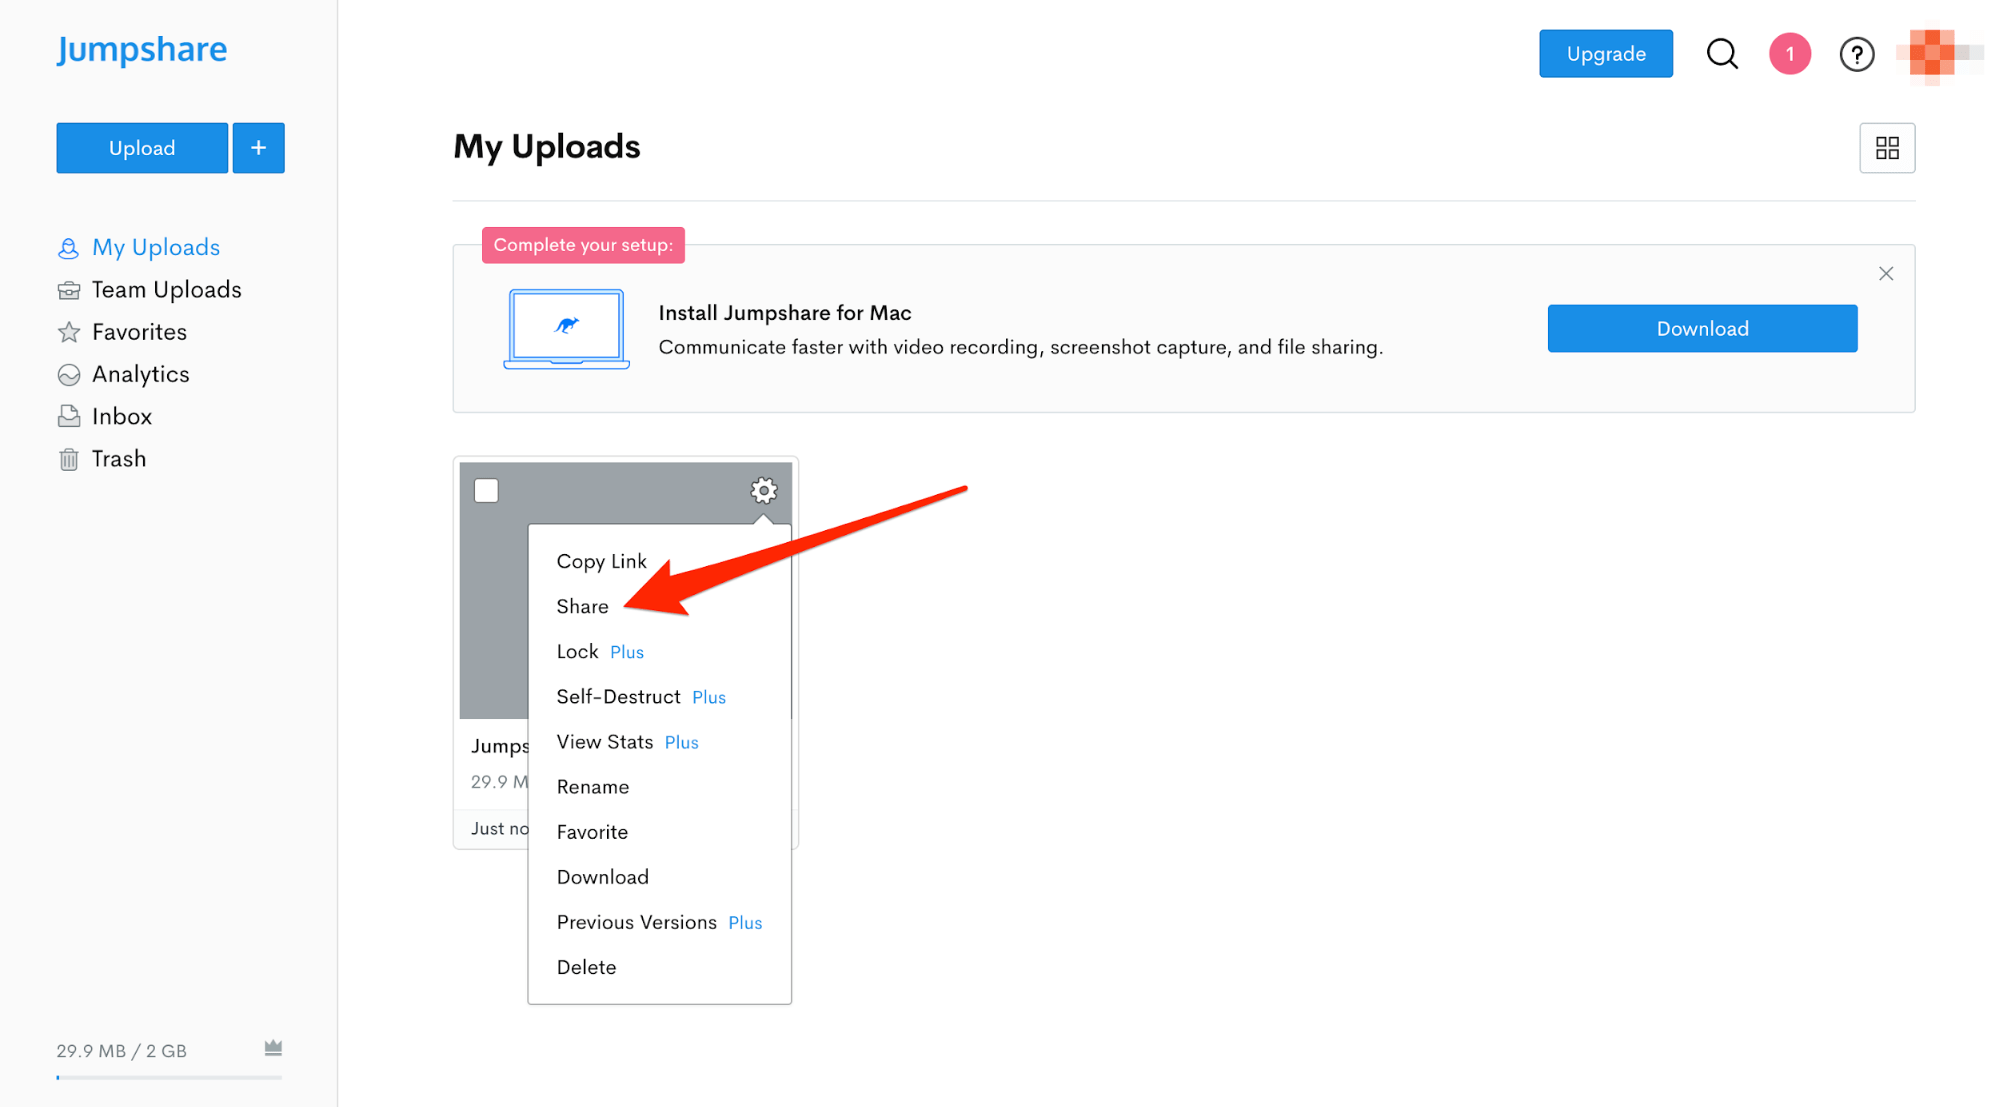
Step #4 Click on Share from the dropdown menu. A pop-up box will appear on your screen.
Step #5 Type in the names or email addresses of your recipients. Then click on the Send button when done.
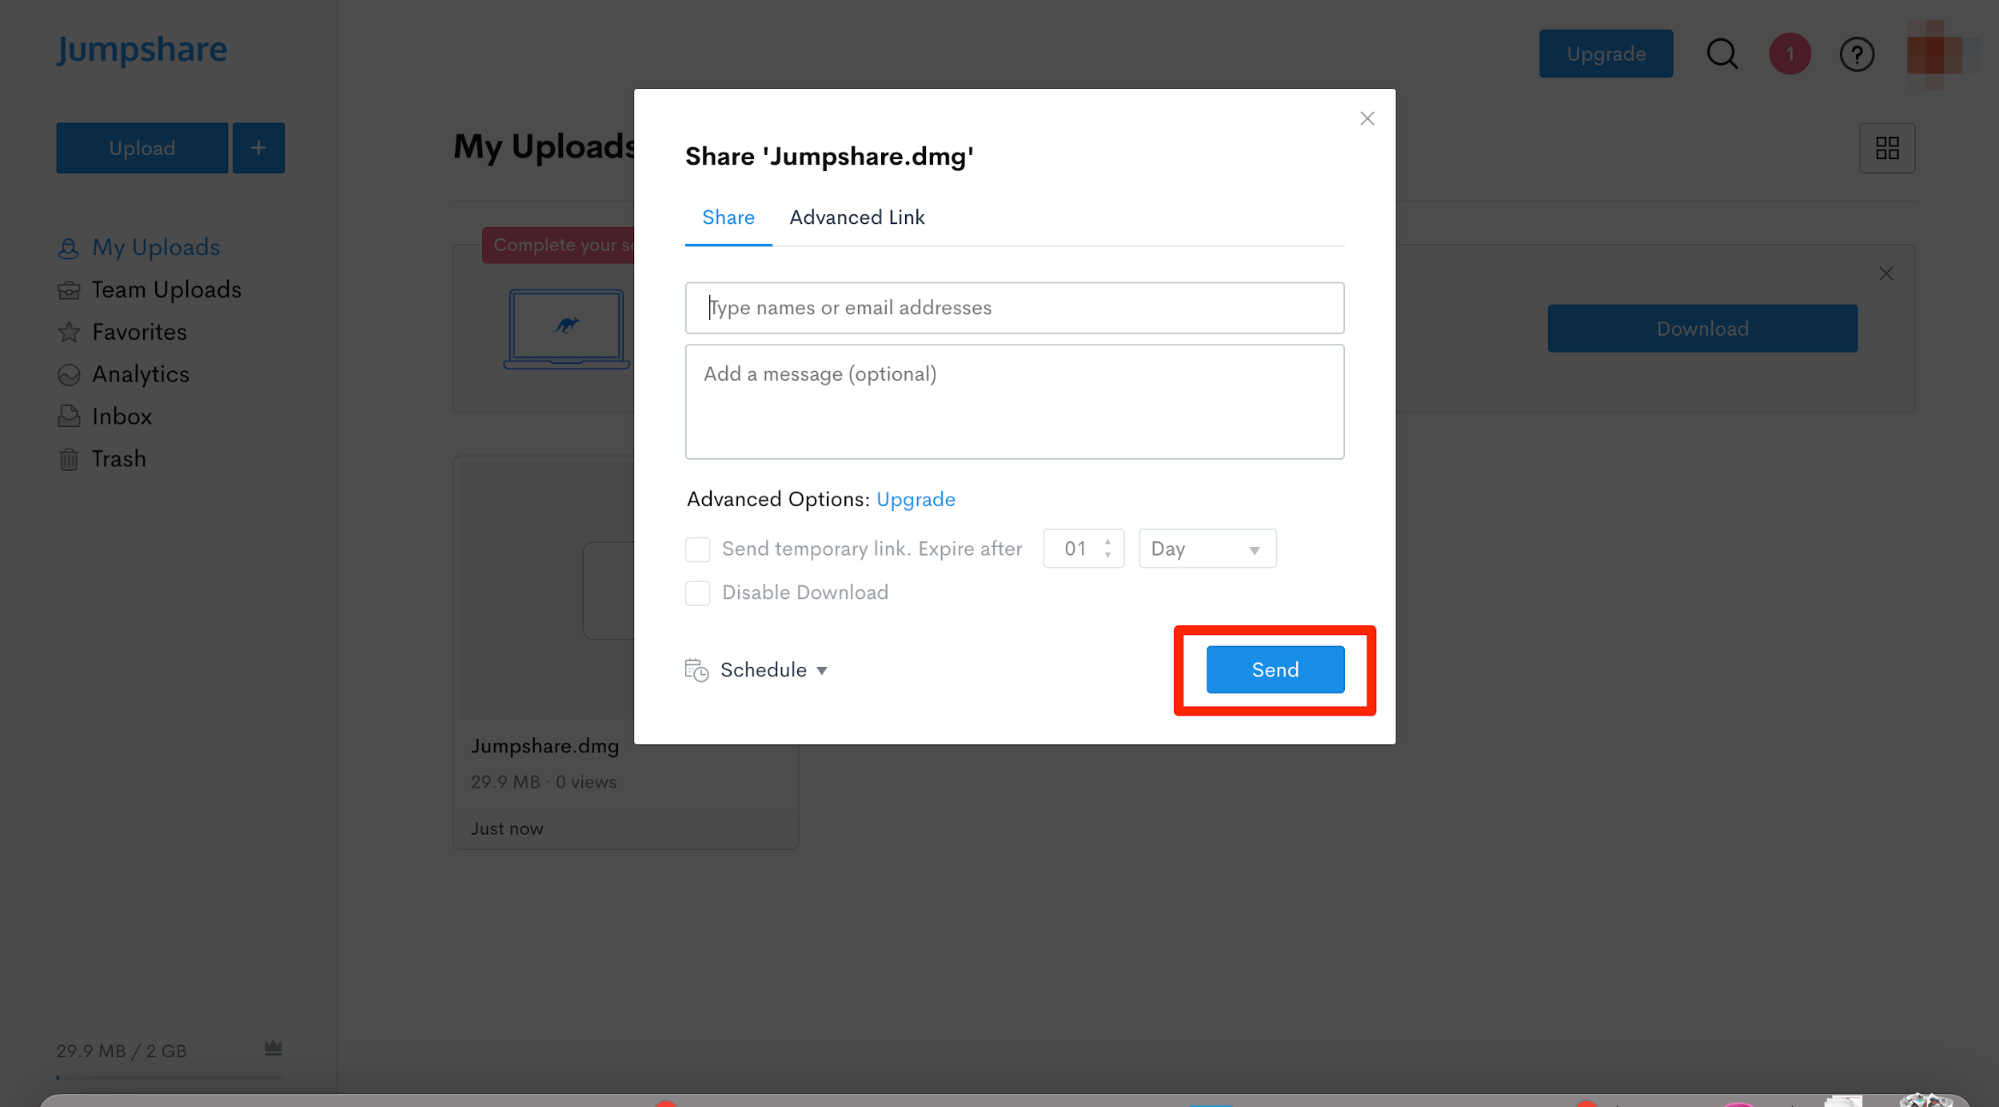
You can also schedule to send the shareable link at a later time according to your convenience.
Method 4: Use a Virtual Private Network or VPN (Not Recommended)
You can use a virtual private network or VPN as well to send large files. But as this isn’t the best option, we won’t go into too much detail about this.
Why, you ask?
Firstly, sending large files will slow down your VPN connection. Secondly, there is no guarantee that your files will be intact upon delivery. Think about it: Won’t this defeat the whole purpose of sending large files in the first place?
Using other alternatives mentioned above, especially ZIP compression and cloud storage services, is much more reliable.
The Bottom Line
G Suite and Office 365 always come to one’s rescue when it comes to carrying out daily tasks more effectively and conveniently. This includes sharing folders and files, allowing multiple people to edit a single document, cloud storage, and so on.
So it’s really no surprise that they make it easier to send large files by email as well. You can use any one of the above methods to safely send files that contain high-quality images or pages (and pages!) of text without any compromise on their overall quality.
However, as we mentioned before, avoid sending your files through a VPN to avoid messing up your files – anything else works fine!

