Remote Desktop on Mac: The Ultimate Manual
It’s no secret that we live in a technology-centered world.
Most people have multiple devices, sometimes from different systems and located in physically different places. They could range from Mac to PC, from being at work to in different rooms of your home. Phones, tablets, laptops, oh my. With this wide range of devices, sometimes it’s hard to remember to copy files over from one device to another. Other times you may forget a device at home that you need to access for work.
With Remote Desktop on Macs, these problems can be a thing of the past.
By getting Apple Remote Desktop, you’ll be able to access other Apple devices whenever you need to. This means you can get to your files from anywhere, or even allow other people to control your Apple device when troubleshooting. And you can even install Microsoft Remote Desktop on your Mac computer if you want, letting you access PC desktops even from Apple devices.
With this system, it is easier than ever to get control over your other screens, files, and more. Using them is sure to increase efficiency and decrease frustration in your professional and personal life.
What is a Remote Desktop Anyway?
A remote desktop is just like how it sounds: it’s a desktop that you can access no matter where you are.
This means that even on a work trip, you’ll be able to see your Windows PC device at home. Or you could access another Mac device that a coworker needs help with. You could even allow users to control your screen or access any files you need, right from your Apple device.
Essentially, if the machine is connected to your Mac, you’ll be able to use it whenever you want. The options for this are endless, making Remote Desktop for Mac and Microsoft Remote Desktop excellent features to invest in. Employing this on your devices will increase efficiency, communication, and organizational capabilities.
With this feature, gone are the days of coaching your family members to log in and manually send files to you from your home computer. Now, with the push of a few buttons, you’ll be able to hop onto your device no matter where you are. These remote features create an intricate web of connections across all of your computers or even phones.
How Remote Desktop Works
Having a remote desktop means that you can access your device no matter where you are. With it, you’ll be able to control the screen of your PC or other Apple device from another device. Using this feature means controlling other computers, copying files, automating tasks, and more.
Essentially, for this to work, the devices you’re hoping to use and access must be linked together. Luckily, it is easier than you’d think to establish this connection, although it does require an investment.
With the Apple Remote Desktop, users will have to pay about $80 for this feature. For Microsoft Remote Desktop, which enables Apple users to connect with their PC devices, it’ll cost closer to $100. While this may seem pricey, this evens out to be about a quarter a day for a year.
In addition, once you buy the software packages, you will have to manually pair the devices together in the settings. This is to ensure that the devices are secure. Fortunately, we have learned the easiest ways to pair your devices, no matter what scenario you may be using the remote desktop for.
To learn more, read about the many ways to utilize this feature, and how to prepare your devices for each of them.
Example #1: Allow remote login to your Mac from another computer
In this case, you would be using another computer to access the capabilities of your Mac. So this may occur if you’re away from home and need to access your device. You’ll be taking one device and using this connection to see and control the screen of another.
In order to do this, both Mac devices need to have matching macOS. This is the computer operating system that your device is using. Over time, new versions of macOS come out with higher quality features, so make sure to keep them updated.
With this, you will be able to use Secure Shell (SSH) to allow remote login. It’s a good idea to consistently check your devices and update them if needed, so you’re not caught in a situation where the connection can’t be established when you need it.
To set this up, start at the Menu then go to System Preferences and select Sharing. Here, there should be an option for Remote Login.
When you get here, there will be a choice to allow select devices to access files and otherwise control the Mac remotely. If you select All users then everyone on your network will have that capability.
For families or networks with several devices, this may not be the best decision. Suddenly, anyone could get into your Mac at any time, even the kids! To protect your work files from any accidental disruptions, it may be better to not choose the All users option.
Instead, Apple also gives users the option to select specific devices to share with. So in this case, you could select only your significant other’s devices to be paired with yours. Ultimately, it is up to the system that would be most convenient and secure for you.
To add an individual device, select the Only these users option. Then, look to the bottom of the selection box and click the + icon.
You will need to know the username for the device as well as the IP address.
Many people do not know exactly where their IP address is located. If this is the case, there is another way to connect the devices. The easiest way to see all of the ones on your network is to open Remote Desktop and click on Scanner. This will be located in the sidebar. From here, choose the option Bonjour. This should display a list of all of the computers on your local subnet.
Once you see a device you want to connect, select it and drag it to All Computers. From here, you’ll just need to enter the username and password for the Remote Desktop administrator.
After that, the remote connection will be established.
Example #2: Allow other people to remotely access your Mac
Sometimes, it can be helpful to allow other people to access your Mac. Establishing this is very simple, but slightly different than giving yourself remote access.
This is especially great if you’re using complex software and someone needs to be able to see your screen to help out. For example, let’s say you just got a new job and are struggling to learn one of the new systems. With remote access, your boss or co-workers can access your Mac and troubleshoot any issues.
There are several instances where this feature would make communication in the workplace far more efficient. Rather than communicating over the phone, or having to get up from your desk, you could solve a problem right then and there.
The steps to do this are pretty similar to the first few steps. Just like the other option for remote access, start at the Menu and then System Preferences. Once again, go to Sharing. Instead of Remote Login, select Remote Management. Here, you can select who has remote access
Once again, you’ll have the choice of allowing All Users or selecting specific devices that can connect. For extra security, selecting specific devices is recommended.
Now, whoever you select will be able to access your Mac.
Example #3: Copy files from Windows Remote Desktop to Mac
Later on, we will show you how to establish the connection between your Mac device and your PC device using Microsoft Remote Desktop.
Once you’ve done this, you’ll be ready to copy files from your PC over to your Mac.
First, you’ll want to open up Remote Desktop on your PC. Look at the sidebar and choose the remote computer you want to send the files to. Select Manage and then Copy items. To add items, simply use the + button. To remove them choose the – one.
Once you have the files you want to transfer, click the button that says Copy. Now, the files will automatically be duplicated to the other computer. The system makes it efficient and easy. You won’t have to worry about files being too big to send over email or wait for hours for them to download. With just the push of a few buttons, they’ll live on both devices.
How to Get Started With Remote Desktop for Mac and Windows
There are a few steps you’ll need to take in order to pair your devices together. For these steps, we will specifically focus on connecting your Mac device with your Windows PC, since establishing that connection can be a bit more complicated than the ones we illustrated before.
Before you start, don’t forget that Microsoft Remote Desktop does cost about $100/year. We will show you where to download and purchase this in these steps.
Step 1: Hop onto your Windows PC
Begin by opening up your device. Go to the Start menu and then click on the gray gear icon to get to Settings.
At this point, you should be automatically taken to the System section. If not, locate that section and click on it. Scroll all the way down to the bottom until you find the About tab.
Here, it’s important to see if you have any updates to install. If so, do that before moving on to the next step. This is a good way to make sure that there are no issues that happen later on in the connection process.
Step 2: Download Microsoft Remote Desktop
Open up the Start menu and search for the Microsoft Store. Open it up, and then search Microsoft Remote Desktop.
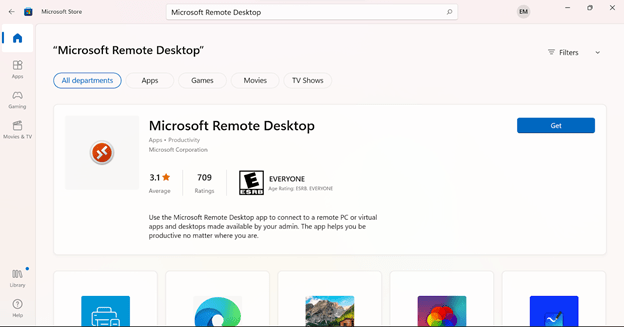
Click the Get button. From here, it will automatically start downloading to your device. In addition, it only costs extra to connect to Macs. If you have multiple Windows PC devices, this app is free.
Step 3: Activate Remote Desktop
Now that your system is primed, go back to Start and then Settings. Or, just click the back arrow from the System section.
From here, locate the Remote Desktop tab. If you didn’t update your device, this step will alert you if it still needs one to utilize the program. Keep in mind that you will need a “Pro” account to use this device.
At this point, you should be able to turn the Remote Desktop feature on. Once this happens, your PC name should pop up. Make a quick mental note of its name, because you’ll need to remember it for the next step.
Now, your device is ready to accept remote connections from your Mac.
Step 4: Install the RDP app on your Mac device
Log in to your Mac device and go to the App Store. Here, you’ll want to search Microsoft Remote Desktop. It will likely be the first search result.
Download it for free by clicking the Get button. There are options both for traditional computers as well as mobile devices, like iPhones and iPads.
Step 5: Establish the connection
Now, your Mac device is primed to be able to connect with your Windows PC. Start by going to Preferences then Gateways.
Once you’re here, there should be a + icon at the bottom of a table. Click that, and you’ll be brought to a pop-up that asks for some more information.
You’ll have to enter a Gateway name. Essentially, this is going to be the name of the PC you’re connecting with. You’ll want to make sure this name is distinguishable from any other Windows devices you may decide to connect.
Then, create a username and password. These both need to match with the Remote Desktop Gateway.
After this, you’ll be ready to make the connection. Just click on the PC name and the two devices will be linked.

