How to Migrate From Google Drive To OneDrive
If you decide to migrate your business’ productivity software from Google apps to Microsoft apps, you may want to also migrate your cloud storage option. Moving your cloud storage from Google Drive to Microsoft OneDrive can occur in a few different ways. We’ll break down four options to migrate from Google Drive to OneDrive.
1. Download and Upload Your Files
The most traditional way to migrate files from Google Drive to OneDrive is by downloading a copy of the Google Drive files. Then upload those files into Microsoft OneDrive. This is the least expensive method because you shouldn’t have to purchase any extra storage, although it can take a long time.
Step 1: Select Your OneDrive Storage Amount

You will want to subscribe to a OneDrive tier that has as much or more storage space as you were using with Google Drive. This should be pretty easy, as all business-level accounts with OneDrive have up to 1 TB of storage per user. But if you have a significant amount of data stored with Google Drive, you will need to pay particular attention to the storage tier you select.
OneDrive standalone accounts will have either 1 TB of storage per user or an unlimited amount of storage per user. (But each user only receives 1 TB without contacting Microsoft customer support to gain more storage.) Microsoft 365 Business accounts include OneDrive storage of up to 1 TB per user.
Step 2: Download Your Google Drive Files
With your OneDrive (or Microsoft 365) account set up and ready to use, you then can begin downloading your Google Drive files to a .zip compressed file.
From your Gmail account, click on the Google Apps button (marked with a 3-by-3 grid of dots) in the upper right corner. Click on the Drive button in the popup list.
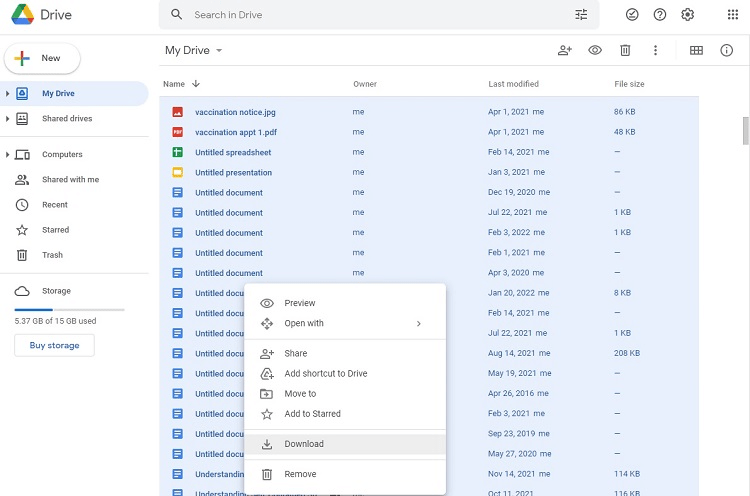
From the Drive window, click on and highlight the first item in the list of your files. Then scroll to the bottom of the list of files and folders.
This may take several minutes, as Google Drive typically will only load 50 filenames at a time. As you scroll down the list, Google Drive will load another 50 filenames and so on until it displays the full list. (If Google Drive’s loading process experiences any delays, you will see a spinning circle at the bottom of the screen while the filenames load.)
Once you reach the final filename in the list, press and hold down the Shift key. Then click on the last filename in the list, and Google Drive should highlight all the items in the list.
Now right-click anywhere in the highlighted list of filenames. In the popup menu, left-click on Download. Google Drive will display a message in the lower right corner of the screen to show that it is downloading and compressing the highlighted files. This process can require anywhere from several seconds for a couple dozen files to several hours for hundreds of thousands of files.
Once Google Drive creates the .zip file, it will appear in a button in the lower-left corner of the browser window. Right-click on this button and left-click on Show in Folder from the popup menu. Copy the .zip file to a location on your hard drive where you can find it again later.
Step 3: Open Your OneDrive Account

Click on the OneDrive button in the system tray of the Windows taskbar (in the lower right corner of the home screen in Windows). In the OneDrive window, click on the System button in the upper right corner (marked with a gear icon). Then click Settings in the popup menu.
In the Settings window, click on the Add an Account button. You then will need to enter the account information for your OneDrive or Microsoft 365 account. Just follow the steps in the sign-in wizard. After entering your information, click on Open My OneDrive Folder.
Now return to the location where you stored the .zip file containing your compressed Google Drive files. Double-click on the .zip file to uncompress the files. Highlight all the now uncompressed files in the folder. Drag them to your OneDrive folder window. OneDrive will begin uploading the files to your OneDrive account. As the files successfully upload, OneDrive will mark them with a green checkmark icon.
The upload process can take anywhere from a few seconds to several hours or more, depending on the number of files you are uploading and on the upload speed of your internet connection.
2. Use the OneDrive and Google Drive Apps
If you do not use Google Drive to create files, such as with Google Docs or Sheets, you have the option of copying files from Google Drive to OneDrive using both service’s desktop apps. For the best results with this option, you would need to only use Google Drive as a backup storage option for things like music files, PDFs, or Word files.
You can use this method with a Google Drive account that contains Google Docs and Sheets files, but Google Drive will not send a copy of the actual file to OneDrive. Instead, it will only send a link to the file to OneDrive. This means you would still need to maintain your Google Drive account to continue to have access to the file, or you would need to convert all of these Google app files to Microsoft app files (such as Docs to Word).
Step 1: Install the Google Drive Desktop App
If you do not have the Google Drive desktop app installed, you can download and install it in only a few minutes.
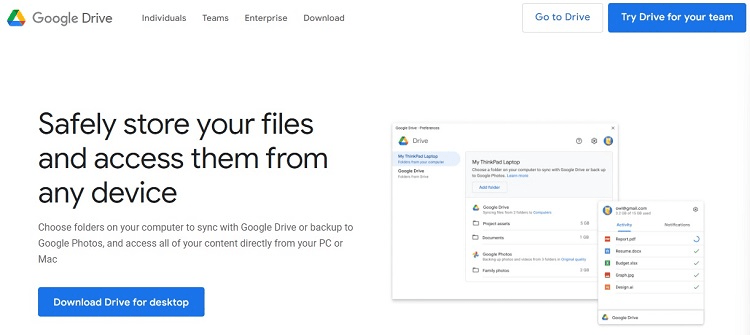
On the Google Drive desktop page, click on the Download Drive for Desktop button. Then click on the .exe button in the lower-left corner of the browser to install the app.
The OneDrive desktop app, meanwhile, is automatically part of Windows 10 and 11. However, if you cannot find it or if you deleted it, you can download the app from Microsoft support.
Step 2: Drag and Drop the Files from Google Drive to OneDrive
Double-click on the Google Drive icon on the desktop to open a window containing your Google Drive files.
From the system tray in the lower right corner of the main Windows screen, click on the OneDrive icon. At the bottom of the popup window, click on the Open Folder button to open a window for your OneDrive account.
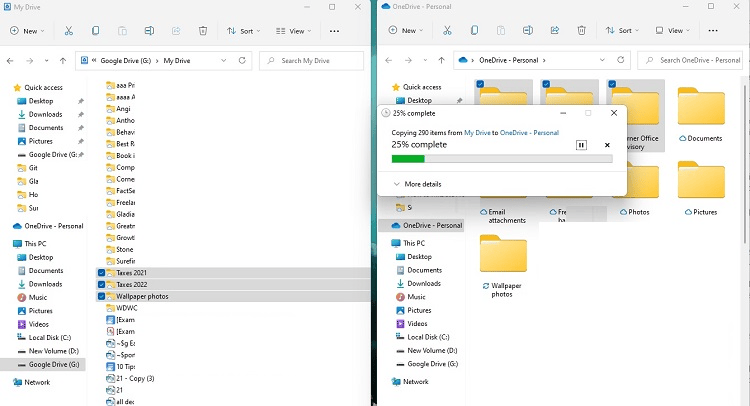
Sign in to your Google Drive and OneDrive accounts, if needed. Arrange these two windows side by side on your desktop. Highlight all the files and folders in the Google Drive window by clicking on any one of the files. Then press and hold the CTRL key, followed by pressing the A key.
With all the files in the Google Drive window highlighted, drag and drop them into the OneDrive window. You should see a popup window that gives you an update on the progress of the copying of the files from Google Drive to OneDrive.
This process may take a few seconds or several hours, depending on how many files you have available. Additionally, OneDrive must upload the files to the cloud, so it can take a long time if your internet connection has a slow upload speed.
3. Use Google Takeout
If you would like to make a copy of your Google Drive folders and files and then send this copy directly to OneDrive, you can use the Google Takeout app. Takeout will make a .zip file that contains the information from Google Drive, sending that file to your OneDrive account, where you can decompress it.
Step 1: Select Your Google Drive Files and Folders in Takeout
Start by opening the Google Takeout app. This process may require that you enter your username and password for your Google account.
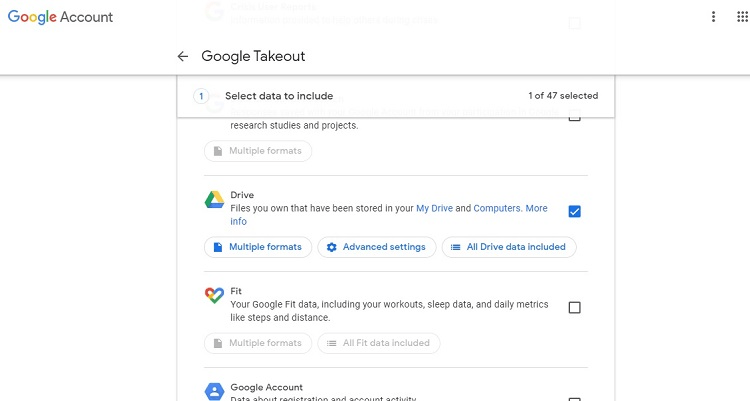
On the Google Takeout page, click on the Deselect All text link in the upper right corner. Then scroll down the page until you see the Google Drive section. Click on the box to the right of the Google Drive section to add a checkmark to it.
Takeout automatically will select all files and folders in your Google Drive account. If you want to copy everything, do not click on any of the buttons in the Google Drive section. To exclude some files and folders, click on the All Drive Data Included button, and you can remove some items from the list of files and folders to copy.
Scroll to the bottom of the Takeout page and click Next Step.
Step 2: Send the Google Drive Files to OneDrive
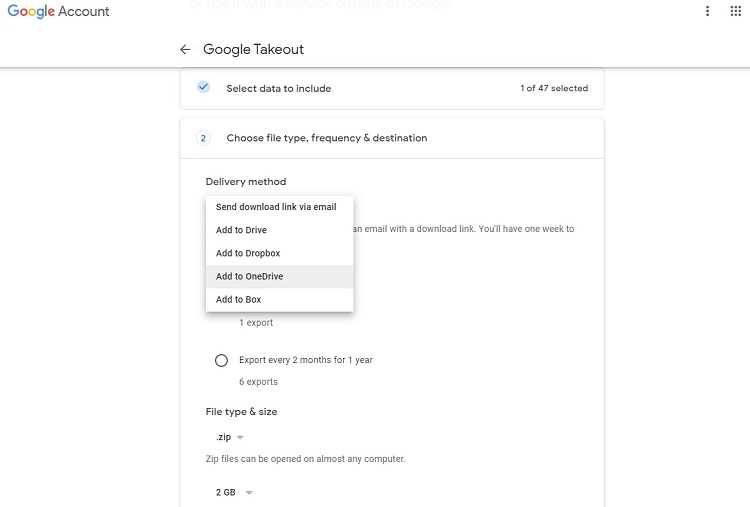
Next, choose how Takeout will deliver the compressed .zip file. Because we are migrating our Google Drive files to OneDrive, we can send the files directly to OneDrive through this section of Takeout.
In the Delivery Method section, click on the downward arrowhead. In the popup menu, click Add to OneDrive. Takeout will automatically upload the files to your OneDrive account and will send you an email message once the process is complete.
In the Frequency section, click on the Export Once button. In the File Type & Size section, most people will want to select .zip file as the file type. Because we are sending the file directly to OneDrive, rather than sending it by email, select 50 GB from the file size option.
Then click the Link Accounts and Create Export button. Takeout will open a browser tab for the Microsoft account login page. Follow the steps in the wizard to log in to your OneDrive account, so Takeout can begin uploading your Google Drive files.
4. Use a Third-Party App
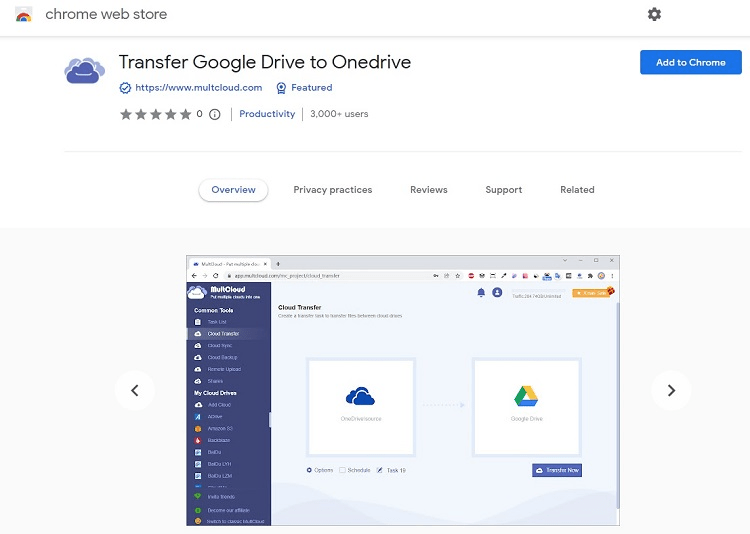
Third-party apps are available that simplify the process of passing data from Google Drive to OneDrive (and vice versa). For example, with the MultCloud app, you can send data back and forth from Google Drive to OneDrive. Other third-party apps can do the job as well.
To use MultCloud, just add it to your Chrome browser and follow the directions for moving files back and forth.
Some of these apps will transfer a certain amount of data for free before charging you a monthly fee when you need more data than is available for free. Others may charge you for all data.
Common Problems When Migrating From Google Drive To OneDrive
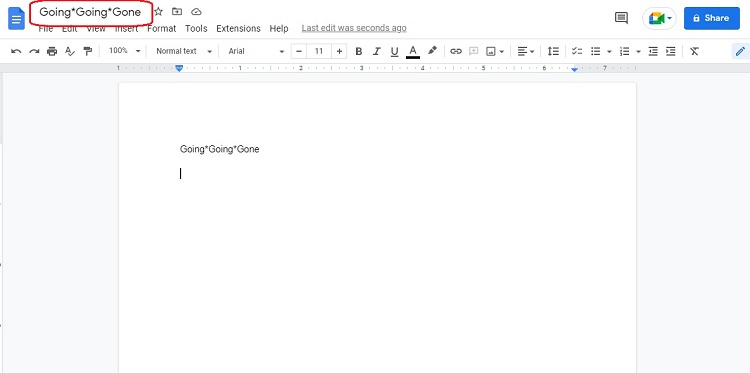
Support for Characters in Filenames
Google Drive allows you to create filenames with certain special characters that Microsoft 365 and OneDrive do not support. This could create an invalid file error when you try to migrate your Google Drive files and folders to Microsoft OneDrive. Or OneDrive may simply ignore some of these special characters, which could lead to conflicts if you end up with two files with the same name after OneDrive ignores the characters.
You may use a hyphen ( – ), an underscore ( _ ) or parentheses ( ) in your file names when migrating them to OneDrive. The characters that will not migrate include:
- Angle brackets ( < or > )
- Asterisks ( * )
- Colons ( : )
- Pipe symbol ( | )
- Question marks ( ? )
- Quotation marks ( “ )
- Slashes ( / or \ )
- Tilde ( ~ ), but only if used to start a file name
Migrating Comments Inside Files
If your organization relies on adding comments to your Google Docs, Sheets, and Slides files, these comments may not migrate successfully when storing the files in OneDrive. This problem tends to be less noticeable if you copy files a few at a time. However, when downloading the entirety of your Google Drive files into a .zip file before uploading them to OneDrive, the chances of losing the comments inside your Google Drive files increase.
Time-Consuming Process
When you are moving thousands of files from Google Drive to OneDrive, the process can take many hours. If you have a slower internet connection, or if your internet provider can throttle down your upload and download speeds, based on your usage levels over a 24-hour period, it could take a few days.
The process tends to take longer than usual if you are using the OneDrive and Google Drive desktop apps.
Because this process can take a long time, it is important to note that an interruption to the file transfer could cause file errors. Such errors could cause problems for just the affected files, or it could cause corruption to an entire block of files. You will need to leave the computer powered on and running, and you will need a steady internet connection to do this task.
If you choose to work on new files during the lengthy migration process, we would suggest only working in and saving files to the OneDrive folder. Do not save new files into Google Drive once you start the migration process.
Avoiding Files Going Through a Public Network
Depending on the sensitivity of your files and data, you may need to make certain that the files never leave your on-premises server. Alternatively, you could migrate the files using a secure server and connection that adheres to data protection laws and regulations that apply to your business or organization.
You may need to go with a third-party migration service that guarantees certain levels of data protection for your files. You also have the option of performing the migration using your local hard drives only, if you would prefer that your files never leave your possession.
Checking for Missing Files
If you are migrating thousands of files from Google Drive to OneDrive, chances are you may not have time to verify that every file migrated successfully.
You may receive a nasty surprise when you try to open one of your migrated files from inside OneDrive a few months down the road, only to discover it did not migrate properly.
To avoid this problem, you could maintain your Google Drive account for a few months to several months after the migration occurs. You then would have a copy of the original file still available on Google Drive that you could access, rather than only having the corrupted file on OneDrive available.
If you don’t want to spend money to continue your Google Drive subscription indefinitely, you may be able to download your Google Drive files to an external hard drive after you migrate to OneDrive. You then would still have a backup copy of the original files available, should you ever need them, without having to continue paying for Google Drive.

