The Ultimate Manual for Jira Workflows
If you want to learn everything about Jira workflows and how to use them to optimize your team’s performance, this detailed guide is for you.
The best thing about Jira, as you’ll learn in this guide, is its flexibility. No matter what kind of business you have, you can use it to create tailored workflows that bring transparency to your processes.
We’ll explore the power of Jira workflows and help you understand exactly how they work. We’ll also share the step-by-step process of creating a Jira workflow and how you can customize Jira workflows for your business.
What Are Jira Workflows Anyway?
The steps that your teams follow to create, process, and resolve a problem are collectively called a workflow.
These workflows act as standard operating procedures that can be applied across your organization. Well-defined workflows also help you connect various issues and create escalation models for faster resolution. Workflows also help you manage your workload more efficiently.
Jira Workflows help you standardize your workflows through Jira’s centralized platform so that your teams know precisely what steps to follow every time they come across a problem or have a task to complete.
Workflows reside in Jira scrum boards and Kanban boards. The default workflow in Jira scrum boards comprises three stages: To Do, In Progress, and Done.
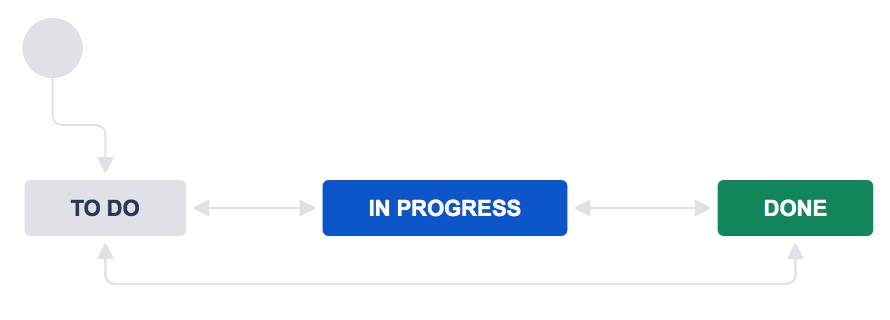
Here’s how they appear in Jira scrum boards.
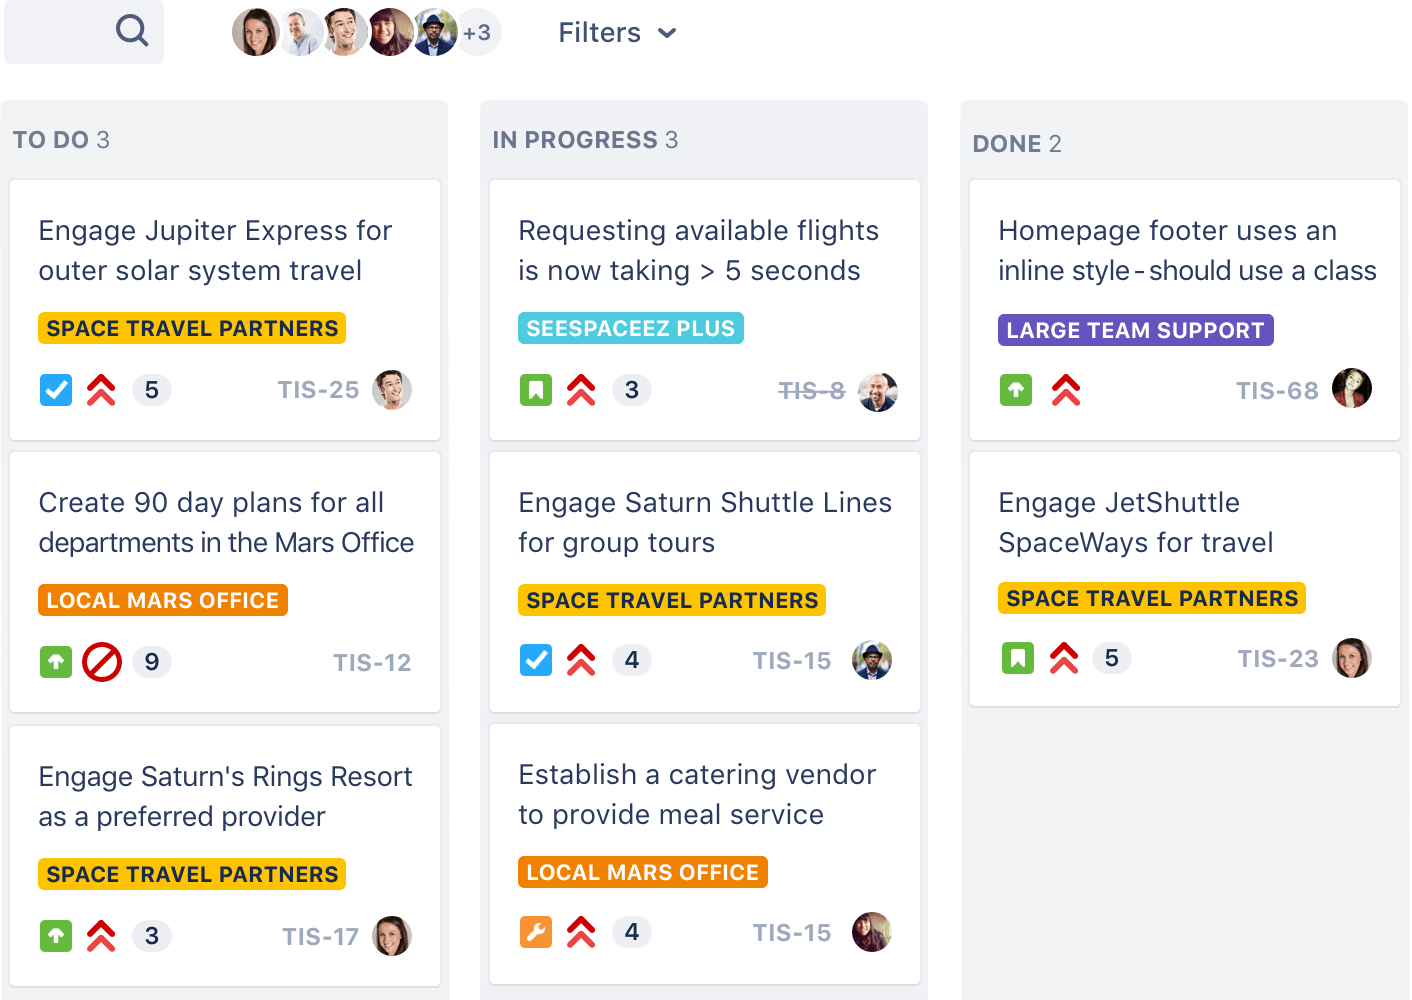
Each stage can have multiple statuses that you can assign to your issues.
For example, the In Progress stage can be divided into multiple steps like this.
You can always create more complex and even condition-based workflows if there’s a need.
But generally, it’s always best to start with a simple three-step workflow to avoid confusion.
Since every business follows unique processes, Jira allows you to create different workflows for various issue types and teams within your company.
How Jira Workflows Work
Jira workflows help you chalk out the path your teams follow to resolve an issue. They reside either in a scrum board or a Kanban board in Jira, where you can use the drag and drop interface of Jira boards to move issues from one stage of your workflow to another.
To fully understand how Jira Workflows work, you need to understand its common terminologies.
Workflow: the path your team adopts to resolve an issue.
Workflow scheme: a set of associations that allow you to link different issues with workflows. A workflow scheme has multiple workflows linked to different issue types. When you handle a particular issue type, the relevant workflow is activated. You can associate a workflow scheme to one or more projects in Jira.
Issue: the problem or task at hand. An issue enters your workflow from its initial stage and transitions between various stages depending on your process until it resolves.
Status: the state of an issue in a workflow. It shows you where an issue is within a workflow based on which you can assign team members or apply the relevant procedures.
Statuses are the core elements of a workflow that also determine its complexity. A simple workflow can comprise of just three-stage such as To Do, In Progress, and Done.
But if your business involves complex and multi-stage processes, you can add new statuses to your workflow. Depending on your workflow complexity, an issue can enter a status multiple times.
Remember that statuses in Jira are universal across workflows. This means that if you edit a status, it will impact all the workflows that use it. So, as a rule of thumb, try not to edit an existing status without measuring its impact on other workflows.
Transition: a description of how an issue moves between different statuses in your workflow. They can be one-way or two-way, depending on the complexity of your workflow. You can also create free-flowing or condition-based transitions. For example, you can set conditions that need to be fulfilled before an issue can transition to the following status.
Unlike statuses, transitions are specific to individual workflows. This means you can edit transitions without worrying about their impact on other workflows.
Assignee: the person or entity responsible for the issues in a particular status. Depending on your workflow, you can have multiple assignees for a status.
Resolution: the condition based on which an issue can be considered closed in your workflow.
Jira gives you a visual drag & drop interface to create workflows by adding new statuses, transitions, and resolutions.
You can use this visual interface to add new statuses to a workflow stage or create transitions between different statuses. It also makes it relatively easy to create complex workflows based on if-then conditions.
To use a workflow, you need to add it to a workflow scheme and associate that workflow scheme with a project.
You can include a workflow in multiple workflow schemes to use them with various projects.
Example 1: Workflow For A Library
Let’s take the example of Jira Workflow designed for a public library where the members borrow and return books according to the library’s policies.
Here’s a visual representation of the library workflow.
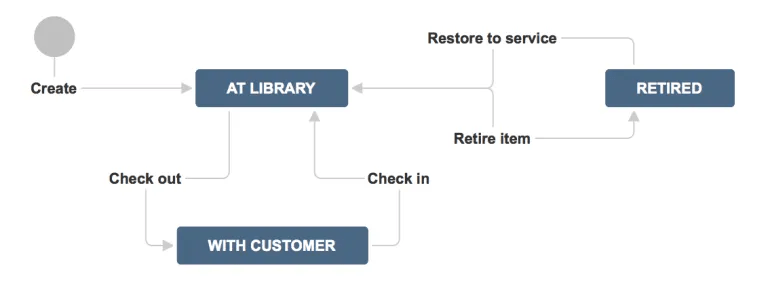
Here’s the workflow for every book issued from the library.
Step 1: The customer approaches the library
Step 2: Checks out with a book
Step 3: Checks in to return the book
Step 4: The library evaluates the book to see if it’s fit for circulation. If yes, it’s restored to service. If no, it’s retired.
As you can see, this is a more complex workflow as compared to the simple ones we’ve seen before that used only one-way transitions.
Example 2: Code Review Process
Let’s take another example of a workflow. This time, the objective is to review and approve or disapprove the code that is assigned to the QA team.
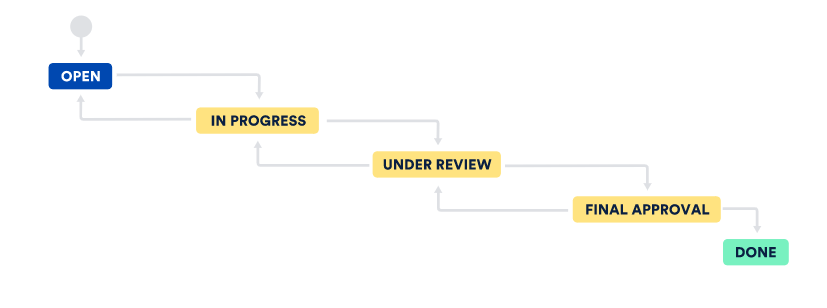
Here’s a visual representation of the workflow.
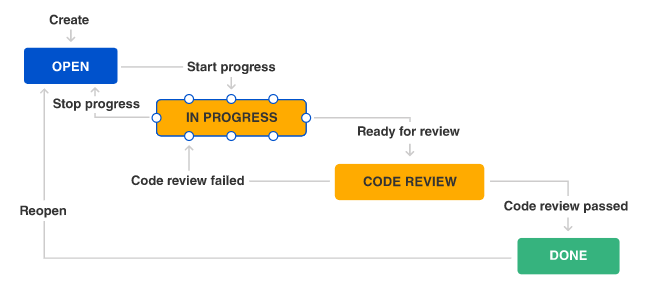
Here’s what’s happening in this workflow.
Step 1: The issue is created when code review is assigned to the QA team.
Step 2: In the In Progress status, the code is ready to be sent for review.
Step 3: In this step, the code is being reviewed. If it passes the review, it is sent to the next step. If it fails the review, it is sent back to the previous step.
Step 4: Unapproved code is sent back, and there’s no more progress on it.
Step 5: The approved code is passed on to the next workflow.
Just like the previous example, this workflow also uses two-way transitions based on the conditions defined n the workflow.
How to Get Started With Jira Workflows
Now that you understand how Jira workflows work let’s dive into the actual process of creating workflows.
Here are the steps you need to follow.
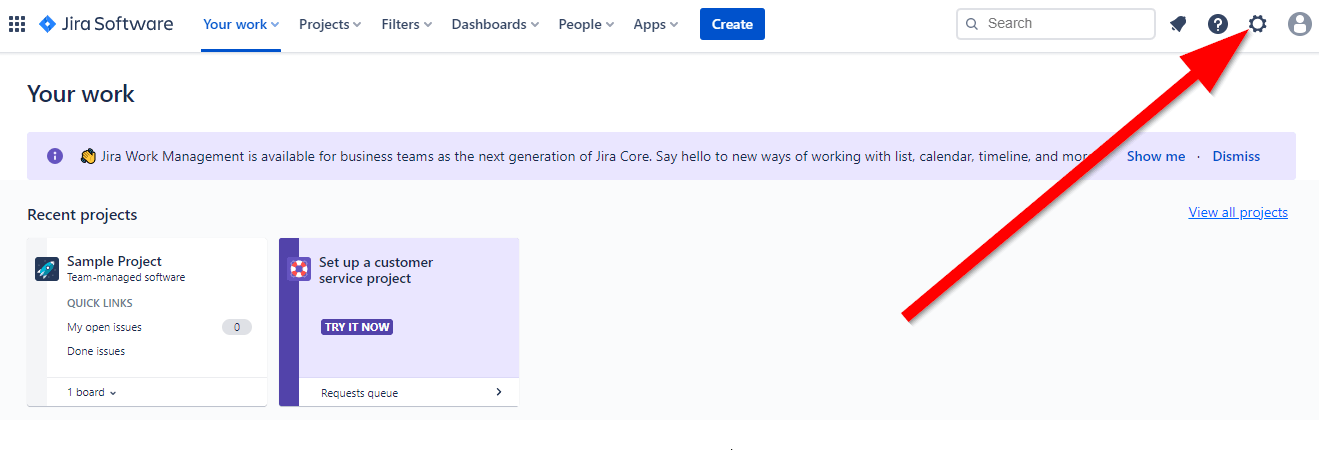
Step 1: Sign in to your Jira account
Step 2: Click on the Settings icon to open the menu.
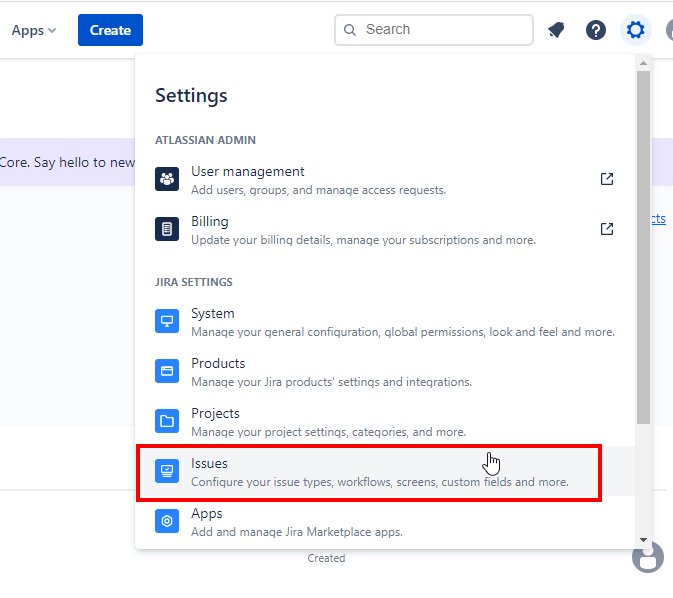
Step 3: In the Settings menu, click on Issues
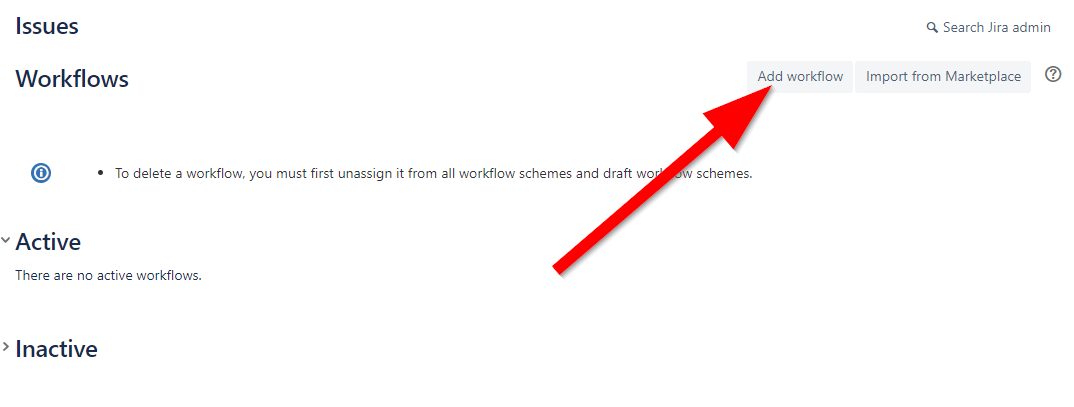
Step 4: In the left menu of the Issues page, click Workflows.

Step 5: On this page, you can either create a new workflow or import a workflow from the Jira marketplace. For this post, we’ll create a new workflow by clicking Add workflow.
Step 6: Name your workflow and add a description.
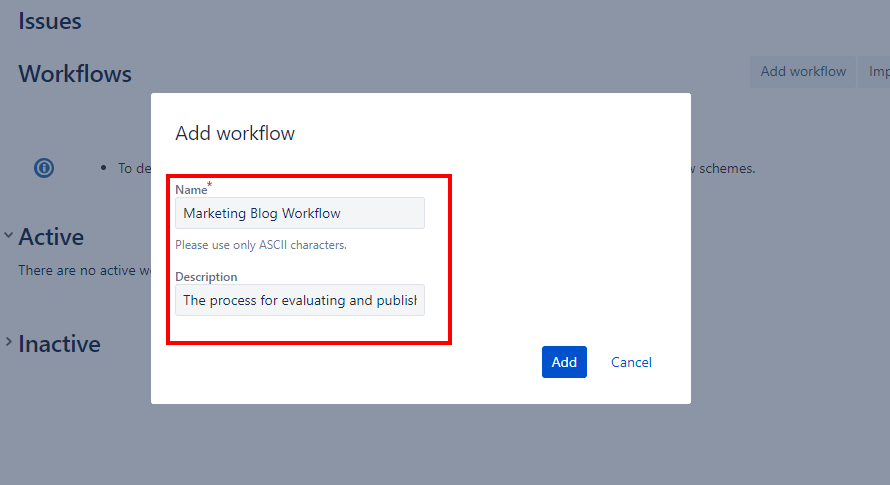
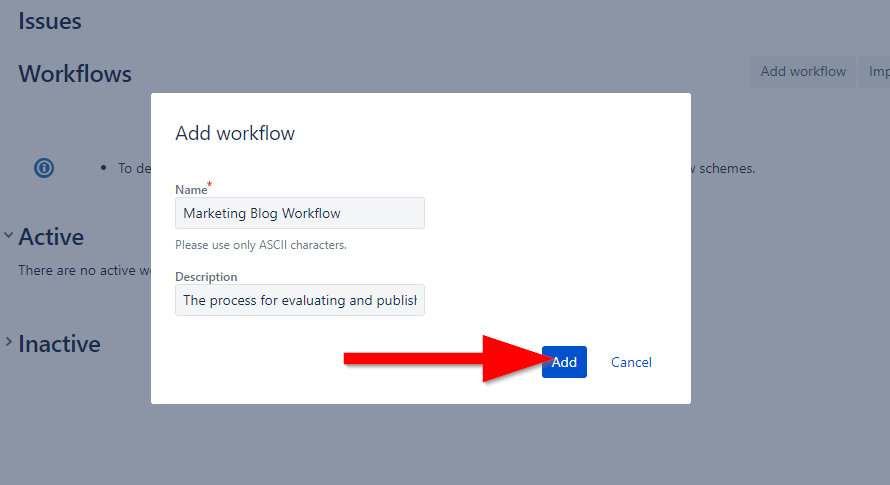
Step 7: Click Add to continue to the visual workflow builder.
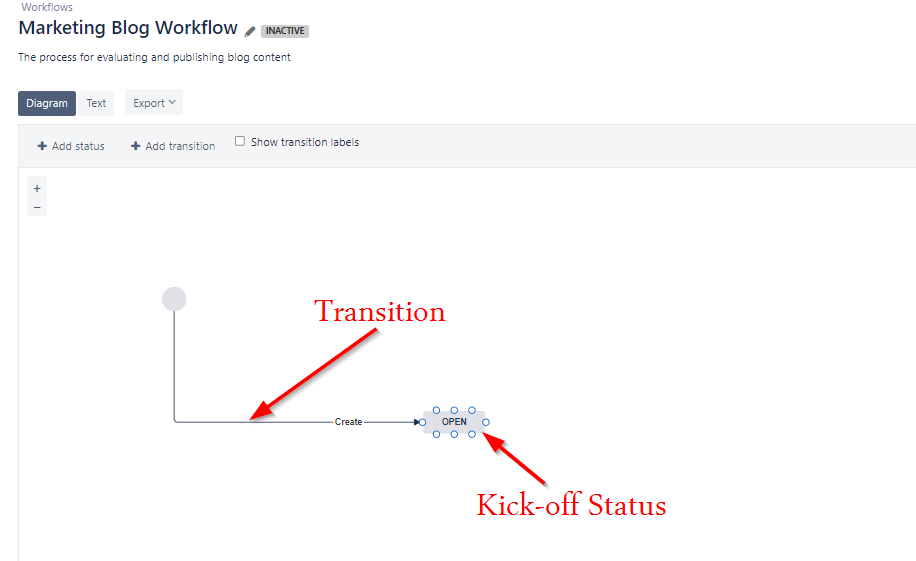
In the visual workflow builder, you can see the default issue kick-off status with the initial transition.
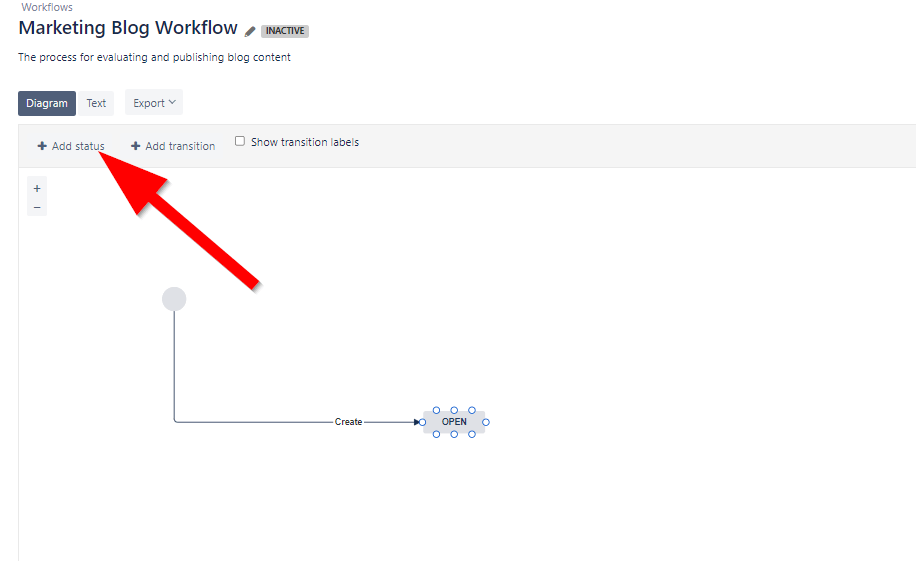
Step 8: To add a new status to your workflow, click Add status.
Step 9: Choose a status from the dropdown menu.
Step 10: Click Add to create the status.
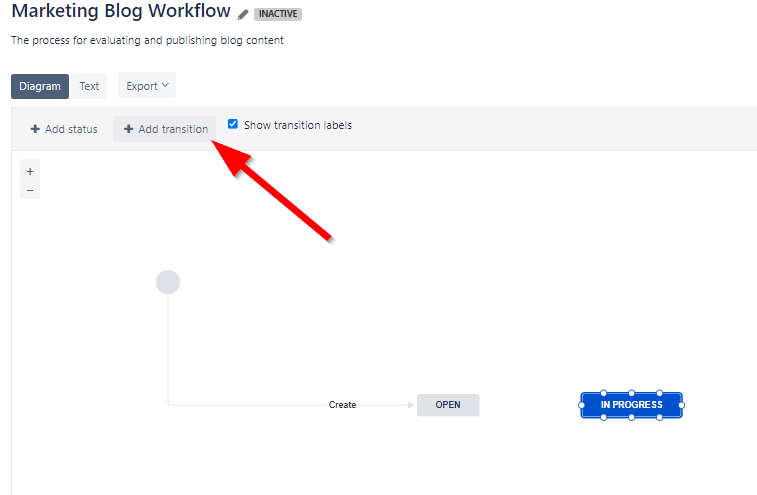
Step 11: To create a transition to your new status, click Add transition.
Step 14: Choose the initial point and the destination of the transition.
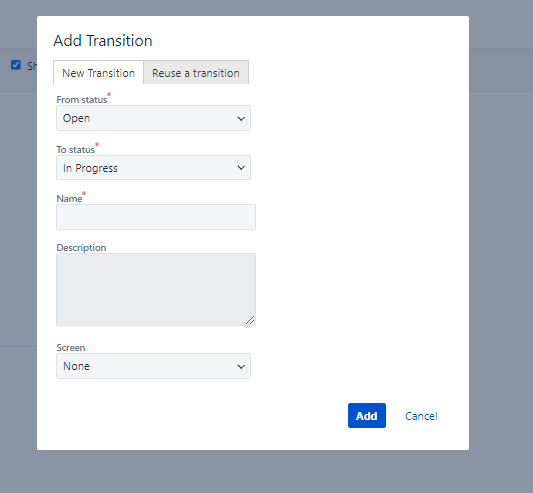
Step 15: Name your transition.
Step 16: Click Add to continue.
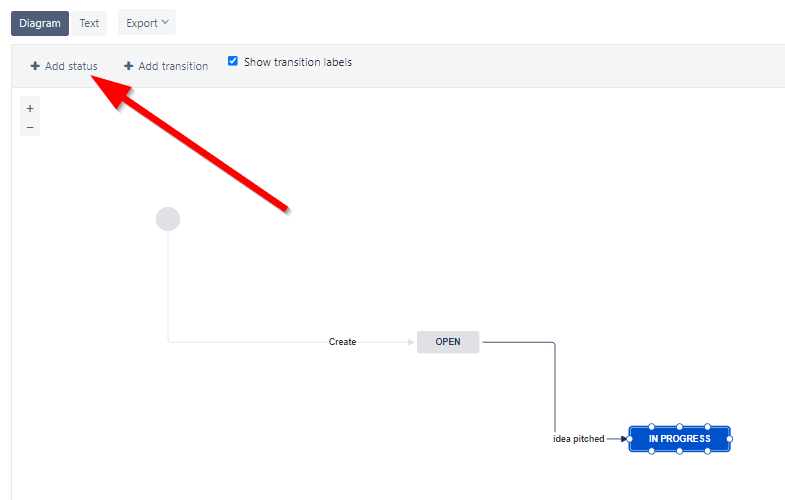
Step 17: Click Add status to create another status in your workflow.
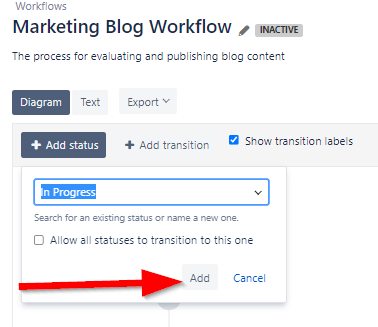
Step 18: This time, we’ll create a new status that’s not on the list. Enter the name of the status you want to create.

Step 19: Click Add to continue.
Step 20: Choose a category for your new status from the three default categories – To Do, In Progress, and Done. For this status, we’ll choose In Progress.
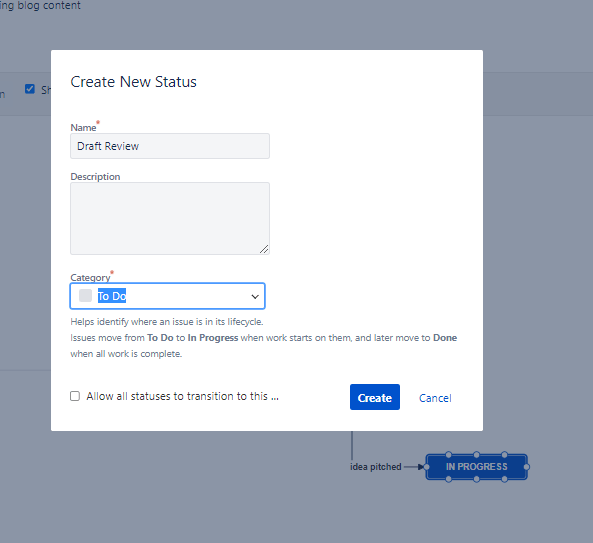
Step 21: Click Create to add the status to your workflow. You can add as many statuses as you want this way.
Step 22: Create transitions for each status the same way we did from steps 11 to 16.
Step 23: To create the ending point of your workflow, add another status.
Step 24: Since our workflow is for blog content approval, name the endpoint status as Publish.
Step 25: To configure Publish as the concluding status, choose Done from the category menu.

Step 26: Click Create to continue.
Step 27: To create a concluding transition to your workflow, click Add transition.
Step 28: Choose the relevant starting and ending statuses.
Step 29: From the Screen menu, choose Resolve Issue Screen.
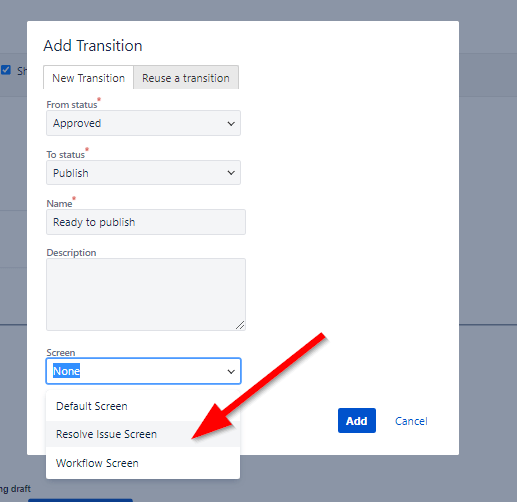
Step 30: Click Add to continue.
You can now view your complete workflow in the screenshot below.
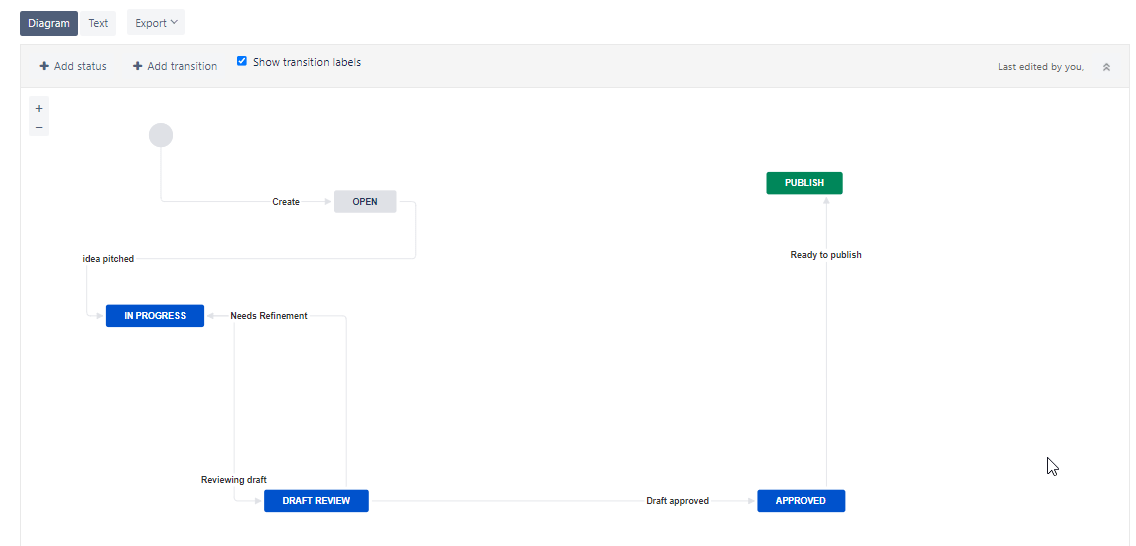
Here’s what’s happening in this workflow.
- An issue is opened when an article idea is generated.
- The idea is pitched to the editorial board that reviews it.
- If the review is unsuccessful, the idea is returned for refinement.
- If the idea is approved, it is sent to the next stage.
- Approved ideas are sent for publishing.
This is a simple workflow that editorial teams can use for evaluating content ideas.
Jira Workflow Best Practices
Here are some of the things you need to keep in mind when using Jira Workflows or creating custom workflows for your business.
Rely On Default Workflows Whenever Possible
Here’s the golden rule of Jira Workflows–don’t create a new workflow unless you really need it.
The default Jira workflows are simple and applicable to most businesses because they’ve been designed after thorough research.
Try using them whenever possible because it helps you avoid unnecessary workflow steps and confusion among your team members.
However, if your business genuinely needs a customized workflow, there’s nothing wrong with creating one.
Bring All Stakeholders On Board
When creating a customized workflow, it’s vital to seek the input of all the relevant stakeholders of the process. Share why you need a custom workflow and ask the key stakeholders to design and/or provide feedback on the most practical workflow according to your team’s needs.
Again, start simple and only add new steps/statuses if needed.
Optimize Your Workflows
Once you create a workflow with the input from all the relevant stakeholders, you need to review it for any possible improvement areas and loopholes.
You can do this by making the workflow a part of your operations and asking your teams for feedback. If you see blockages at different workflow steps or find your team struggling to communicate transparently, reevaluate your workflow.
Workflow optimization often takes multiple iterations, so don’t hesitate to revise your workflow as many times as needed.
Manage User Permissions
Jira has various user roles with unique permissions. For example, only administrators can create and edit workflows. The board admins have limited editing permissions but cannot create or delete workflows.
Keep these permissions in mind while assigning roles to different team members since you’d want to limit workflow editing permissions to only the most critical team members.

