The Ultimate Manual to Jira Bitbucket Integration
Bitbucket is an excellent tool that is able to help people collaborate in real-time while working with Git-based code. One of the most powerful integration tools is Jira, a bug tracking and project management software that users can choose to employ on their accounts for no additional cost.
In order to completely integrate these two systems together, there are several options that each include multiple steps to take. Luckily, we’ve done the research on these so you don’t have to.
What is the Jira Bitbucket Integration Anyway?
The Jira integration will allow Bitbucket users to automatically keep your team up-to-date with any changes in code and when a feature is ready to be deployed.
By using this integration, you’ll be able to easily see a full picture of your progress, changes, and next steps all in the same place.
How Jira Bitbucket Integration Works
Bitbucket has two main kinds of integration for people to utilize: Jira and Trello. With Jira, there is a slew of benefits, from the ability to automate tasks to visualizing your project with ease.
In order to integrate these two tools, there are a few steps that users must follow. However, once the two have merged, they will be able to effectively communicate with one another. The main benefits of this are to automate repetitive tasks, increase organization, and allow even more software to join the online party.
Example 1: Automate Repetitive Tasks
One of the primary benefits of having a Jira Bitbucket integration is the ability to automate tedious tasks.
Rather than having to do the same routine tasks over and over again, Jira allows users to program these tasks into the platform. Atlassian, the parent company of Bitbucket and Jira, has a handy guide to show the various options that the program supports.
There are a variety of templates to utilize, from creating commits to PR codes. Essentially, in the program, you can choose that one element that will trigger action from another element.
For example, one trigger could be a pull request. Then, you’ll customize this trigger with whatever rules you have. Users can make many of these depending on what they are hoping the software to accomplish. Once you have customized the triggers that you want, the software will be able to detect them automatically and then employ an automatic reaction so you don’t have to do it over and over manually.
Example 2: Heightened Organization
One of the primary benefits of the integration between Jira and Bitbucket is a heightened level of organization and communication within the website, all for no extra cost.
With this integration, you’ll be able to see your assigned Jira issues right from your Bitbucket dashboard. This means that instead of hopping back and forth between different browsers or accidentally forgetting to check Jira, you’ll be able to see all of your tasks in one place.
To see this while working, users simply have to go to their Bitbucket dashboard and look to the left-hand side. There will be a tab called Jira issues. If you click on it, you’ll be able to see what the issues are, leave comments, view attachments, and make edits.
Not only will you be able to see Jira issues, but you’ll also be able to create alerts that there are issues right from the Bitbucket site. This can be helpful for both you and your potential team.
Jira issues can be created right from pull requests, which are a part of the Bitbucket Code Review. Essentially, if someone leaves feedback on work, users are able to assign the ticket to a specific project or even click into the ticket and begin collaborating right then and there. Ultimately, this integration puts more work all in one place and allows users to communicate with each other more effectively within the Bitbucket framework.
Example 3: Atlassian Open DevOps
Finally, the last way that this integration can be applied to your Bitbucket account is with Atlassian Open DevOps.
According to the Atlassian website, this is a tool that is built from Jira but incorporates qualities from multiple software tools. These include Bitbucket, Jira, Confluence, and Opsgenie. Unsurprisingly given its name, Confluence is a team workspace whose main goal is to help people and work better flow together. Opsgenie is an incident management platform that’s main focus is on efficient alerts.
In order to access these capabilities, you’ll need to get the Jira software. With this, users can switch and swap tools from a variety of sources with just the push of a few buttons. The main benefit of this feature is being able to access a wide variety of tools across multiple platforms seamlessly and on one single page.
How to Get Started With Jira Bitbucket Integration
There are a few different options when it comes to integrating Jira and Bitbucket, depending on your needs. To ensure that you are able to complete the integration regardless of your package, we will run through each option.
Link Bitbucket with Jira Software from Bitbucket Account
Users can integrate with Bitbucket using application links. This can be done during the installation of Bitbucket with Setup Wizard, or at any time after you install Bitbucket.
For now, we will assume that you already have a Bitbucket account. After you log in, scroll to the bottom of the page. Here, you should see a section that says Jira Issues. Underneath it will be a link called Connect Jira Sites.
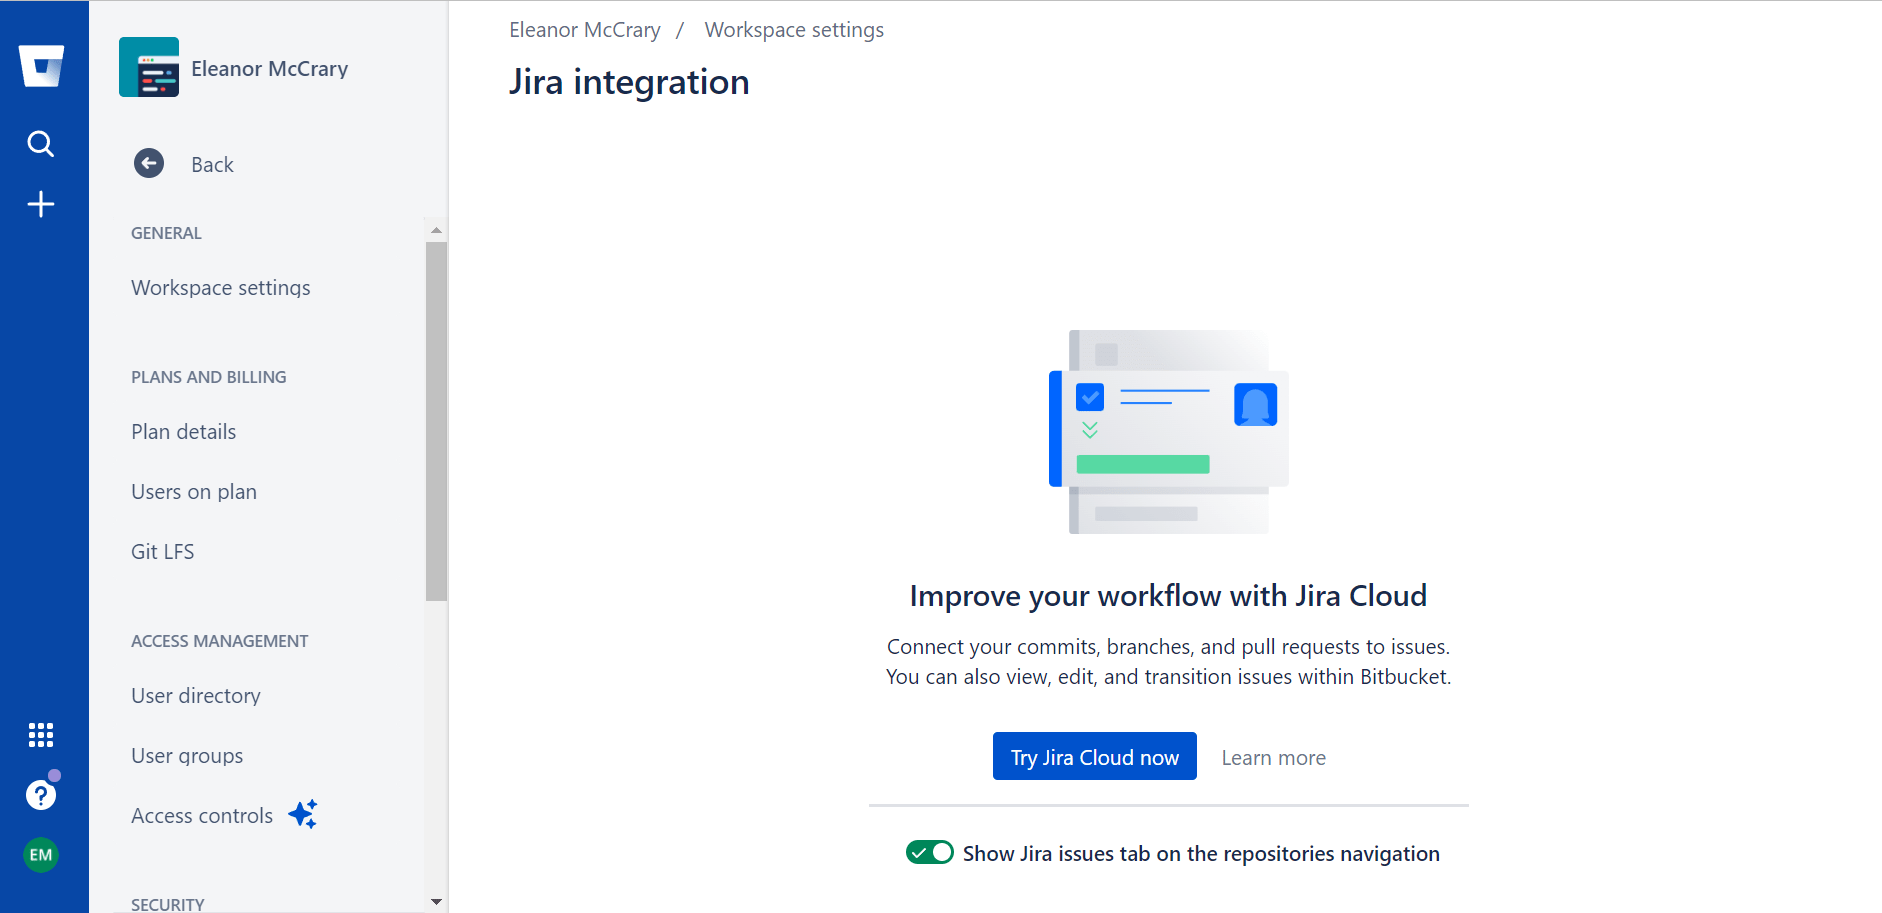
Once you click this, you will be taken to a new window.
Here, you’ll be able to click a blue button that says Try Jira Cloud Now. After this, you will be directed to the Jira website on Atlassian. On this next website, you will have the option to add a second product or continue with just the Jira Software. One of these options will be Jira Service Management.
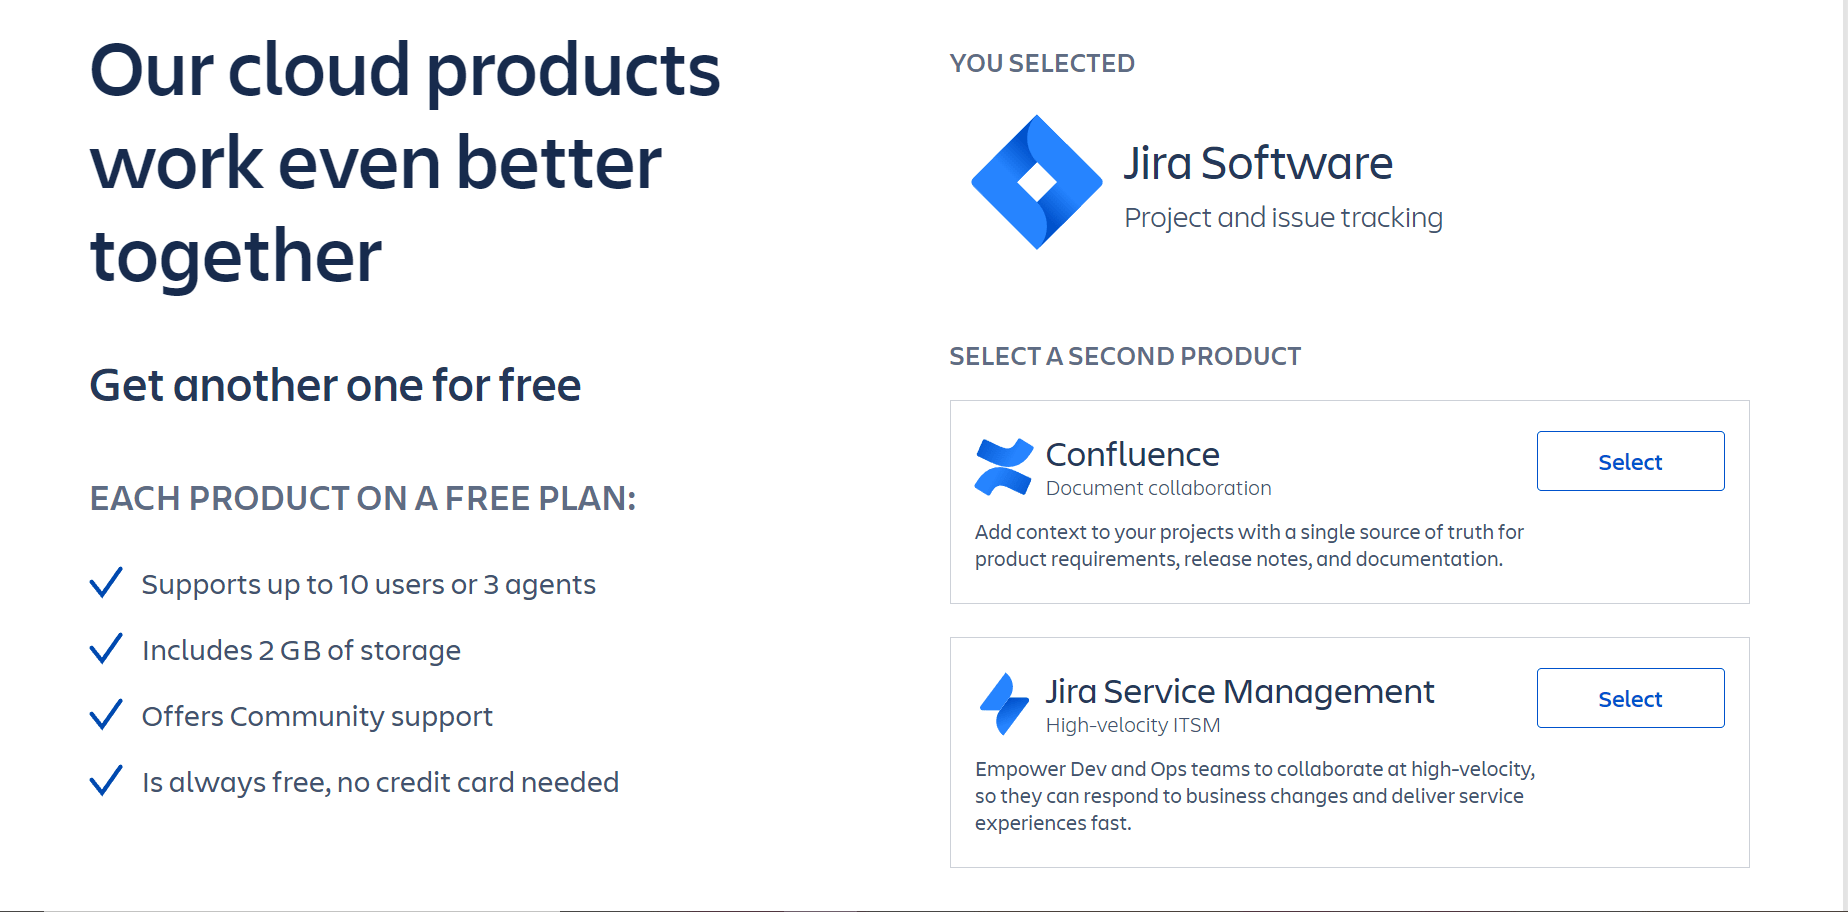
You can choose whether or not you would also like that application. With it, users will be able to “Empower Dev and Ops teams to collaborate at high-velocity, so they can respond to business changes and deliver service experiences fast.” So, while you focus on building and operating software, Jira Service Management integrates Atlassian and partner tools automatically.
Like the Jira Software, Jira Service Management is also free and requires no credit card information to acquire. Once you make your decision, you’ll be ready for the next step. Click the blue Next button at the bottom of the screen. After this, you’ll be able to register for an account, either with a Google account or another one.
After this, you’ll be prompted to name your Atlassian website. A safe bet is to name it after yourself or after your company.
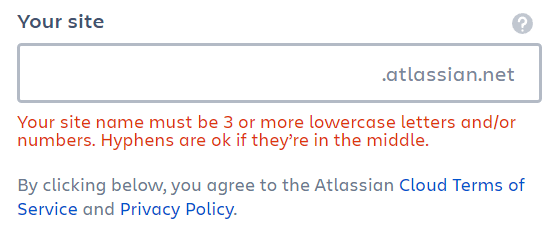
Whatever you choose, make sure that you like it. Once you name it, it is very difficult to change. To do so, you would need to buy a new cloud system, name it what you want, export the data from your old website, and then import it into the new one. Either that, or you could appeal to Atlassian, but they will not switch the names of URLs regularly.
Take some time to decide on your website’s name. After that, you’ll be taken through a series of prompts so that Jira can best accommodate your business. You’ll be able to tell the software if you and your team are familiar with Jira yet, what you are hoping to use the software for, and even the kind of schedule you have for your work.
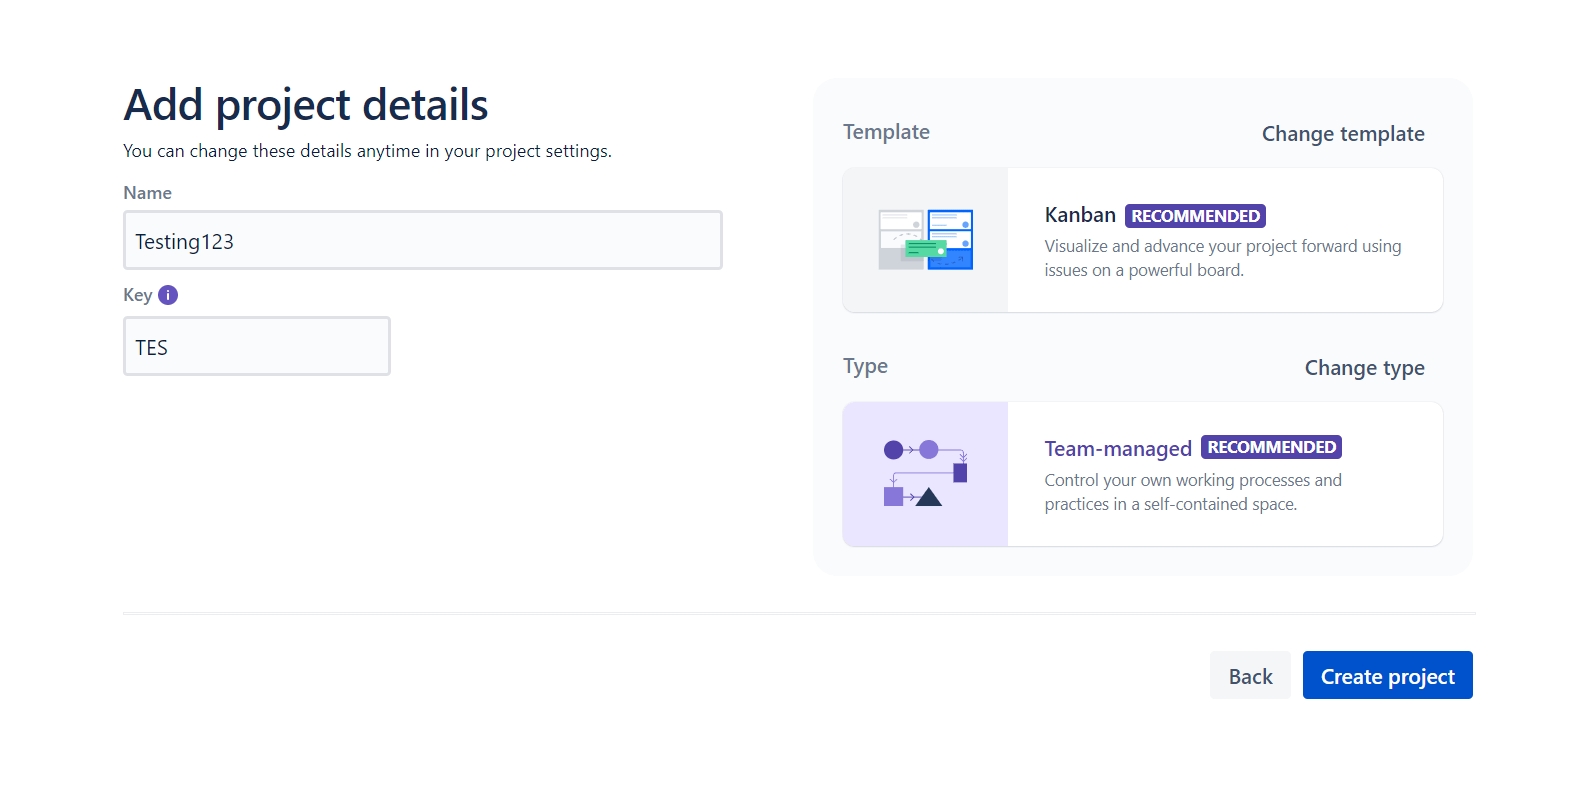
The last step of this process is adding your project details. You can name your project, add a key, and even decide what kind of template you want to use for it. However, don’t stress too much about this step – any of the decisions you make can be changed in your project settings at any time.
Select the ones you like the most, or just go with the ones Jira recommends automatically, and then press the blue Create Project button on the bottom right side of the screen.
After this, go back to your Bitbucket page. Refresh, and suddenly the page should give you the option to connect your new Atlassian website with Bitbucket. Click this button.
A pop-up should open up with the message “Jira app is requesting access to Bitbucket.” Choose the option that says grant access. You’ll have to confirm to grant access one more time, and then you should see another popup that says “The (workspace name) is connected. From here, your workspace will automatically refresh, and the software you selected will be available to use.
Link an Existing Jira Account
Let’s say that you already use Jira, but just need to link that account to your Bitbucket account. According to the Atlassian website, there is another option to integrate the two software tools together.
Just like the first method, you’re first going to want to start by getting onto your Bitbucket account. Start at your homepage, and then click on the Settings tab.
From here, you should be able to click on Application Links. Once you get here, you’ll see a spot to enter a URL. This is where you will type the URL of the Jira website that you want to connect to your Bitbucket Server. Once you have that written, the only thing left to do is press the Create new link button.
From here, you should be able to proceed like normal.
Integrate Jira Software Cloud with OAuth
Finally, you can integrate the Jira Software Cloud with the Bitbucket Data Center by using OAuth. OAuth is an open standard authorization protocol. In layman’s terms, all OAuth really does is allow different websites or applications to talk with one another safely. It makes the various applications able to access one another’s information, while still protecting the individual passwords for the separate accounts.
By doing this, the two software platforms will be able to communicate back and forth. This means that they’ll be able to share development information, like branches, commits, and pull requests. Once again, this ability will allow users to have more ease of use and more information in one place.
To do this, you must be the system admin for Bitbucket as well as the website admin for Jira Software Cloud.
To begin, you’ll actually want to start on your Jira account this time. Once you’re on the homepage, navigate to the upper right-hand corner where you’ll see a gear icon. This is the Jira settings tab.
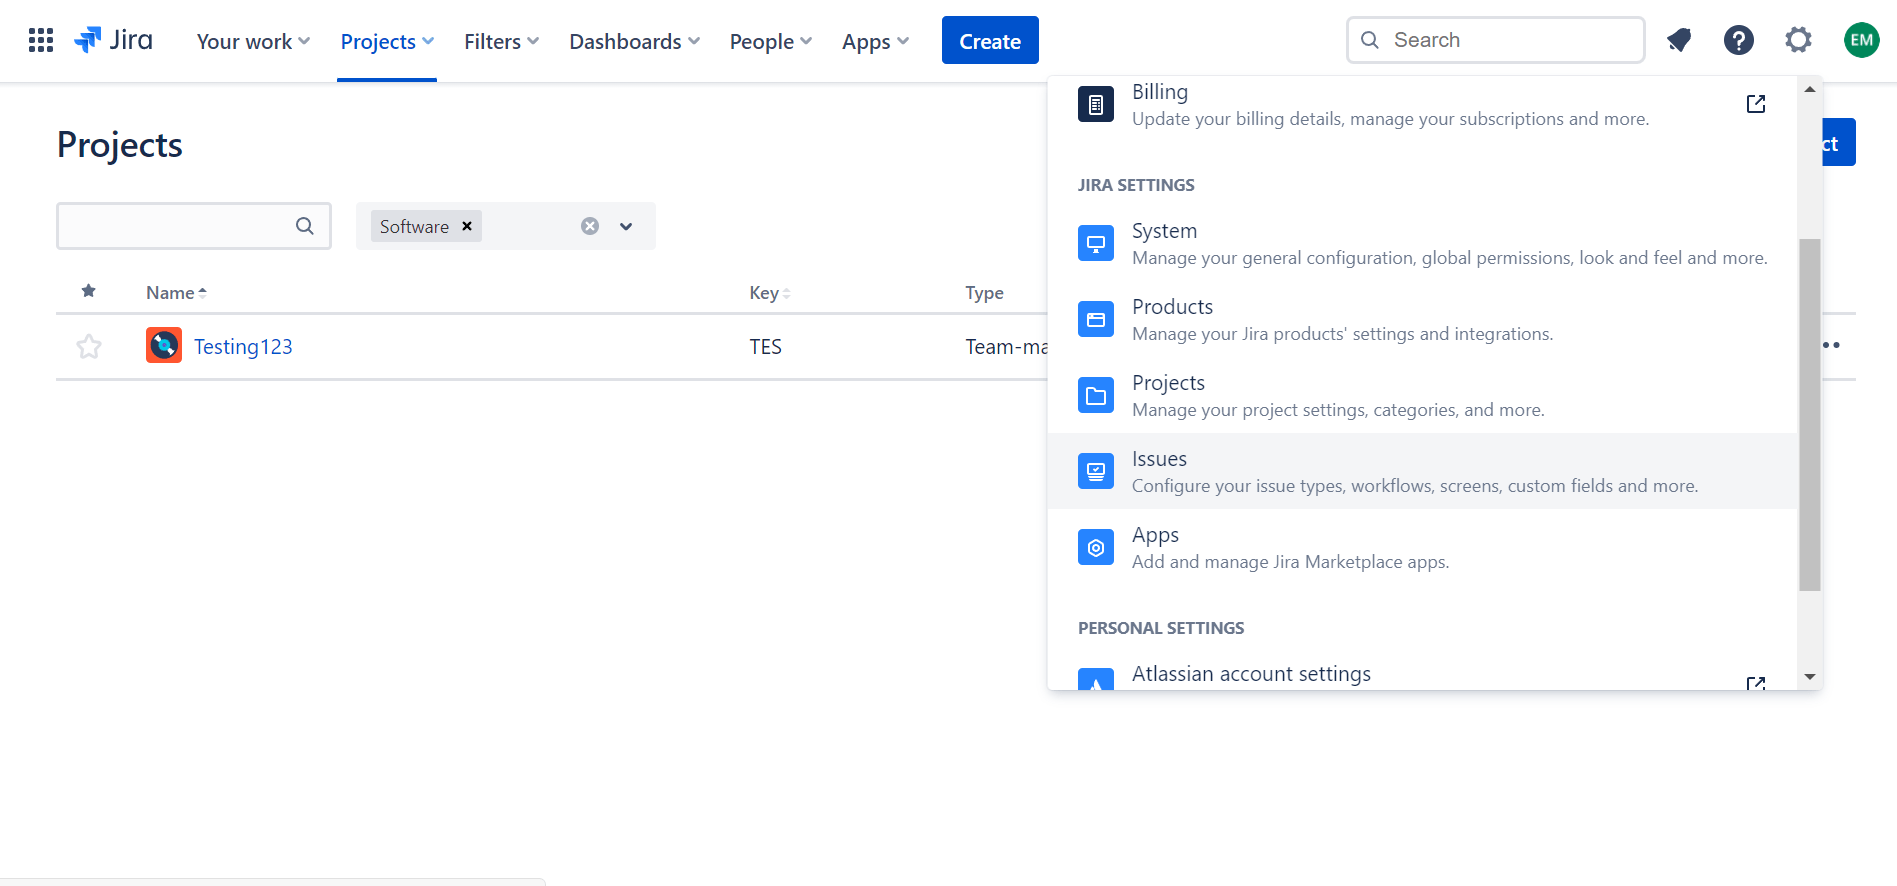
Click this, and then scroll down until you see the Apps section under Jira Settings. Go here, and on the left-hand side you’ll see a section called OAuth credentials. Click this, and then select Create credentials. From here, you’ll be prompted to add a few credentials.

You’ll need to come up with the App name, enter a Bitbucket-based URL, your logo URL, permissions, and the create branch template URL.
Once this is done, select the Create button.
From here, open up the Bitbucket Data Administration area. Under System, select Jira Cloud Integration and then click Register site. From here, another form should pop up that looks similar to the one on Jira. You’ll need to fill out your website name, URL, client ID, and “secret” which is just the passcode you made on the original Jira website.
Once you’re done, click Submit.
Although the first method is the most user-friendly of the three, according to the Atlassian website as of December 19, 2021, each of these methods should be able to work on either the Bitbucket or Jira websites.
By integrating these powerful tools together, you’ll be able to heighten your Bitbucket account to a superior quality for absolutely no extra cost. While there is no requirement to integrate the applications, there are very few downsides. The setup is relatively easy and only needs to be done once for a slew of benefits that improve the ease of use on the website.

