The Ultimate Manual to Integrating Jira and Confluence
Managing a major product successfully often boils down to being able to juggle the small day-to-day steps of the project, all while keeping an eye on the overall picture.
Combining two Atlassian software products like Jira and Confluence will make managing the project more efficient. A Jira and Confluence combination can especially help with communication, ensuring all team members have the real-time data they need. We’ll discuss the important aspects of a Jira-Confluence integration.
What Are Jira and Confluence Anyway?
Jira and Confluence work as independent software products–Jira is a project tracking platform and Confluence is a knowledge management tool.
But Atlassian originally built Confluence and Jira to have complementary features, which makes integrating them a natural process.
With the integration in place, Confluence users have the ability to view and reference aspects of Jira’s project tracking within a Confluence-built page. From within Confluence, users have the ability to participate in discussions about projects the team is tracking in Jira as well.
When working inside Jira, team members are able to access documents stored in Confluence, ensuring they always have access to up-to-date information. Users can send tracking and reporting data about any project from Jira to Confluence, displaying it for all users to see.
How Integrating Jira and Confluence Works
When putting together an integration between Confluence and Jira, it’s important to install the two software packages separately. Although the two packages work together well, they both were designed as standalone software products first.
Benefits of a Jira/Confluence Combination
By integrating Confluence and Jira, organizations are able to develop knowledge-sharing tools that work for the entire team. Confluence simplifies the process of creating real-time changes to documents, keeping everything up to date for the team. The organization then can use those documents to make progress on projects tracked in Jira.
Some of the benefits of using these two software packages together include:
- Accurate information: When planning projects in Jira, the team members will always have the most accurate and the latest information from the documents in Confluence.
- One source of documents: Team members no longer must search for a random document in an email chain. Rather, all documents that the Jira team needs to complete a step in a project will appear in Confluence, making them easy to find.
- Document consistency: Through Confluence, teams can set up a document template, ensuring all documents the Jira team needs will have the same outline and formatting structure.
- Full clarity: When a team member finds an issue in a document in Confluence, it’s easy to create a to-do card in Jira. All team members will know which tasks need completing and any deadlines that exist. Everyone stays on the same page about the most important project tasks.
- Report creation: Jira offers multiple templates for creating reports that show the status of a project. With the integration, those reports can migrate into Confluence documents, so all team members can see them instantly, even when working in Confluence.
- Full visibility: When a team is working with the Confluence and Jira integration, full transparency on the project’s progress exists. Everyone can see the issues that need fixing, as well as the progress that’s occurring.
Example #1: Setting Up Real-Time Views
One of the best ways to make successful use of this integration is by setting up views from one package in the other package.
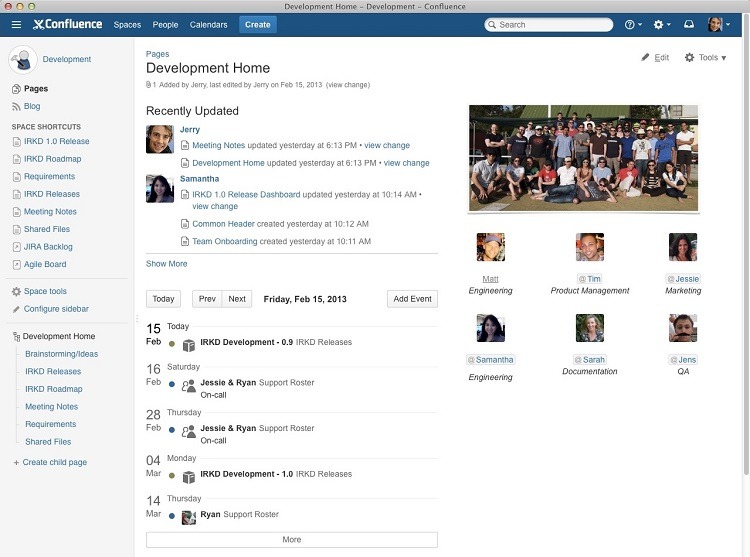
Team members may want to view the dashboard from Jira within the Confluence software, for example. Through the integration, administrators can configure Confluence to display certain elements of Jira. This ensures only the most useful and important items appear in Confluence, which avoids bogging down the software with unnecessary information.
On the flip side, administrators can choose to have certain Confluence documents displayed inside the Jira dashboard.
By displaying items in the two types of software in real time, team members will have immediate access to the information they need.
Example #2: Giving Agile Teams the Tools They Need
Agile project management teams receive a significant benefit from a Confluence-Jira integration. Agile projects are those where team members break down a large, complex project into smaller tasks that become more manageable.
The combination of Confluence and Jira can give agile team members help with a few key tasks for the project.
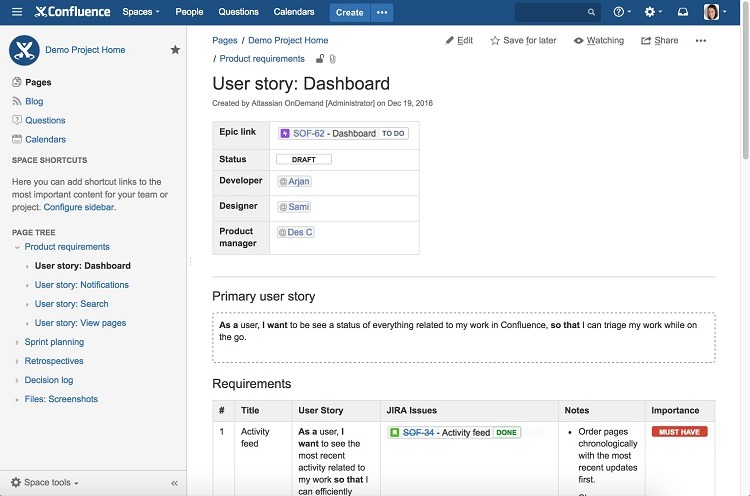
Defining and Planning the Project
When working on a Jira project in the early stages, team members can create documentation in Confluence. If developers are creating a new product as part of the project, these documents would lay out the scope of the product under development. This ensures that all team members have full clarity about the requirements for the product under development.
As the team runs into situations where the product documentation requires updating and editing, just make the changes in Confluence. Everyone involved in the project in Jira then can gain access to the new document parameters immediately.
By using this integration, it’s easy to see which team members made changes to the documentation as well. There’s always a trail to follow to see any changes to the project’s scope.
Managing Progress in the Project
As the product moves closer to an official release date, team members can create release notes in Confluence, pulling data directly from Jira to maintain accuracy.
Additionally, team members can create a template in Confluence that helps them track the progress of the Jira project. After the project ends, these templates make it easy to see exactly how the project moved forward and whether any correctable errors occurred along the way. Team members then can avoid those errors in the future.
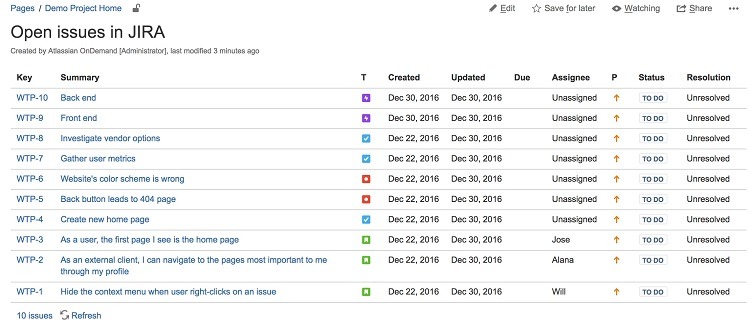
Example #3: Creating Issues for Display
After spotting an issue in Jira or Confluence, team members can directly create a link to the issue in the other software package. This saves time versus trying to perform this step without having the integration in place.
Without the integration, team members could end up creating an error or missing some key information when trying to create a link to the issue in the other software package.
Creating an Issue in Jira From Confluence
When working in a Confluence document, users who spot problems can create an issue directly in Jira.
Highlight the text in Confluence that relates to the issue. Click on the popup Create Jira Issue button to start the process. Then follow the prompts.
After completing the process, the issue will appear as part of the Jira project. This allows team members using Jira to see the issue and to take care of it to keep the project moving forward. Team members don’t have to regularly jump into Confluence to check for issues.
Creating an Issue in Confluence From Jira
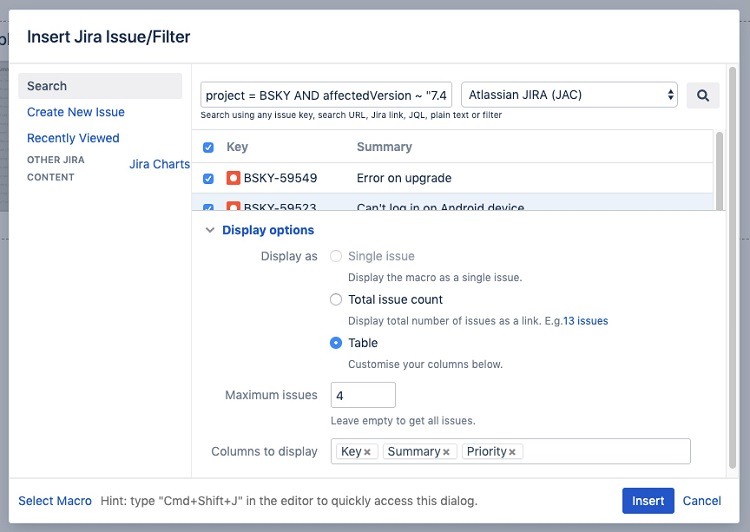
Once the Jira-Confluence integration is in place, linking a Jira issue in Confluence is an easy process.
Click on the + menu at the far right of the Confluence ribbon menu and click on Jira Issue/Filter. Use the prompts to navigate to the team’s Jira account page and find the issue to highlight in Confluence. Then select the method to use to display the issue in Confluence before clicking Insert.
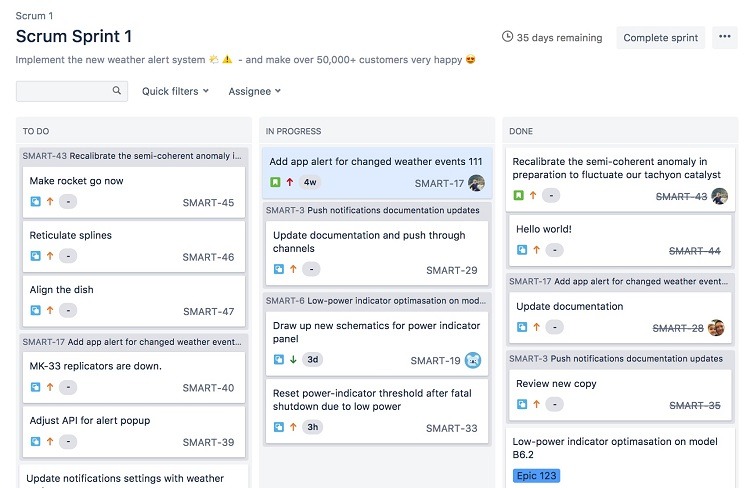
Example #4: Manage Sprints in Both Jira and Confluence
When a project would benefit from a sprint process, the Jira and Confluence integration can make the work go smoother. A sprint is a process by which teams try to complete work within a fixed time period, usually a short amount of time. Sprints work well for helping a development team focus on delivering an application quickly.
To have success with the sprint, the team must be able to access the resources it needs as quickly as possible.
Having the necessary documents available in Confluence gives Jira users the ability to find them in a short amount of time. Rather than trying to search random emails or various storage locations for the documents, they’re all available in Confluence. This capability keeps the project on track and moving forward, giving the team a better shot at hitting the sprint deadline.
Confluence also contains a template that can help the team set up the plans for the sprint. They then can transfer that information from Confluence into Jira, thanks to the integration. This sets up a baseline plan for managing the sprint project that users can tweak from within Jira as needed.
Example #5: Adding Jira Gadgets to Confluence
When using Jira, team members have the option of making use of gadgets. These are widgets that allow team members to see summaries of various aspects of the projects in Jira, including things like:
- Progress toward the final goal
- Reports about the project
- Lists of issues Jira is tracking
- Lists of tasks assigned to a particular team member
- Chart showing average of days issues exist before solving
Dozens of gadgets are part of Jira naturally. Other gadgets are available through the Atlassian Marketplace as plugins.
As part of the Jira/Confluence integration, users can add the Jira gadgets they use most often to the Confluence window. By placing the gadgets from Jira into Confluence, those using Confluence can immediately see real-time information on what’s happening in Jira with a particular project.
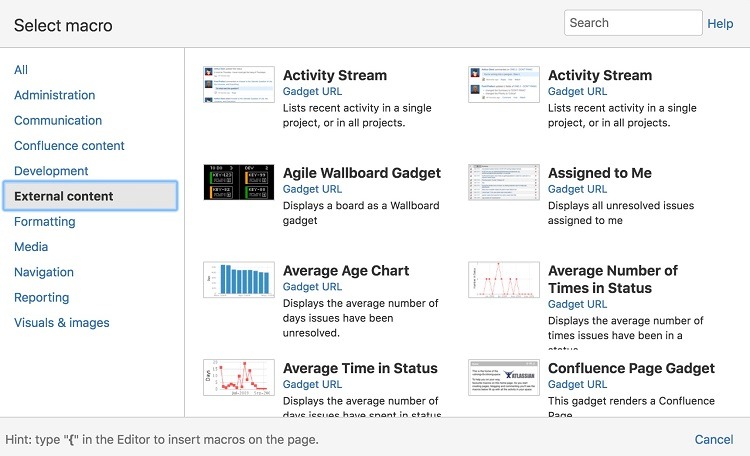
Set Up the Jira Gadget for Use With Confluence
Start in the Jira window. Find the gadget to display inside the Confluence window. Click the Display XML link to show the URL address for the gadget. Highlight and copy the address.
Toggle to the Confluence window. Open the administration page inside Confluence. In the search bar, type external gadgets and hit Enter. Click on the External Gadgets link in the list of search terms.
The subsequent window will include a text box for pasting the URL from the Jira gadget. After pasting the URL into the text box, click the Add button to insert the gadget into Confluence. The gadget will retain the same name it had in Jira when using it in Confluence.
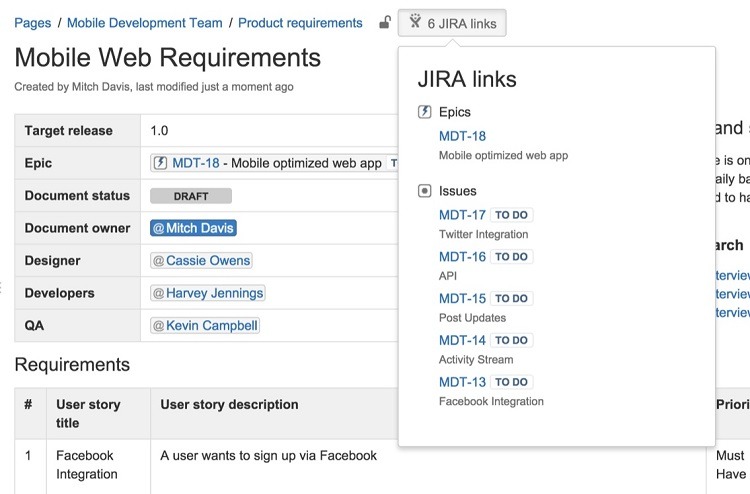
Example #6: Toggling From Confluence to Jira
Although the Jira-Confluence integration makes using the two packages much easier, your team members don’t have to stick to the integrated aspects of the two software packages. Instead, team members can switch back and forth as needed using buttons within the software.
Within the Confluence software window, click on the Jira Links button. This allows team members to open the Jira software and perform some quick work before going back to the Confluence window.
How to Get Started With a Jira and Confluence Integration
When it’s time to begin using Confluence and Jira together, follow these steps to start the process.
Subscribe to Both Software Packages
Setting up the integration requires subscriptions to both Confluence and Jira to make the integration work. Having cloud subscriptions to both packages will make the process work especially smoothly.
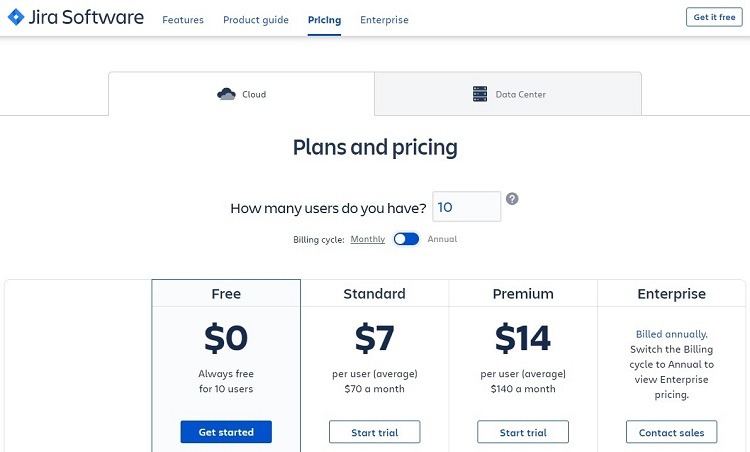
Pricing tiers for Jira include:
- Free: For up to 10 users at one site.
- Standard: $7 per month per user for up to 10,000 users at one site.
- Premium: $14 per month per user for up to 10,000 users at one site.
- Enterprise: Contact Atlassian for a price quote for up to 10,000 users per site with no limit on the number of sites.
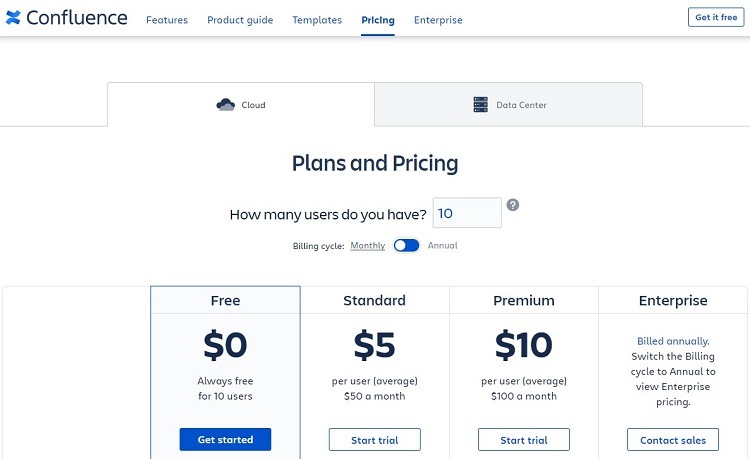
Pricing tiers for Confluence include:
- Free: For up to 10 users at one site.
- Standard: $5 per month per user for up to 10,000 users at one site.
- Premium: $10 per month per user for up to 10,000 users at one site.
- Enterprise: Contact Atlassian for a price quote for up to 10,000 users per site with no limit on the number of sites.
Set Up The Application Link
One of the most common methods for integrating two separate software tools is to place them into a container within Tomcat, an open-source Java servlet by Apache. Atlassian does not recommend doing this with Confluence and Jira. This type of container installation has a high probability of creating problems and software errors with Atlassian products–they just don’t mesh well.
Instead, to create the integration between the two packages, use an application link. Those with administrative privileges in both Jira and Confluence can set this up pretty easily, so once you give yourself or your team leader those privileges, they can follow these steps to start the integration via the application link.
From within the Confluence software, click on the Settings icon in the upper right corner of the software window. Look for the Confluence Administration section and click on General Configuration.
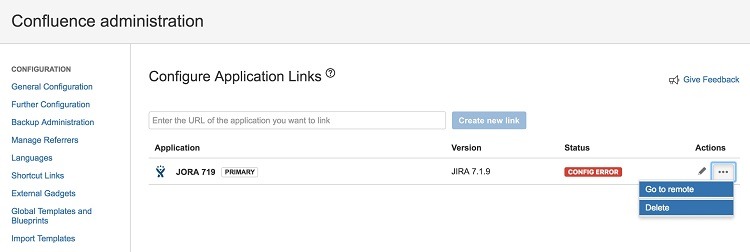
On the left side of the page, the software will display all of the options available. Scroll about halfway down the list and click on Application Links.
In the Configure Application Links window, enter the URL address for the organization’s Jira account in the text box and click the Create New Link button.
When prompted, be sure to select the checkboxes that tell the software that the servers have the same set of users and that you have administrative privileges for both accounts.
After making those selections, follow the steps in the installation wizard to complete the Jira-Confluence integration. You’ll need to enter some information about the organization’s Jira and Confluence accounts to complete the wizard.

