How to Zoom From Your Phone
Over the last couple of years, Zoom has become an intrinsic part of life and continues to be despite many organizations going back to work in person.
From conference calls in the car to when your laptop breaks, it’s necessary to know how to pivot from the web version of Zoom to the mobile version. Luckily, Zoom has an easy-to-use interface, so it’s pretty simple to kickstart your mobile Zoom experience.
1. Hop on the App Store
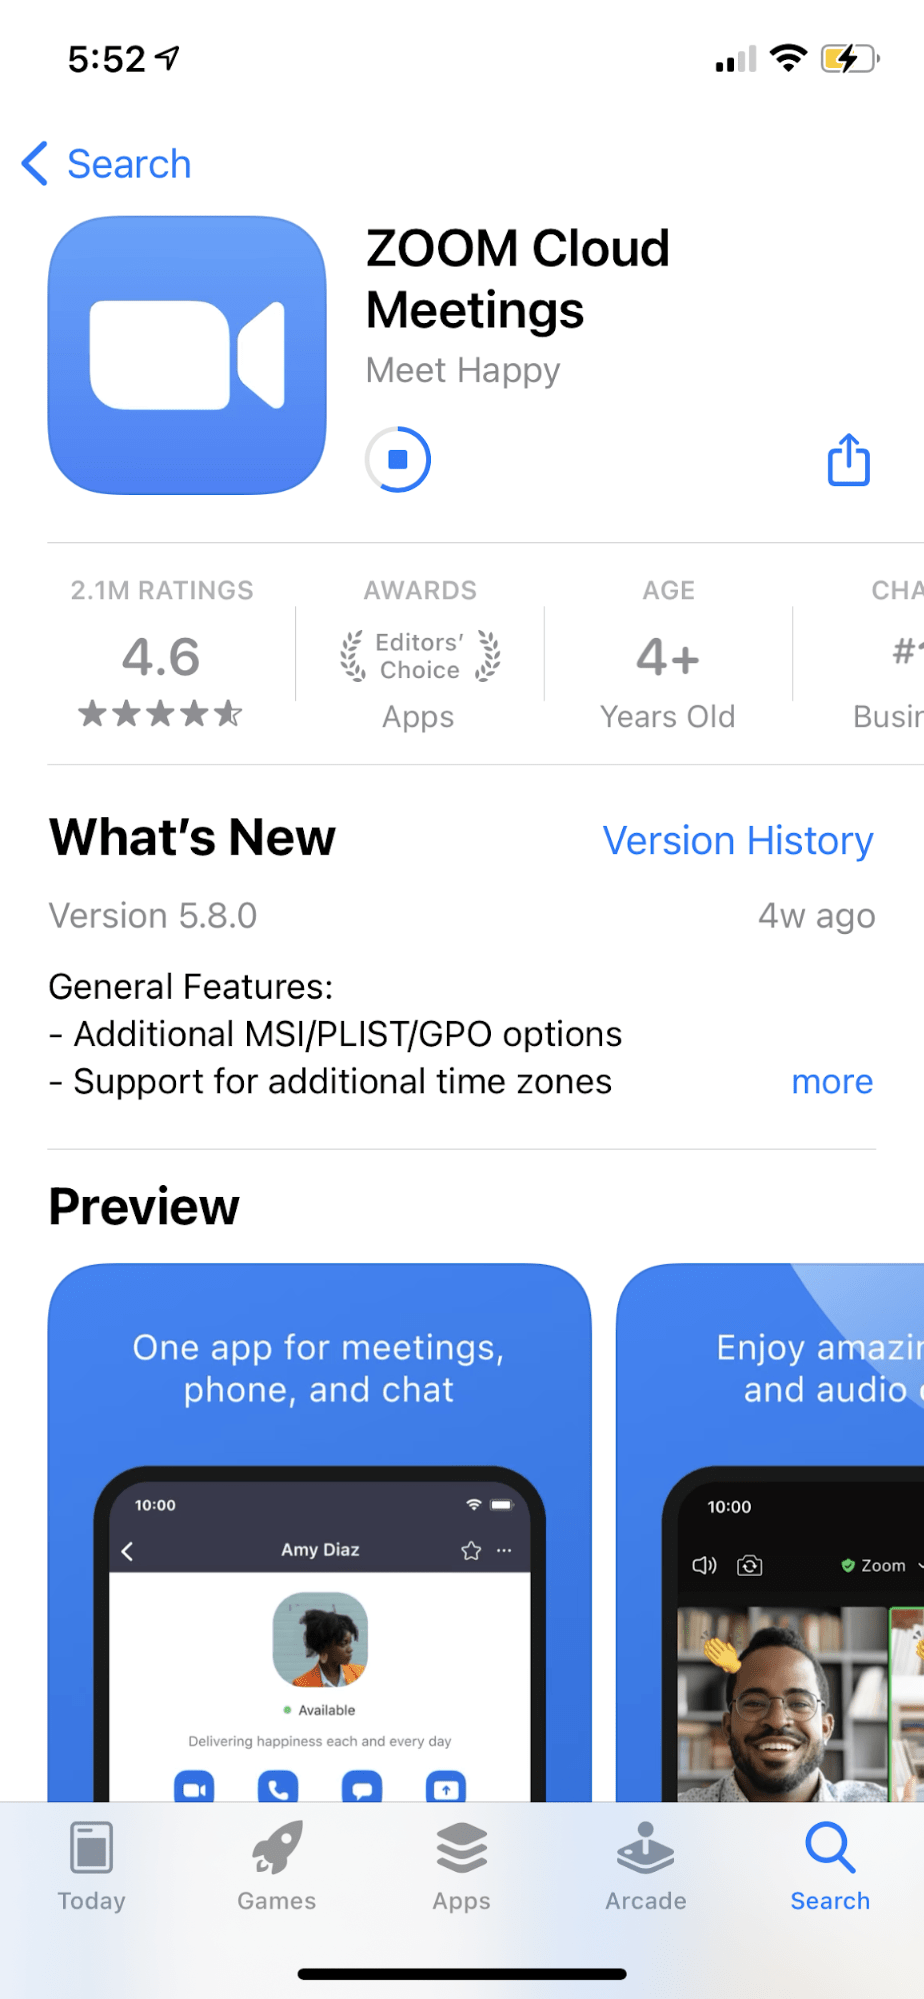
For iPhones: Open up the blue app on your phone that says “App Store.” The logo is a dark blue square with an “A” written in white.
Once you’ve opened the app, look at the bottom right-hand corner. Click on the magnifying glass icon with the word “Search” underneath it. From there, click on the gray search bar at the top of the page. Here, you will type in the word “Zoom,” and the app should appear.
Click on the app labeled “ZOOM Cloud Meetings” and hit the dark blue button that says “Download.” From here, you may need to enter your Apple ID information. Once you do, the app will begin downloading on your phone.
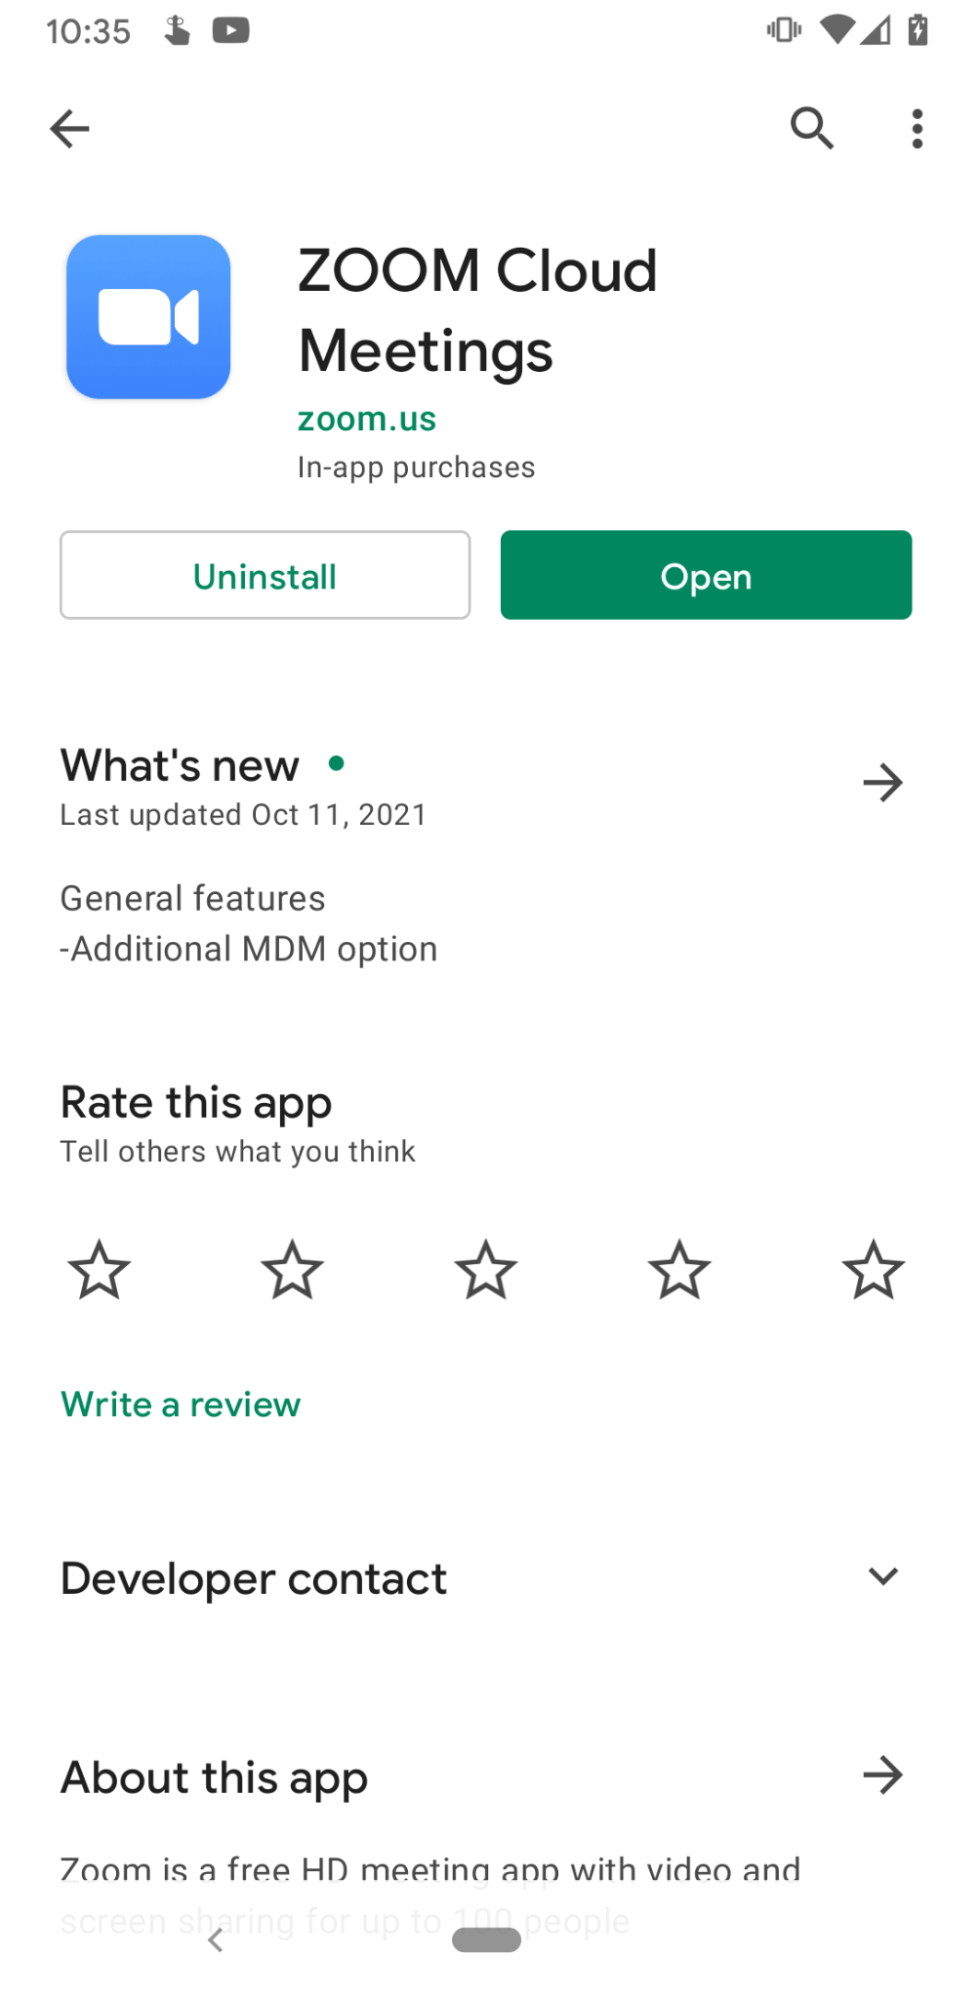
For Android: Open up the app on your phone that says “Play Store.” It’s white with a tri-color triangle in the center. Once you open the app, click on the search bar and type in the word “Zoom.” Once again, the app should appear as one of the first results.
Choose the “ZOOM Cloud Meetings” option and click the green “Install” button on the right of the screen. From there, the app should begin downloading on your phone.
The app is free to download no matter what device you are using, although users can purchase a premium Zoom account if they would like to add extra participants to the meetings. See the benefits of the different versions and pricing here.
2. Join the Meeting
Now that the app is downloaded to your phone, click on the Zoom icon. The app should have a blue background with a white camera on it.

When you first open the app, it will show you a display page that looks like this:
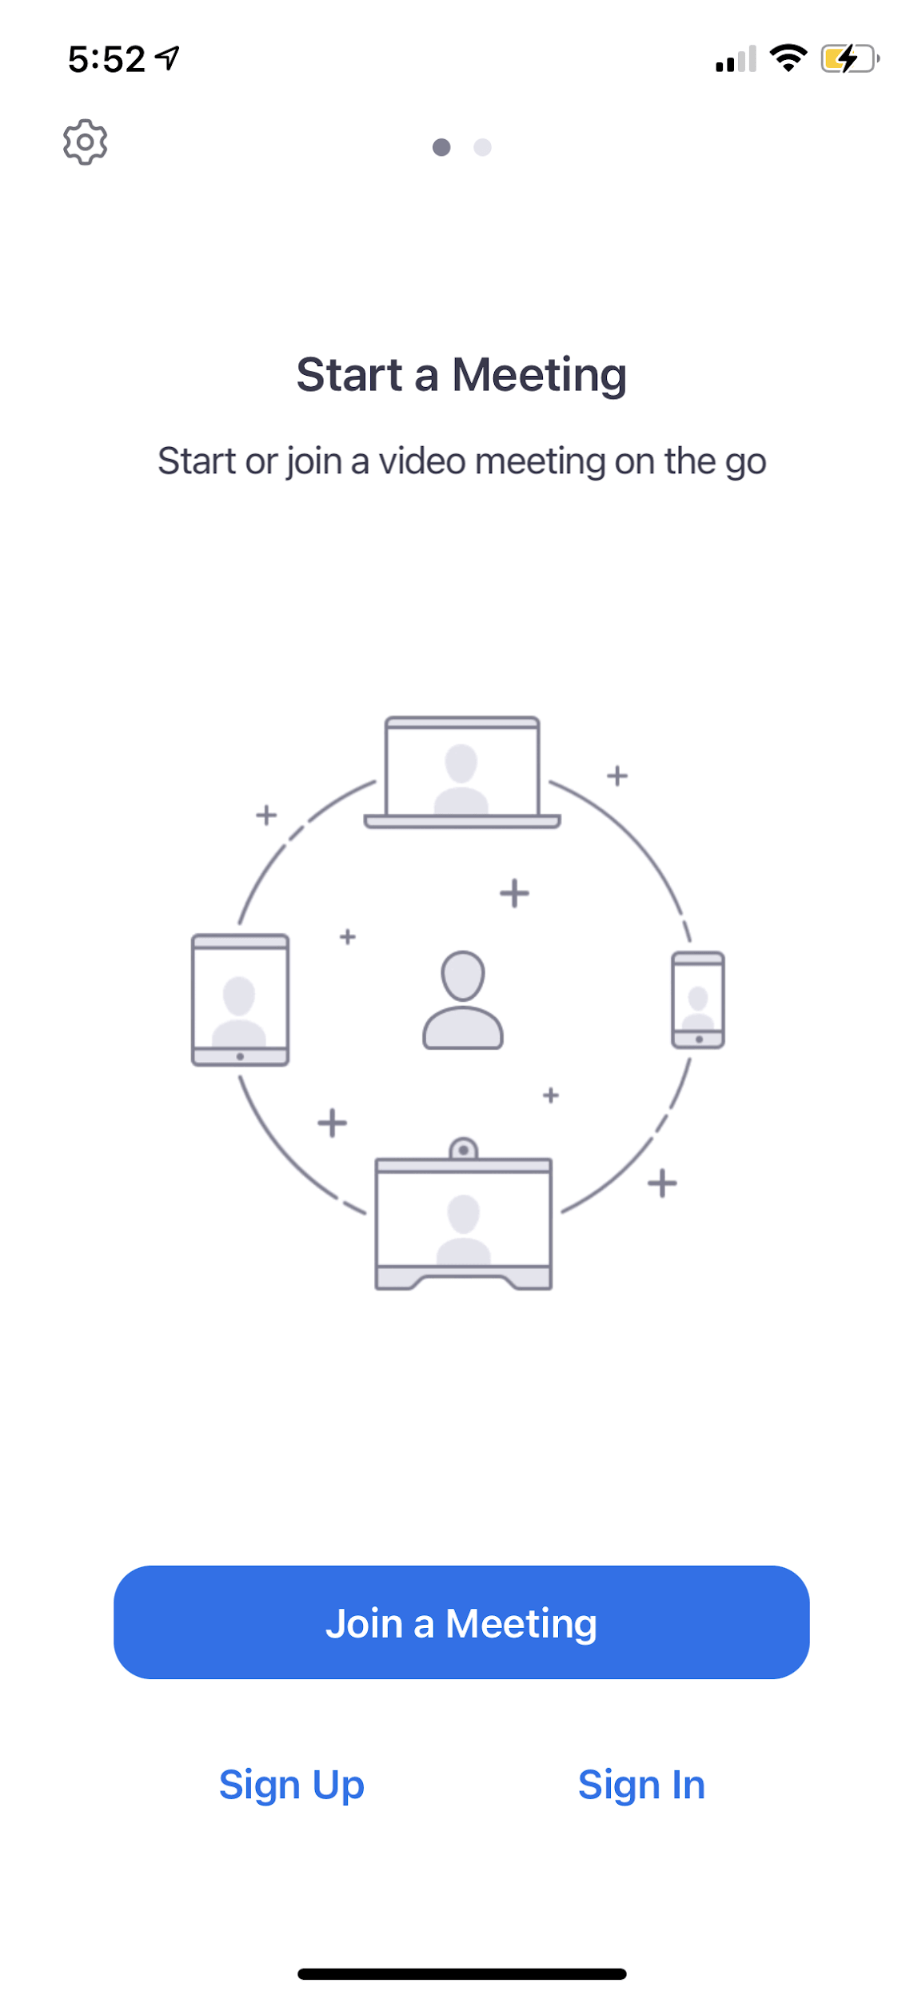
From here, you have two options. If you’re in a hurry and need to join a meeting right then and there, go ahead and click the big blue button that says “Join a Meeting.”
Before entering your Meeting ID, there are a few options to consider. Underneath the Meeting ID section, you can enter a display name. This is the name that will appear to others in the meeting. Finally, there are “Join Options.” You can choose not to connect to the audio or not show your video. If you forget to select one of the options, you’ll be able to change these later on in the meeting.
After that, you’ll be ready to enter your Meeting ID. This is typically a code of about eleven numbers unique to your meeting. Once you enter the code, you may be prompted to enter a password. Zoom offers this as an option to make the meetings as secure as possible.
At this point, Zoom will send you two alerts. The first asks for permission for the app to use your microphone. The second is a request for Zoom to send you notifications, such as alerts, sounds, and icon badges.
The other options you can choose from are “Sign Up” or “Sign In.” Although you do not need a Zoom account to use the app, it can be beneficial. For example, your account will remember your screen name, so you won’t have to enter it every time. In addition, with an account, you’ll be able to see a history of your past meetings.
Making an account could be even more important if you’re using Zoom daily for work or school. Some universities pay so that you can have longer meetings or not allow those to enter without a certain single sign-on (SSO).
3. To Host a Meeting
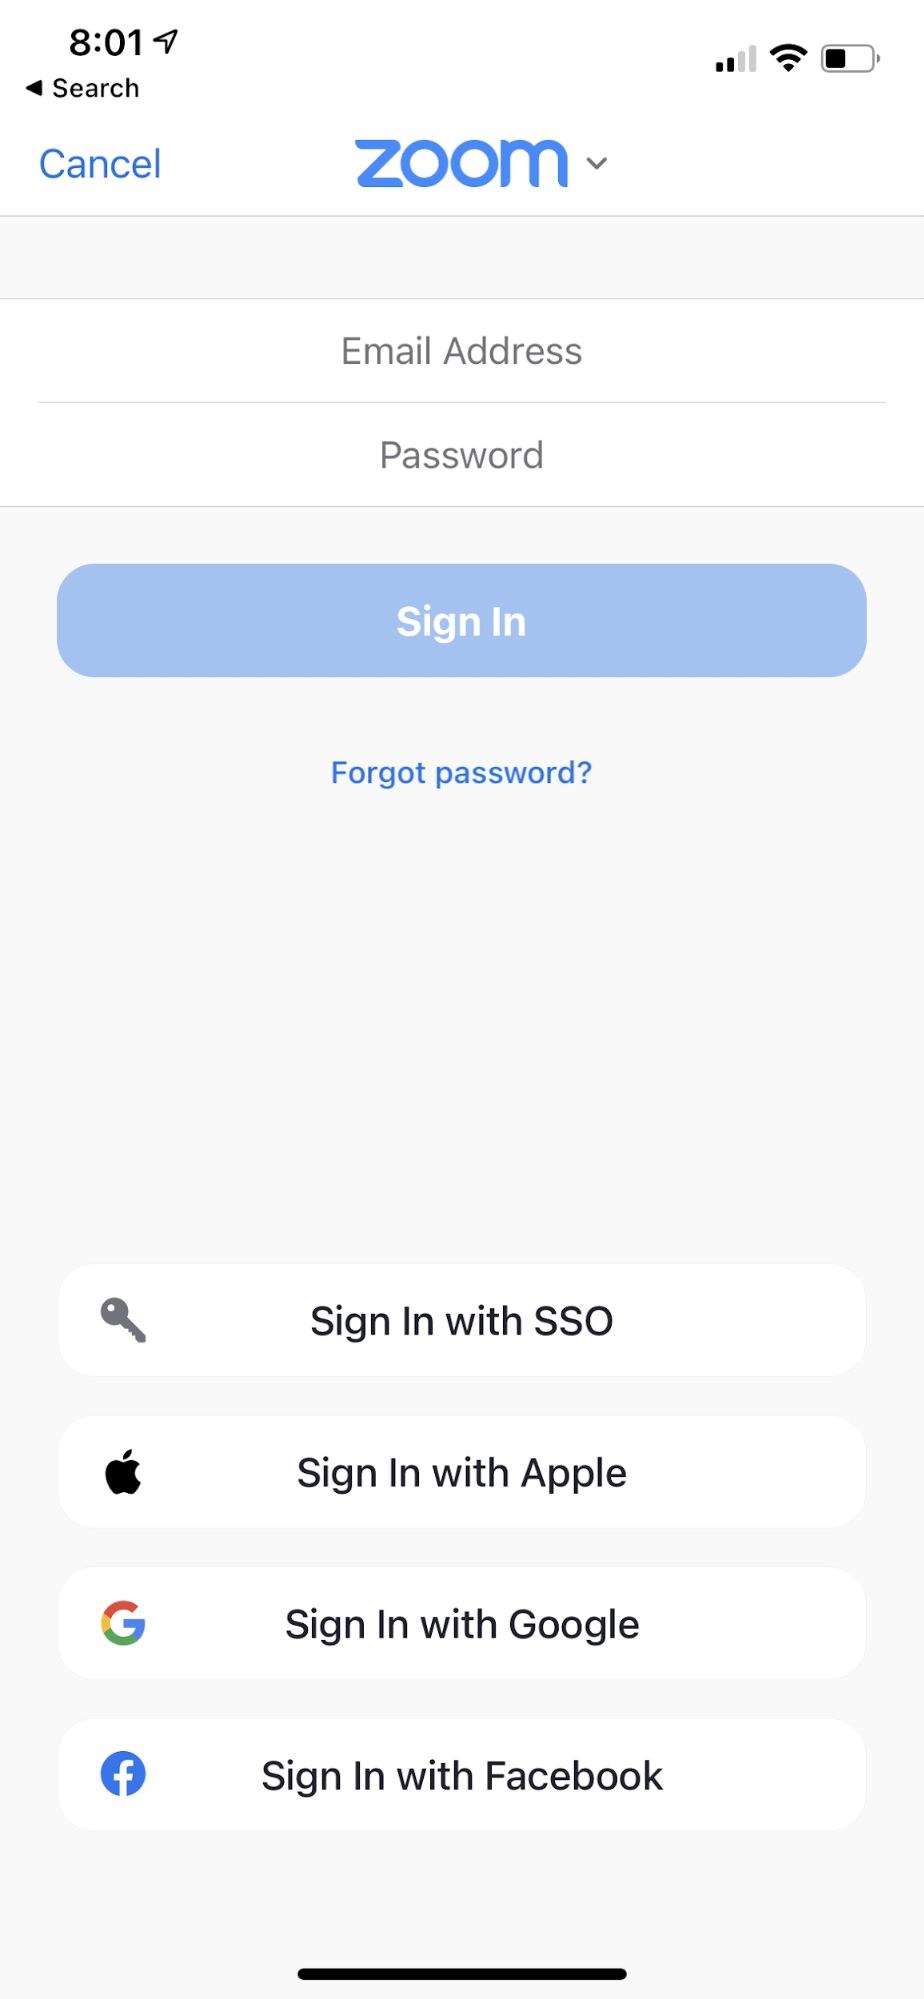
To host a meeting, you must sign up for an account. Zoom will ask you for some basic information when you make an account, such as your birthday and email address.
You can also link your Zoom account to your Google account, Facebook account, Apple account, or SSO to make the process faster. Your information will automatically sync.
Once you’ve logged into your account, select the orange icon in the left corner that says “New Meeting” underneath it. After clicking it, you will have two choices. First, you can choose whether or not you want your video to be on when you begin the meeting. Green means the video will be on, and grey denotes the video will not be on.
After that, you can choose whether or not to use your Personal Meeting ID. A Personal Meeting ID comes with your account. It is a specific ID number tied to your particular account. This is useful if you are hosting consistent meetings. Rather than sending out a new link or Meeting ID and password every time, your associates can reuse the same one.
After making your selections, click the large blue rectangle that says “Start a Meeting.” Zoom will send a notification to access the camera. Allow this for your video to appear on the screen.
4. Options Within the Meeting
Throughout the meeting, you can choose whether or not you’d like your audio or video on and seen by the other participants. To turn off your audio, tap on the screen. At the bottom, a series of options will appear. Look to the bottom left corner, and there will be a microphone icon that says “Mute” underneath it.
Click on the microphone, and a red line will appear through the icon. This indicates the other participants cannot hear you. To unmute, simply click the same button again. The red line will disappear, and the other people in the meeting will be able to hear you again.


You have the same choice for video. Look to the icon immediately to the right of the microphone. There is a video camera icon with the words “Stop Video” underneath. Click it, and a redline will appear, indicating that you have stopped sharing your video. Like the audio, all you need to bring your video back is to click the icon again.
5. Hosting Capabilities
As the host, you’ll also have a few choices for collaboration. If you click the green button at the bottom of the screen that says “Share Content,” you’ll see different options.
One of the most useful options you will see is to share your screen. Simply press the “Screen” button, and Zoom will allow you to show anything on your screen to the rest of the participants in the meeting.
This means everyone in the meeting will be able to see what you see, including any notifications.

Another fantastic feature is the “Photos” choice. Here, you’ll be able to show the rest of the participants any photo or video saved to your phone. If you select a video, it will play automatically on everyone’s screens.
As the host, you can also connect Zoom to iCloud Drive, Dropbox, Microsoft OneDrive, Microsoft SharePoint, Google Drive, Box, Website URLs, and Bookmarks.
6. Using Siri on Zoom
Finally, Zoom allows mobile users with iOS to utilize Siri within the app. You can adjust the settings to set up Siri shortcuts, such as allowing you to join your next scheduled meeting, view today’s meetings, or start a meeting.
To do this, open your Zoom app and look to the bottom right corner. Select the “Settings” option with the gear icon above it. Once you get there, tap the “Siri Shortcuts” option.
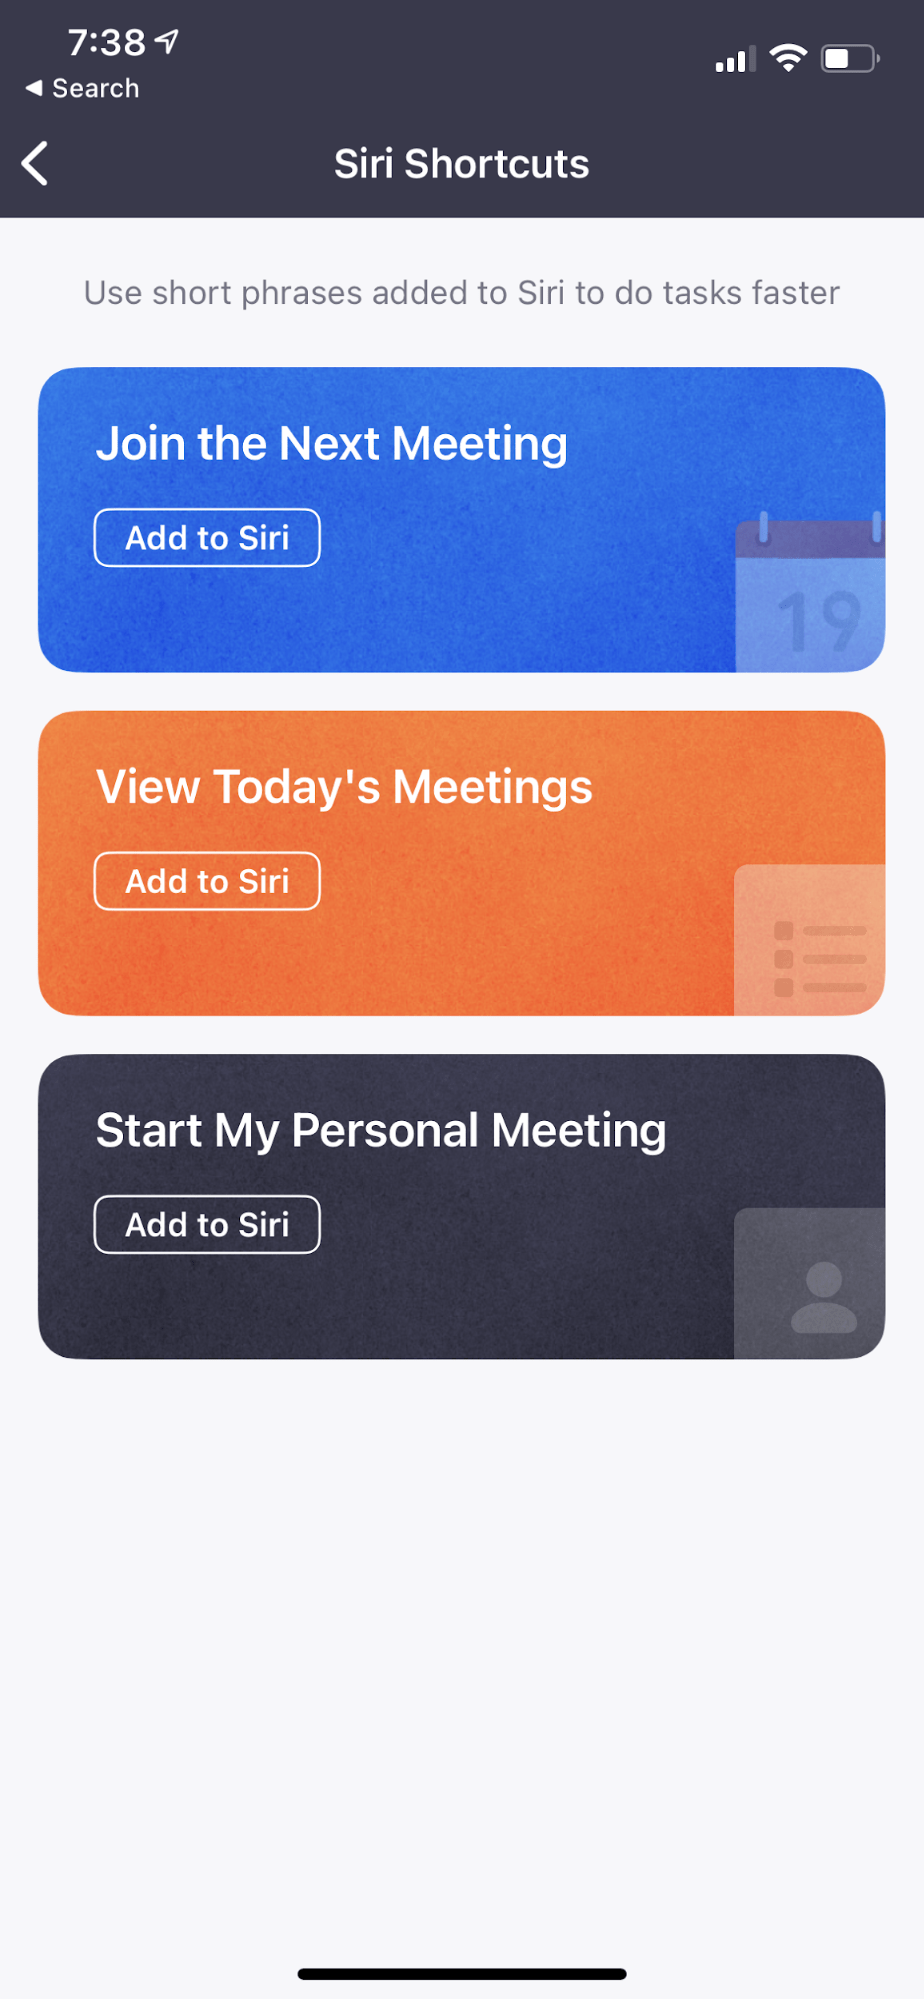
From here, select whichever Siri option you want to enable. That will bring you to a page where you can customize what phrase will allow you to do whatever task you want. Finally, click the blue button that says “Add to Siri,” and it will be added to your Siri options.
To use Zoom with Siri, activate Siri by pressing down on the power button on the side of your iPhone or iPad or the home button if you have an older iPhone. From there, you can either say, “Hey Siri, call [contact name] with Zoom” to start a Zoom meeting with that person. Or, you can say “Hey Siri” followed by the phrase you set up in the first step.
Common Problems When Using Zoom from Your Phone
Although Zoom has a pretty intuitive user interface, there are still a couple of common mistakes many users make when using Zoom on the phone.
Losing Meeting Participants
Phones are smaller than their computer counterparts. Unfortunately for Zoom, this means that participants will see far fewer people in their meetings. To see all of the members, participants will have to scroll manually through the gallery.
When you first join the meeting, the automatic screen the app brings you to shows only the person who is speaking. So one person will take up the whole screen.
Place your finger on the screen and swipe to the left to see more people in the conversation. On this page, you should see the other people in the meeting. The person speaking will have their Zoom box outlined in yellow to ensure everyone knows who is talking.
On these screens, Zoom automatically allows users to see up to four participants. If your meeting has more people than that, you’ll have to keep swiping to see everyone. The first screen will always have whichever person is speaking on it.
Crashing
Zoom, like many platforms, is not immune from the occasional crash. When this happens, the app will close, and you will be automatically kicked out of a meeting.
To get back into your meeting, re-open the app and enter the Meeting ID and password once again. From here, the host should be able to allow you access back in the meeting.
Sometimes during conferences, work meetings, or classes, the meeting host may not notice when someone is trying to get back into the Zoom. If you end up sitting in the waiting room for more than a couple of minutes, consider emailing the host or sending a message to one of the other participants in the meeting.
Issues On the Go
At its core, Zoom is an audio and visual app. Most of the time, when users are on Zoom from a mobile device, it means they aren’t home with access to a computer. So, if you’re going to use Zoom from your phone, invest in a pair of headphones.
While you could make do without them, the sound quality will be sharper with less background noise. In addition, you’ll be able to be more engaged with the meeting and less likely to annoy anyone around you.
This could be especially important for business meetings when discussing private matters, such as plans for the company, hiring and firing, and money.
Zoom also offers options for users who may be in meetings in the car. This includes a “Safe Driving Mode,” where your audio and visual displays will automatically be stopped and muted. To talk, all you need to do is press the big button that says “Tap to Speak.” Users can also choose to switch their phone from the phone’s microphone or speaker.
When using Zoom on the go, these features can make the experience safer and more user-friendly.

