How to Use Asana as an Editorial Calendar
One of Asana’s biggest strengths is its versatility. It’s a popular project management and workflow management tool for agile software development teams.
But it is an equally valuable product for marketing, sales, HR, and content marketing teams. Editors of some of the largest publications in the world use Asana for managing their content calendars.
Asana’s list, board, and calendar views simplify brainstorming content ideas, sharing content templates, assigning work to the right creators, and managing the complete editorial process.
In this article, we’ll discuss the various Asana features to help you manage your editorial calendar efficiently.
Let’s get started.
Using Asana As An Editorial Calendar – An Overview
Asana can be used for a wide range of business goals. Creating and managing an editorial calendar is one of them.
With an Asana editorial calendar, you can develop a transparent content management process in which you and your content production team are on the same page all the time.
Asana provides you with a structured procedure to brainstorm content ideas, shortlist content titles for every month/quarter, and assign content pieces to the relevant team members.
Moreover, you can provide your team templates for every content type along with a checklist of steps to follow while creating each piece of content.
You can add transparency to your content production and ensure that all stakeholders can easily track where a specific content piece stands at any given time by using sub-tasks.
By adding sub-tasks for every content title, your content creators can update their work progress and seek feedback on specific steps from the relevant editors and team members.
The best thing about managing content production through an Asana content calendar is that you don’t need to start everything from scratch. Asana provides you with ready-to-use editorial calendar templates that you can modify and customize according to your workflow.
In short, creating and managing your editorial calendar significantly improves your content creation process, increases your team’s efficiency, and allows you to produce higher-quality content that aligns with your business goals.
Let’s now go through some of the main steps of creating and managing an editorial calendar in Asana.
Step 1: Map Your Editorial Process In A Document
Asana helps you create a standardized editorial calendar that you and your team can use for streamlining your content planning, managing, and publishing processes.
However, before you can create an editorial calendar in Asana, we’d recommend that you map your existing editorial process and its stakeholders in a separate document.
If you already have a documented editorial process, great. But if you don’t, let’s create one before moving to Asana.
Here’s how you can do it.
- Open a blank document in Google Spreadsheets.
- Start mapping your content process by listing your primary content strategy goal.
- Write down all the content types in your content calendar in a single row.
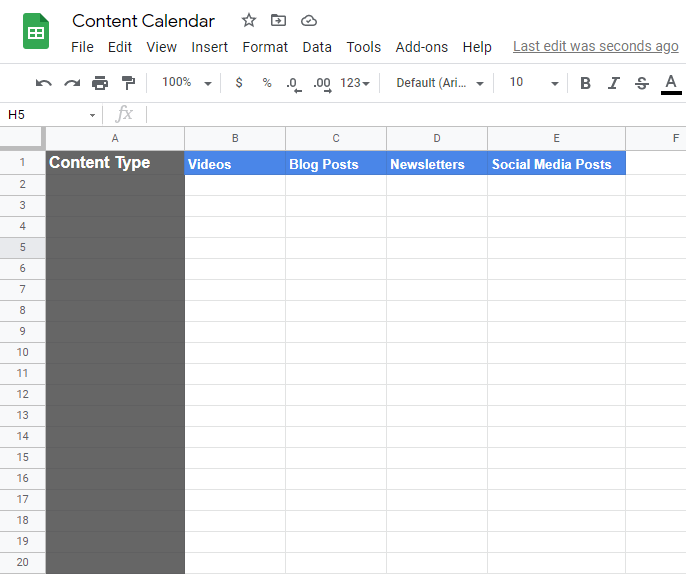
- Use each content type as the header for a separate column.
- Think about the content creation steps for each content type and write them down in the relevant column.
- Similarly, think of the publishing channels for each content type and write in the relevant column.
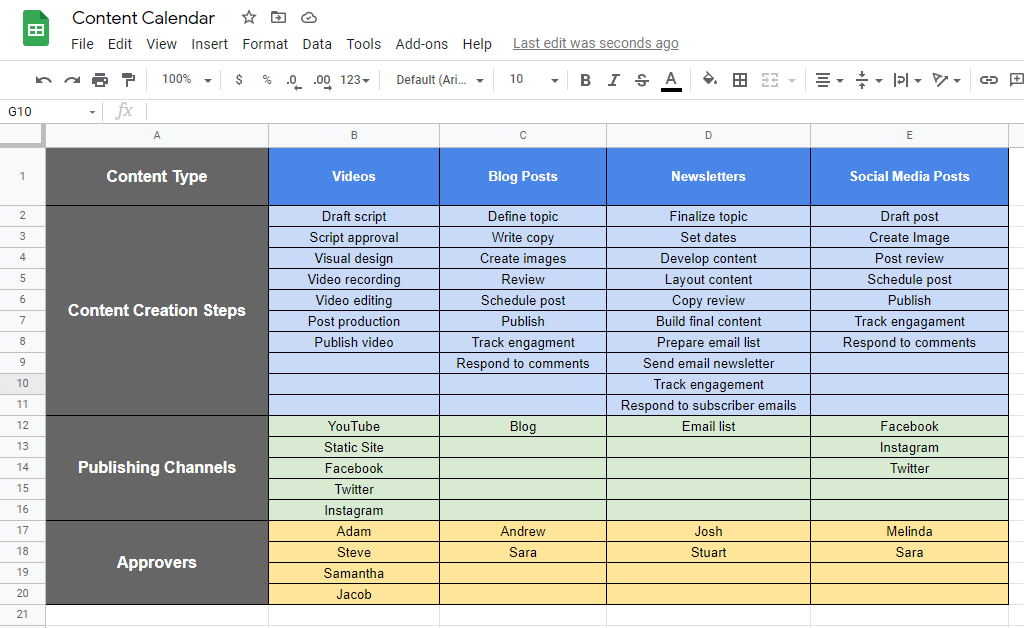 Also, list the approvers for each content type in the relevant columns. For example, you could have a separate content team for video content, blog articles, podcasts, and social media content. List the names of the relevant team members where applicable.
You now have your current content creation process in a somewhat structured format. We can now take this structure to Asana and expand it by using its advanced project management features.
Remember, this is just an example content calendar that we created using the most common content types. If your content strategy uses other content types, feel free to add them to the spreadsheet.
The goal here is to document your existing content creation process in order to map it in Asana.
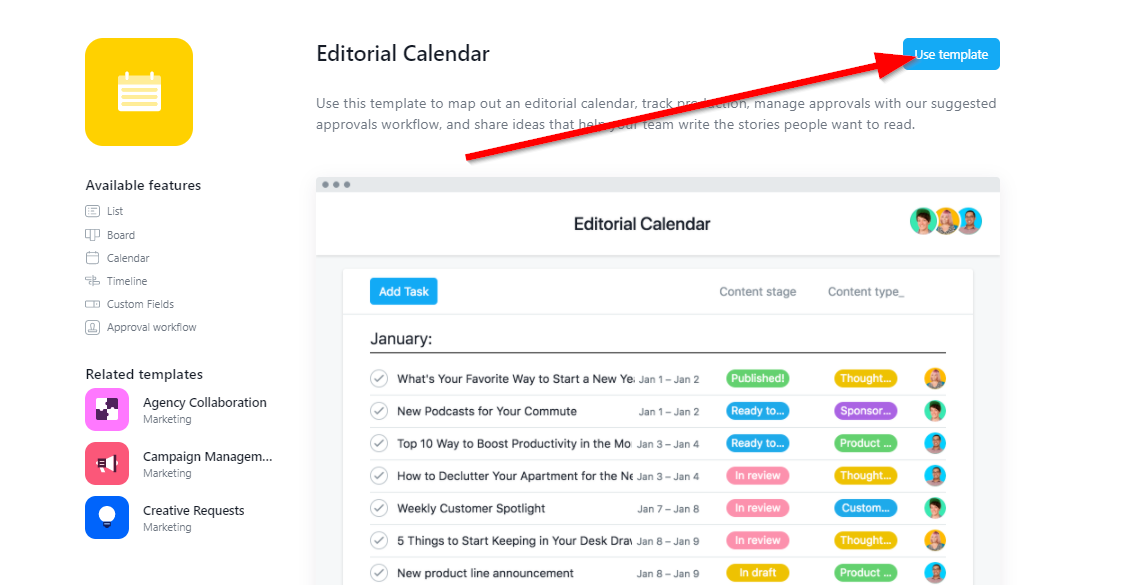
Step 2. Use Asana’s Editorial Calendar Template
Now you’re ready to create your editorial calendar as an Asana project. As I said earlier in the article, Asana provides you an editorial calendar template so that you don’t have to start from scratch.
Here’s how you can use it.
1. Sign in to your Asana account
2. Click on the + icon in your dashboard.
3. Click Project to start a new project.

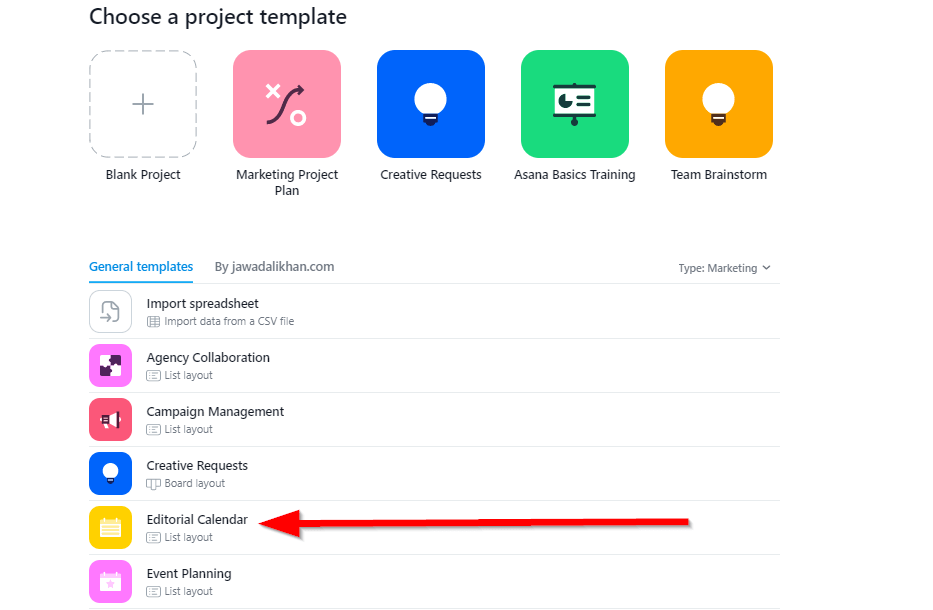
4. Since we’ll use Asana’s editorial calendar template for this article, click on Use a template.

5. Asana offers a long list of project templates. Scroll down the list and choose Editorial Calendar from the list.
6. To activate the template and import it to your Asana dashboard, click Use Template.
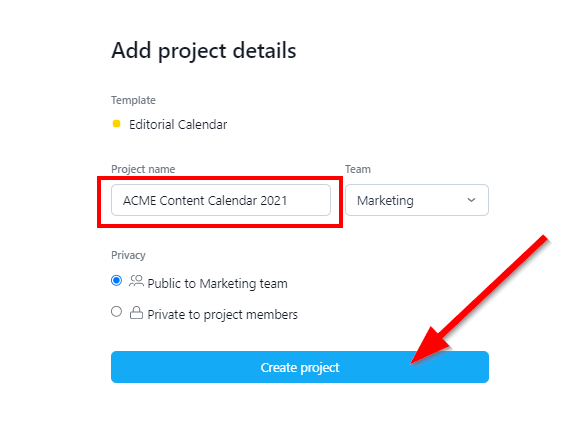
7. Before you can access the template, you need to name your project. Do that now.
8. Click Create Project to import the template to your account.
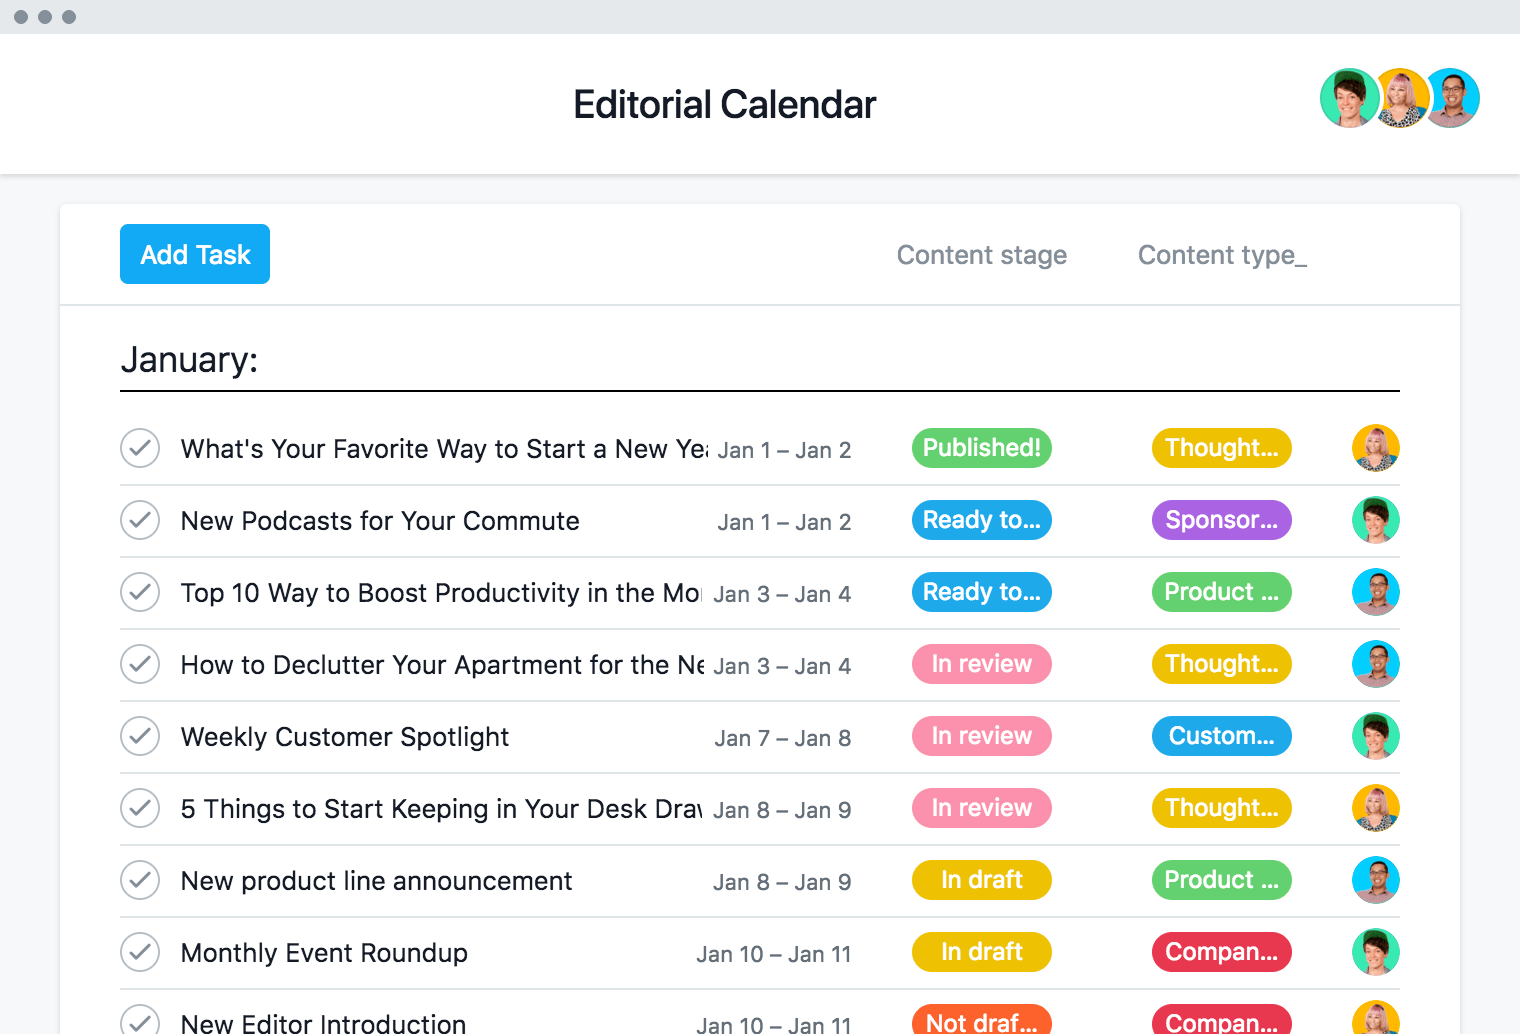
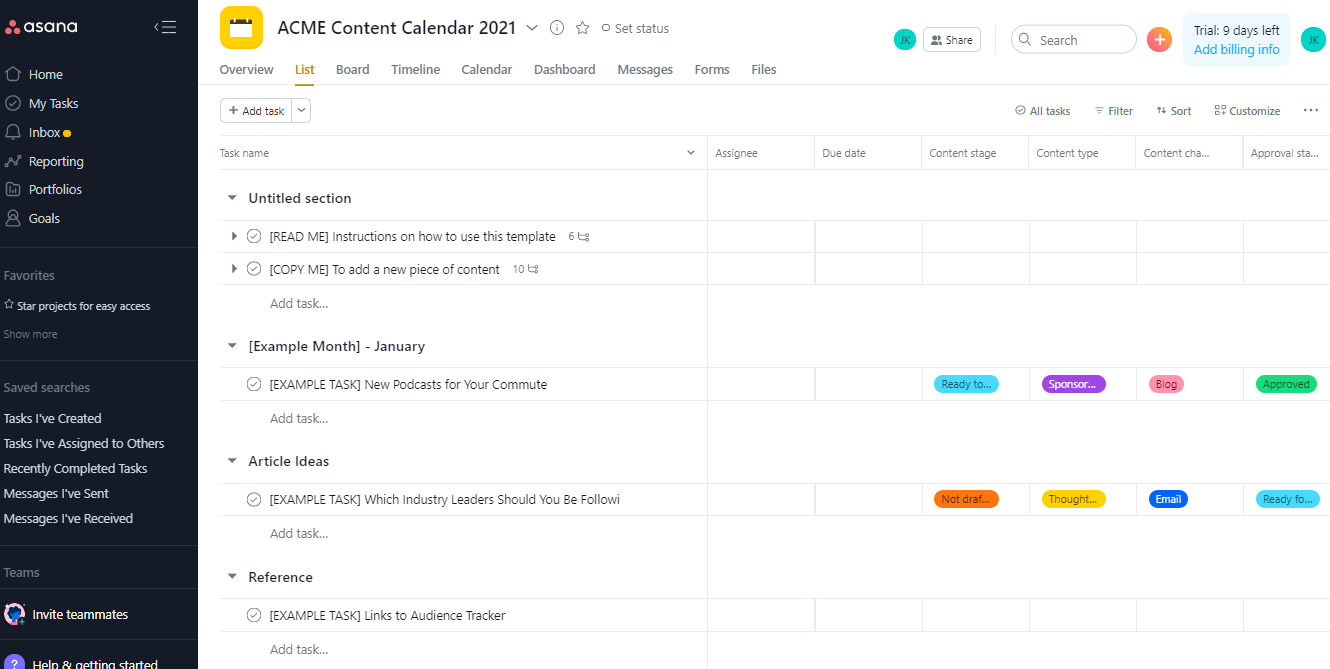
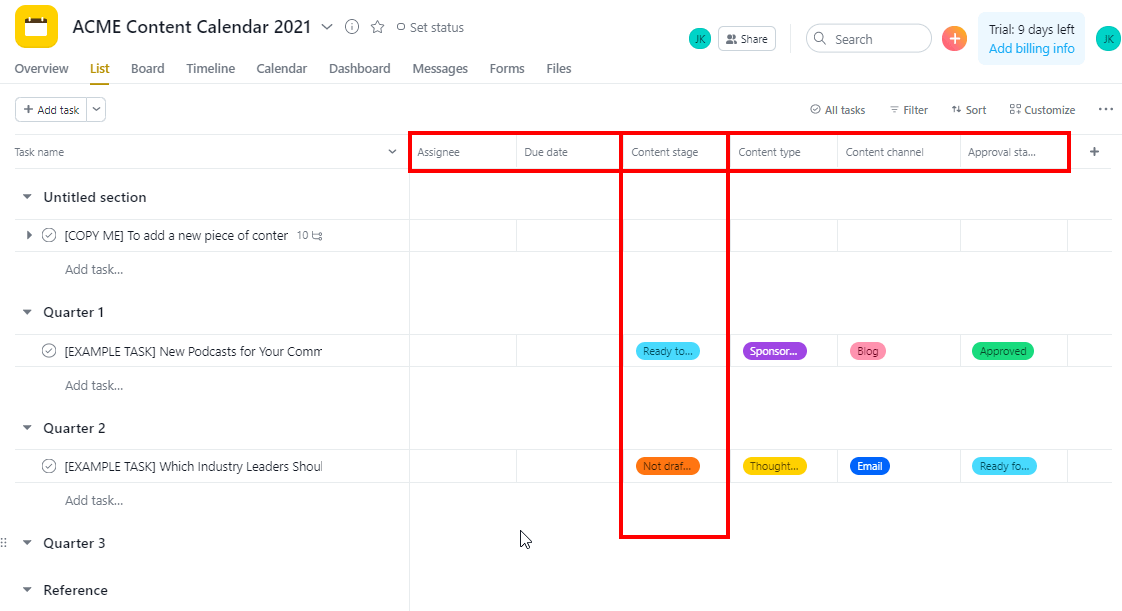
The template imported to your Asana account uses the List view by default and has sample data to help you understand its usage.
As visible in the screenshot, the template has several sections, and each section has sample tasks.
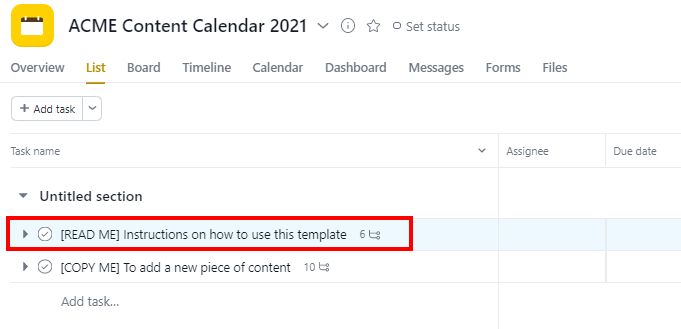
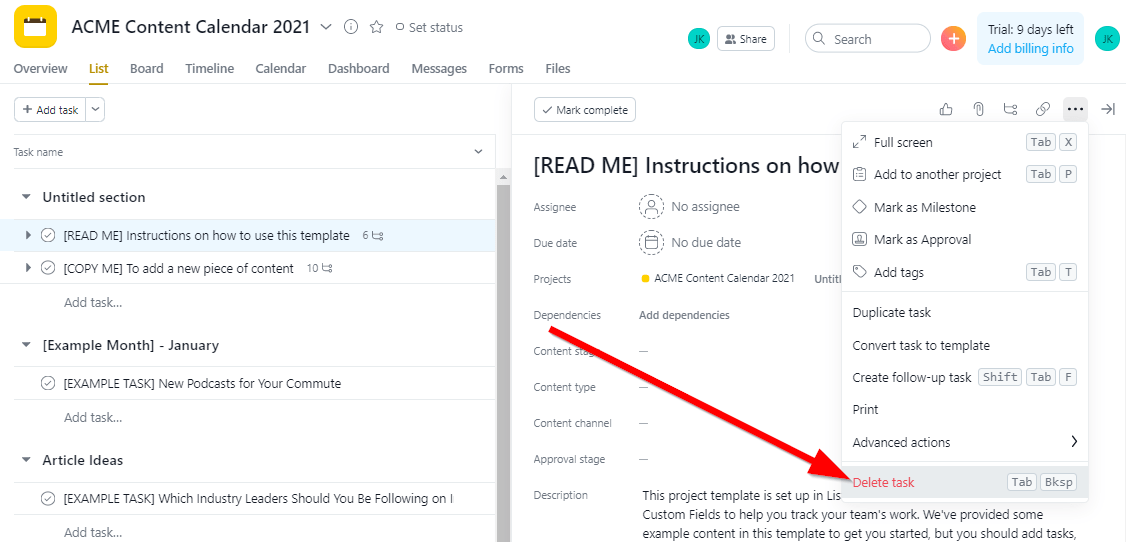
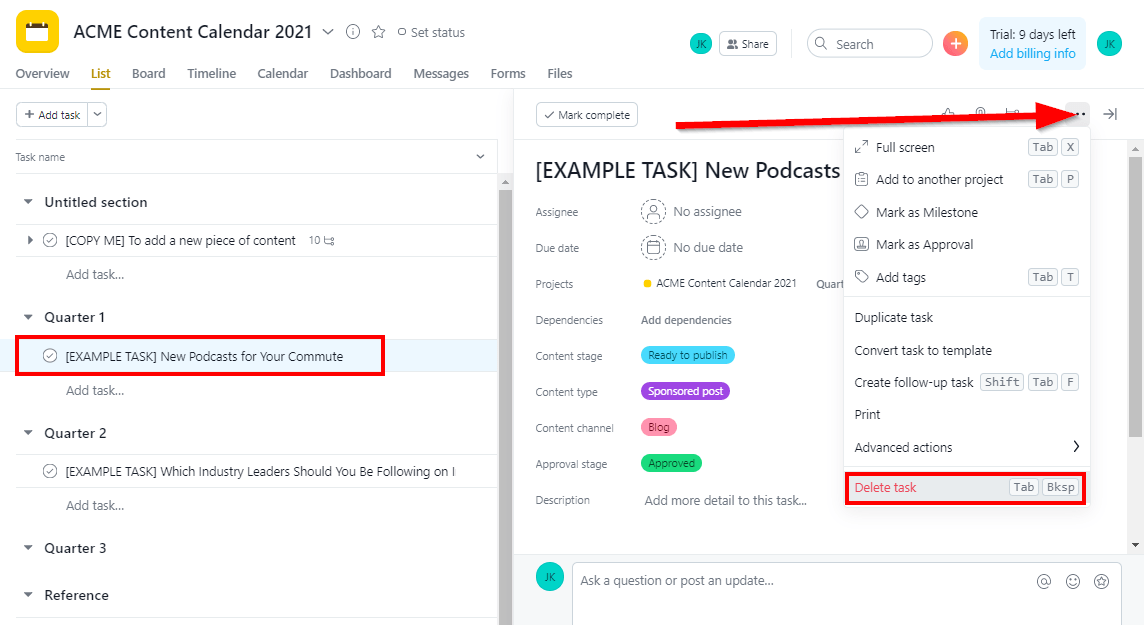
9. To delete a sample task, click on it to open the details pane.
10. Click the options icon in the task details.
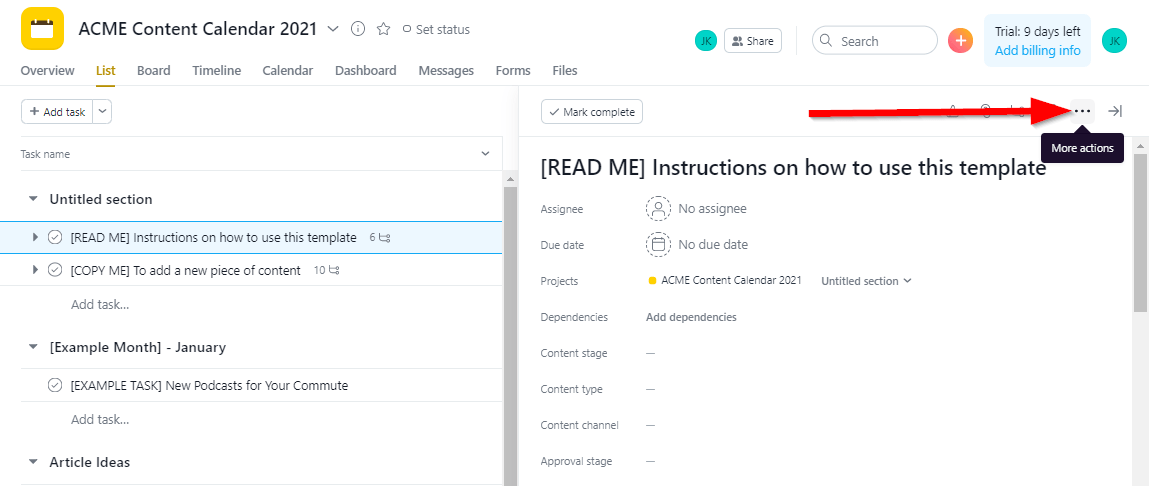
11. Click Delete from the menu to remove the sample task from your task list. You can use the same process to remove any task from your task list in Asana.
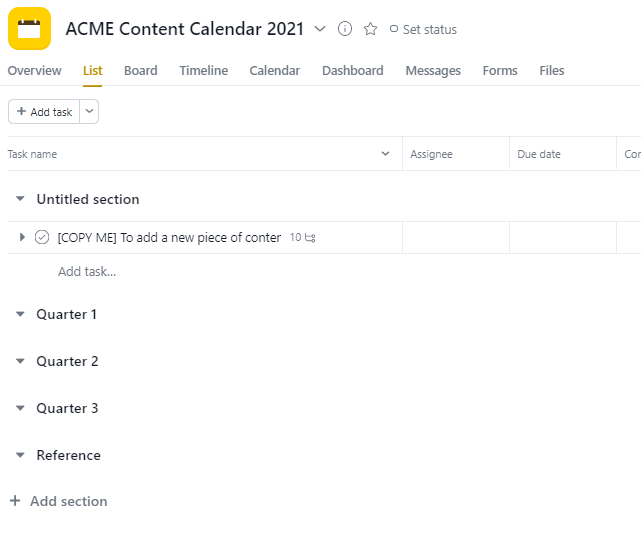
12. You can customize the template sections to represent different stages of your editorial process or your content timeline. To simplify this example, we’ll use the sections to represent different timelines. For this, click on a section, remove its sample name and rename it as Quarter 1.
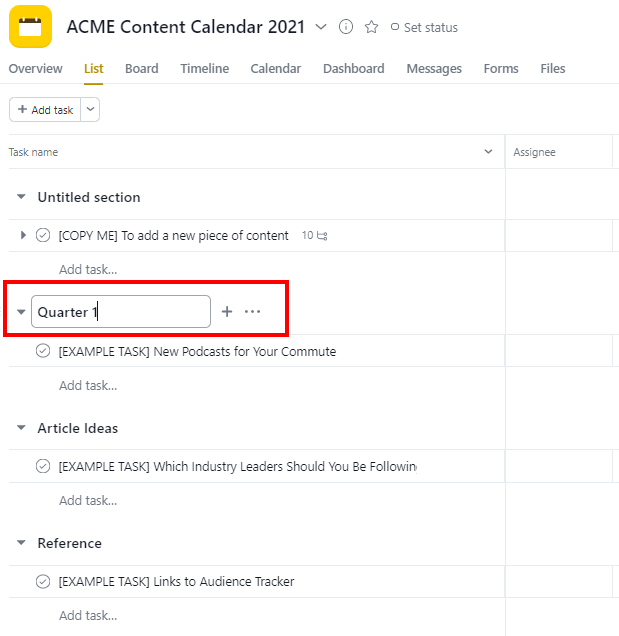
13. Rename the other sections as Quarter 2, Quarter 3, and Quarter 4. This way, you’ve organized your annual content calendar into four different quarters. In each quarter, we’ll list the relevant content tasks later.
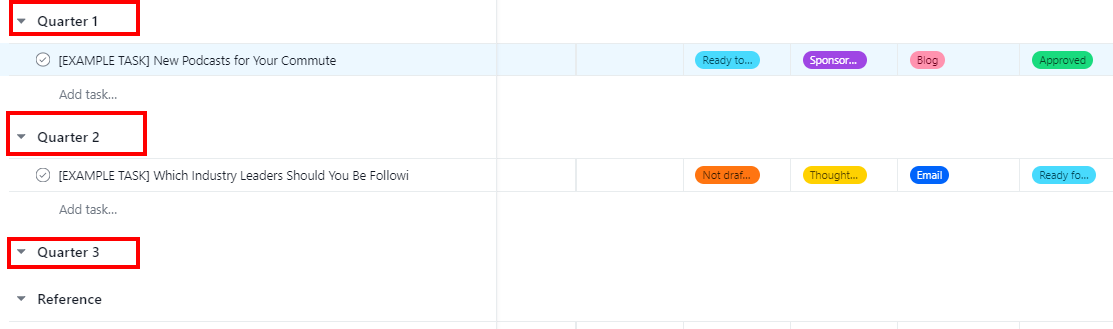
The columns in your task list represent the relevant information for every task. For example, you can see the Assignee, Due Date, Content Stage, Content Type, Content Channel, and Approval Status for each task.
14. To start fresh, remove all the other sample tasks from your task list so that you can start with a clear view. You can use the same process to delete the sample tasks as discussed earlier.
Your task list is now clear and only lists your main calendar sections (plus a sample task that we’ve intentionally left for use later).
You’ve successfully customized Asana’s editorial calendar template according to your content workflow. In the next steps, we’ll discuss how to streamline content production with Asana’s content calendar.
Step 3: Create Content Templates For Streamlining Content Production
When you work with multiple writers in creating different types of content for your organization, editing their work can quickly eat up all of your time unless you define a standard content creation process.
This is where content templates come in.
By creating templates for every content type in your editorial calendar, you can share step-by-step guidelines with your writers on creating a specific post.
For example, you can create separate templates for blog posts, videos, podcasts, social media posts, newsletters, etc.
You can go even further by creating separate templates for different blog post types, for example, reviews, comparisons, list posts, how-to posts, etc.
Here’s how you can do it.
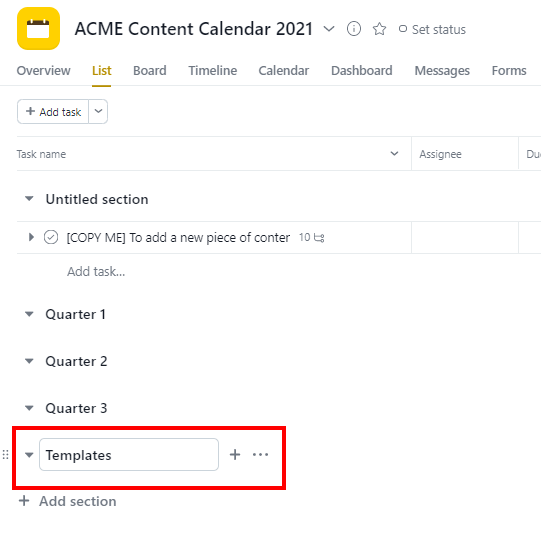
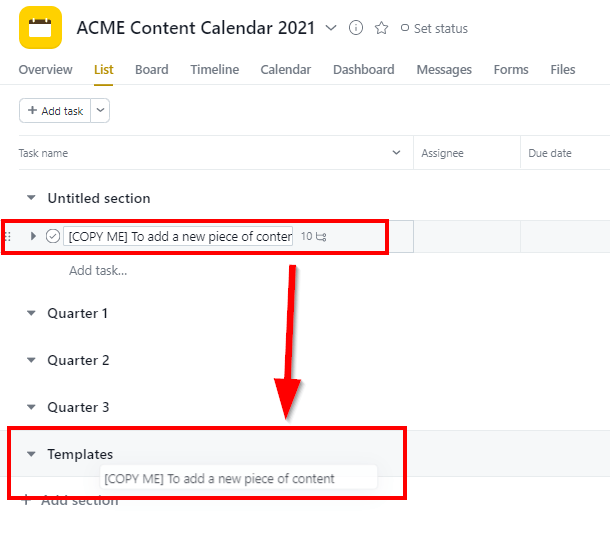
1. Click on the Reference section in your task list and rename it to Templates.
2. Now drag and drop Asana’s content template task from the Untitled section to Templates.
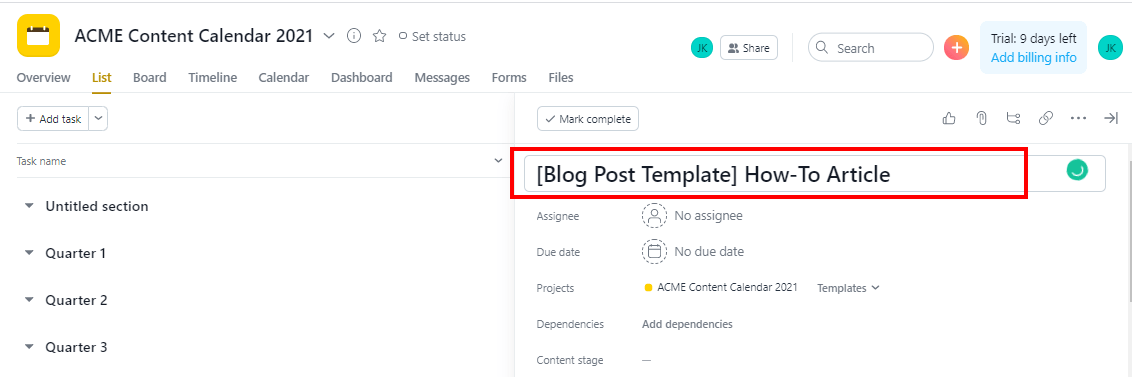
3. Now click the sample task to customize it for your content calendar.
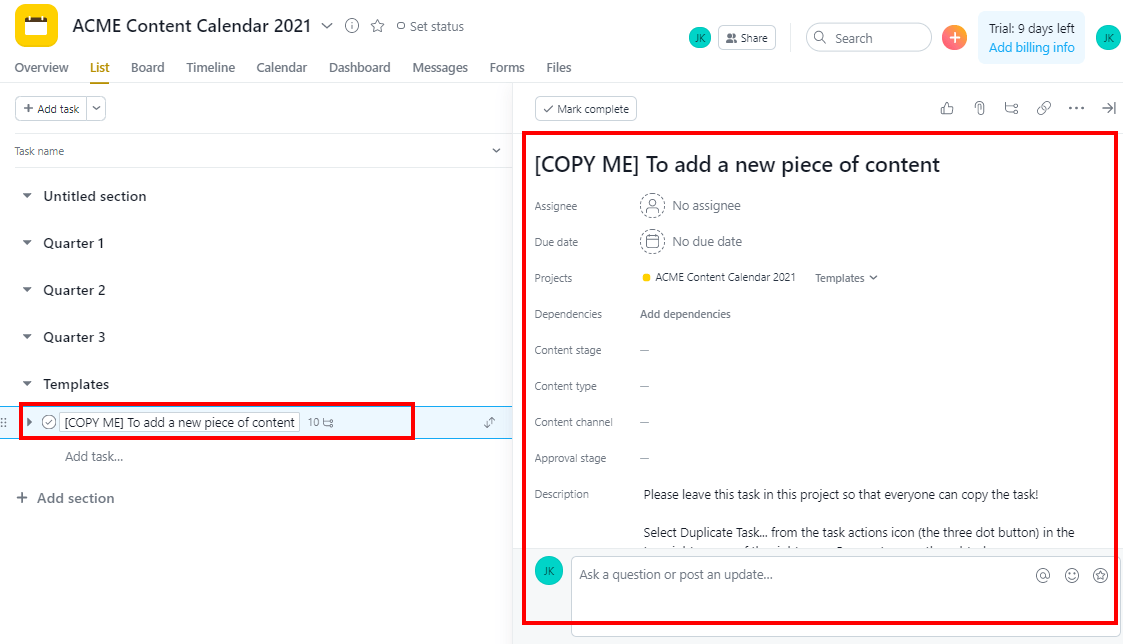
4. Click on the template title and rename it to your content type.
5. In the description box, enter your template content that your writers can use to develop the content. Also, add any instructions for your writers in the relevant sections.
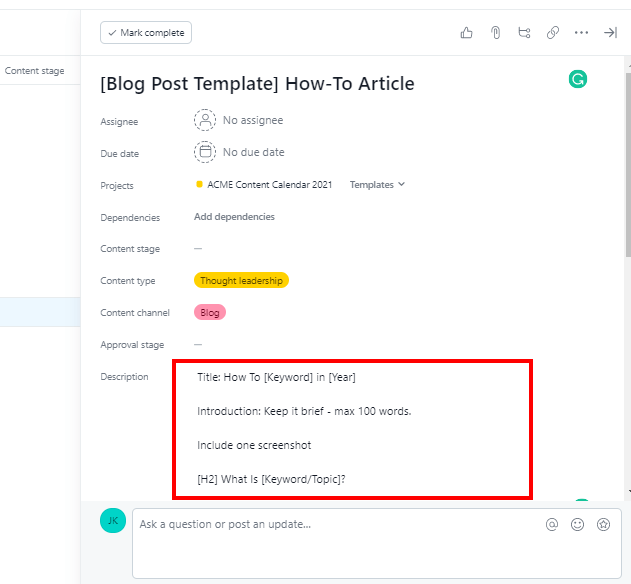
6. Next, the Asana theme template has a list of sub-tasks for every content type that represent its content creation steps. You can use this list as is or change it according to your business needs by clicking each step and modifying it.
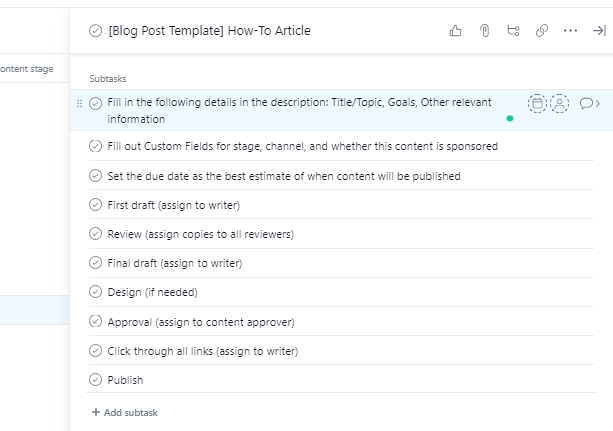
7. You can also assign each step in this subtask list to a different team member and set a due date.
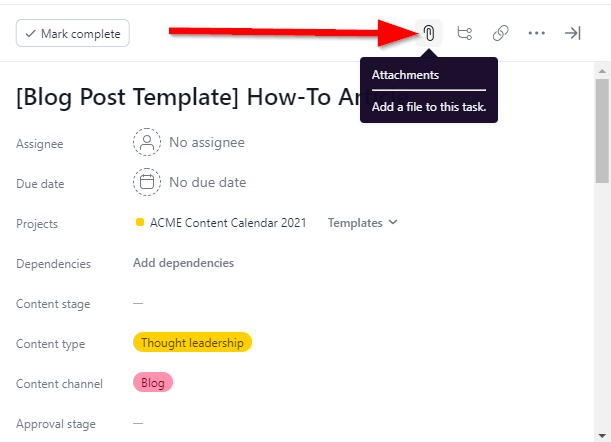
8. Finally, you can also add any files to your template that your writers can use as a reference. You can do this by clicking the attachment button and uploading a file from your computer or cloud storage account.
You can create separate templates for each content type using the same process we’ve described in this step.
Step 4: Using Content Templates For Creating Different Content Types
Now that you have templates for every content type on your editorial calendar creating new content tasks is much easier. Instead of creating content requirements from scratch, you can simply copy the relevant templates and move them to the appropriate quarter in your content calendar.
Here’s how to do it.
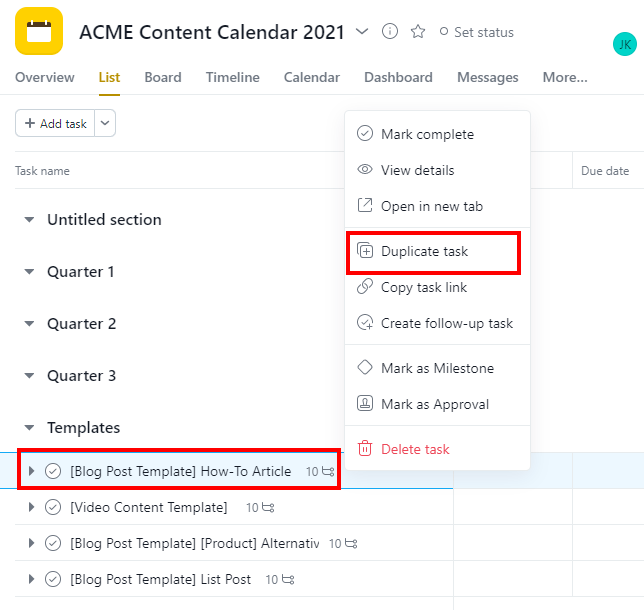
1. Right-click on the template that you want to use for creating a new task requirement.
2. Click Duplicate Task.
3. Rename the template to reflect your new task.
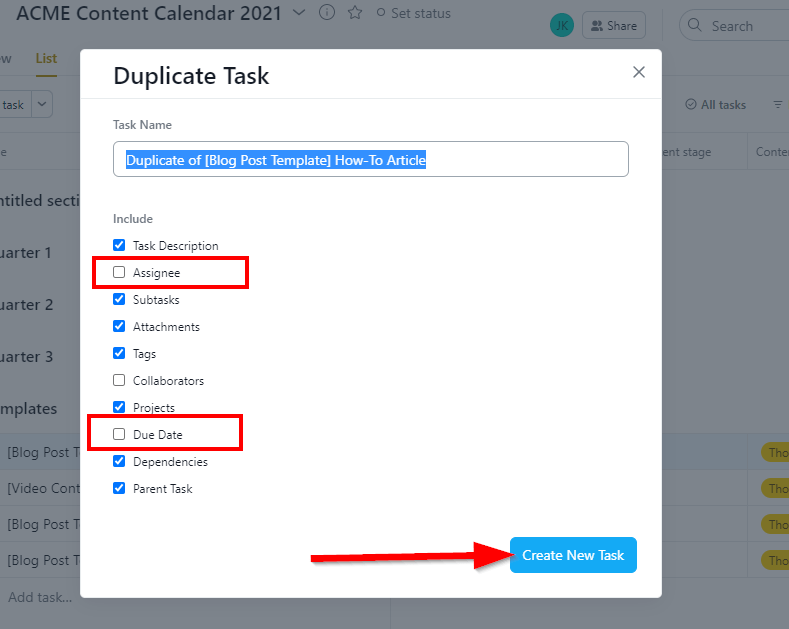
4. Click Assignee and Due Date from the Include list to add to your task components.
5. Click Create New Task.
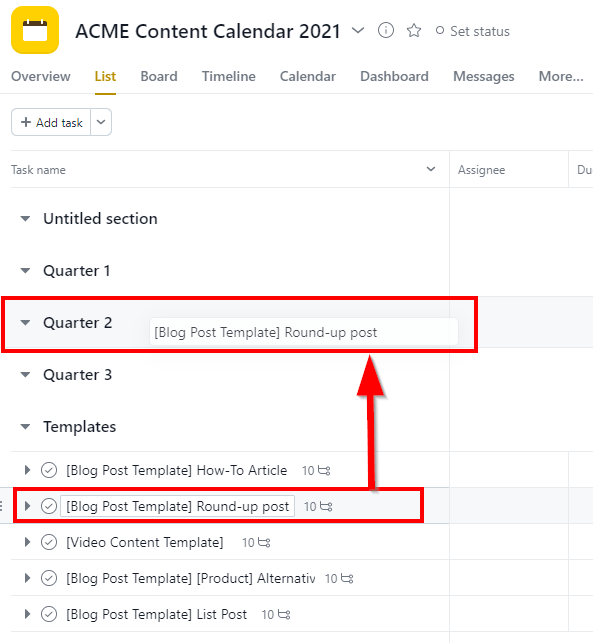
6. Once a task is created, drag & drop it to the relevant time frame section of your editorial calendar.
7. Now click on this task to open the details pane.
8. Edit the task description to add any specific instructions for this particular task.
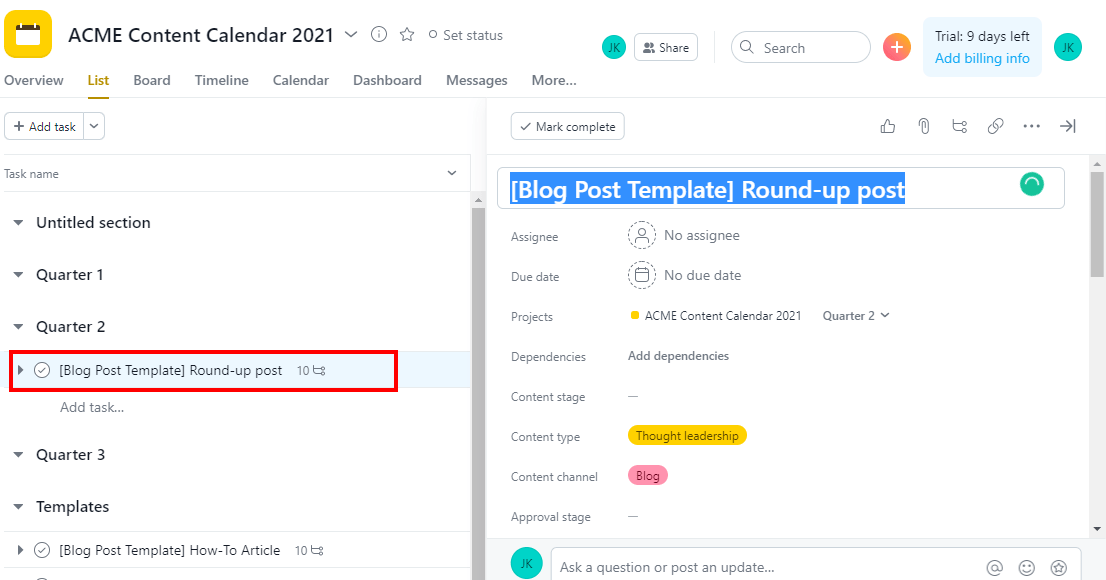
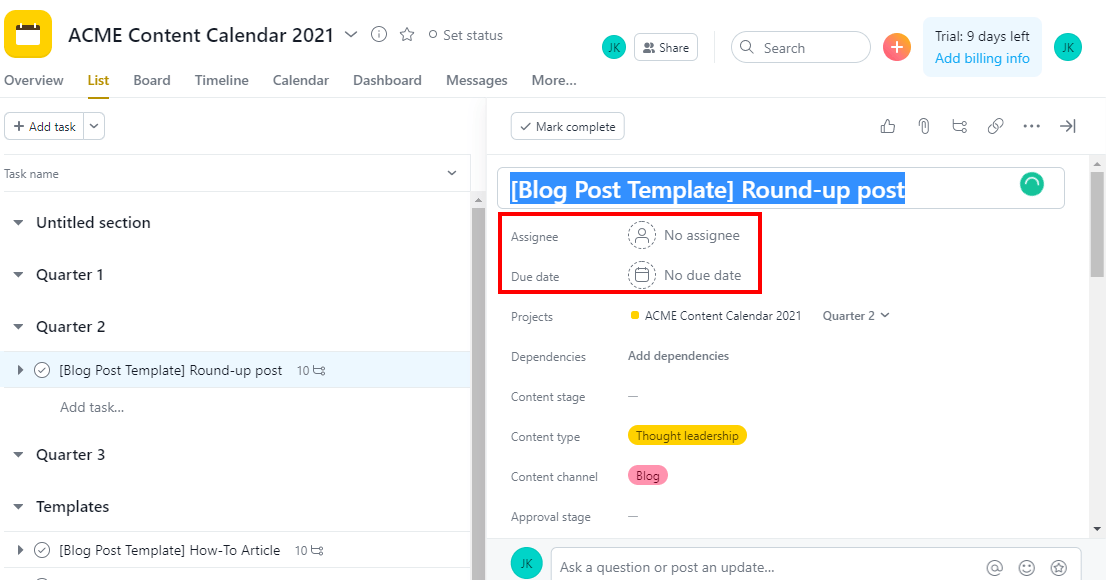
9. To assign this task to a team member, click Assignee and choose the relevant team member.
10. Click the calendar icon next to the due date to add the deadline for this task.
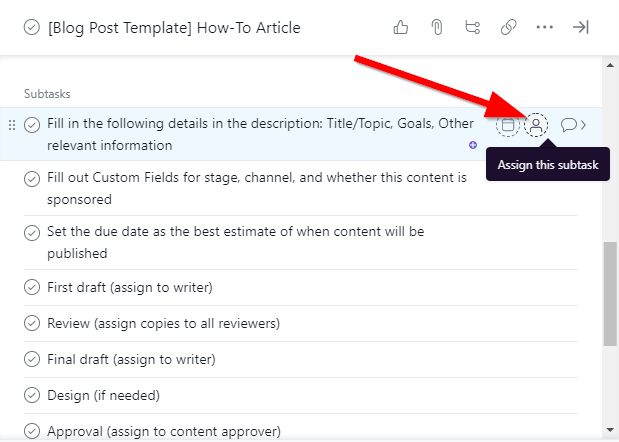
11. Now, move to the sub-task list and add the relevant instructions for each sub-task.
12. Assign each sub-task to the relevant team member.
13. Finally, click the Collaborators icon below the message text box and add all the team members and stakeholders one by one.
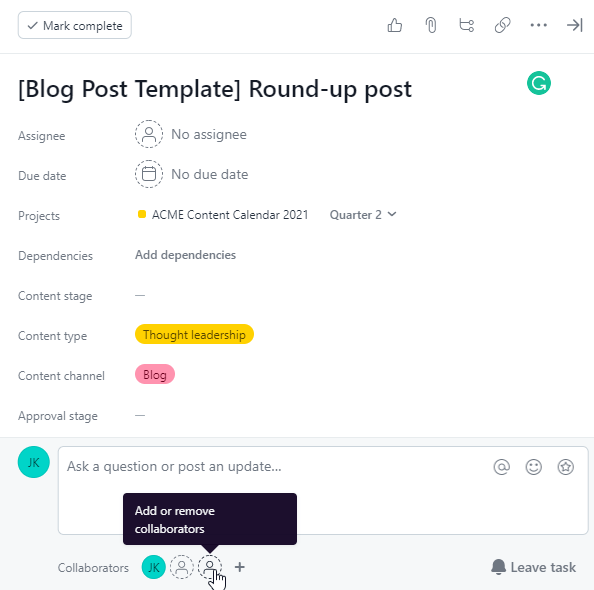
14. Now, send a welcome message through the message box to notify all the assignees and collaborators of your new task.
You can create new tasks by choosing the relevant templates and following the same steps outlined in this section.
5. Collaborating With Your Content Production Team
Till now, we’ve discussed how you or your editors will create and organize a content calendar in Asana and assign tasks to your writers.
In this step, we’ll discuss how your writers can update their work in Asana.
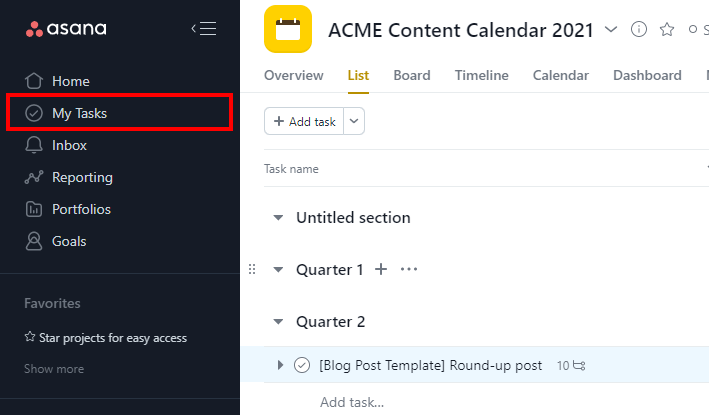
1. Every writer can see all of their assigned tasks by clicking the My Tasks section.
2. To post updates to a task, click on it from the My Tasks section.
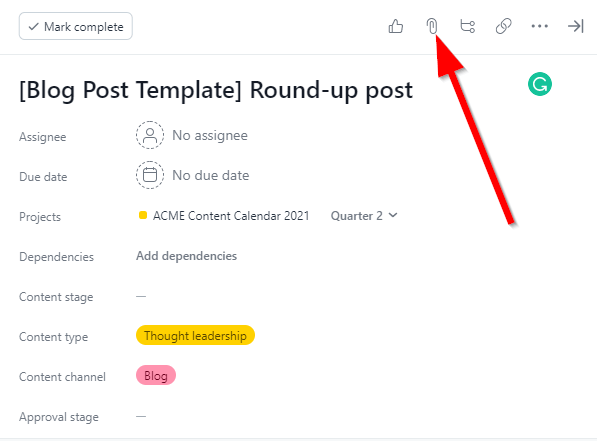
3. To add an attachment, click on the attachment icon and upload files from your computer or cloud storage accounts.
4. To seek feedback from a collaborator, send a message using the message text box.
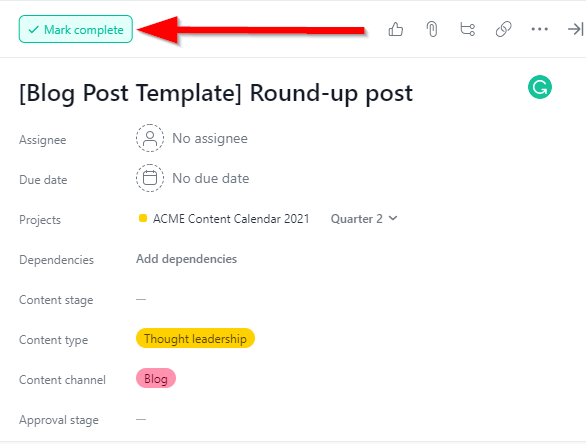
5. When you complete a task, click the completed icon next to the task title.
6. Assign the task to the relevant stakeholder for review.
Your writers and content creators can update their work in the relevant tasks and sub-tasks following these steps.
Common Problems When Using Asana As An Editorial Calendar
Asana is an excellent product for creating and managing an editorial calendar. However, like every product, it has some problems as well.
Here are the most common ones.
Steep Learning Curve For Editors And Writers
Asana is ideal for detail-oriented users who want to bring clarity to their processes by breaking them down into smaller tasks and assigning them to different users.
However, most editors and writers are non-technical users. This is why many of them find it difficult to get used to Asana’s features. In addition, most of them are used to simple solutions like Google Sheets and MS Word, so switching to Asana comes with challenges for them.
If you plan to move your editorial team to Asana, you’ll need to arrange training programs to ensure they don’t get overwhelmed with all the features.
No Option To Choose Multiple Assignees
Asana doesn’t give you an option to assign a task to multiple users. This makes perfect sense from a project management perspective and ensures that every task has a clear owner. However, many editorial tasks are performed in partnership between different team members equally responsible for project delivery.
The workaround for this problem is the collaborator option in Asana, using which you can add other team members to a task. But it’s still not an ideal solution.

