How to Use Asana as a Dashboard
Managing a project can truly test your multitasking skills.
You have to manage your team, keep track of pending tasks, implement client requests, carry out marketing and promotional activities, and everything in between.
Keeping up with all these tasks from memory can become borderline impossible unless you develop superhero powers.
This is where a project management tool like Asana can be incredibly handy.
In addition to its pre-existing features like file sharing, task scheduling and prioritization, and premade templates, Asana has introduced an intuitive Dashboard feature that lets you see real-time project data in charts.
Asana Dashboards are project-level tabs that comprise visualization tools and graphs to make it easier for you to see and determine your team’s daily progress. It lets you identify potential bottlenecks in your workflow, eliminate them, and ensure better outcomes.
In this guide, we’ll give you a step-by-step breakdown of how you can use Asana as a dashboard, as well as discuss common challenges you might face when setting up Asana Dashboards.
Step 1: Create Your (Free) Asana Account
Naturally, the first step to getting started is to actually have an Asana account for your company.
The good news is Asana is a free tool with a super simple registration process, so you don’t have to spend a dime or more than a few minutes of your time for registration.
Go to Asana.com, and click on the Try for Free button.
From there, you’ll be asked to type in and verify your email address. Fill in your information and other crucial data about your workflow.
Asana will ask you to make a list of a few tasks related to your project. While you can always skip this step, doing this will enable you to start right off the bat.
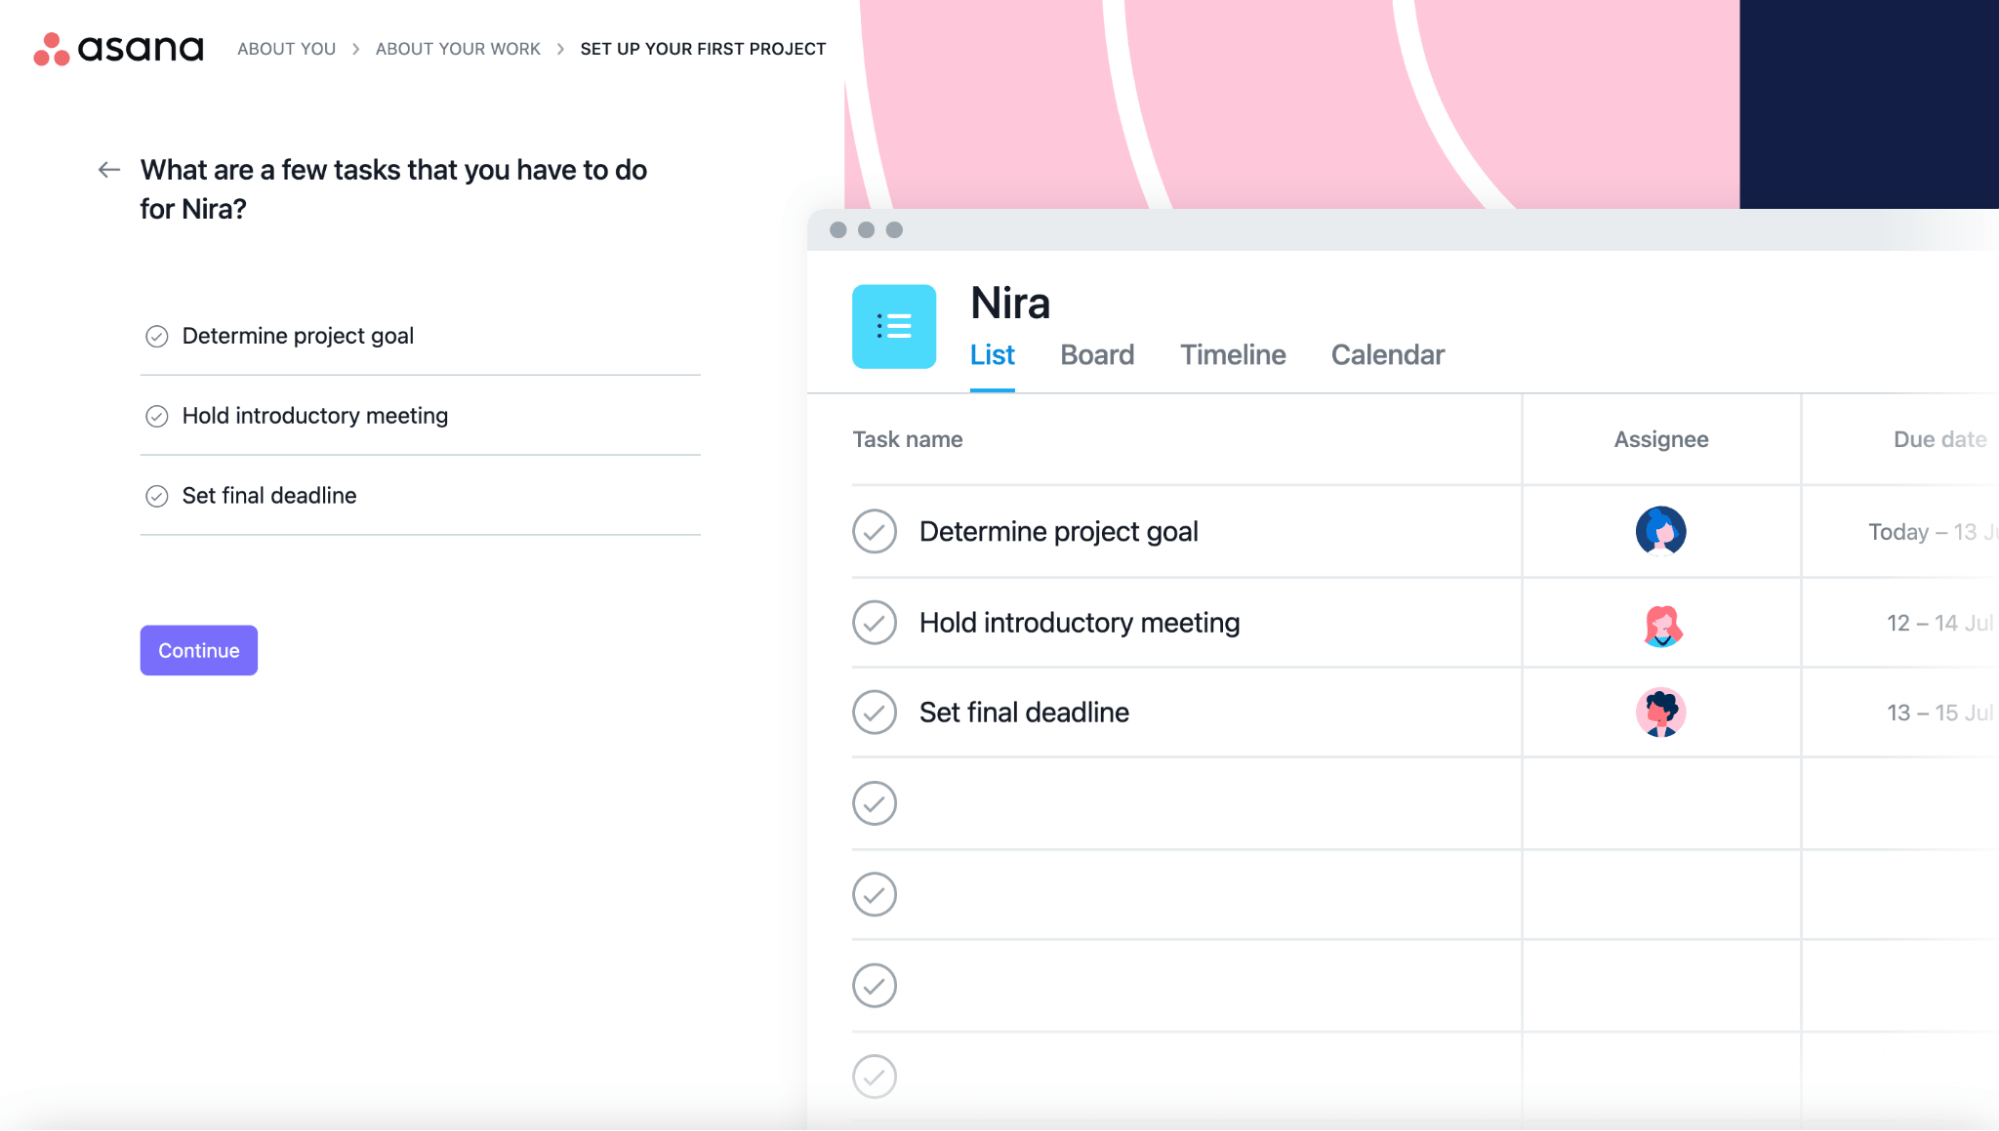
Once you’ve finalized everything, your screen should look something like this.
Note: We’ve chosen the Board preview, but you can always select a format that appeals to you best.
Step 2: Invite Team Members to Your Asana Workspace
After you’ve set everything up, you can proceed to invite your colleagues, clients, and anyone else you want to Asana.
Just like the registration process, inviting team members is super simple. Select Invite teammates on the sidebar, and enter the email addresses of all the teammates you want to give access to your Asana board.
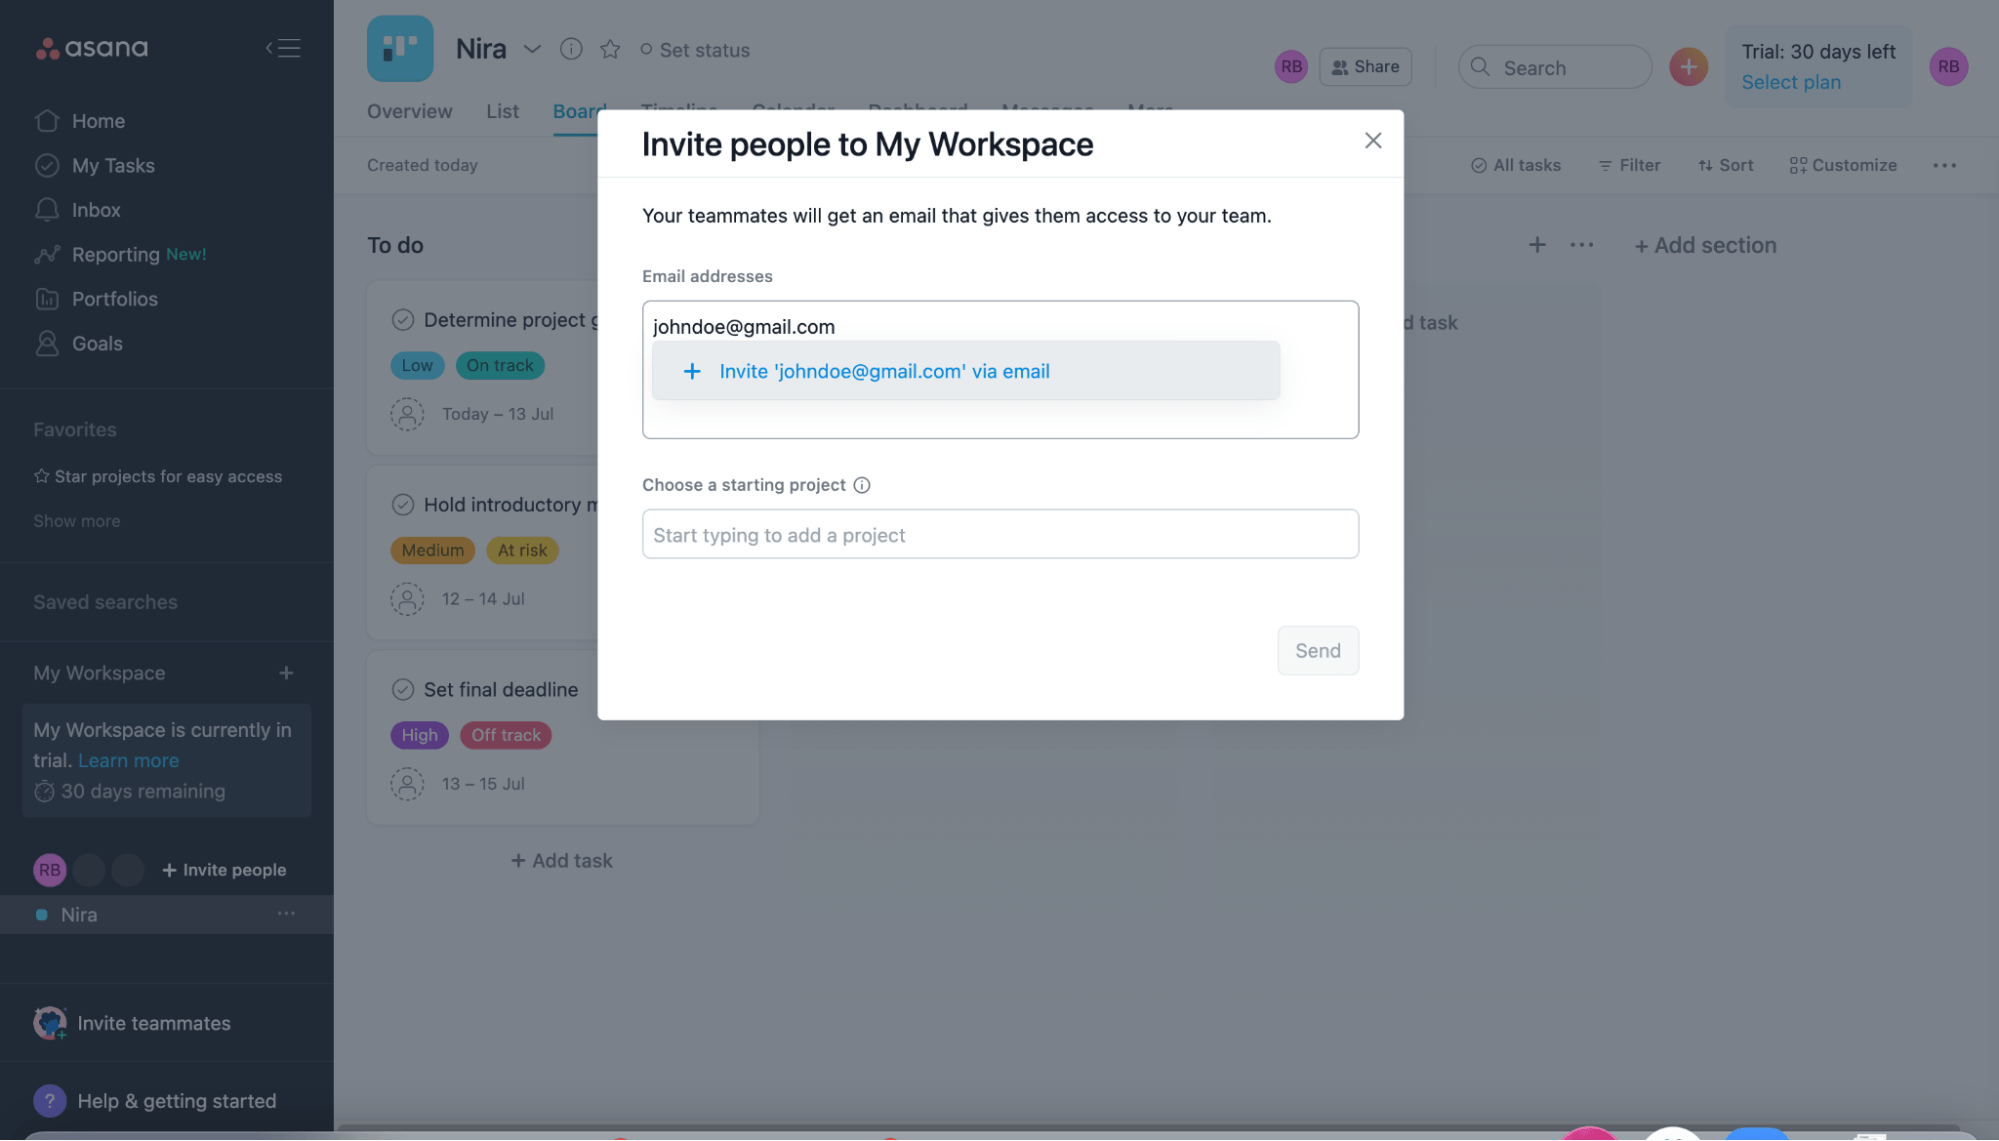
You can enter as many email addresses as you want. There’s also the option to add specific team members to specific projects only in case you plan on keeping projects private.
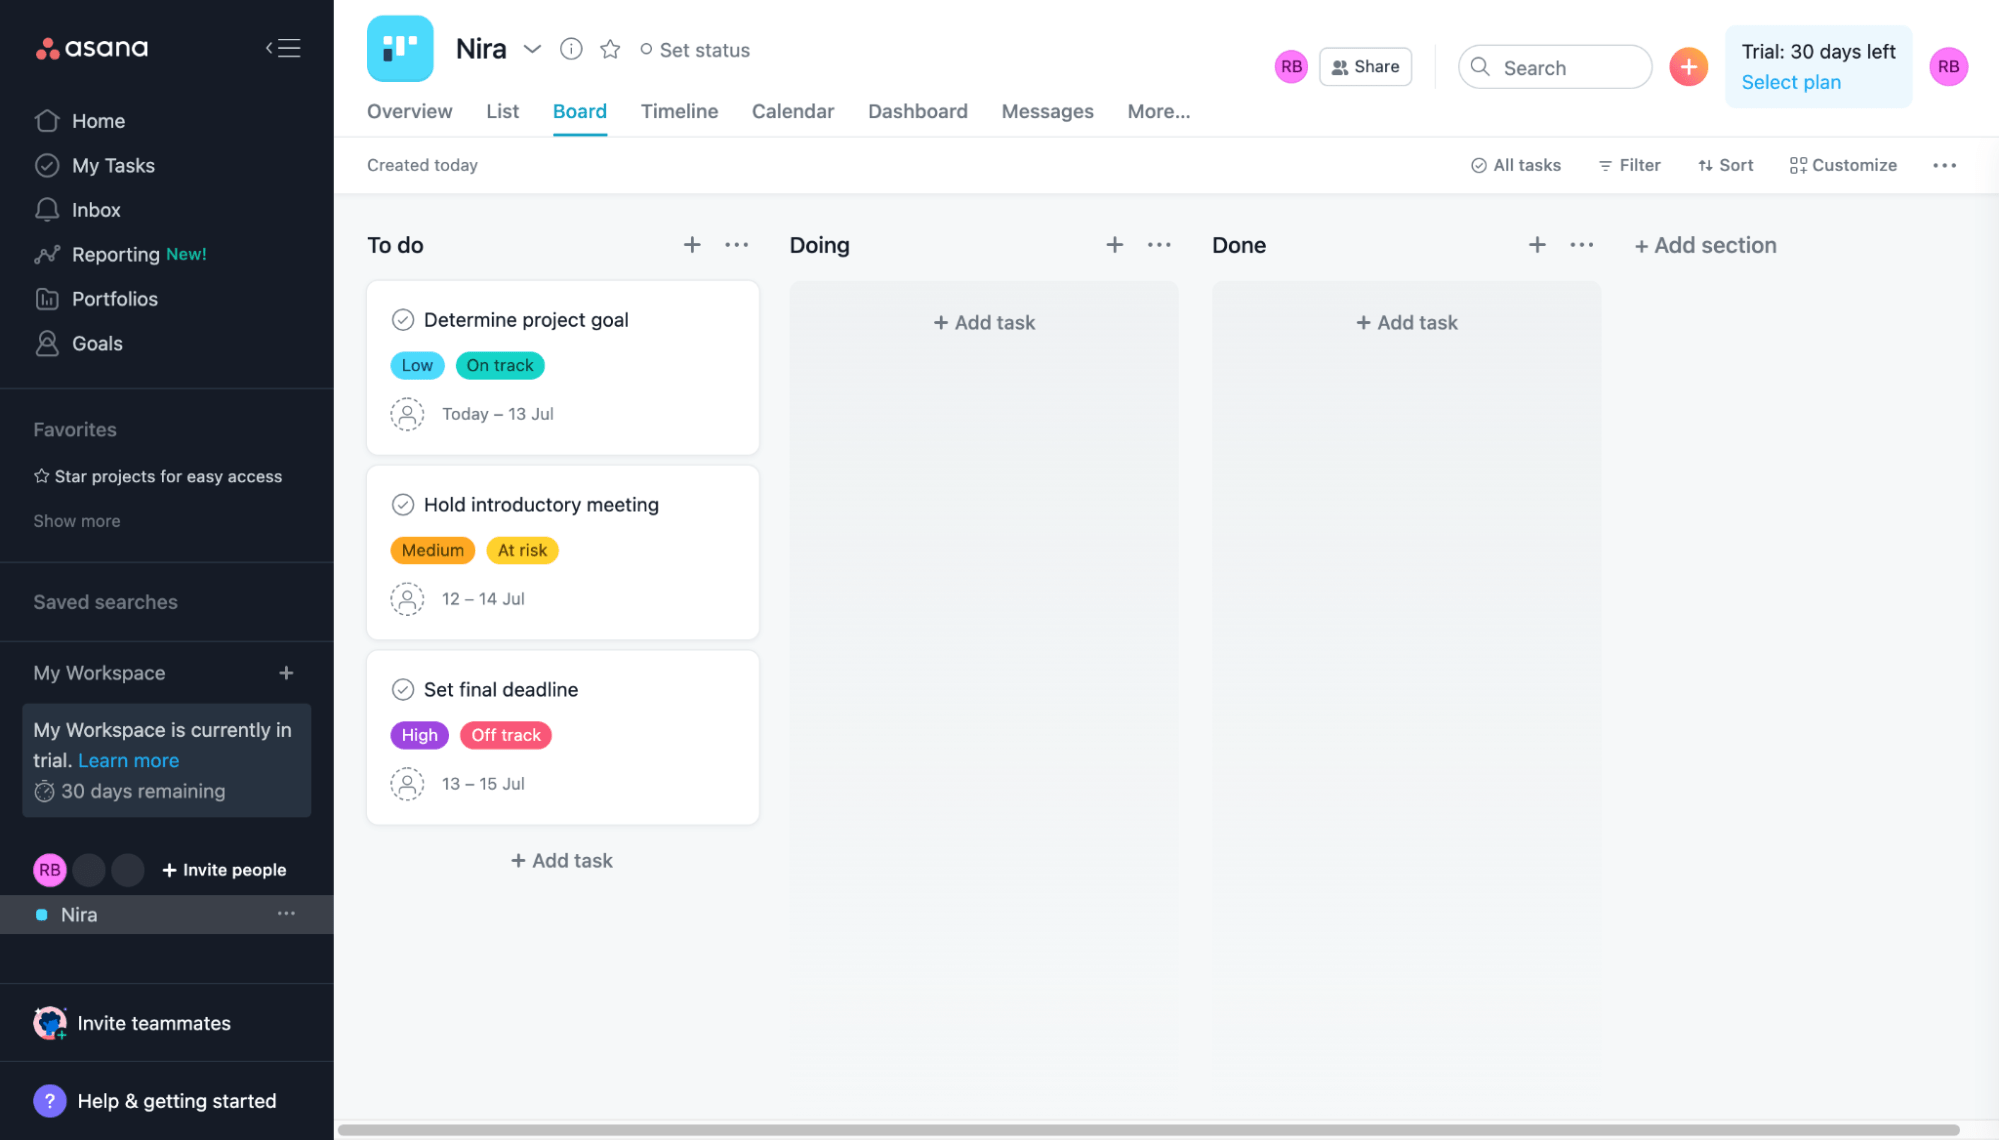
Step 3: Set Up All Your Projects
Let’s be clear on one thing: All your Asana projects are essentially different lists of related tasks.
You can create different projects for different areas of your work or for different clients. Follow this up by creating sections to categorize your work (we’ve chosen “To do,” “Doing,” and “Done”), and then tasks and subtasks under each section.
Renaming tasks and subtasks, along with rearranging sections and individual tasks, as the need arises is always possible. So you don’t have to worry too much about getting everything correct right away.
You should already have a project and a list of tasks set up if you followed Step 1 above. But if you skipped ahead, you’ll have to add a new project to your workplace.
To add a project, simply click on the Plus (+) sign beside your current project’s name.
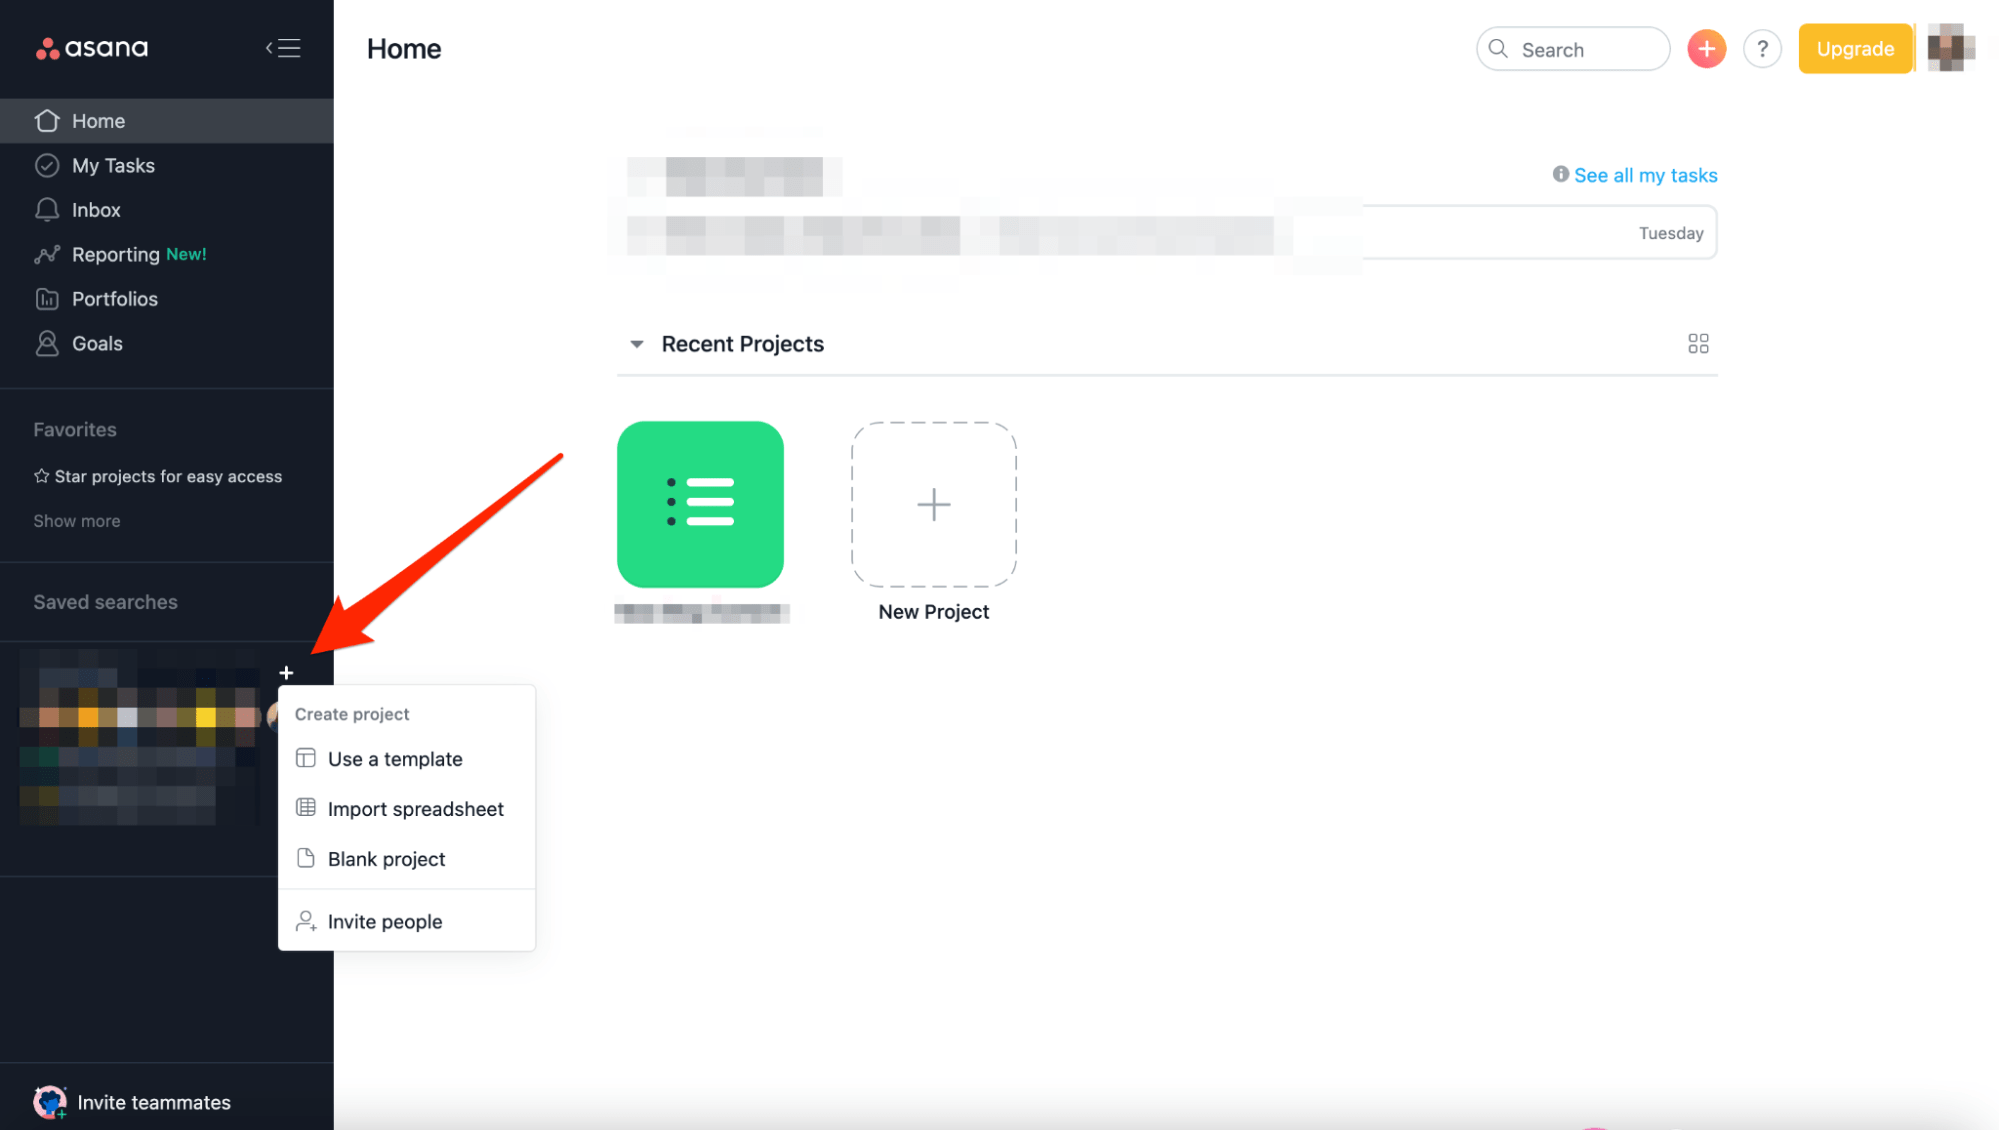
The process is the same for creating new tasks under a specific project. However, instead of the sidebar, you’ll find the Plus (+) sign next to the different columns you’ve set up.
Step 4: Fine-Tune Your Projects
In Asana, you can create projects for product launches, administrative tasks, workflows—whatever you like. It’s this versatility that’s one of the biggest USPs of the project management system.
Here’s how you can fine-tune your projects:
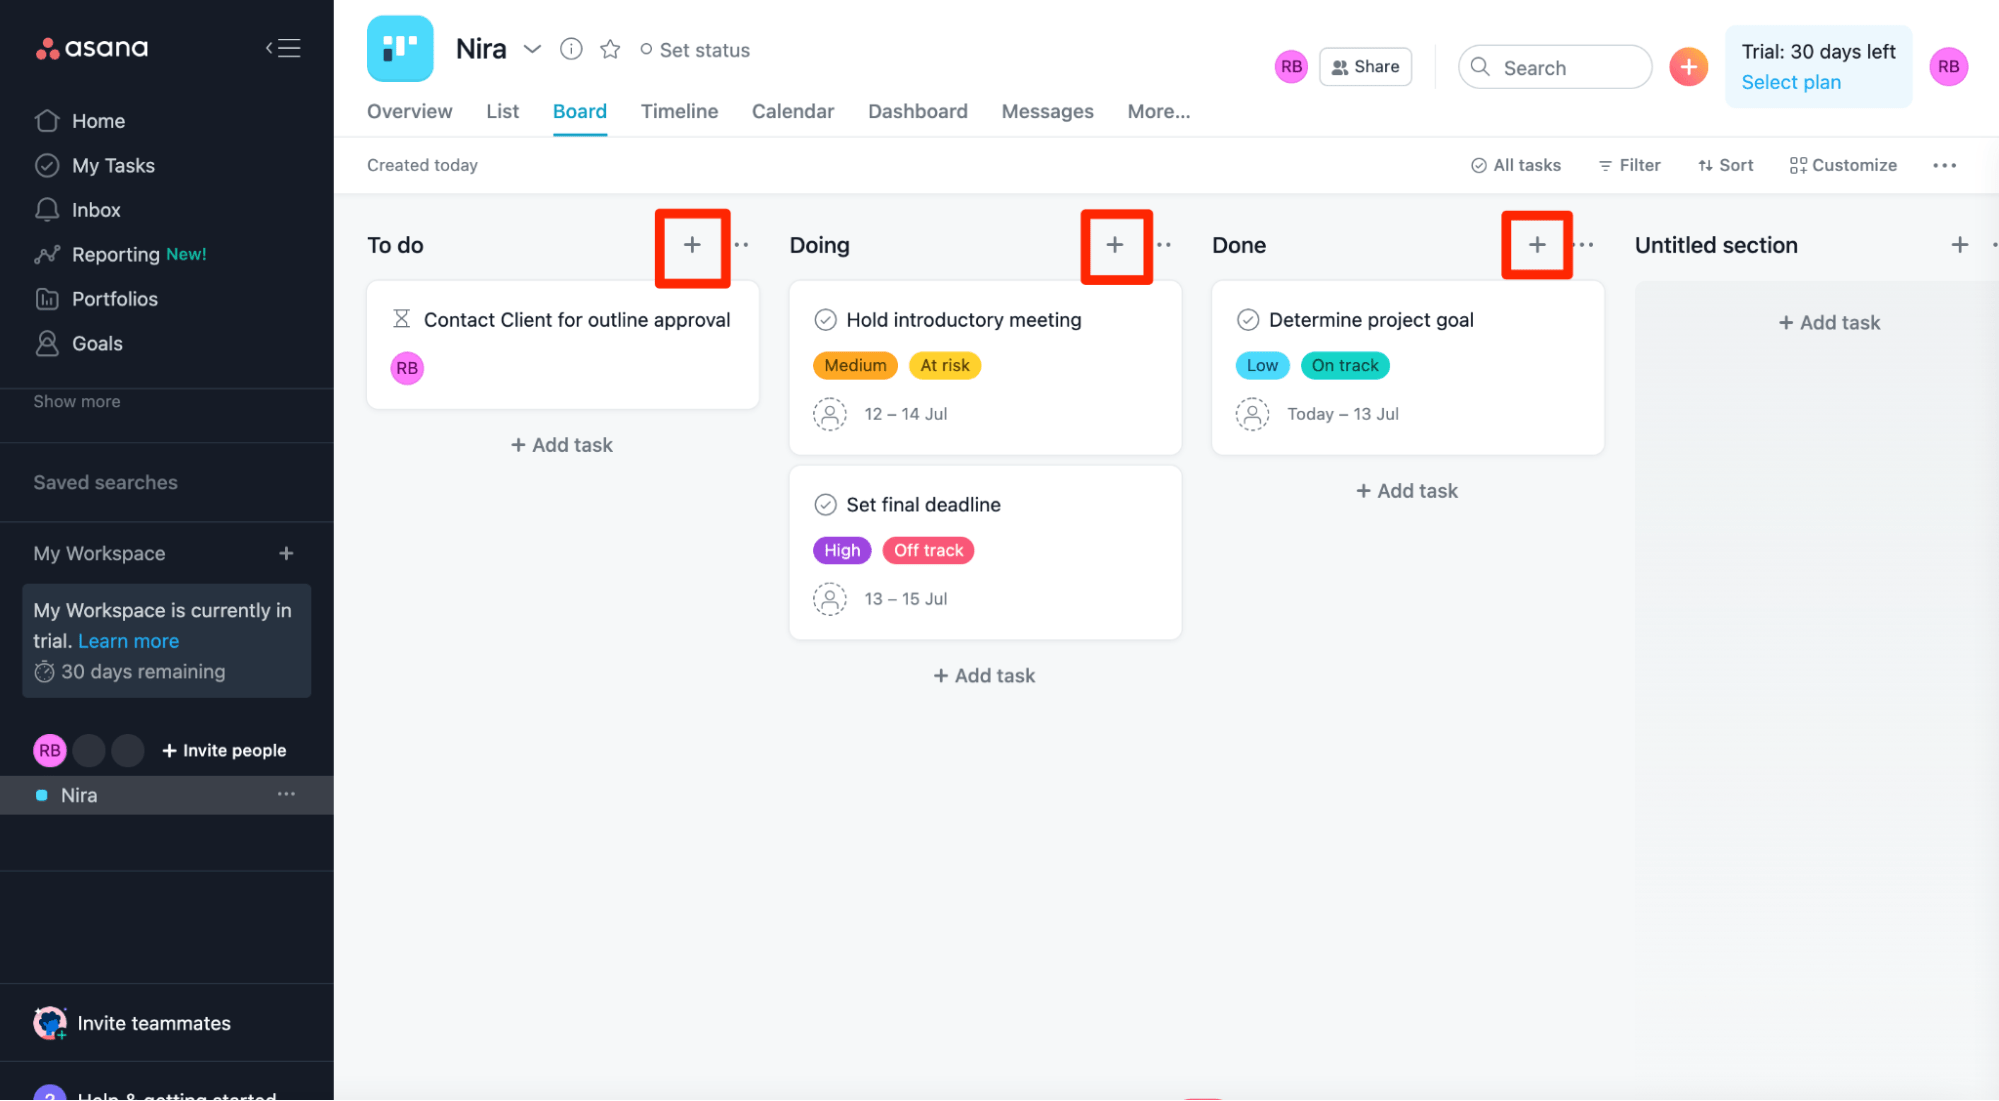
- Choose the project that you want to create tasks for.
- Click on the List tab. Add the necessary sections for different stages of the project by clicking on Add Section.
- Once you’ve created sections for the different stages, you can start adding tasks for every step of the process. To add this, select Add Task for the respective section and label it.
All this may look complicated at the first glance. But once you get accustomed to the interface, it won’t be that intimidating. You just have to familiarize yourself with the different tab names.
Step 5: Customize Your Tasks to Add Sub-Tasks
There are tons of related things involved in any main task—some big, some small. Asana understands this.
Precisely why you can customize all your tasks on the project management platform, breaking down every small step to ensure each one of your team members knows what needs to be done and who’s responsible for what.
Here’s a list of the different things you can do to boost productivity and improve results:
Creating Sub-Tasks
You can create tasks within tasks, also known as sub-tasks to break them down further. This is actually an excellent feature that can work wonders to streamline all your processes. This also enforces accountability at the granular level, driving workflow.
Here’s how you create sub-tasks for the main task category.
-
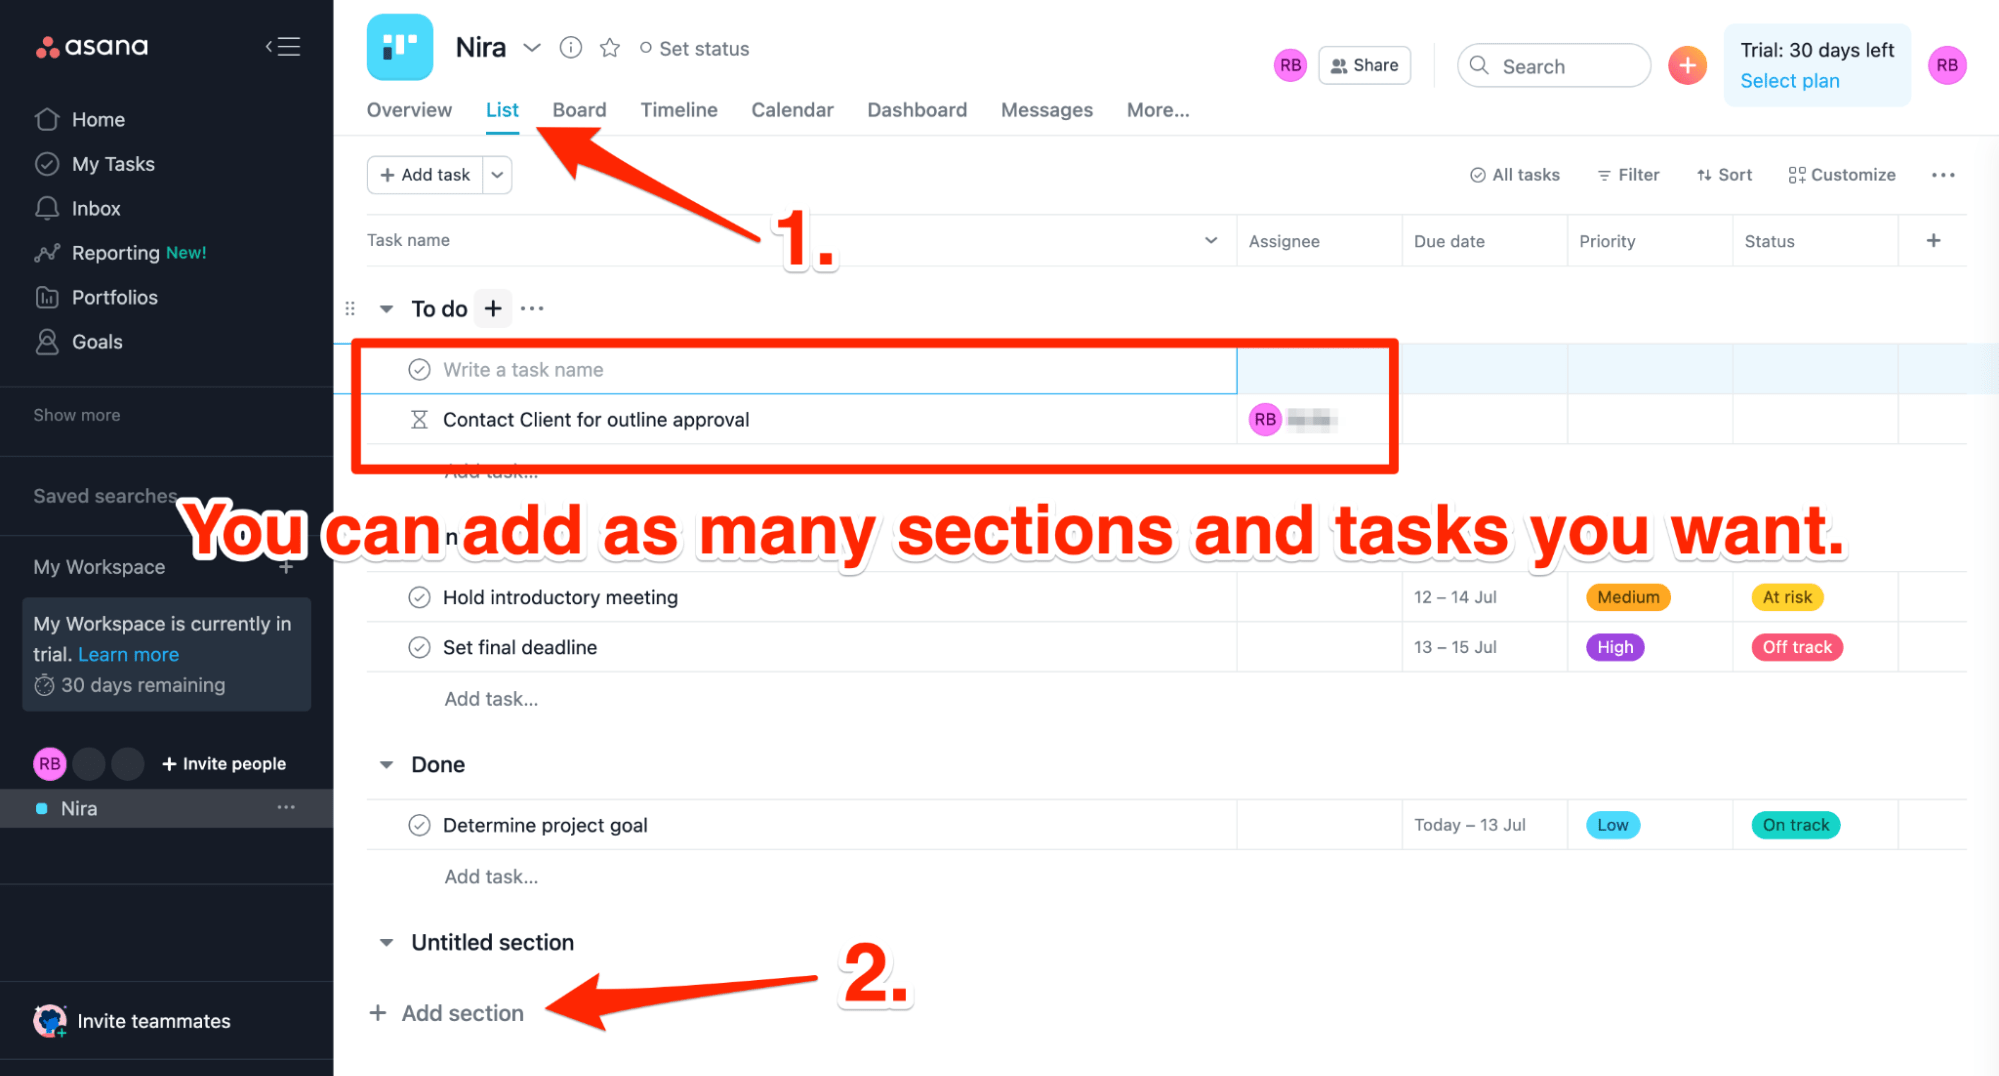
- Click on the task you want to create sub-tasks for.
- Select the List icon at the top of the task. Alternatively, you can also click on the Add subtask button.
3. You’ll see a new row added under the Subtasks heading. Type in the name of your subtask.
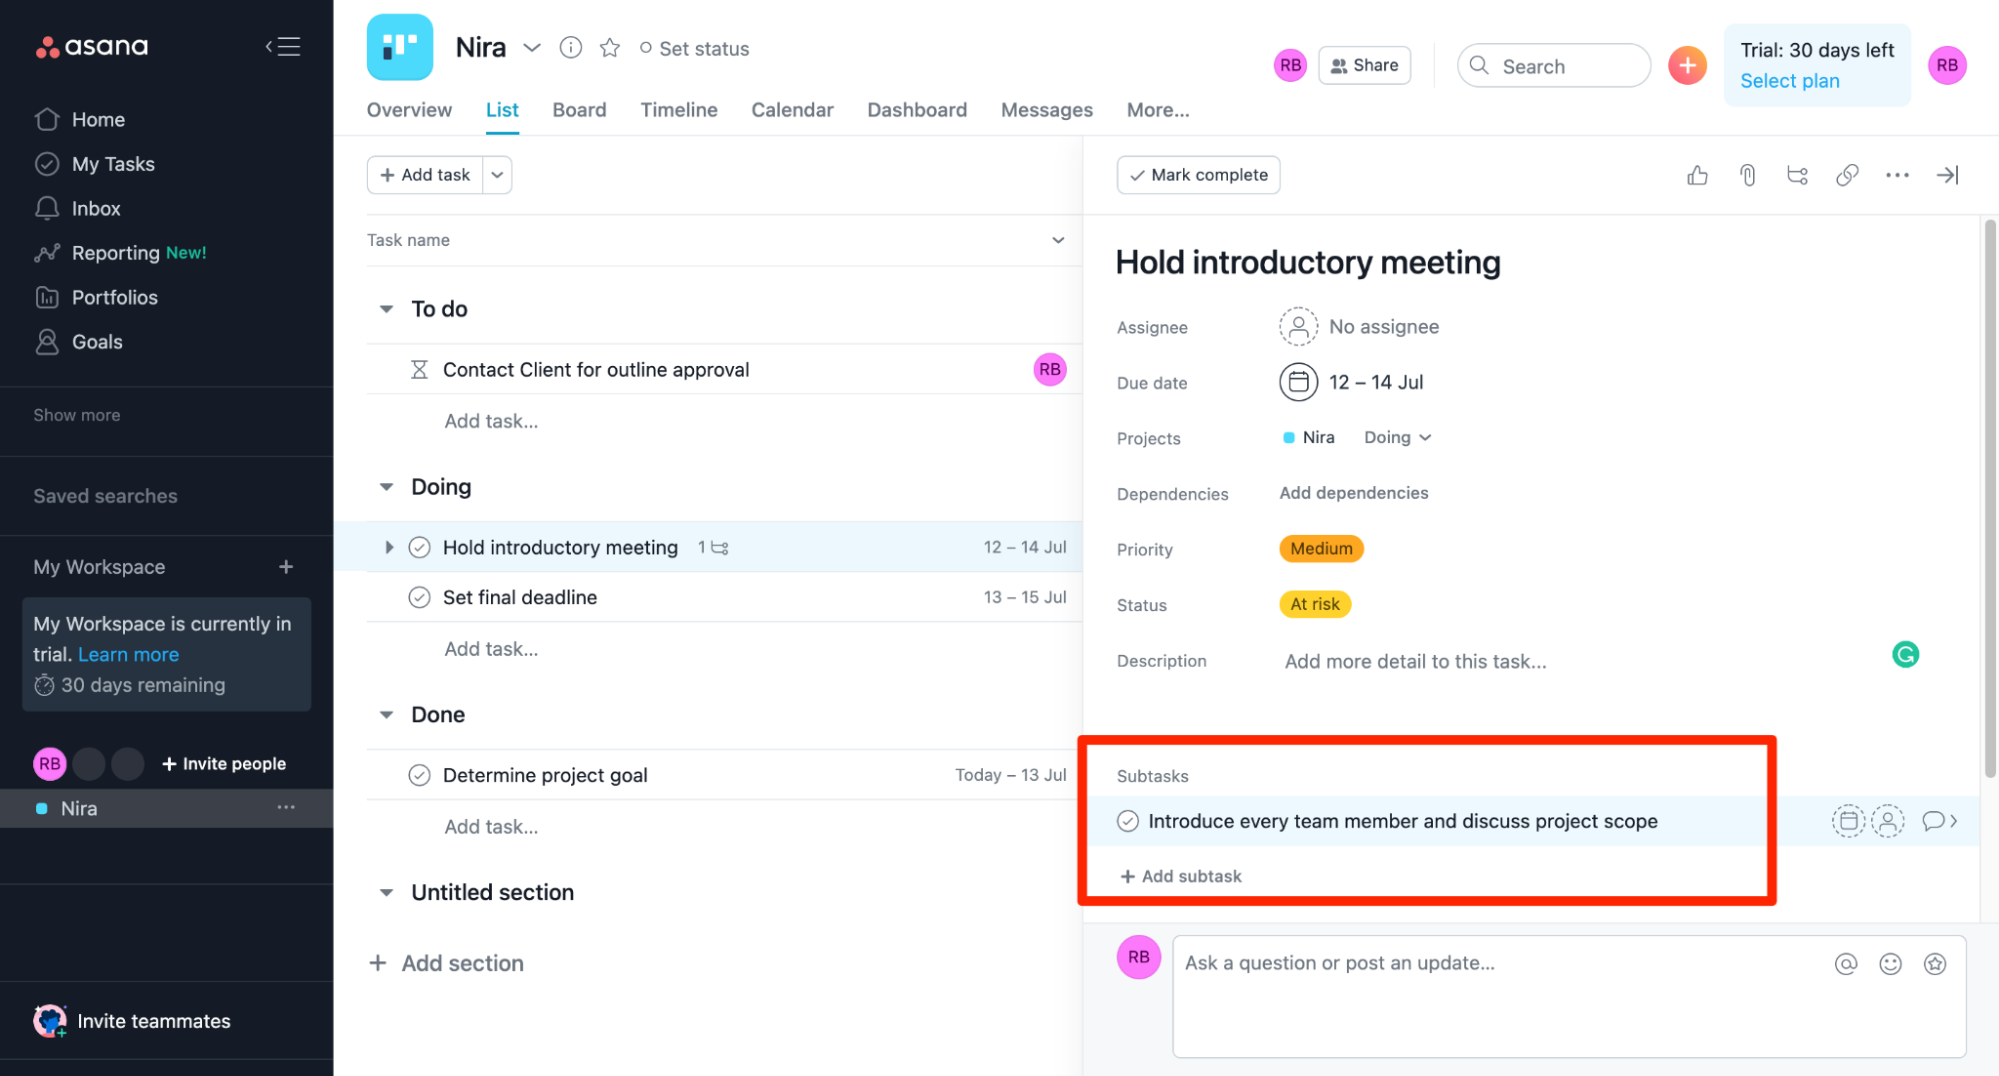
Continue outlining all the sub-tasks by following the same process.
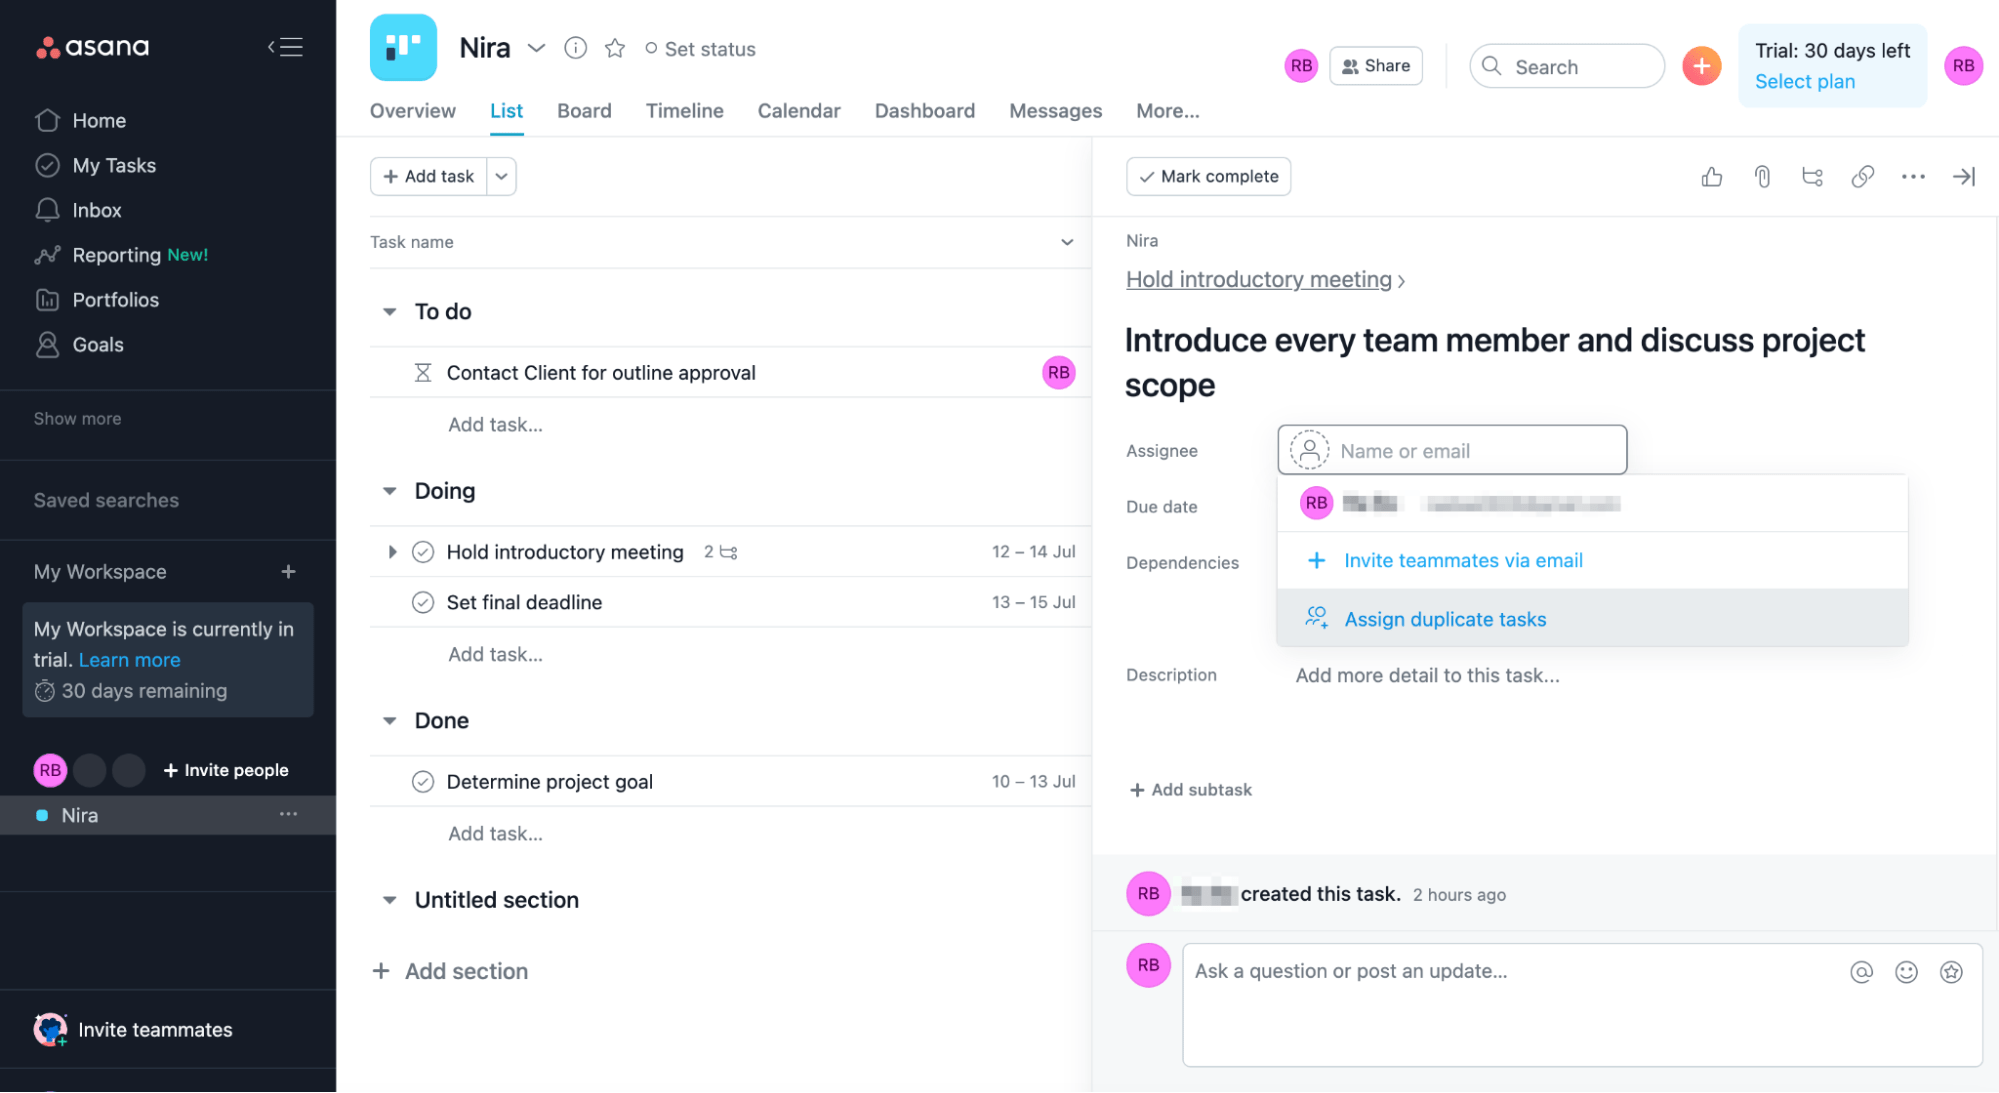
Adding Due Dates and Assigning Sub-Tasks
You can allot due dates and assign every sub-task created. To add a due date, click on the small Arrowhead towards the very end of the sub-task row.

Click on the small calendar icon. A small calendar pop-up will appear on your screen. Assign a due date for the specific sub-task.
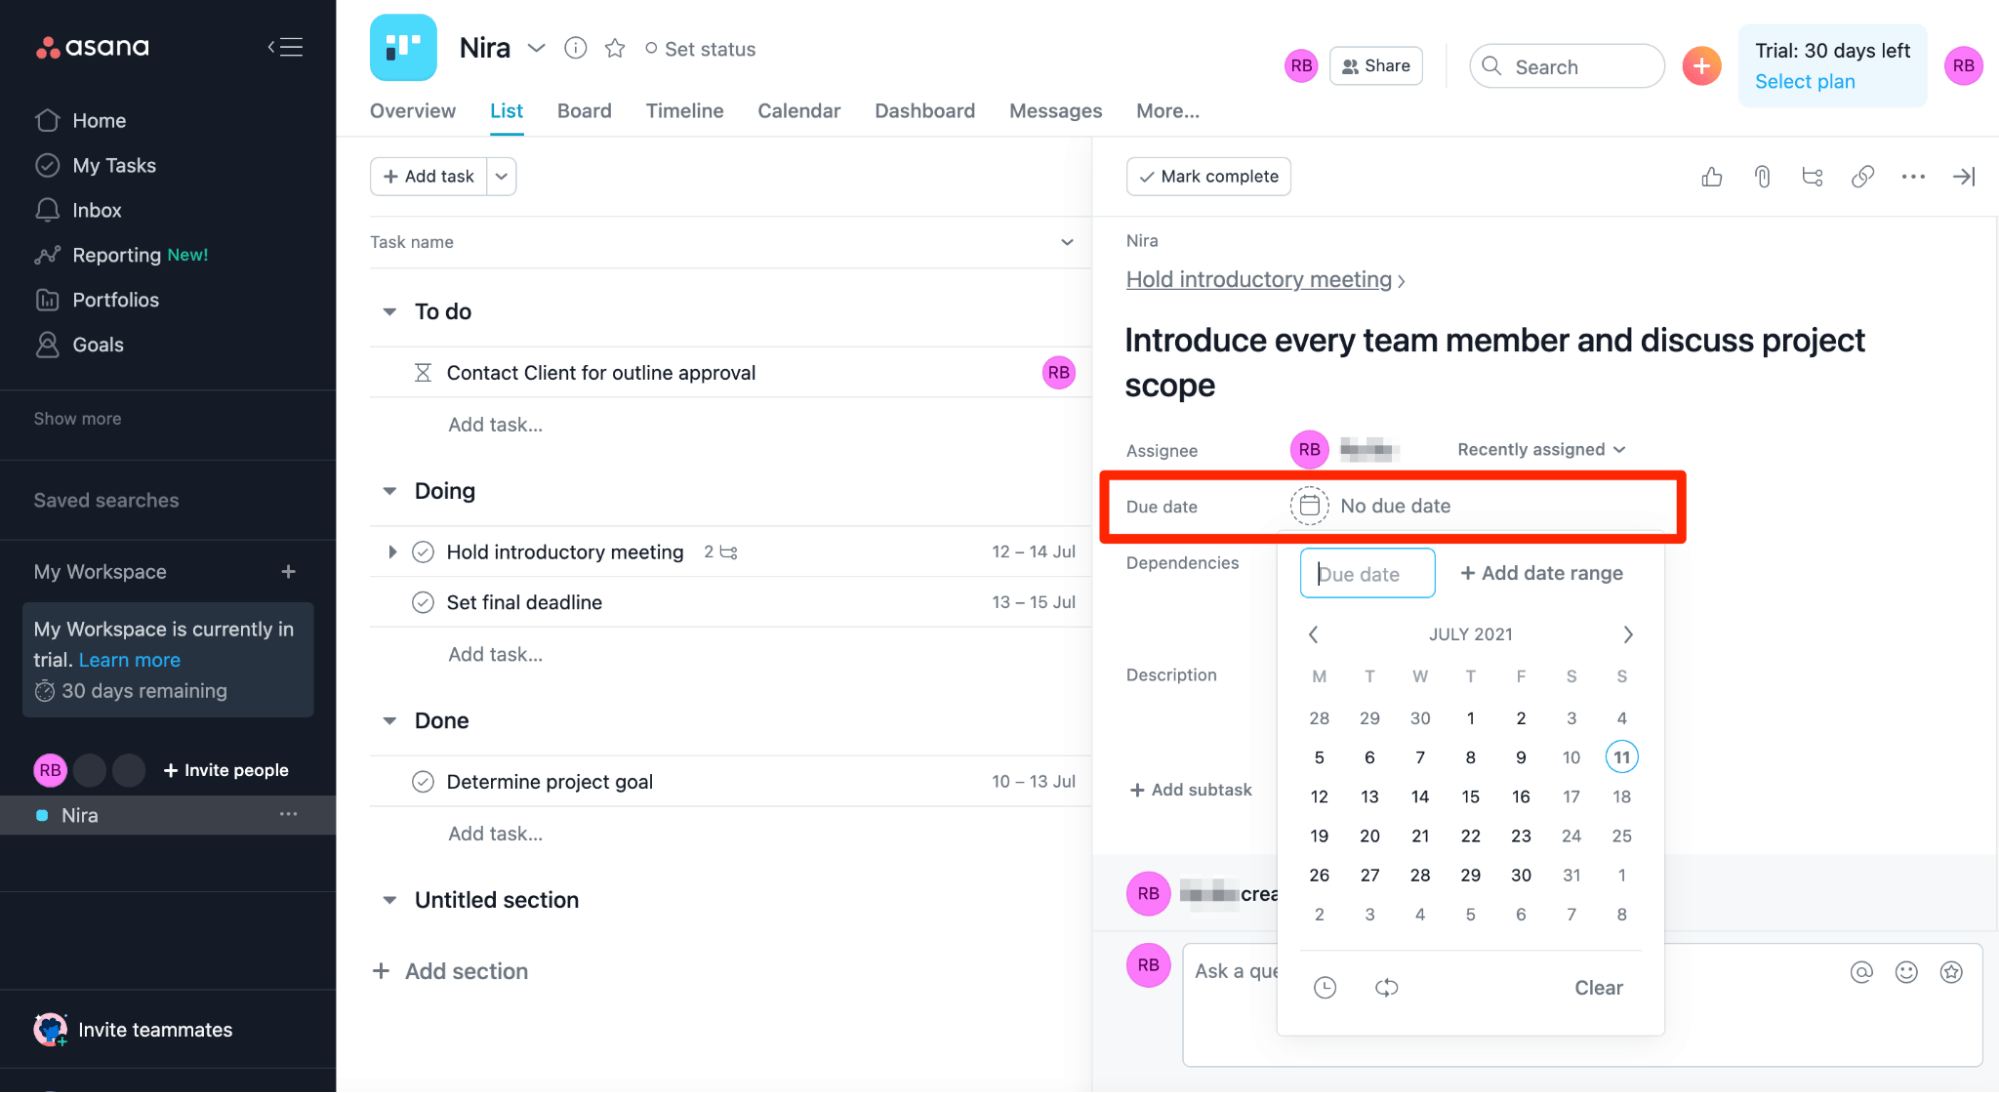
If you want to assign the task to a team member, click on the Assignee field to select the team member’s name. You can also invite new team members to your Asana board.
Adding due dates and assignee names is incredibly important to facilitate your workflow. Make sure you don’t forget this step or make mistakes since this may considerably slow down progress.
Adding Tags to Tasks (Color-Coordinating Tasks)
Asana lets you add tags to organize tags into different categories. This color-coded organization can be very useful to keep a visual track of all the different types of tasks going on.
To add tags to your tasks, click on the three dots towards the top right-hand side of your screen. Select Add Tags.
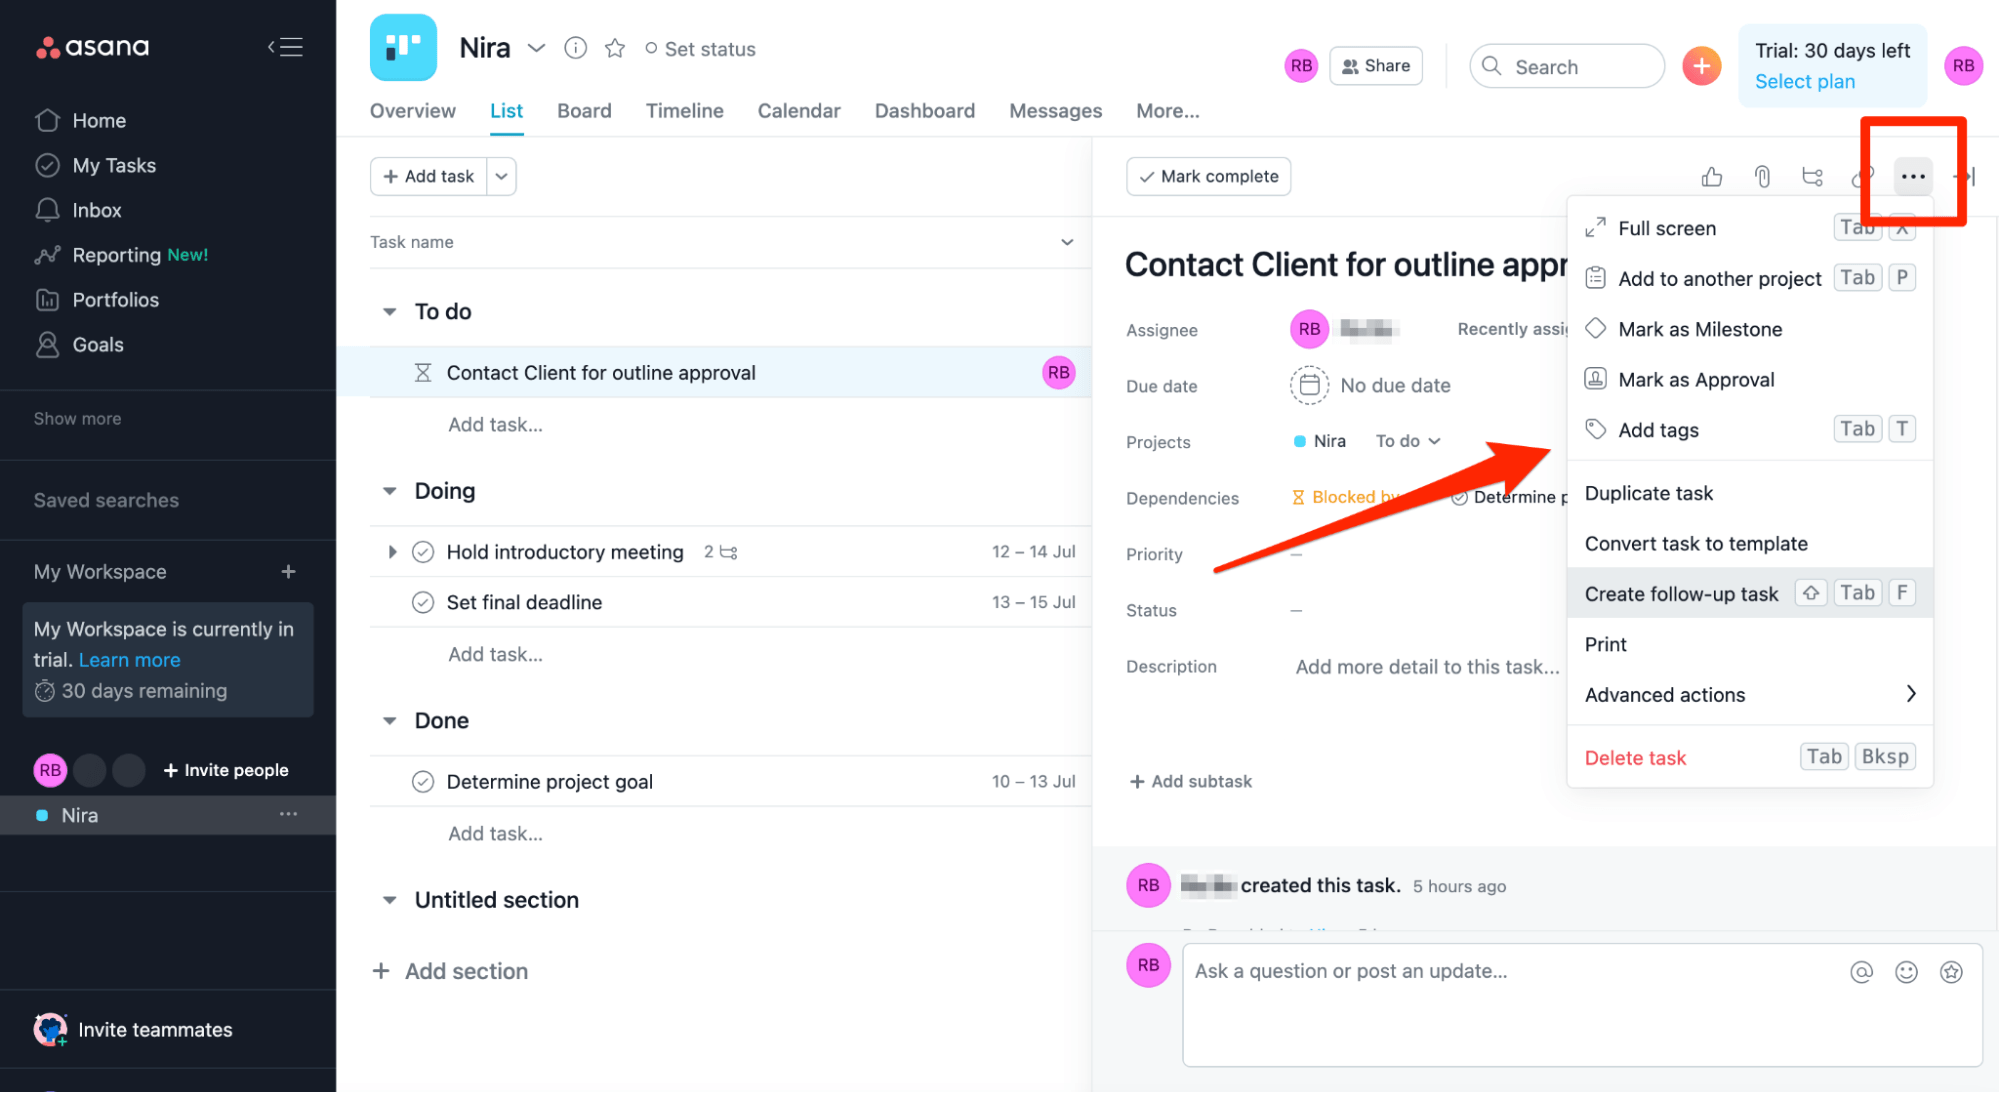
Enter a relevant tag name in the field. Choose your tag name carefully as you’ll be using them to categorize your tasks in the future as well. For instance, if you’re creating a content calendar on Asana, your tag names can be “Blogs,” “Newsletters,” “Social media posts,” “eBooks,” and so on.
Do you see how we’ve purposely opted for tag names with a broader scope? Try to do something similar.
Adding Files, Images, and Comments
In addition to the above, there are tons of other things that you can do to customize your Asana tasks, including:
- Attaching photos
- Adding files
- Leaving comments
These features will allow you to post document links, add files, and communicate with team members in one place, which, in turn, will make the whole process more transparent.
Step 6: View Your Dashboard (and Customize if Needed)
At this stage, all your projects and tasks are set up and assigned. We also recommend assigning due dates for every task and sub-task to drive and simplify project workflow.
This way, each team member can keep track of all their assigned tasks and organize their schedules to be on top of things always. To organize an individual dashboard, click on the My Tasks tab on the sidebar. Your screen should look something like this:
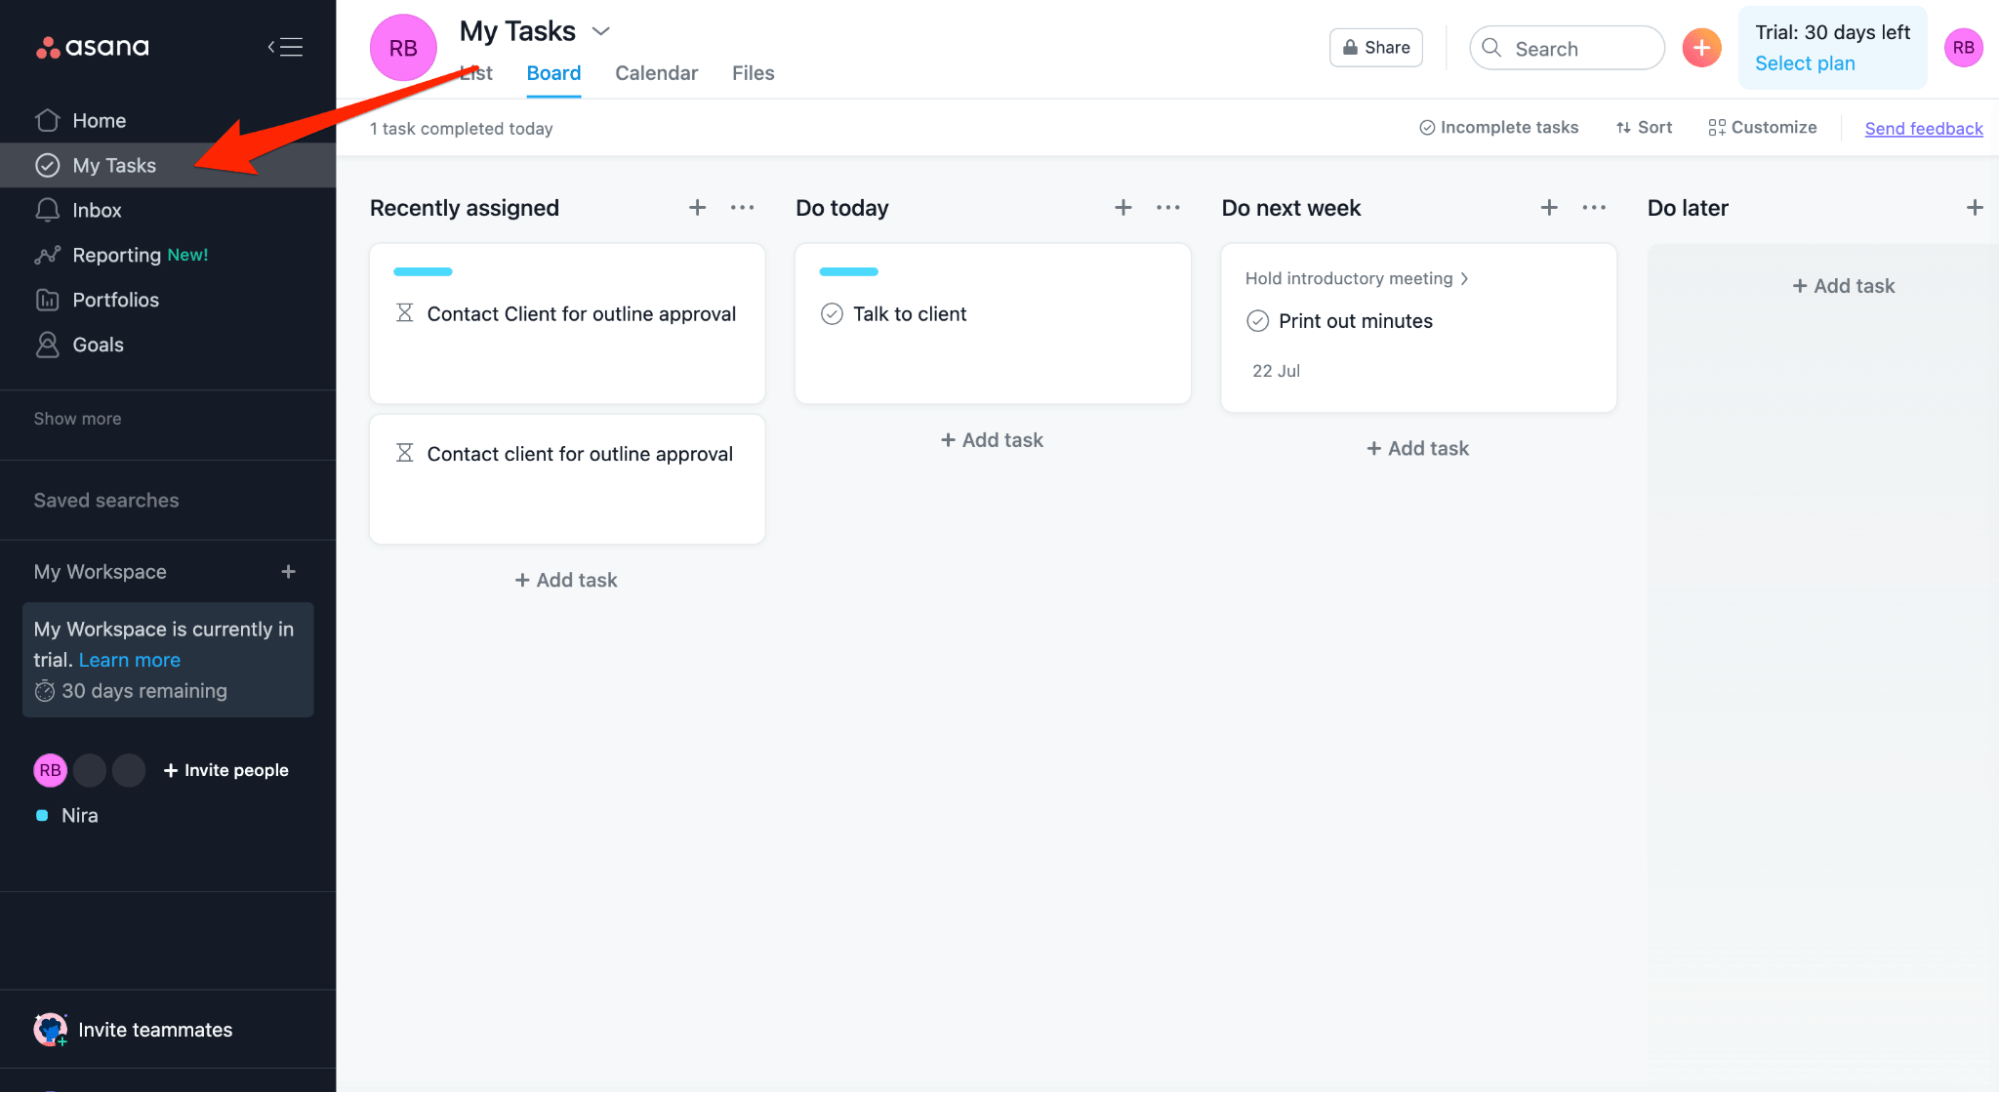
Selecting different dashboard views for your assigned tasks is also possible. You can choose between List, Board, and Calendar views.

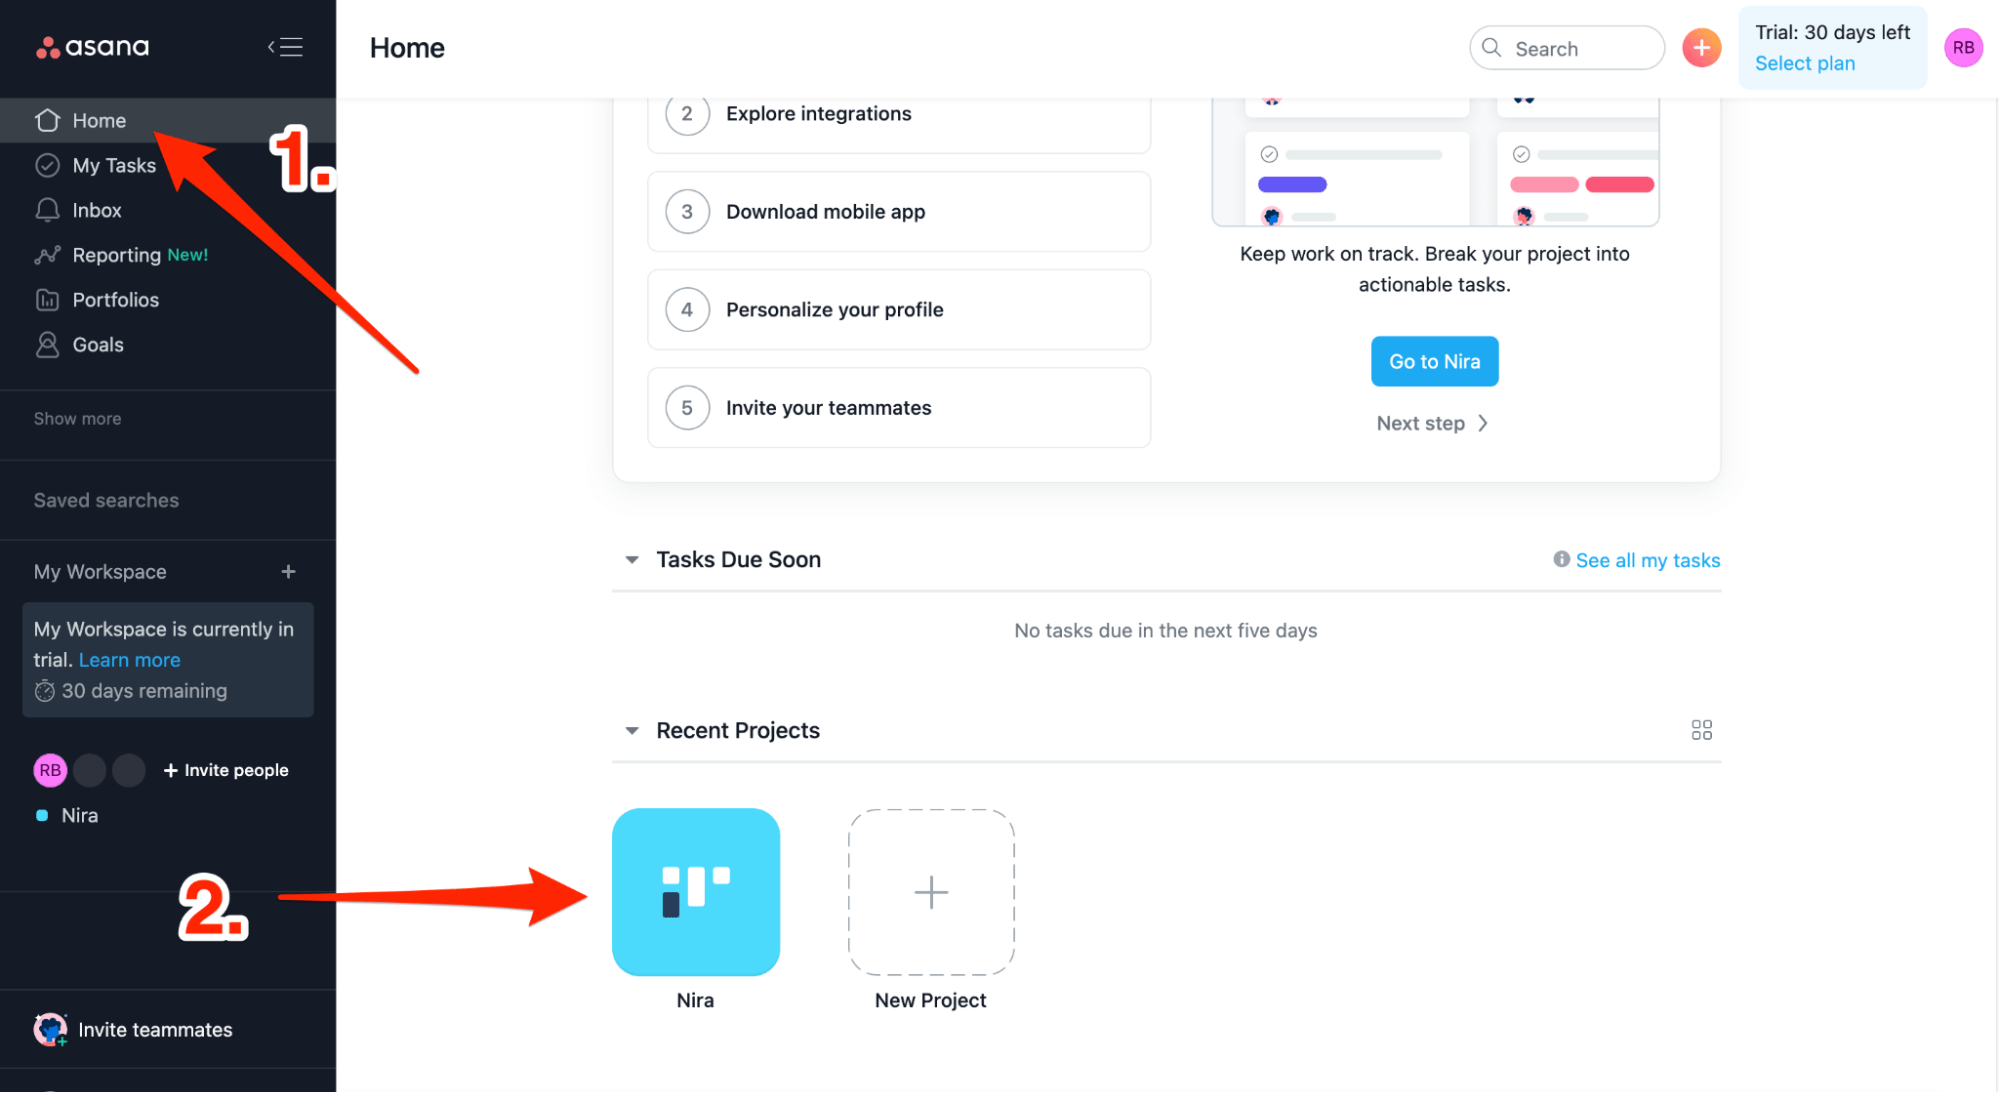
However, if you want to get a pulse of how the overall project is performing, the steps are different.
Click on Home, followed by the project you want to track progress for.
Then select Dashboard from the top menu bar. Your screen should now look like this:
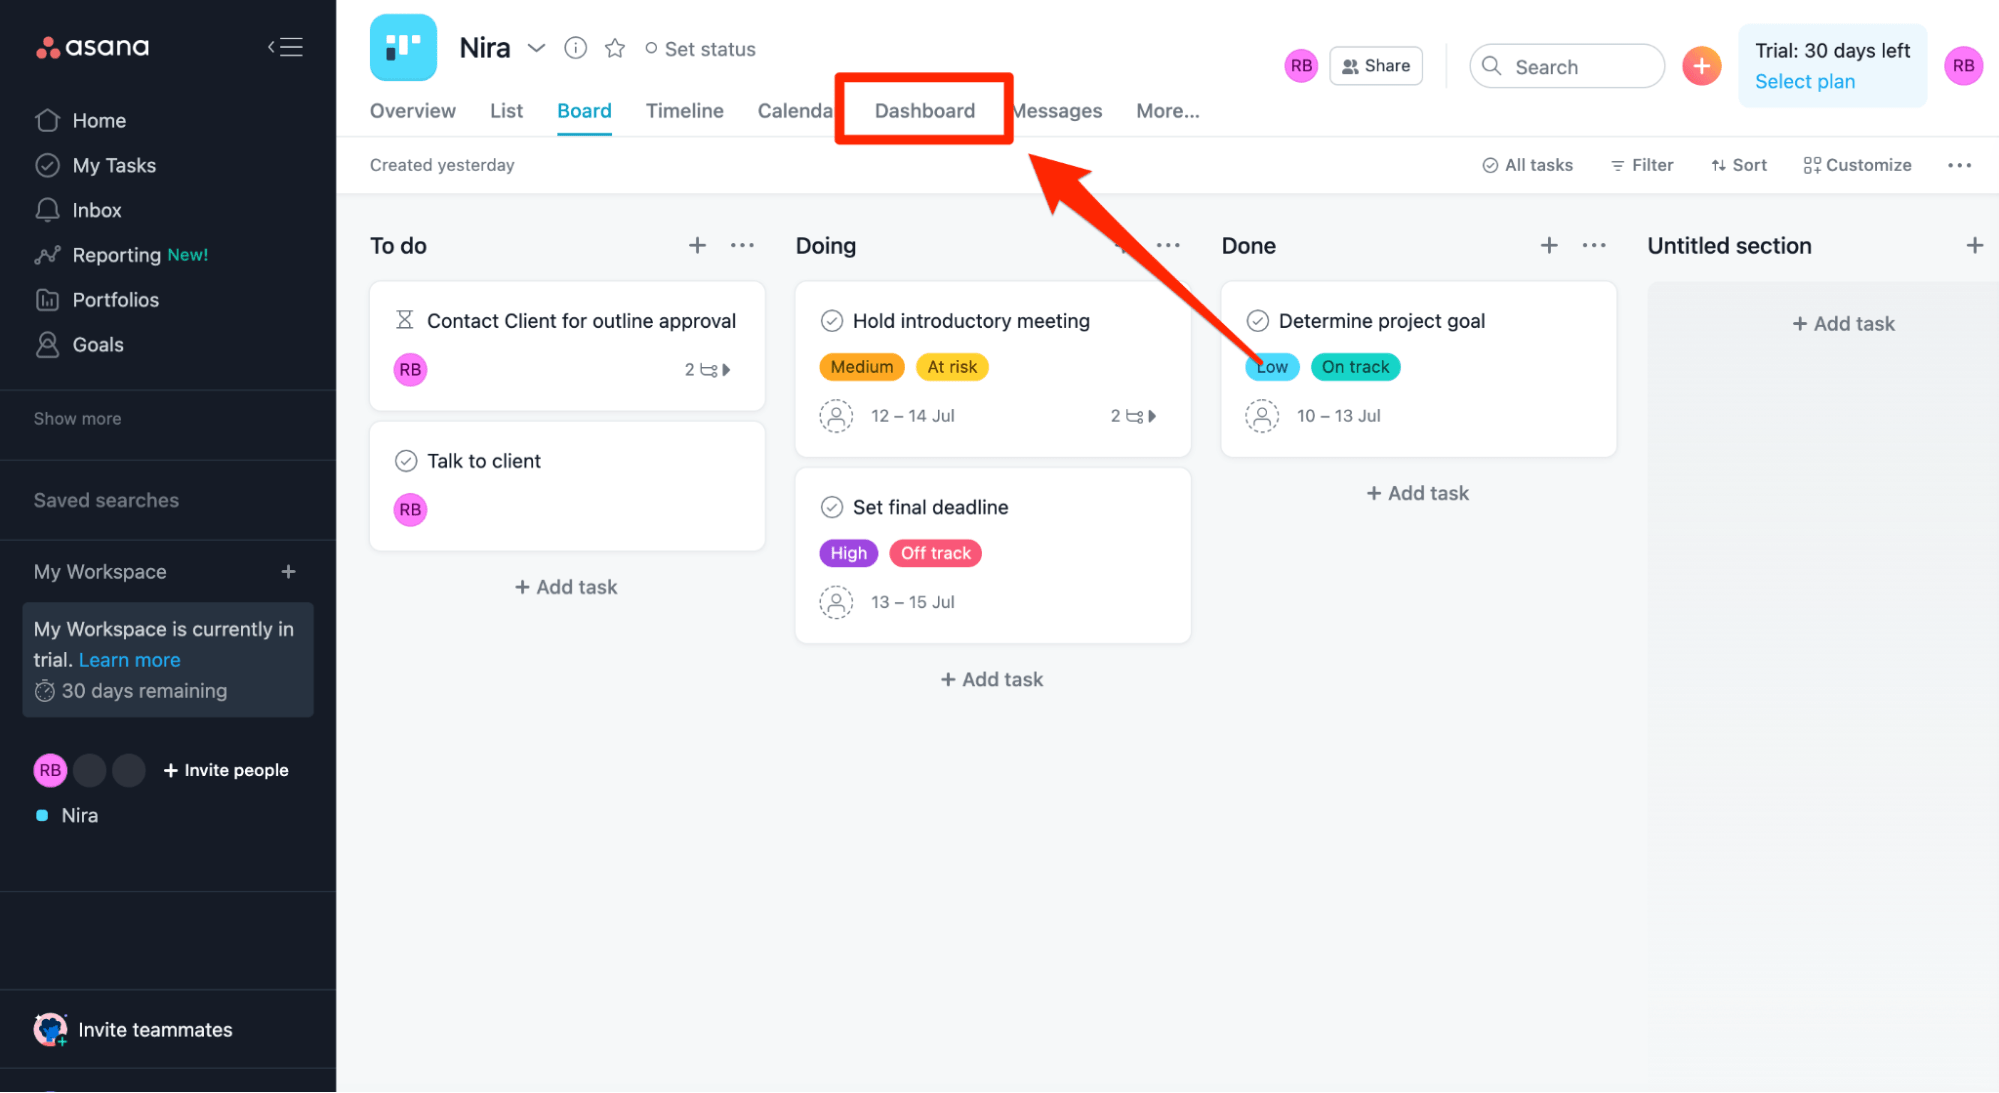
As you can see, all the different aspects of your projects are properly organized in the form of charts and graphs, giving you a visual representation of your overall progress.
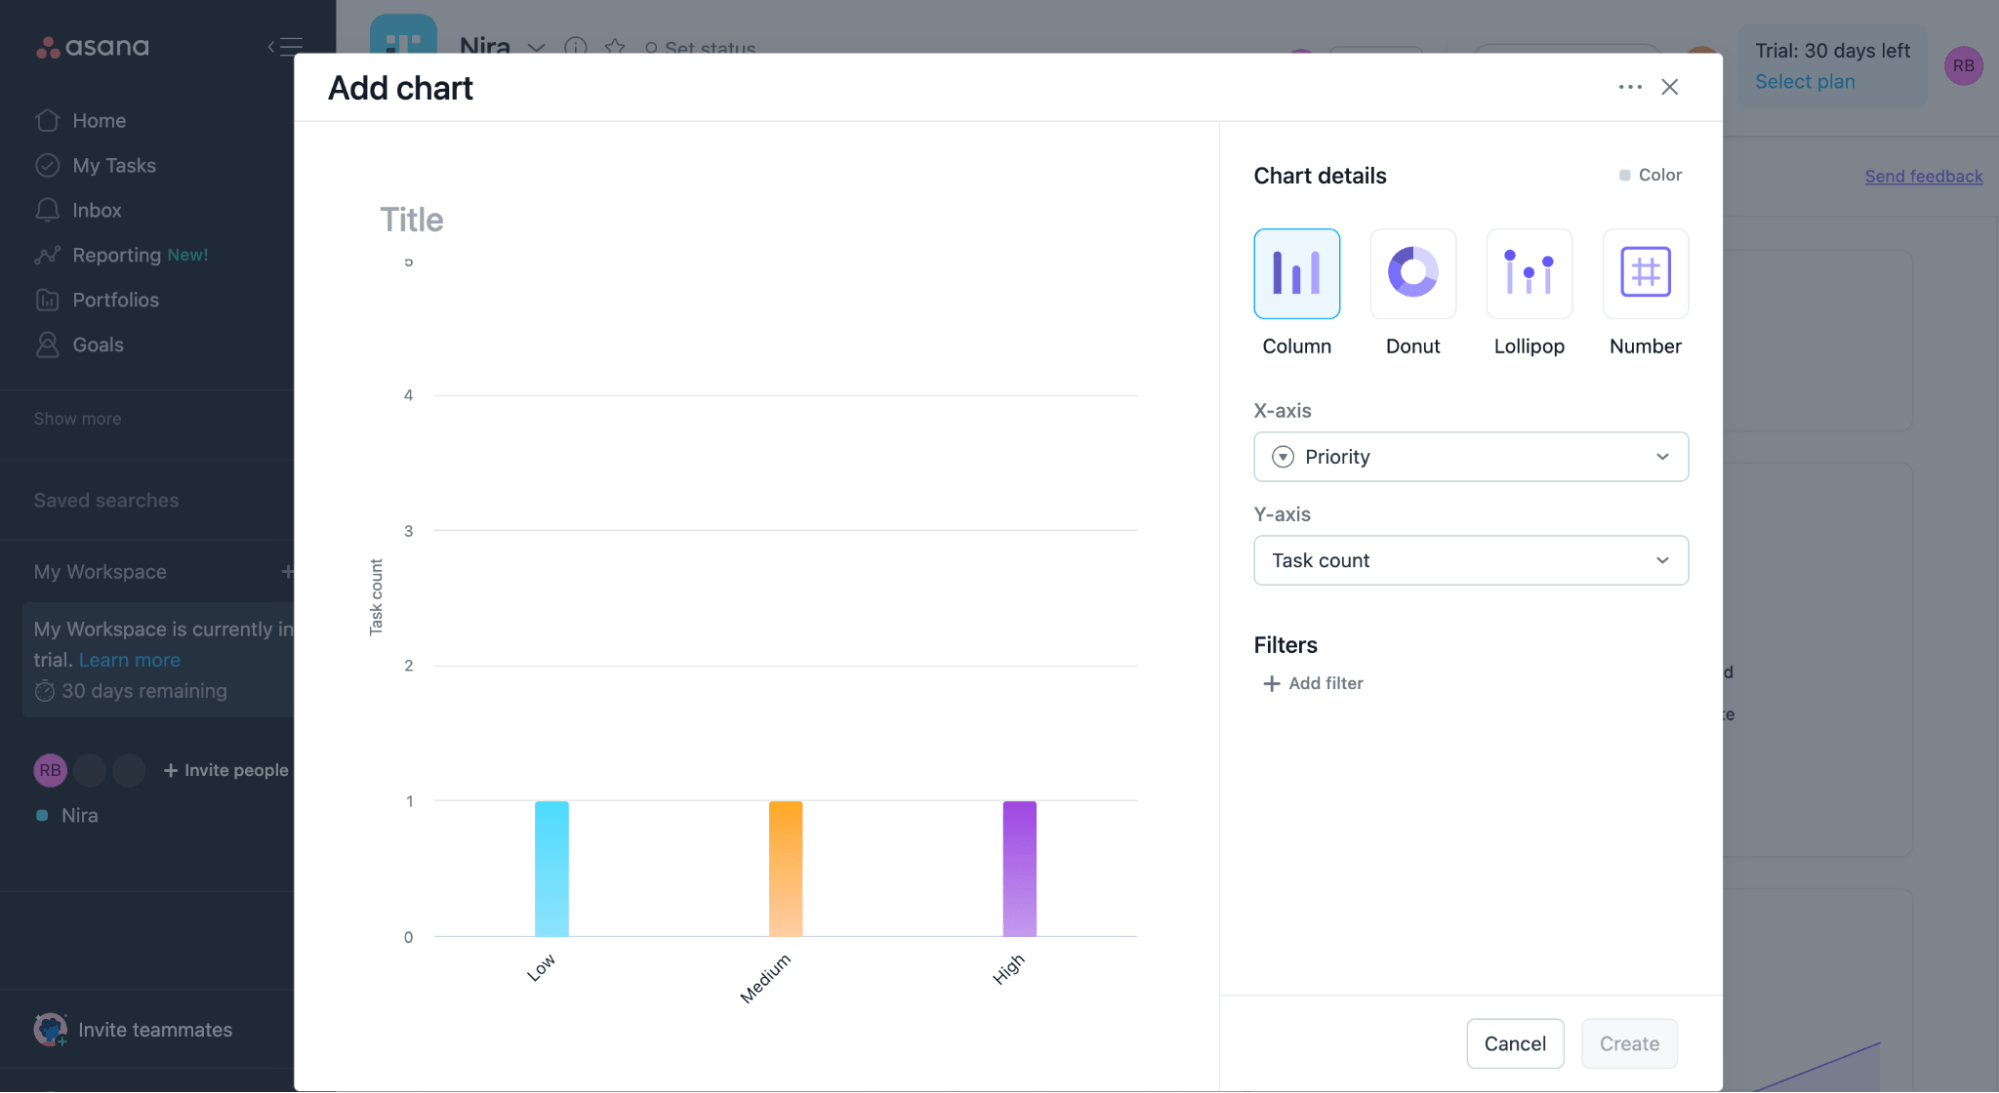
What’s more, you can also add charts—column, donut, lollipop, and number—to customize the dashboard further by clicking on the Add Chart button on the top.
So that’s how you use Asana as a dashboard. Pretty awesome, right?
One of the biggest advantages of doing this is the neat and clear display, where you can see everyone’s tasks at a glance as well as track the overall project progress.
And oh! Don’t forget to mark the completed tasks off.
Common Problems When Using Asana as a Dashboard
Asana is definitely one of the more user-friendly project management tools on the market. But this still doesn’t guarantee you won’t encounter problems when using the system.
Below is a list of some of the most common issues faced by users when using Asana as a dashboard. Let’s take a quick look.
Problem 1: Forgetfulness
We’re human beings. We forget stuff. However, if you forget to add team members to tasks or assign due dates, you may end up creating unintentional bottlenecks in your workflow.
Forgetting to assign a task to the designated team member means they won’t be notified about it. This also means the task won’t appear on their personal dashboards, which would lead to them not doing the task.
It’s the same issue if you forget to assign the due date for a specific task. With no due date set, the team member may prioritize other tasks, leaving this one pending—sometimes, way past the due date.
Both these mistakes will affect your Dashboard’s result, giving you an inaccurate visual progress representation of the project.
Problem 2: Overcoming the Learning Curve
Although the majority of Asana users find the project management system user-friendly, there are also project managers who don’t.
A few users have complained they struggled when learning to use Asana and were hence, not very keen on its graphics and interface.
While holding an onboarding training session for all team members is an excellent solution to solve this issue, this can be expensive in terms of the expense and time involved, especially when you’re using a free version of the platform.
Problem 3: Dashboard Customization Complexity
Asana‘s Dashboard feature can be life-changing for companies. However, customizing these charts may also be a bit complex for beginners.
One has to first know how to create and edit a chart, which includes choosing a format (doughnut, lollipop, column, numeric) and deciding how to group your chart data (x-axis) and measure the data (y-axis). Understanding how to layer filters on each chart is another thing to learn.
This is again a challenge that can be overcome by giving team members a brief rundown of how Asana dashboards work, meaning you have to be prepared for the time and money investment.

