How to Use Asana as a CRM
Customer relationship management, or CRM, is an essential function in every organization that needs to ensure the flow of information from and to customers is relevant, impactful, and timely.
In this article, we’ll discuss how you can transform Asana’s robust project management features into an effective customer relationship management setup and how you can use it to take your business to the next level.
Let’s begin.
Using Asana As A CRM: An Overview
Asana is a powerful work management application designed for agile software development teams and modern-day businesses looking for flexible ways to manage their projects and operations.
It isn’t primarily a CRM, and it is not advisable to use it as an alternative to dedicated CRMs like Salesforce, PipeDrive, HubSpot, etc.
However, you can use Asana as a lightweight CRM when your organization does not require advanced customer relationship management features.
So what exactly can you do with Asana as a CRM?
The primary function of a CRM is to provide users with a complete picture of customers’ paths with their organization. For example, in the case of a sales CRM, this journey would start from the pre-sale lead stage and go to the purchasing stage and beyond.
For a regular post-sale CRM, this journey would include everything from onboarding, account setup, and a complete track of the customer’s engagement with an organization.
Asana provides you a central platform to create a CRM-like environment where you can track the complete journey of a lead or customer and ensure that everyone involved in the process is regularly updated. You can also use Asana’s boards and task list views to track the complete workflow of your sales or customer service procedures.
Moreover, you can use tasks and projects in Asana to create dedicated customer lifecycle threads to track their complete journey with your organization transparently.
Asana comes with several account management and pre/post sales workflow templates that can help you set up your initial CRM workflow.
Alternatively, you could start from scratch and create a workflow that suits your specific business needs.
Either way, you can use Asana as a lightweight CRM that provides you a 360-degree view of your customer’s lifecycle and helps you and your team deliver better customer experiences.
Let’s now move to the various steps involved in using Asana as a CRM.
Creating Your Sales CRM Workflow In Asana
We’ll start with a simplified sales CRM workflow to demonstrate how you can use Asana as a CRM. The objective here is to ensure that we create a system in which every lead is appropriately tracked and managed, and all relevant stakeholders are updated on its progress all the time.
Here’s how you can do it.
Step 1: Sign in to your Asana account.
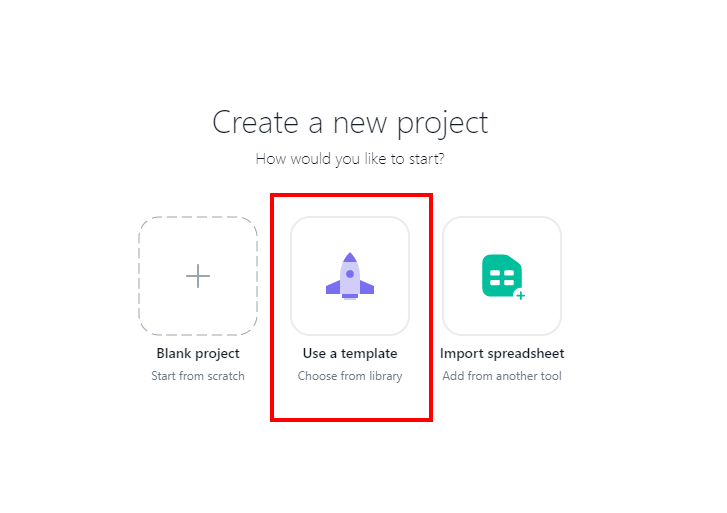
Step 2: Click the + icon in your dashboard and select New Project.

Step 3: We’ll be using a template for creating a CRM in Asana, so choose to Use a template.
Step 4: In the template section, click the Type menu and choose Sales.
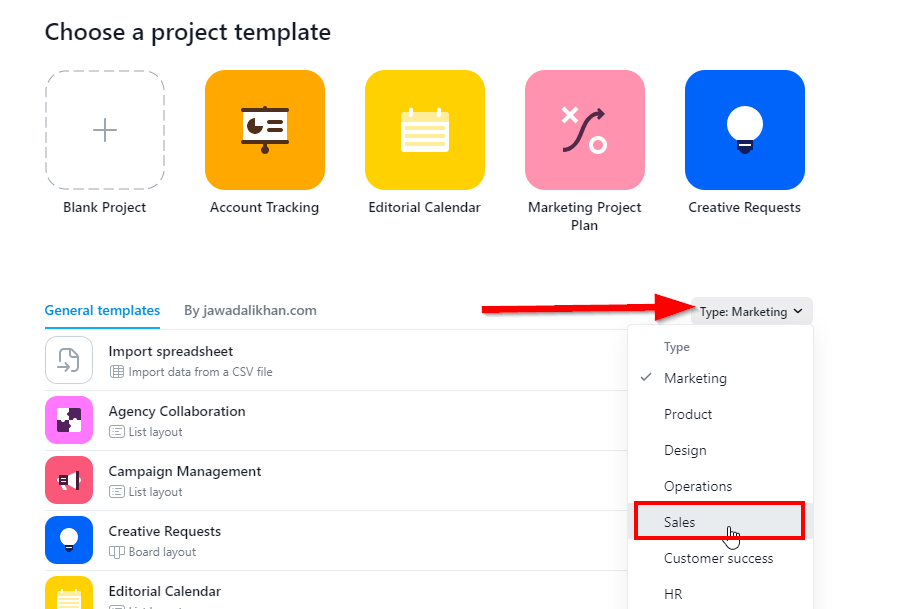
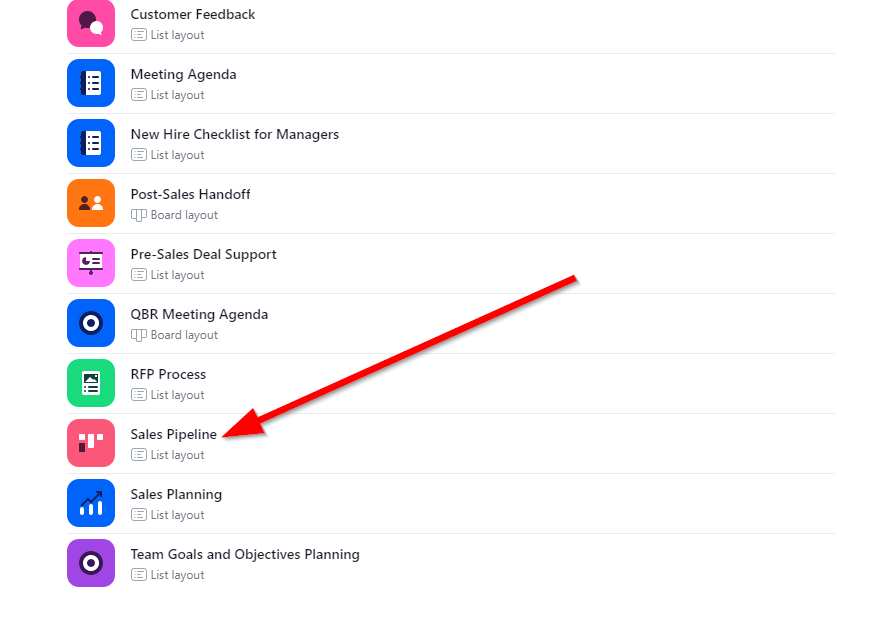
Step 5: From the list of sales templates, select the Sales Pipeline template.
Step 6: Click Use template to activate the template for your Asana account.
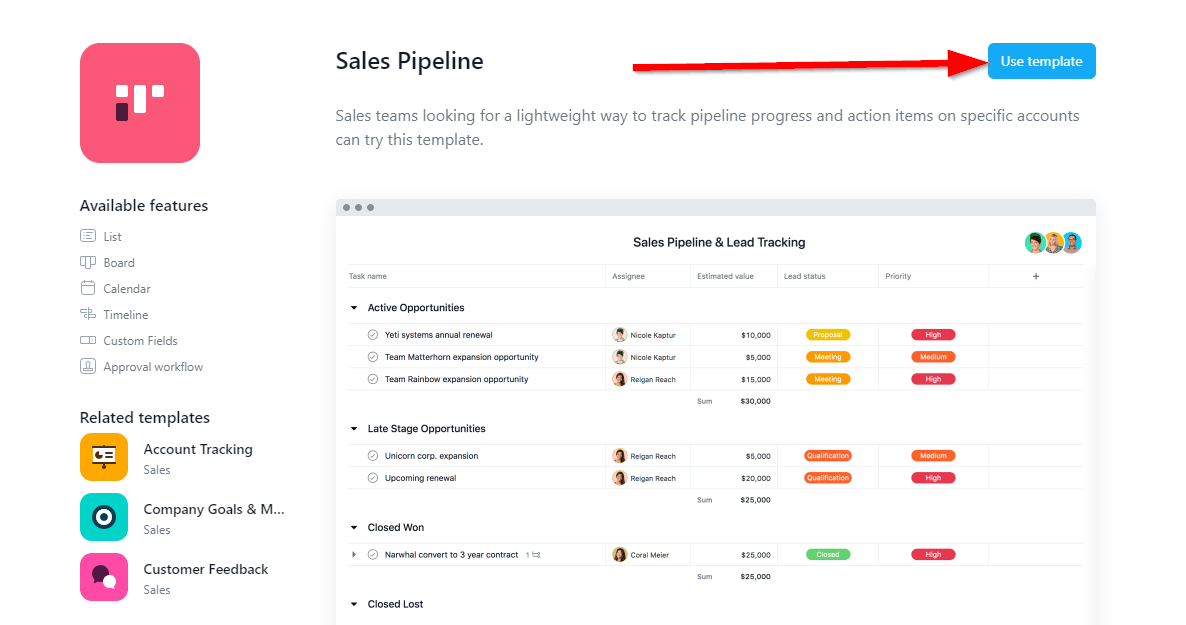
Before you can start using the template, you need to name your project. We’ll use a sample name for this demonstration.
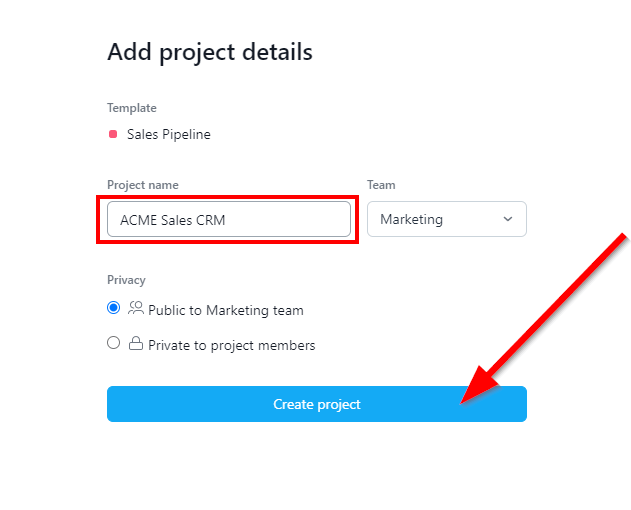
Step 7: Click Create project to import the template to your Asana account. You can now see the Sales Pipeline template in your Asana account with sample sections and tasks. However, to use it, you need to customize it to your sales workflow.
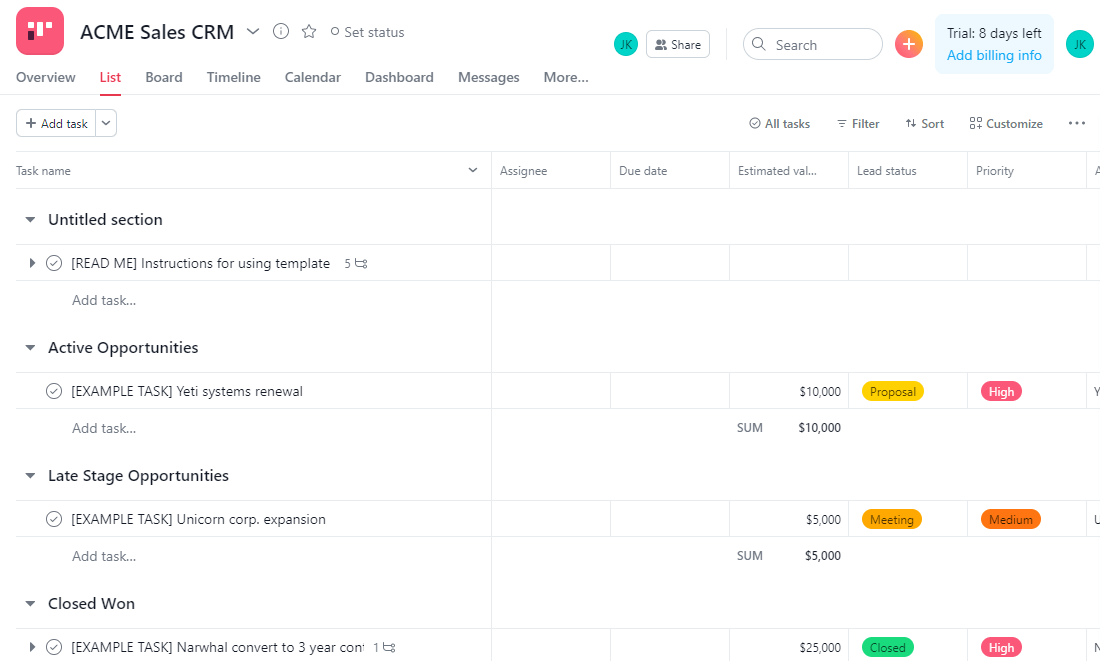
Step 8: First, click a sample task to open its details page.
Step 9: Click the options icon (three dots at the top right) and click Delete task from the menu.
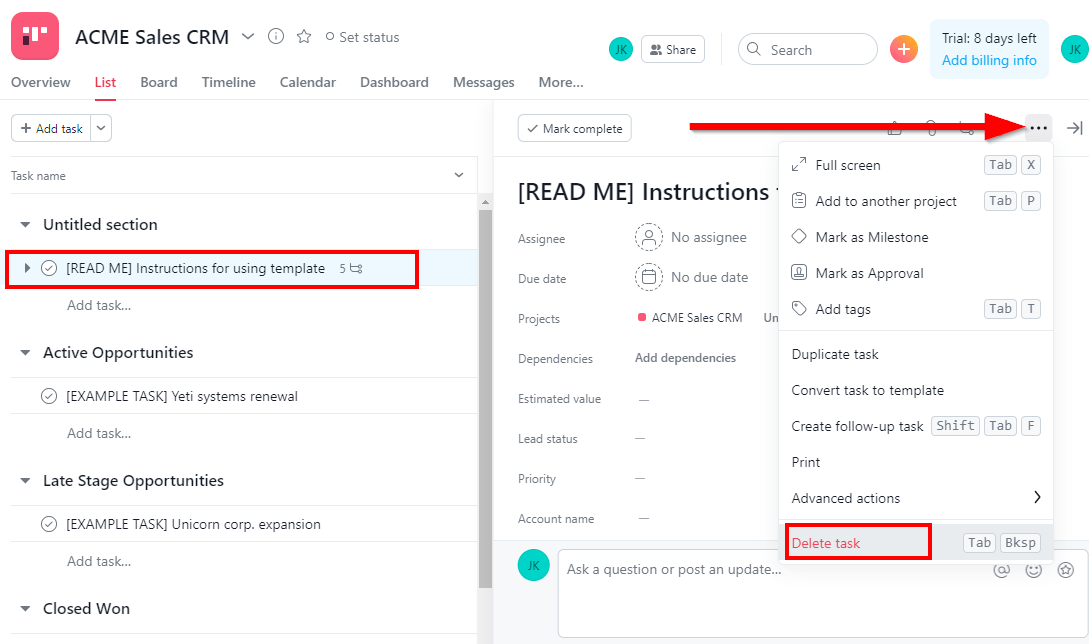
Delete all the sample tasks using this process. Just make sure you leave one sample task untouched so that we can use it for customization.
Step 10: Next, we’ll rename the workflow sections to match our sales process. To do this, click on a section, remove its previous name, and enter your desired name.
Step 11: One by one, rename all the sections to represent your sales workflow. Here’s how our sales workflow looks like after renaming the sections.
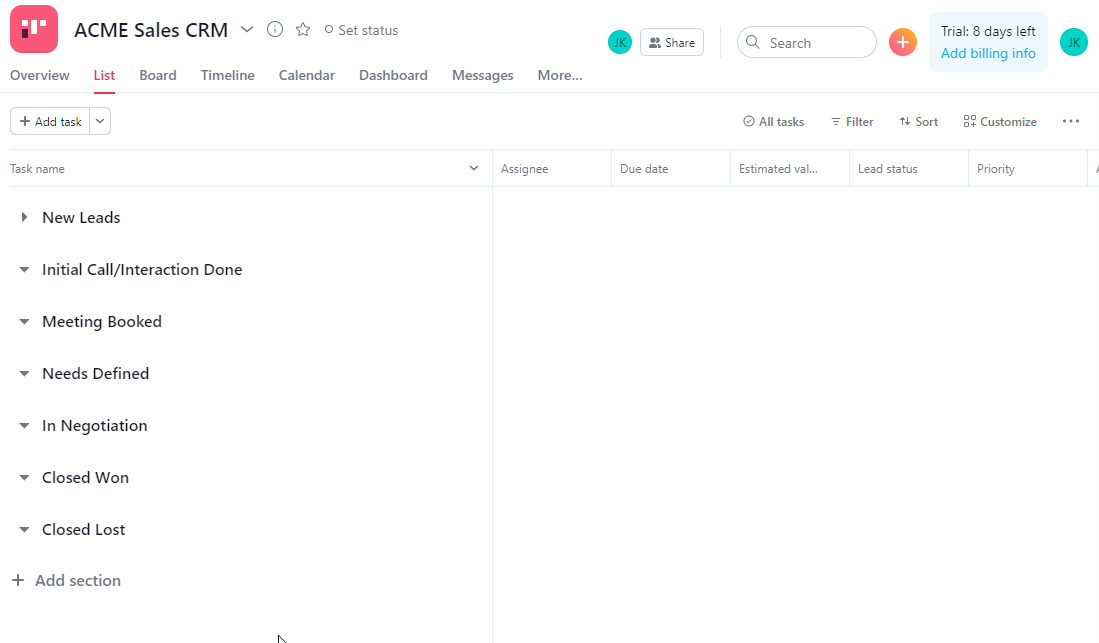
This is just a sample, and you’re entirely free to create any workflow that suits your sales process.
Step 12: If you need to add a new section, you can do it by clicking the Add section link at the bottom of your list.
Step 13: Name your new section and press enter.
To better visualize our sales workflow, we’ll switch to the Board view for the rest of this article. Remember, you can always switch between views if you want.
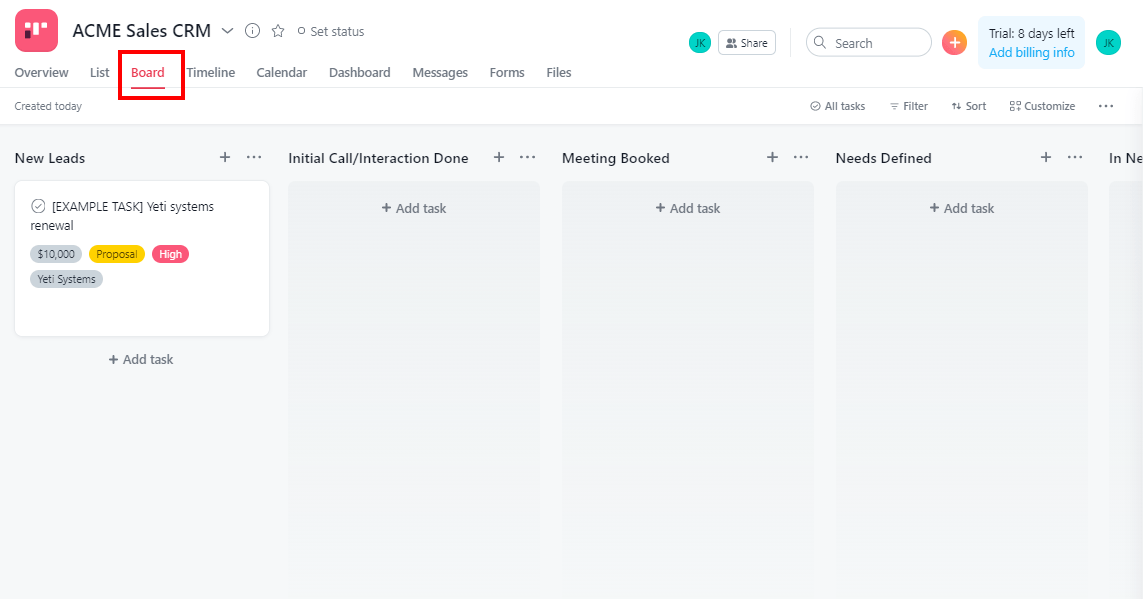
You have now successfully created a sales CRM workflow for your business. In the following sections, we’ll look at how you can customize Asana tasks to gather the necessary lead information for your sales and services teams.
Customizing Asana Tasks For Lead Management
Now that you have created a basic workflow for your sales CRM in Asana, it’s time to build a framework for gathering your lead’s information.
For this purpose, we’ll use Asana tasks and subtasks. Thankfully, Asana’s Sales Pipeline template already comes with a sample task that also uses different custom fields. If you’re using Asana’s Premium plan or higher, you can add and remove custom fields if you want. Otherwise, you’ll need to work with the fields available in your template.
Here’s how we can use Asana tasks for lead management:
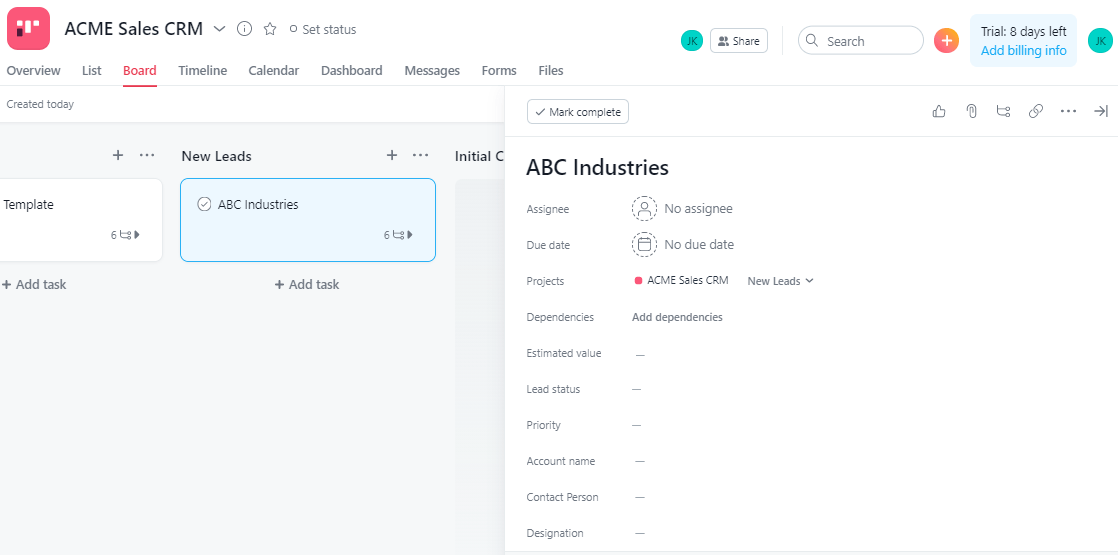
Step 1: Open your Asana CRM project.
Step 2: Click on the sample task in your project template to open its details page.
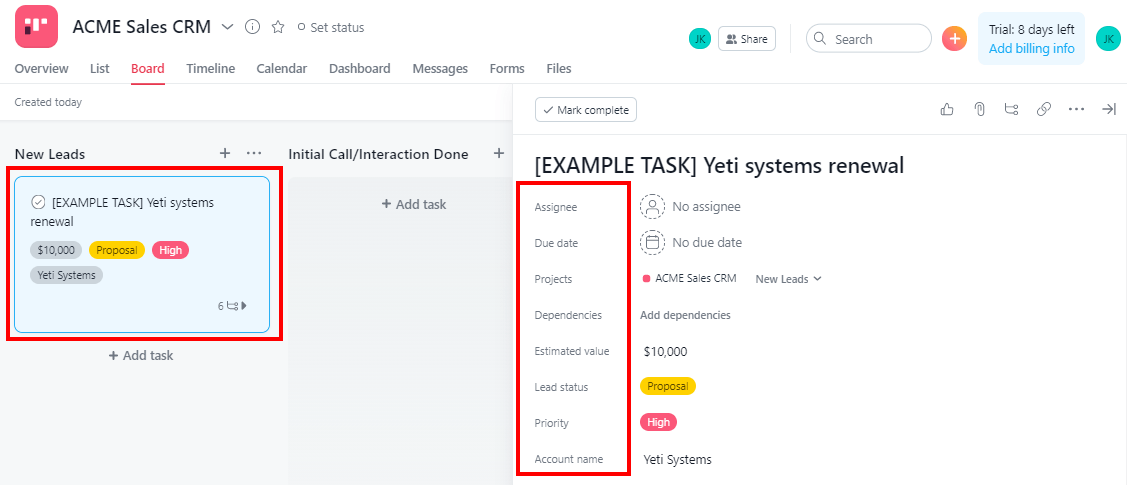
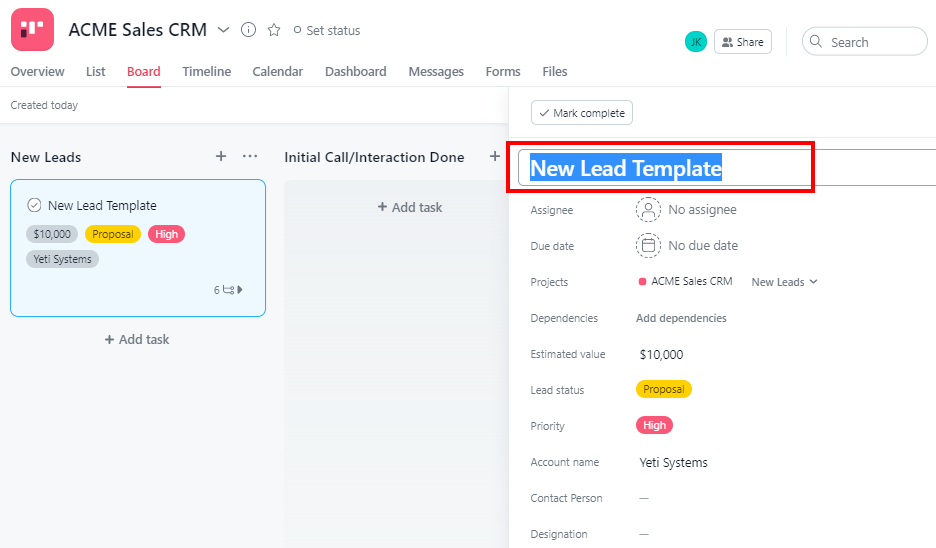
You can create tasks as dedicated customer/lead threads for your CRM workflow. In the details area, you can see the fields you can use to manage lead information.
For example, you use the Assignee field to assign a sales agent to a lead and use the Due Date field to set a deadline. Similarly, you can use the Lead Value field to enter an estimated business value from a lead.
You can add more fields using custom fields if required.
Step 3: To add a custom field, go to your main Kanban board view and click Customize.
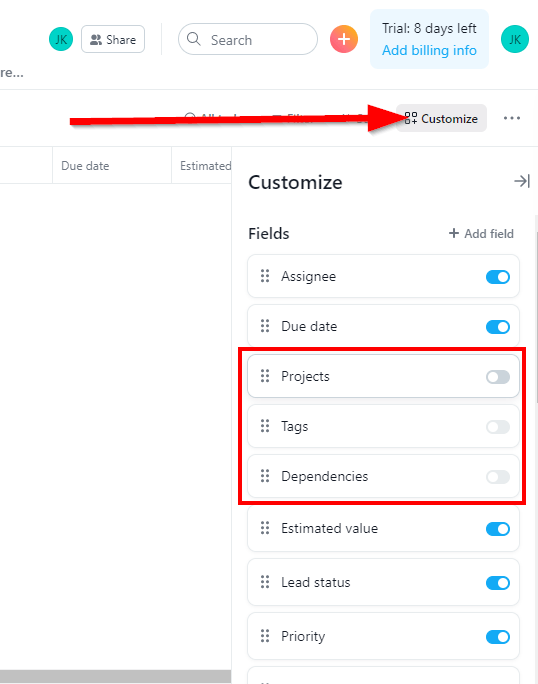
Step 4: You can see all the available fields in this list. For a sales CRM, we recommend enabling the projects, tags, and dependencies fields by clicking and toggling the icons next to them.
Step 5: To add a new field, click Add field on the top of the fields list.
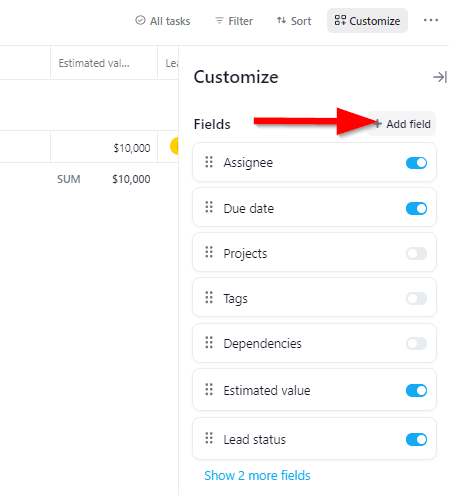
Step 6: To gather more specific information about every lead, add an email address field and choose Text as the field type.
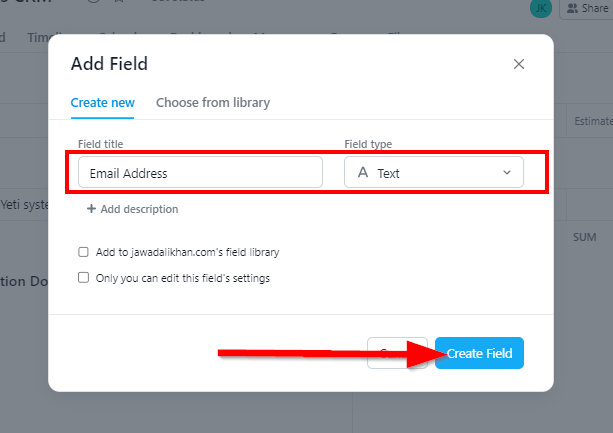
Step 7: Click Create Field to add it to your task.
Similarly, we’ll add the Phone Number field and add it to our task list.

Your task structure is now ready to gather the relevant lead information. In the next section, we’ll discuss how to create a template your team can use for managing leads in Asana.
Creating New Lead Templates For Your Team
It’s critical for the success of a CRM to consistently gather all the necessary information about your leads and customers. To ensure this, you need to provide a template or a framework for your team to collect lead information.
Here’s how you can create a lead template in Asana for your CRM users.
Step 1: Click on your Asana sample task.
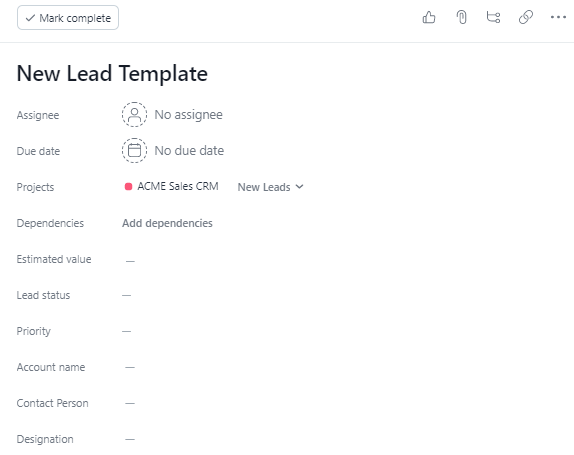
Step 2: Rename the task as “New Lead Template” by editing its title.
Step 3: Remove all the sample information from this task’s fields by clicking each field and pressing backspace.
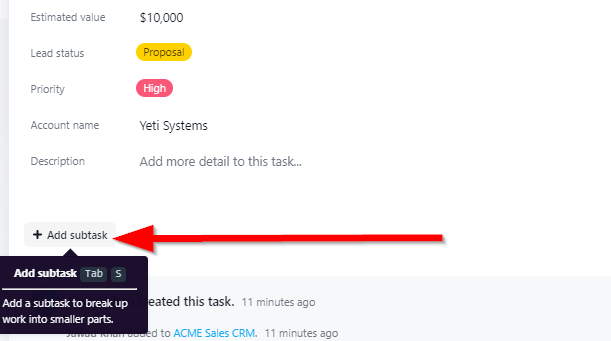
Subtasks are the more minor elements or milestones of a task. We’ll use subtasks to create a list of activities your team needs to perform for every new lead. Asana also allows you to assign separate team members to every subtask, making it easier to manage your work.
Step 4: Now scroll down the details pane and click on Add subtask.
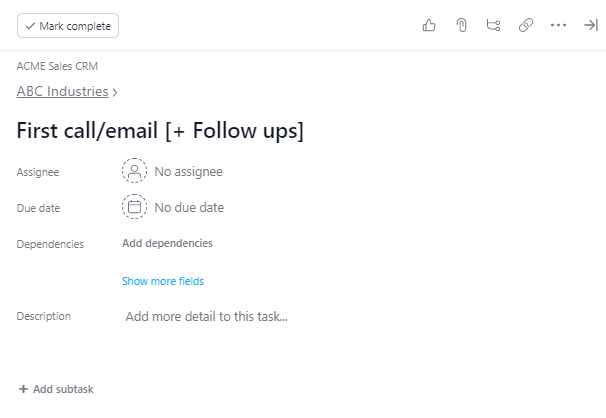
Step 5: Think of the logical steps you need to follow to engage a lead. We’ll start by adding a subtask for an initial call/email.
Step 6: Press the enter key or click Add subtask to list more subtasks.
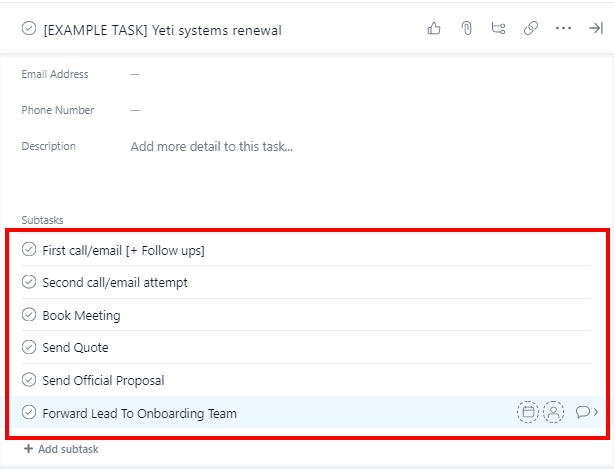
Your task template is now ready.
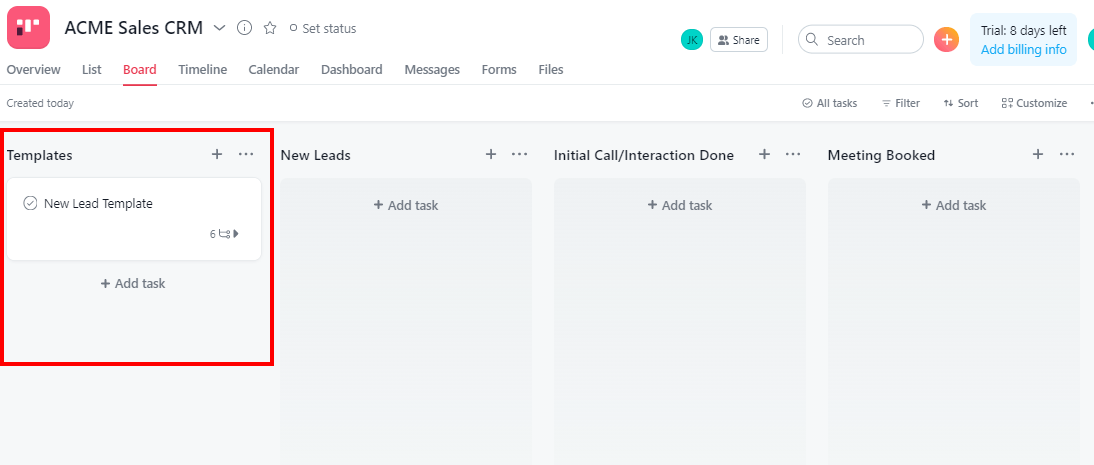
Step 7: Create a new section in your Asana board by clicking Add section.
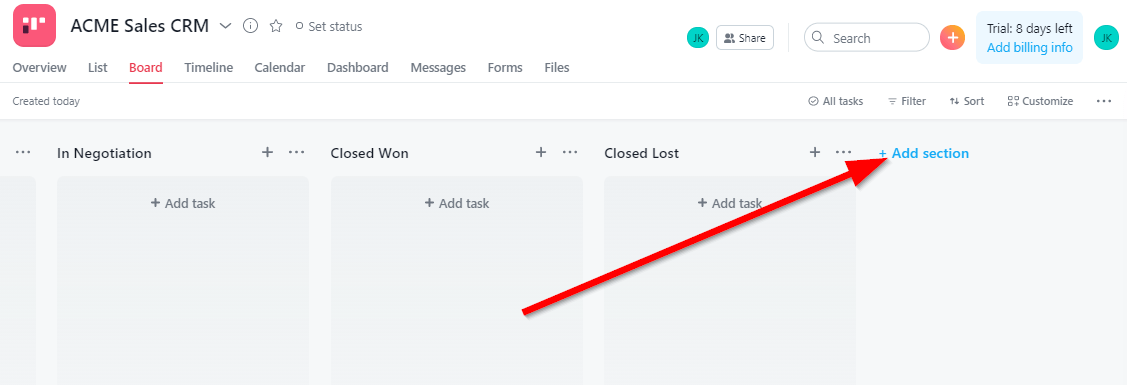
Step 8: Name the section as Templates.
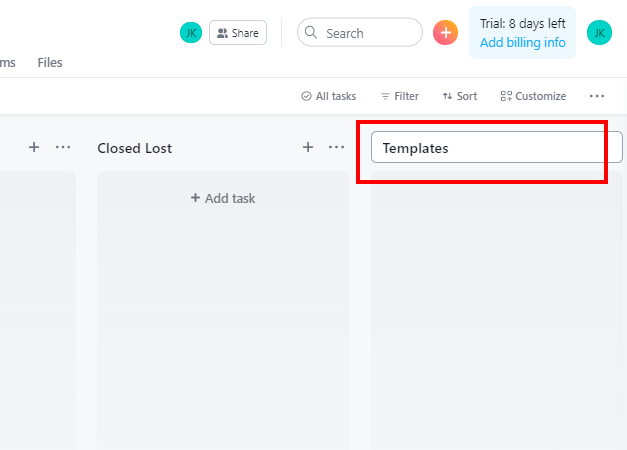
Step 9: Drag and drop the template section to the start of your workflow.
Step 10: Now drag and drop the template task you just created from the New Lead section to the Templates section.
You’ve successfully created a template that your team can use for logging critical information of every new lead.
In the next section, we will demonstrate how you can use this template for managing your CRM workflow in Asana.
Using Asana As For Account Management
Now that you have customized your CRM workflow in Asana and created a template task that your team can use for tracking leads, it’s time to put this into action.
The process is going to be simple.
Every time a new lead arrives in your system, your team can create a copy of the template task to log its information and track its journey in your system.
Here’s how to do it.
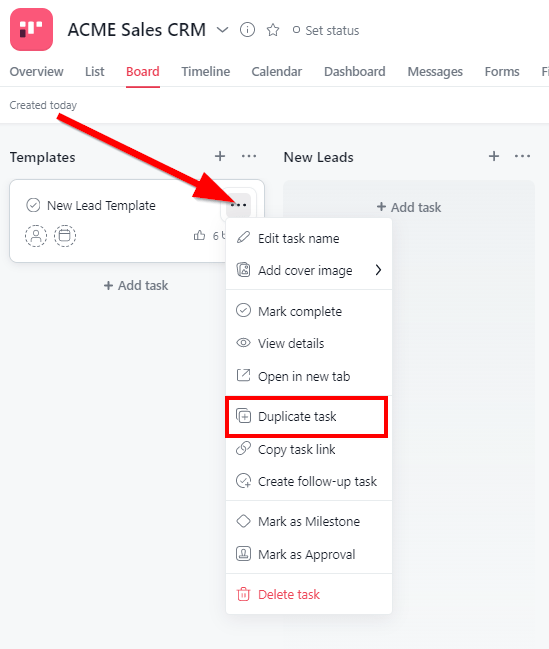
Step 1: Hover your mouse over the template task.
Step 2: Click the menu icon and select Duplicate Task.
Step 3: Rename the task to your lead’s name.
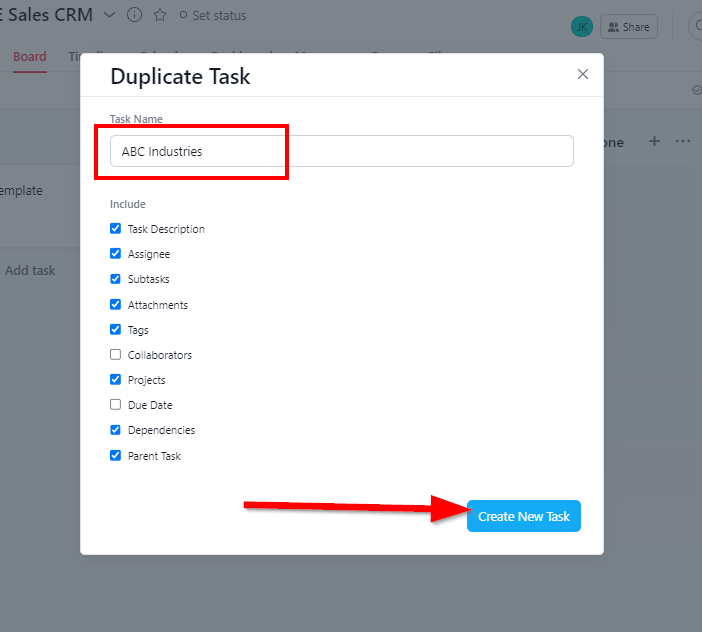
Make sure you’ve selected all the relevant fields under the title (Assignee and Collaborators in particular.)
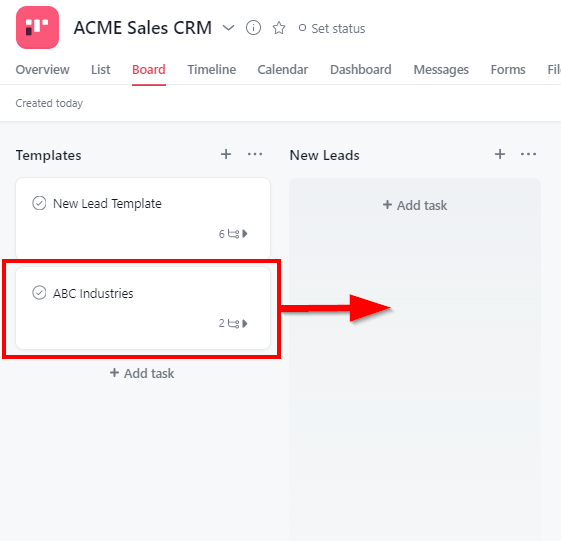
Step 4: Click Create New Task. The new task will appear in the Template section.
Step 5: Drag and drop it to the New Lead section.
Step 6: Click the new task to open its details page.
Step 7: Assign the task to a team member using the Assignee field.
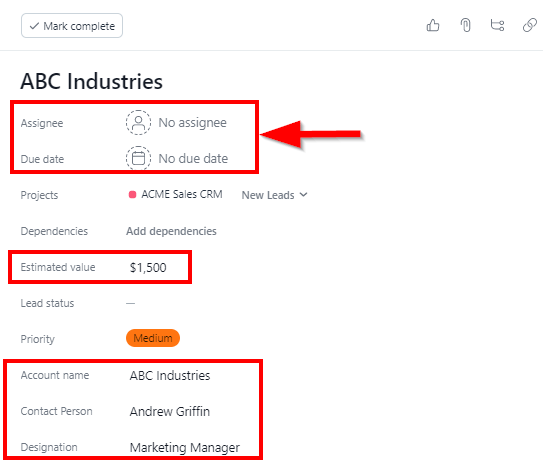
Step 8: Enter an estimated value of the lead based on your initial research.
Step 9: Enter the company name, contact person, designation, email address, and phone number. You will get all this information from your lead generation team.
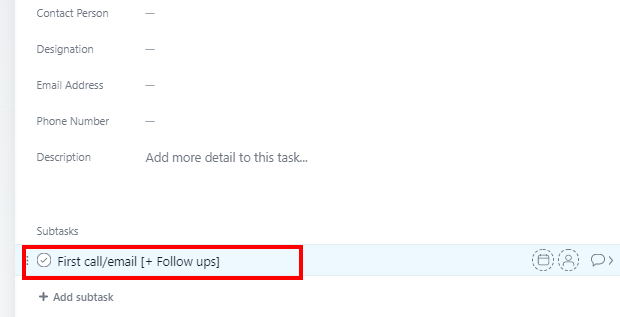
Step 10: Now scroll down to the subtasks section and click on the first subtask.
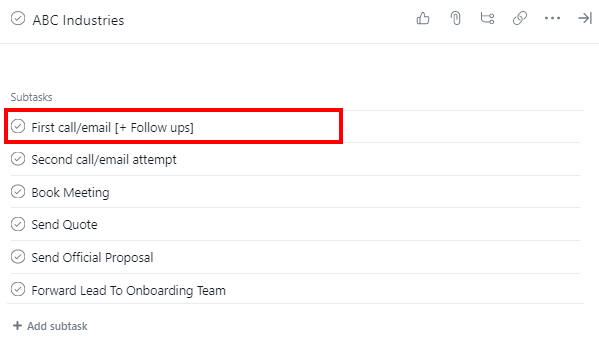
You can assign each subtask to a different team member and set a due date for it.
Once you complete assigning all the subtasks, go back to your main task card. Your card now appears in the Asana Kanban Board with all the labels you’ve attached to it.

Step 11: Move the task card from one workflow stage to another as the lead moves through your sales pipeline.
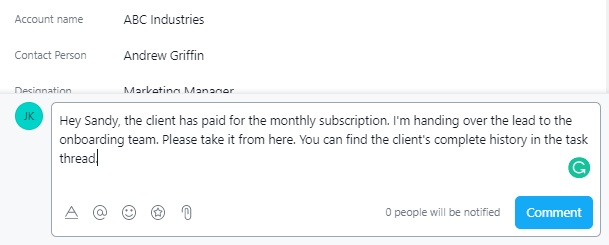
Step 12: When your lead finally converts into a customer, it’s time to hand it over to the onboarding team. To ensure a smooth handover, add your sales team lead and the customer onboarding manager as Collaborators to your task card.
Task collaborators get all the updates from a task card.
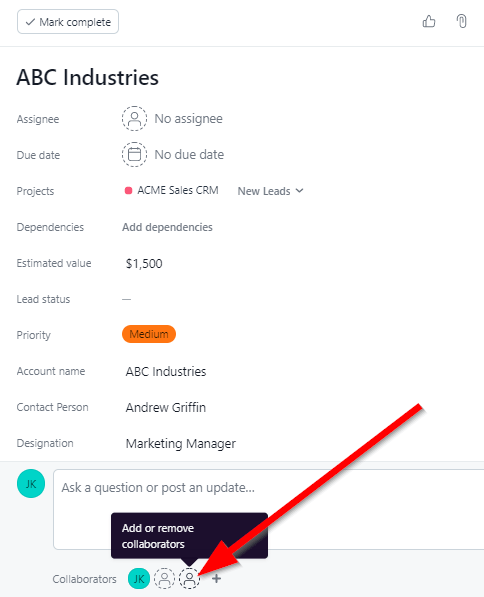
Step 13: After adding collaborators, leave them a message to ensure they pick up the lead and add it to the onboarding CRM for further processing.
You’ve successfully created a sales CRM workflow in Asana using which your team can track a lead’s progress transparently. Using the same methodology, you can create CRM workflows for your onboarding, customer service, and retention teams.
We used sample data for demonstration in this article. You can customize everything from the workflow section to task fields and templates as you want.
Common Problems When Using Asana as a CRM
As mentioned at the start of this article, Asana is a lightweight CRM solution at best. Therefore, it is not an ideal alternative to Salesforce or any other dedicated CRM solution.
Here are some of the problems you might face using Asana as a CRM.
Limited Reporting and Analytics
Asana offers analytics and reports for projects and tasks. However, since it’s not designed as a CRM, its reports provide limited insights from a customer management perspective. For example, you can see the overall lead value in the pipeline, but you cannot create forecasts based on lead behavior like some dedicated CRMs offer.
No Dedicated Customer Data Interface
You can manage lead data through tasks and custom fields in Asana. But since it’s not designed for lead gathering, the interface still has several limitations. For example, you need to frequently use custom fields for gathering different information.
But custom fields are not available in all Asana plans. Similarly, you cannot link the lead generation forms directly with other workflow stages like Salesforce and several other CRMs can.
Complicated Lead Handover Process
Once a lead passes through all the workflow stages of a specific business function, handing it over to the next part of the process is quite complicated. In regular CRMs, the lead is assigned and transferred to the new section, for example, from sales to onboarding. But in Asana, the new section must create a duplicate task to move it to its workflow. This not only takes additional manual work but can result in data inaccuracies.

