How to Sort in Google Sheets
If you’re looking to learn different ways to sort your data in Google Sheets, this article is for you.
Data sorting is a handy feature especially when you’re handling a large data set, need to organize data to find trends, or arrange your data to use other Google Sheets functions like VLOOKUP.
Google Sheets allows you to sort your data in several ways. You can use the standard sort option to orange your data in ascending or descending order.
Or you can apply the SORT function to create a new and sorted data set from your original selection.
Plus, there are a few other ways you can use this feature to make more sense of your data set.
We’ll discuss all of them in this article (with examples).
Let’s get started.
How to Sort A Column In Google Sheets
There are several ways you can sort your data in Google Sheets. But all of them offer different sorting options and capabilities.
Let’s explore them one by one.
Method 1: Sort Using Sort Range
The first method to sort data in Google Sheets is by using the Sort Range option.
Here’s how to use it.
Step#1: Open the Google Sheet file with your data table.
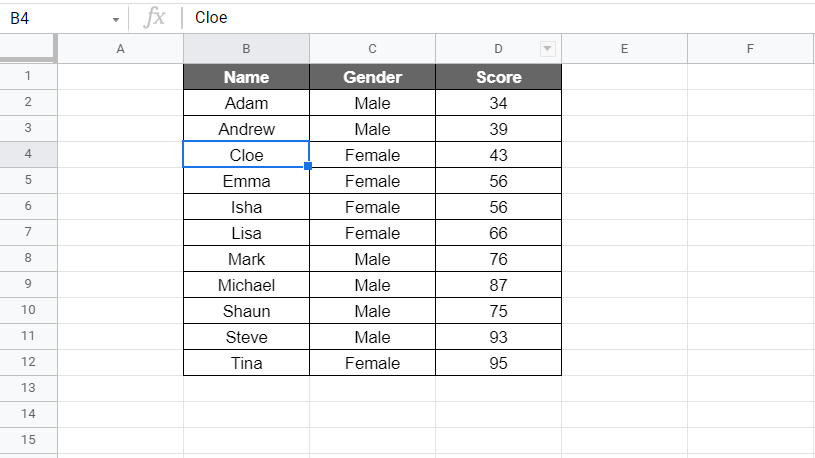
Step#2: Select the column you want to sort
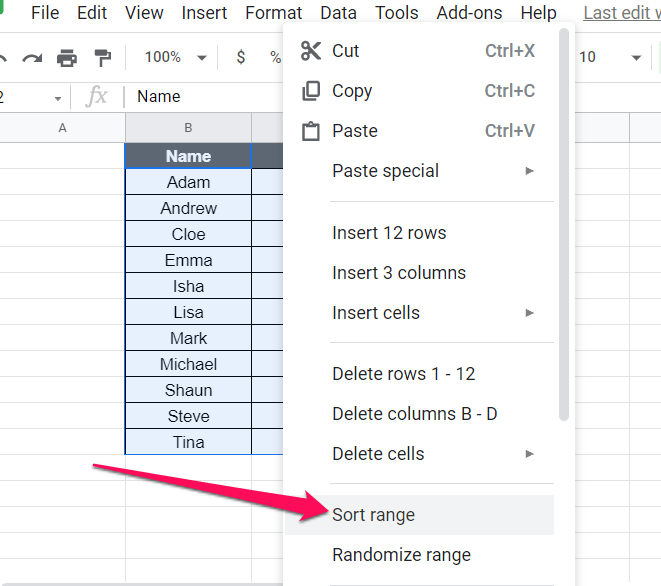
Step#3: Right-click anywhere in the column
Step#4: Click Sort Range from the menu
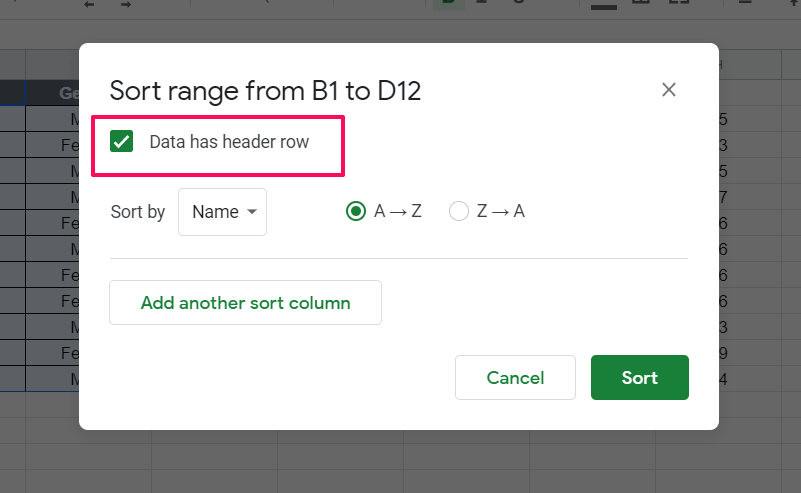
Step#5: This will open Sort Range settings
Step#6: Check the box next to “Data has header” if your table has headers (recommended)
Step#7: In the Sort By menu, choose your column name.
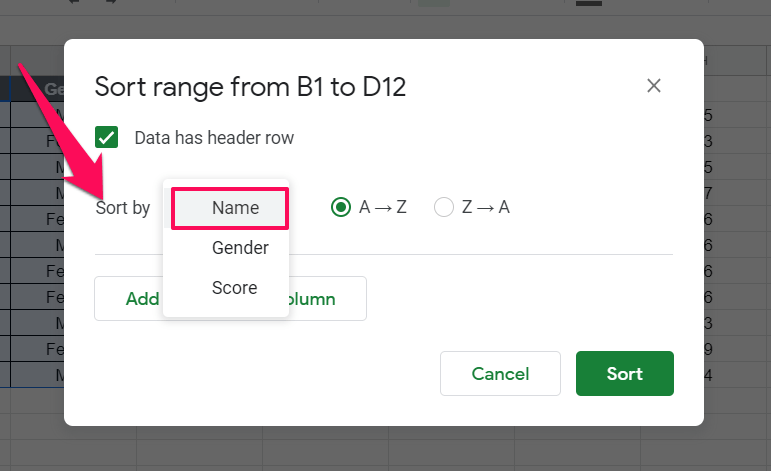
Step#8: Choose A → Z to sort data in ascending order and Z → A to sort your column in descending order.
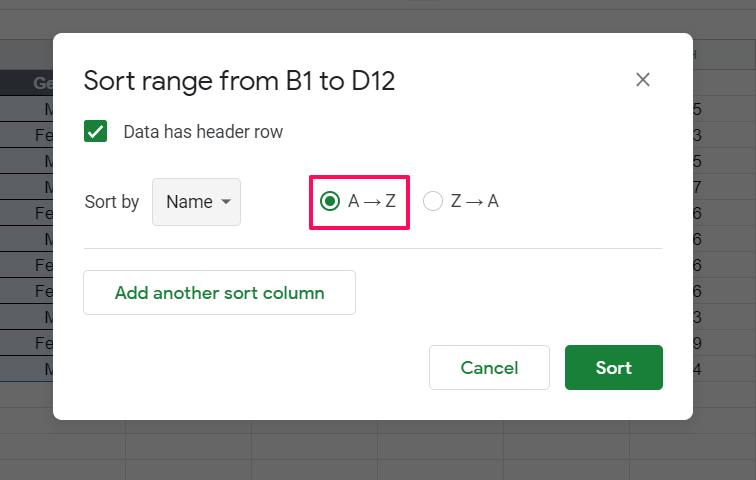
Step#9: Click Sort to close the settings box
Now your selected column has been sorted in ascending order. But the rest of the column will remain the same.
If you want the corresponding columns to adjust accordingly, go back to Step#2 and choose the complete table instead of just the column you want to sort.
The rest of the process will remain the same.
Now when you sort your data in ascending or descending order, the columns next to your main column will also adjust accordingly.
Method 2: Sort Using The Column Menu
The second method to sort your data in Google Sheets is by using the column options menu.
Here’s how to do it.
Step#1: Open the Google Sheet with your data table
Step#2: Your table should start from the first row of the sheet
Step#3: Make sure your data table has headers
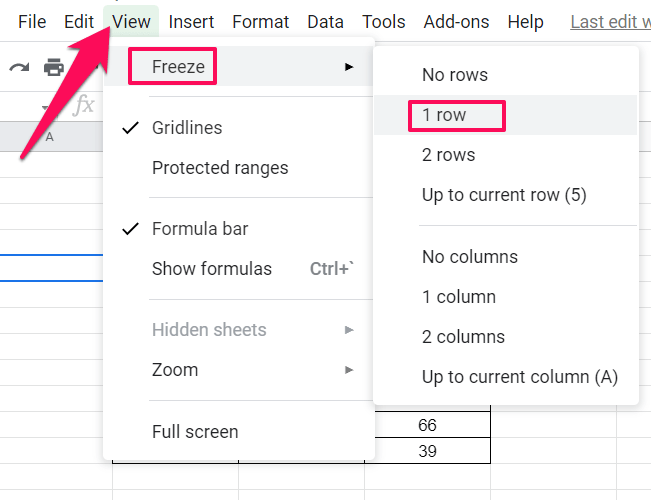
Step#4: Now click on View → Freeze
Step#5: Click on row 1. This will freeze the first row of your table (headers) in the sheet.
Step#6: Hover your mouse pointer over the column that you want to sort. This will show you a small arrow next to it.
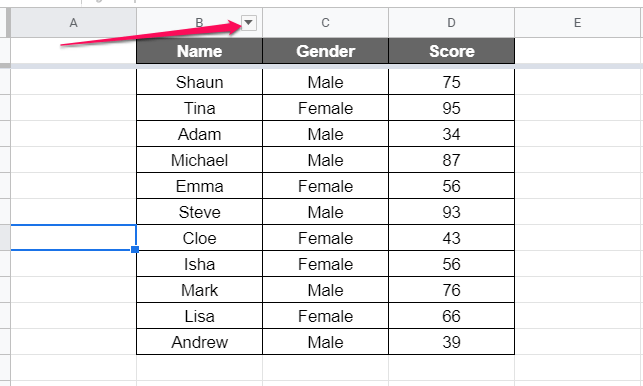
Step#7: Click on the arrow sign to open a menu
Step#8: Click on Sort sheet A → Z to sort your column in ascending order and Z → A to sort the column in descending order.
You have successfully sorted your selected column in descending or ascending order. However, the other columns will remain the same.
If you want the other columns of your table to adjust according to your selected column follow these steps.
Step#1: Select the headers of your table.
Step#2: Go to the Data menu
Step#3: Click on Sort sheet by [your selected column] in either ascending or descending order.
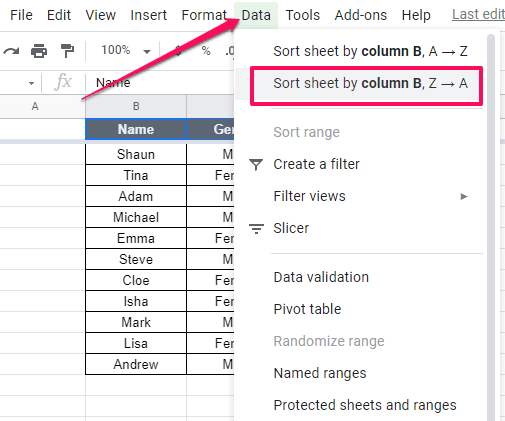
In this method, Google Sheets will use your selected column as the primary reference point for sorting the other columns in your data table.
Method 3: Sort Using Filters
The third method to sort data in Google Sheets is by applying filters. Here’s how to do it.
Step#1: Open the Google Sheet with your data
Step#2: Select all the cells in your data table
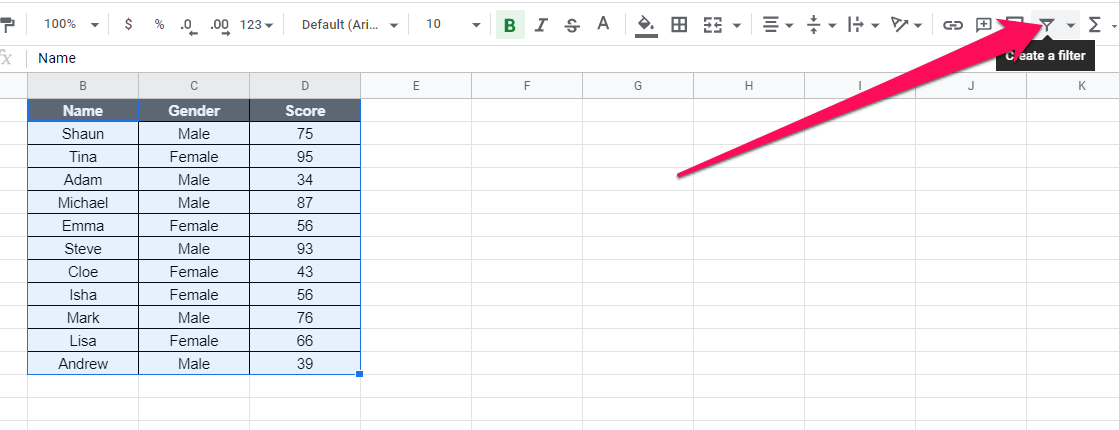
Step#3: Click on Data → Create a filter
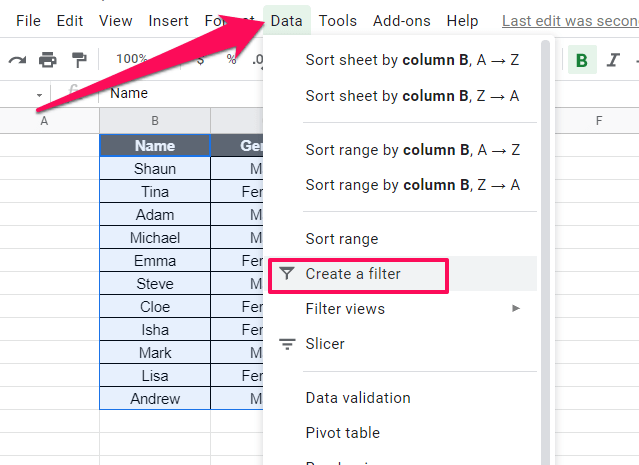
Step#4: This adds the filter icons to all the headers in your table
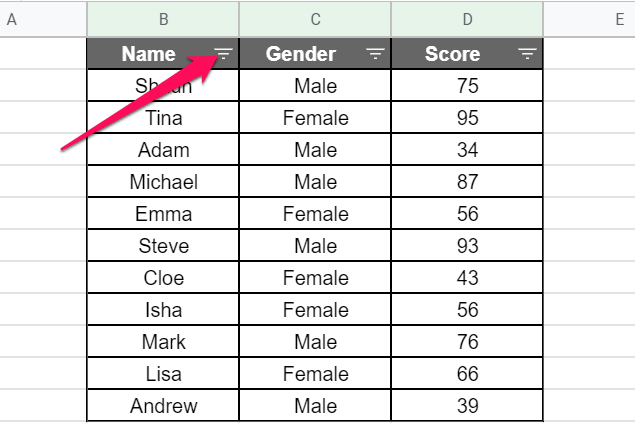
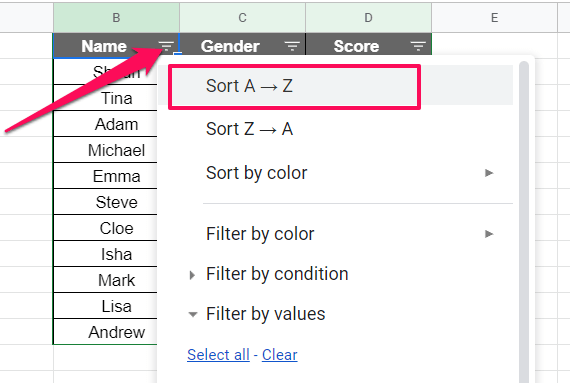
Step#5: Click on the filter icon in the column that you want to sort
Step#6: Click on sort A → Z to sort your data in ascending order and Z → A for descending order.
Alternatively, you can also apply filters to your table (Step#3) by selecting your table and clicking on the filter icon.
The rest of the process will remain the same.
These were the three main methods to sort data in Google Sheets.
Let’s now look at some of the other ways you can use the sorting feature.
How To Sort Alphabetically
If you have alphabetic or alphanumeric data in your Google Sheets table, you can sort it by alphabetic order using the sort feature.
Here’s how to do it.
Step#1: Open the Google Sheet with your data
Step#2: Select the whole table that contains your data
Step#3: Right-click anywhere on the table and choose Sort Range
Step#4: Check the box next to “Data has header row”
Step#5: Choose the primary column that you want to sort from the dropdown.
Step#6: To sort your column alphabetically, choose A → Z sorting.
Step#7: Click on Sort
Now your data has been sorted alphabetically.
If you want to sort it in reverse order, choose Z → A.
How To Sort Multiple Columns
In the last section, we discussed how to sort a column alphabetically. But what if you want to sort multiple columns in the same table?
Here’s how to do it.
Step#1: Open the Google Sheet with your data table
Step#2: Make sure your table has headers
Step#3: Select all the cells in your table
Step#4: Right-click anywhere on the table
Step#5: Check the box next to “Data has headers”
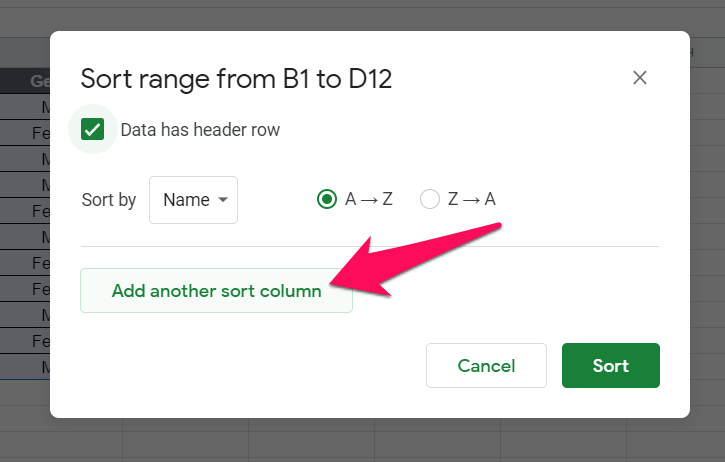
Step#6: Now choose the ascending primary column that you want to sort first. In sorting multiple columns, Google Sheets will sort the data in the same order as you choose your columns in the settings.
Step#7: Choose A → Z to sort your column in ascending order.
Step#8: To sort another column, click on Add another sort column
Step#9: Now choose the second column that you want to sort in your table
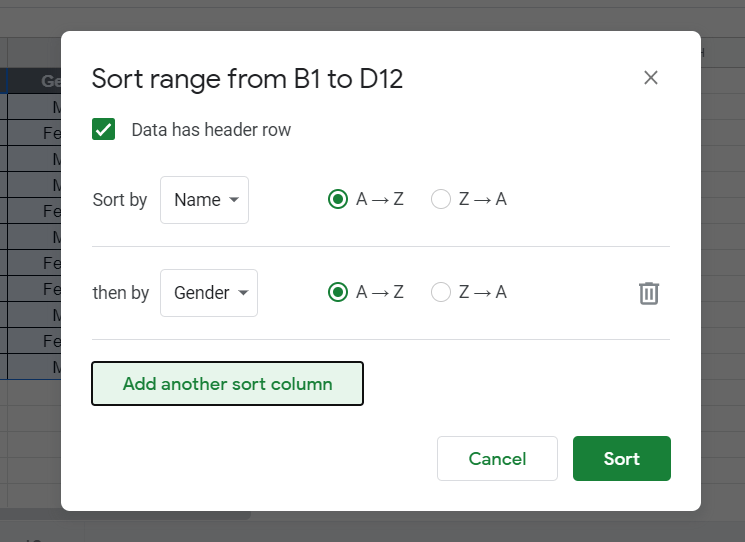
Step#10: Choose ascending or descending order to sort your data
Step#11: To sort another column, click on Add another sort column again.
Step#12: Again, choose the column you want to sort. You can add up to 10 columns to sort this way.
Step#13: Once you’ve added all the columns, click on Sort to close the settings box.
Now your data table has been sorted in the same order in which you chose your columns in the sort settings.
How To Sort An Entire Google Sheet
If you want to sort not just a column in your table but also the rest of the cells in a column, here’s how to do it.
Step#1: Open the Google Sheet with your data table.
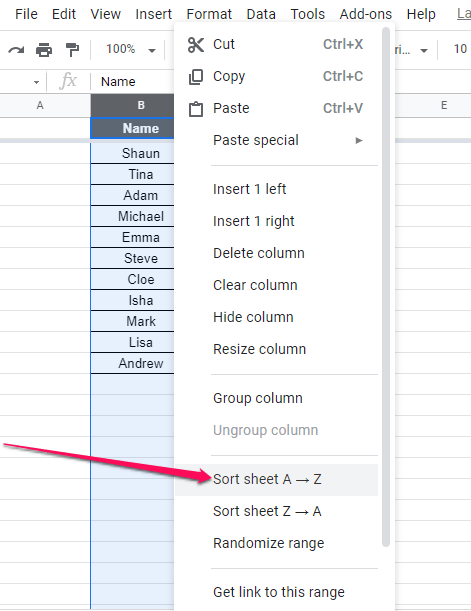
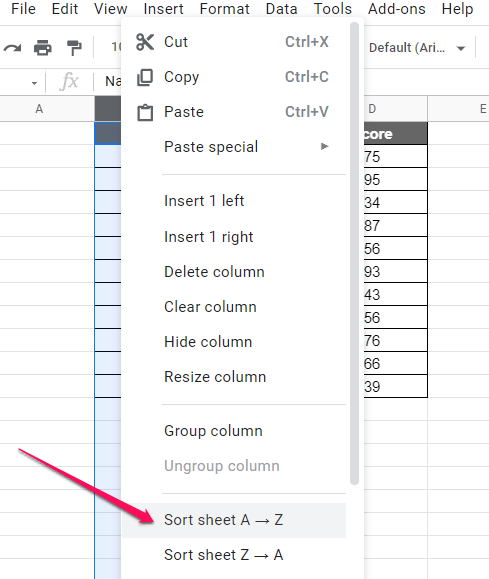
Step#2: Right-click on the letter of the column that you want to sort.
Step#3: Click on Sort sheet A → Z to sort the whole solemn in the sheet in ascending order. To sort in descending order, click on Sort sheet Z → A.
Here’s the alternate method for sorting a complete column in your sheet
Step#1: Select the column you want to sort by clicking on its letter at the top of the sheet.
Step#2: Go to Data → Sort sheet by column [your selection] A → Z

With this method, the whole column you’ve selected will be sorted and the rest of the columns in your table will adjust according to it.
How To Sort Columns By Color
Apart from sorting columns in ascending and descending orders, Google Sheets also allows you to sort columns by color.
There are a couple of ways you can use color sorting.
- Sort cells by the color of the text
- Sort cells by the color of the cell
Applying the color filters only makes sense when your cells or the text in them has multiple colors. If you’ve not used any colors, use the standard ascending and descending order sorting that we discussed earlier in the article.
Here’s how you can apply color sorting to your data in Google Sheets.
Step#1: Open the Google Sheet that has your data table
Step#2: Make sure your table has headers
Step#3: Select the table and click on the filter icon
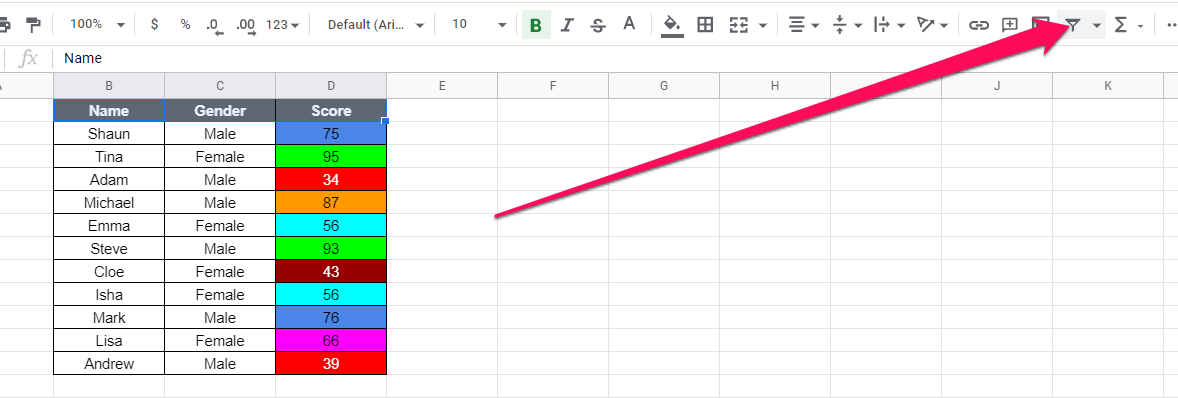
Step#4: Now click on the filter for the column you want to sort.
Step#5: Hover your mouse pointer over “Sort by color.” This gives you two options: Fill color and Text color. Choose any one of them.
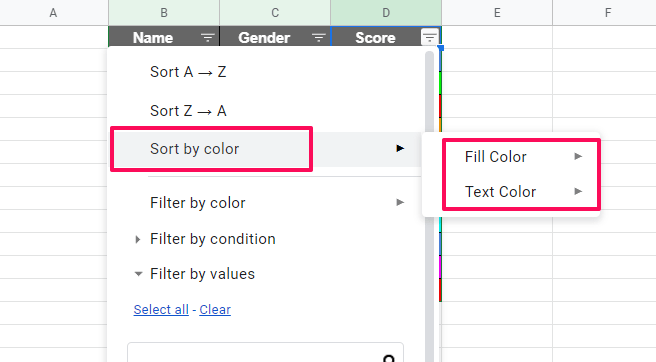
Step#6: If there is more than one color on your table, you’ll see all of them in the sort menu. Choose the primary color using which you want to sort your table.

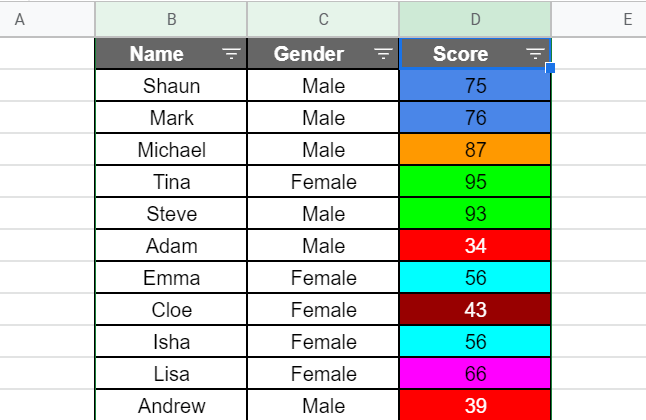
Now your data has been sorted by your chosen color.
For Advanced Users: The SORT Function
Other than the basic sort option that we’ve covered in detail in this article, Google Sheets also has a SORT function which is for advanced users.
Here’s what it does.
Suppose you have a data table in Google Sheets that you want to replicate in another section of the sheet but in ascending order.
To achieve this, you’ll apply the SORT function to the cell from where you want your replicated data to appear.
SORT Function Syntax
Here’s the syntax of the SORT function in Google Sheets
=SORT(range, sort_column, is_ascending, [sort_column2, is_ascending2, …])
Here’s what each component of this syntax represents
Range: This is the data range that you want to sort.
Sort_column: This is the index of the column that you want to sort in your data range. This has to be a single column with the same number of rows as the Range. All other columns in the data range will be sorted according to sort_column.
Is_ascending: This is marked as TRUE or FALSE and determines if your sorted data appears in ascending or descending order (TRUE=ascedning and FALSE=descending)
[sort_column2, is_ascending2, …]): This is optional and used when you want to sort multiple columns
How To Apply The SORT Function In Google Sheets
Here’s how to use the SORT function to replicate and sort your data in Google Sheets
Step#1: Open the Google Sheet with your data set
Step#2: Click on the cell from where you, want your replicated and sorted data to start.
Step#3: Apply the SORT function to this cell.
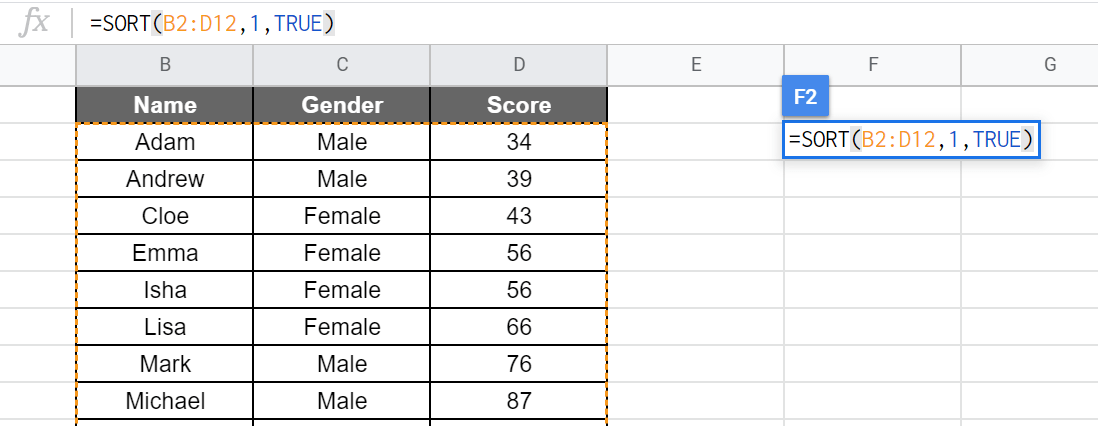
For example, for the table below, here’s how you’ll apply the SORT function
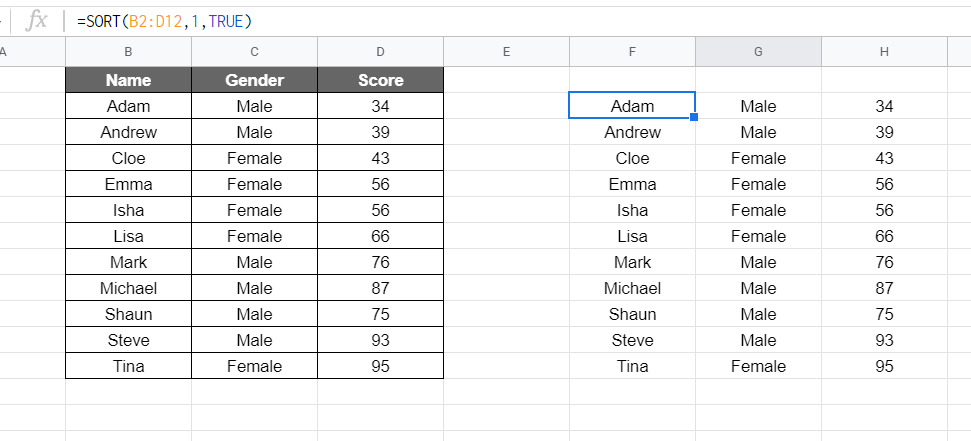
Since the original data was already in ascending order, the replicated data also looks the same
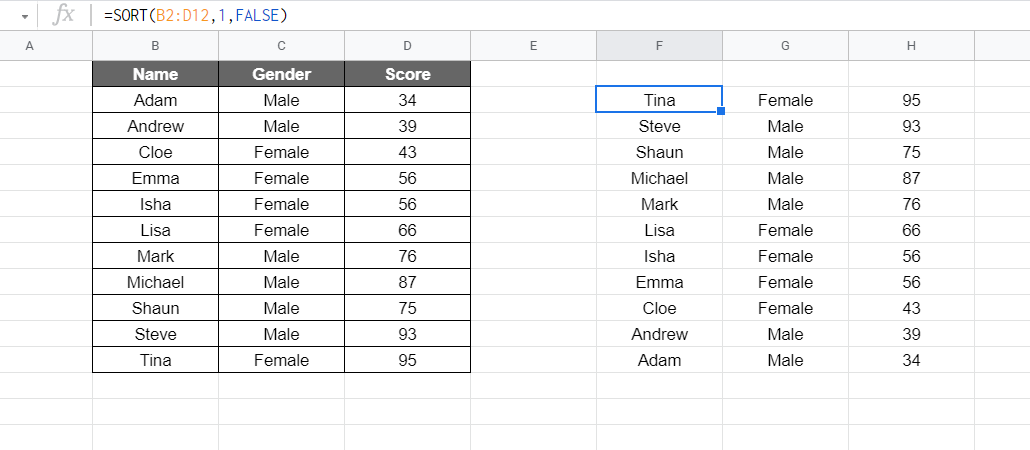
Step#5: If you change the formula from TRUE to FALSE, the replicated data would be sorted in descending order.
Also, note that I’ve intentionally excluded the headers from the data range because the SORT function does not treat them differently from other cells.
Once your data is replicated, you can add the headers manually.
Wrapping Up
Sorting appears to be an option with limited use. But as you’ve seen in this article, you can use it in several ways. Not only does it make your data easier to organize but also helps you analyze it better. For advanced users, the SORT function is another useful option that allows you to sort and replicate your data in different ways.

