How to Set Up GitHub Branch Protection Rules
Providing collaborators write access to your repository is an excellent way to collaborate on projects. However, accidents do happen. For example, a developer may introduce bugs to the code, delete a critical branch, or overwrite the commit history. GitHub branch protection rules help to avoid these scenarios.
Here’s how to set up your branch protection rules in GitHub:
Step 1 – Enable Default Branch Protection
GitHub allows you to protect any branch you wish. You can also create branch protection rules for branches that don’t exist yet. To create your rules, go to the repository’s main page.
Next, choose your repository and click the Settings icon under the repository name.

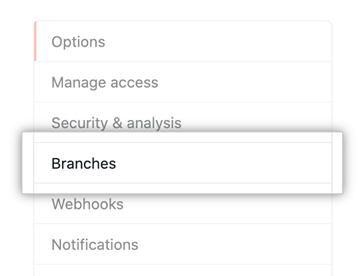
Then click Branches in the left menu.
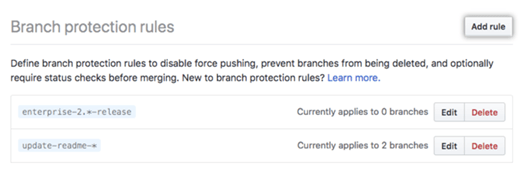
Click Add rule next to Branch protection rules.
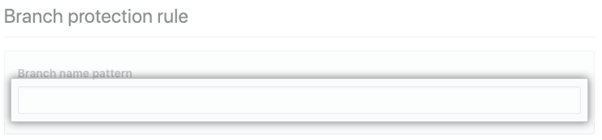
Next, type the branch name or pattern you’d like to protect. You’ll find this under the Branch name pattern.
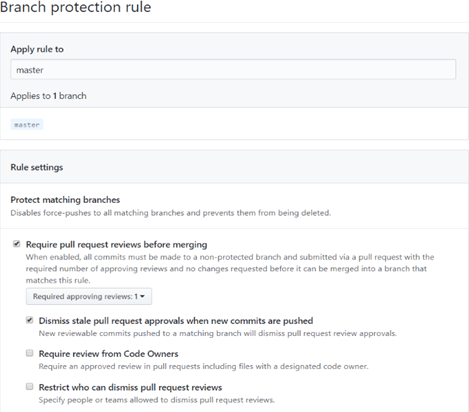
GitHub will present you with the Rule settings under Protect matching branches. Then, simply tick the box for the rules you want to enforce. All the controls are optional. But we will go through them in detail to decide which ones you want to implement.
By default, no one can force push to the branch. This makes it impossible to overwrite the commit history. Similarly, users cannot delete the branch, whether intentionally or accidentally.
However, these rules do not apply to administrators unless specified. You can also temporarily disable the protection if you need to delete the branch or force-push changes. Finally, you can set these rules for a specific branch or for all branches in a repository.
The default branch protection is a good start. But you can fine-tune the rules depending on the protection level you want. GitHub offers granular controls to match diverse workflows.
Step 2 – Create Your Pull Request Rules
This rule ensures that collaborators cannot merge their pull requests or push directly to the branch. Instead, users first have to commit to an unprotected branch. Then, they’ll need to submit a pull request before merging into the protected branch.
You don’t necessarily need to approve the pull requests before merging. A situation that comes to mind is when you need pull requests for continuous integration (CI) configuration or for tracking purposes. There are also users who don’t need to be restricted by approving reviews to merge changes.

Conversely, you can make the rule stricter by requiring approval before merging a pull request. Code review is a git best practice, so it’s worth checking this box. Even so, there are some best practices to keep in mind.
Firstly, choose your reviewers carefully. For example, encourage your reviewers to review code quickly. Additionally, encourage them to provide constructive criticism. You should also try to limit the number of reviewers on a single pull request.
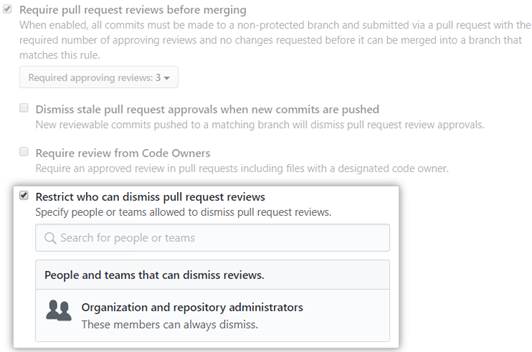
Either way, GitHub also lets you specify how many reviewers are required to approve merging a pull request. You can do this in the dropdown menu under Require Approvals.
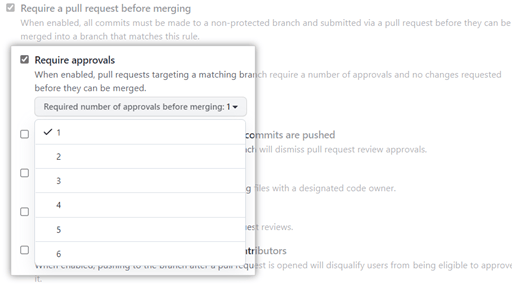
At the very least, ensure that the pull request is accompanied by a review. There are exceptions. For example, trivial changes like formatting or fixing typos may not require a review. Request your team to take the reviews seriously to optimize the workflow.
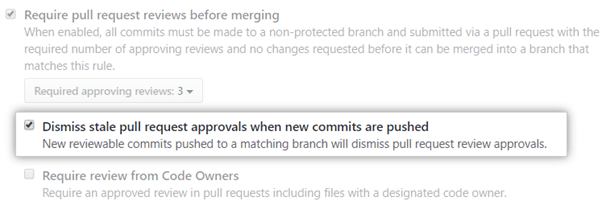
It’s also good to enable the Dismiss stale pull requests flag. Sometimes approved pull requests need new changes. This option ensures that your reviewers are notified when this happens. It also prevents urgent pull requests from being bogged down in a queue.
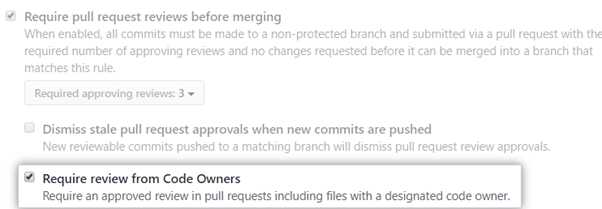
Finally, you can specify which members can review and approve pull requests. GitHub provides a CODEOWNERS file where you can add the code owner.
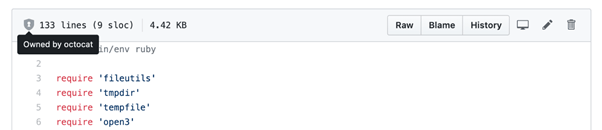
The code owner or team will be notified whenever a member opens a pull request. Simply check the Require review from Code Owners box to enforce this rule.
Step 3 – Establish Exceptions to the Pull Request Rules
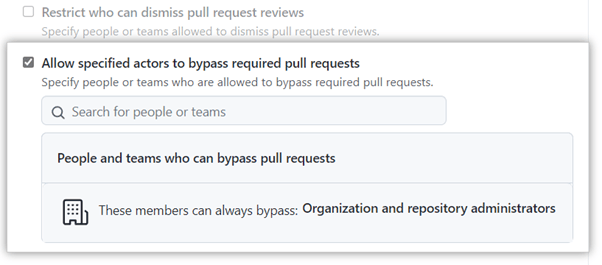
Not everyone needs to jump through these hoops to push code to the branch. GitHub offers a way to exempt users from the rules. You can check the bypass required pull request box. Then, choose the members you want to exempt from the drop-down menu.
We recommend using this feature sparingly. The purpose of pull requests is to ensure buggy or broken code doesn’t make it to your critical branches.
Additionally, you can also specify which members can dismiss pull request reviews. This option is handy if there are requests that cannot be reviewed or that are no longer valid. By default, anyone with administrator or write access can dismiss a review.
So it’s a good idea to limit the number of people who can dismiss reviews. Fortunately, you won’t need to change roles or permissions. Instead, simply click the Dismiss pull request reviews box and select the appropriate members or teams.
Step 4 – Enable Required Status Checks
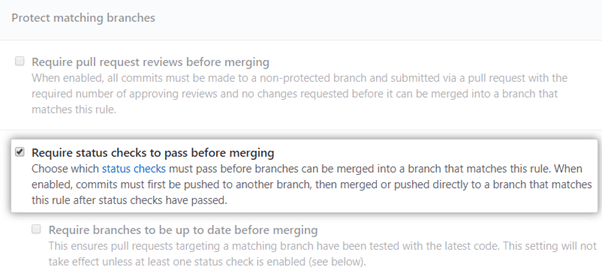
Most collaborative development teams use continuous integration (CI) systems like Jenkins or Travis. These systems are helpful for testing code before sending the build status back to GitHub. GitHub lets you define the status checks that the code has to go through before merging pull requests to the branch.
You can enable status checks from the same branch protection rules menu.
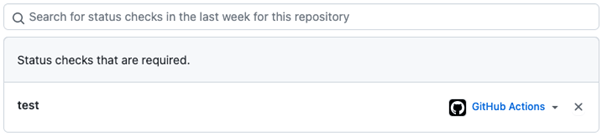
You can also specify the status checks and CI systems required for these checks.
Similarly, it’s good to ensure that these checks are run against the latest version of the target branch. Again, GitHub allows you to enable Required branches to be up to date before merging.
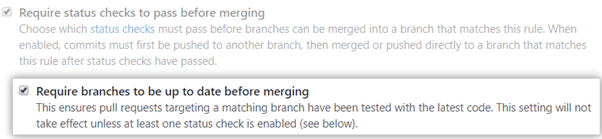
This way, authors will receive a message to merge changes from the target branch to their pull request branch if they skip this step. Combining status checks with this requirement helps improve the quality of code making it to your protected branches.
Step 5 – Finalize the Appropriate Restrictions
The branch permissions get more granular at this point. You don’t need to enable all the additional restrictions going forward. We’ve covered the basic controls and best practices in the previous steps.
From here, you can choose the permissions that make the most sense. Your options include:
Conversation resolution before merging – This rule requires that code comments be acknowledged or resolved. You can easily keep track of unresolved or outdated conversations in the Conversations menu. This way, there’s no confusion as to why a pull request hasn’t been merged.
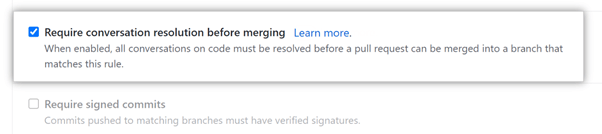
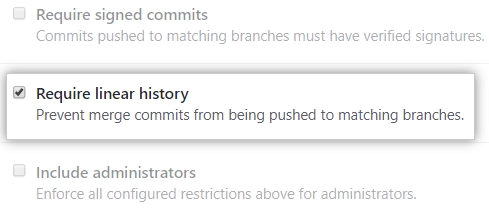
Require signed commits – Here, authors must authenticate their commits. This permission helps prevent impersonators. The feature works much like digital signatures for documents. A sign commit from a trusted source also means you don’t have to spend unnecessary time double-checking their code.

Require linear history – These permissions ensure that there are no branches with independent commit histories. Instead, the commits have to come after one another. This kind of history is easier to follow and revert changes.
Require merge queue – This permission is ideal for busy target branches. GitHub automatically merges the changes once they pass the required checks.

Require deployments to succeed – You can require that the changes be deployed successfully before merging. Then, naturally, you can choose the specific environment to deploy these changes.

Finally, you can ensure that these changes also apply to the administrators. You can also leave this box unchecked in case you require someone to bypass the restrictions. For example, an administrator can approve pull requests if the assigned reviewer isn’t available.

Step 6 – Restrict User Access to Organization Branches
This step applies to shared GitHub accounts. These include organization or enterprise accounts. It’s good practice to restrict which members can interact with your branches in the first place. Protecting branches isn’t useful if unauthorized users with admin or write privileges can still access them.
To enable branch protection and restrict access:
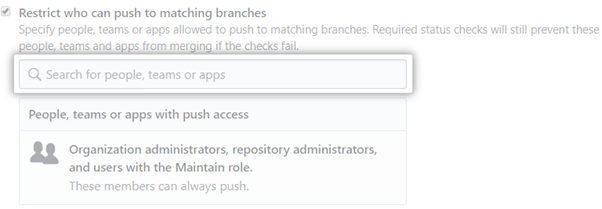
Check the Restrict who can push to matching branches box.

Then, search for the people or teams you want to allow to push to the protected branch.
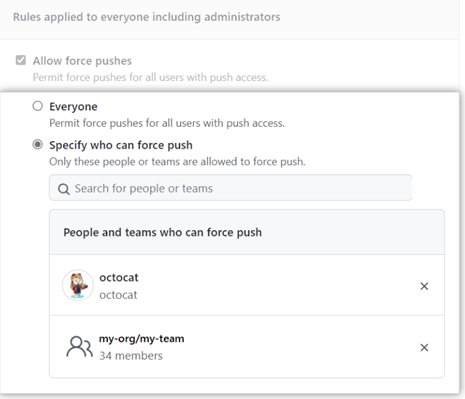
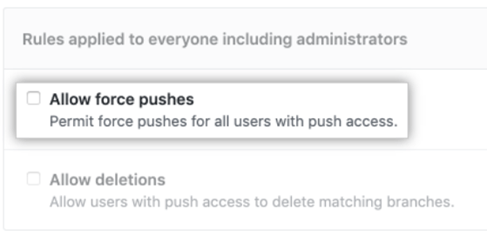
There are instances where users will need to force push changes. GitHub permissions allow you to choose who can do this. Checking this option will prevent you from disabling branch permissions when you need to force-push changes.
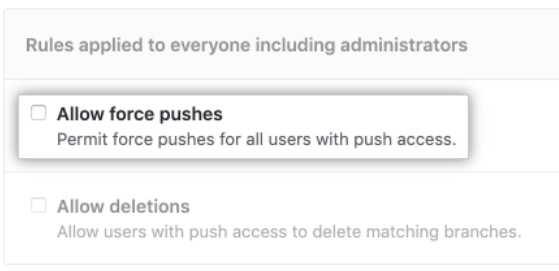
At the very least, consider granting your admins this access. Alternatively, you may choose to give access to specific teams. There’s also a strong case to be made for denying force pushes so this consideration depends on your organization’s structure and workflow.
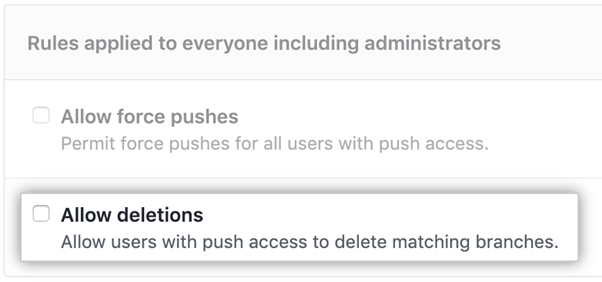
Finally, decide if you want to allow users to delete branches. You may want to limit this access, especially for critical branches. It’s best to disable this rule for your sensitive branches. You can always change it when you need to delete branches.
Now you only need to click Create to enforce your branch permissions.
Common Problems When Setting Up GitHub Branch Protection Rules
Setting up your GitHub branch protection rules is straightforward for the most part. You’ll be prompted to select or disable the protection rules as you scroll down the list of rules. The process is very intuitive.
However, you may encounter some potential problems, including:
Unable to Add Branch Protection Rules
GitHub only allows you to set up branch protection rules free with public repositories. You’ll need a paid plan to create and enforce these rules in private repositories. Please upgrade to a paid plan to enjoy branch protection rules for private repos.

You also need owner or admin access to set up branch protection rules. Check your permissions if you still can’t create rules with GitHub’s paid plans.
Merge Conflicts with a Protected Branch
Merge conflicts occur from time to time. This problem is relatively easy to resolve with unprotected branches. However, protected branches require more manual work before you can fix the merge conflict. This scenario is more common when multiple people merge into the same branch.
The first step is to create a new unprotected branch from the protected branch. Then, merge the conflicting pull request.
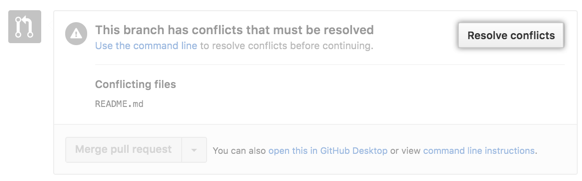
Next, resolve the conflicts in the new branch. You can do this by clicking the pull request with the merge conflict. Then click Resolve conflicts near the bottom of the conflicting pull request.
Finally, open a new pull request from the new branch to the protected branch. Now you should be able to merge your changes since the conflict has been resolved successfully.
However, there are instances where you might need to resolve the conflict locally in your git command line. You’ll need to do this if:
- The admin has disabled the GitHub conflict editor.
- The Resolve conflicts button is deactivated.
- The pull request merge conflict is too complex for GitHub.
Keep in mind that you’ll still need to follow the branch protection rule. For instance, your changes may not be merged until your pull request is approved or the conversation is resolved. Of course, these depend on the branch’s specific protection rules.
Pull Request Reviewer is Unavailable
Ensuring that pull requests are approved before being merged is a reasonable restriction. However, the reviewer might not be available to approve the request. GitHub allows users with write access to dismiss a blocking review.
You can simply ask a user with the owner or admin access to approve or dismiss the review. Alternatively, the admin can ignore the review or assign another user the rights.
The reviewed file will be marked as viewed. So you’ll know when the request has been reviewed. Finally, the author will need to submit another review to approve the pull request changes. Otherwise, the changes cannot be merged with the reviewer’s approval alone.
Can’t Force Push to Protected Branch
GitHub disables force pushes to protected branches by default. Additionally, the author of a pull request cannot approve their own merges.
Unfortunately, sometimes it is necessary to force-push pull requests. It is possible to bypass this restriction. Simply ask the admin to enable force push to the branch. They can do this in the repository settings.
Again, it’s worth thinking carefully before force pushing to a protected branch. Use this feature sparingly and only when necessary. Force pushing to branches comes with inherent risk. For example, the pull request may be corrupted or have merge conflicts.
Finally, you won’t override other existing branch protection rules. For instance, you can force push your pull request to the protected branch. But you cannot merge commits if the protected repo only supports a linear commit history.

