How to Integrate Slack With Zendesk
For those who need a customizable customer support system within Slack, integrating Zendesk Support dramatically simplifies this process.
This integration creates a smoother customer experience, as you can generate support tickets directly from within Slack. Route the tickets to the correct channels, and you’ll make the entire process run smartly.
Here are the steps required to perform a Slack Zendesk integration.
1. Set Up the Slack Zendesk Integration App
Before starting his process, understand that you will need to have administrative privileges in Zendesk Support. You will need to have administrative access in your company’s Slack workspace and the ability to install apps in the Slack workspace. Without these permissions in place, you will be unable to complete this integration.
Start the Slack Zendesk integration process by logging into your company’s Slack workspace.
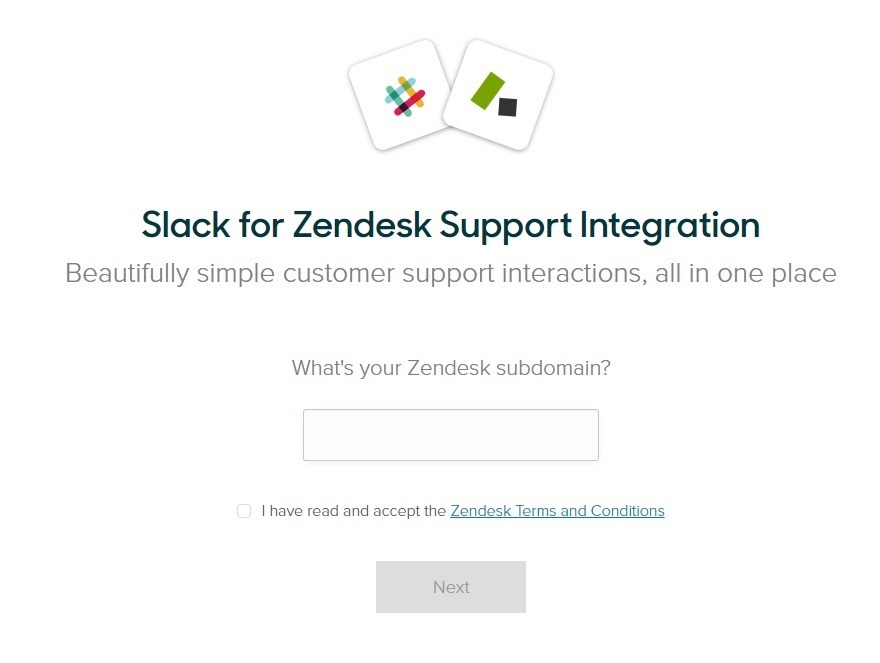
Then open the Slack Zendesk integration page and click Continue.
You will need to enter some information regarding your Zendesk account, including your Zendesk subdomain. After entering all of the requested information, accept the terms and conditions and click Next.
2. Complete the Installation Process
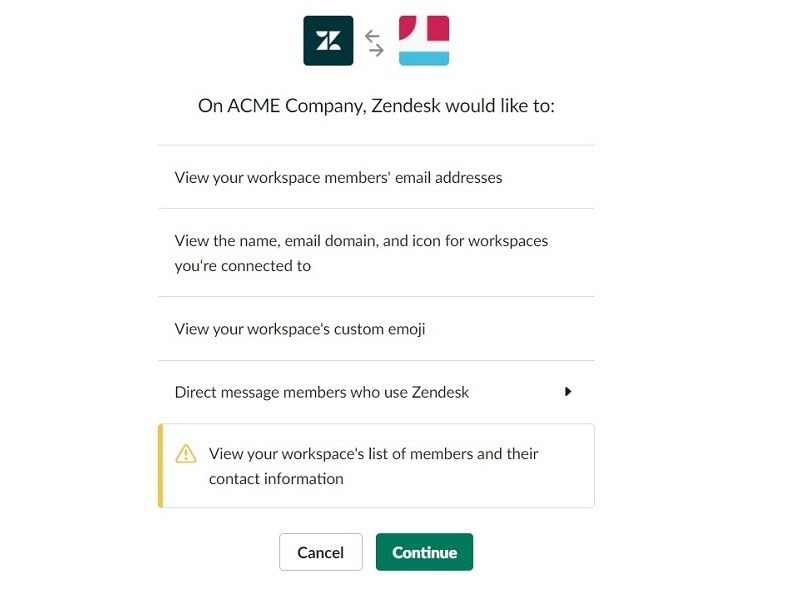
After clicking Next, you will see a list of functions that the Zendesk app will attempt to perform on the various Slack channels to make the most of the integration.
Through the selections you make in this window, the Zendesk Support app may be able to add, edit, and delete files from specific Slack channels, post messages into Slack channels directly from the Zendesk Support app, and view information from private channels.
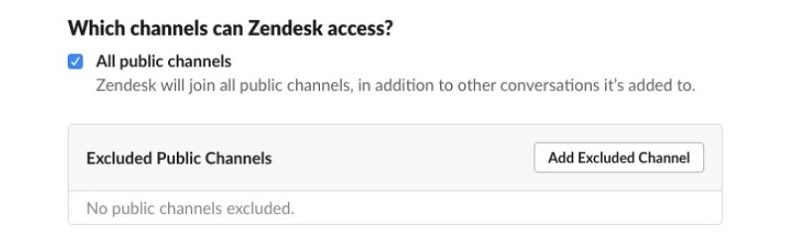
Scroll to the bottom of the window to see the options you have for giving Zendesk access to your company’s various Slack channels, which include:
- All public channels: If you select this option, Zendesk will be able to gain access to any channel that’s available to members of your Slack team.
- Specific channels: With this selection, you can specify the exact channels in Slack to which Zendesk will have access. Start typing the name of the Slack channel you want to access in the text box, and the app will find any channels that match your search criteria. Just click on the channel you want to use from the available selections.
- No channels: If you select this option, the Slack Zendesk integration will only work through private conversations held in Slack rather than in the Slack channels.
Unless you have a specific reason for picking either the particular channels or no channel options, the best idea is to select All public channels. This option allows your team to begin using the Slack Zendesk integration as quickly as possible.
Should you later decide that you need to limit the integration, you can rework the settings to change over to the specific channels or no channels option.
After making your selection, click Install to begin the installation process for the app.
One important note: If one of the other Slack users attempts to reinstall the Zendesk Support app after you already installed it, this could create corruption in the first installation. You will want to either turn on the permission setting in Slack that requires users to receive approval for installing apps, or you will want to inform all of the members of your Slack team never to attempt to install the Zendesk Support app.
3. Configure the Channel Notifications in Slack
After the installation is complete, you will need to configure the channel notifications in Slack to allow the Zendesk app integration to work. Only administrators in Slack can perform this process.
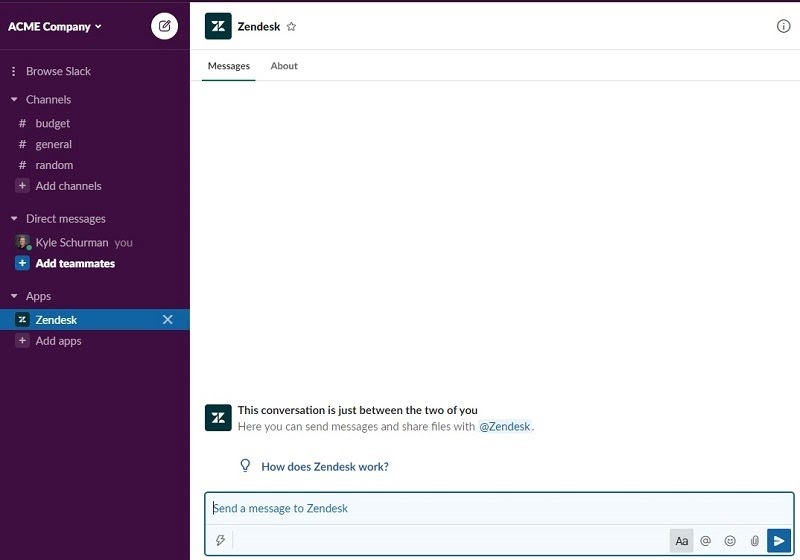
Start by opening your Slack administrative account. You should see a direct message from the Zendesk app. Click on the Get Started button in the message.
In the window that follows, you’ll be able to select which channel to configure in Slack, meaning the selected channel will contain the Zendesk notification postings.
If you are already working in a particular channel, that channel will appear as the default selection in the drop-down menu. Otherwise, click on the drop-down menu to select another Slack channel you want to configure. After picking a channel, click the Next button.
4. Select the Types of Notifications to Receive
Once you have picked the channel in Slack where you’d like to receive notifications, you should select the types of notifications you want to receive.
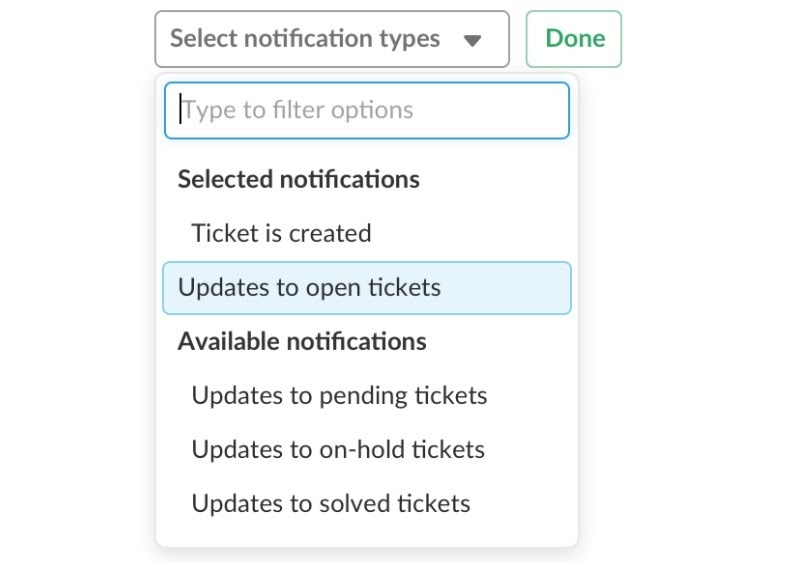
Click on the drop-down menu to make your selections. You can pick one or more types of notifications. As you make selections, the view in the drop-down menu should change to reflect each of the notifications currently active and the ones still available for selection.
Should you select a notification that you want to remove later, just click on it again. Slack will move it from the “selected notifications” list to the “available notifications” list. Some of the notification options you can pick include:
- Creation of a ticket
- Update of open tickets
- Update of pending tickets
- Update of solved tickets
After making all of your selections, click the Done button to move to the next step.
5. Select Who Can Post Notifications
You will then have to decide which support group or groups can post notifications within the Slack channel through the Zendesk Support app. You may only want certain support people to access the support tickets, especially if certain tickets have sensitive personal data included in them. You can also go the opposite direction and provide universal access to all of your team members if desired.
Another benefit of limiting specific support tickets to particular groups is that you won’t have to worry about having tickets that don’t belong in certain channels showing up in those channels. Properly determining which groups can post notifications about tickets in which channels keeps the entire Slack Zendesk integration better organized and less cluttered.
The default setting will have no group selected. To use the integration, you will have to select at least one group before any updates appear in the channel.
After selecting the groups you want to use, click the Done button. It often takes several minutes before your selections for the groups will appear in the Zendesk Support app settings.
6. Make the Final Tweaks
Now, you may want to make a few additional changes to the settings. After selecting the groups, the Zendesk app will provide a message that gives you the ability to make additional selections.
Your options include:
- Edit your existing settings
- Change the subdomain
- Provide feedback to Zendesk regarding the app’s performance
Other Channel Options
Once you begin using the integration, you can make some changes to your choices.
You have the option of adding the Zendesk Support app to either private or public channels in Slack after you complete the installation, for example.
Add the Zendesk Support App to Private Channels
If you want to add the Zendesk app to a private channel in Slack, start by clicking on the drop-down menu in the main Slack window. Select Administration, followed by Manage Apps.
On the subsequent page, you should see a list of apps that you have available in Slack. Click on the Zendesk app, followed by Settings.
Click on Channel Access on the left side of the page. Scroll toward the bottom of the page to the “Which Channels Can Zendesk Access” section. Within that section, you’ll see the private channels in which you’ve already added the Zendesk app.
Then click the Add App to Channel button. You’ll see a drop-down menu that lists all of the private channels available. Click on the private track you want to use. You should see a popup page where you can click on the Allow button.
Go back to the main Slack window and click on Zendesk in the Apps section of the left-hand menu. If you see a popup text box, enter the following text string: /zendesk settings.
Then click the Add Channel button. Return to step 3 in our list and configure the channel notifications for the newly added private channel.
Add the Zendesk Support App to Public Channels
Versus adding Zendesk Support to a private channel, adding the app to a public channel requires far less work.
Start at the Slack home page. Open the Apps section on the left-hand menu and click on Zendesk. Create and send a message to start a dialog with the app. Because Zendesk doesn’t yet have a connection with this public channel, Zendesk will respond by giving you the option of clicking the Add Channel button.
You then can return to step 3 in our list to configure notifications for this public channel.
How to Use the Slack Zendesk Integration
Adding the ability to access Zendesk Support from within Slack should simplify your organization’s ability to track and solve customer issues. You should be able to prioritize specific tickets over others, too.
By running support through Slack, the entire team can be involved in solving customer issues. When your team members already use Slack for most of their communications, incorporating Zendesk into Slack makes a huge difference in how your team can perform its customer service work.
Your team members will no longer have to go back and forth between Zendesk and Slack, which allows them to spot customer requests quicker and make the most of their time. Some of the benefits of using a Slack Zendesk integration include:
- Smoother workflow for your team members
- Easier to find the right team member to address a particular customer issue, even if that team member doesn’t typically work with customer support
- Communicate with other team members quickly about customer issues
- Faster response times
- Stay on top of tasks
- Tasks are searchable
- Respond to customer tickets directly from within Slack
Here are three common tasks you can complete with the Zendesk Slack integration.
Create a New Zendesk Support Ticket in Slack
After creating the integration between Zendesk and Slack, any support messages submitted through Zendesk will appear in the matching channel in Slack.
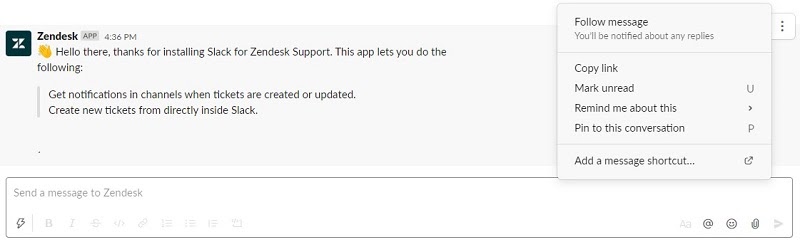
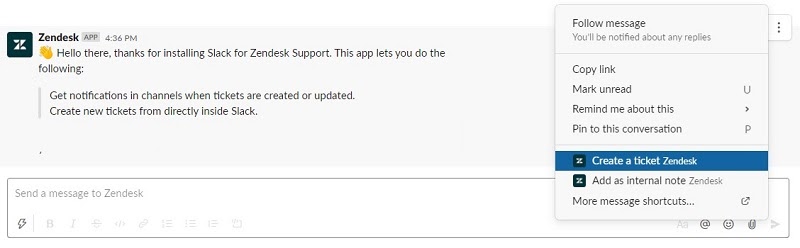
To create a support ticket in Slack from the request, hover the cursor over the notification message to display the popup menu in the upper right. Click on the More Actions button (marked with three horizontal dots) on the far right. Toward the bottom of the popup menu, click on Create a Ticket.
In the new window, you can add several items, including:
- Subject: The subject is the description or title of the ticket. Limit it to a few words to avoid too much clutter in the Slack display windows.
- Requester: The person submitting the ticket automatically becomes the requester in the new window. However, you can change the person listed in the Requester box. Start typing a new name in the box, and Slack will show the names of current Slack users who match the text. Click on any name in the list to select it as the Requester.
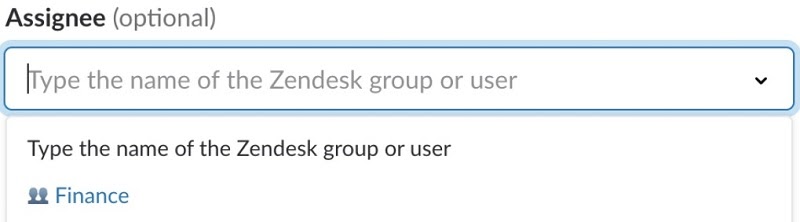
- Assignee: You can use the Assignee box to assign the task to any available group. Start typing the name of the desired group in the Assignee box, and Slack will return group names that fit the text you’ve entered. Select the group name you want to use from the list. You also can leave the Assignee box blank.
- Description: The Zendesk app will pull some of the text from the original request and add it to the description box for you. Leave this text as is, add to it, or edit it from here. You can have up to 3,000 characters in the description box.
Click the Submit button, and the request officially becomes a ticket in the proper thread in Slack.
Add Private Notes to a Support Ticket in Slack
Once the ticket exists in Slack, you and your team members may need to add notes to the ticket that only agents on your team will be able to see. In other words, the customer who originally made the support request will not be able to see the notes your team members are adding.
You can add the private note directly to the original ticket notification in Slack, or you can add a note to a reply in the ticket.
Either way, hover the cursor over the original message or the reply to see the popup menu in the upper right. Click on More Actions, followed by Add As Internal Note, which is toward the bottom of the menu.
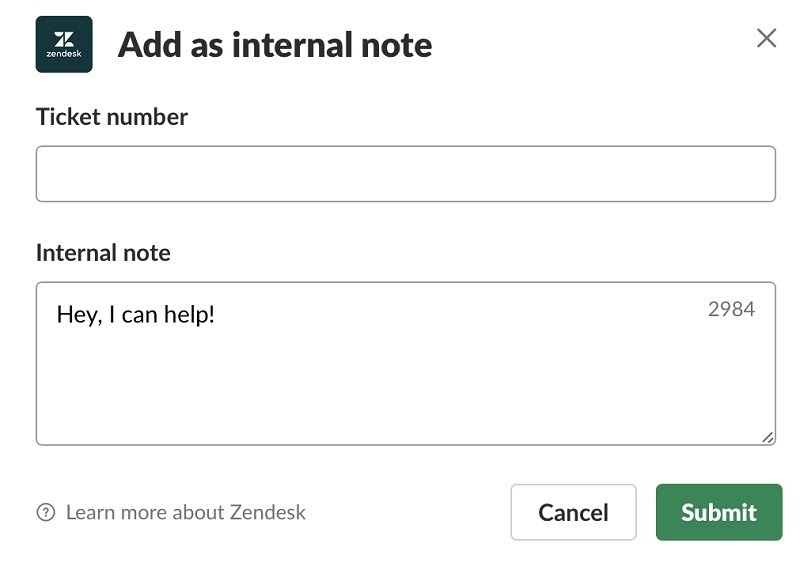
In the window that appears, add the ticket number in the Ticket Number box, if required. If you add the private note from the original ticket notification, Slack should insert the ticket number for you. Then type the message inside the Internal Note box. Slack may prepopulate the Internal Note box with some text that you will likely want to delete or change.
Click the Submit button, and the note will become part of the Zendesk Support ticket, only visible to team members.
Use Side Conversations in a Support Ticket in Slack
Sometimes, it may be easier for team members to hold a text conversation as part of the ticket, rather than using email or real-time chat separately. This is the side conversations feature in the Zendesk Support app inside Slack.
To start a side conversation, look in the upper left corner of a ticket, where you should see a Side Conversations popup menu option. If you do not see this option, an administrator may need to enable side conversations within Slack. You also will need to have the latest version of Slack in use. Click on the Side Conversations button and pick Slack in the popup menu.

In the popup window, add the Slack channel you want to use and add your message. Click the Send button. Other team members with access to that Slack channel can see your side conversation message and reply directly.
The side conversation can continue until you’ve received the information you need. Click the Mark Done button to end the side conversation.
You also can delete a side conversation. Click the Side Conversations button and pick the conversation you want to delete. Click the three vertical dots on the right area of the side conversation, followed by Delete Message. You may have to confirm the deletion by clicking Delete again.

