How to Install GitHub
GitHub is the most popular source code management solution on the market today. By installing GitHub Desktop, you can interact with the tool using a graphic user interface (GUI) instead of the web browser or command line.
This guide will teach you exactly how to install GitHub, along with troubleshooting tips for the process and getting started.
Step #1: Verify Your OS Compatibility
Before you install GitHub, you’ll want to make sure that the operating system you’re using is compatible with the software.
As of now, you can install GitHub on macOS 10.12 versions or later and Windows 7 64-bit or later.
To be clear, you need to have a 64-bit operating system to successfully run GitHub Desktop on a Windows machine. So while the installation process might technically work with a lesser OS, the software won’t run if you’re not using a 64-bit OS.
The main purpose of installing GitHub is simplicity. GitHub Desktop lets you handle the majority of Git commands directly from your local device. You’ll also benefit from visual confirmation of your changes. GitHub Desktop also lets you push to remote repositories, pull from remote repositories, and clone remote repositories. GitHub Desktop even supports collaborative work, like attributions for commits and creating new pull requests.
It’s also worth noting that like GitHub, GitHub Desktop is also an open-source project. Once installed, you can provide feedback, ask for feature requests, and even contribute to the project.
Step #2: Download the GitHub Installer File
Next, navigate to the official GitHub Desktop download page. From here, you’ll be able to choose between downloading the installer file for macOS or Windows.
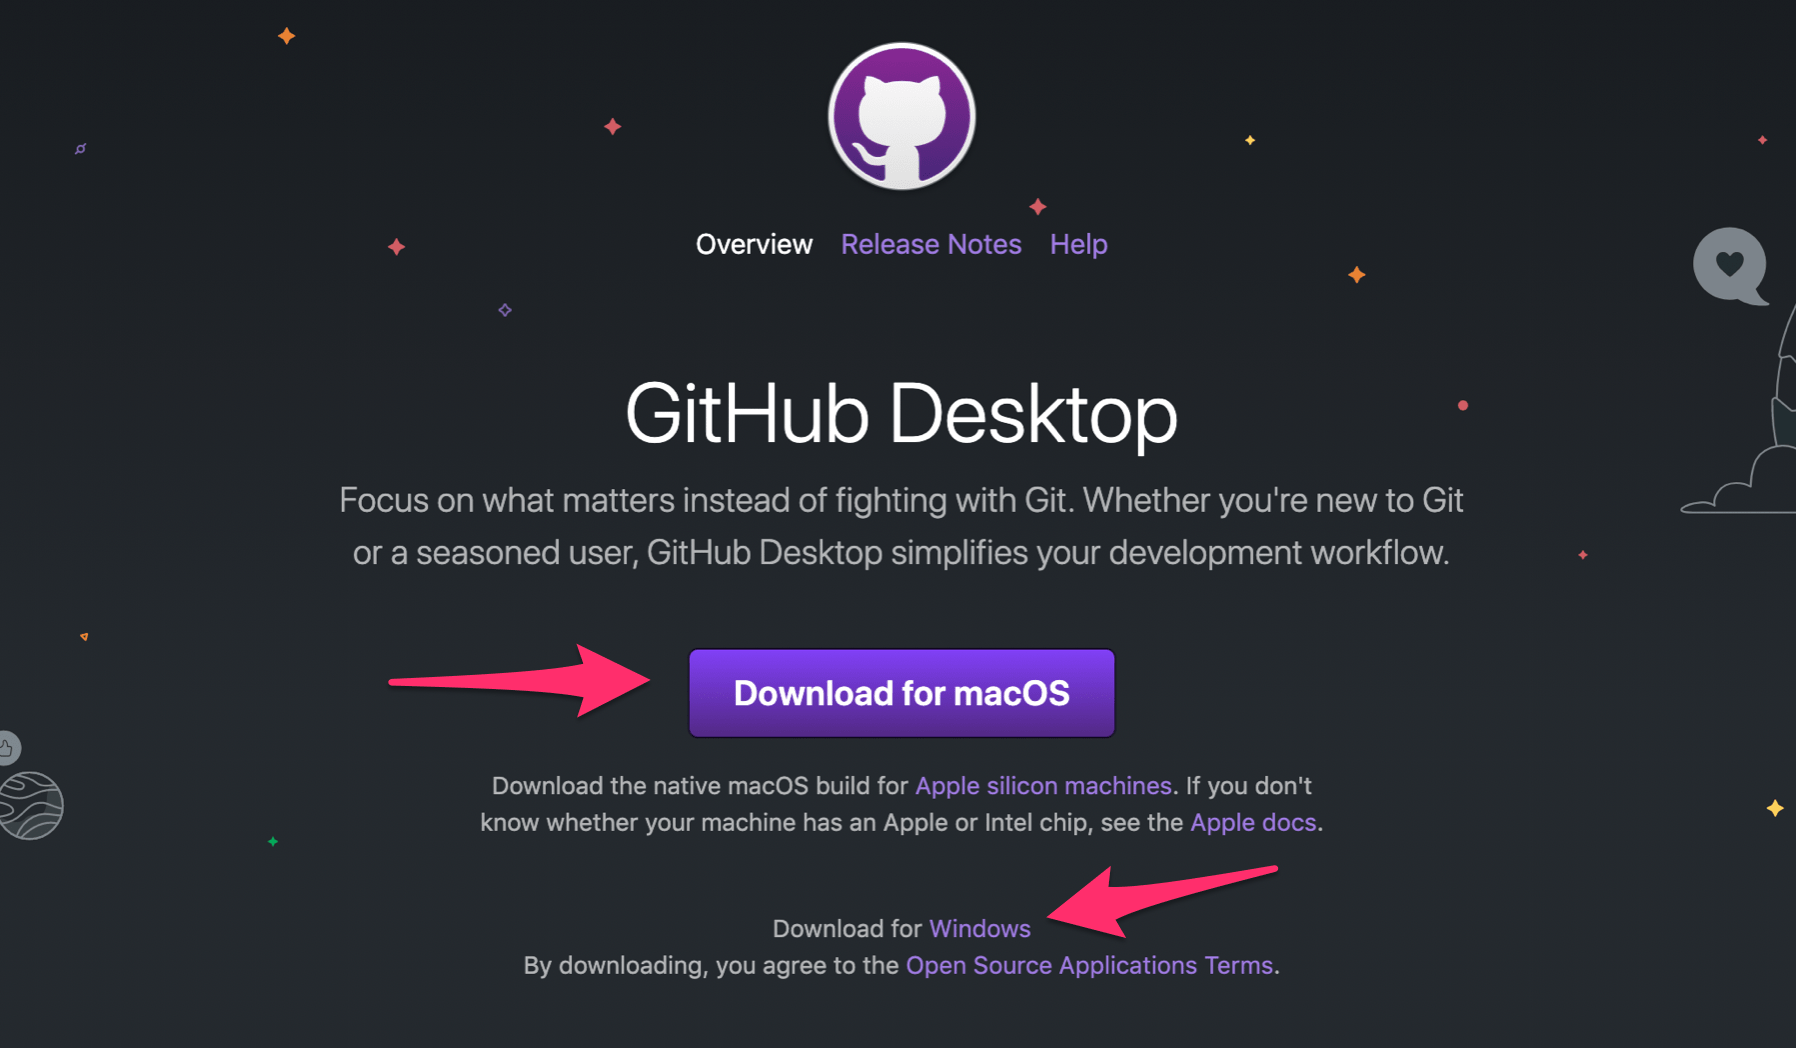
Click to open the installation file after it finishes downloading.
By default, the file should go straight to the Downloads folder on Mac devices. From here, Mac users will be prompted to drag the GitHub Desktop app file to the device’s Application folder. If you’ve installed any other third-party software on your device, you already have experience with this drag-and-drop installation method for Mac.
For Windows, the application should open immediately after you click to unzip the file. Windows users should see this on the screen while they’re waiting:
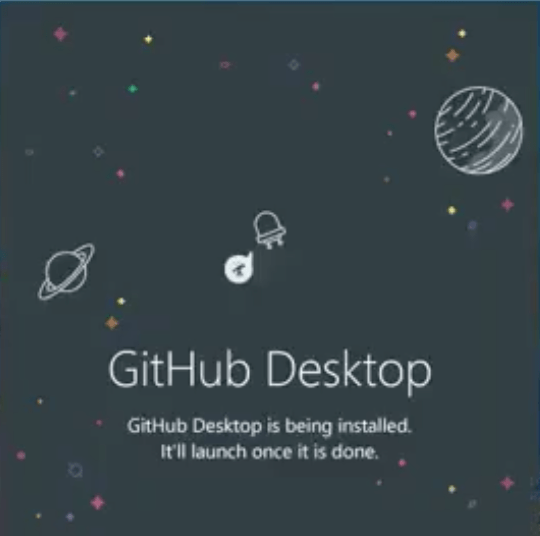
The installation process is relatively fast for macOS and Windows alike.
Step #3: Authenticate the Application
Once GitHub Desktop has finished installing on your device, you still need to authenticate the app before you can actually use it. You can do this with your GitHub or GitHub Enterprise account.
The authentication lets you connect to any remote repositories on GitHub or GitHub Enterprise.
This assumes that you already have a GitHub account. For those of you who don’t have a GitHub account, you’ll need to sign up for one. Here are the different types of accounts available on GitHub:
- Personal User Accounts — Anyone who uses GitHub.com needs to have their own account. These accounts come with free unlimited public and private repositories, unlimited collaborators, and the ability to invite repository collaborators.
- Enterprise Managed Users — These are individual users within an enterprise plan. The accounts are provided by the enterprise IdP (identity provider). Managed enterprise users can only interact with other users, repositories, and organizations within that enterprise plan. Read-only access is available for the rest of GitHub.
- Organization Accounts — These accounts allow groups of people to collaborate on multiple projects simultaneously. Admins and project owners have sophisticated security and sharing features, allowing them to manage the access of the organizational data. There are some organizational features available with a free GitHub account. But for advanced support, you’ll need to upgrade to GitHub Team or GitHub Enterprise.
- Enterprise Accounts — Enterprise accounts are a central location to manage the policies and billing settings for multiple organizations on GitHub.com. These accounts are only available for GitHub Enterprise Cloud and GitHub Enterprise Server plans.
If it’s your first time using GitHub and you’re not sure what account works best for you, just start with a free plan and personal account. You can always upgrade later. But you’ll need to have this account before you can authenticate GitHub Desktop.
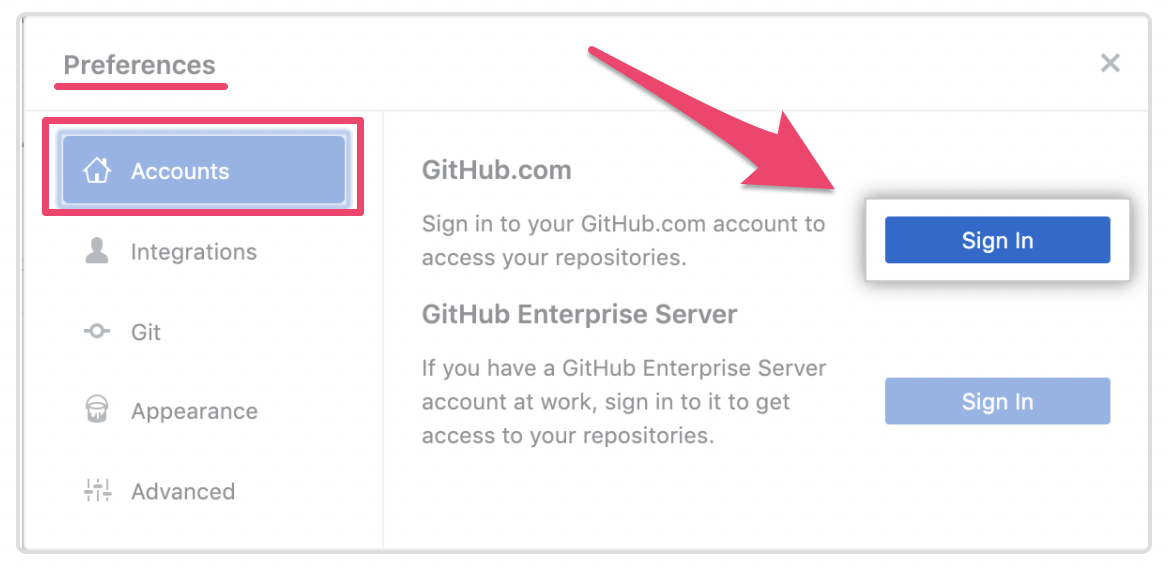
Navigate to the Accounts section of your GitHub Preferences, which can be found in the drop-down menu of GitHub Desktop.
Then click Sign In to authenticate the desktop app with your GitHub.com account.
For enterprise users, contact your enterprise site administrator if you need help signing in.
Step #4: Customize and Configure GitHub Desktop
Now that the application has been authenticated, you can start customizing GitHub based on your personal preferences.
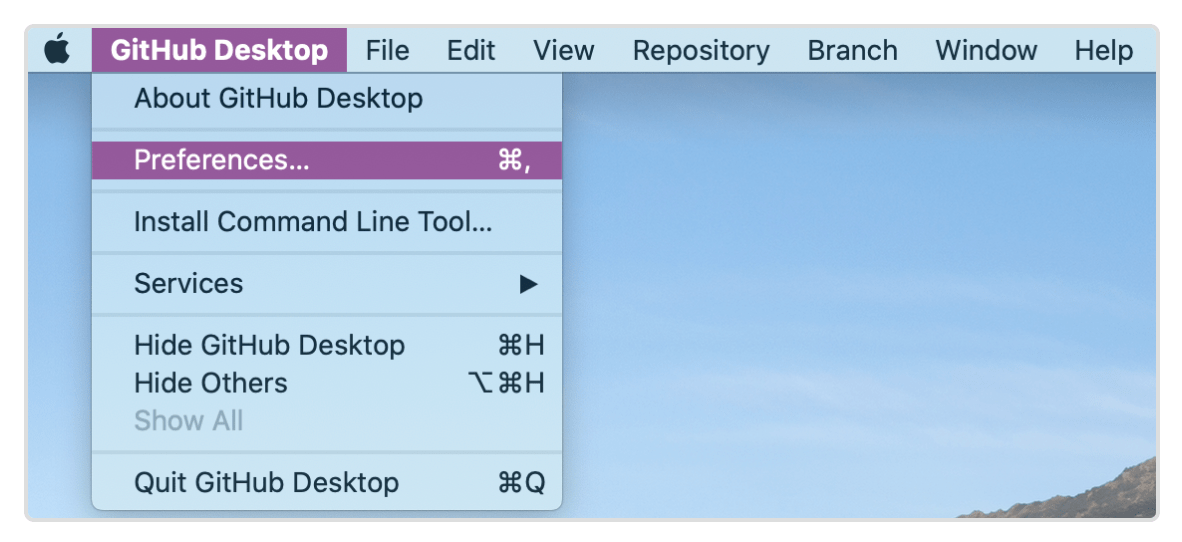
Click the GitHub Desktop menu and navigate to Preferences to configure basic settings.
There are six different menus to choose from within your Preferences. Here’s a simple overview of each one:
- Accounts — Use this to add or remove GitHub.com or GitHub Enterprise accounts.
- Integrations — Select your shell or external editor.
- Git — Manage your Git configurations.
- Appearance — Switch your theme (choose light or dark).
- Prompts — Enable and disable confirmations before a destructive action.
- Advanced — All other configuration preferences, like usage data.
Here’s a really basic example of what it looks like if you want to switch between a light or dark theme:
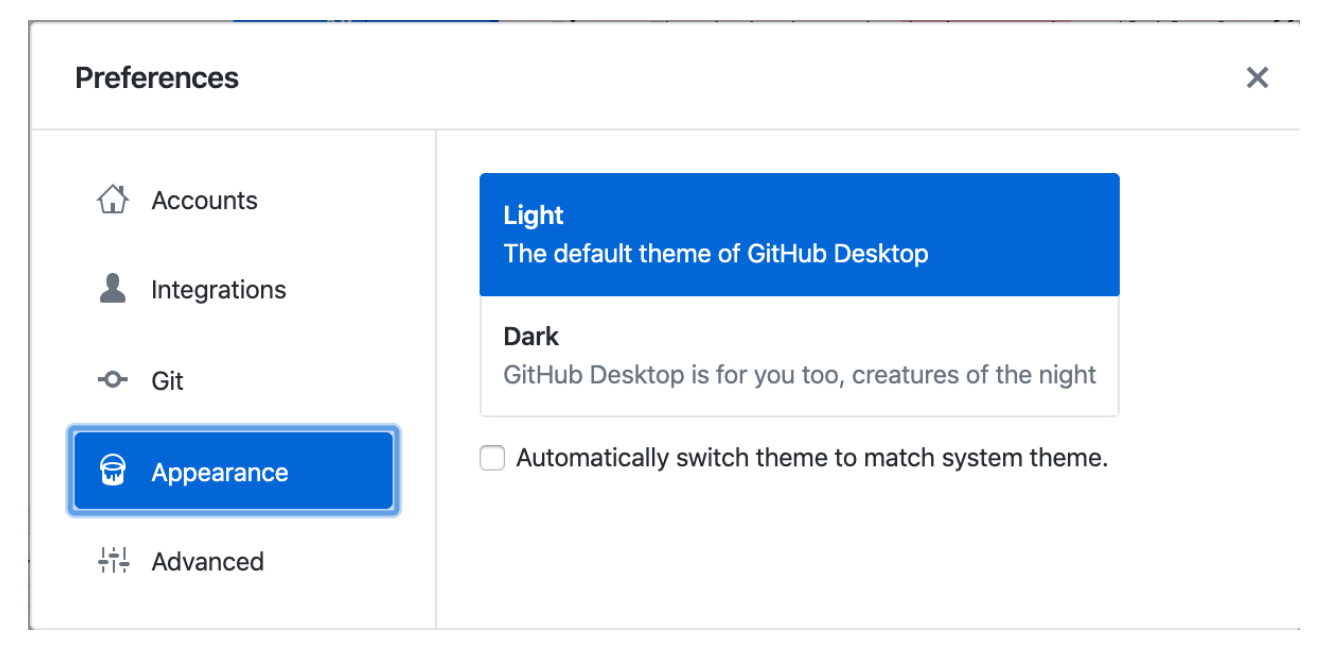
You can always change these settings at a later time. But I recommend going through each one before you get started. This way, all of your preferences will be set, and you won’t be constantly interrupted once you start actually working within GitHub Desktop for various projects.
Step #5: Getting Started Using GitHub Desktop
That’s it! The software is officially installed and ready to use.
Technically, the installation process is over. But I want to walk you through some logical next steps for using GitHub on macOS or Windows. Here’s what you need to know:
Create, Add, or Clone Repositories in GitHub Desktop
Before you can start collaborating on projects, you’ll need to have a repository associated with your desktop account. If you don’t have any repositories right now, you should see this screen:
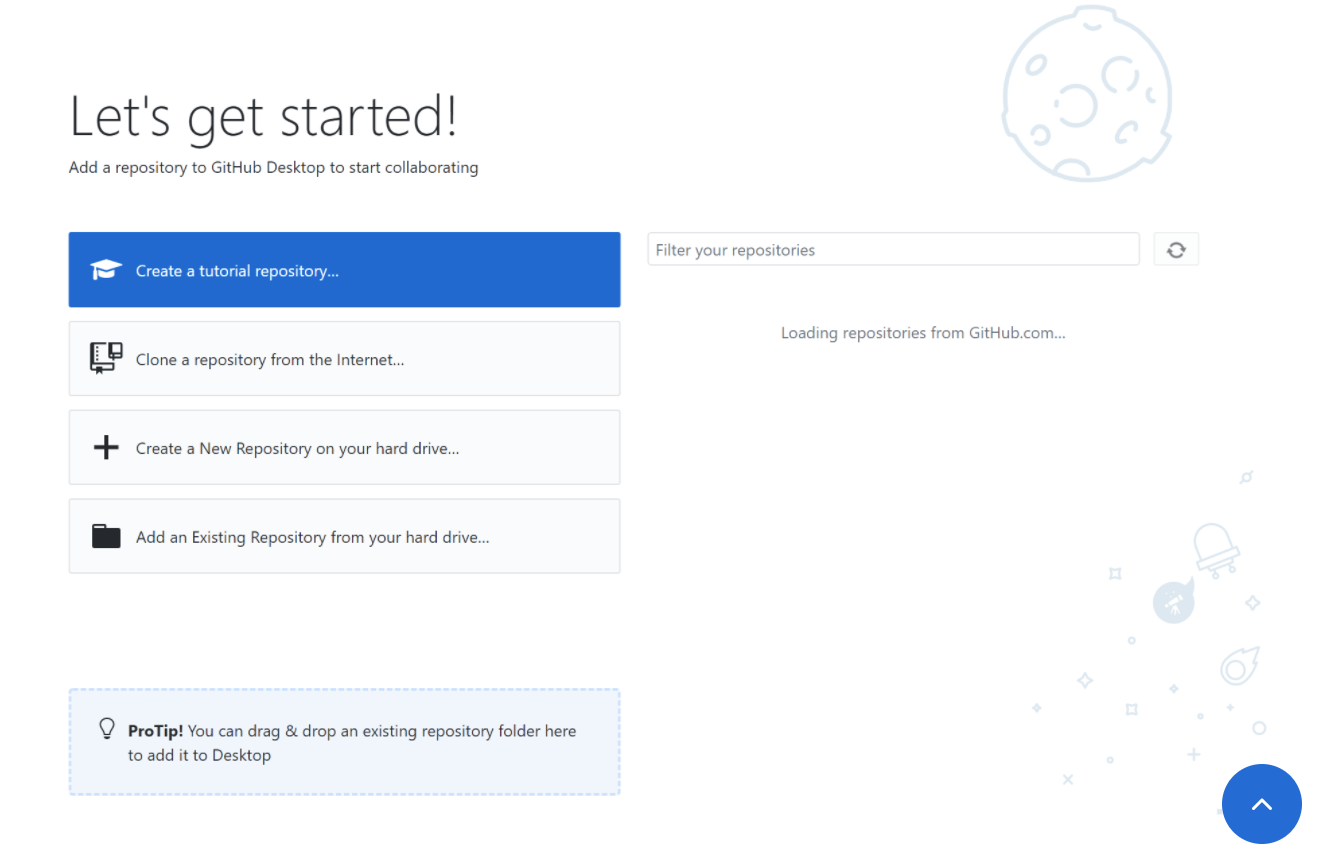
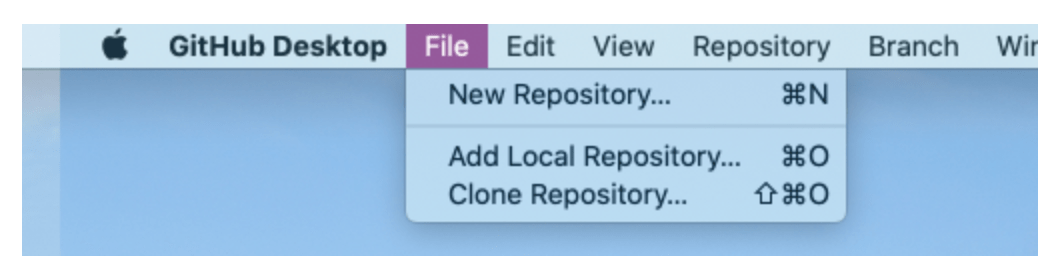
Alternatively, you can navigate to the File menu of your GitHub Desktop application. From here, you’ll have the option to select:
- New Repository
- Add Local Repository
- Clone Repository
If you’re creating a new repository, GitHub will prompt you to fill out the following form fields:
- Name — The repository’s name on your local device and GitHub.com
- Description — An optional field to include info about the repository’s purpose
- Local Path — Location of the repository on your local computer.
- Git Ignore menu — Add custom file that ignores specific files in local repositories.
- License menu — Add open-source licenses to your repository.
Once you’re done with all of these settings, just click Create Repository to proceed.
Publishing a Repository to GitHub.com
When you create a new repository using GitHub Desktop, it’s only available on your local device. Nobody else can access the repository except for you.
You’ll have the option to publish this repository to GitHub, which is necessary if you’re planning to collaborate or work with team members. Then you can sync the repository across multiple computers as well.
From your repository menu bar, click Publish repository.

GitHub will automatically fill the repository information with the same name, description, and other fields that you’ve previously created.
Check the box that says Keep this code private if you don’t want others to view the repository. If the box is left unchecked, then the repository will be publicly available on GitHub.com.
If you belong to an organization, then you’ll have the option to publish the repository to a specific organization by selecting one from the drop-down menu. Once all of this is complete, click Publish Repository to push it to GitHub.com.
Common Problems When Installing GitHub
While Installing GitHub is fairly straightforward, some users still experience different problems, pain points, or stumbling blocks when they’re going through this process. I’ve identified a handful of these common problems, along with an explanation and troubleshooting steps for each one.
If you’re experiencing any of these issues, the information below will solve your problems:
Problem #1: Confusing Git and GitHub
Git and GitHub are two very different things. Git is an open-source version control solution that was initially created by developers using Linux OS. GitHub is an open-source solution offering tools that integrate with Git.
GitHub Desktop is the local application for GitHub. When you install GitHub Desktop (as explained in the tutorial above), you’ll also get the command line version of Git.
You cannot use GitHub without Git. But technically, you could use Git without using GitHub. For example, some popular GitHub alternatives include GitLab, Bitbucket, and self-hosted solutions.
If you came to this guide looking for step-by-step instructions to install Git, then this resource isn’t exactly what you’re looking for. The five steps outlined above explain how to install GitHub Desktop on macOS or Windows. However, if you don’t already have Git on your local device, the latest version will automatically install when you download and install GitHub Desktop.
There are lots of different ways to install Git. Git can also be installed on additional local devices compared to GitHub.
For example, Git can be installed on Mac, Windows, or Linux. There are various installation methods for each, including Debian/Ubuntu or Fedora for Linux and Homebrew for Mac.
To keep things simple, installing GitHub Desktop by following the five steps I explained above is the easiest way to install Git. If you’re a beginner, there’s no need to overcomplicate things with a separate installation.
Problem #2: Authentication Errors on macOS From Keychain Login
As mentioned in step #3 of this guide, you need to authenticate GitHub Desktop with your GitHub account before you can start using it. But some Mac users run into problems here.
One common occurrence is an error that appears after you’ve attempted to sign in to your account. The message says:
The username or passphrase you entered is not correct
This can be frustrating, especially if you know those same credentials work on GitHub.com. But it happens if GitHub Desktop can’t access the credentials stored on your Mac Keychain. So if you’re using the Keychain with your stored passwords, here’s how to troubleshoot this authentication:
- Open the Keychain Access application on your macOS device
- Right-click on the Login option on the left side Keychains menu
- Select Lock Keychain “login” from the pop-up menu
- Right-click on the Login option again
- This time, select Unlock Keychain “login” from the pop-up menu
- Follow the prompts on the screen to finish the unlocking process
Once you complete these steps, you should be able to re-authenticate GitHub Desktop with your GitHub account using Keychain.
Problem #3: Permission Denied Creating Temporary Directory for Updates
Here’s another known GitHub issue for macOS. After checking for updates, you may get an error message that says:
Could not create temporary directory: Permission denied
This happens if the permissions are missing within a ~/Library/Caches/com.github.GitHubClient.ShipIt directory. This is what the GitHub Desktop application uses to create and unload temporary files when the application is being updated.
To fix this problem, follow these simple troubleshooting steps:
- Close out of your GitHub Desktop application
- Open the Finder menu in your Mac
- Navigate to ~/Library/Caches/
- Click on the arrow next to Sharing & Permissions
- Look at the Privilege menu to the right of your user account’s name
- Click on the privilege and select Read & Write from the list of options.
If the privilege was set to read-only or write-only, then that’s likely what was causing the error message in GitHub. Once these settings have been updated, you can re-open GitHub Desktop and check for updates.
If you’re still getting the same message, repeat the steps again. This time, make sure that you’ve completely closed out of GitHub Desktop and it’s not running in the background. You can also restart your computer after you change the sharing and permission settings.
Once the computer reboots, open GitHub Desktop and check for the latest updates.

