How to Delete Chats on Microsoft Teams
Whether you’re chatting with a team or another person, sometimes it’s necessary to delete your chat messages on the free Microsoft Teams tool. This lets you remove typos and save yourself from embarrassment. Once you delete your messages, no one can see them again. But how do you do it?
1. Start Microsoft Teams and Log In
The first step is simple: you need to load up the desktop version of Microsoft Teams and log in before doing anything else.
Start by finding the Microsoft Teams icon on your desktop, and double click to launch it. You will arrive at a screen that looks like this:
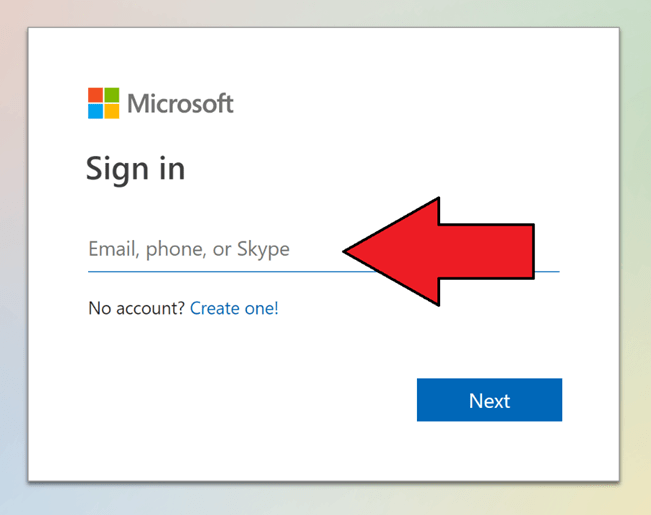
You need to sign in with the email address linked to your account or phone number and then input your password. Note that you won’t always have to put in your password depending on how much you use the software.
2. Find the Right Conversation Under Chat
Now that you’ve logged into Microsoft Teams, you’ll need to find the message we want to delete.
You can do this by viewing your list of conversations. To do this, click where it says Chat, like so:
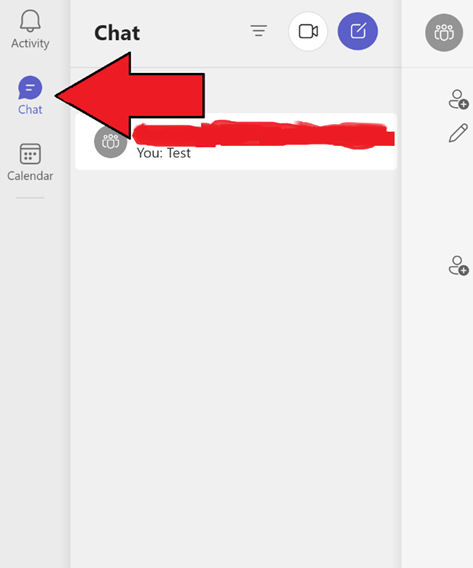
From there, all of your recent chats are displayed, including the messages within them. Click on the conversation where the message you want to delete is, then move to step three.
3. Find the Message and Delete It
Next, it’s time to find the message you want to delete and then hover your cursor over it.
By doing so, a range of emojis will appear, along with a three-dot symbol at the end. You want to click the three-dot icon—or ellipsis—to open up a new menu, like so:
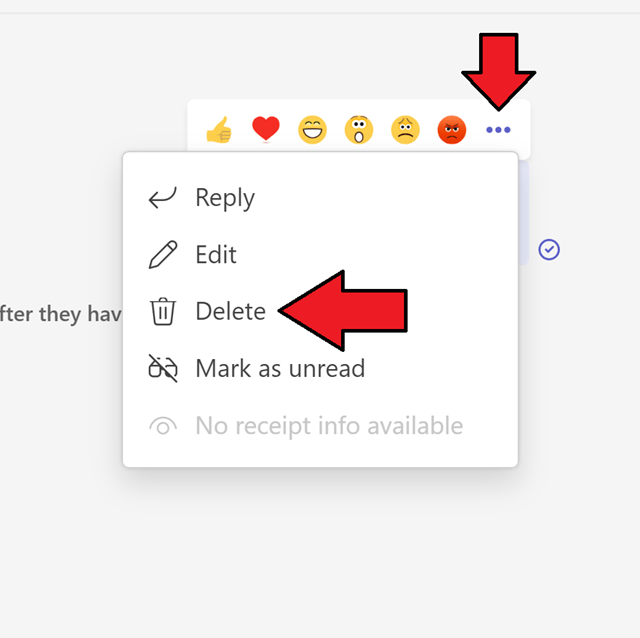
It’s here where you want to click the all-important Delete button. Once that’s done, the message box will say “This message has been deleted.”
Remember that everyone in the chat can see this text, so they still know you deleted a message, but it’s better than keeping a typo in full view.
4. Mute or Hide the Entire Chat
You may want to take things further and mute or hide the entire chat from view, rather than just one of two messages.
To do so, click the Chat tab like before, and then pick the conversation you wish to mute or hide. Click on the three-dot icon that appears like so:
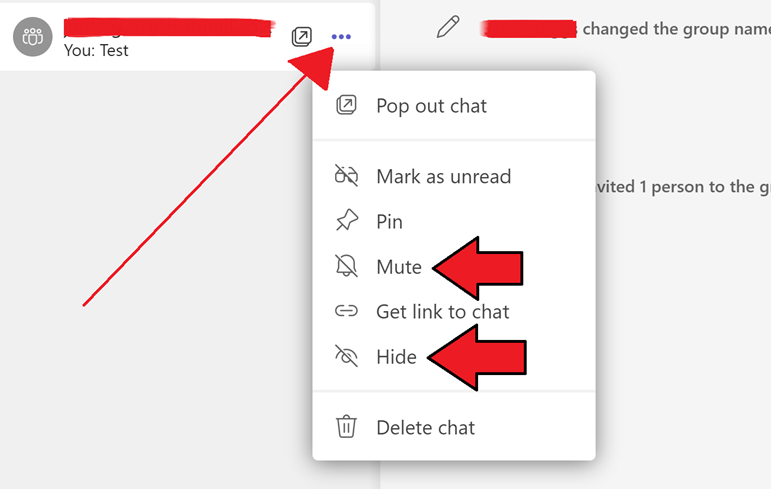
Then it’s as simple as choosing whether to Mute or Hide the chat.
Hiding a chat keeps it out of your way on the UI, while muting a chat means you won’t hear from it or get notifications for it. Think about which of these you want.
Common Problems When Deleting Chats on Microsoft Teams
While deleting messages and chats on Microsoft Teams may seem like an easy task, this isn’t always the case. In fact, users often run into several problems, from not being able to delete messages to receiving them when they have deleted the chat, to not knowing how to change their retention policies. Sometimes it can be challenging to understand what is happening within the app and why.
We’ve listed some of the most common issues for you and what to do about them should you get stuck.
You Can’t Delete Some of the Messages in a Chat
This problem occurs when trying to delete a message that didn’t originate from your account. Whether you created a group chat or a chat with one other person, the only messages you can delete are the ones you write and send yourself.
For instance, even if you’re the owner of a group chat with full admin privileges, you still won’t be able to delete any of the messages that other people write. While this may change in the future, there isn’t a way to delete other messages for now, so it’s best to be aware of that before creating group conversations.
With that said, you can delete any of the messages you’ve personally sent unless you face other problems along the way.
You Can’t Delete the Entire Chat
This problem is common, too, and it comes from the confusion centered around the platform and what it was designed to do. While you can delete any of the messages you send, you can’t delete an entire chat within Microsoft Teams containing those messages, at least not in an expected way.
But that’s deliberate, and the platform acts as an ongoing record of messages that you and your team can refer back to when required. Any team member can track the progress of a task by just following the notes. Not to mention this ensures that no one can blame others without valid proof. In that sense, then, it’s easy to see why you can’t delete every message inside a conversation, or indeed the entire chat.
While it’s possible to mute or hide a chat, which effectively stops it or removes it from your UI at that point, there is no way to outright delete an entire conversation within the platform. Microsoft is aware of the desire to remove chats, but it’s unlikely the change is coming anytime soon, if ever, so the best option is to mute or hide them. You can also vote for and comment on suggestions.
You’ve Hidden the Chat but Get Messages Anyway
Some users experience a problem whereby they have hidden their chat—like we showed you—but they still receive messages for that conversation. This issue is frustrating, but why does it happen? The simple answer is that hiding the chat doesn’t stop you from receiving new messages. Hiding a chat removes it from your way, yes, but it shows up when someone sends a new message. The solution here is to mute the conversation instead.
When muting a conversation, you’ll still be in it, but you won’t receive ongoing notifications from it. To mute a chat, right-click the conversation and choose the Mute option. You could hide the chat after doing this if you wish; that way, you won’t see it, nor will you receive any messages. If you want to hear from the conversation again, right-click and click Unmute to receive notifications.
You Clicked Delete, but the Message Remains
So you’ve followed the steps, and yet one of your messages within a chat won’t go away. You might click the delete button, but nothing on the screen happens when you do so. This common problem has quite a few possible causes—let’s look at them.
The first thing to do is to make sure you’re using a stable internet connection. While it may sound obvious, error code caa70004 can be caused by an unstable internet connection—among other things—and refers to the inability of the platform to sign you into its server; that’s why you may be struggling to delete messages. You may have been able to log into the app seemingly, but that doesn’t mean things are working as intended or that you can carry out actions.
If you’re an admin or a general team member, always check your internet connection before deleting or editing messages from conversations, as often refreshing your wireless connection can fix the problem entirely. Check your router is functioning too, and if there’s still an issue, contact your ISP and ask for help. Doing this fixes the problem most of the time.
If none of that worked, it’s most likely not your internet connection and could be to do with “admin privilege.” Admin privilege is where some companies withdraw the ability of more general members of a Microsoft Teams chat to delete their messages—you can’t edit or delete your messages if that’s the case. Yet there is a way around this: you can contact the admin to fix your permissions if they allow it.
Of course, if you’re the admin yourself and get contacted by another member, follow these steps to change their permissions:
- Open up Microsoft Teams
- Go to the Settings
- Click on Members
- Turn on Permissions to edit or delete messages for that member
There have been cases where permissions have switched themselves on automatically, which happens here and there. The good news is that a few clicks will solve the problem, and you can get back to collaborating with your team.
Moving away from admin privilege, it’s worth checking your details at the start of loading up the platform. Essentially, logging in as a Guest User doesn’t afford you the ability to edit or delete sent messages. If that’s the case, you need to log out and log back in again using a complete account. Doing so will bring back your privileges, allowing you to delete any messages you’ve sent to others.
If you’re using Microsoft Teams on either iOS or Android, try logging in on a desktop to see if that solves the problem. Sometimes just alternating between versions, so desktop to mobile, and vice versa, can fix things. When doing this, be sure to log in with your main account each time, not a guest account, as this can cause additional problems.
If you’ve done all of that and still have no luck, there’s one more thing you can try, and it involves the firmware of the app you’re using. What do we mean? Effectively, an out-of-date Microsoft Teams app won’t work correctly with the algorithms of the current Microsoft Teams server. This scenario prevents the app from performing actions such as deleting your messages and can cause other issues too.
You’ll need to go to Microsoft Teams’ official site and download the latest application to fix this. From there, install it as usual and log in. The desktop app automatically updates itself, but it doesn’t always work as it should for a variety of reasons. You can also check for available updates by selecting the Settings menu next to your profile picture at the top right of Teams and then clicking Check for updates.
Now when you log in and click Delete, the message should remove itself and be replaced with “This message has been deleted.” If that doesn’t work, you can contact support or ask the Microsoft Community.
You Don’t Understand the Retention Policy or How To Change It
The retention policy may sound fancy, but it’s straightforward to understand and highly practical. When you first load up and create a team in Microsoft Teams, you have to select a retention policy for it.
There are two key options here, and they are as follows:
- To delete messages automatically after a specific time of retention
- To delete conversations automatically that are older than a set period of time
This is what it looks like in the app:
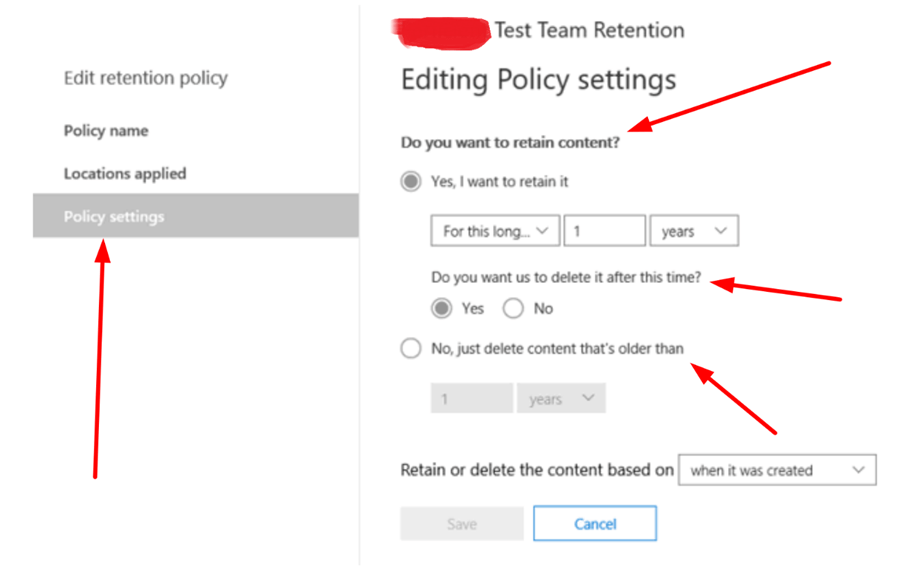
Clearly, the retention policy has its uses, and it’s a good way for a company to prevent unwanted data from getting into the wrong hands. Users can also customize the time period here, and it’s as easy as clicking on the drop-down menu and selecting what works best for you.
If you’re finding it challenging to locate your retention policy settings after initially setting up a team—perhaps you’ve forgotten what you selected, it does happen—you need to click on the team in question and click where it says Policy Settings. You’ll also be able to change the name of your policy and pick the specific locations in which it applies.
Be aware that if you select a Microsoft Teams retention policy to retain chats or channel messages, users can still freely edit and delete their messages within the app—something which may cause confusion for some users. Also, note that if there’s a conflict in how long to retain the same content, it’s retained in a secured location for the longest retention period automatically, so you don’t have to worry.

