How To Clone A Private Repository In GitHub
Cloning a repository in GitHub is relatively straightforward. But when it comes to private repositories, the process can be a bit tricker.
This step-by-step guide will show you how to clone a private GitHub repository and walk you through common stumbling blocks you might encounter along the way.
Step #1: Understand the Differences Between Public and Private Repositories in GitHub
Having a firm grasp of how GitHub repos work will make your life much easier when you’re cloning them. This background information helps you make sense of the process behind the cloning steps—so you’re not just blindly following directions.
GitHub repositories contain all project files and version histories of each file. You have the ability to own repositories independently, or share ownership of them with other users in an organization.
If you own a repository, you can restrict access to your files and manage your project’s visibility. You can grant access to collaborators, giving them the ability to work on the project simultaneously.
For repositories owned by an organization, the members and collaborators can all be managed using GitHub’s permission levels and organizational repository roles.
All GitHub repositories fall into one of two categories—public or private. You can determine these settings when you first create a new repo in GitHub.
Public repositories in GitHub are accessible to anyone on the internet. Private repositories are only accessible by the owner, people who have been directly given access to the repo, and certain members of an organization.
It’s also worth noting that users with certain administrative permissions have the ability to change the visibility of an existing repository from public to private or vice versa.
Whenever you create a repository, it exists remotely on GitHub. When you clone a repository, it creates a local copy on your computer so you can sync it between two locations.
Cloning a repository can make it easier to add files, remove files, fix merge issues, and push large commits. This process pulls a full copy of the repo data from GitHub.com, which includes all of the file versions and folders of the project. You can also clone repositories owned by someone else as a way to contribute to the project.
Technically, you could temporarily change the visibility settings of a private repository, making it public to clone. But this is not something that we recommend, as it will put all of your private project files on the open web for anyone with internet access to view and download. Even if it’s only temporary, this is not an advisable approach to cloning a private repository.
Step #2: Prerequisites
Before you can clone a GitHub repository, you need to make sure that Git has been properly installed on your computer. You could use GitHub.com to lookup and access projects without a Git installation. But a local Git version is required for a clone.
This is something many people forget to do if they just got a new computer and want a GitHub project located on multiple local devices.
To see if git has been installed on your device, just execute this command in your terminal:
$ git –version
If a version number is not the output, then something is wrong.
Next, you need to ensure that you actually have the right permissions to clone a private repository. For example, if you’re the owner of an independently owned repository, then you obviously have the right to do so. But if you’re trying to clone a GitHub repository as an organizational user, your permission levels might not allow you to do so.
Trying to access and clone a repository that you don’t have access to will not work.
Once you’ve verified a local Git installation and your permission levels, you can proceed with the private cloning process.
Step #3: Use HTTPS With Your Username and Password
Using HTTPS is the easiest way to clone a private GitHub repository. However, it involves putting your username and password in the URL.
This is fine if you’re working on a personal project on your own. But it is not recommended if you’re planning to share access with anyone else. Anyone with the URL will see your GitHub username and password.
Here’s what this command looks like:
git clone https://yourusername:yourpassword@github.com/yourproject.git
Alternatively, you can omit your password from the URL and just include your username, which would look like this:
git clone https:yourusername@hithub.com/yourproject.git
However, this would prompt you to enter your password after and for other actions beyond the clone. Some users might find this annoying. You’d have to enter your password for each push, pull, and other operation.
If you’re going this route, you can store your password within your Git configuration file so you won’t be constantly asked for your password.
Enable the credentials helper by setting your credential.helper command to storage. The command would look like this:
git config –global credential.helper store
Once this has been enabled, you’ll only be asked for your password the first time you clone a private repository. But once your local Git version is connected with the repo, your password will be stored within the home directory.
Again, this is really only a viable option if you’re not working on a project with other users.
Step #4: Use SSH Keys
You also have the option to clone a private GitHub repository using SSH. To do this, you need to start by generating an SSH keypair on your local device. Then add a public key to your GitHub account.
This gives you the ability to connect your local device with GibHub using a secure channel over an unsecured network.
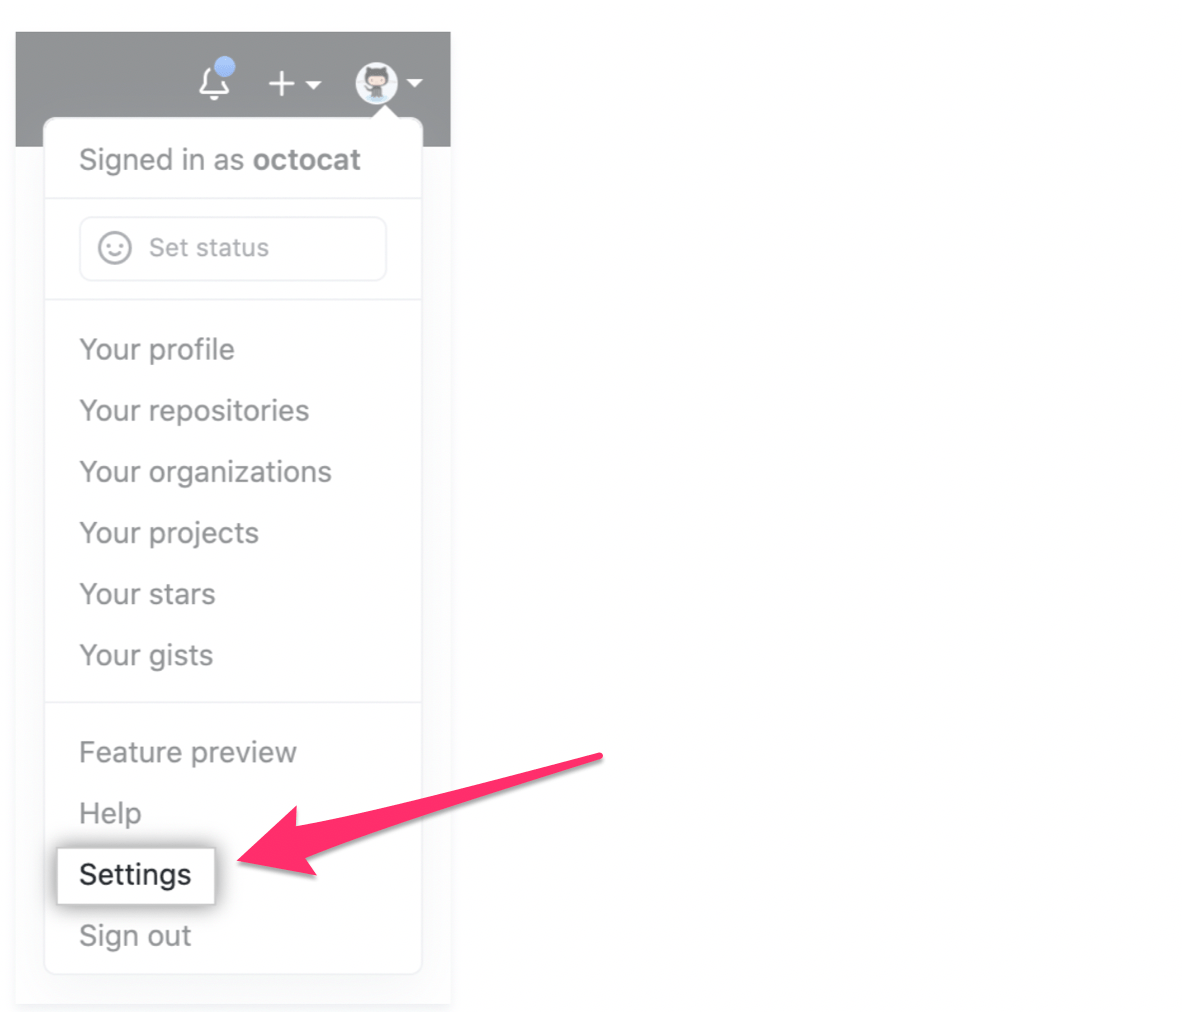
To add a new SSH key to your GitHub account, click on your GitHub profile and navigate to Settings:
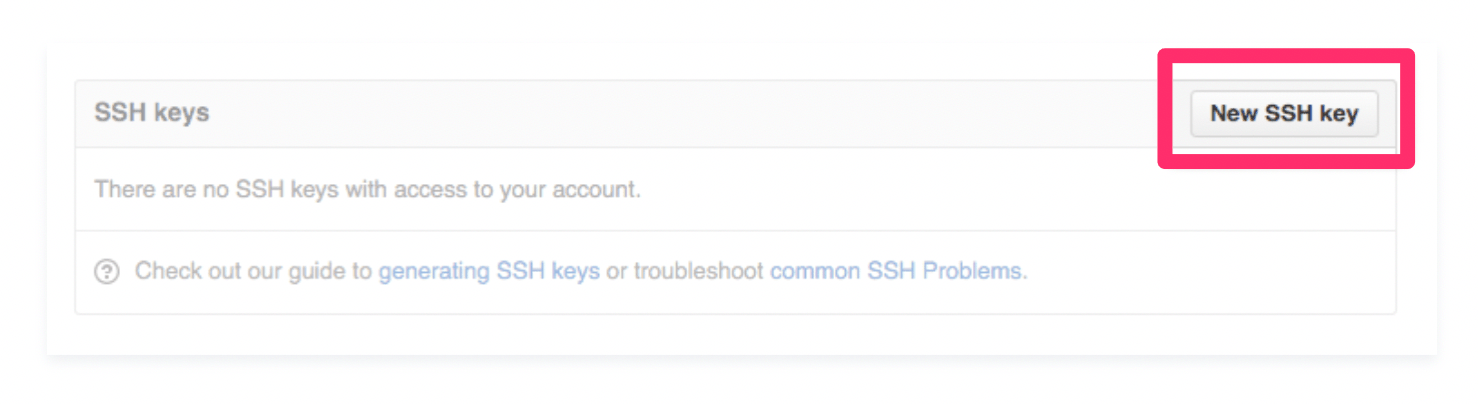
Then locate the Access section of your sidebar.
Find SSH and GPG keys. Then click New SSH key to proceed:
Use the title field to add a descriptor for your key. For example, if you’re using a personal laptop, you might call the key “My Personal MacBook Pro.”
Add the key, and confirm your GitHub password if prompted.
Once you’ve connected to GitHub using SSH, you need to find the private repository URL.
Click the Clone or download button, and select Use SSH as the method:
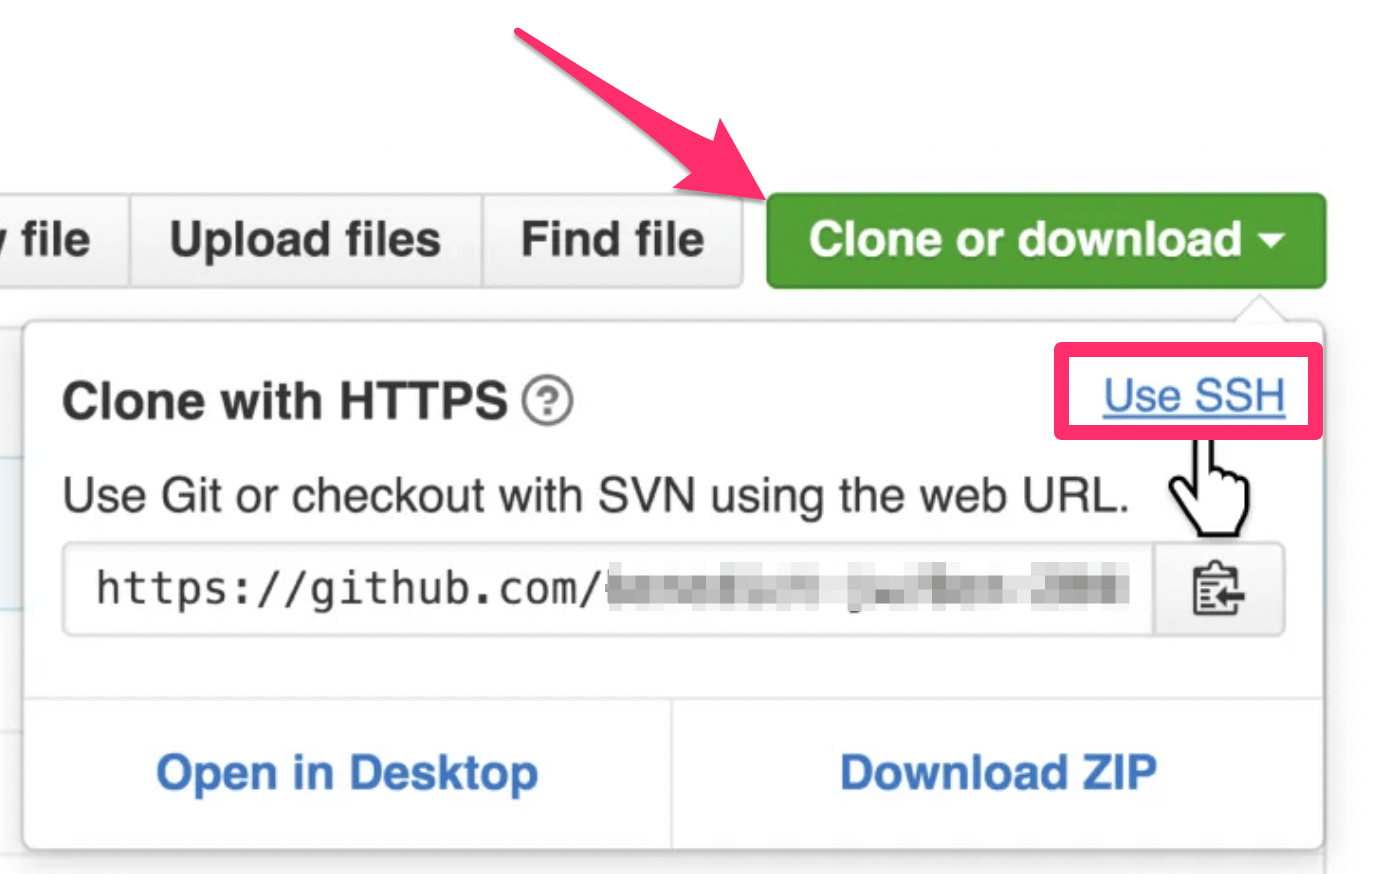
The URL will change from HTTPS to the SSH key. Then just copy that URL to your clipboard.
Your SSH URL will work the same way as a username and password pairing. The only difference is that you won’t have to enter a password to clone because it’s already stored in your account as a private key.
Step #5: Create a Personal Access Token
Depending on your authentication settings, you may need to create a personal access token to clone a private GitHub repository. Entering a password will not work for everyone.
Your GitHub access token will also give you the ability to log into organizational accounts using SAML single sign-on (SSO). This technology is used to manage who can access specific parts of a shared private repository.
To create a personal access token, go to your GitHub dashboard. Click your profile photo in the top right corner of the page, then navigate to Settings from the drop-down menu.
On the left side of the screen, look for your Developer settings.
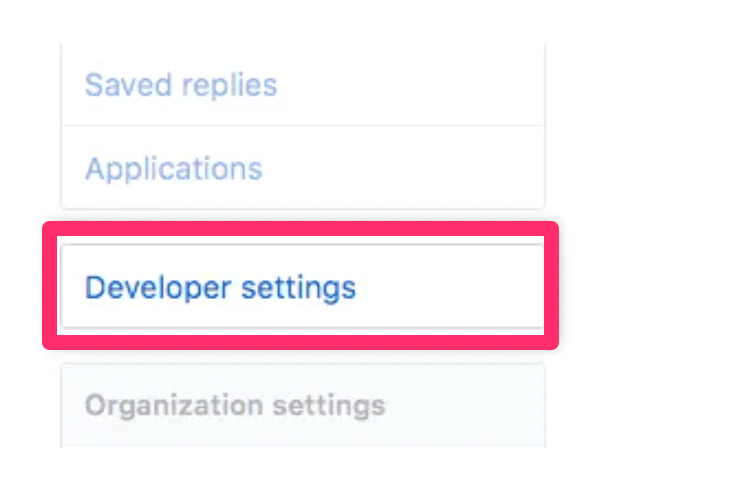
Clicking this menu option will redirect you to the GitHub Apps page.
Navigate to Personal access tokens and then select Generate new token:

You’ll be asked to give the token a descriptive name. Then you need to grant the token permissions to access repositories from the Git command line. Some of those permissions include:
- Full control of private repositories
- Access commit status
- Access deployment status
- Access public repositories
- Full control of orgs and teams
- Read and write org and team membership
- Read org and tea membership
- Full control of user public keys
- Write user public keys
- Read user public keys
- Full control of repository hooks
- Write repository hooks
- Read repository hooks
- Full control of organization hooks
- Access notifications
- Update all user data
- Access user email addresses
- Follow and unfollow users
- Delete repositories
For the purposes of this tutorial, you obviously want to make sure that the first bullet has been enabled—full control of private repositories.
There’s really no reason not to enable all of these. It’s just a matter of security protection. You need to treat your access token like a password. If someone gets ahold of it, they’ll be able to do anything that the token has permission to do.
Once the token has been generated, and the settings have been saved, you need to copy it and save the token in a secure location. After you navigate away from the page, you won’t be able to see this personal access token again.
Tokens are long and difficult to remember. Saving it somewhere that you can copy whenever you’re prompted for it is the only realistic way to use a token instead of a password.
Common Problems When Cloning a Private Repository in GitHub
There are certain pain points and stumbling blocks that many GitHub users encounter when trying to clone a private GitHub repository. Below we’ll take a closer look at those problems and provide you with simple solutions to resolve them.
Problem 1: Determining the Best Clone Method
As you’ve seen from the steps in this tutorial, there are several different methods to clone a private repository on GitHub. Some are simple, while others are a bit more complex.
The best option for you just depends on the type of project you’re working on, and whether or not you’re collaborating with others.
For example, if you’re working on a solo project with no collaborators, using HTTPS with your username and password is fine. It’s fast and easy, but your credentials will be exposed as plain text in the URL. This is obviously a security threat if you’re sharing this information with anyone.
Otherwise, using an SSH key is a more secure way to clone a private repo. However, the steps to create a new SSH key and connect that key with your local device are a bit more in-depth and complex. This is also a more time-consuming process.
Any GitHub user who has two-factor authentication enabled must use a personal access token to clone a private GitHub repository. A password does not work for 2FA if you’re using HTTPS Git.
GitHub users on an organization account that uses SAML single sign-on (SSO) must also provide a personal access token to clone a private repository. Passwords using HTTPS won’t work in this scenario either.
Based on these situations, you should have a clearer answer on which cloning method is the right path for you.
Problem 2: “Repository Not Found” Error
Seeing a “repository not found” message is one of the most common problems when you’re cloning a private GitHub repository.
The message means one of two things—either the repository doesn’t exist or you don’t have permission to access it.
First, verify that everything is spelled correctly if you’re manually typing URLs or repos into the command line.
If that doesn’t work, you need to go back and check your permissions to ensure you’re actually allowed to clone a private repo. For example, if you created an access token but didn’t enable that token’s permissions to have control over private repositories, you’ll probably get this message.
For those of you that used SSH to connect with the repository, verify that the connection was successful and proper permissions have been granted.
It may sound silly, but if you’re trying to clone a private repository that doesn’t belong to you, verify that the repo actually exists in GitHub. There’s a chance it could have been removed or deleted after you were given the URL.
Problem 3: Remote HEAD Error
Some of you might get the following message:
Warning: Remote HEAD refers to nonexistent ref, unable to checkout
This error is telling you that the default branch of a repo was deleted on GitHub.com. The message appears when you’re trying to clone the repository.
The only people who can fix this error are the administrators of the repository. You need to change the default branch using the command line. Then just switch to a new main branch before you clone it.

