How To Clone A Branch In GitLab
Git is a distributed version control system that gives developers complete control over their code both locally and remotely, with a full history of the changes.
Git clone and Git branch workflows are two important concepts for using Git effectively. This in-depth guide will show you how to clone a specific branch using GitLab.
Step #1: Install Git
First, you need to make sure Git has been installed. For those of you who have already completed this task, you can skip ahead to the next step.
You can use GitLab to install Git locally or access it in the cloud. But since GitLab is built on top of Git, you still need a Git installation. Then you’ll be able to complete many Git operations, like cloning branches, directly in GitLab.
Installing Git on macOS
There should be a Git version already supplied with your existing macOS. You can continue with this version or download the latest version of Git for macOS directly from the Git project website.
You must have at least 15 GB of disk space available for the installation. Extra disc space is also required for your development libraries.
To see if Git works on your Mac, run this terminal command: Git –version.
If you haven’t used Git before on your Mac, then you’ll like get a pop-up that looks like this:
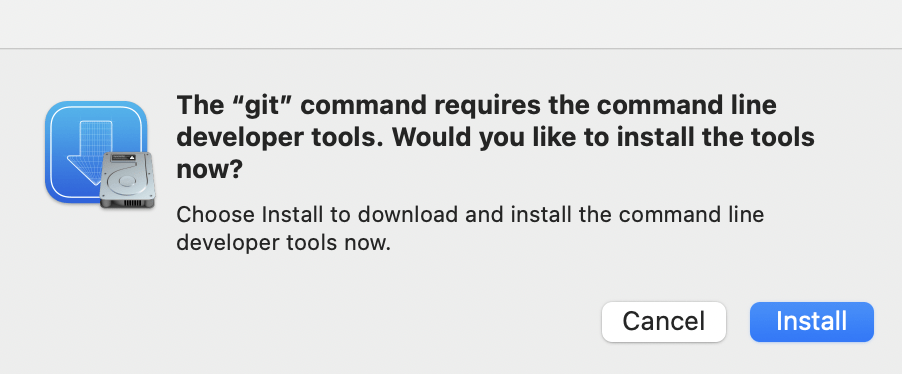
To run Git commands on macOS, you’ll need developer tools installed. Xcode is a popular option to consider, as it’s the official IDE for Apple. You can download Xcode directly from the macOS App Store or use the following terminal command: Xcode-select –install.
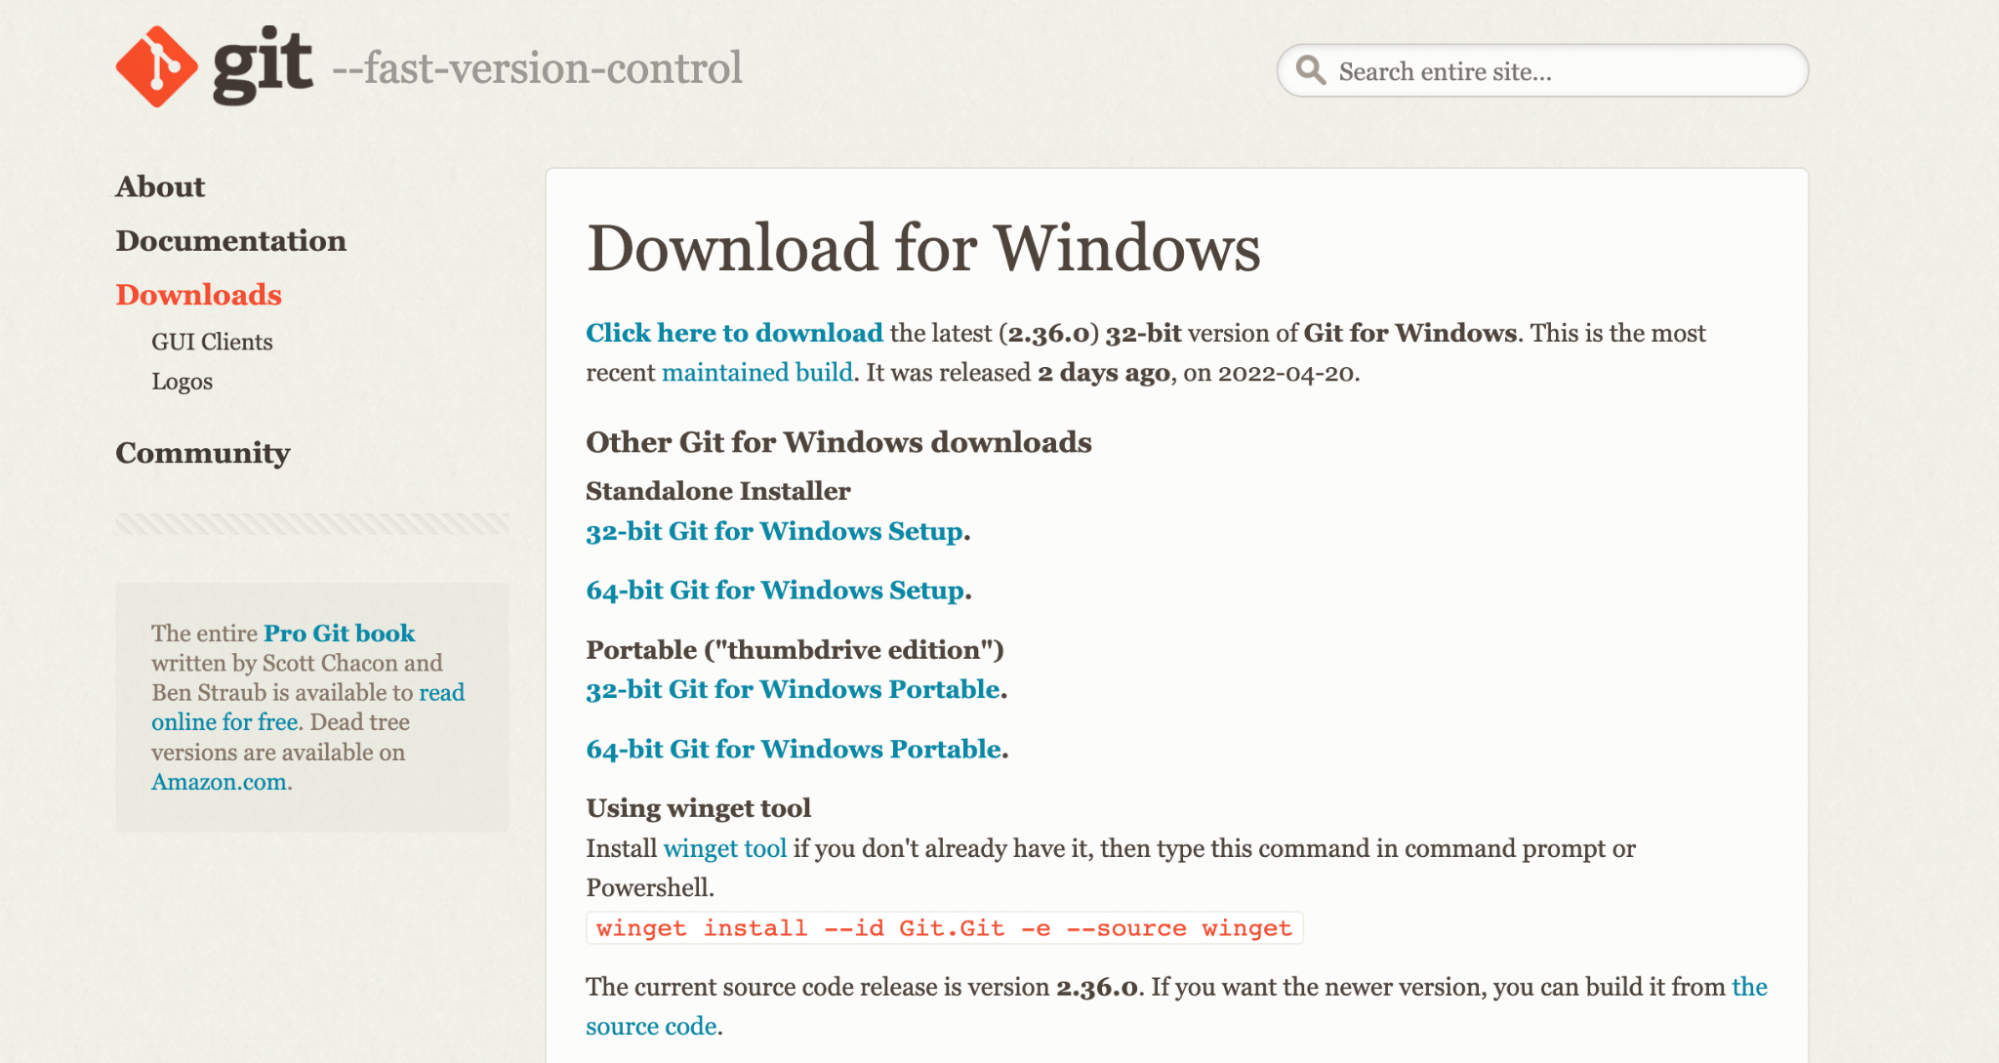
Installing Git on Windows
Windows Git installations are a bit more straightforward. You should be able to use the built-in command line on the Windows taskbar immediately after the installation.
Similar to macOS, you can verify the installation by running a command for the latest Git version. The output in your terminal should show the version. Any other output means there’s a problem with the installation.
Installing Git on Linux
For Linux machines, you can use the built-in package manager to handle your Git installation. Open your terminal and run the following commands based on your Linux distribution:
- Debian or Ubuntu: sudo apt-get install Git
- Fedora: sudo dnf install Git
- CentOS: sudo yum install Git
- Arch Linux: sudo pacman -Sy Git
- Gentoo: sudo emerge –ask –verbose -dev-vcs/git
Then run a command to see the latest Git version to verify a successful install.
Step #2: Select a Repository
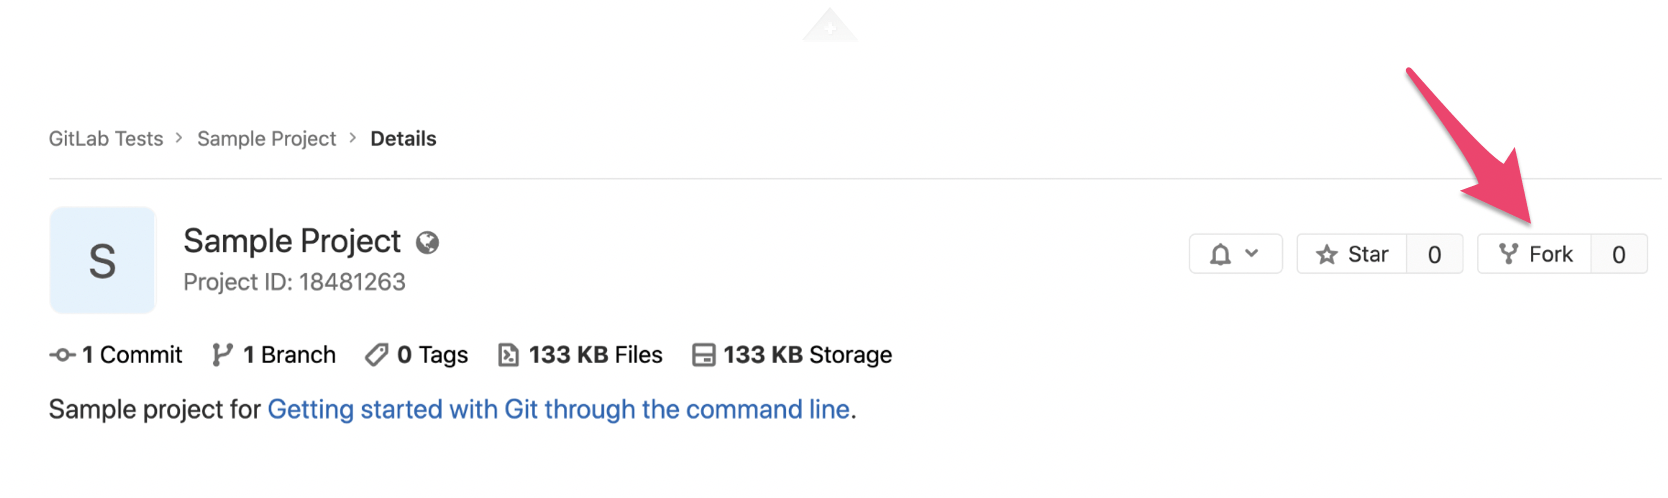
Before you can clone anything, you must select the repository you want to work with. You can select any project on GitLab.com that you have access to.
If you’d just like to practice cloning branches before working on an actual project, you can use the following link as a sample test: https://gitlab.com/gitlab-tests/sample-project/.
Then fork the project into your username from the project home page.
Choose a namespace for the fork. Then the project will be available on GitLab through the following link: https://gitlab.com/<your-namespace>/sample-project/.
As an alternative to cloning a branch, you can also clone an entire repository in GitLab.
You can clone repositories using GitLab with SSH or HTTPS.
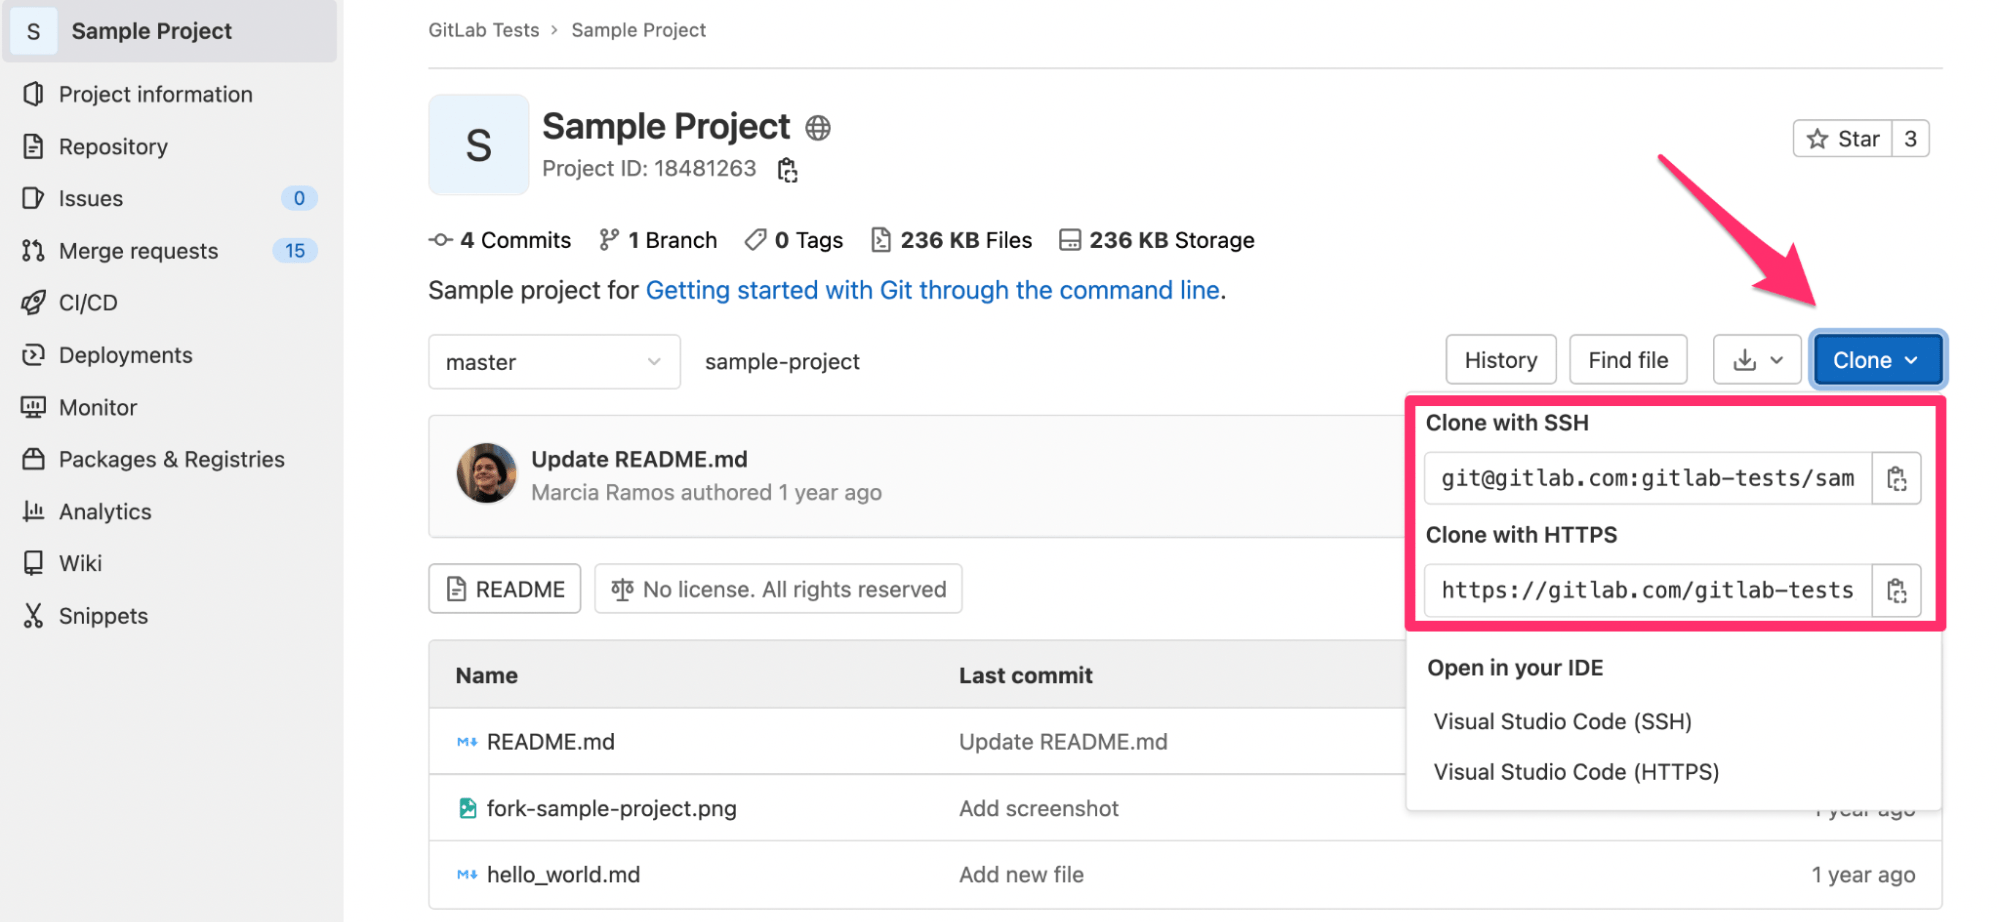
When you clone a repository, all of the files from the remote GitLab repository get downloaded to your local machine. The download creates a connection between GitLab and your computer, requiring you to enter your credentials.
SSH clones should be used for one authentication at a time. Git will automatically create a folder with the name of the repository, like Sample Project, and all of the files will go there.
HTTPS clones should be used for authenticating each time an operation is performed between GitLab and your local computer. In this scenario, GitLab will request your username and password for each operation.
Cloning in GitLab simply means you can save a cloud repository on your computer. But depending on the project size, repository clones can take up a lot of disk space on your device.
That’s why many developers choose to clone branches instead, as a branch takes up less space than a full repository.
Step #3: Create a Branch
GitLab projects typically have multiple features. It’s also common for several contributors to work on projects and features simultaneously.
Branches let you set up a playground using the same files from the master branch. This allows you to test new features, make changes, fix code, and create independent features. Essentially, branches help you try new concepts or ideas without impacting the master production code.
If you’re satisfied with the changes in your branch, you can always merge that branch with the master.
Branching is a crucial element of a GitLab workflow to manage multiple versions of a single project. Master branches within a repository are considered as code that’s ready and deployable.
New branches in GitLab are often referred to as “feature branches” as a way to differentiate from “master branches” or “default branches.”
To create a new branch, use the following command: git checkout -b <name-of-branch>
You can’t have any empty spaces or special characters in a branch. You must only use lowercase letters and numbers. Instead of spaces, use hyphens and underscores if the branch is more than one word.
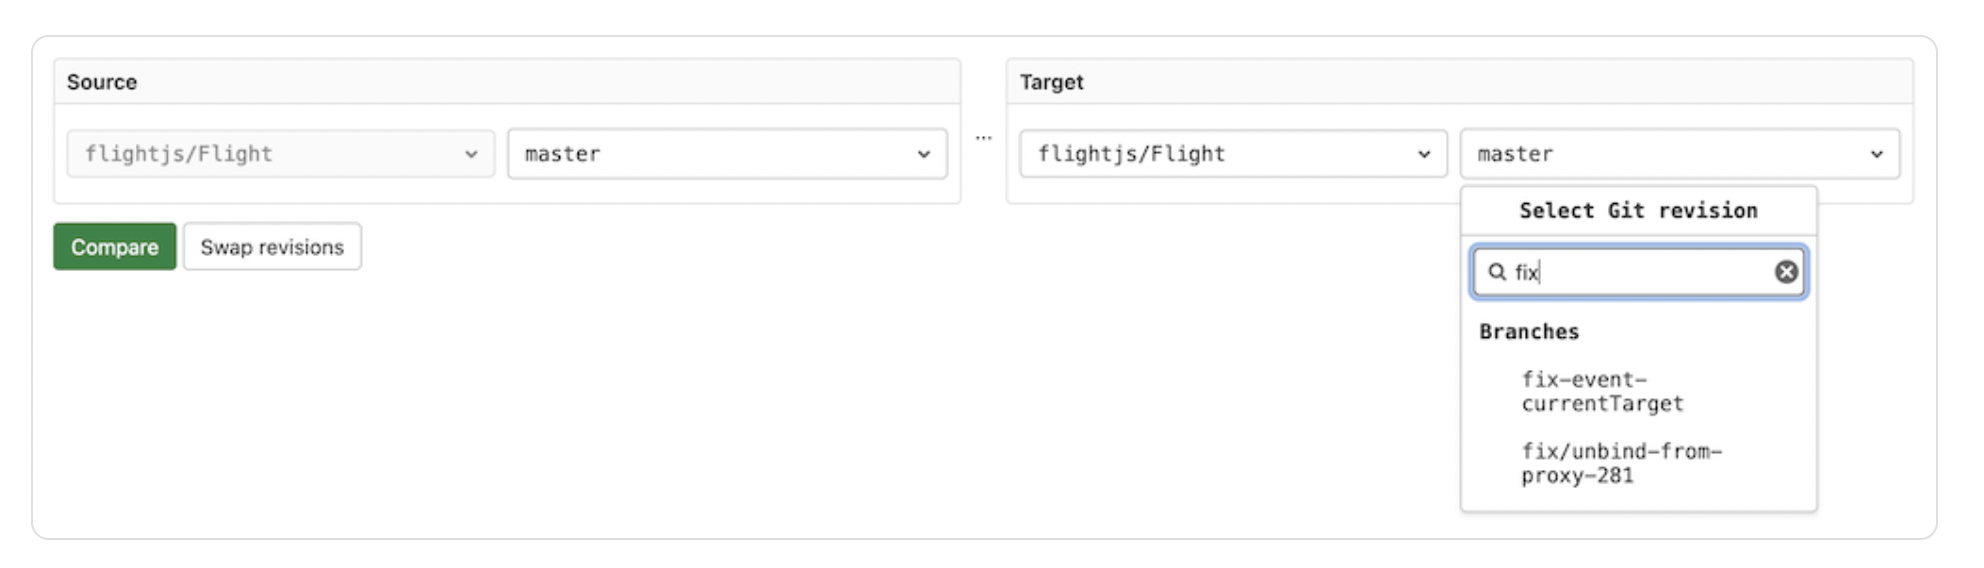
Once created, you can use GitLab’s branch filter search box to quickly find it without using the command line.
You can also perform actions like:
- Switching branches
- Viewing differences between branches
- View files that have changed
- Add and commit local changes
- Send branch changes to GitLab.com
- Delete branch changes
- Unstage changes that have been added to your GitLab staging area
- Undo your most recent branch commits
- Merge your feature branch with a default branch
All of these actions are a great introduction to using branches and GitLab. You can practice these types of actions and commands to get more familiar with how branches work before you start cloning them.
Step #4: Clone Git Branches
When you clone repositories using a Git clone command, this clones the branch from the master or default. It also includes all other branches in that repository.
If you’re using this approach, then you must check out specific branches on your own.
For example, let’s say you’re working on a collaborative project. It’s your job to add passwordless authentication to a dashboard of the software you’re building. For simplicity’s sake, we’ll say that this new feature can be found in the project’s passwordless-auth branch.
In this scenario, you don’t actually need to clone the entire master branch. This just takes up extra space on your computer. The feature branch (new branch), will ultimately get merged to the master when you commit the changes.
So you can get your task done without having to fetch a ton of files that you don’t actually need.
Start by cloning the repository to give you access to all branches. Then you can toggle between each branch to see the different versions and files associated with each one.
During this process, you should see some remotes/origin text in the terminal. This just comes from the GitLab remote URL, and you can adjust this alias if you want to name it something else. It’s just there to point you back to the original repository cloned from GitLab.com, allowing you to perform push and pull requests from the main source.
Here’s an example that shows what it looks like if you run a command to show the Git remote origin.
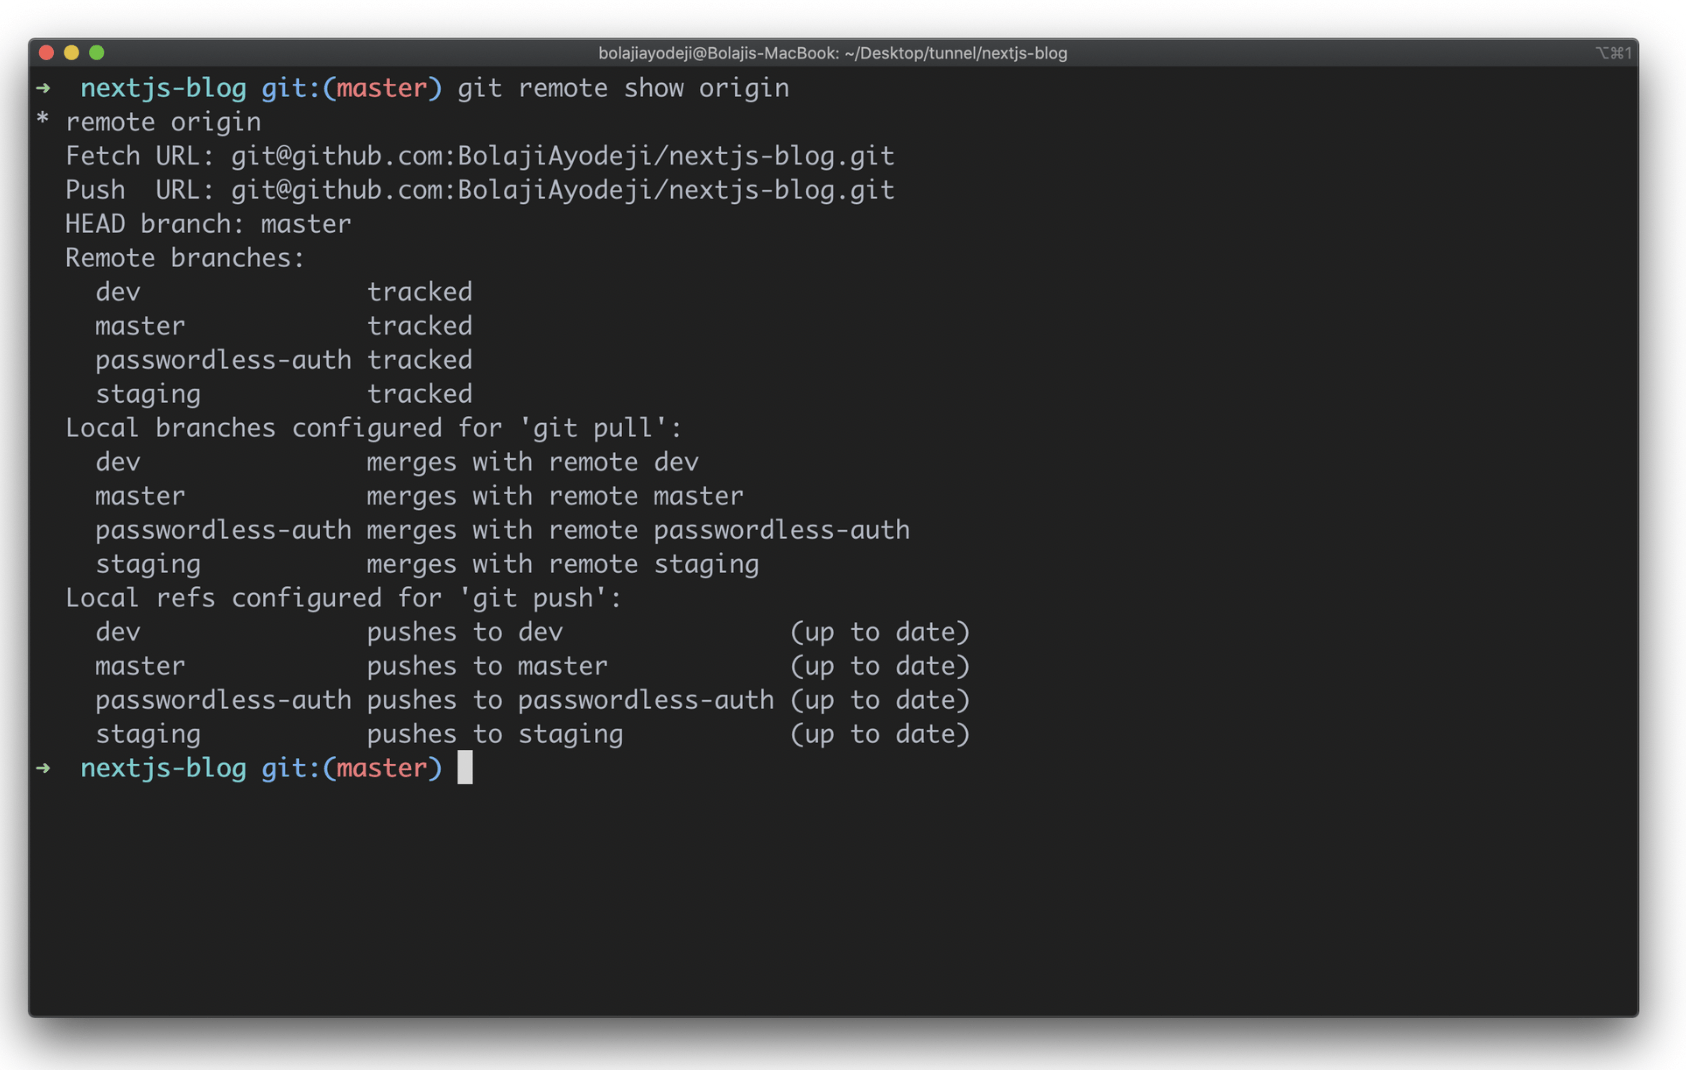
The URL pointing to the repository on GitLab.com is the “remote.” The “origin” is the alias for the same remote URL.
Step #5: Clone a Specific Branch
There are two ways to clone specific Git branches in GitLab.
- Method A — Clone your repository, fetch all repository branches, and immediately checkout to the specific branch.
- Method B — Clone your repository and only fetch a single branch.
We’ll cover each of these options in greater detail below:
Method A
Start by entering the following command into your terminal:
Git clone –branch <name-of-branch> <url-of-remote-repo>
This command will fetch all of the branches from the desired repository URL. It will checkout to the branch you specified, and it gets configured with the local branch for push and pull requests.
However, this method still fetches all the files. Even though you’re able to clone a specific branch from here, the other branches still get tracked.
Method B
To clone your repository and only fetch a single branch, run this command:
Git clone –branch <name-of-branch> –single-branch <url-of-remote-repo>
This command performs the same action as method A, except the –single-branch command lets you fetch only the files from the branch you want, without the other files from branches in the repository.
Common Problems When Cloning a Branch in GitLab
Cloning a branch in GitLab is fairly straightforward if you follow the steps above. However, some users still face some problems and stumbling blocks as they go through this process.
Below we’ll discuss some of the common errors or pain points you might experience as you’re cloning branches in GitLab and how to troubleshoot them.
Problem #1: Repository Not Found Error
Getting a “repository not found error” can be really frustrating for developers using Git. There are several potential reasons for this error message, each with its own solution.
- No authentication — If you’re trying to connect to private GitLab repositories and don’t authenticate properly, you’ll get this error. To overcome this problem, make sure you add your username and password within the Git URL.
- Password changes — This problem frequently occurs in Microsoft-based workstations. If you’ve recently changed your password, the Microsoft credentials manager might automatically submit your old password each time you’re cloning, pulling, or fetching with GitLab. To fix this, eliminate outdated passwords that might be cached on your computer.
- No access privileges to the project — If you’ve recently joined a team, it’s possible that the admins haven’t added you as a collaborator to the project. So while you’re able to authenticate your GitLab account, you won’t be able to access a private repository. Just ask your administrator to add you as a collaborator and try again.
- Spelling errors or incorrect cases — For those of you using a Linux distribution for source code management, it’s possible that the name of your repository could be case-sensitive. Sometimes repository spellings get lost in translation if you’re manually inputting them, like the number zero vs. the letter O. To avoid this, you can always copy and paste the clone commands from your documentation instead of trying to type them manually.
If you’re still getting this error message, there’s a good chance the Git repository has been deleted. Check with your team leader to see if that remote repository is still live.
Problem #2: Broken Pipe Errors
A “broken pipe” message may appear when you’re trying to push remote repositories after a clone. There are a few different workarounds to consider if you’re getting this message.
First, check your SSH configuration. Sometimes this error is directly tied to SSH issues or authentication problems. GitLab admins with server access can prevent SSH session timeouts using the keep-alive command on the client or server.
Running older versions of Git clients could also lead to broken pipe errors. In this case, upgrading to the latest Git version could solve your problem.
If you’re getting a “pack-objects” error alongside a broken pipe error, you should try running a Git repack command before you push the remote repository with the cloned branch.
Problem #3: Clone Over HTTP Failure
If you’re using HTTP to clone an old repository or large repository, you might get an error that indicates some type of fatal error.
This usually indicates a problem with Git itself, as opposed to GitLab. Sometimes Git just can’t handle large quantities of files or large files with HTTP.
Regardless of the root cause, you can attempt to decrease the cloning depth of the repository. Alternatively, you can increase the buffering on the server side.
You should always attempt local changes before attempting to modify the server, as server modifications could pose other potential risks to your branch clones.

