How to Share Your Google Drive (Step-by-Step)
What is that one application that you use every day?
We bet that most will agree it’s either Google or G Suite that includes Gmail, Google Docs, Google Meet, and of course, Google Drive.
These applications have become an integral part of our daily lives. But while a few Google products may seem to be similar, they have different applications.
G Suite users often find the subtle difference between Shared Drive and MyDrive confusing. After all, aren’t both built on the same Google cloud infrastructure?
Well, not exactly.
In this article, we’ll highlight the main differences between Your Drive and Shared Drive (previously known as Team Drive), along with a step-by-step walk-through of how you can create and share your Google Drive.
How Does Google Drive Sharing Work?
Being an alternative to Microsoft Office, Google Drive isn’t just cloud storage and syncing service.
It’s an overachiever of sorts—one that includes a word processor, a presentation program, a form builder, a drawing program, and spreadsheets. Phew!
Moreover, you can share your Google Drive files and folders with anyone—provided you give them the permissions and have their email addresses.
Sharing files in Google Drive is possible through two methods:
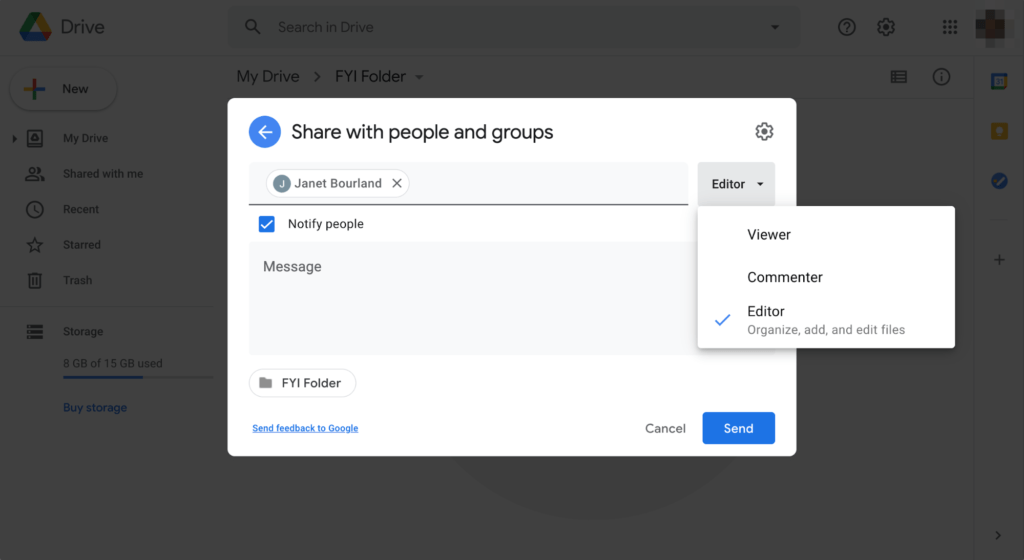
- Share with people and groups – You have to grant access to specific individuals you want to collaborate with on the file.
- Get shareable links – You grant access to anyone who has the link to view, comment or edit the file.
Additionally, you can give an individual or group the option to do a specific action. These are as follows:
- Viewer – People with this right can view the file but can’t make any changes or share the file with others.
- Commentator – People with this right can make comments and suggestions, but they can’t change or share the file with others.
- Editor – People with this right can make changes, accept and reject suggestions, and share the file with email addresses.
Sharing Google Drive With External Collaborators Without Google Accounts
While it’s recommended that external collaborators either create or use a Google account to view your files since it’s the most secure way to collaborate, there are two methods to share files with those who are unwilling or unable to create one.
- Visitor Sharing – You can invite people as a collaborator to the file with PIN-based sharing. This allows you to share items with non-Google accounts, allowing them to view, comment on, or edit after giving them a secure PIN code.
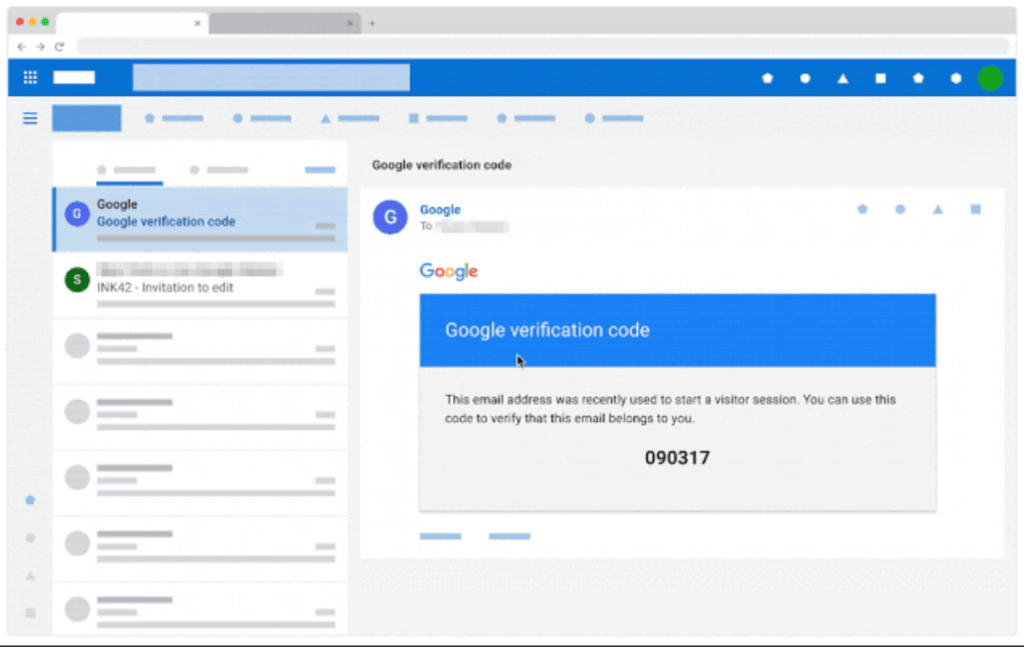
- Link Sharing – You can set a link sharing to “Anyone with the link“ and share the link with them. Any person with the link can view, comment on, or edit the file.
By default, this link is set to Restricted, so only people you’ve shared the file with can access the link.
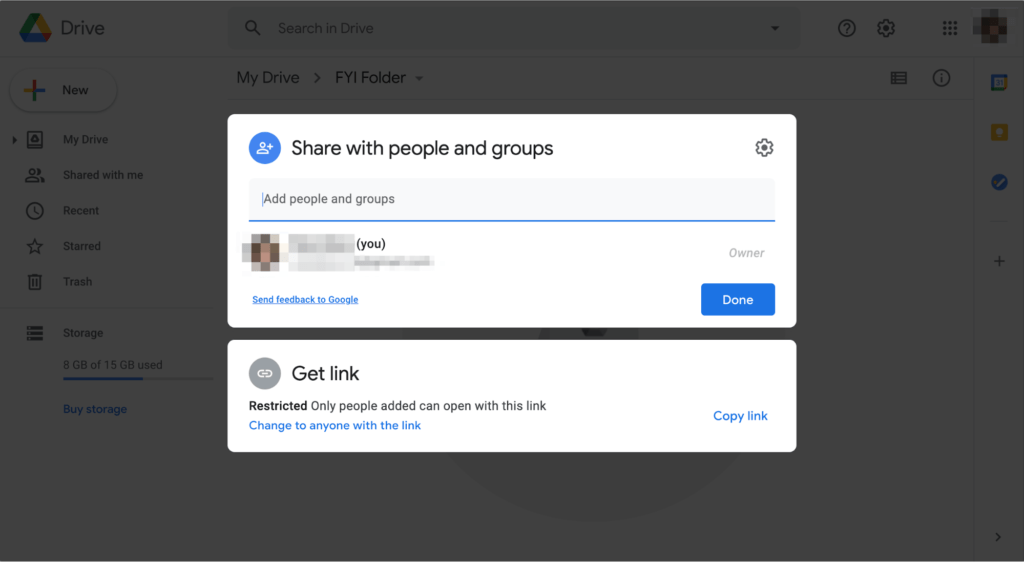
It would be better to use Visitor Sharing as this way, you remain the file owner, which, in turn, lets you view detailed activity on your files. You can also revoke access from the Drive sharing dialogue whenever required.
Your Drive vs. Shared Drive: What’s the Difference?
Shared Drive is the shared space that lets teams store, search, and access files anywhere and anytime from any device. Unlike Your Drive, a Shared Drive belongs to an entire team instead of one individual.
Below, we’ll highlight the differences between Shared Drives and Your Drive in a bit more detail.
Permissions Access
As mentioned before, you can allow an individual or a team to view, comment, and edit a file. But it’s the ease with which you can give access to several people that’s one of the most notable differences between the two.
Shared Drives are designed for multiple users to give different levels of permissions access to the files and folders added to these drives. As such, multiple users having access to it can make changes to the files. The look and feel remain similar to My Drive, though.
My Drive, on the other hand, is the personal storage of an individual user that he automatically gets access to in signing up for a Google account. Any kind of file can be stored on Google Drive, and the user decides how a specific person can have access to their personal files.
Local Syncing Capabilities
Google has two applications – Google File Stream and Google Backup and Sync – to sync files and folders locally or from the Google cloud.
Google File Stream streams the files and folders in a way that allows them to be used locally on an end-user client. Google Backup and Sync syncs and stores content locally on the computer. Out of the two, Shared Drives can only utilize the former application.
Overall Cost
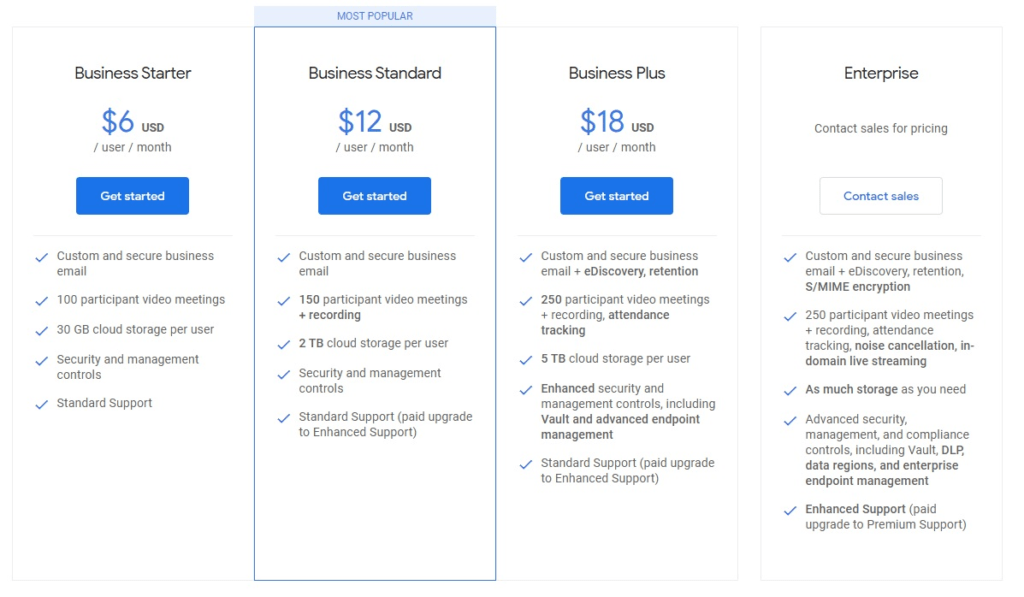
My Drive is completely free and comes with a default of 15GB storage. However, you can buy more storage, if required. Prices start at $1.99 per month for 100GB and go on to $9.99 per month for 2TB.
Shared Drive is more of an add-on exclusive feature only available to paid subscribers of G Suite Business and Enterprise plans. Therefore, the subscription price depends on the option you choose.
We’ve made a list of questions to help you understand the differences between Shared Drives and Your Drive better:
Who owns the files and folders?
- Shared Drive: Every team member.
- Your Drive: The individual owner of the cloud storage drive.
Can I restore the files?
- Shared Drive: Only administrator, contributor, and content manager roles.
- Your Drive: Yes.
Can I move files and folders?
- Shared Drive: File owners and manager, content manager, and contributor roles can move files. However, moving folders from My Drive to Shared Drive isn’t possible.
- Your Drive: Yes.
What are the sharing permissions?
- Shared Drive: While members can share files, sharing folders isn’t allowed. Every team member can see all the files, but they can also share with people outside of the team.
- Your Drive: Based on the access given to a person, different people see different files in a folder. Sharing folders is also possible inside My Drive.
Is it mobile-friendly?
- Shared Drive: Yes, it’s supported on mobile devices.
- Your Drive: Yes, it’s supported on mobile devices.
How long do the deleted files stay in the trash?
- Shared Drive: Each Shared Drives have their own trash. Trashed files and folders are deleted forever after 30 days, but members can delete specific files sooner.
- Your Drive: Trashed files and folders are deleted forever after 30 days, but the individual owner can delete files sooner.
How to Create and Share a Google Drive?
In this section, we’ll discuss how you can create and share your Google Drive as well as Shared Drives.
For Your Drive:
As soon as you sign up for Google, you automatically get a My Drive account. You can add all kinds of files and folders to your Drive and even share them with different people.
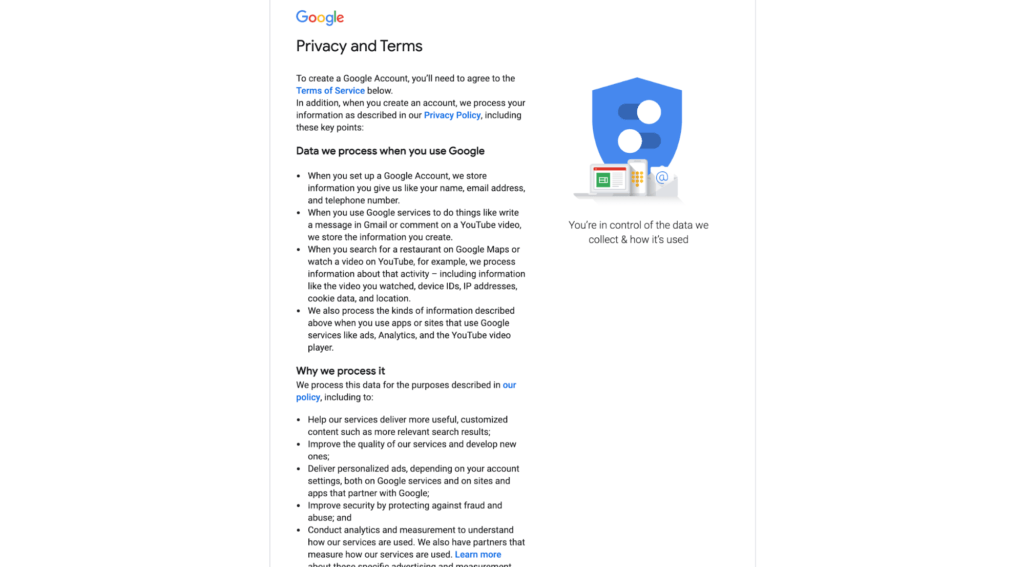
Start by creating your Google account. Fill in your personal information like name, phone number, birthday, and then finally sign the Terms of Service contract. Once you hit I agree, your Gmail account and Google Drive will be ready for use.
Unfortunately, you can’t share your entire Google Drive with somebody simply because Google doesn’t try to drive that way.
Think of your Google Drive storage as a post office. While you can definitely grant access to people to individual boxes inside the post office lobby, you can’t give free access to the whole building.
Another alternative is to use third-party applications. We wouldn’t really recommend it since you’re practically giving away access to your personal and critical files on your Drive to strangers.
Instead, you should share your Google Drive manually. This method is more time-consuming but better safe than sorry, right?
Sharing Via Inbuilt Share Option
When you want to share between different Drives, you’ll have to first choose all the relevant files and folders from My Drive, Shared With Me, and Trash one by one.
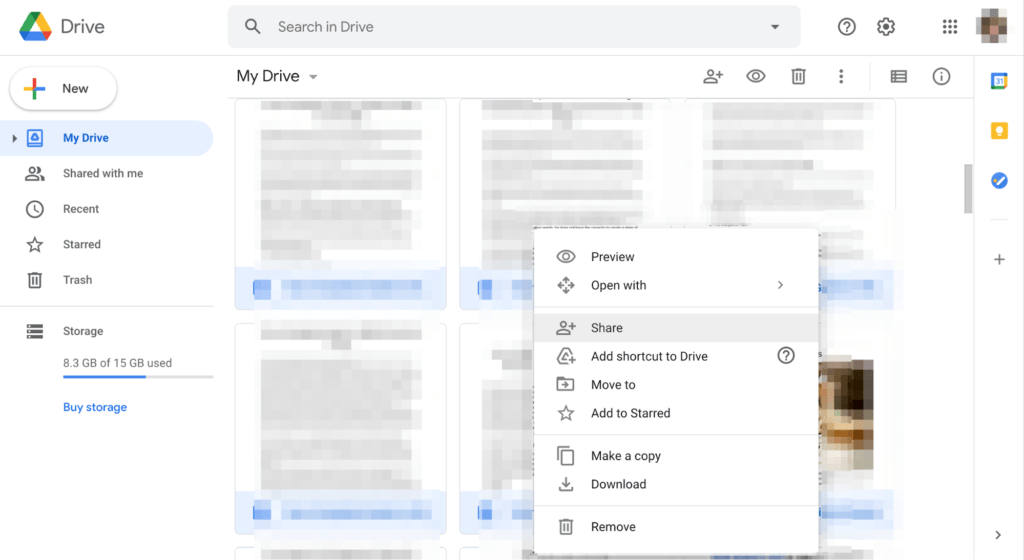
Step #1 Log in to your Google Drive account. Select all files and folders you want to share and right-click Share.
Step #2 Enter your recipients’ email addresses, giving them permission to access the file. You can have different settings for different files. For instance, the recipients can have editing access to one file and viewing access to the other.
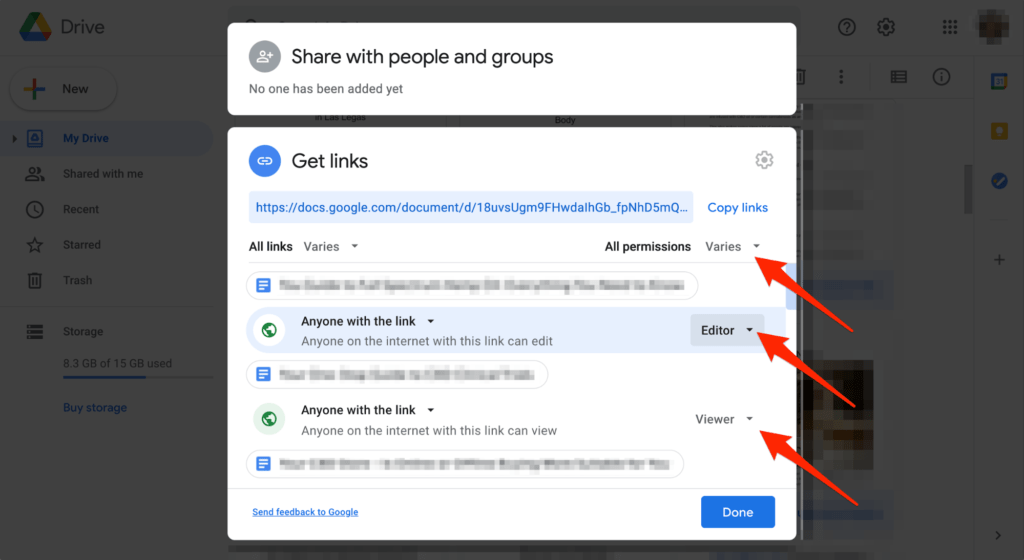
Step #3 Click on Done.
Sharing Via Downloading and Uploading
Suppose you want to share your whole Drive at once with your other account. You can download all data on your computer, and then upload it to the other Google Drive account.
Step #1 Log in to your old Google Drive account.
Step #2 Create a new folder to store all files, and then collect all the relevant files and put them in it.
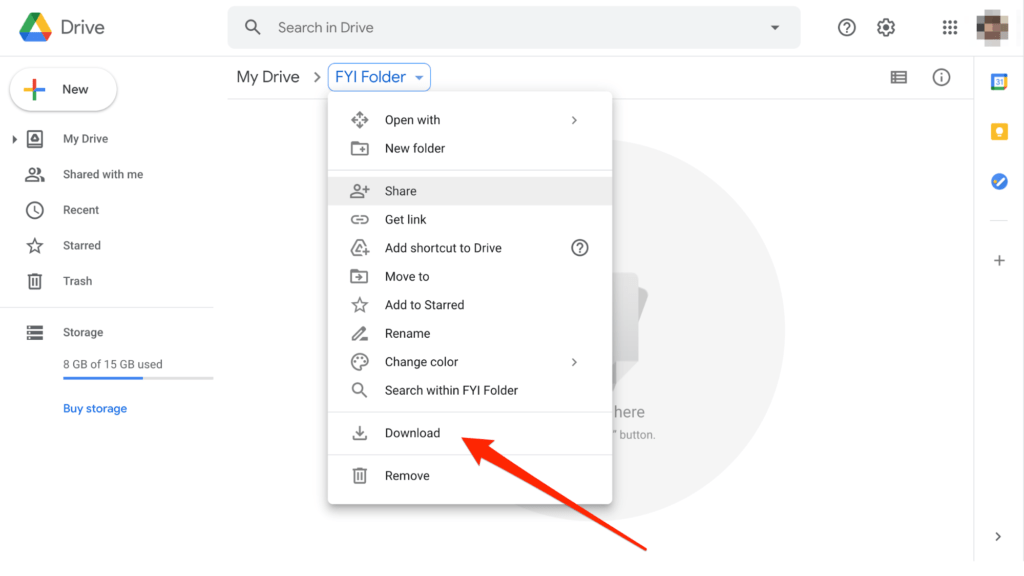
Step #3 Right-click on the new folder. From the dropdown menu, click on Download. Wait for the process to complete.
Step #4 Open your other Google account where you want to keep the files. Click on My Drive and then Upload Files (or Folders) to your other Google Drive account.
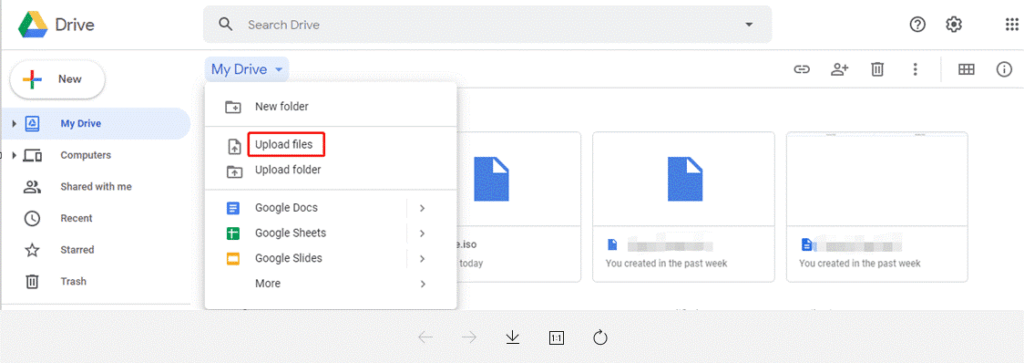
All your files and folders will then be transferred to the new Google Drive account.
For Shared Drives:
The rules are slightly different for a Shared Drive. Here’s a detailed tutorial:
A. How to Create a Shared Drive
You can create a Shared Drive for either a specific team or several people. Follow the below steps to make a new shared drive:
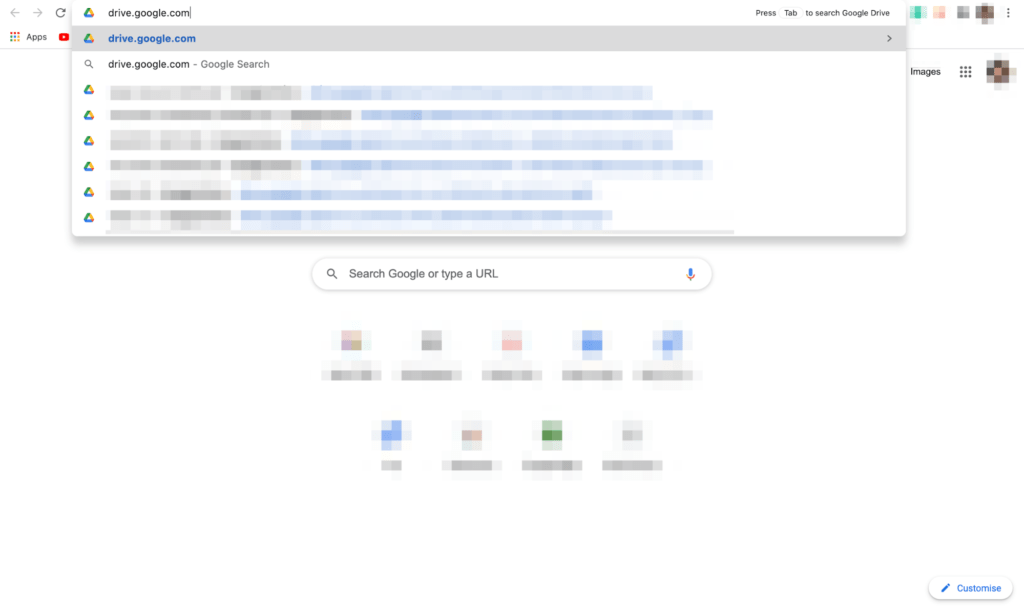
Step #1 On your web browser, go to https://drive.google.com.
Step #2 From the left-hand side menu option, click on Shared Drive. Remember, you need a G Suite Business or Enterprise account for this.
Step #3 Click on New and then enter a name for your new Shared Drive. Once you’re done, select Create.

That’s it! You can then move on to adding members to this Shared Drive or Team Drive.
B. Adding Members to the Shared Drive
To add members to your Drive, all you need is that email address.
Just like you have the facility to select the different levels of access for different people for Your Drive, you do the same for them for Shared Drive too. The default setting is always ‘Full,’ which gives them the right to upload, edit, delete, and move files around.
If you decide to choose the ‘Edit’ level of access, members can upload and edit files, but they won’t be able to delete or move items. The settings are the same as Your Drive for ‘Comment’ and ‘View.’
C. Managing and Sharing Your Shared Drive
You can give individuals and groups access to a shared drive—provided it doesn’t cross the maximum number of accounts limit set by Google.
There’s a 400,000 cap on the number of files and folders a Shared Drive can contain. Plus, you can share a given file within the Shared Drive with a maximum of 100 groups, with the total number of individuals (users and group members) limited to 50,000.
Here’s how you can manage members on the Shared Drive:
Step #1 Go to https://drive.google.com on your web browser.

Step #2 Click on Shared Drives from the left side menu bar. Then, select your desired shared file.
Step #3 On the upper right-hand side, select Manage Members. Follow this up by adding people in groups or modify the access levels of the current members as per your preference.
Currently, Shared Drives give you the option to choose between five distinct access levels. These are:
- Viewer
- Commentator
- Contributor (Allows people to add and edit files)
- Content Manager (Allows people to move and delete files)
- Manager (Enjoys full administrative control over the Shared Drive)

Step #4 Click on Done to save settings.
The Bottom Line
That’s all there is to create and share Google Drive—Your Drive or Shared Drive.
As you can see the process is incredibly easy and fast. Precisely why Google Suite is a winner among business owners, professionals, and students alike.
If you want team members to collaborate efficiently and effectively using the same centralized storage location, Shared Drives could be the best solution for your needs.
However, if you simply want to store personal files and folders and share them at times, My Drive would be a better fit for your needs.

