How to Turn Your Google Doc into Two Columns
G Suite is a crucial part of the corporate world.
Nay, not only business owners and professionals but school and college-goers too use Google Docs (almost) every day.
And why not? It has various useful capabilities, and all you need to use it is a reliable internet connection.
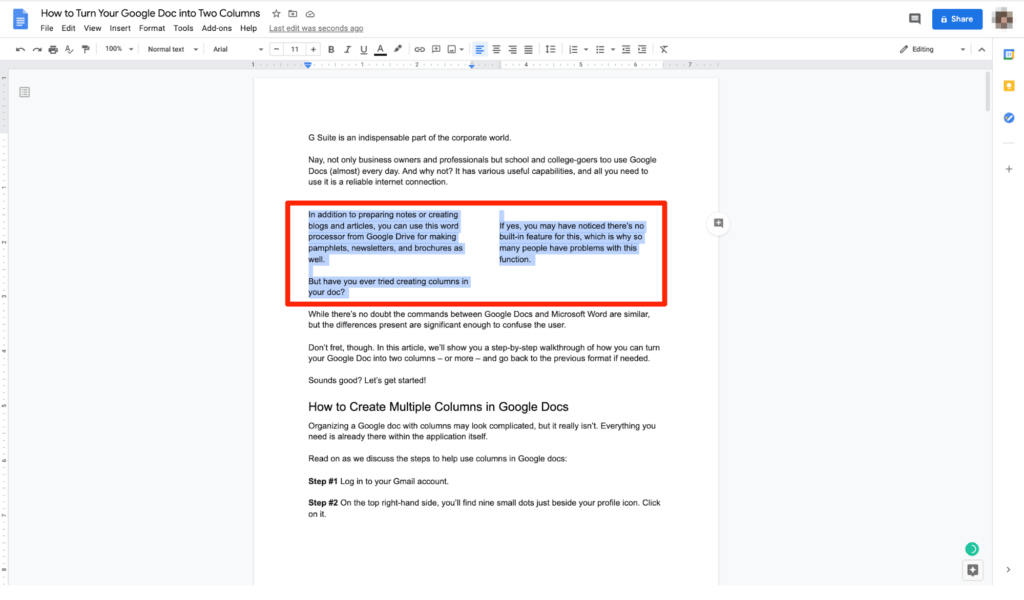
In addition to preparing notes or creating blogs and articles, you can use this word processor from Google Drive for making pamphlets, newsletters, and brochures as well.
But have you ever tried creating columns in your doc?
If yes, you may have noticed there’s no built-in feature for this, which is why so many people have problems with this function.
While there’s no doubt the commands between Google Docs and Microsoft Word are similar, the differences present are significant enough to confuse the user.
Don’t fret, though. In this article, we’ll show you a step-by-step walkthrough of how you can turn your Google Doc into two columns – or more – and go back to the previous format if needed.
Sounds good? Let’s get started!
What Is the Two Column Template in Google Docs?
Have you ever seen an academic publication or a scientific report?
More often than not, you’ll find the text is presented in a double-column format. This is what the two-column template is.
The two-column template is exactly how it sounds. It’s a formatting option that can divide your text into two separate sides on a Google doc page – provided you use something known as a column break.
This feature can make your document look more organized while simultaneously giving the reader a better view of all the material on it. So not only are the text and space better utilized, but it also makes everything look more professional.
In fact, we would highly recommend using this format for all your documents, especially if you’ve added images to it.
But Why Should You Use Two Columns in Google Docs?
Imagine you’re planning to make a file that contains lots of data. We’re talking about 350 to 500 pages in a single file.
On top of this, you also add lots of images to the document to add more visual appeal and explain the presented concepts better.
While all this sounds incredible, think from the reader’s point of view for a second: Would you like scrolling through 350 pages, or God forbid, 700 pages?
Exactly.
Presenting such large files in a two-column format offers the author a better way of utilizing the space in your document, which will make the text easily scannable. Then there’s also the fact that a multiple-column template is common in academic settings as it gives a more formal touch to the document.
Therefore, if you want to make your document easily readable or present it in a professional capacity, a double-column format should be your go-to setting.
How to Create Multiple Columns in Google Docs
Organizing a Google doc with columns may look complicated, but it really isn’t. Everything you need is already there within the application itself.
Read on as we discuss the steps to help use columns in Google docs:
Step #1 Log in to your Gmail account.
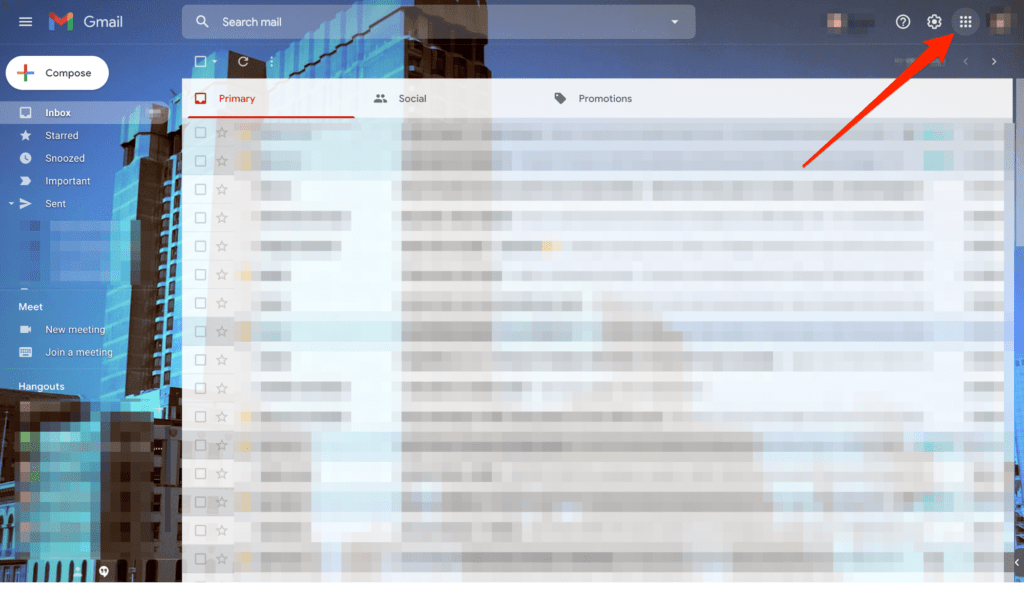
Step #2 On the top right-hand side, you’ll find nine small dots just beside your profile icon. Click on it.
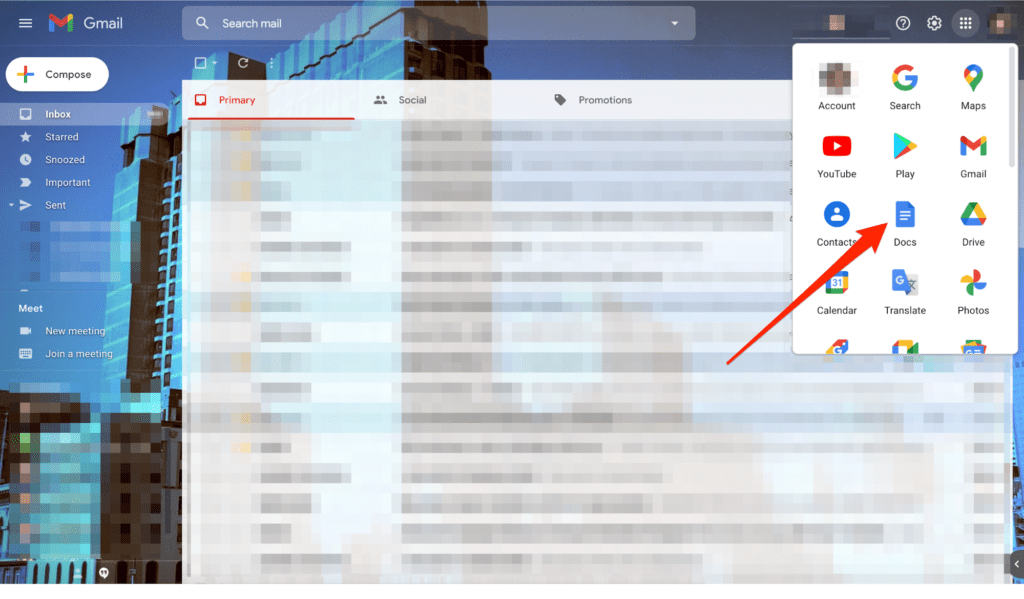
Step #3 Select the Google Docs icon. A new tab will open.
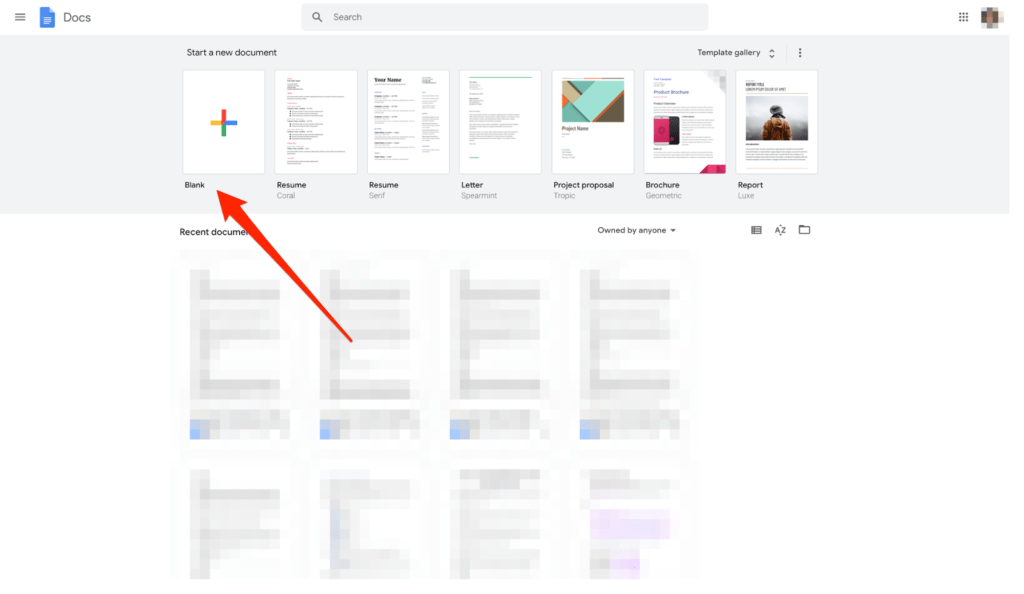
Step #4 Click on Blank right under the Start a new document tab to open a new Google document.
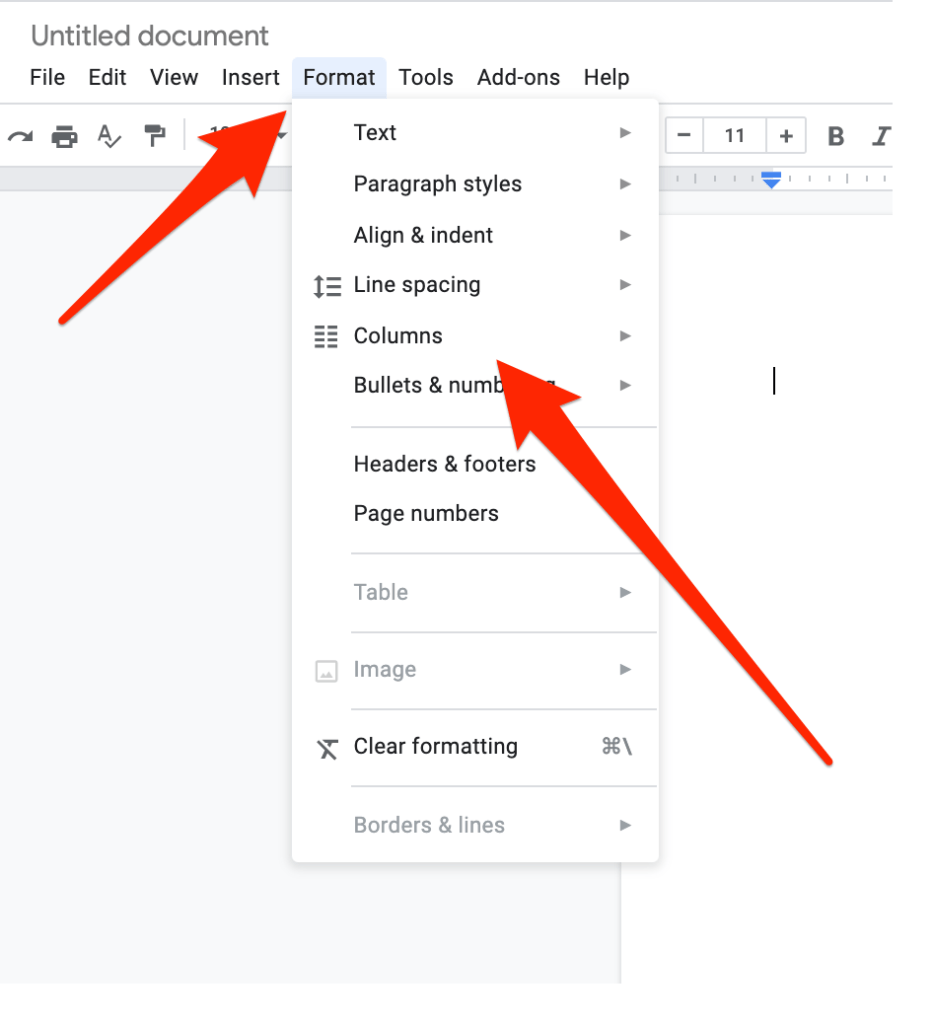
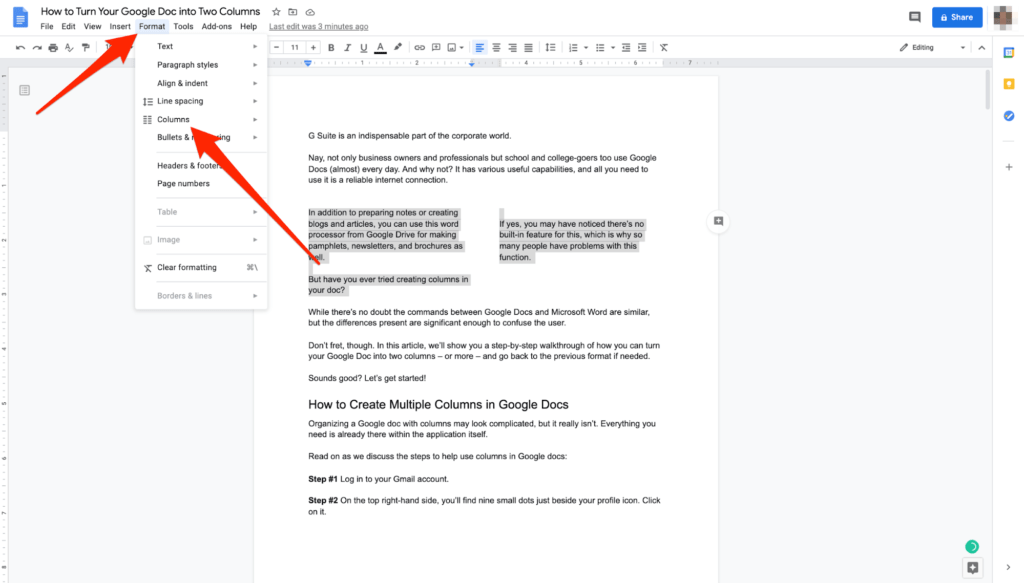
Step #5 Before entering any text on the document, point your cursor on the Format tab on the top menu bar. From there, go to Columns to view the available options.
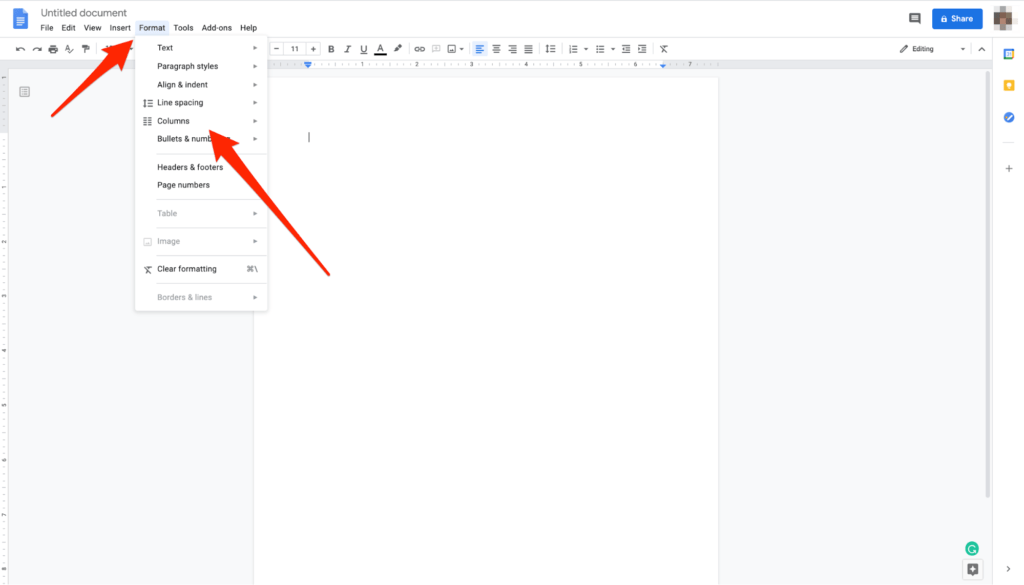
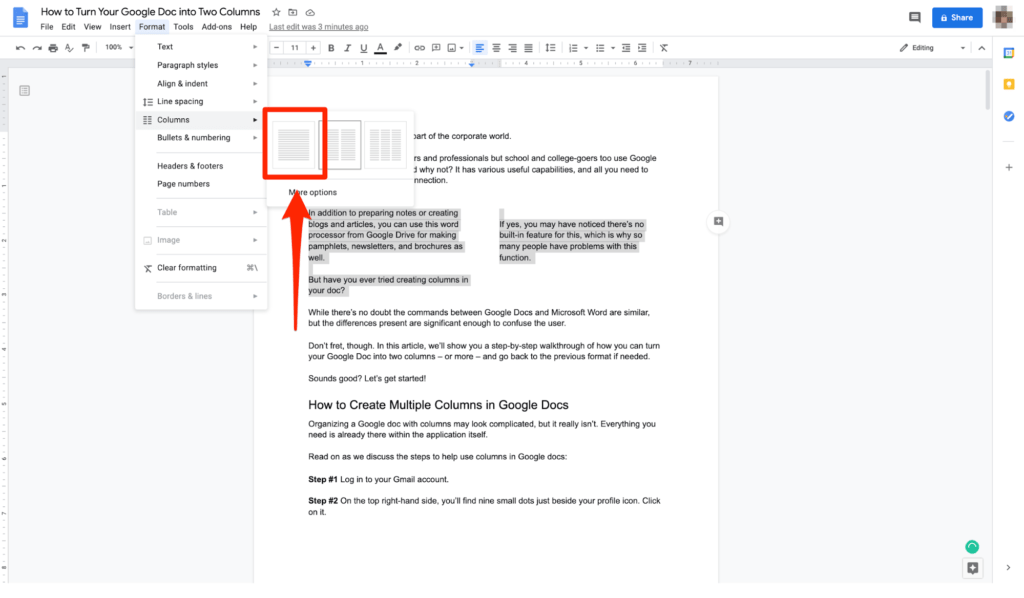
Step #6 You’ll find that the default single column option is selected. You can choose either the two or three columns format by selecting the appropriate icon.
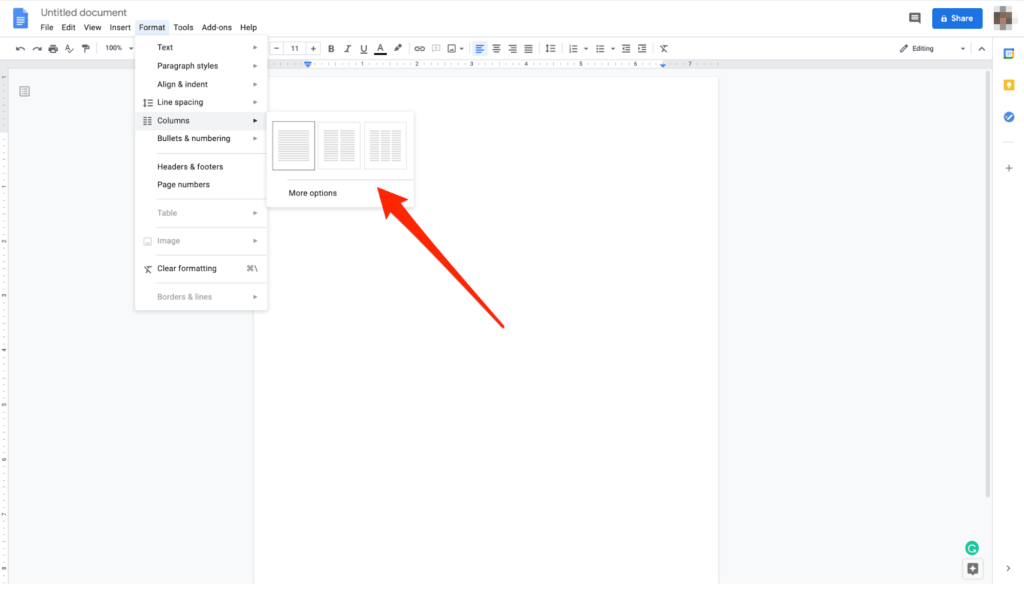
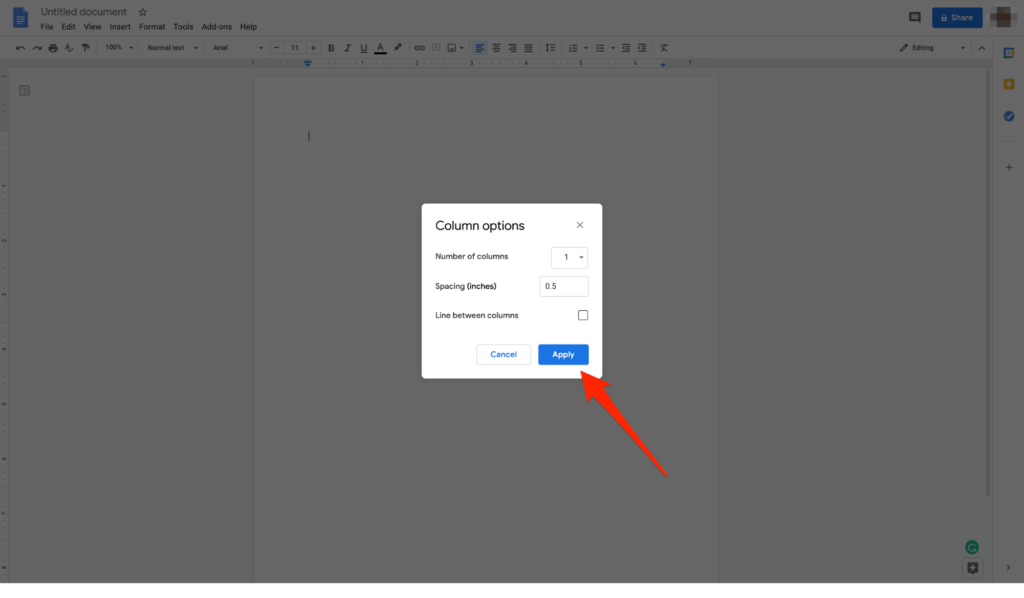
Step #7 If you want more than three columns in the doc, select More options. A pop-up window will crop up on your screen, where you can import different column formatting options according to your preference.
Additionally, you can set the number of columns up to three and determine the spacing between each one of them in inches. There’s also the option to add a line between each column if you want.
Once the settings are customized to your preference, and you’ve chosen all your options, click on Apply.
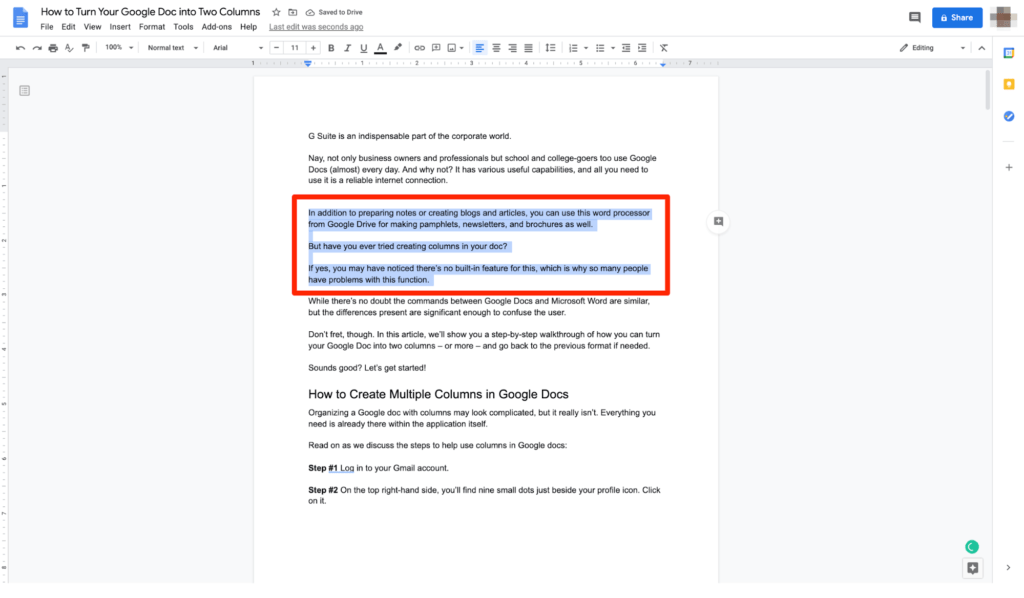
Step #8 This is how any text you enter after applying the new settings will appear.
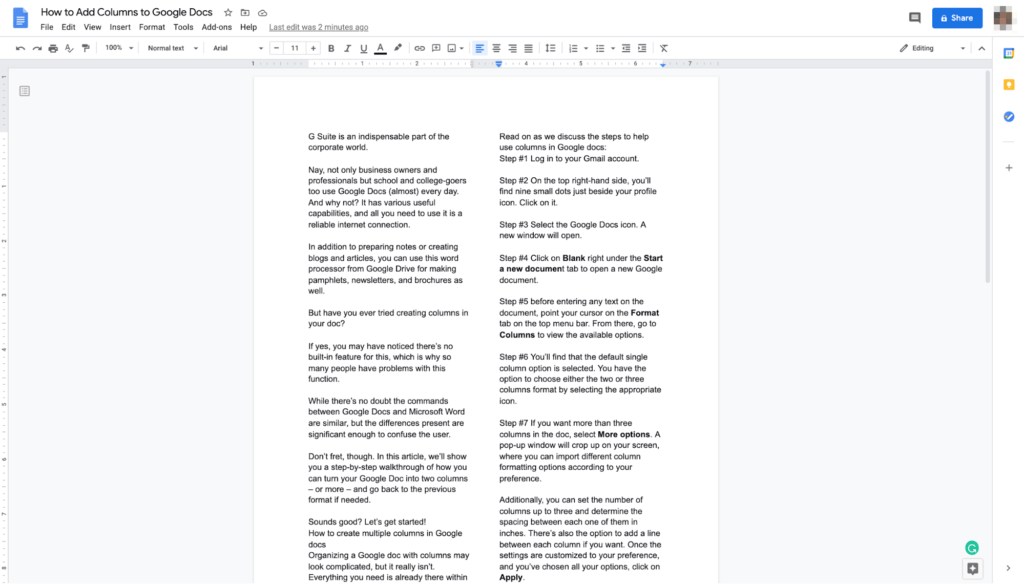
And that’s it! This is all you need to do to create columns and start writing in your Google doc.
How to Apply the Multiple Column Format Only to a Specific Text
You may not want to format the entire document with the multiple-column template. Instead, you may only want a specific text to appear in columns.
If that’s the case, you can do that too.
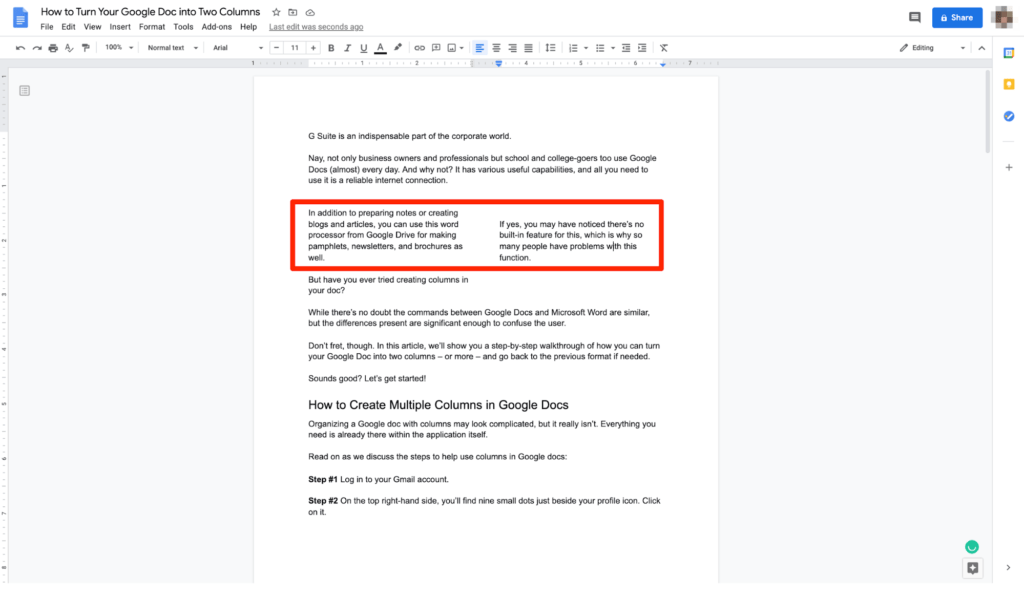
Step #1 Select the part of the text where you want to apply the column formatting to.
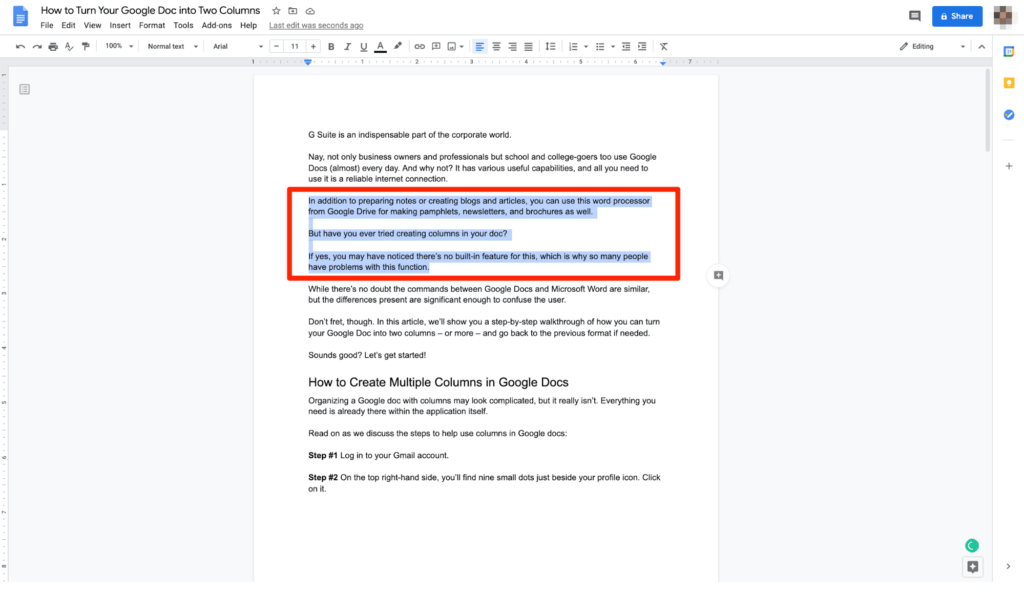
Step #2 Go to the Format tab on the top menu bar. From there, go to Columns to view the available options. Exactly how you had done everything before.
Step #3 The formatting option will now only apply to the selected text instead of the entire document.
But, that’s not it.
You think you have it all sorted. You’ve applied the columns, so there’s nothing else you need to do, right?
But when typing on your doc, you suddenly realize you aren’t able to transition your text from the first column to the next.
Wondering what went wrong?
The problem is you didn’t insert a column break. Read on to find out how you can solve this problem.
How to Type Your Text From One Column to Another
You have to add a column break if you want to type in the second column – and simply trying to move your cursor there isn’t going to work, especially if there isn’t enough text in that column.
So how do you switch between columns? It’s just as easy as adding columns.
Here’s what you need to do:
Step #1 Keep the document open where you want to add a column break.
Step #2 Go to the Insert tab on the top menu bar. As soon as you click on it, you’ll find all kinds of options.
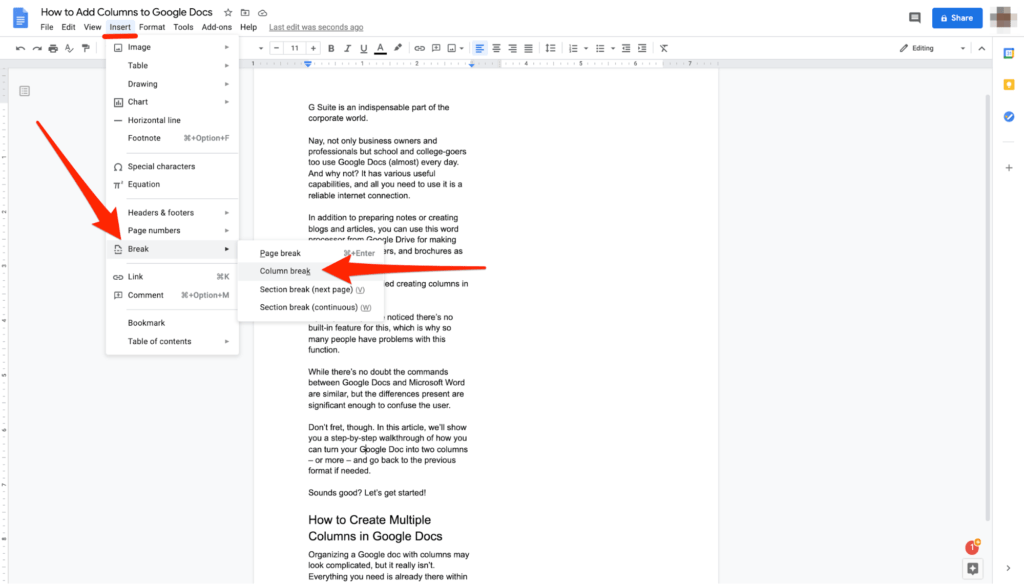
Step #3 Point your cursor on Break. This will then show you another menu, where you’ll then select Column break.
As soon as you do this, the cursor will direct you to your second column. So make sure your cursor is exactly at the place where you want your next column to start.
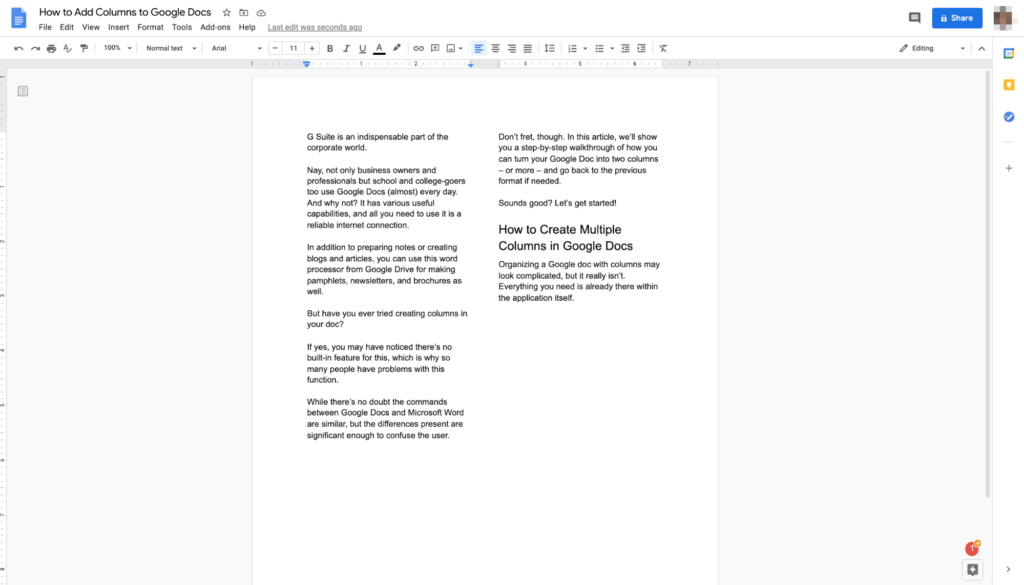
You can now also navigate between your columns of the document easily.
Oops, I Made a Mistake. What to Do Now?
You don’t need to worry if you make any mistakes while making all these formatting changes. We honestly get it, it can be confusing at first.
The good news is that you can always return to the default formatting.
That said, make sure your cursor is at the right place before you click on Format to change columns, as any changes will be applied starting from the text opposition on the document where your cursor currently is.
How to Revert Your Text Back to One Column
You’ll have to retrace your steps a bit if you want to return to the previous single column template after applying columns to your text.
Here are the steps to restore your Google doc text to a single column:
Step #1 In your Google doc, highlight the columns that you want to return to a single block of text.
Step #2 Go to Format in the Google doc menu bar at the top.
Step #3 Now, hover your cursor over the Columns sub-menu. From the presented options, click on the single-column icon on the left.
The formatting option will get applied automatically to the selected text, and it’ll be viewable in a single column format.
As you can see, adding multiple columns or even reverting back to the single-column format is incredibly easy on Google doc. The whole thing hardly takes minutes, and you’ll be able to format your document exactly to your liking.
Other Tips and Tricks for Google Columns
You don’t have to follow the above method to add columns to your Google doc. Instead, you can create a table to get a similar look.
And yes, it’s just as easy!
Here’s what you need to do:
Step #1 Open a fresh Google doc.
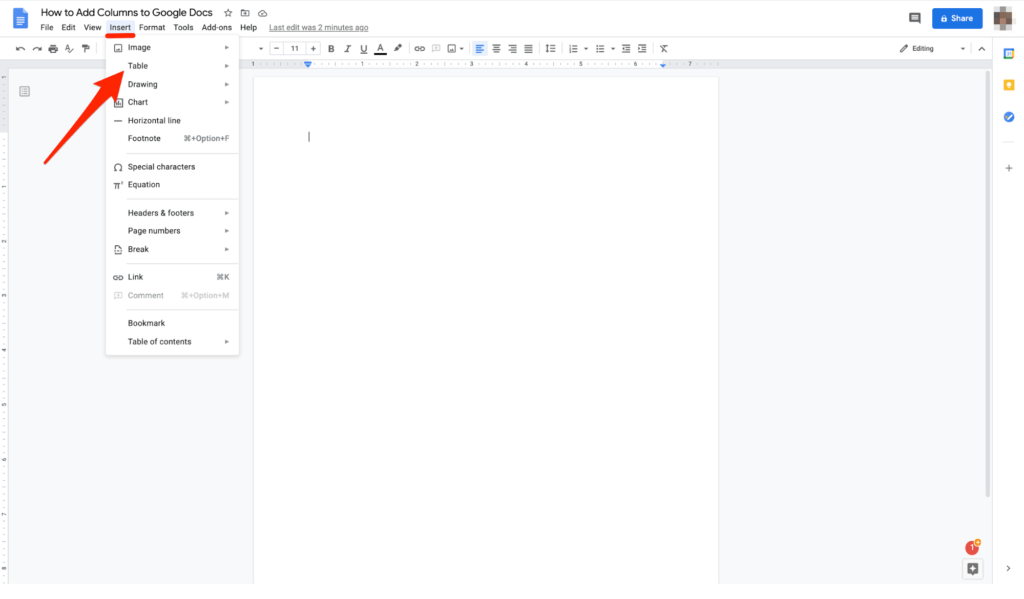
Step #2 Go to Insert on the top menu bar and then select Table.
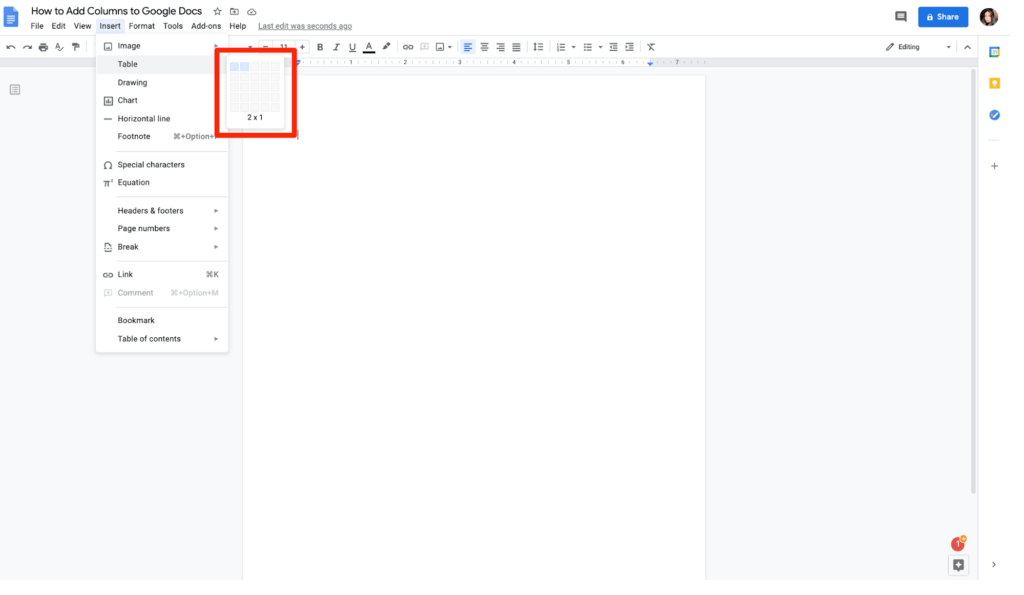
Step #3 If you hover your cursor on Table, you’ll find a sub-menu where you have to select the number of columns and rows. Choose two columns and only one row.
Step #4 Type in your text into the table.
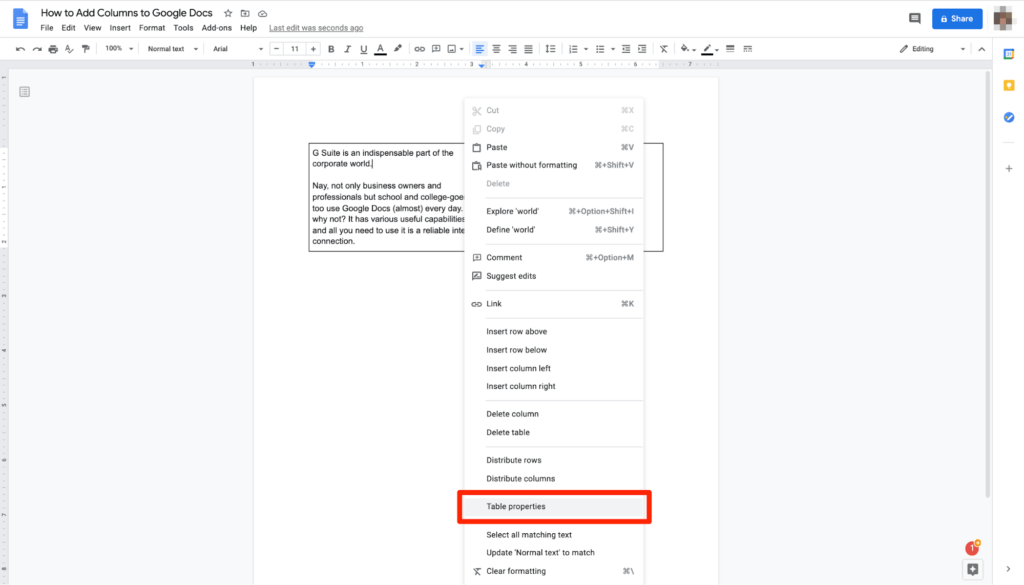
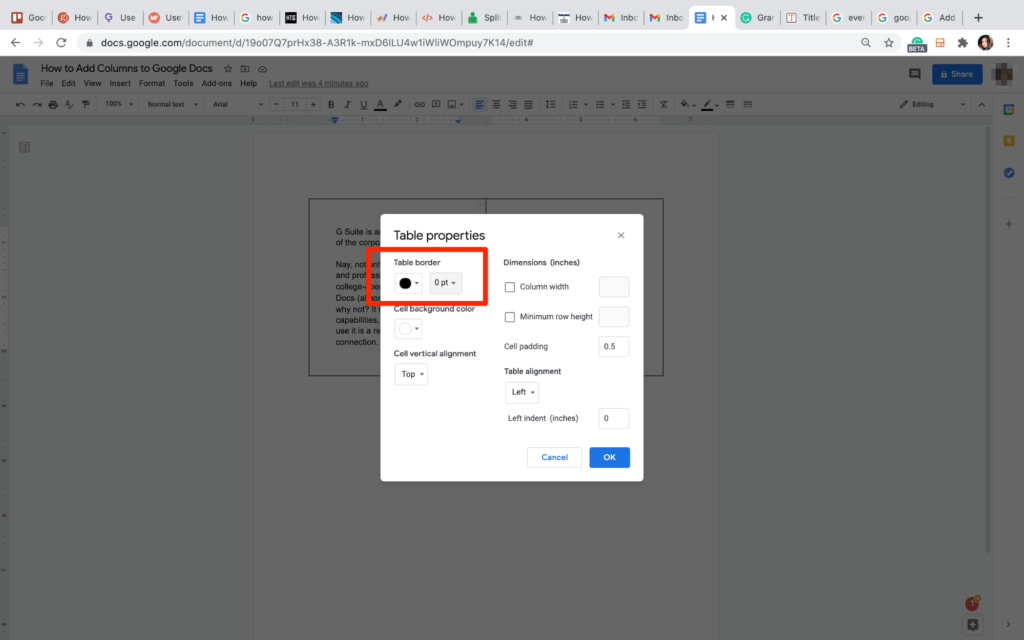
Step #5 Place the cursor inside the table and right-click. From the presented menu, select Table Properties.
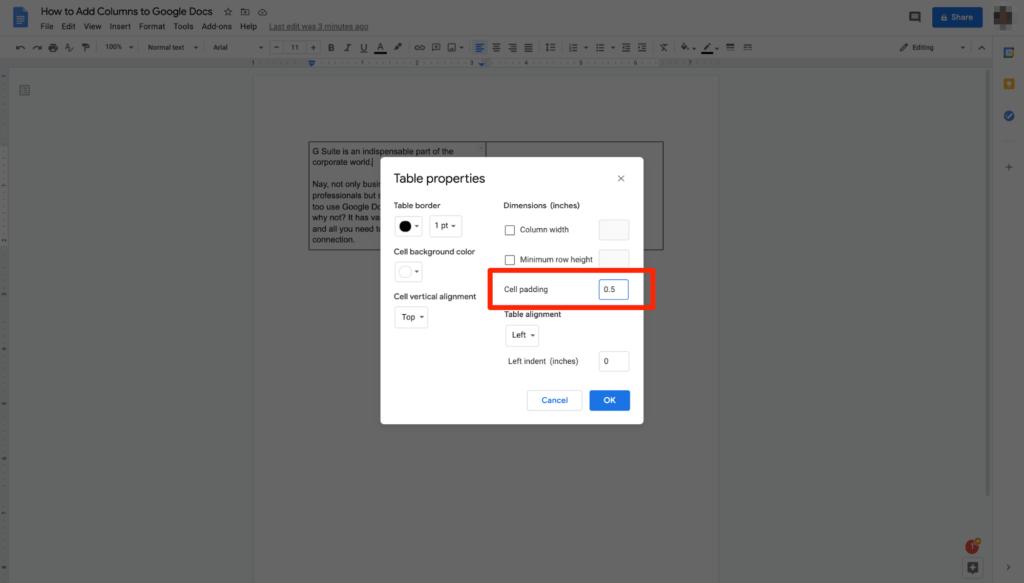
Step #6 Next, you’ll have to change the Cell padding value. While we’ve typed in 0.5, you can enter any value that you like.
Step #7 This is what your table will look like now – of course, that’s only when you type 0.5 in the Cell padding value.

Step #8 Right-click inside the table again and select Table properties. Only this time, you’ll change the table border value and make it zero. This will make the border disappear completely.
Step #9 As you can see, you’ll now have two columns inserted in your doc and can enter text where you please.
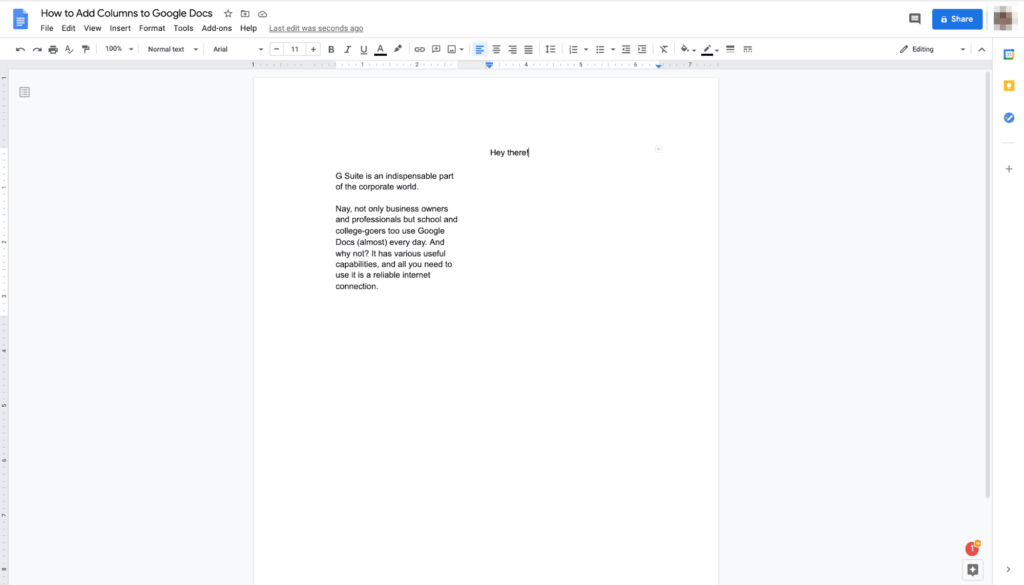
So that was the second way of turning your Google doc into two columns. Irrespective of the method you choose, you can be sure of one thing – your large docs will be easier to scan and read.

