The Ultimate Manual for GitLab Merge Requests
Think of merge requests in GitLab as the voice of reason in code development. The GitLab merge requests allow the team to take a breath and fully review a proposed change to the code before deciding whether to include it in the primary code. We’ll explain how merge requests work and how they can benefit your project.
What Are GitLab Merge Requests Anyway?
When working with Git inside GitLab, merge requests (also called pull requests) are the key to a successful, collaborative project. As a version control software system, merge requests sit at the heart of Git.
Merge requests ensure that any proposed code changes encounter a thorough review before they become an official part of the code. Merge requests also create a trail of information that’s vital for tracking changes.
Reviewing Proposed Changes to the Code
Merge requests allow your team to review any code that is part of a source branch. This is code that a team member developed and would like to merge with the primary code in the target branch. The team collaborates and discusses the merge request before deciding whether to make it part of the primary code.
Rather than allowing developers to just upload any code changes they want to the project, the merge request gives the team the ability to discuss the changes first. Once everyone agrees on the necessity of the proposed changes, they can become part of the project. If the team cannot agree on whether the changes are necessary, it can discard the changes and go in another direction.
Tracking Changes to the Code
Another advantage of merge requests is that they create a clear trail of work and proposed changes from team members. It’s easy to go back and see who created and proposed certain changes to the project’s code. The record of merge requests simplifies the process of determining who approved various changes.
Should problems arise down the road after a certain code change, this trail of information can help your team fix the problem faster.
How GitLab Merge Requests Work
Before discussing merge requests specifically, it’s important to understand a bit more about how Git works inside GitLab.
What Is Git?
Git is open-source software that helps coders keep track of different versions of their software projects. Git uses a distributed architecture system, which means that it helps your team manage the currently active version of your coding project. But it also keeps track of a full history of changes to the code.
Both commercial and open-source code development projects make use of Git. It works for all different sizes of projects too. Teams of almost any size can use Git to collaborate on a software project.
How Does GitLab Use Git?
GitLab is a repository that allows you to manage your Git project. GitLab provides project monitoring and security. It delivers source code management features that improve productivity. You don’t need to use GitLab to be able to code with Git, but GitLab can make managing your Git project far easier and more efficient.
It also simplifies the ability of all team members to collaborate on the project. Gitlab follows the principles of DevOps, which involves a set of practices designed to help with software development.
Using Branching Strategies With Merge Requests
When collaborating on coding projects inside GitLab, you will make use of branching strategies. The primary code will exist in the target branch (or main branch), while developers will work on their proposed changes in source branches (or minor branches).
When a developer is ready to add the new code to the main code, the developer will create a merge request. The merge request is a request from the developer to merge the proposed code changes in the source branch into the target branch.
Once a merge request occurs, other members of the coding team will begin reviewing the new code. They are looking for errors and incompatibilities that could cause issues with the default code. But they also want to make sure that the new coding proposal will deliver the desired benefits and will represent a useful change.
By keeping the proposed changes in the source branches, you can always be certain the main version of the code is working and is free of coding errors. You will only merge, or push, a code change from a source branch to the target branch after the team has a chance to review the changes. This extra oversight increases the chances that the new coding will not cause incompatibilities or errors within the main coding.
You can perform a number of actions in GitLab by working through merge requests. We’ll discuss those options in the following sections.
Example 1: Assigning a Merge Request to Other Users
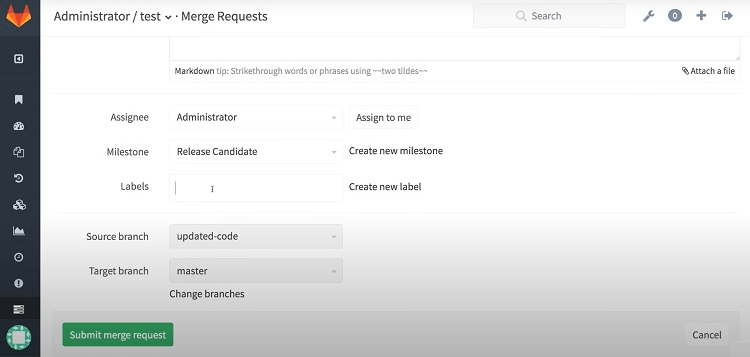
When you create a merge request, GitLab automatically assigns the merge request to you. However, because you almost certainly want someone else on the team to review the merge request, you will have to assign the merge request to other team members as well. You can assign one user or multiple users to a single merge request.
With your merge request displayed on the screen in GitLab, look for a section called Assignees. By editing this section, you can add or remove users from the list of assignees.
Example 2: Adding Labels to Merge Requests
After you use GitLab for a while, you likely will end up with quite a large number of merge requests and other items to track. It can become confusing to find the merge request that you need to access when you have a large list of them.
GitLab allows the use of labels to help you better organize your merge requests. Labels allow you to tag your merge requests with descriptive text, making it easier to find a particular merge request when you need it later.
GitLab allows for two types of labels with merge requests.
- Group labels: Use a group label when you want the merge requests for all projects within the group or subgroup to contain the same label.
- Project labels: Use a project label when you want only the merge requests inside a certain project to receive the desired label. The project label will be a more common selection for the majority of GitLab users.
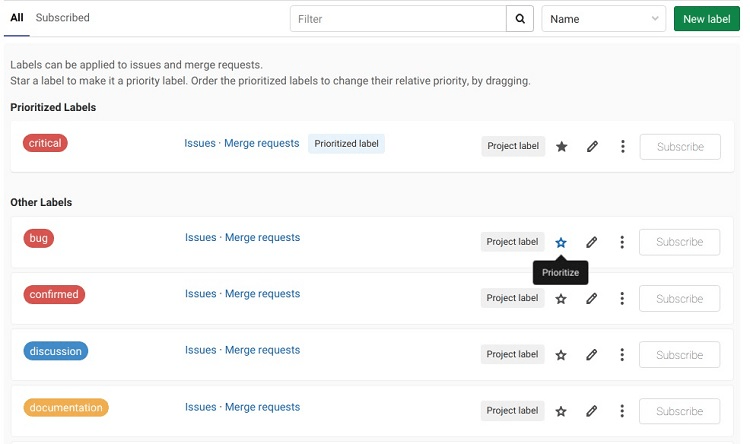
To create a project label, open the merge request that needs a label. Look for the Labels section in the window and click on the Edit button. Then click on the Create Project Label button. You can enter a descriptive name for the label, as well as a particular color for the label. If you want to prioritize a certain label, you can mark it with a star. Then click the Create button to finish creating the label.
If desired, you later can edit your labels by opening your list of labels in GitLab.
Example 3: Setting a Merge Request to Draft

You may have situations in GitLab where you want to start a merge request before you actually are ready to submit it to other team members. You can set a merge request as a draft to compile your thoughts for the merge request before you actually submit the merge request.
By setting the merge request to draft, it disables the Merge button in the merge request, so you cannot accidentally submit the merge request before you are ready. No one else can see your merge request until you remove it from draft status and officially submit it.
When you finish your draft and are ready to actually submit the merge request, you can click the Mark As Ready button to change it from draft status to submission status. You then should be able to click the Merge button to officially submit the merge request.
If you are performing a search of your merge requests, you have the ability to include or exclude merge requests set to draft from your search. This can be a very helpful option if you have quite a few merge requests set to draft.
Example 4: Making Comments in Merge Requests
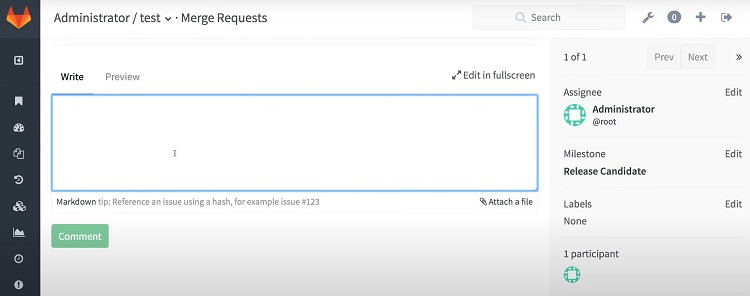
You and your team can make comments regarding the merge request. This is an important aspect of GitLab, as it encourages communication among team members. Each merge request can contain up to 5,000 comments.
Through comments, you can attach your comment directly to a specific line in the code related to the merge request. You also can direct your comment at certain users in the group using the @ symbol and the user’s name or email address.
GitLab does allow you to direct comments at the entire team by entering @all. However, GitLab does not recommend sending merge request comments to all users very often, as it can create an almost overwhelming number of comment requests for users. (The use of the @all command also generates email messages for all users).
Example 5: Accepting a Merge Request
There are multiple options for approving your merge request. Those who have the appropriate level of permission in GitLab have the ability to approve a merge request. If you do not have a high enough level of permission, you will have to wait for someone with the proper permission level to approve the merge request. You should still be able to make comments on the merge request, however.
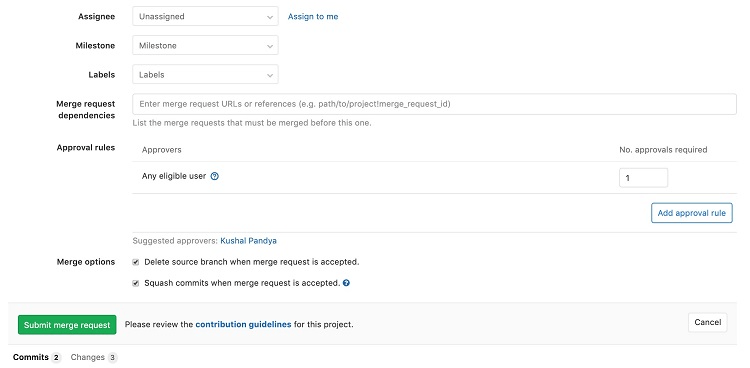
As part of the approval process, you can require that multiple steps must occur before the merge request receives approval. One option is to require that a certain number of coders with the proper permission level approve of the merge request before the source branch is eligible to merge into the target branch.
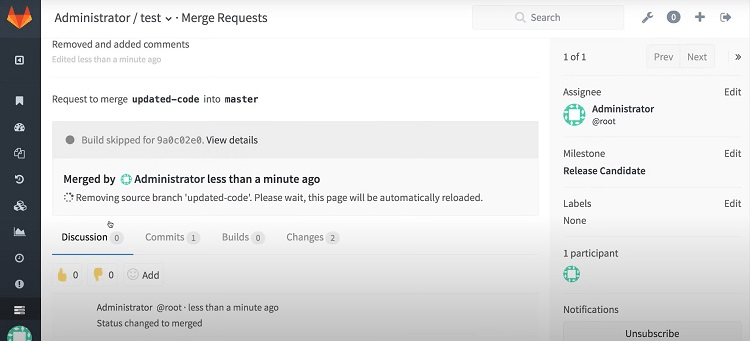
When someone who has the appropriate permission level is viewing the merge request, that team member should have buttons available that allow them to approve or revoke the merge request.
If the merge request must have a certain number of approvals before it becomes part of the target branch, the team member may see an Approve Additionally button. This means that the merge request needs additional approvals before it receives final approval.
Once the merge request receives the number of approvals required to meet the rules that are part of the merge request, a coder who has the correct levels of permissions can merge it to the target branch.
How to Get Started With GitLab Merge Requests
Creating a merge request only requires following a few steps, but the steps depend on the circumstances involved.
Step 1: Create a Merge Request From the Main Window
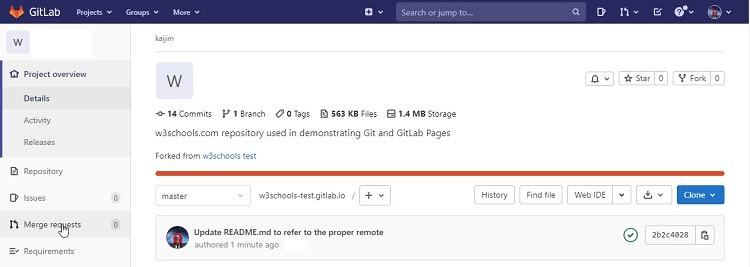
When creating a merge request, you can perform this task from the main GitLab window.
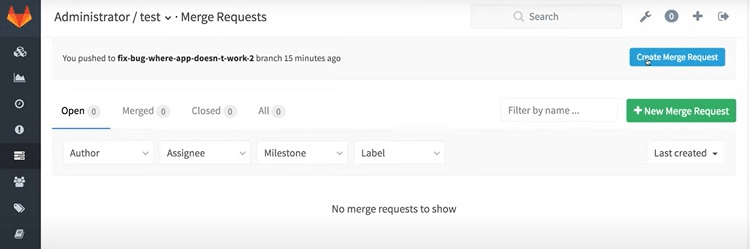
From the top of the screen, click on Menu, followed by Projects. In the list of options along the left side of the window, click on Merge Requests.
At the top right of the window, you now should be able to click on the New Merge Request button. Select the source branch that has the changes you are proposing. Then select the target branch where you would like to send the changes involved in this merge request. After picking the two branches to use, click Compare Branches and Continue.
Enter the requested information in the text boxes, including a description of the reason for the merge request, and click the Create Merge Request button.
Step 2: Create a Merge Request From a Local Git Command Line

If you are working at the command line with Git, you can create a merge request directly from the command line. You do not have to return to the GitLab interface.
If you don’t already have a branch containing your proposed code changes, start by creating a branch from the command line. Type git checkout -b followed by the name of the branch that you want to create. Then hit the Enter key.
You then can push your branch to GitLab from the command line. Type git push followed by the name of the GitLab remote repository. Add the name of the branch that you created earlier and press the Enter key.
When you push the branch correctly, GitLab will return a prompt that gives a web browser link you can use to create the merge request. Copy the web address and paste it into your browser. Then follow the prompts on the web page to submit your merge request.
Step 3: Create a Merge Request When Working From a Fork
Some coders working in GitLab may not have access to the repository they need. In a case like this, they can create and use a fork. This provides a personal copy of a repository through which the coder can make changes. After making the desired changes, the coder can use a merge request to submit the changes made in the fork to the repository where the coder does not have access.
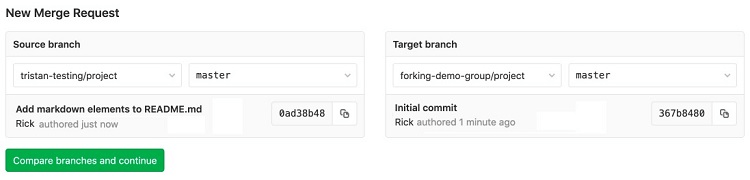
After you create the desired changes in your fork, return to the main GitLab screen. Click Menu along the top of the window, followed by Project. From this list, select the fork that you want to use for the merge request. Then click on Merge Requests on the left side of the screen. Click on the New Merge Request button.
In the Source Branch area of the window, click on the drop-down menu and select the name of your fork repository from the list. In the Target Branch area, click on the drop-down menu. Select the name of the repository into which you want to merge the changes from your fork.
Click the Compare Branches and Continue button. Then click the Submit Merge Request button. Other members of the team now can check out the coding changes and determine whether they want to allow the merge request to occur.

