The Ultimate Manual to GitHub Project Management
Effective project management is invaluable for planning, collaboration, quality control, and accountability. But, adding new software to your development process isn’t always the best option. GitHub offers project management (PM) capabilities, so you might not even need to change your workflow.

What is GitHub Project Management Anyway?
Most developers only think of GitHub as a collaborative version control system. While this is true, the platform has evolved to extend its functionality over the years. As a result, it is no longer necessary to switch to a different tool to manage tasks, tickets, and reports.
GitHub offers a collection of features to support the Agile project management framework. It is granted that GitHub isn’t the most powerful project management tool. But, it is still invaluable for small teams that already use the platform to store, share, and collaborate on code.
Furthermore, GitHub supports native integrations with more popular and powerful PM platforms. This design makes it easy to scale your management capacity as your projects grow and complexity increases.
Finally, GitHub’s project management capabilities are nested in its built-in features, namely:
- Project Boards
- Issues
- Labels
- Milestones
In the next section, we’ll discuss how these critical features support project management in GitHub.
How GitHub Project Management Works
GitHub’s most fundamental element is the repository. This is where you store all your project files, including each file’s revision history. Additionally, the platform offers various features to manage and interact with your repository.
Now, some of these repository features are well suited to project management. These features include:
Issues – Successful project management is mainly about tracking and organizing work. GitHub Issues is a crucial feature for this purpose. Users can create issues for any number of things, including requesting features, reporting bugs, and hosting discussions.
Furthermore, GitHub offers a dedicated dashboard for all your issues. You can even sort them by category, such as issues you created, in which you are mentioned, or assigned to.
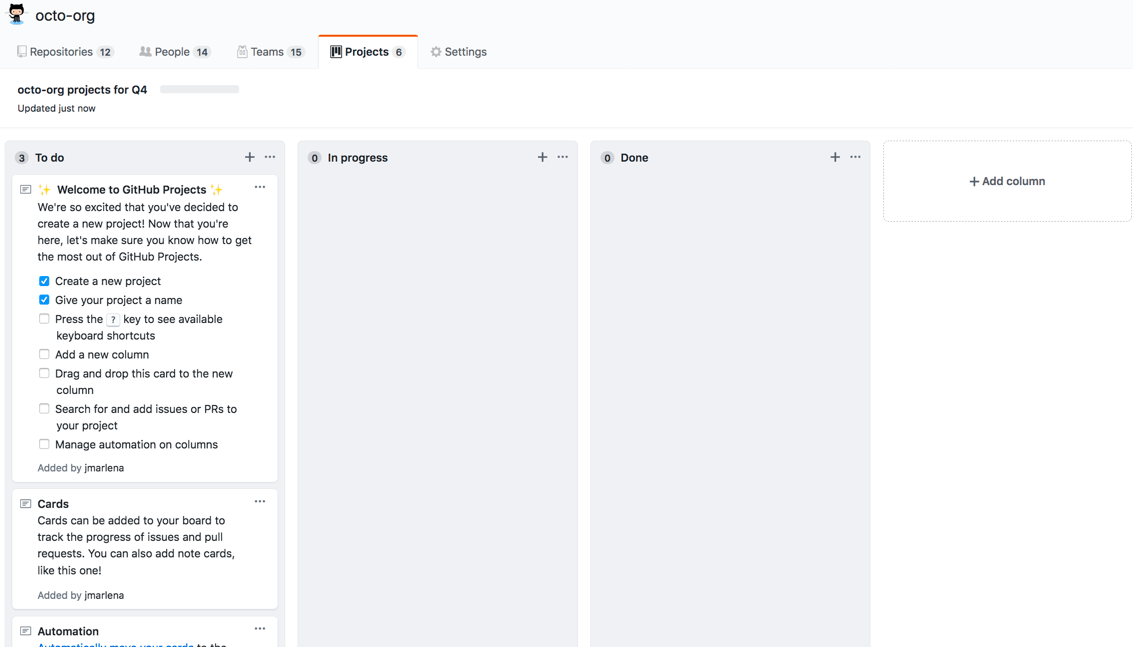
Project Boards – A Kanban board is a staple in Agile project management. The board helps to maximize efficiency, limit work-in-progress, and visualize the workflow. GitHub features a Kanban-style tool with its Project Boards.
You can even use the feature out-of-the-box with default templates. Alternatively, you can build your board from scratch with the specific columns you need for your workflow.
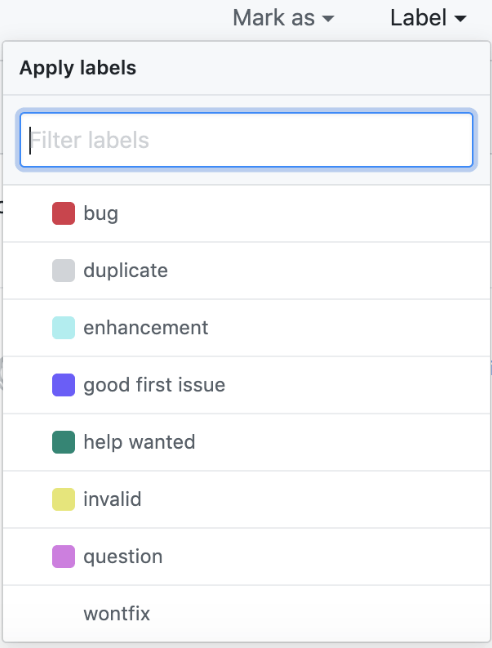
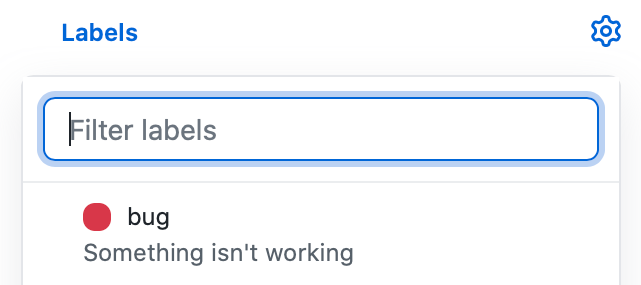
Labels – A good project manager can prioritize issues and assign tasks. GitHub offers labels to keep track of issues. For example, you can use color-coded labels to tag issues such as feature requests, bugs, and discussions. This feature gives you a quick visual layout of all your issues and tasks.
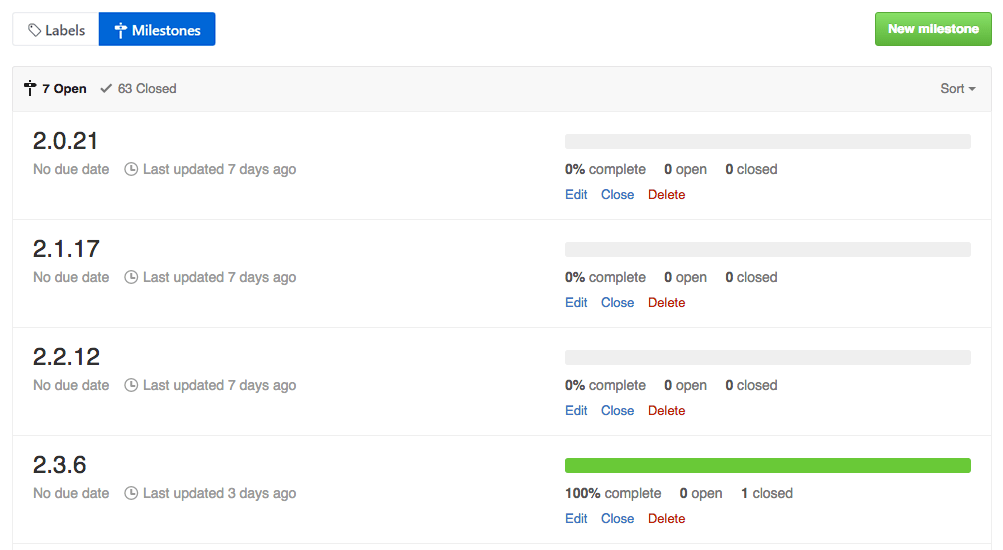
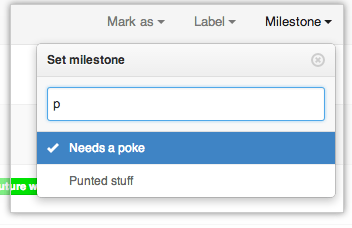
Milestones – Milestones in project management help measure progress towards the goal. Again, GitHub provides a milestones feature to track progress on clusters of issues or pull requests in your repository. Again, you get a quick visual of your progress in real-time.
Wikis – Finally, good project management calls for a central place to host all the project documentation. GitHub makes this available with wikis. Wikis are built into your repository, allowing you to detail the project’s documentation, including the project’s purpose, goal, core principles, and other crucial information.
Below are a few examples of how you can use GitHub’s features for project management.
Example #1 – Project Management with GitHub Issues
GitHub Issues is an incredibly robust tool for project planning. This feature has everything you need to describe tasks, track the progress, and maintain constant communication with your team.
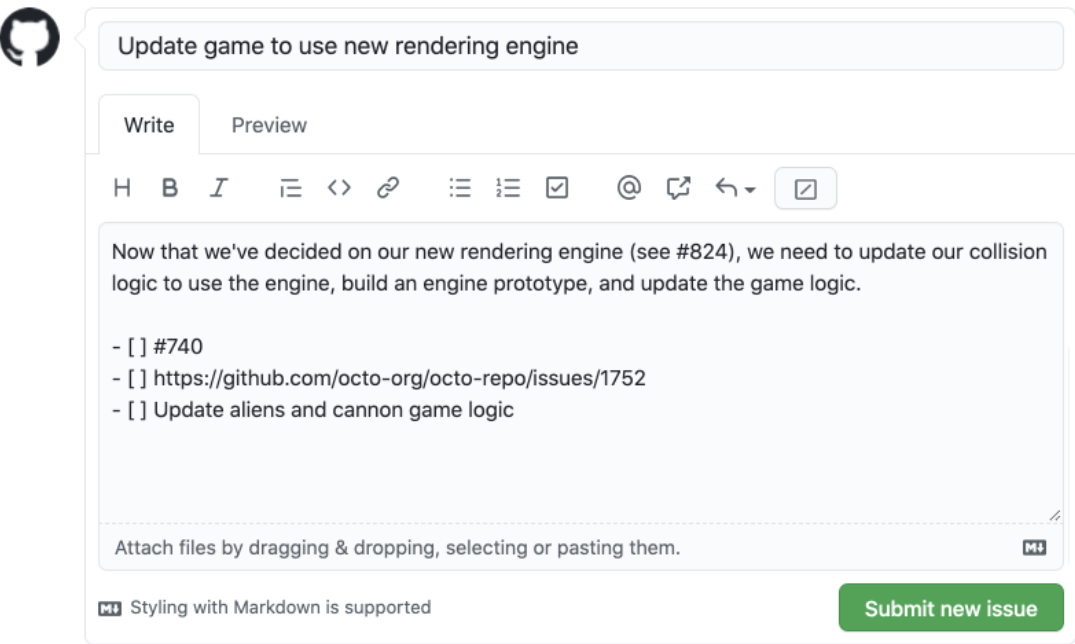
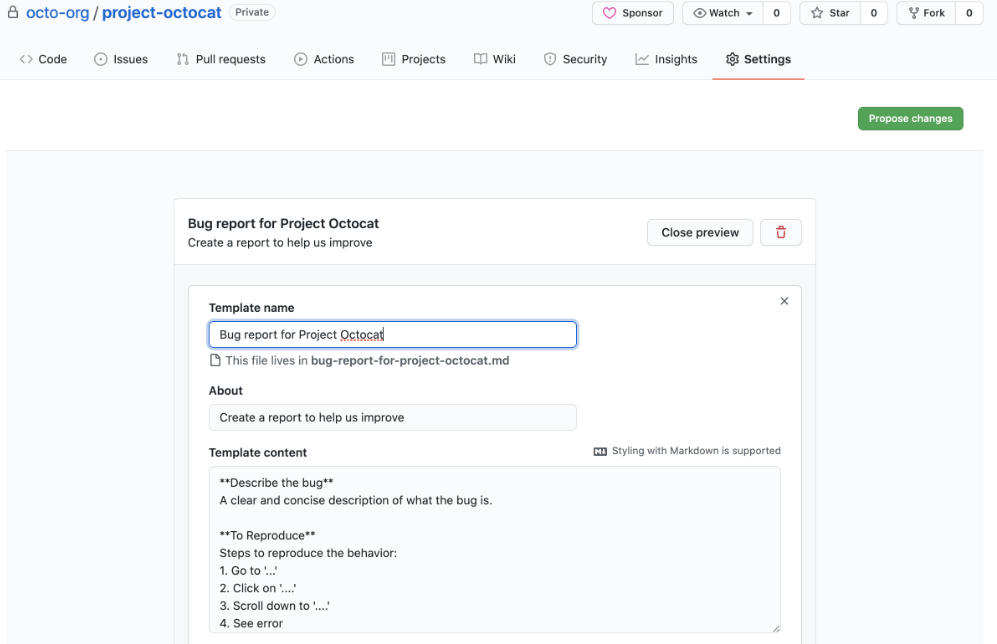
Say you want to report a bug. First, you can create a new issue from your repository. The issue comes with templates and forms, so ensure you enter all the relevant information. You can also create a blank issue and describe it in detail.
A typical bug report requires multiple steps to solve the problem. The issues feature lets you add a task list of individual pieces of work that need to be completed. This way, you’re team knows exactly what needs to be done to fix the problem.

You may also want to make it apparent that the issue is a bug report. This way, team members can spot it at a glance without scrolling the complete list of issues. Additionally, GitHub lets you filter issues by category, such as Bug Report in our case.
Simply add a color-coded label to specify that the issue is a bug report. Ideally, your team will use a consistent color scheme for issue labels. For instance, all bug reports will have a red label.
The bug report is most likely time-sensitive. So you may also want to add a target date to resolve the issue. Again, you can do this by adding a milestone to your issue. The milestone will also help you track the progress as the deadline approaches.
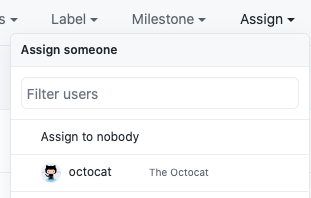
Finally, you can assign the issue to an individual, team, or organization. This way, it’s clear who is working on the issue. You can avoid multiple people working on the same issue or contributors assuming someone else is already working on it.
The issues feature also supports comments and discussions. This way, team members can update each other on their progress. You can use the @mention feature to specify the team member you’re communicating with.

As you can see, GitHub features allow you to specify the who, what, why, how, and when of your projects. In this example, you can clearly identify who created an issue, what the issue is, why it happened, how it might be resolved, and a deadline for closing the issue.
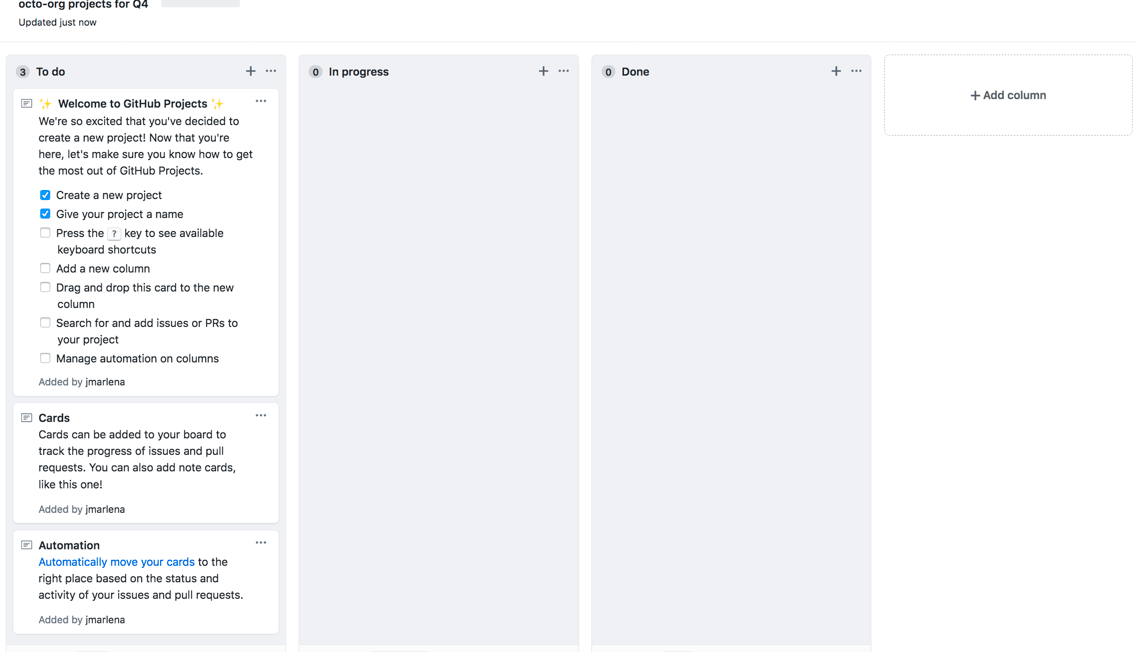
Example #2 – Organizing Your Project with GitHub Project Boards
GitHub Issues is excellent for tracking your workflow in a small team. However, things can get confusing, with many people creating issues and pull requests. You’ll feel right at home with GitHub’s project boards if you’ve used Trello before.
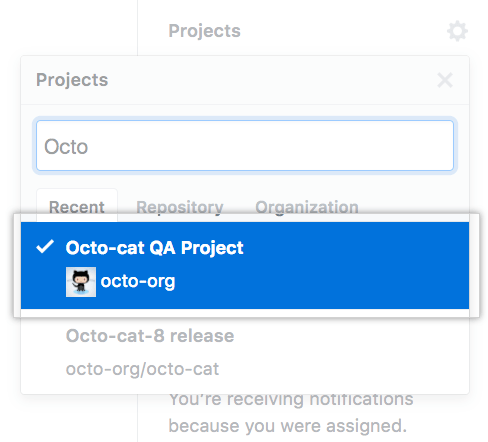
You can create a new project to organize related issues, pull requests, and notes. GitHub also offers templates to help you get started quickly. For instance, the basic Kanban template lets you visualize your project, similar to Trello.
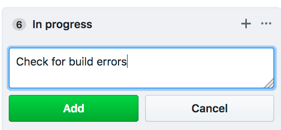
Next, you can add your issues to the project board. You’ll find all your issues in the project board sidebar under Triage. Then, simply drag and drop the issues. Alternatively, you can search for issues in the search sidebar and add them manually.
You can also add notes to the project board. This feature helps add relevant information or send task reminders to your team. It’s also a good way to encourage communication in your teams.
Finally, you’ll be able to track the project’s progress during its lifecycle. GitHub project board provides a handy progress bar for tracking the progress. Again, the visual cue makes it easier to track progress at a glance.
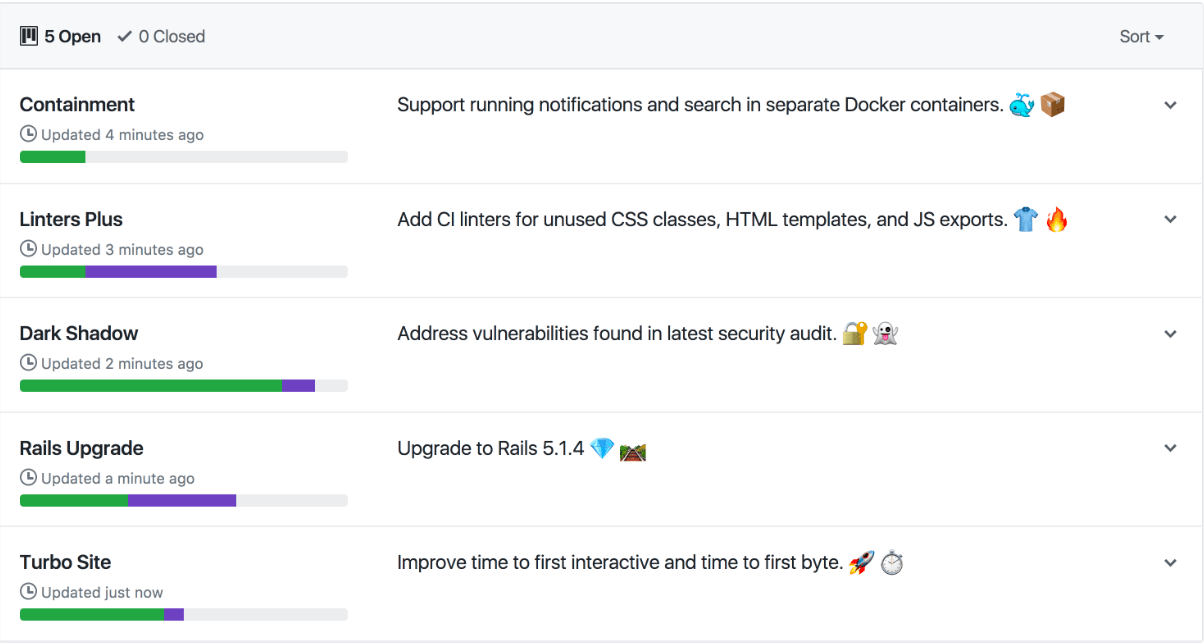
You have a central dashboard to keep track of all your issues, pull requests, and comments.
How to Get Started With GitHub Project Management
GitHub has a relatively steep learning curve for new users. The platform also releases new features constantly, so there’s much to learn. However, you can quickly get started managing projects with GitHub by following these steps:
Step 1 – Learn How to Create High-Quality Issues
We’ve already seen that issues are at the heart of managing projects on GitHub. Unfortunately, issues can spiral out of control, especially in large teams. As a result, they may show up as an endless list of problems that need to be solved.
The first step to creating high-quality issues is to provide brief but valuable details. Issue templates can help to maintain a consistent structure. Additionally, these templates also ensure that users don’t miss crucial information.
GitHub comes with built-in issue templates. Similarly, you can create your custom templates from scratch to align more closely with your workflow. At the very least, an issue should detail the user or audience, the required task or action, and the anticipated goal or outcome.
Another tip is to encourage users to search for existing issues before creating new ones. This step helps to discourage duplicate problems. Also, consider including this requirement in your issue reporting workflow.
Finally, be sure to break down large issues into smaller ones. This practice helps make your workflow more manageable. The size of your pull requests will also naturally shrink as a consequence.
Step 2 – Take Advantage of Automated Workflows
The typical coding project has a lot of moving parts. It’s hard to keep track of all the manual tasks required to keep your projects up-to-date. GitHub offers multiple automation features to ease your workload.
Github project boards come in handy for this purpose. For instance, you can automatically set your issues to update to Done when they’re closed. Similarly, you can automatically update the pull request status to needs review. This happens immediately when the pull request is marked as ready for review.
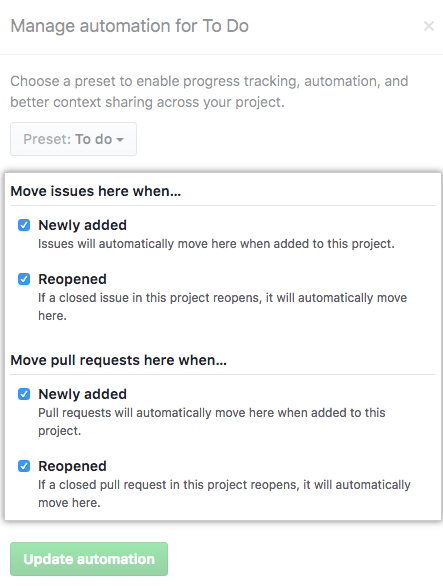
GitHub can also automatically close your stale issues. Everyone associated with the matter will be notified. The platform also tags stale issues for you and removes the tag when someone interacts with the issue.
Again, GitHub doesn’t offer a lot of automation features. But its powerful API can help you customize your own automation and expand GitHub’s existing capabilities. Similarly, you can integrate with more powerful automation tools.
Step 3 – Prioritize Tasks with GitHub’s Labels and Milestones
Tracking work is essential in project management. GitHub issues are perfect for this purpose. But, it’s not immediately obvious which issues should take precedence over others. GitHub labels and milestones can help you prioritize issues and manage your workflow.
Milestones allow you to set deadlines for your key issues. You can also enter a detailed description of the milestone. Finally, you can track progress visually with GitHub’s completion graph feature.
Similarly, you can use labels to assign each issue’s priority level. GitHub allows you to customize labels. You can create priority labels such as:
Priority: Critical – for issues that need to be addressed ASAP.
Priority: High – for issues that should be fixed immediately after the critical issues.
Priority: Medium – for issues that need some attention.
Priority: Low – for entry fix issues that anyone can pick up.
You may also consider shortening the labels, such as Prio Critical or Prior Low and so on.
GitHub also lets you use multiple labels on the same issue. For example, you can repeat the same process for status labels. In this case, you can have Status: Available or Status: Accepted. Finally, you can also create labels for the issue type. For instance, Type: Bug, Type: Question, and Type: Maintenance.
So an issue may have the following combination of labels:
Type: Bug
Priority: Critical
Status: In Progress
This type of structure clarifies the issue, its priority, and the current status. All this information is available to your team at a glance.
Step 4 – Master Communication in GitHub
Many teams use communication platforms like Slack in addition to GitHub. This situation can result in parallel discussions about the same issue. It’s also challenging to keep track of all the information spreading within the organization.
GitHub offers multiple avenues for communication. For instance, users can leave a comment in the code review or pull request. However, try to limit communication to GitHub issues.
GitHub issues are more accessible to users than other communication avenues on the platform. For instance, developers may prefer to communicate in pull requests or code reviews. You’ll hardly ever find the marketing team on these pages. Instead, the marketing team is more likely to pitch its enhancement ideas in GitHub issues.
You can also direct specific conversations to GitHub Discussions. Here, the team can discuss common questions and answers or show off new features. Using the discussions feature for non-code-related discussions avoids cluttering your issues.
It’s also worth creating a unified policy and documentation about communicating on GitHub.
Finally, make use of GitHub’s feeds. This feature provides up-to-date information on what’s going on in your repositories, including who created a branch, closed an issue, etc.
Step 5 – Enhance GitHub Project Management with Integrations
GitHub has many helpful project management features. But it’s far from being a powerful project management tool. You might need a dedicated project management tool with more robust features and capabilities.
Fortunately, you don’t have to use a stand-alone tool. You also don’t need to switch between software to manage your GitHub project. Instead, the platform offers deep integrations with the most popular project management tools.
Wrike is an excellent example in this case. The tool offers two-way integration with GitHub. This means you can perform many GitHub actions, including creating issues, right from Wrike. Similarly, your Wrike comments appear in GitHub and vice-versa.

Other popular project management tools that integrate seamlessly with GitHub include Slack, Jira, and Asana.

