The Ultimate Manual to GitHub Permissions
GitHub is an exceptional version control tool designed to support collaborative development. However, keeping track of who can change your code isn’t always easy. GitHub permissions help you manage what people can do to your sensitive repositories, projects, and branches.
What are GitHub Permissions Anyway?
GitHub allows you to perform any number of alterations to your source code or account. For example, you can create a new repository, change a file, or change your organization’s billing information. However, what you can do on GitHub depends on your permissions.
GitHub permissions refer to the level of access a GitHub user needs to control a specific account or resource. For example, the ability to open and merge a pull request is a type of permission. In addition, an admin can grant individuals or teams specific permissions to control various GitHub resources and features. This set of permissions is referred to as a Role.
How GitHub Permissions Work
Not everyone should have full access to your source code or make changes to the code. For example, an external collaborator like a DevOps freelancer shouldn’t have access to the entire organization’s repositories. Ideally, the collaborator should only have access to the repository they are working on.
Equally, the freelancer should only have the minimum access they need to do their job. This access may include committing code, adding issues, and submitting pull requests. They shouldn’t be able to add new members to the repository, change the organization’s billing information, or delete the repository.
Similarly, a project manager may need access to the repository to monitor progress. However, they won’t be required to change the code. Therefore, they’ll need enough access to view the project’s progress, but not enough to change or contribute directly to the project.
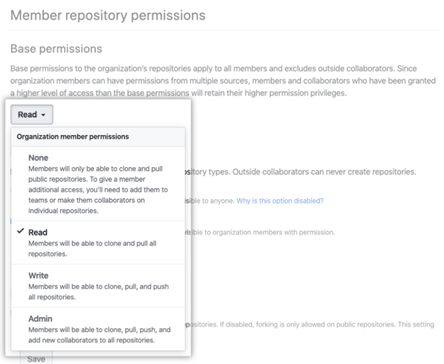
GitHub offers administrators control over what users can see and do. Admins have this control thanks to the permissions settings. Generally, GitHub offers three primary permission levels, including:
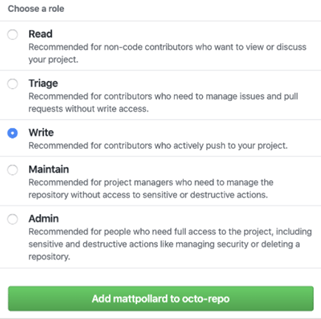
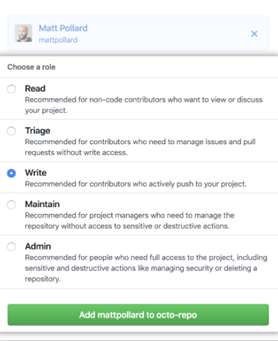
Read –This is the least access level. Users with this permission can read and clone the code. They can also create issues, review pull requests, and create new pull requests. This access is typically granted to non-code contributors.
Write – This permission allows users to issue commits in addition to Read access. The permission is ideal for active contributors, such as those who push to the project.
Admin – The Admin permission grants unlimited access to the repository and GitHub’s features. The administrator can also perform destructive actions, such as deleting a repository.
GitHub also offers more nuanced permissions in between the ones we mentioned above. These more recent permissions include:
Triage – This permission offers more access than Read but less than Write. For instance, users with this permission can apply or dismiss labels, unlike Read-level users. However, they cannot create, edit, or delete labels. Only Write users and above can do this.
Maintain – This option is recommended for project managers. It sits between Write and Admin access levels. For example, users in this category can edit a repository’s description, just like an admin but unlike Write users. However, Maintain roles cannot delete an issue. This privilege is restricted to the admin only.
Below are a few solid examples of how GitHub permissions work
Example #1 – Managing GitHub Permissions for Personal Projects
GitHub’s Personal Account allows you to manage your development projects. You are assigned the Owner role once you create your account. However, the personal account comes with three permission levels, including:
- Admin
- Write
- Read
You’ll be assigned Admin permission as the repository’s owner. This permission level gives you complete access to all GitHub actions and resources, including creating and deleting repositories.
Say you’d like to collaborate with other developers on your project. GitHub allows you to invite them to contribute to your repository. Additionally, you can assign the collaborators Write access. This permission level allows your partners to pull and push changes to your repository.
Finally, maybe you’d like to share your open-source project with others. However, you don’t want the public to contribute directly to your code. GitHub allows you to grant Read access in these kinds of situations. Now, anyone with the link to your project can see what you’ve been working on.
GitHub users with Read permission can only view your project. They cannot perform any action, including creating pull requests or commenting on commits.
It’s worth reiterating that your Admin status gives you total control of your GitHub account and projects. For instance, you can rename the default branch any time you wish. However, this privilege doesn’t extend to your collaborators with Write access. Instead, they can rename any other branch except the default.
Similarly, collaborators cannot invite others to join your repository. Only you can do this. Collaborators can only remove themselves from the repository.
Example #2 – Managing GitHub Permissions in an Organization
Naturally, organizations have more robust and nuanced access control requirements than personal projects. Therefore, the GitHub Organization Account offers more granular permissions than the personal account.
GitHub offers three types of roles at this level. These include:
- Owners
- Billing managers
- Members
The Owner role is designated for the admins in charge of the organization’s account. So, these users receive Admin permission by default. Finally, the Members role includes other employees or users collaborating on the organization’s code.
Besides the user roles, GitHub offers different permission levels for organizations, including:
- Read
- Triage
- Write
- Maintain
- Admin
Naturally, the Owner has the most access and permissions. This person can change the organization’s account settings, including profile or billing information. Additionally, this user can assign one or more administrators to control the organization’s repositories.
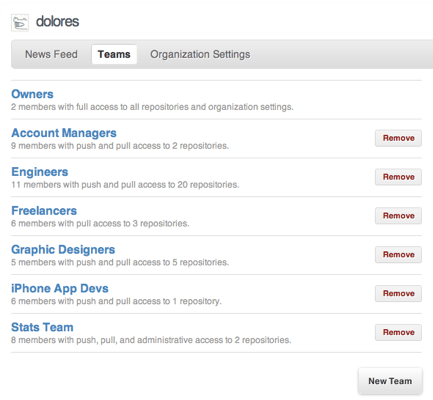
The best way to grant GitHub permissions in an organization is to group employees into teams. GitHub lets you create custom teams depending on your organization structure or project management framework.
For example, your GitHub team may include:
- Account Managers
- Engineers
- Graphic Designers
- Freelancers
- App Devs
You can grant collective permissions to members based on their team. For example, you can give freelancers Pull Only access. This means they can participate in private issues or wikis and access the code. However, these members cannot push to the repository.
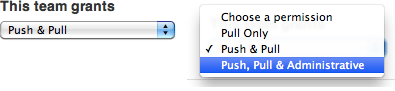
Similarly, you can grant more access to other members, such as the account managers. For instance, you may offer all team members in the account manager team Pull + Push permissions. This means that they can push code and participate more than their freelancer counterparts.
Finally, you can grant your Stats team even more permissions. For instance, Pull + Push + Administrative permissions let them do more than the account managers, including changing the repository’s metadata such as teams or private/public status.
Here’s how to go about using GitHub permissions to streamline your workflow.
Step 1 – Manage Permissions With GitHub Teams
This step applies to organizations. Manually adding members to repositories is tedious. Plus, it’s challenging to keep track of who has what permission. For example, you don’t want an employee having to write access to all organization repositories.
GitHub Teams is very useful for assigning members to relevant groups. This process allows you to grant permissions according to groups. It will save the headache of tracking individual employee access.
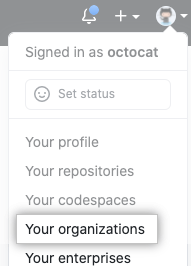
You can create your team by clicking your profile photo. Next, click Your organizations.
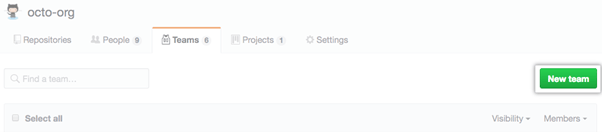
Click Teams.
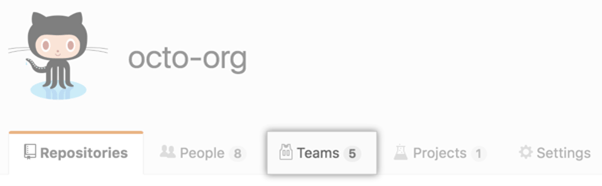
Then Click New Teams.
You can now assign your teams the appropriate permissions for their roles.
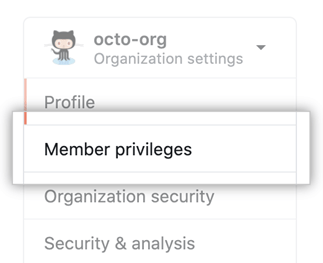
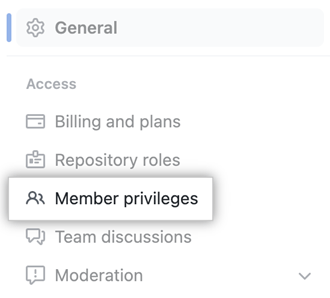
Also, be sure to change your team creation permission. GitHub lets all members create teams by default. So, navigate to the organization settings and click Member privileges.
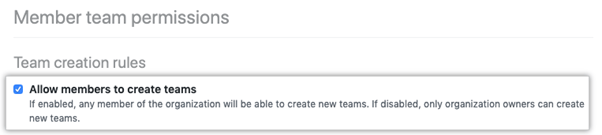
Finally, uncheck the box that allows members to create teams. You’ll find it under Team creation rules.
GitHub also offers a Team Maintainer role. This user acts as the admin of the team. The maintainer will have more access than other team members. They can also invite and remove members as necessary.
GitHub also offers additional team features worth exploring. For instance, you can hide a team’s visibility. This way, only people on the team or users with owner permissions can see who’s on the team. This permission is crucial for sensitive teams, such as those dealing directly with clients.
Step 2 – Limit the Base Permissions
Each new member who joins your organization gets a set of base or default permissions. For instance, every new member may be granted read, write, or admin permission for your organization’s GitHub.
Remember that members with write access can push to your project. Similarly, admins have total control of the account and repositories. You don’t want privileged access to fall into the wrong hands.
Therefore, GitHub lets you deny access to new members until you can manually assign the appropriate permission. We highly recommend this option. To restrict base permissions:
- Go to the organization settings.
- Next, click Member privileges under the Access menu.
- Go to Base permissions and choose None from the drop-down menu.
Step 3 – Limit Access to Your Repositories
Ideally, you want to limit repository access only to the members who need the access. GitHub offers private and public repositories. Public repositories grant everyone access by default.
Therefore, switching your repositories to private helps to limit access. To change your repository visibility:
Go to the main page and click Settings under your repository name.

Navigate to Danger Zone and click Change visibility.
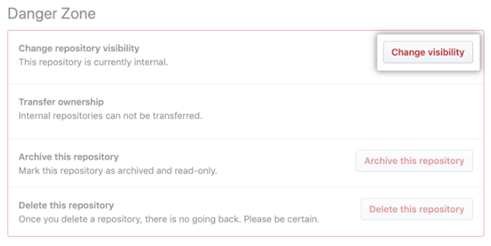
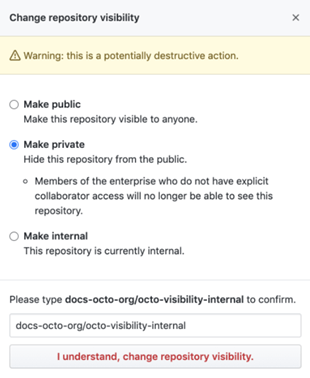
Finally, click Make private to limit who access to your repository.
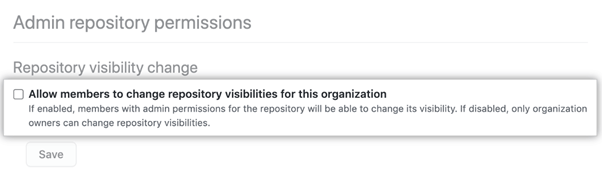
Again, remember to limit who can change the repository visibility. For instance, you can restrict this permission to owners or admins only. This precaution helps to protect your organization’s data from accidental or malicious leaks.
There’s also the option of setting your visibility to Internal. This option is perfect for restricting access to members of your organization.
Step 4 – Disable Forking
Forking is a helpful feature for experimenting with code. This feature allows GitHub users to duplicate the original repository. Then, the developer can work on the copy without affecting the original code. Despite its convenience, it’s almost always a good idea to disable or otherwise limit forking.
Keeping track of all the copies of a repository is difficult. There’s also no guarantee that a user won’t leak the code, intentionally or accidentally. It’s also better to stick with branches except for a few exceptions. For example, forking works when you’re creating a logically independent project. The independent project shouldn’t be merged with the parent project.
To disable forking permission:
Go to organization settings.
Navigate to Access and click Member privileges.
Uncheck the allow forking option under repository forking.
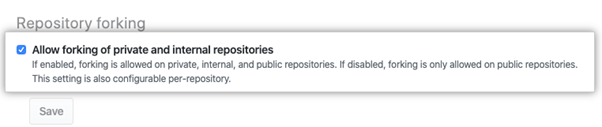
It’s also worth noting that a user’s fork is automatically deleted if you change their permissions. However, it’s best to disable forking altogether to avoid potential problems.
Finally, forking is automatically disabled for organization accounts. It’s still worth confirming this is the case. Another user with admin access may have enabled this feature.
Step 5 – Restrict and Monitor Permissions for Outside Collaborators
Naturally, GitHub allows you to onboard outside collaborators, such as freelancers, to your organization. Unfortunately, this capacity also introduces risks to your repository security. Outsiders with too much access may leak sensitive information or tamper with the organization’s code.
The best practice is to provide collaborators with the minimal access required to do their job. But, again, you can manage these permissions in your organization’s settings.
It’s also a good idea to implement additional security measures if you’ll be collaborating with outsiders. For instance, external collaborators will be required to enable two-factor authentication if you’ve enforced this rule in your organization.
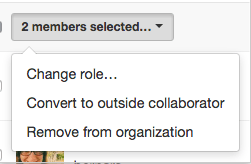
Step 6 – Remove Inactive Members
It’s good practice to remove inactive members from your repositories. This includes employees who’ve left the organization. Your security policy should also account for inactive users, including those whose contributions are no longer required. You can remove inactive members from your organization settings.
Please note that you’ll need to downgrade your organization’s paid seats in this case. Otherwise, you will still need to pay for the users you already removed. Finally, you can reinstate the user any time you require their contribution.
Finally, make sure the user deletes all local copies of the repository. Removing them from your repo doesn’t delete any local copies of the repository. GitHub also stores their data for up to three months after the removal. This feature makes reinstating their permission much easier.

