The Ultimate Manual to GitHub Hosting
When your organization has very simple web page building and hosting requirements, paying a premium for website building services may be unnecessary. Instead, consider using the GitHub Hosting service, which provides basic webpage building services in an easy-to-use hosting format.
Additionally, for those already subscribing to GitHub, the fee for hosting pages is part of the subscription price, potentially saving you quite a bit of money.
What Is GitHub Hosting Anyway?
GitHub offers a static hosting service through its GitHub Pages service. This is a service that allows you to make use of your HTML, CSS, and JavaScript files stored on the GitHub repository to create a simple web page. Use these files to publish a website in very little time.
In fact, GitHub will run the files through the build process for you, saving you even more time. You can have as much or as little involvement in the building of the website as you want.
GitHub allows you to host the website using GitHub’s domain of github.io.
GitHub Pricing
GitHub is a for-profit service hosted in the cloud where developers can store their code projects using the Git open-source system. Git allows you to manage all of the different versions of your coding projects, protecting sections of the code while you work on a related section.
You do not have to use GitHub to make use of Git, but GitHub provides an interface and a framework that significantly simplifies using Git.
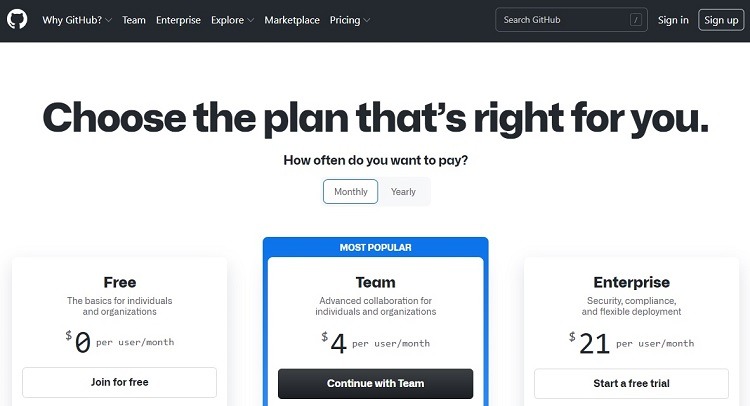
When you subscribe to GitHub, you can use GitHub Pages and Hosting with any of the three subscription tiers. There is no extra cost beyond the subscription price to make use of GitHub Hosting.
- Free: The Free tier is available to use for free with no trial period involved. Those who subscribe to the Free tier do not have to upgrade to one of the pay tiers in the future, unless they want to gain more features. The GitHub Pages service is available in public repositories only with the Free tier, although Free tier users can set up an unlimited number of public and private repositories in the Free tier. They just can’t use the private repositories with GitHub Pages.
- Team: The Team tier costs $4 per month per user on the account. With the Team tier, you receive all of the features found in the Free tier, along with web-based customer support and the ability to access multiple reviewers during pull requests. When using the GitHub Pages service in the Team tier, you have the ability to use it with both public and private repositories for GitHub Hosting.
- Enterprise: The Enterprise tier costs $21 per user per month on the account. Enterprise subscribers have the same features found in the Team tier, along with advanced security protocols and automatic version updates. Enterprise subscribers using the GitHub Pages service can use it with both public and private GitHub repositories.
How GitHub Hosting Works
Understand that GitHub Hosting is a minimalistic web hosting service. If you are looking for a web hosting service that can handle protocols like PHP and CMS, GitHub Hosting and Pages will not work for you.
GitHub Pages will work best for those who only need a few simple pages consisting primarily of text, photos, and graphical elements. GitHub Pages do support JavaScript, so those who have some experience coding with JavaScript can add some complexity to the site.
Ultimately, though, GitHub Hosting works best for simple sites and pages.
Types of GitHub Pages Supported
You can select among three different types of GitHub Pages.
- Project: When setting up and publishing a project website through GitHub Hosting, you’ll be connecting the site to a project that you’re hosting on GitHub. This differs from the other two types of pages, which will have an association with a subscription account on GitHub.
- User: Setting up a user website through GitHub Hosting associates the site with a personal user account. When you use your files to build the website or web pages, they will come from a repository associated with your user account.
- Organization: When using GitHub Hosting to set up an organization website, the files will come from the repository associated with the organization-wide account.
Example 1: Incorporate HTTPS on the Website
You may want to have your GitHub Pages website make use of HTTPS technology. HTTPS (hypertext transfer protocol secure) is a secure version of HTTP, which is the primary protocol that manages data sent to and from web browsers across the Internet. HTTPS adds an extra layer of security over the top of HTTP.
By adding HTTPS to your GitHub Pages site, you will add a layer of protection for the traffic at your website. Even if the request for the information from your website comes over HTTP, you can set up your GitHub Pages site to automatically change this to an HTTPS request.
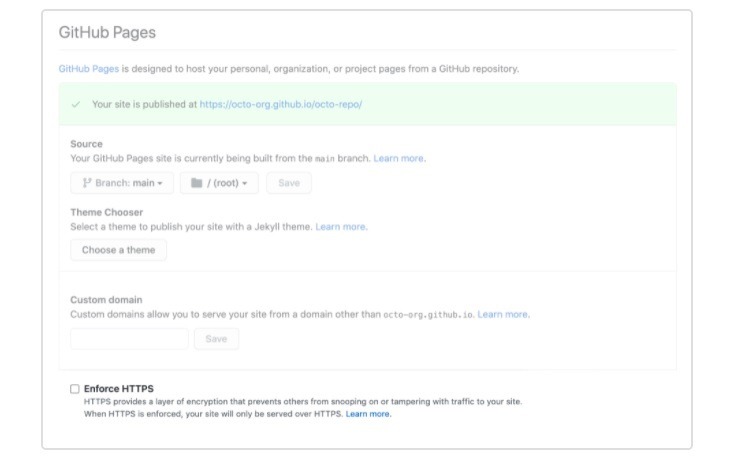
From the screen for the repository that hosts your website, click on Settings in the upper left corner. In the drop-down menu, click Pages.
From the GitHub Pages window, scroll toward the bottom. You can click on the Enforce HTTPS checkbox to activate this feature.
Troubleshooting HTTPS With GitHub Hosting
Understand that enabling HTTPS with your GitHub Hosting site only provides the highest level of security when you are using HTTPS to reference all of the images and elements of the site.
Perhaps you originally built the GitHub Pages for your site with HTML coding that references the elements of the page using HTTP. If you later decide to switch the site to HTTPS protocols, you may experience problems and errors from the HTML code that references HTTP.
Using both HTTPS and HTTP in the website coding in GitHub Pages is a mixed content configuration. Mixed content setups in GitHub Pages can cause errors.
To fix this potential problem, go back into the HTML coding and change all of the HTTP references to HTTPS references.
Example 2: Create a 404 Error Page
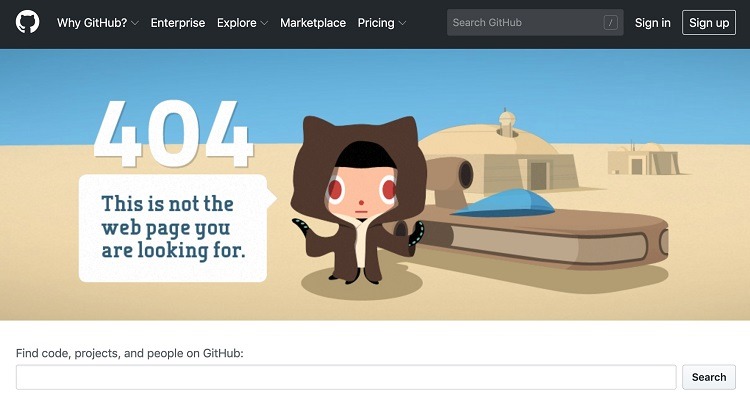
As you are building your GitHub Hosting site, you may not create all of the pages for your site immediately. When you are missing some web pages, you may want to create a custom 404 error page for these locations.
You probably are familiar with these error pages, as you may see them when visiting other websites. They have 404 displayed on them, sometimes with an explanation of the error. The HTTP 404 error is a part of the HTTP code that indicates the requested file or web page does not exist.
If you do not have a web page available when someone clicks on the nonexistent link, you could receive negative reflections in your search rankings. Websites often will generate a generic 404 error page for you when someone clicks on a nonexistent link or mistypes a URL address. However, having a generic 404 error page can affect your ranking negatively in search results.
The generic page may cause visitors to believe the site does not exist, meaning they may not click on your links in the future.
As the website developer, by creating your own custom 404 error page, it then can serve as a placeholder until you build the webpage you want to use. The custom 404 error page gives search engines the impression that the page exists on your site, so you don’t receive a negative impression from them.
Additionally, visitors will see the custom error page and know that your site is operational, but this particular page is not. Depending on how you build the 404 page, it could end up being something amusing that visitors will appreciate seeing. They may remember your website later too.
To add your custom 404 page, find the repository for your site on GitHub. Find the publishing source for the site and click on the Add File button. In the drop-down menu, click Create New File.
In the popup window, add 404.html to the text box. Scroll toward the bottom of the window, and select the process by which GitHub Pages should generate the 404 error page. Then click the Propose New File button.
Example 3: Use a Theme With GitHub Pages
GitHub Pages allows you to set up and use a theme with your website that ensures consistency in the design and look of the site from page to page. Jekyll is site generation software that contains support for GitHub Pages and Hosting, and Jekyll will generate your theme options.
Jekyll provides an automatic option for generating and using themes in GitHub Pages called Theme Chooser. To use Theme Chooser, start by navigating to the repository for the website on GitHub. In the upper left corner of the window, click the Settings button. From the popup menu, click on Pages.
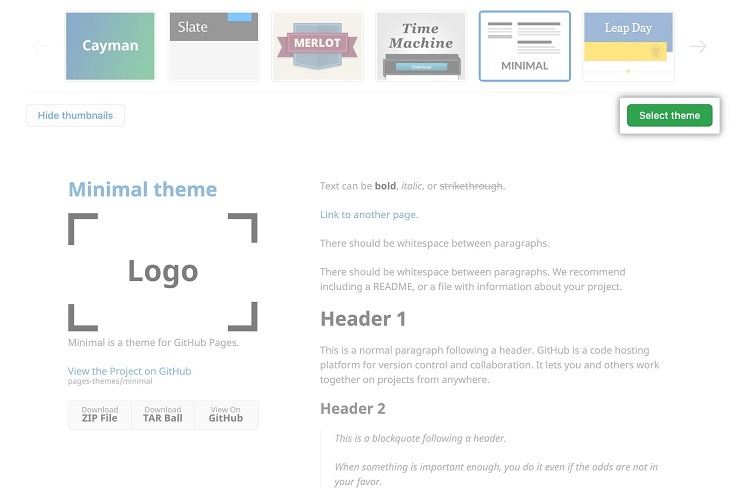
On the GitHub Pages screen, scroll down to the Theme Chooser section. If you already have a theme in use, you will see it listed here. To change the theme or to select a new theme, click the Change Theme or Select Theme button.
In the next window, you’ll see a series of themes from which you can select along the top of the window. Click on one of the themes in the upper section, and you will see information about it listed in the lower half of the screen.
Once you decide on a theme, click on it in the upper part of the window. Then click the Select Theme button. GitHub Pages will use Jekyll to make use of the selected theme throughout the website automatically for you.
How to Get Started With GitHub Hosting
Here are the steps you can follow to create an extremely basic website using GitHub Hosting.
Step 1: Create a Repository for the Site’s Source Code
The first step involves setting up the repository that will host the source code for the website. For GitHub Pages, either create a new repository or use an existing repository associated with the project. If you already have a repository for the code, you can skip this first step.
Inside the GitHub interface, click on the plus sign in the upper right corner to gain access to the drop-down menu. Select New Repository from this menu.
In the next window, you will need to select the owner of the repository. In the majority of cases, this means clicking on your user name. In the Repository Name text box, enter a name for the repository.
If you are creating user or organization GitHub Pages, as we described earlier, you will need to match the name of the user account name or organization account name. Always enter this name in all lowercase letters here, even if your account name has some uppercase letters in it elsewhere in GitHub.
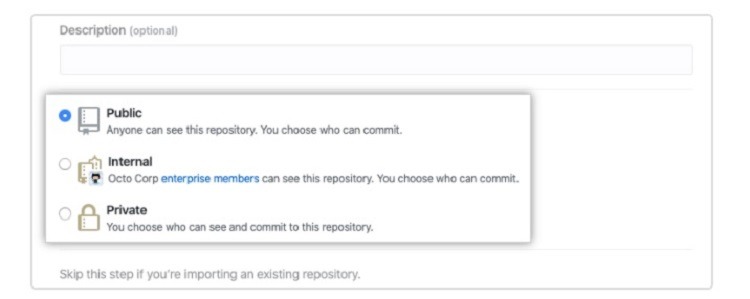
In the Description text box, you can type an explanation of the repository’s planned use case. This is an optional step.
Next, select the visibility for the repository, which gives you the ability to restrict who may access the repository. The options here include:
- Public: A public repository will allow anyone to see the website. You retain the ability to limit those who can make a revision (or what GitHub documentation calls a commit) to the files in the repository, though.
- Private: With a private repository, you can restrict who may access and change the files in the repository. In addition to your own access, you can invite others to gain access to the repository’s files. If you are using organization GitHub Pages, you can give certain other members of the organization access to make changes to the private repository as well. However, everyone who is a member of the organization’s account will be able to see the website.
- Internal: An internal repository option is only available in the Enterprise subscription tier of GitHub. Using an internal repository gives team members within the enterprise the ability to collaborate without exposing any of the information in discussion to the public, such as proprietary information. You can choose those within the team who can make revisions to the files in the repository and who can see the website.
Finally, click the Create Repository button to finish this step.
Step 2: Push Files to the Repository
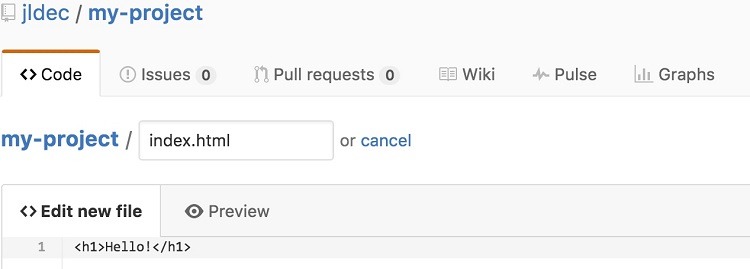
Add files to the repository that you will use as part of the website. Users will need an index.html file at a minimum in the repository. This is the basic file the GitHub Pages service uses to create the website.
Adding other files will give the website more features and functionality. These can be CSS, HTML, or image files.
All of the files you push to the repository will end up being part of the website.
Step 3: Configure the Publishing Source
Next, determine the publishing source you want to use for your GitHub Pages. Start by moving to the repository that contains the website files.
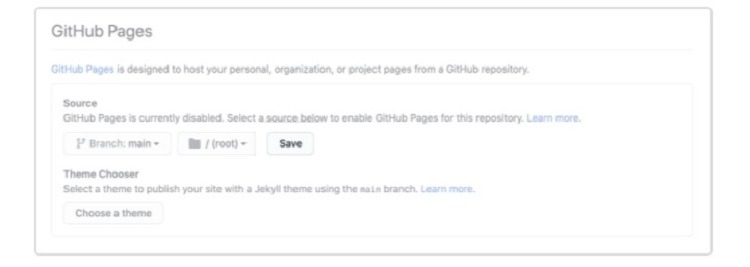
In the upper right corner of the window, click on Settings. In the popup menu that appears, click on Pages.
In the GitHub Pages window, click on the None drop-down menu and select the branch you want to use, which usually will be Main. (If you already have a branch associated with your GitHub Pages, you will see Branch in the drop-down menu button, rather than None.)
Next, click on the folder button to select the folder you want to use as the publishing source. Click the Save button. You then should see a message that tells you that GitHub published the site. It also will display a link to the site. Click the link to see the site.

