The Ultimate Manual for GitHub Container Registry
If you’re interested in learning about the GitHub Container Registry, you’ve found the right article.
The use of containers has really taken off since the launch of Docker in 2013. Containers help developers run and test their code in isolated environments, independent of any operating system or other dependencies.
The GitHub Container Registry is the next step for developers to effectively manage their container Images and functions as an extension to GitHub Packages.
What is the GitHub Container Registry Anyway?

A container registry is a repository or a collection of repositories used to store and access container images. These containers can be public or private. Container registries make container-based application development easier.
In the GitHub environment, the GitHub Container Registry improves how you handle containers within GitHub Packages. It allows you to manage who can access your containers with fine-grained controls, makes it easy to use a standard base image, and facilitates easier container sharing throughout the organization.
To understand how the GitHub Container Registry makes life easier for developers, let’s first look at what containers are, how they work with images, and how they work together to help developers continuously improve their code and deploy it with ease.
Containers
Containers solve the problem of application portability during the development, testing, and deployment phases.
As a software developer, imagine building, testing, and finalizing an application on your system, only for it to fail when you run it on a colleague’s system. Why does this happen?
The missing piece in this puzzle is dependencies. The application you built was designed under a specific environment, a certain operating system, libraries, and other system-dependent conditions.
Applications often fail to run as expected on other systems for various reasons, including a different operating system, variation in libraries, and an overall difference in the operating environment.
Containers solve this problem by packaging the application code and all its dependencies in a single isolated unit. These units allow developers to test different variations in their code simultaneously under different operating environments and share them with different teams for their contributions as needed.
Containers make cloud-native development possible due to their ease of portability and lack of external dependencies. Each container comes from a container image. How are containers and container images related? Let’s find out.
Container Images
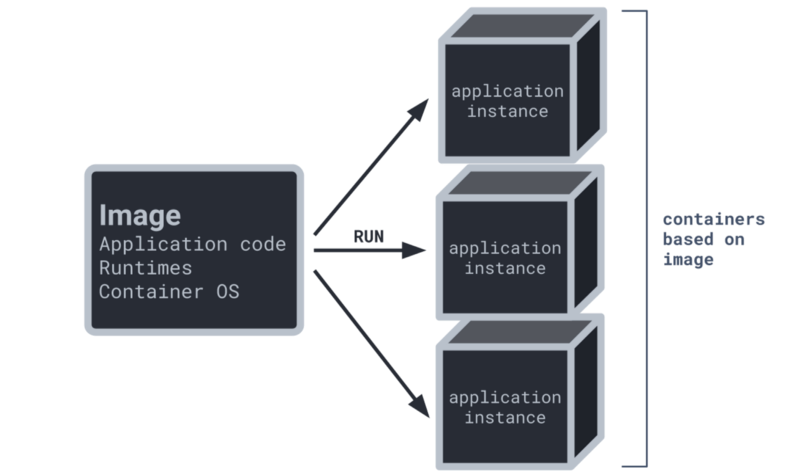
A container image is a blueprint for the application being developed. It is a static file with the original executable code. Think of it as a snapshot of all the dependencies and everything else that should be in our container when it is run.
You can create as many containers as you need from an image. Each container could eventually be a variation of the original code, operating environment, etc to test the application stability and make improvements as necessary.
How GitHub Container Registry Works
GitHub Container Registry allows organizations to host and manage their container images with fine-grain permissions. It can store both Private and Public container images as well.
It adds several features to GitHub Packages. Let’s discuss some of them in a bit more detail.
Store Container Images Under Your Organization
Using the GitHub Container Registry, you can create container images under your organization. This makes it easy to share those container images with your teams seamlessly.
Enhanced Security Permissions
Under the container registry, you can set separate permissions for the repository and the containers. In fact, you can now assign the least privilege permission for individual users to ensure better security for your container images.
Ability to Access Public Container Images Anonymously
Access any public image without authentication using the GitHub Container Registry.
How to Make the GitHub Container Registry Work For You
First things first, the package namespace used by the GitHub Container Registry is https://ghcr.io.
The Container Registry supports the following container image formats:
- Docker Image Manifest V2, Schema 2
- Open Container Initiative (OCI) Specifications
When installing or publishing a Docker image, the GitHub Container Registry provides support for foreign layers, such as Windows images.
Example 1: Authenticating to the Container Registry
To authenticate to the Container Registry within a GitHub Actions workflow, use the GitHub_TOKEN as a best practice for optimum security levels.
If your workflow is using a personal access token (PAT) to authenticate to ghcr.io, then you should update your workflow to use the GitHub_TOKEN.
For a more detailed guide on updating your workflows that authenticate to ghcr.io with a personal access token, see “Upgrading a workflow that accesses ghcr.io.” To learn more about the GitHub_TOKEN, see “Authentication in a workflow.”
- Generate a new personal access token (PAT) with the relevant permissions for the tasks you want to accomplish. If SSO is a requirement for your organization, you must enable SSO for your new token.
- Select the read:packages scope to download container images and read their metadata.
- Select the write:packages scope to download and upload container images and read and write their metadata.
- Select the delete:packages scope to delete container images.
- Save your PAT. We recommend saving your PAT as an environment variable:
$ export CR_PAT=YOUR_TOKEN
- Using the CLI for your container type, sign in to the Container registry service at ghcr.io.
$ echo $CR_PAT | docker login ghcr.io -u USERNAME –password-stdin
>Login Succeeded
Example 2: Pushing Container Images
In this example, we’re going to see how to push the latest version of our container image to our repository. We’ll refer to the image by IMAGE-NAME.
$ docker push ghcr.io/OWNER/IMAGE_NAME:latest
Similarly, this example pushes the 2.5 version of the image.
$ docker push ghcr.io/OWNER/IMAGE-NAME:2.5
The default visibility of every package you first publish is set to private. To learn how to change the visibility or set access permissions, we recommend having a look at “Configuring a package’s access control and visibility.”
Example 3: Pulling Container Images
Pull by digest
To make sure you’re always using the same container image, you can specify the exact image version you want to pull by the digest SHA value.
- To find the digest SHA value, use docker inspect or docker pull and copy the SHA value after Digest:
$ docker inspect ghcr.io/OWNER/IMAGE_NAME
- Remove image locally as needed.
$ docker rmi ghcr.io/OWNER/IMAGE_NAME:latest
- Pull the container image with @YOUR_SHA_VALUE after the image name.
$ docker pull ghcr.io/OWNER/IMAGE_NAME@sha256:51jf9a84u29hiasldj368498uhois8498hjs29hkuhs
Pull by Name
$ docker pull ghcr.io/OWNER/IMAGE_NAME
Pull by Name and Version
Here’s a Docker CLI example showing an image being pulled by its name and the 2.24.1 version tag:
$ docker pull ghcr.io/OWNER/IMAGE_NAME:2.24.1
> 6e35bd43cf78: Pull complete
> 0c58c2209aab: Pull complete
> gd45dd1aad5a: Pull complete
> eb6eb50c2d36: Pull complete
> Digest: sha256:fe4b135f133155b3824d8b1f62959ff8a72e9cf9e884d88db7895d8544010d8e
> Status: Downloaded newer image for ghcr.io/orgname/image-name/release:2.24.1
> ghcr.io/orgname/image-name/release:2.24.1
Pull by Name and Latest Version
$ docker pull ghcr.io/OWNER/IMAGE_NAME:latest
> latest: Pulling from user/image-name
> Digest: sha256:b3d3e366b55f9a54599220198b3db5da8f53592acbbb7dc7e4e9878762fc5344
> Status: Downloaded newer image for ghcr.io/user/image-name:latest
> ghcr.io/user/image-name:latest
Building Container Images
This example builds the hello_docker image:
$ docker build -t hello_docker
How to Get Started With GitHub Container Registry
You can start taking advantage of the GitHub Container Registry by following the steps below.
Step 1: Sign Up for a GitHub Account
Before anything else, you’d need a GitHub account to get the ball rolling. Go to GitHub.com and click the Sign Up button on the top-right.

Enter your email, desired password, and a username of your choice.
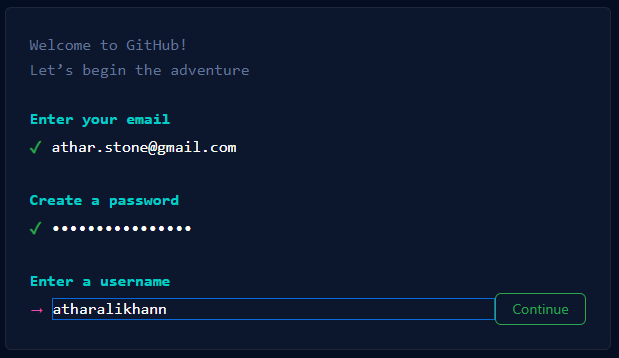
After a couple of account verifications, you’d be taken to your home screen.
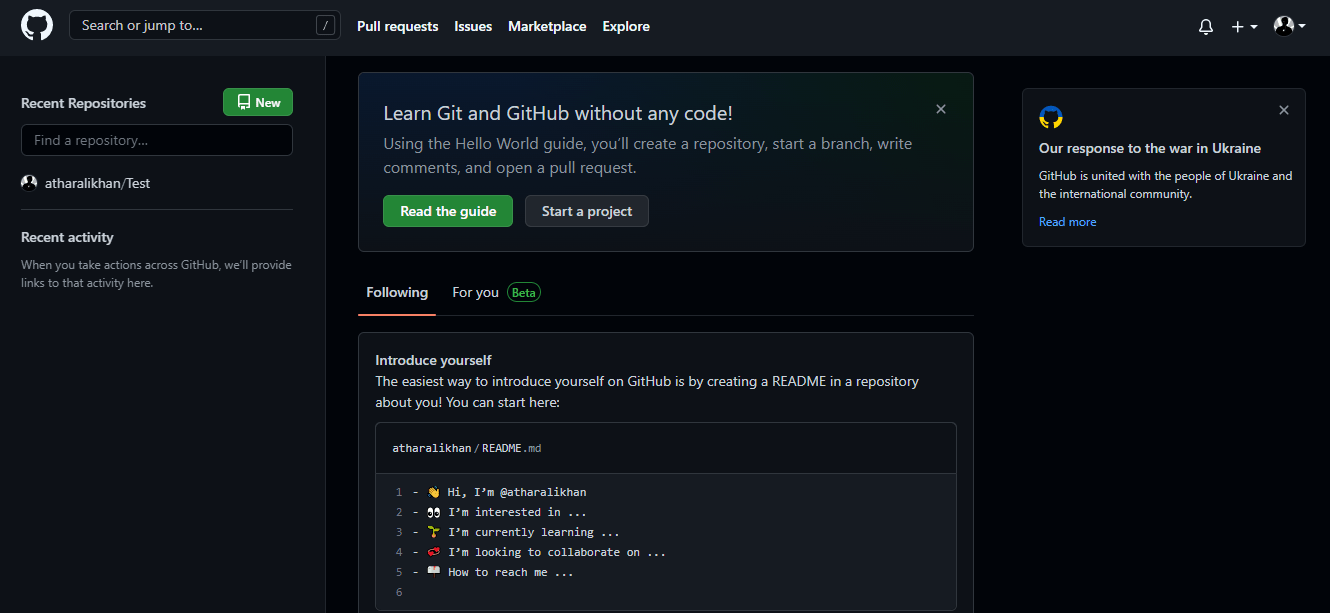
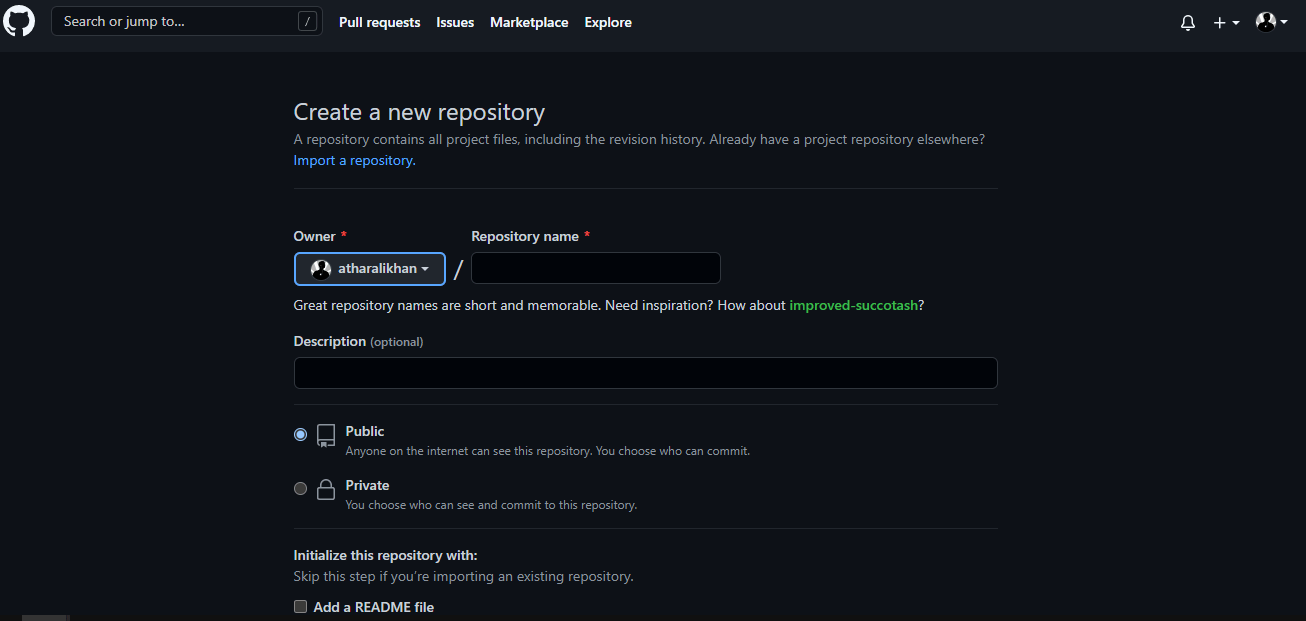
Step 2: Create a New Repository
Use the + button on the top-right to start the process of creating a new repository.
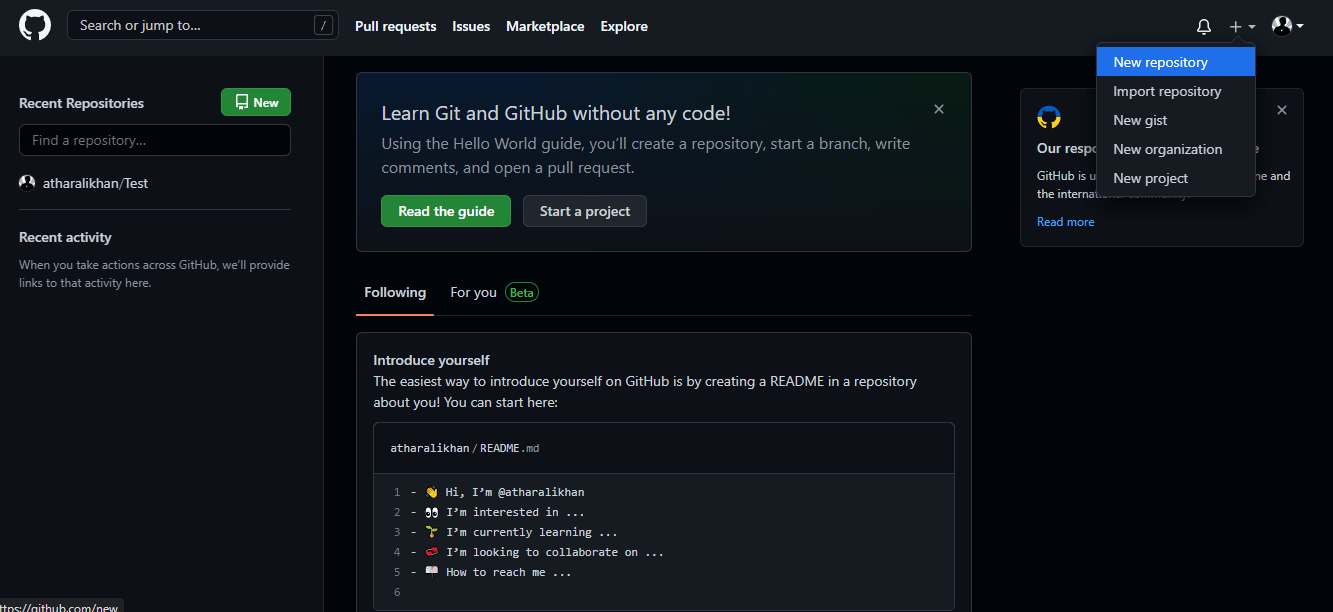
The repository is where all your application assets and container images will reside. Enter the required information about the repository such as repository name, privacy, etc, then click the Create Repository button at the bottom to complete the repository creation process.
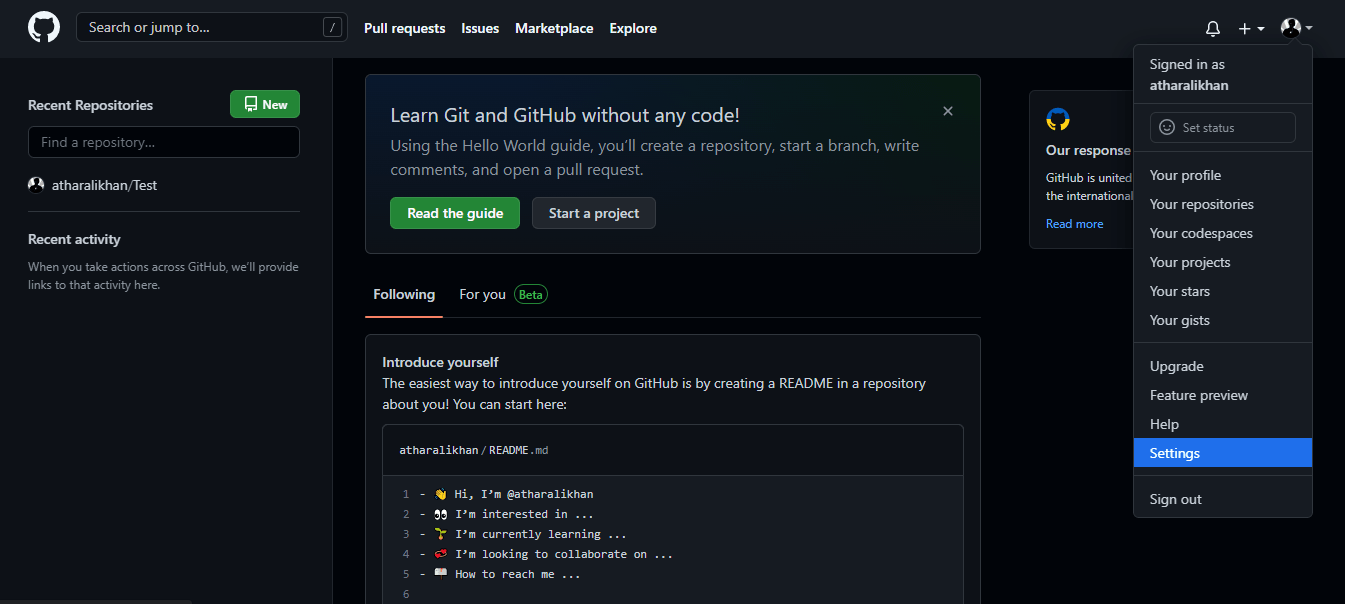
Step 3: Generate an Authentication Token
To connect with the GitHub Container Registry, you’d need an authentication token. Go to Settings from the top-right menu.
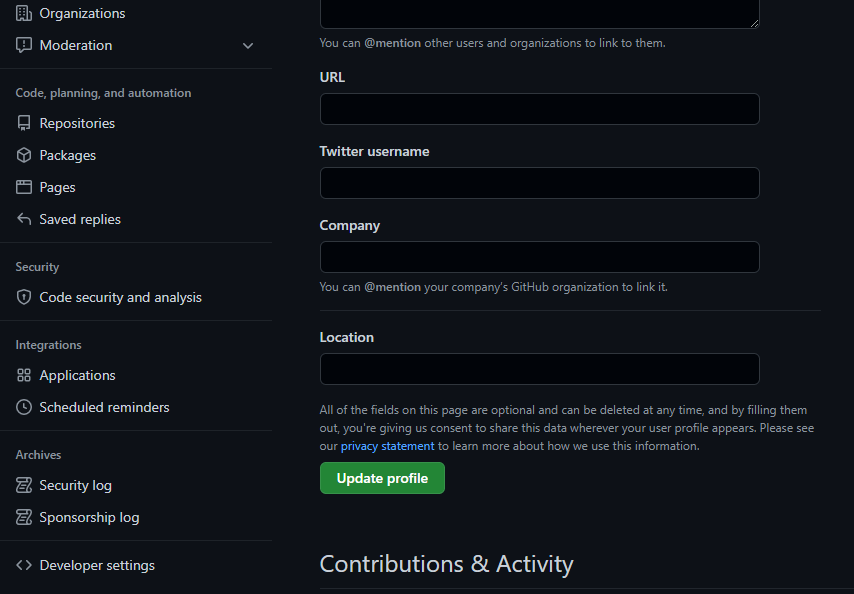
From the left menu, go to Developer Settings at the bottom.
Then finally, click the Personal access token button to reach the token generation page. Here, click the Generate new token button to generate the required token.
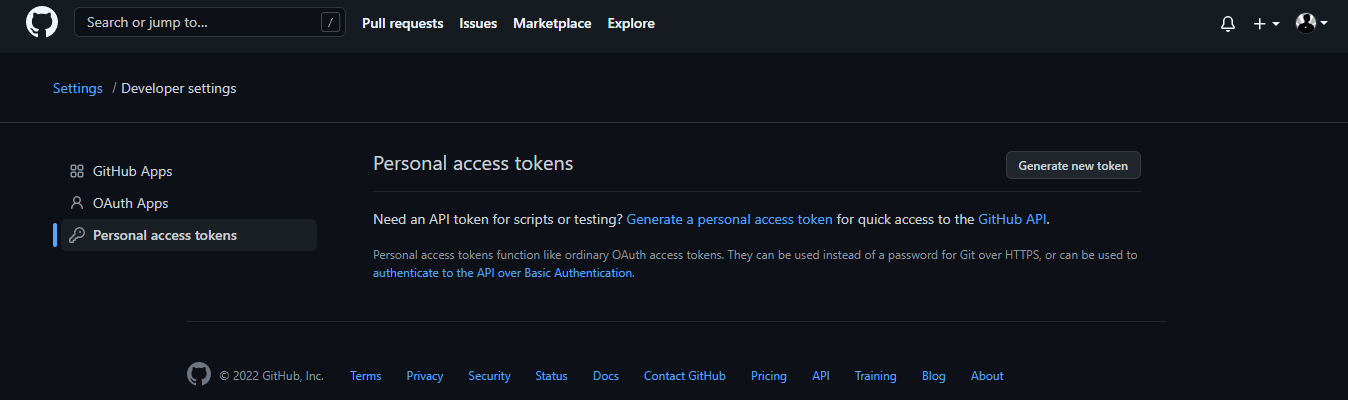
Once the token is generated, it will appear on this page. Copy it for use with Docker.
Step 4: Get Docker
Docker is a command-line package management tool. You can use it to perform a variety of functions on your repository. Download Docker from: https://docs.docker.com/get-docker/
Step 5: Build and Push the Image
Login to the registry using the token you generated earlier.
docker login ghcr.io -u username
To build and push an image, run a standard Docker build, tag it with the repo URL and repository name, and push the image.
docker build . -t ghcr.io/username/repository/image:version
docker push ghcr.io/username/repository/image:version
After a successful push, the package should be visible under “Packages” in your repository.

