The Best Way to Encrypt Your Email (Gmail and Outlook)
The average person checks their inbox 1-3 times every day.
This means that there are 1-3 opportunities for you to receive malware or other malicious emails. There might also be times where unauthorized people may read the private emails you sent to somebody else.
So what should you do to stop it? Stop opening emails that contain attachments? Or not use email at all?
Obviously not! Instead, what you should do is embrace email encryption.
Encrypting emails refers to the practice of disguising the content of your emails to protect them from unwanted and prying eyes.
Whether your email messages contain social security numbers or general contact information, you must make a point to encrypt all your emails – ones with sensitive information and ones without – to keep hackers away.
Read on as we give you a step-by-step rundown of how you can encrypt your email in Gmail and Outlook, along with other options that you can explore to ensure your privacy remains uncompromised.
How to Encrypt Your Email in Gmail
Google does have a standard method of encrypting emails sent on Gmail – it’s called Transport Layer Security or TLS.
The catch here is for this Gmail encryption to work, the person whom you’re emailing should also use a mail service that supports TLS.
The good news is that most major mail providers do support TLS. The bad news? There’s no guarantee that all the messages you send will remain private or available only to the intended recipient once it reaches the destination mail server.
Moreover, if you send emails to a mail server that doesn’t support TLS, your messages won’t be encrypted at all!
Precisely why you should follow our step-by-step below to encrypt your messages before sending out emails.
Method 1: Using Gmail’s Confidential Mode
Back in April 2018, Gmail unveiled a confidential mode that allows users to optionally activate confidential mode from within the composer.
Turning on this mode gave users the option to either set an expiration period for the email or a password that the recipient will have to enter to access the email’s content. It also disables the recipient from copying, pasting, downloading, printing, and forwarding the email.
Here’s how you turn on the confidential mode:
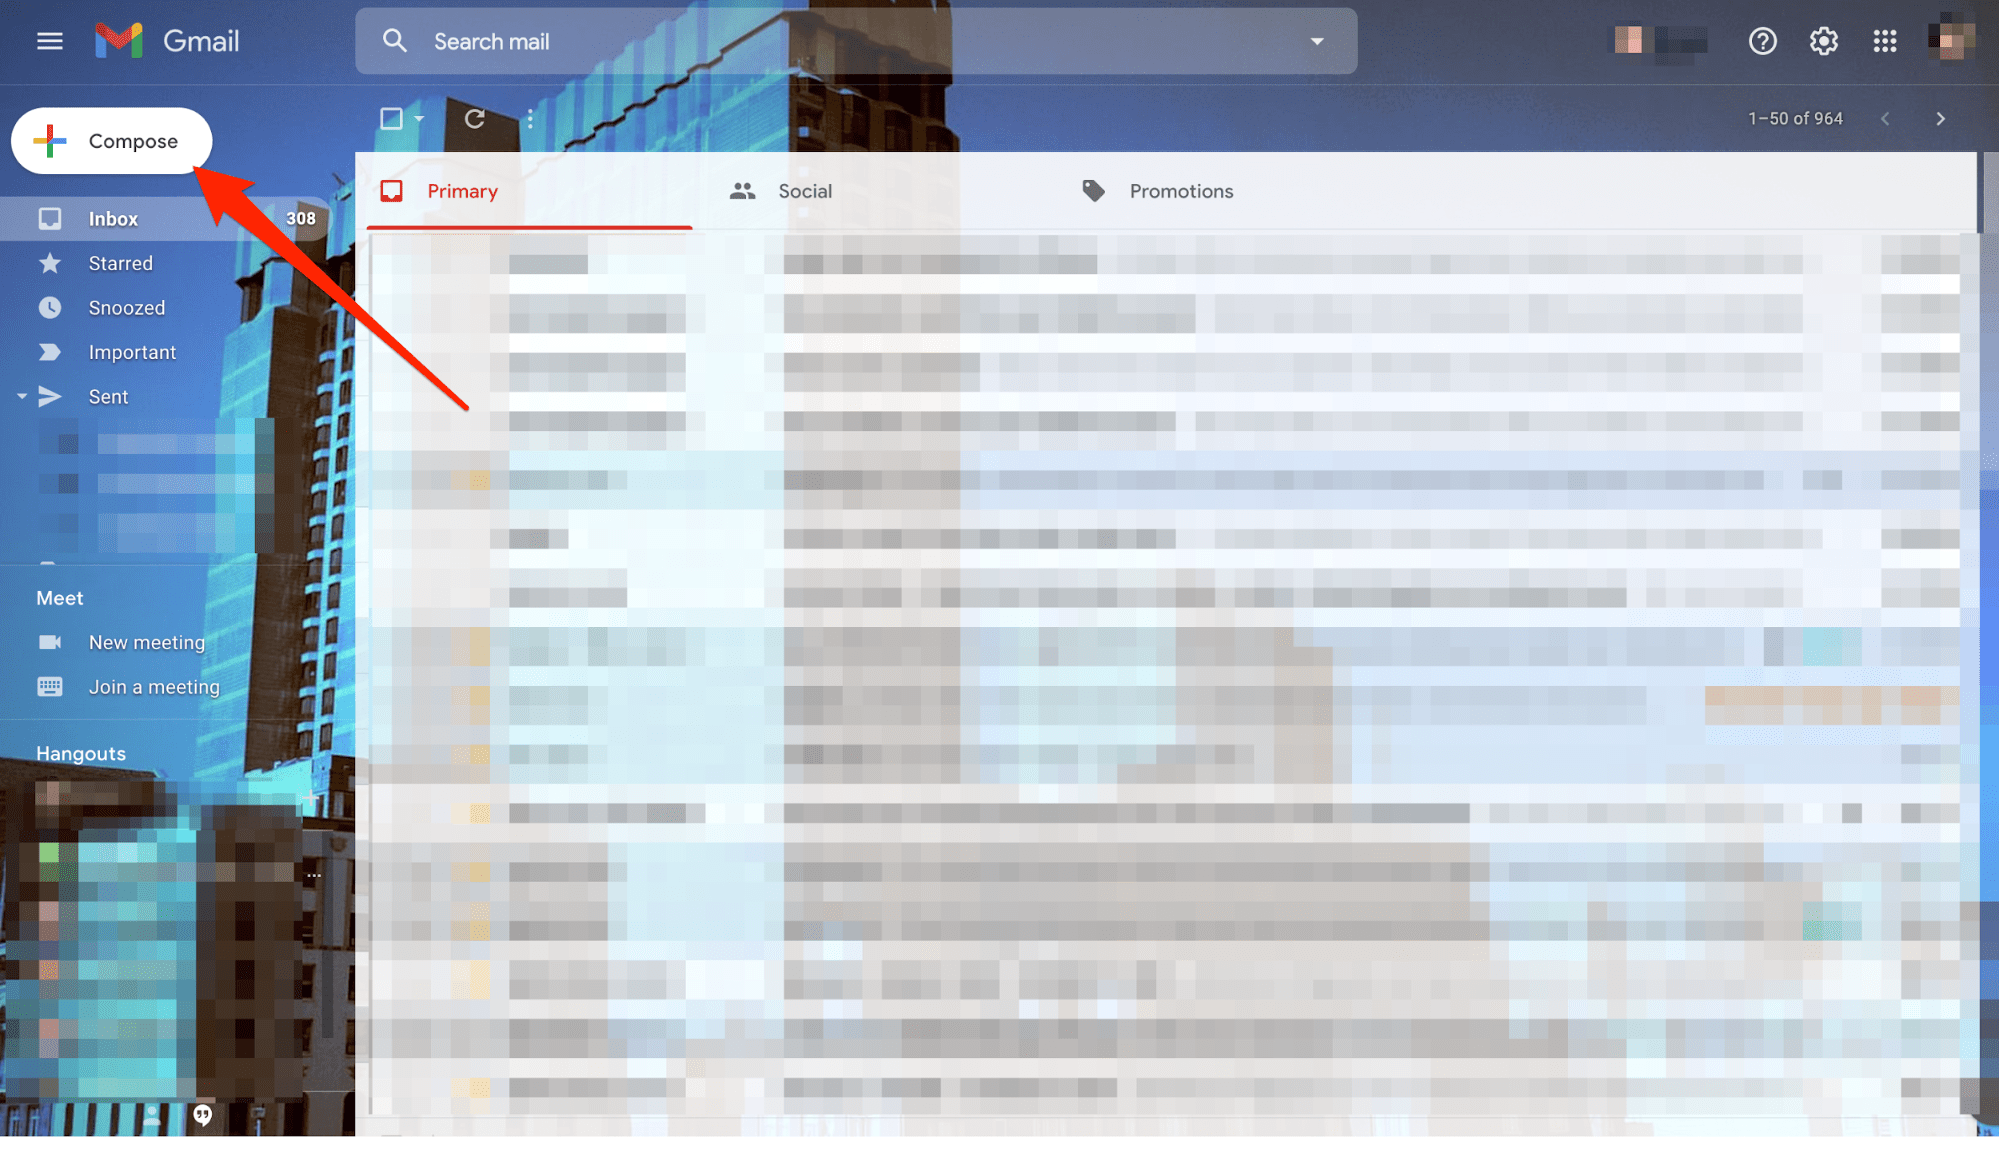
Step #1 Open your Gmail account.
Step #2 Click on Compose. A New Message pop-up box will appear.
Step #3 Click on the Turn confidential mode on/off icon located on the bottom right hand of your screen.
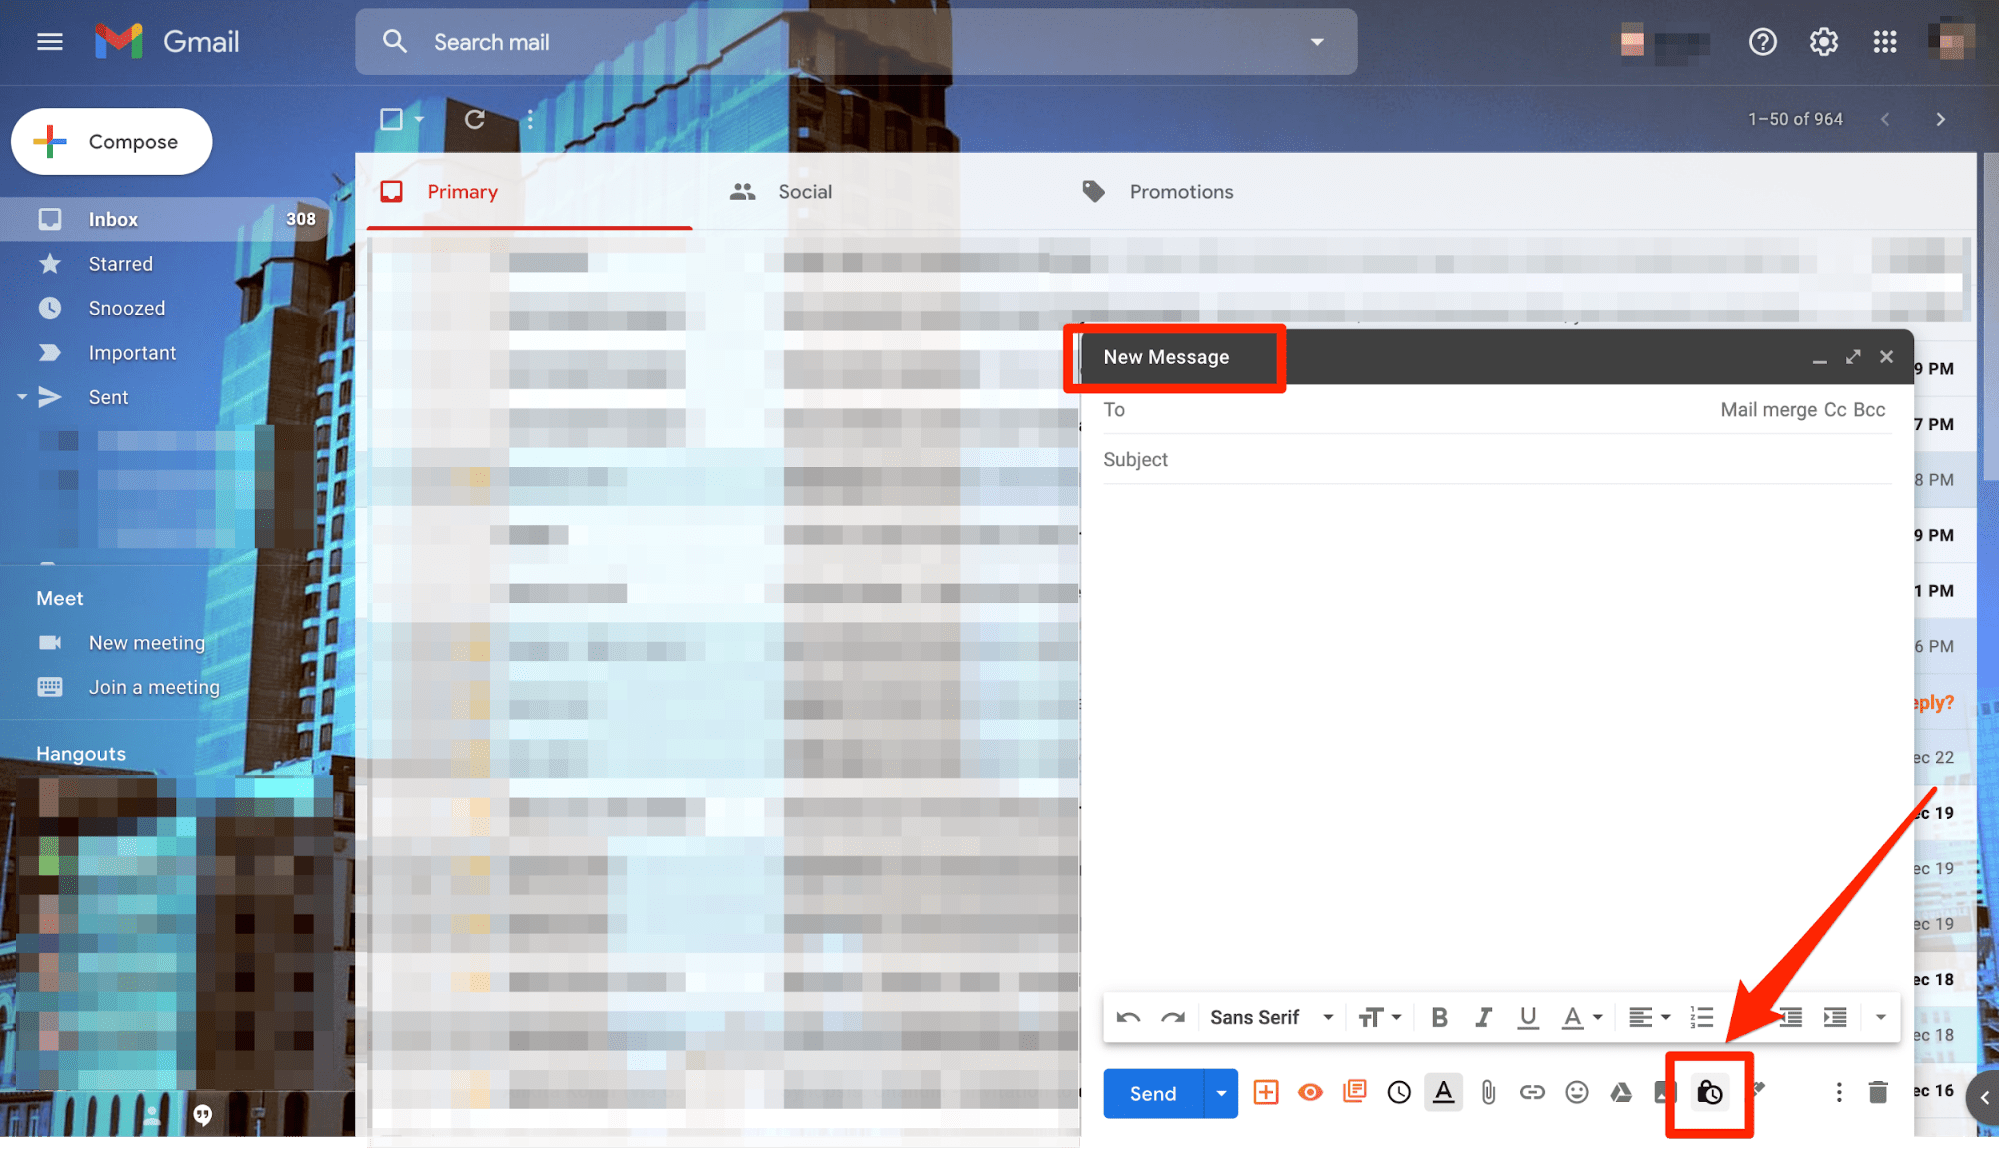
In case you’ve already turned on confidential mode, go to the bottom of the email and then select Edit.
Step #4 You’ll see options to set an expiration date and passcode for your email, which will affect both the message content and any attachments you send through Gmail.
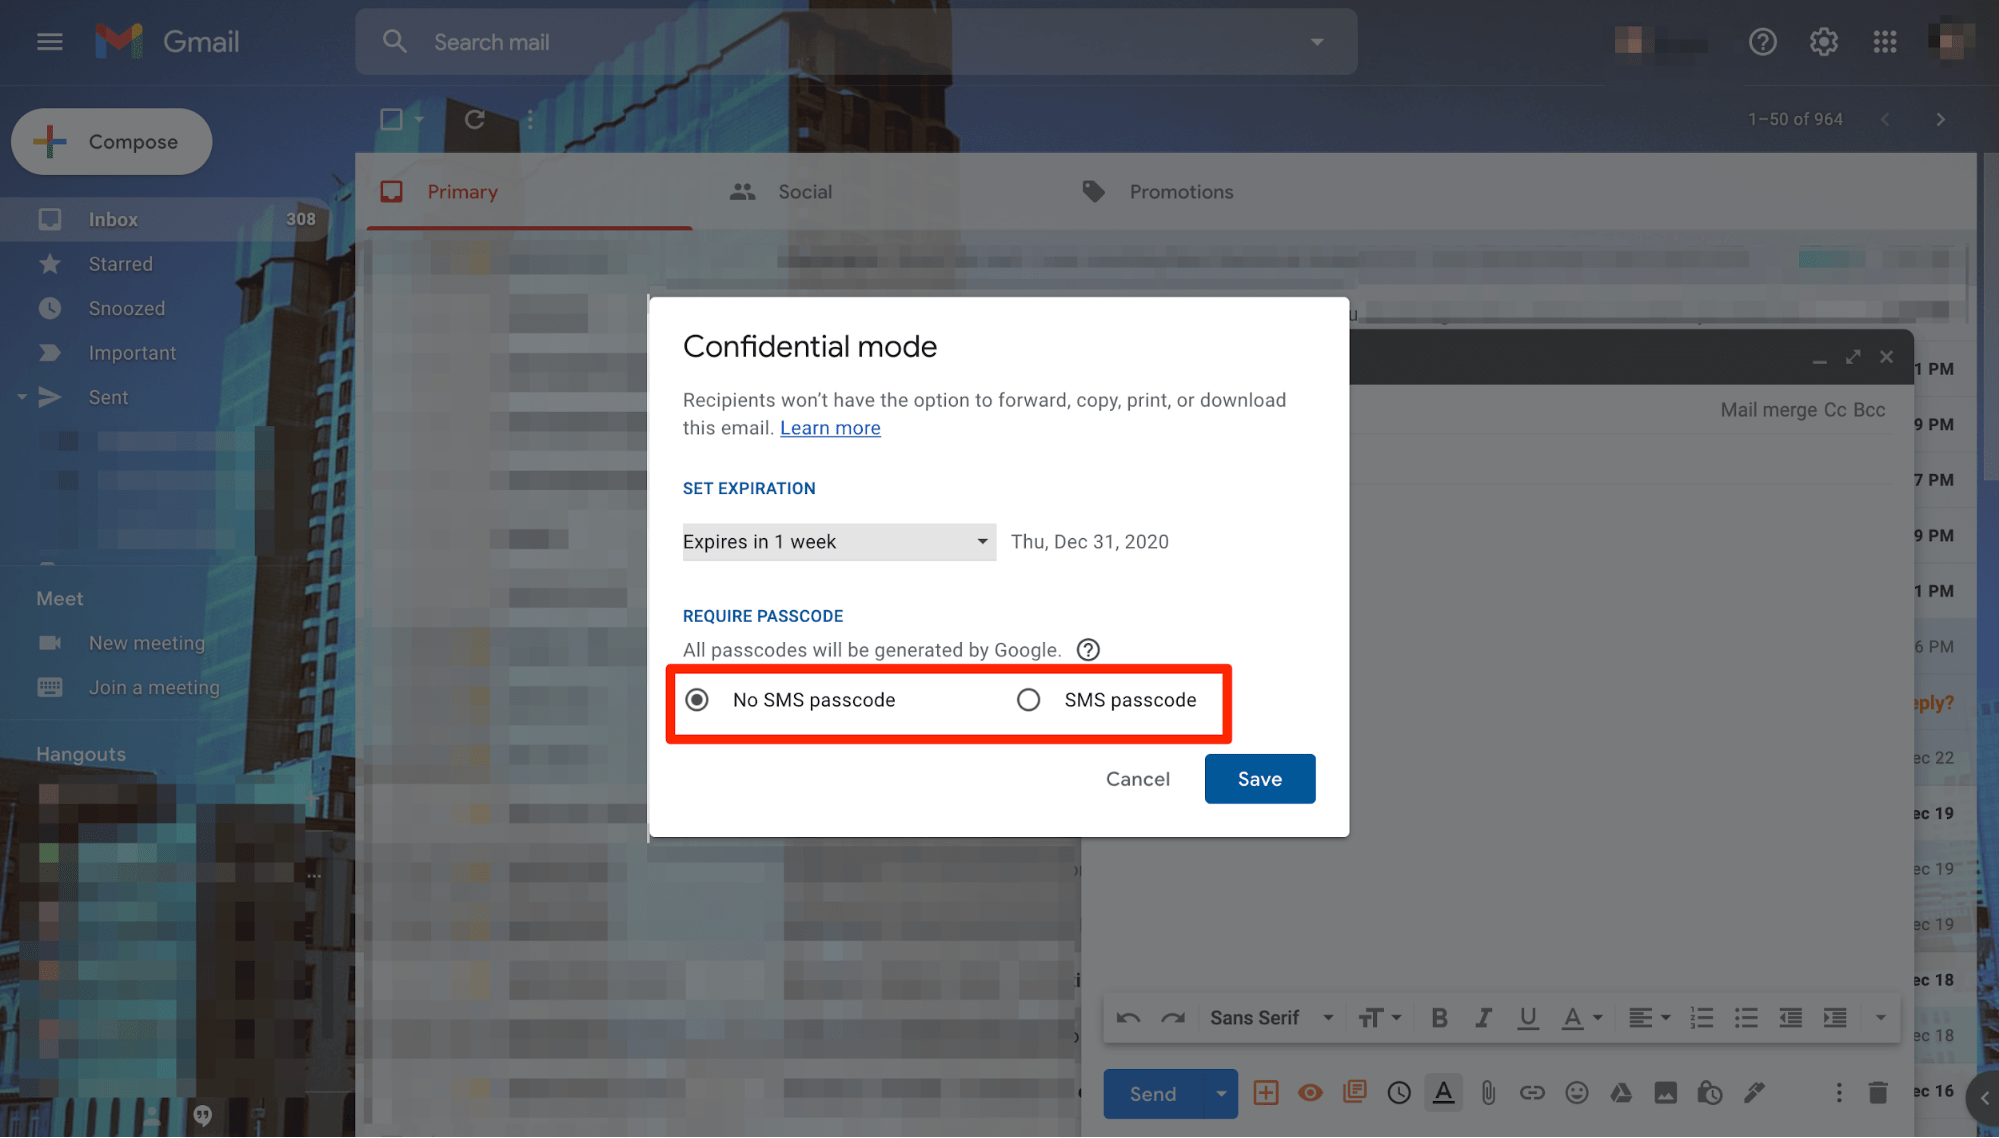
You’ll also have the choice to select between No SMS passcode and SMS passcode. ‘No SMS passcode’ allows recipients using the Gmail app to open the email directly; recipients who don’t use the Gmail app will be emailed a passcode instead.
In the case of SMS passcode, the recipient gets a passcode by text message. So make sure you enter the recipient’s right phone number (and not your personal number!) before hitting send.
Step #5 Select Save.
Method 2: Using S/MIME Encryption
There’s no doubt that Gmail’s confidential mode is good, but it’s also inadequate.
You send an email. The recipient receives it. Your email will disappear, right? Wrong.
Emails sent via Gmail aren’t private because Google can always read every message you send and receive. If you’re under the impression that setting an expiration date for your messages will keep communications ephemeral, we have (bad) news for you.
Yes, the email will disappear from the recipient’s inbox, but they remain in your Sent folder, which is again accessible by Google, along with hackers, governments, and anyone with even basic technical knowledge. Plus, taking screenshots of your emails is also possible, which is something that doesn’t expire.
This is why we recommend using a Secure/Multipurpose Internet Mail Extensions or S/MIME encryption solution. Here’s how you enable this:
Enabling S/MIME Encryption
Step #1 Go to Google Admin Console.
Step #2 Click on Apps and then G Suite. From the available options, select Gmail and then go to User Settings.
Step #3 Select the organization or domain on the left-hand side of the screen that you want to configure. Set Enable S/MIME encryption for sending and receiving emails box at the bottom of the settings window.
Step #4 Click Save.
Applying S/MIME Encryption
Step #1 Compose your email as you normally would.
Step #2 Add the recipient to the To field. You’ll find a lock icon towards the right of the recipient. This will vary depending on the level of encryption the recipient’s email service provider supports.
In case you have multiple users with varying encryption levels, the icon will show Gmail is held to the lowest encryption status.
Step #3 Click on the lock to change your S/MIMS settings.
The encryption levels are indicated by three colors:
- Green: This means your information is protected by S/MIME enhanced encryption and that the recipient of the email will need a private key to decrypt it.
- Grey: This means the email was sent with TLS encryption only. So while the email is protected when sent from one server to another, TLS will only work if the sender and the recipient both use an email service provider that supports TLS.
- Red: This means there’s no encryption protection when sending the email.
Remember, after you enable S/MIME, you and the recipient will have to exchange information called “keys“ to uniquely identify each other.
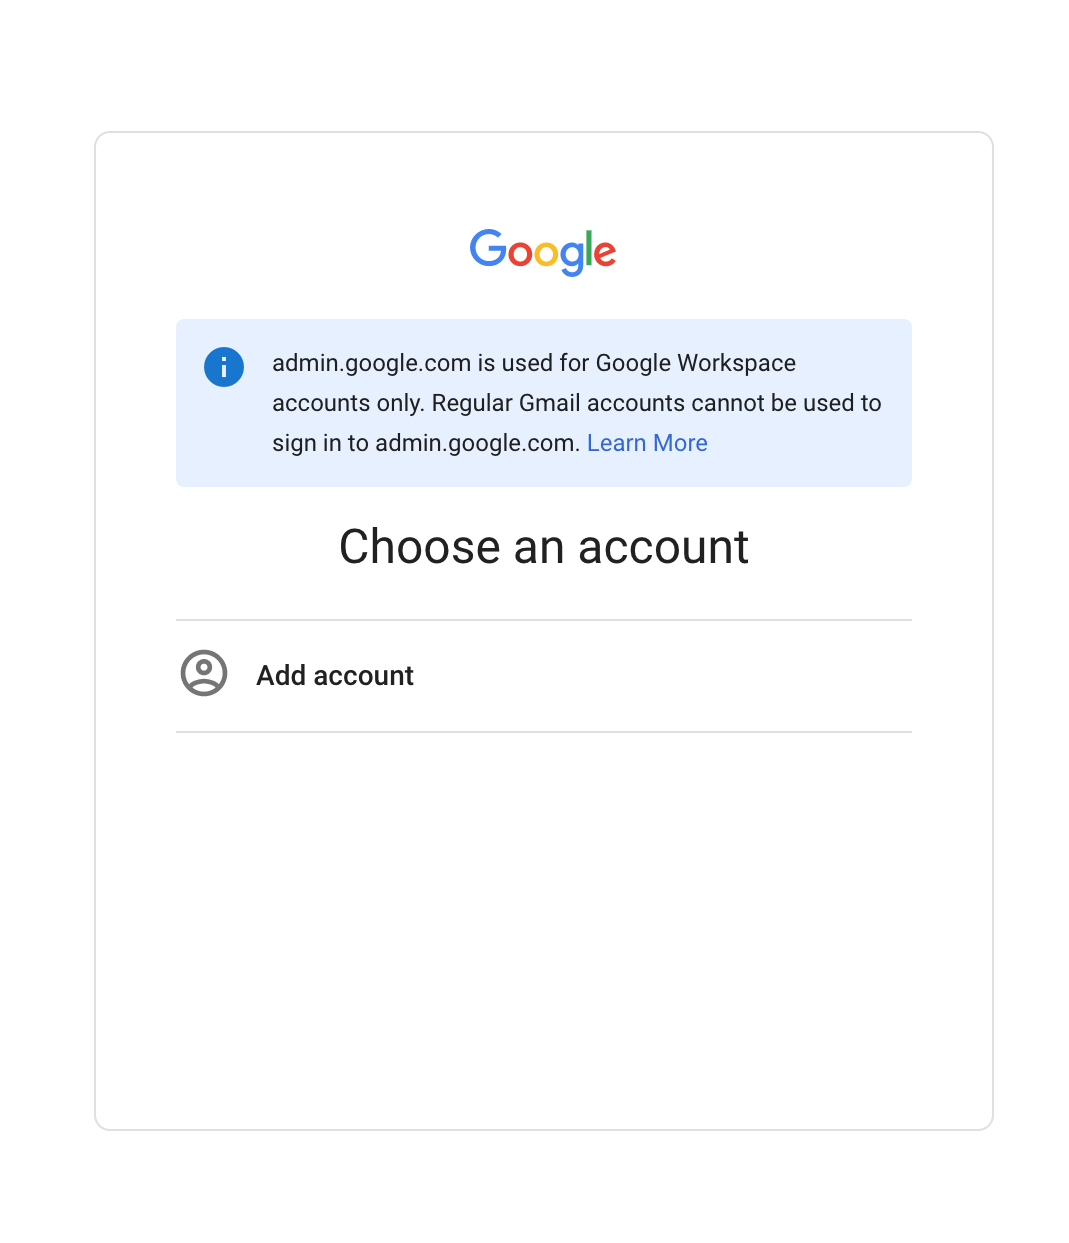
Disclaimer: This encryption method is limited to Google Workspace accounts only. In case you use a regular Gmail account, you won’t be able to sign in to admin.google.com.
Method 3: Using Third-Party Services
Google promised end-to-end encryption into Gmail back in 2014. Unfortunately, it remains undelivered.
As such, the only way to get that level of protection in Gmail is through third-party services like FlowCrypt, Mailvelope, and GNU Privacy Guard.
The services add an Encrypt and Send button to your Gmail inbox, allowing you to send encrypted messages using the PGP or Pretty Good Privacy standard (yes, it’s really called that!).
Each one of these third-party services is available as a Chrome or Firefox extension – all you need to do is download the app and customize settings.
How to Encrypt Your Email in Outlook
Microsoft Outlook is another popular email provider, especially among professionals, to communicate with clients.
In a bid to adapt and offer robust encryption, the platform supports three different email encryption methods – each of which we’ll discuss in detail below.
Method 1: Using Certificates to Encrypt Emails (S/MIME)
S/MIME encryption could be useful when both the sender and recipient have installed and shared the encryption certificates.
However, this encryption method isn’t widely supported.
It’s only available to an individual with an email account incorporated into Outlook. Even the intended recipient should be an Outlook user or use an email platform that’s compatible with S/MIME.
Here’s what you need to do to set up email encryption with S/MINE on Outlook:
Acquiring Email Encryption Certificate
You need to acquire an email encryption certificate for yourself, import it into Outlook, and then share it with the recipients.
Next, you have to verify that each intended recipient has purchased and installed an email encryption certificate into Outlook or other S/MIME compatible email platforms. This certificate must be shared with you as well.
Moreover, make sure you buy the email security certificate (also known as the S/MIME encryption certificate) and not the SSL certificate.
Importing S/MIME Encryption Certificate Into Outlook
Step #1 Open Microsoft Outlook. Select File on the top menu bar.
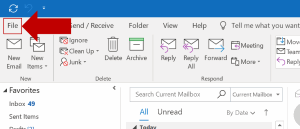
Image Source: Encyro
Step #2 Select Options. This will then open a new window.
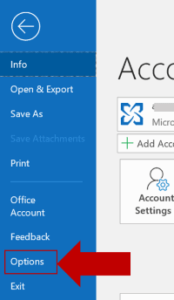
Image Source: Encyro
Step #3 Select Trust Center, followed by Trust Center Settings.
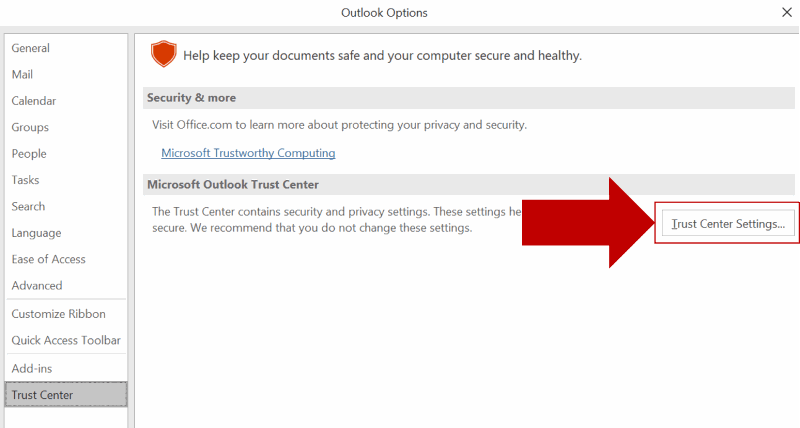
Image Source: Encyro
Step #4 In the left pane, click on Email Security.
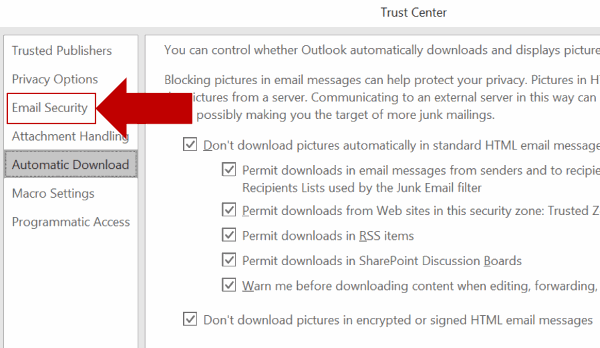
Image Source: Encyro
Step #5 Under the Digital IDs (Certificates) heading, click on Import/Export.
In case the certificate was already installed on your computer by your IT staff, click on Settings, and then select the required certificate from the displayed options. A new window will open.
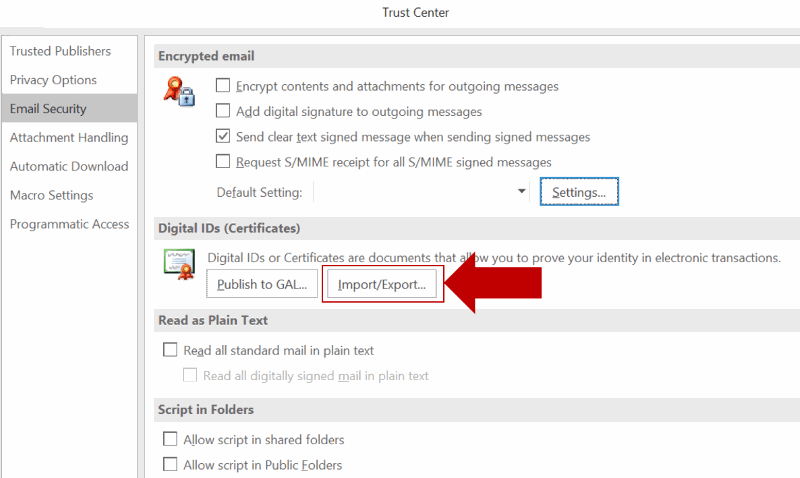
Image Source: Encyro
Step #6 Select Import existing Digital ID from a file, and then click on Browse to explore all the certificates file options.
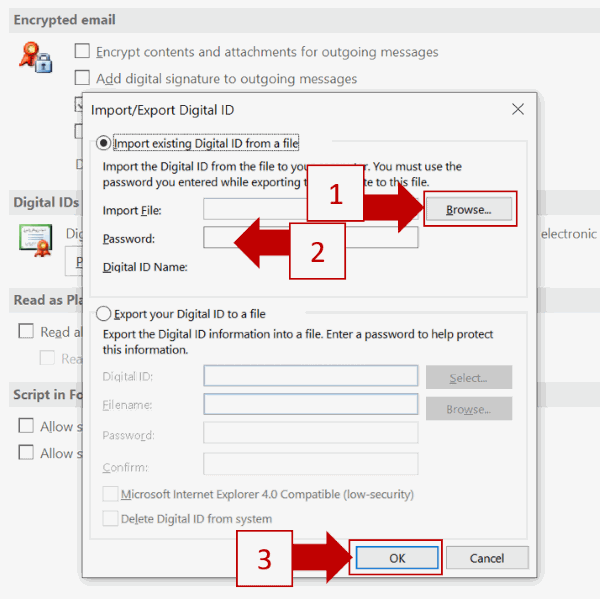
Image Source: Encyro
Finally, enter the password associated with the certificate file, and select OK.
Step #7 A pop-up window will show you the security level is set to Medium – and it’s best to leave it at that. The other option is to set it at High, but it’ll involve you entering the certificate password more often.
Click OK.
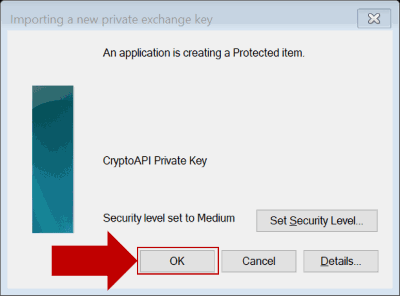
Image Source: Encyro
Step #8 You might see additional warning pop-up boxes about certificate validation. If you still wish to use the certificate anyway, select Yes to continue.
Step #9 The Import/Export window will close automatically.
Step #10 Click OK on the Trust Center window. This will close the window automatically.
Following the above steps will allow you to import your certificate. Remember, your recipients will have to obtain and import their own certificates too.
Sharing Digital Certificate With Recipients
The final step is to share the certificate by sending a digitally signed message to each recipient to whom you intend to send encrypted emails.
Step #1 Compose a new email on Outlook.
Step #2 Click on Options on the New Message window.
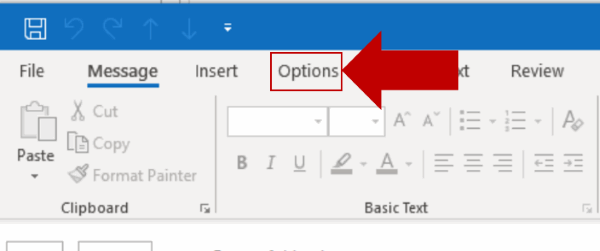
Image Source: Encyro
Step #3 Select the tiny icon right next to More Options from the top menu bar.
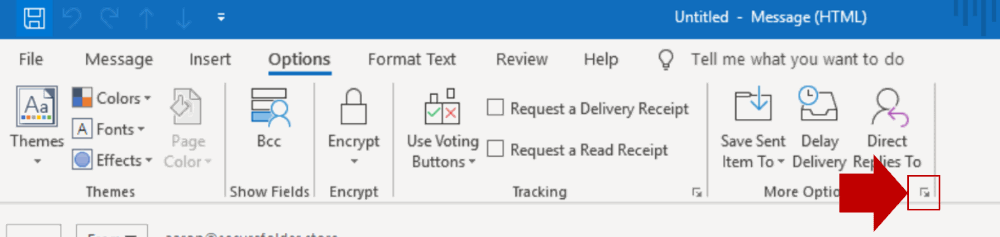
Image Source: Encyro
Step #4 A new Properties window will open. Select Security Settings. A Security Settings pop-up window will open.
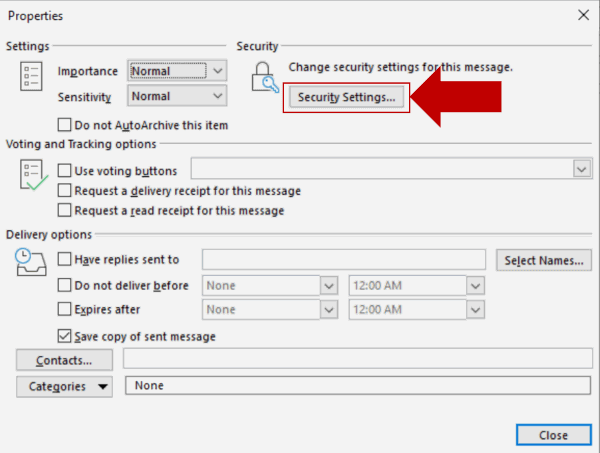
Image Source: Encyro
Step #5 Click on Add a digital signature to this message. You can alternatively select Change Settings to see the certificate used for signing the message. Make sure it’s the same certificate that you imported recently.
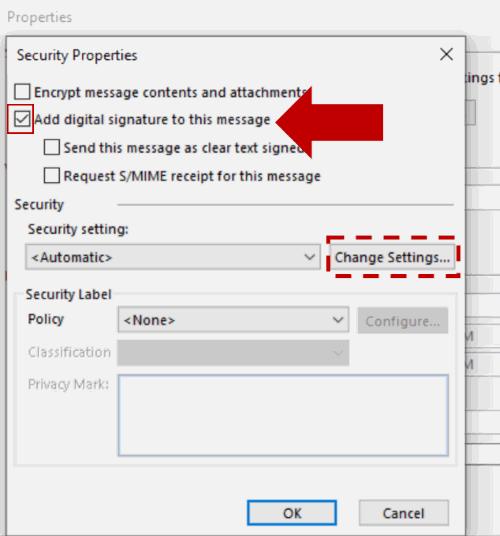
Image Source: Encyro
Click OK, and then close on the Properties window.
Step #6 In the To field, add the email addresses of the intended recipients. You can also tell them how to add your certificate to their contact data in the message field and share their certificate with you.
After following the above steps, the public key part of your certificate will be forwarded to the intended email recipients, allowing them to encrypt a message they send you.
Only you can decrypt the encrypted email message using your private key, which will be imported within your Outlook application.
Sending Encrypted Emails Using S/MIME in Outlook
For sending an encrypted message in Outlook, you need the public key portion of the recipient’s certificate and add their certificates to your contact data. To do this, you’ll need to do the following:
- Adding Recipient’s Certificate to Contact Data
Step #1 Open the digitally signed message sent by the recipient.
Step #2 In the From information for the message, right-click on the sender’s name.
Select Add to Outlook Contacts, and in case the sender is already in your contacts, you can edit or update the contact. A contact card will open.
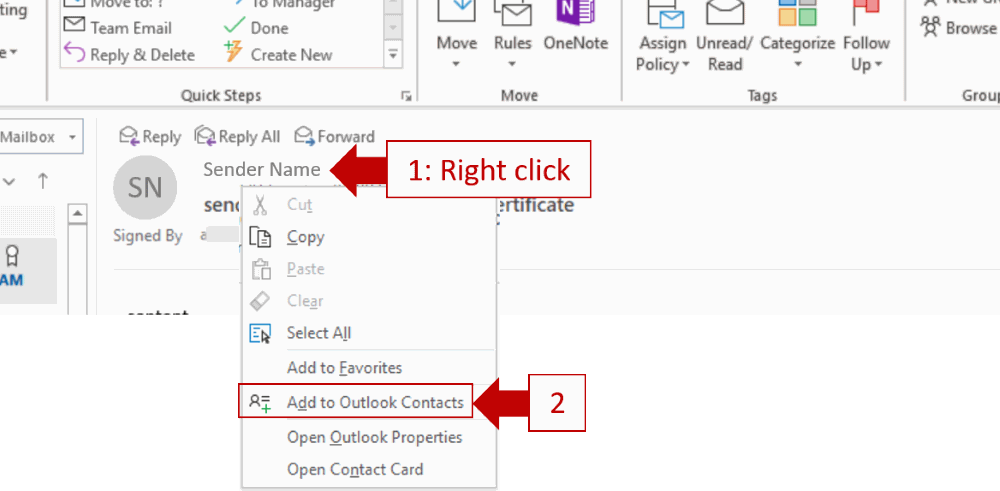
Image Source: Encyro
Step #3 Select Certificates in the top ribbon in the contact card. You’ll see a full list of certificates, which is where you can select the certificate you want to use.
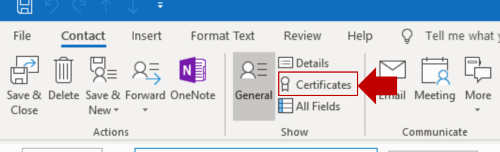
Image Source: Encyro
- Sending Encrypted Messages
Step #1 Compose a new message. In the new message window, select Options.
Step #2 Click on the little icon next to More Options.
Step #3 A Properties window will pop-up. Select Security Settings. A Security Properties window will open.
Step #4 Select the checkbox next to Encrypt message content and attachments. Select OK on this window, followed by Close on the previous window.
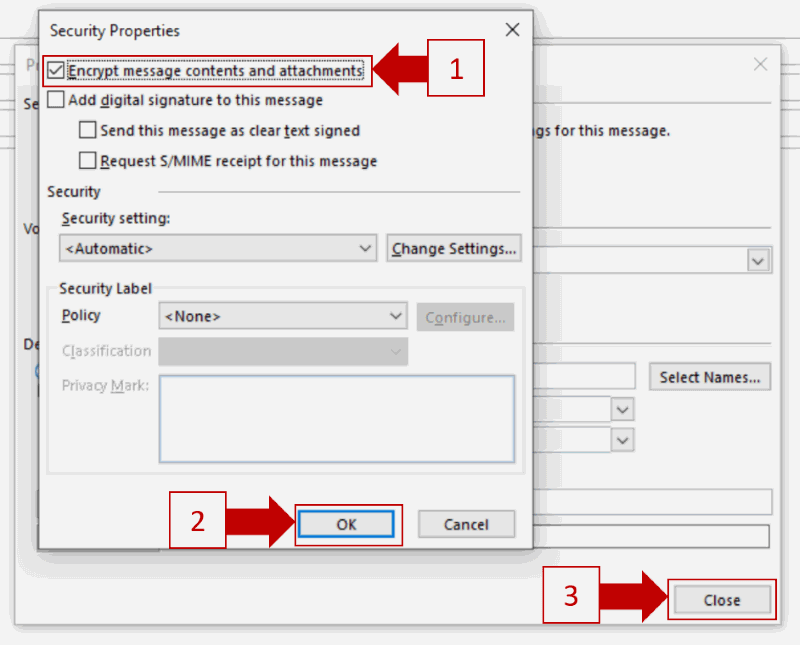
Image Source: Encyro
This won’t encrypt your message subject, though, so avoid including any sensitive material in the subject line. You can then (finally!) press Send.
Method 2: Using Office 365 Message Encryption (OME)
Before we get to the step-by-step instructions, keep in mind the following two pointers:
- OME only works with a Microsoft email account. Therefore, you must set up an email account that’s a part of an Office 365 subscription.
- The recipient should be ready to do a couple of extra steps to decrypt your encrypted email. They will have to request a special code and then manually copy and paste the code into a box on the web page to see the email.
Now, let’s get to the steps:
Initial Setup (Account Upgrade)
You’ll have to upgrade your Office 365 subscription to a plan that includes Office 365 Message Encryption or OME.
Your options include Office 365 Enterprise E3 or 85, Microsoft 365 Business, Microsoft Enterprise E3 or E5, Office 365 A1, A3, or A5. Office 365 Government G3 or G5 are other options.
Subscription Plan Upgrade
Step #1 Sign in to your Office 365 administrator account.
Step #2 Select Admin from the option tiles displayed. Follow this by clicking on Billing, and then Subscriptions.
Step #3 Select Switch Plans to upgrade to a higher plan.
Once you’ve finished upgrading, verify the availability of OME. For this, sign in to your Office 365 subscription account. While composing a new message, make sure the Encrypt button is enabled and not greyed out.
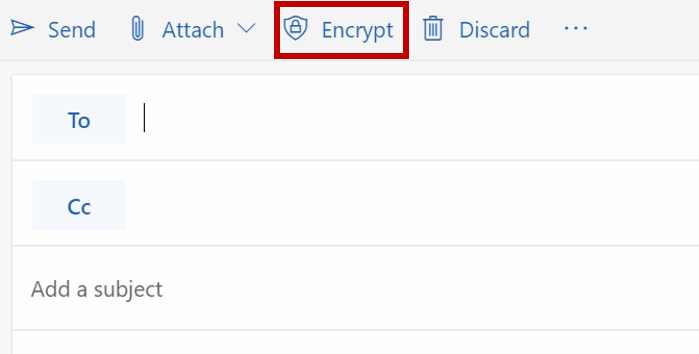
Image Source: Encyro
Sending Encrypted Emails
Start composing a new email. Click on Options in the top menu bar and then click Encrypt.
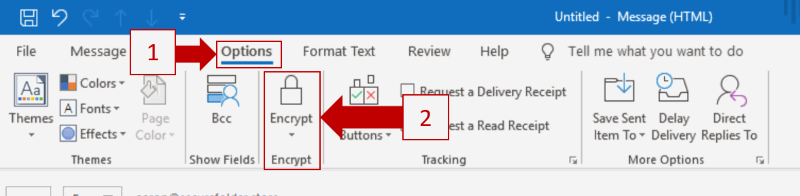
Image Source: Encyro
You should see a message informing you that the encryption is applied to the email. Once done, finish composing your email and hit the Send button as you normally would.
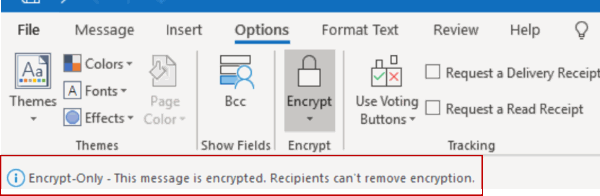
Image Source: Encyro
Reading Encrypted Emails
Your recipient will receive your email encrypted using OME. To read it, they’ll have to click on the Read the message button.
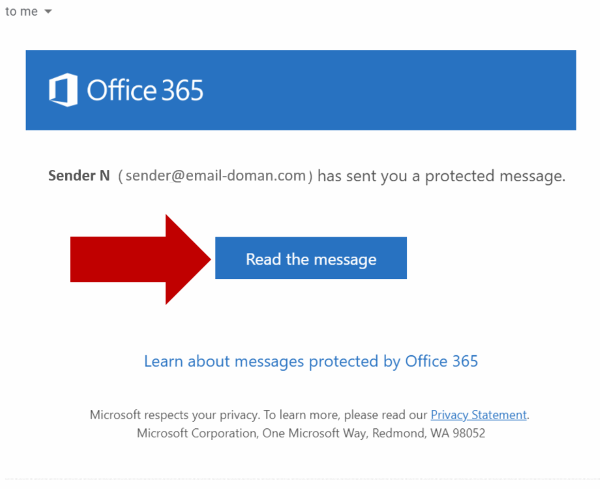
Image Source: Encyro
Clicking on the button will direct the recipient to a webpage that’ll have two options: Sign in with a work or school account or Or, sign in with a one-time passcode.
Unless the recipient has an Office 365 subscription with the same email address you mailed them, they should click on the second option, which will take them to a second web page.
At this stage, the recipient has to go back to their email account and wait for an email from Microsoft Office 365 that contains the one-time passcode.
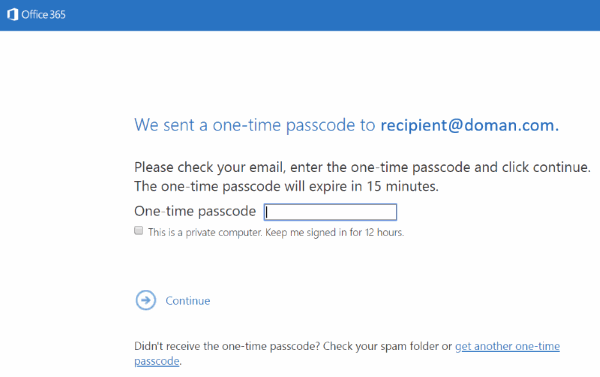
Image Source: Encyro
The recipient will then copy the passcode from the email and enter it into the web page. Once the passcode is entered, they’ll have to click on Continue. Finally, the secured email message will be decrypted.
To view attachments, the recipient will have to download the file manually and then open it.
Method 3: Using Outlook Encryption Add-Ins
Outlook encryption add-ins are the go-to option for small organizations who can’t afford to set up a large IT staff but want to send secure emails to users.
You can install the add-on by visiting their respective websites and then downloading the installer. Next, start or restart the Outlook application to compose a new email.
At this point, you will see a Secure Send button at the top left of the window. Click on it to send encrypted emails and attachments to your recipient regardless of the platform you use.
Other Options for Email Encryption
You don’t have to limit your options to Gmail or Outlook as there are plenty of other email encryption services that you can consider – ones that are arguably better than the above platforms.
Let’s take a quick look at the top three contenders.
ProtonMail
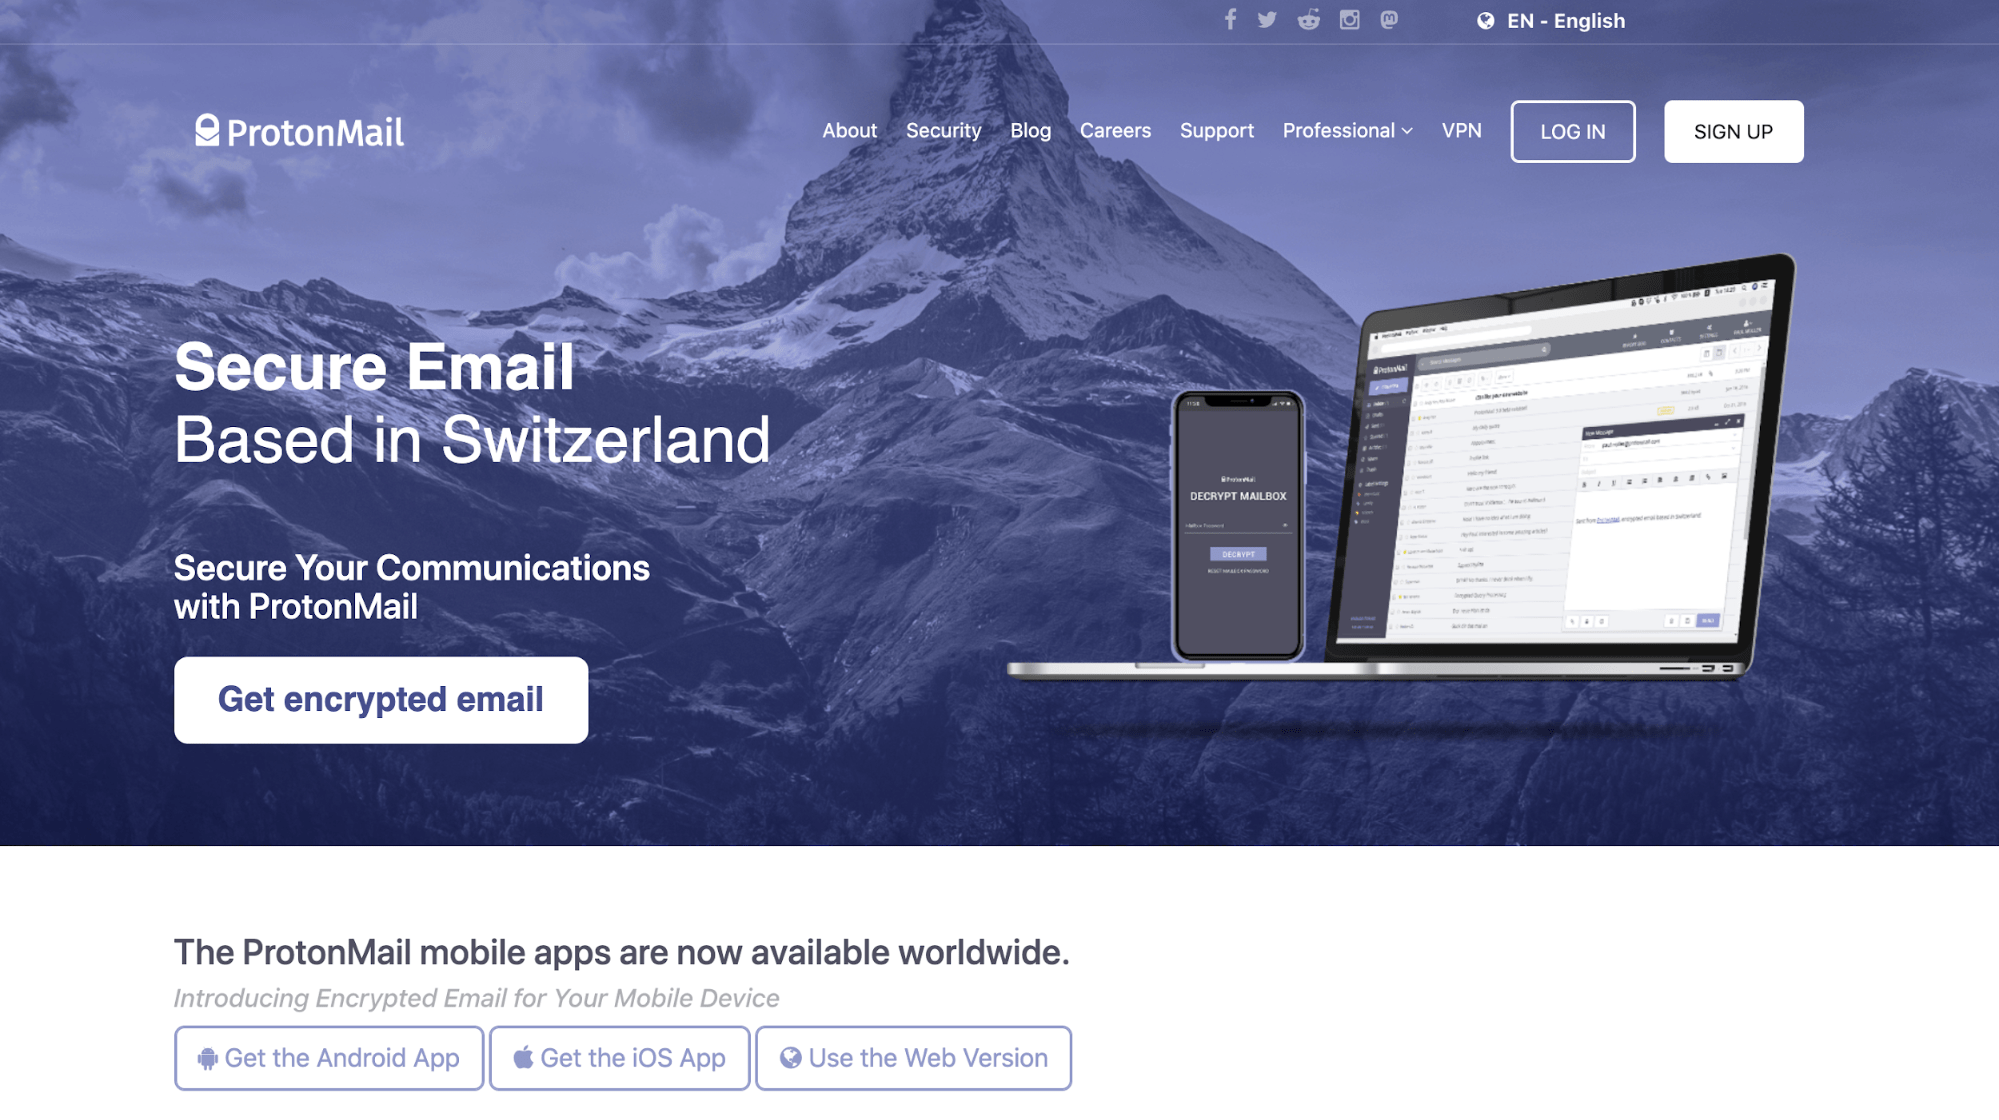
ProtonMail is designed with the principle of zero access and zero-knowledge, which means that the email servers and staff on the team cannot share or read your emails. Plus, its servers are locked down under 1000m of solid rock in a heavily guarded bunker that can even survive a nuclear attack. We kid you not.
Protected by the best privacy protection providers, the Swiss Federal Data Protection Act (DPA) and the Swiss Federal Data Protection Ordinance (BPO) you can be sure that deciphering data is super difficult thanks to ProtonMail‘s encryption.
Unlike Gmail or Outlook, every email you send gets encrypted before being sent to ProtonMail servers. This further reduces the possibility of any hacker decrypting and reading your emails.
Virtru
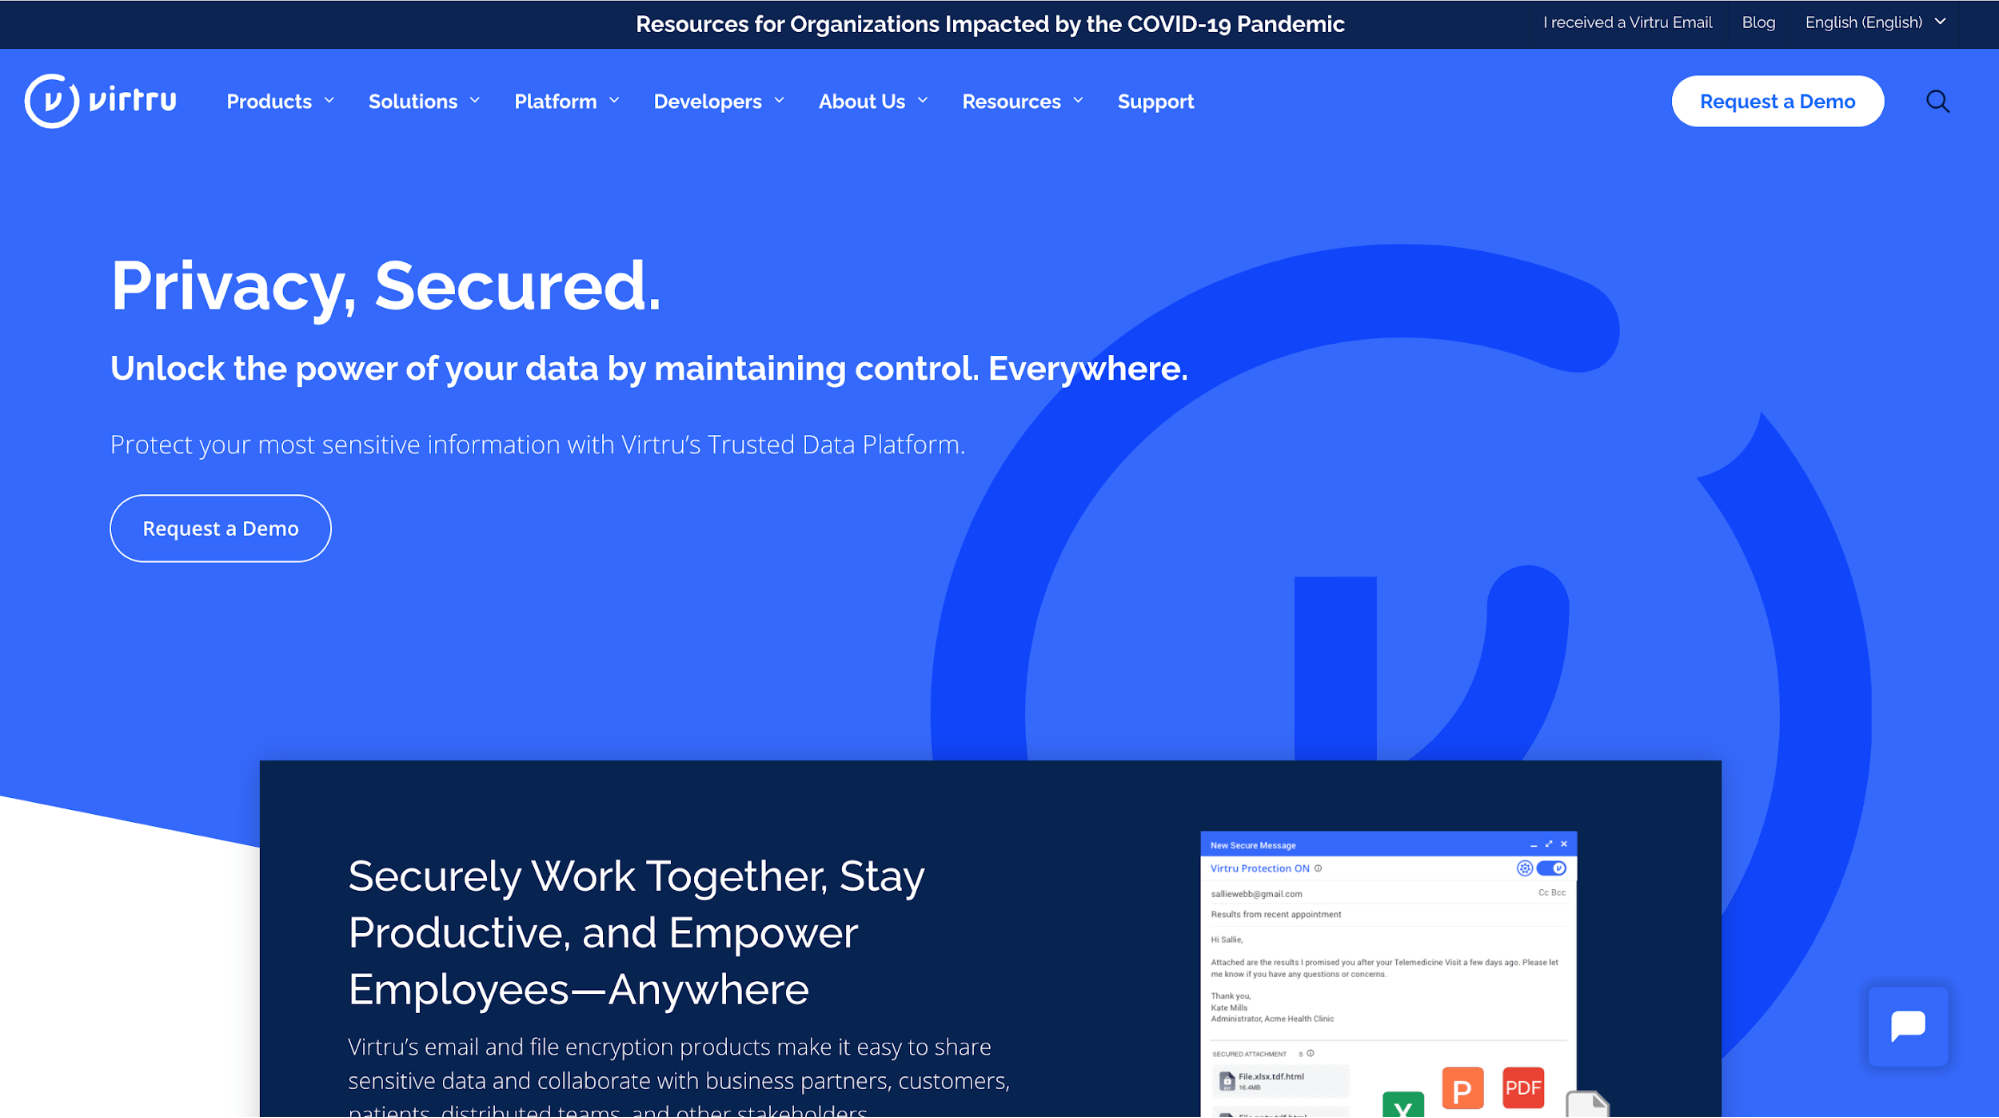
Virtru is a secure cloud-based email and data encryption platform that gives you full control over how recipients interact with your emails. Users can easily send and read encrypted emails, while admins can said security policies to enforce organization-wide.
One of the biggest USPs of Virtru is its ability to encrypt email directly from Gmail, along with other Google Drive documents. You can also add watermarks to encrypted attachments, revoke access to encrypted email, and control email forwarding.
PreVeil
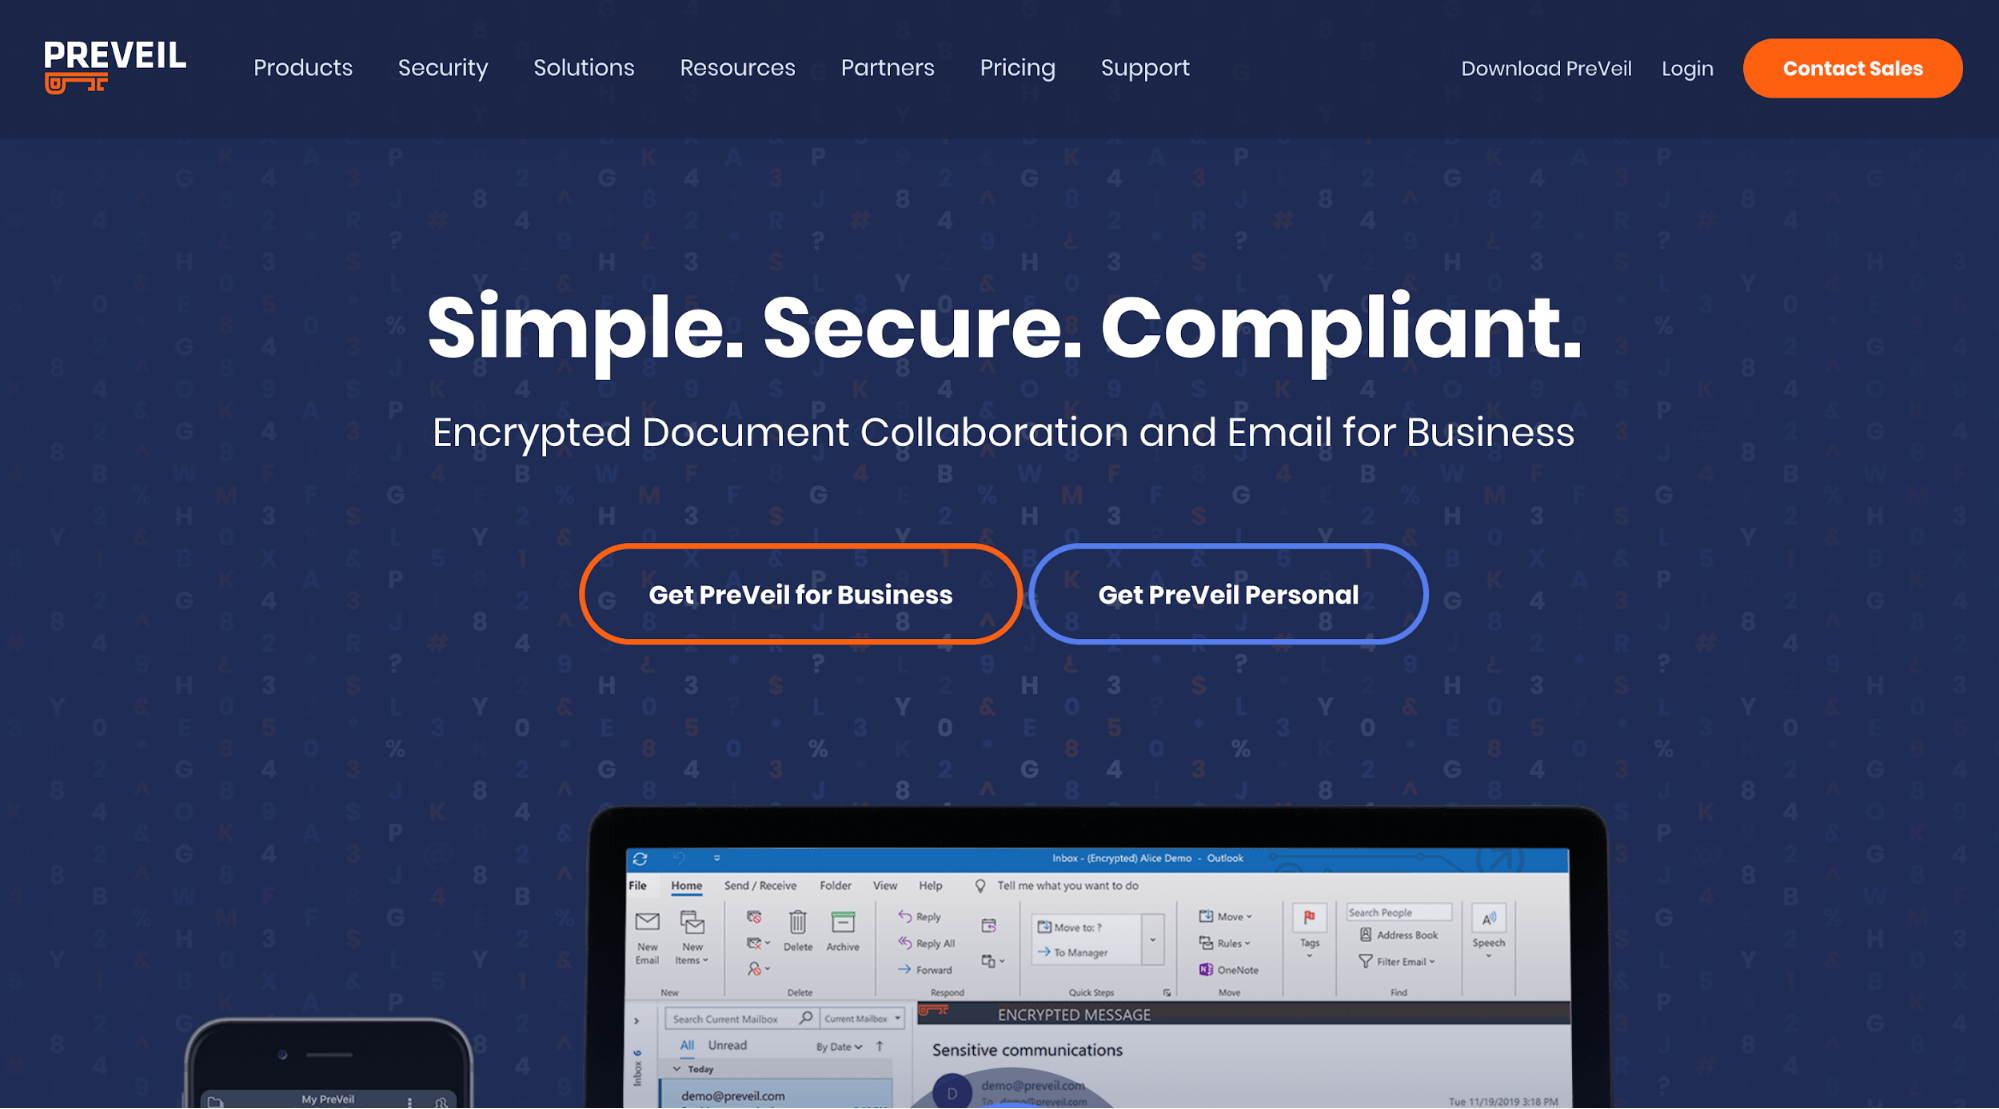
PreVeil is a secure cloud storage that’s not only easy to use but also completely free. Operating with zero knowledge ensures only users with the relevant key can access it. In case you put a file in the folder shared with another user, the file, the folder, and the user, will each have separate keys. This is particularly helpful in enhancing the privacy of your emails.
Direct support for Outlook and Gmail, existing email account compatibility, and high-tech key recovery make it a viable email encryption service. That said, keep in mind that unsupported email clients must install PreVeil manually.

