How to Delete Every Email at Once in Gmail
Gmail’s generous free storage is a double-edged sword. The facility to have gigabytes of free data makes cleaning our email the last of our priorities, which leaves us with hundreds — sometimes thousands — of emails to go through.
And while seeing 6484 emails can be intimidating, clearing everything up to start afresh is surprisingly easy.
In this guide, I’ll show you how to delete every email at once (also known as bulk deleting) with a few clicks.
So let’s begin.
How to Delete Every Email from Your Gmail Mailbox
To delete every single email correspondence on your Gmail mailbox, all you need is a laptop, your Gmail account, and a few minutes of your time.
Here’s how to go about it:
Step #1: Choose the Category of Email That You Want to Delete
Once you open your Gmail mailbox, you’ll find all your emails are segmented into three categories:
- Primary
- Social
- Promotions
The easiest way to delete emails in Gmail is to tackle them by category a.k.a. deleting the emails of one category after another.
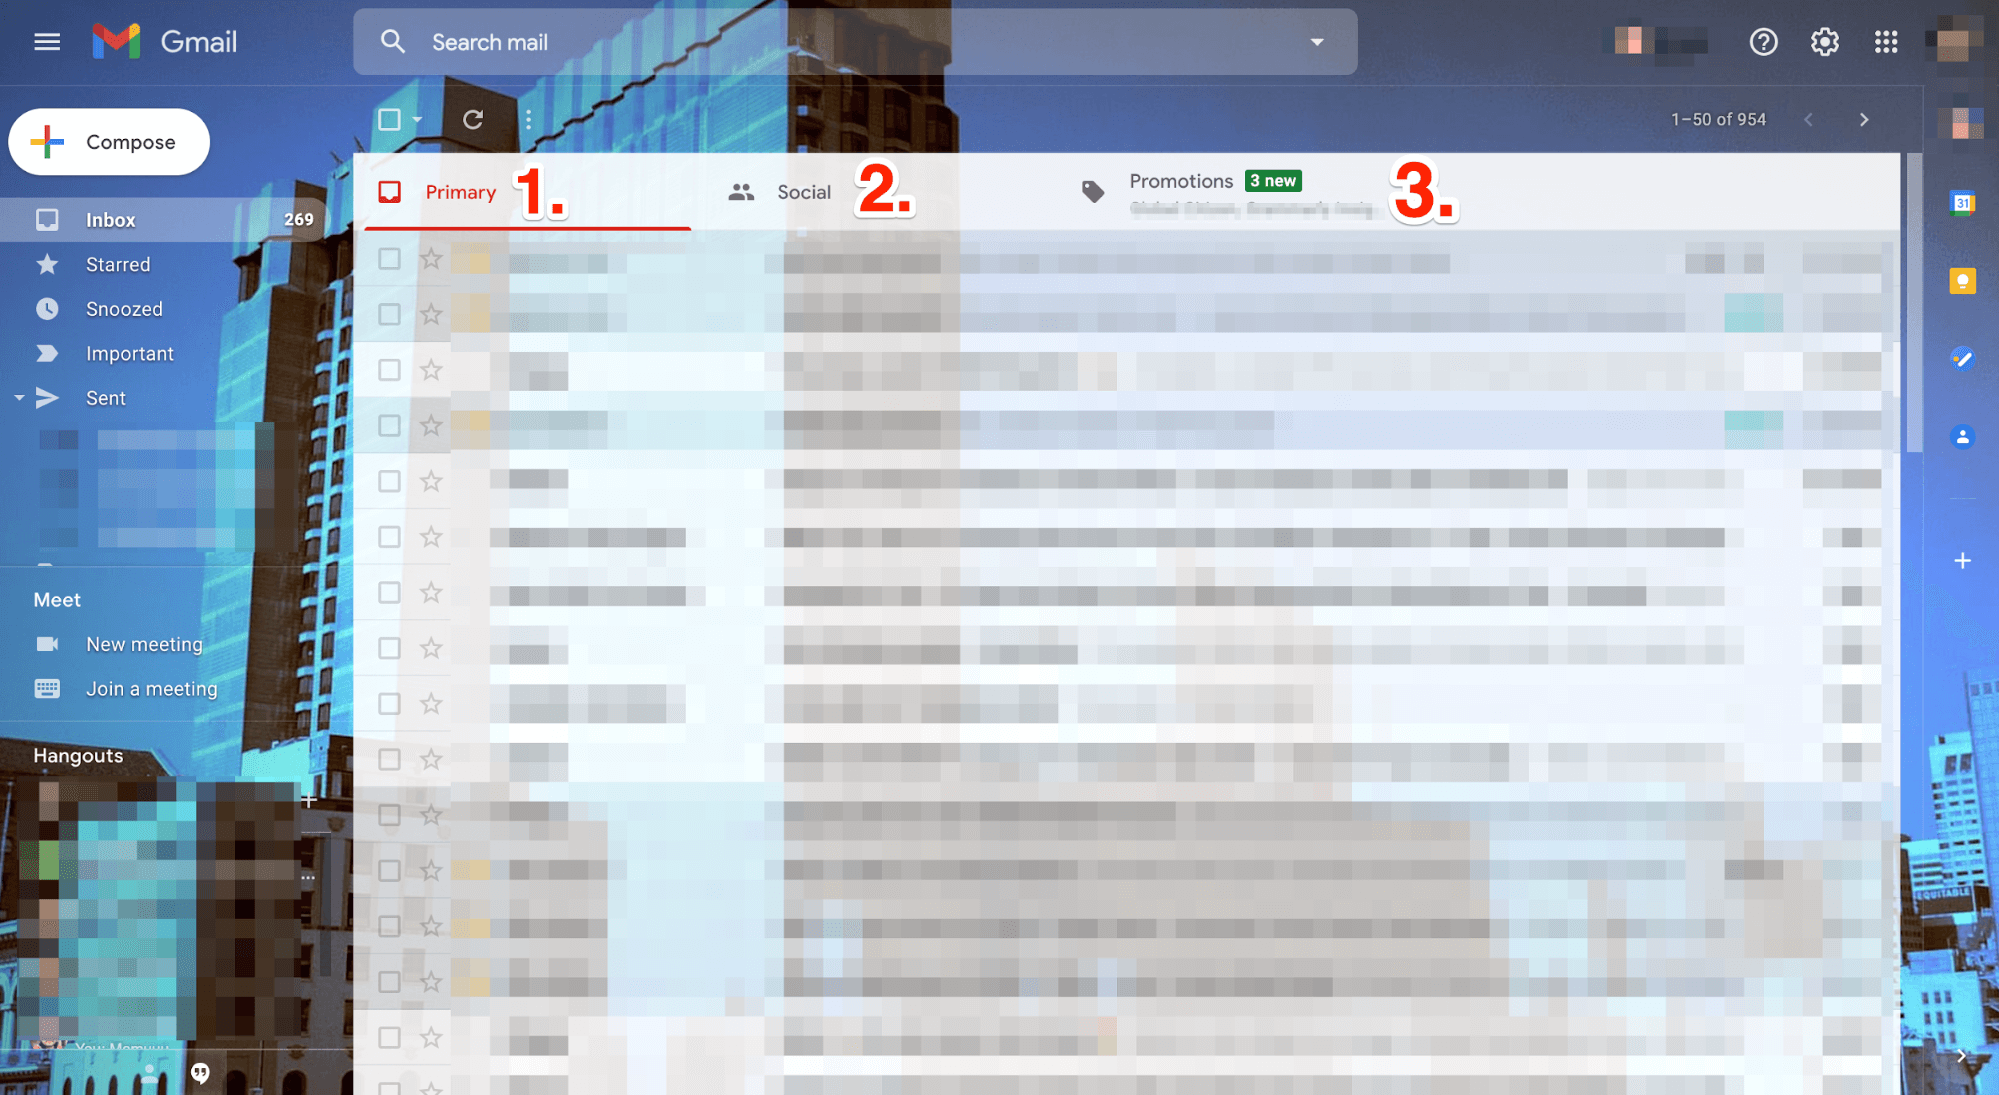
To keep things short, we’ll show you how to delete the Primary category of your email, after which you can apply the same steps for the other two categories.
Select the tab (in our case, Primary) you want to clear with a click.
Step #2: Click on the Tick Box to Select All the Emails
On the top left-hand side of your screen, just under the Search mail search bar, you’ll see a small tick box. Check it off.
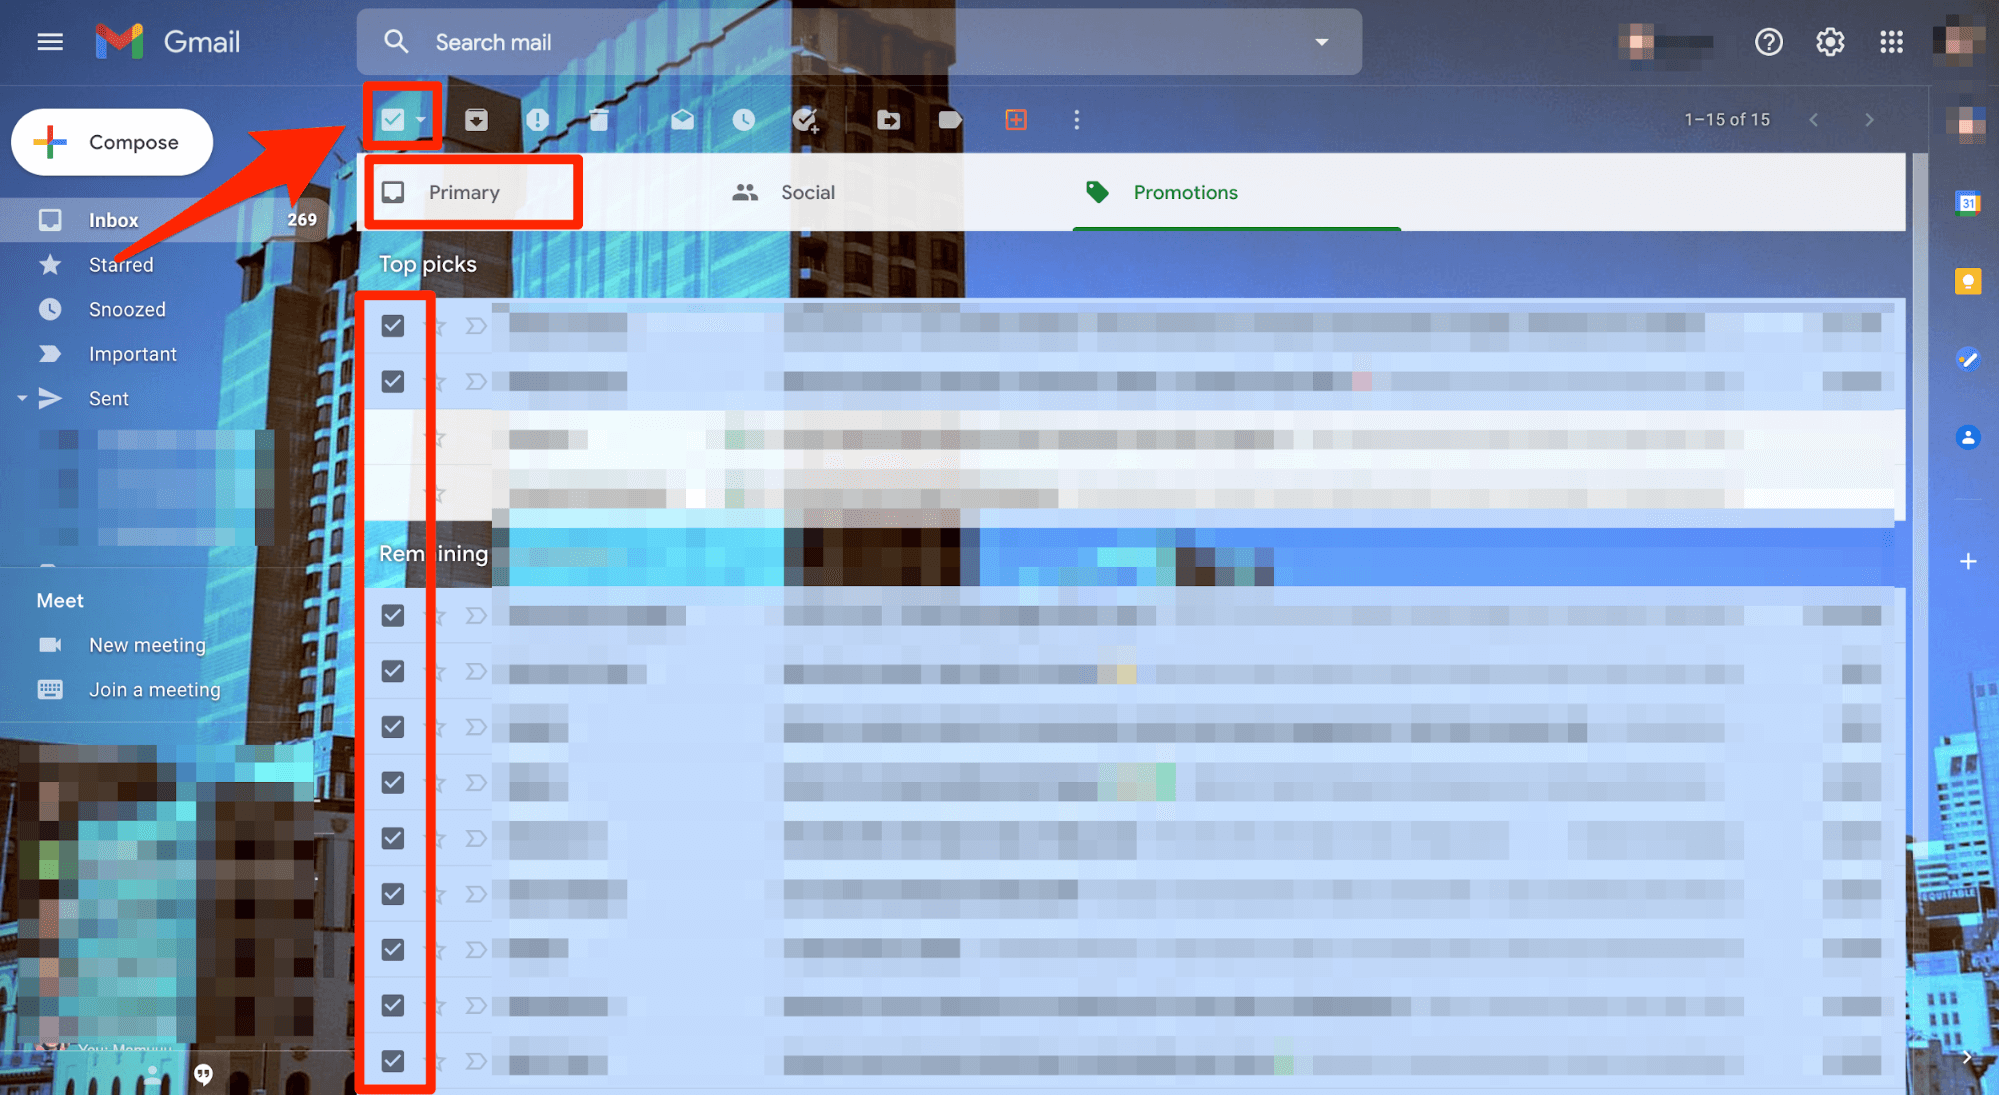
Doing this will select every email on the page that totals up to 50 emails. If you have more than 50 primary emails, you won’t get everything. We’ll deal with the remaining primary emails in our next step.
Every selected email will turn into a darker shade. This also means every single one of these emails will be deleted.
Step #3: Select the Remaining Emails Not Displayed on the Previous Page
After checking off the tick box, you’ll find everything on the page — leaving the inbox ads — has been selected.
You’ll see a small text displayed at the top of your screen stating: “All 50 conversations on this page are selected. Select all X conversations in Primary.“
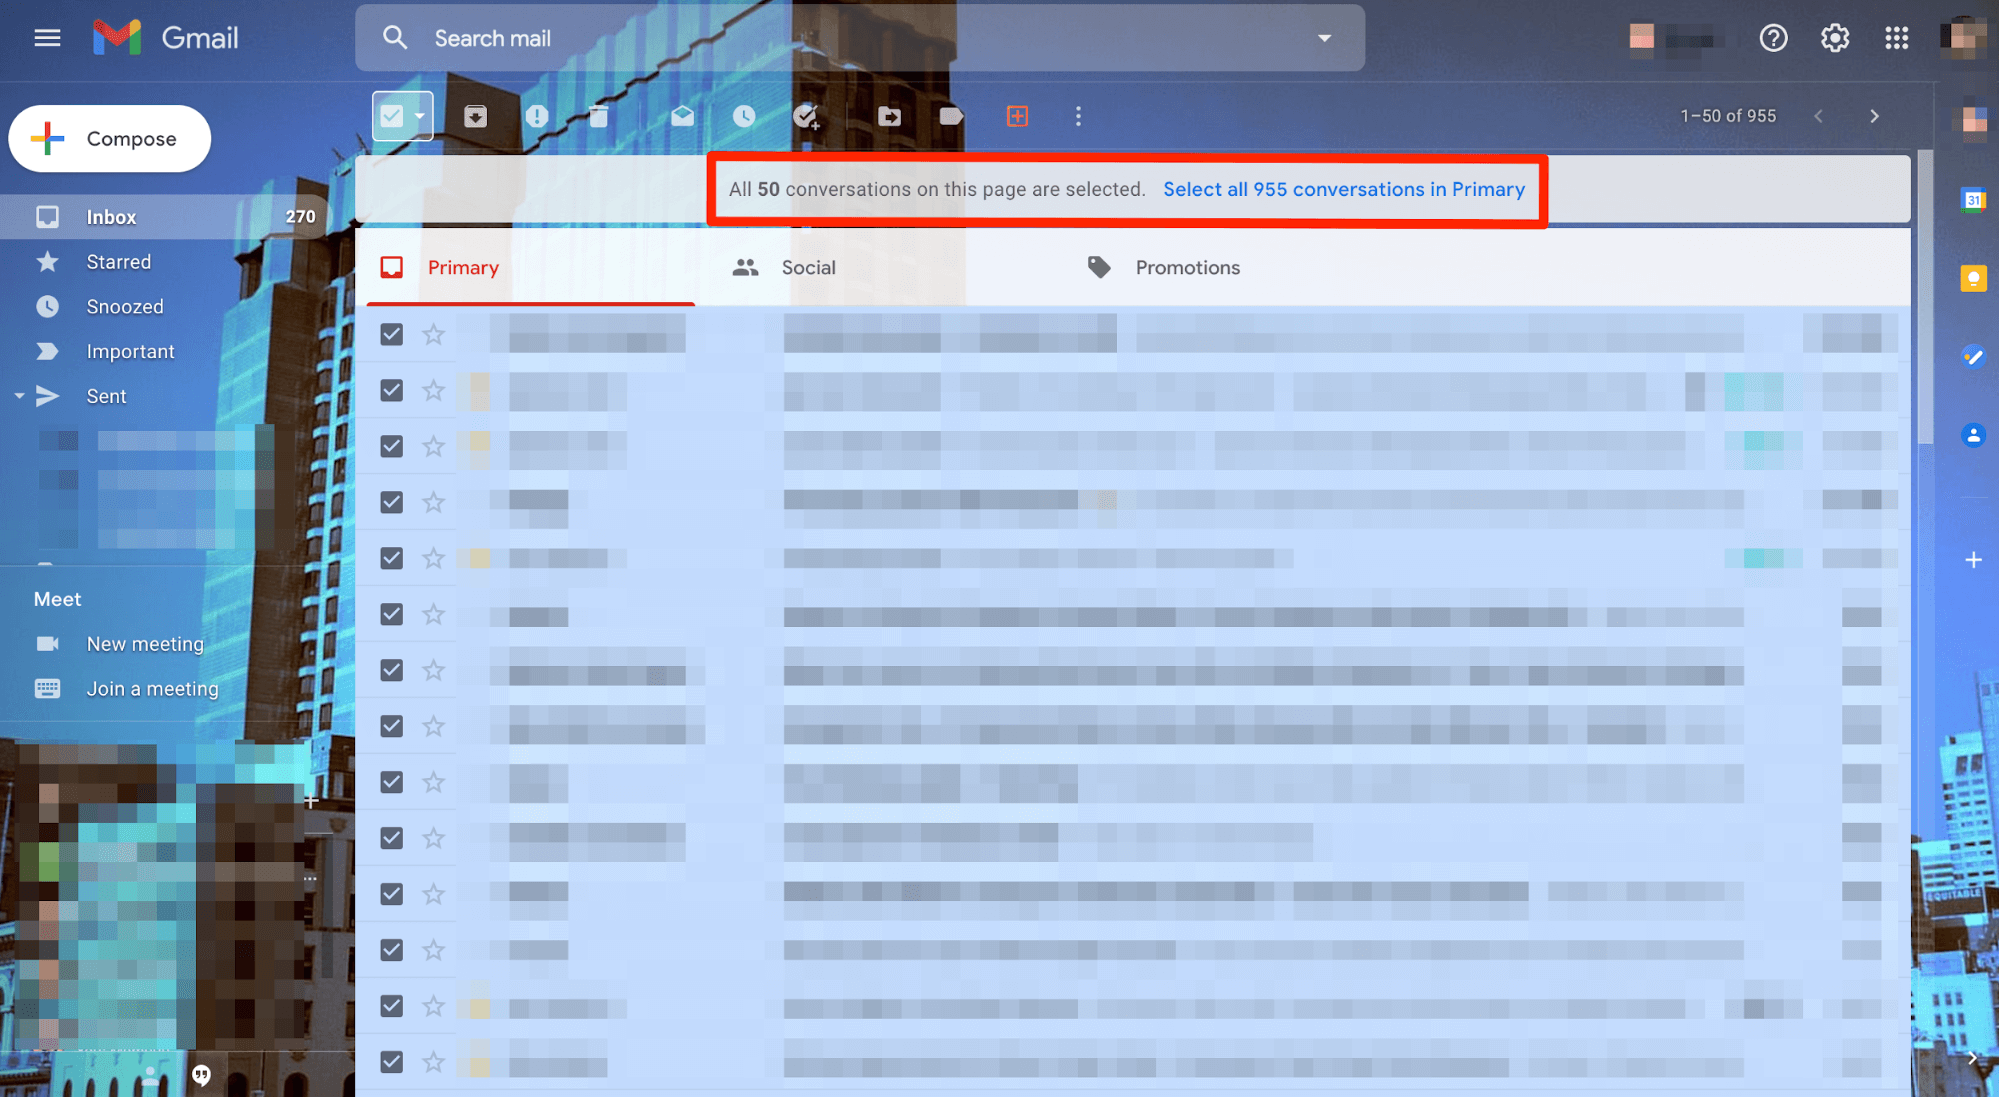
This is your shortcut to delete every email in your promotion mailbox.
Hover your cursor over the second sentence, and press it. Everything in the category will now be highlighted and ready to be deleted.
Step #4: Confirm Bulk Action and Hit Delete
Select the Trash icon located underneath the search bar. It’s shaped like a trash bin.
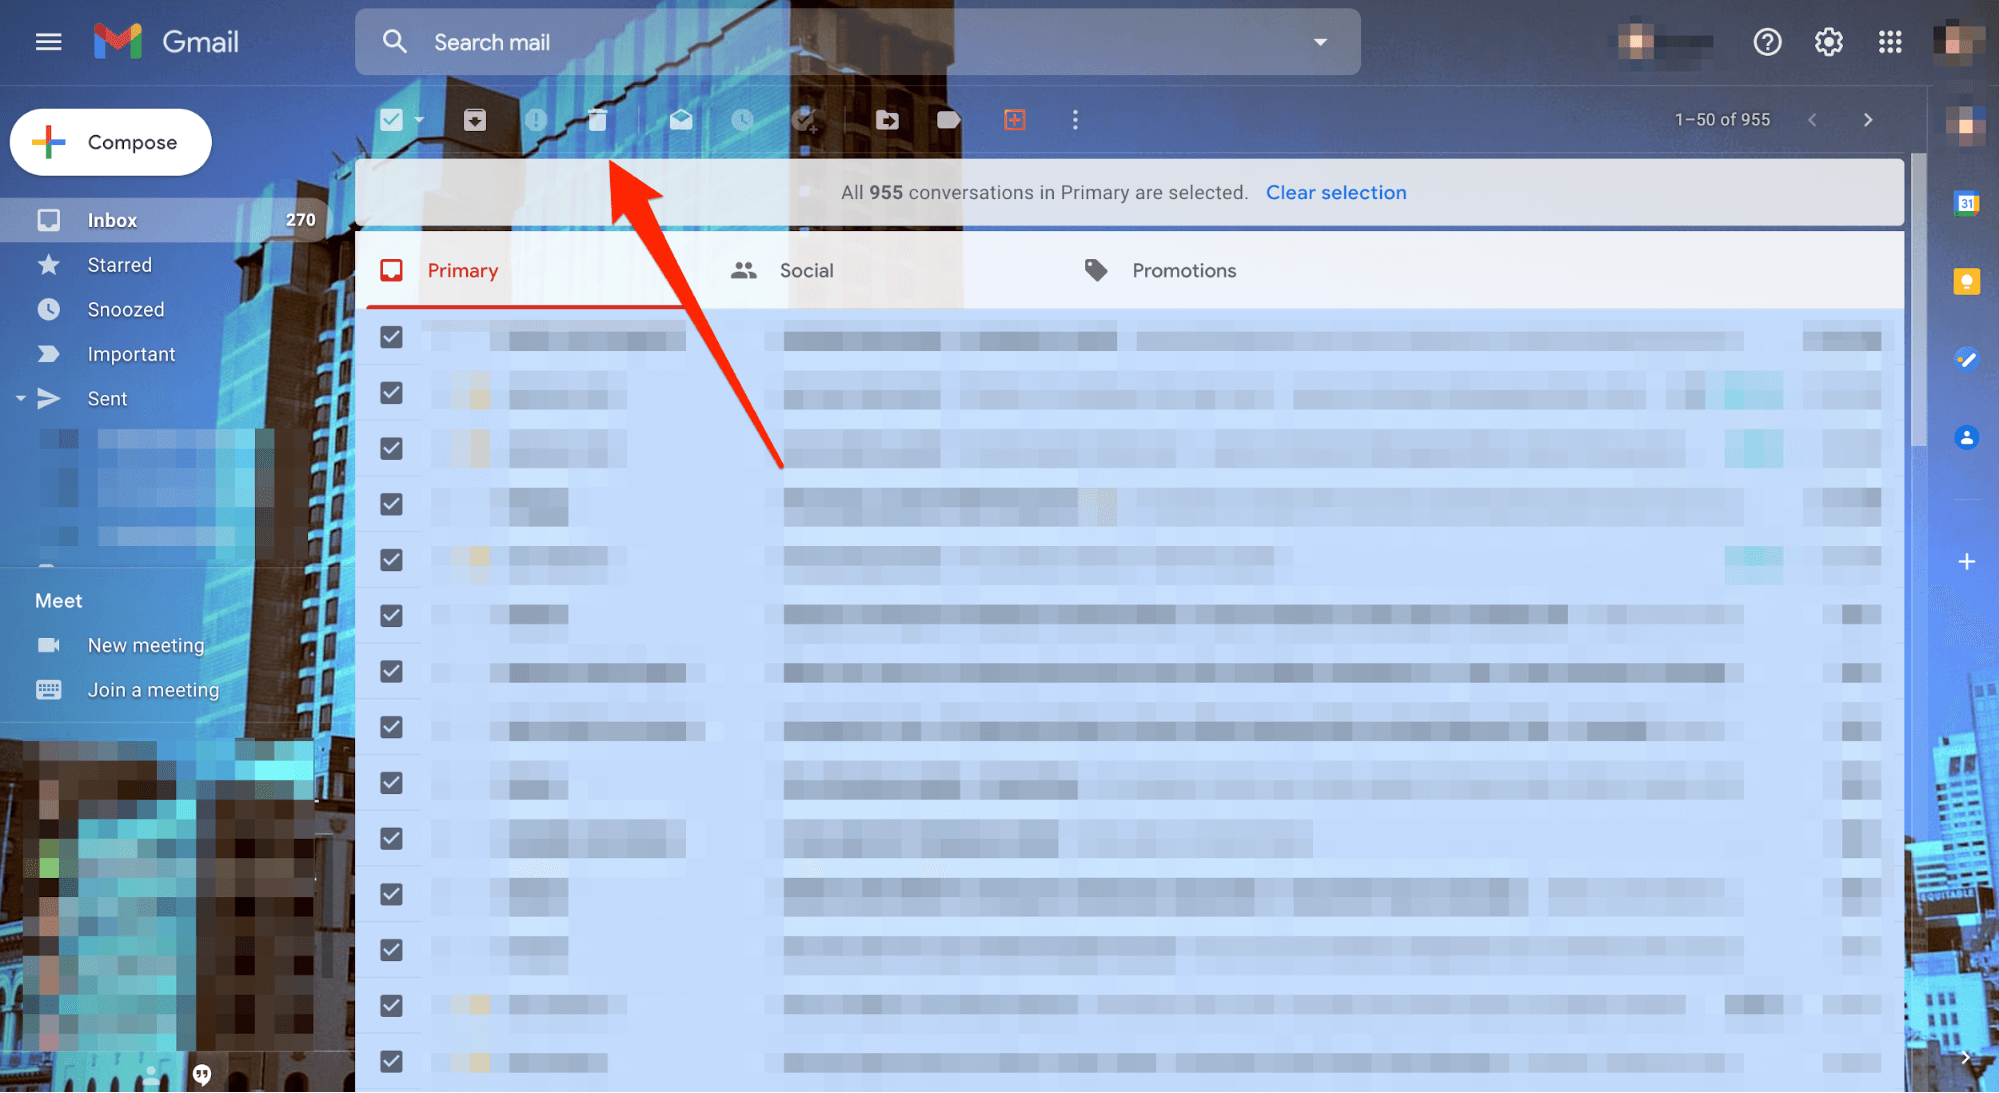
A pop-up window will appear on your screen, asking you to confirm whether you want to delete X number of emails.
Click on Okay.
Step #5: Await the Bulk Action Confirmation
If you have thousands of emails, this may take a bit of time. Since we only had 955 conversations, it only took us a few seconds.
Once the process is complete, you’ll see a little confirmation pop-up towards the bottom left-hand side of your screen. It looks something like this:
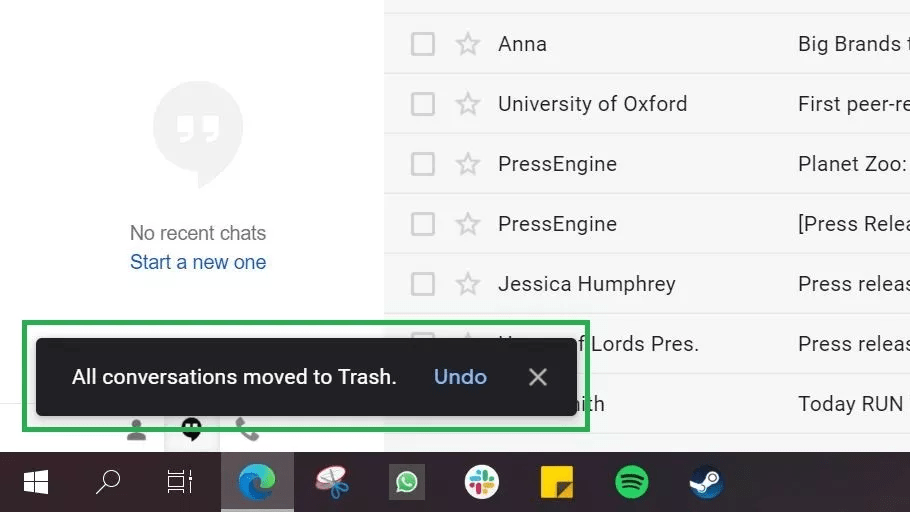
If you hit the Refresh button, you’ll find that everything really is gone and your Primary mailbox has zero emails.
Step #6: Empty Your Trash and Repeat the Process for Other Categories
Your Primary folder is now empty, but that doesn’t mean that the deleted emails have vanished from your Gmail.
You see, once you hit the Delete button, all the emails get stored in your Trash folder for about 30 days. Only once this time period gets over will Google delete it.
If you want to expedite the process, you can head over to your trash folder and empty it manually. Once you’re done, repeat the same process for your social and promotions categories.
In the end, you’ll have a fresh and clean Gmail ready for use.
How to Delete All Emails on Mobile
Our mobile phones are gadgets that are ever attached to us. So it makes sense to discuss how you can delete your emails directly from your mobile phone.
Below, we’ll discuss the steps for emptying your Gmail for Android as well as iOS.
How to Delete All Emails on iOS
Here’s how you can delete all your email correspondence from your iPad or iPhone:
Step #1: Open the Gmail app on your iPhone or iPad.

Step #2: Select the folder where the emails you want to delete are located.

Step #3: From your list of emails, tap on the round thumbnail that represents the user’s profile picture. This should turn the thumbnail into checkboxes.
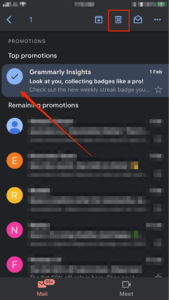
Step #4: Select the email that you want to remove from your mailbox and then tap on Trash (denoted by the trash icon) at the top of your device’s screen.
Step #5: Repeat the process until you remove all your emails.
As you may have realized, this really isn’t the best way to delete your emails. More so if you want to delete every correspondence on your mailbox. Using a desktop for clearing out your Gmail is hands down the more convenient option.
How to Delete All Emails on Android
Now, let’s concentrate on clearing your Gmail for Android devices. Simply follow the below steps for a clean mailbox:
Step #1: Open your Gmail account.
Step #2: Open the folder that contains the emails you want to remove.
Step #3: Tap the icon on the left of the email that you want to delete. You can also press and hold the message to select it.
Step #4: Tap on the other icons next to the other email that you want to delete from your Gmail mailbox.
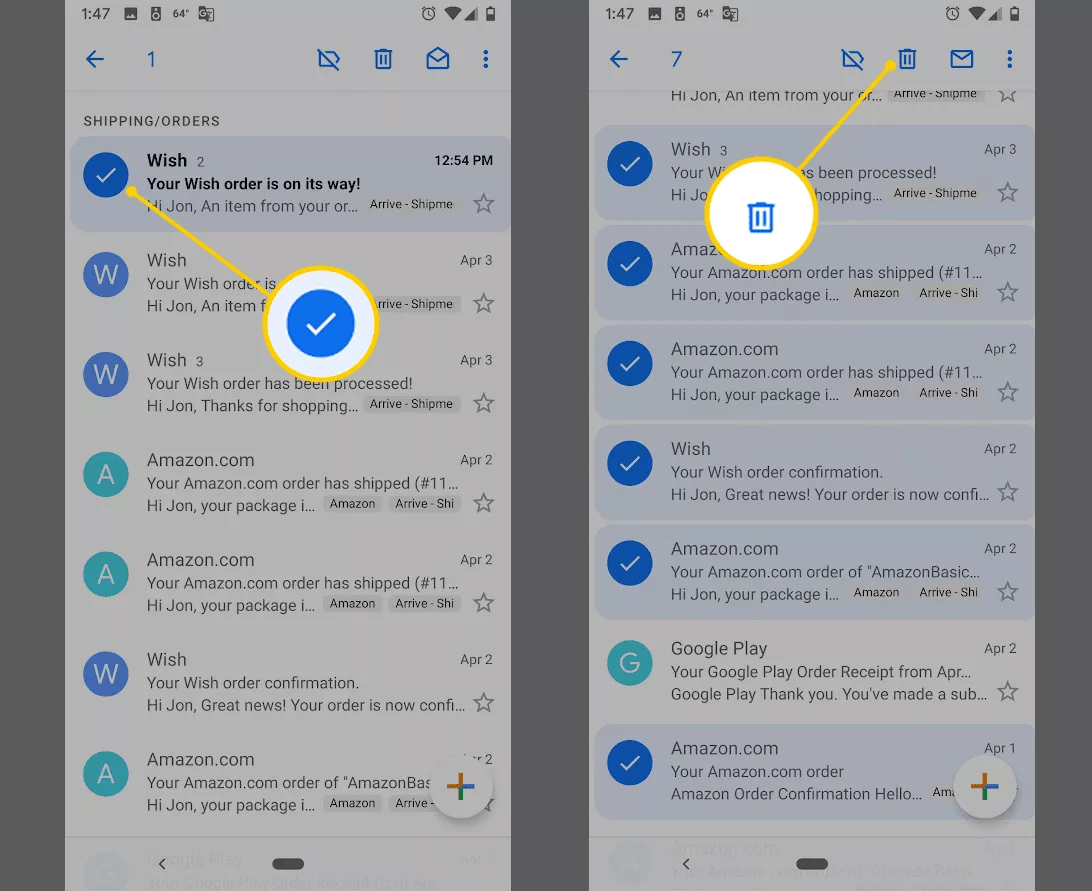
Image Source: Lifewire
Step #5: Tap on the Delete icon located at the top of your screen.
All the selected messages will now be deleted and stored in your Trash folder.
Again, this is a very time-consuming way to clear your mailbox—just like iOS. It’s much better to use a desktop or laptop.
How to Remove Your Old Emails
You can have emails from over three years ago (or more!) thanks to Gmail storage capacity.
Luckily, you can delete them in a single go without having to manually scroll down your Gmail just to locate them. Here’s how you can delete your old email from your Gmail:
Step #1: Search the Old Emails by Date
In the search bar, type the date in a YYYY/DD/MM format. This will automatically filter out emails before a certain date.
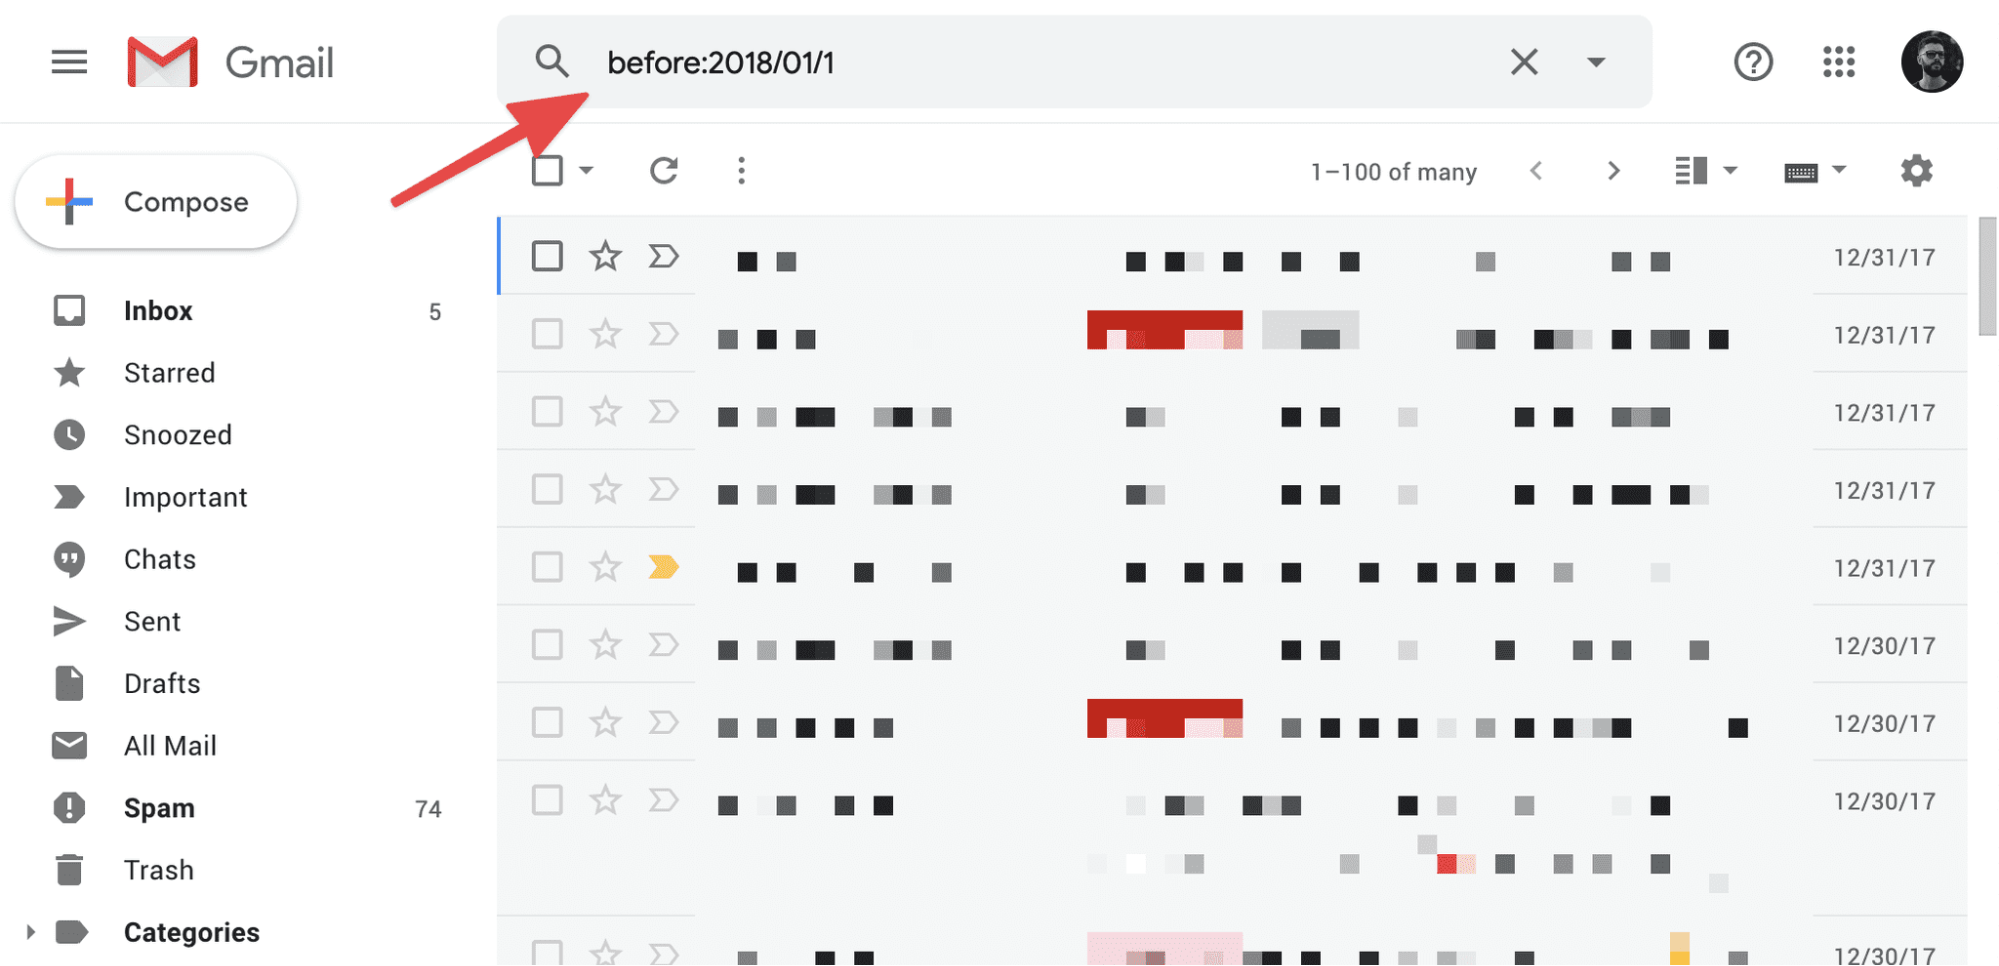
Image Source: BoxySuite
For instance, if you type before:2014/01/1, you’ll see a list of all of the emails you received prior to 1st Jan 2014.
Similarly, you can also search for emails based on how old they are.
If you type older_than:1y, you‘ll see a list of all emails that are older than one year. In the same way, you can use m for months or d for days.
Step #2: Select the Tick-Off Box to Delete the Emails
After you’ve selected the time frame to delete your emails, click on the tick-off box.

Image Source: BoxySuite
Follow this by clicking on Select all conversations that match this search, and finally hit the Delete button.
Voila! All your old emails will land up in the Trash folder.
How to Delete Emails Automatically
To make things even more convenient, you can set up a filter to automatically delete old emails from your mailbox. Here’s how to go about this:
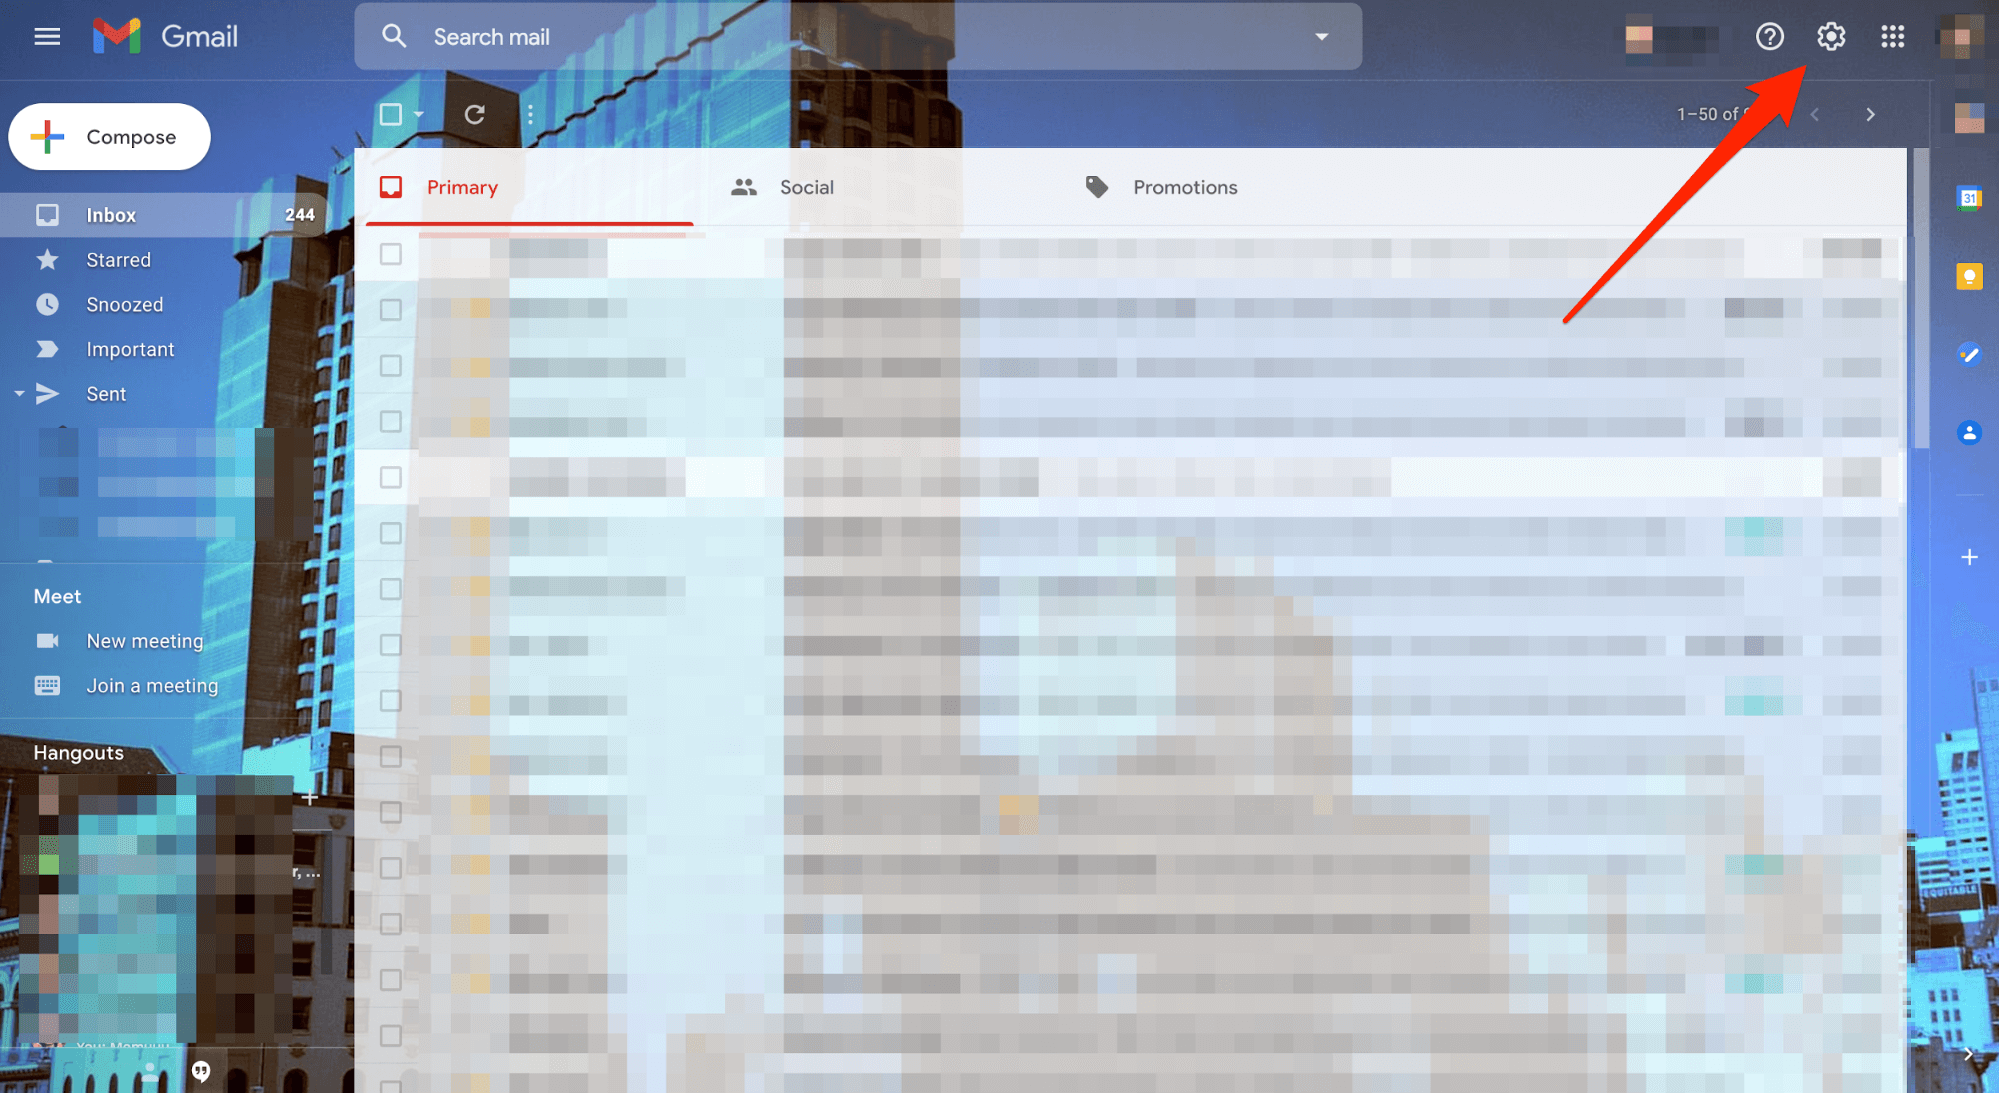
Step #1: Log in to your Gmail account and click on the Settings icon. It’s the small cogwheel-shaped icon located on the top right-hand corner of your screen.
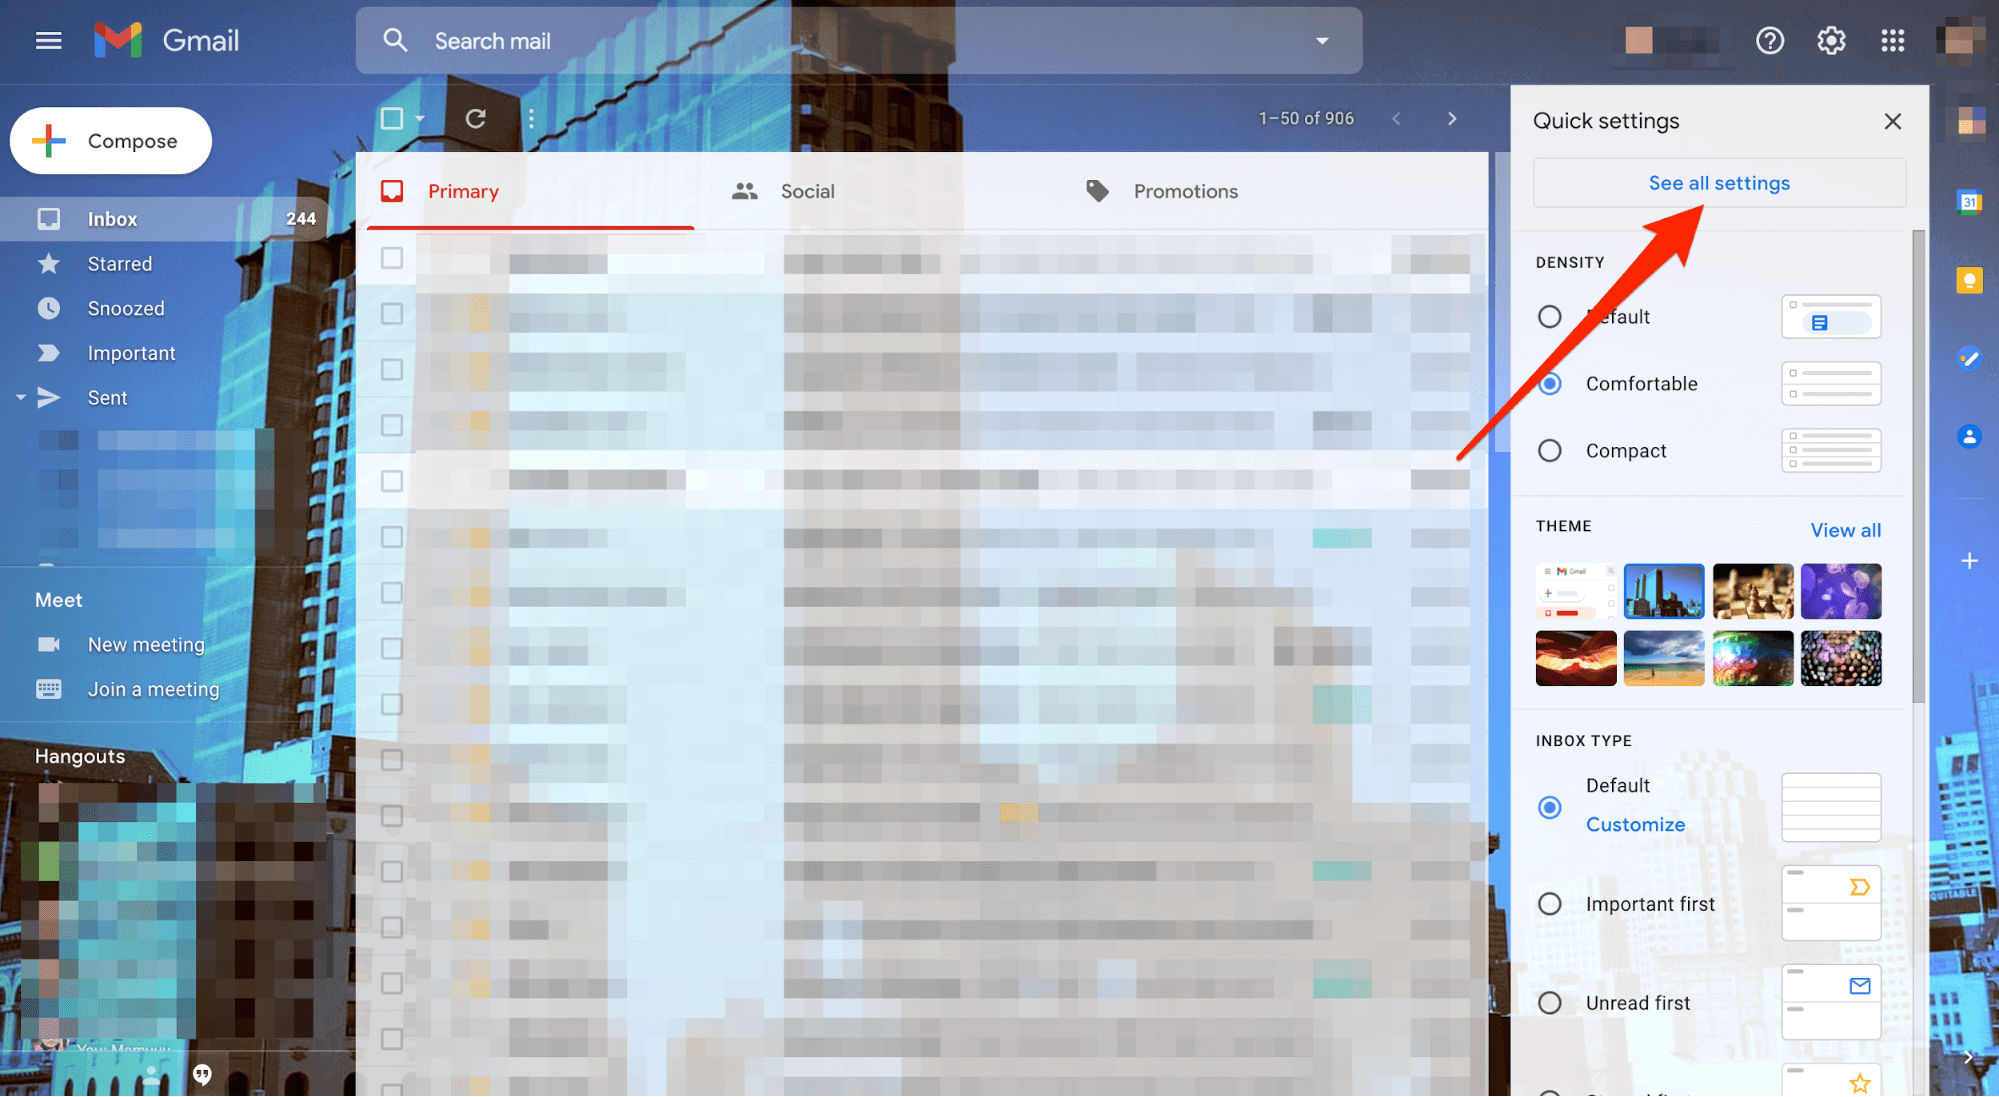
Step #2: From the drop-down menu, click on See all settings.
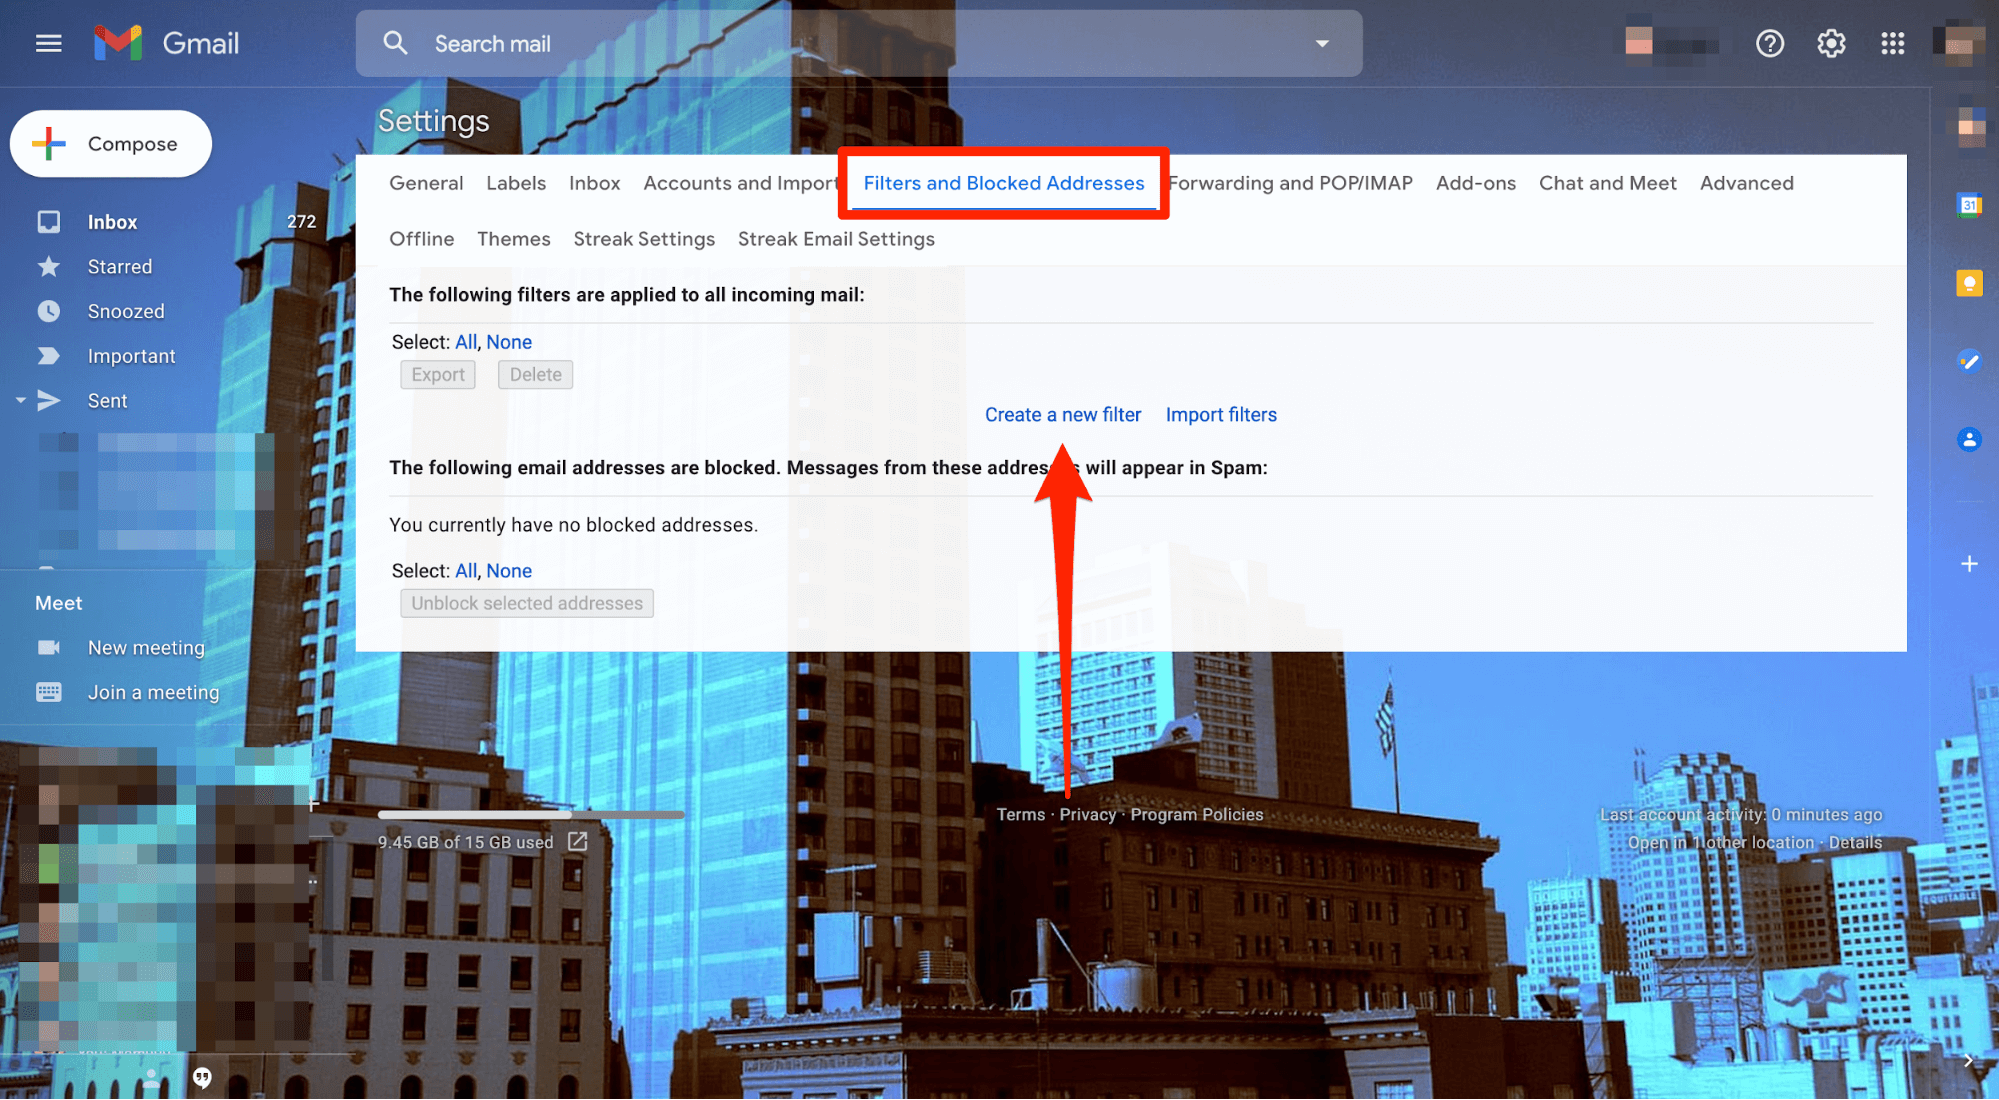
Step #3: Click on the Filters and Blocked Addresses tab from the top menu bar. From there, select the Create a new filter option.
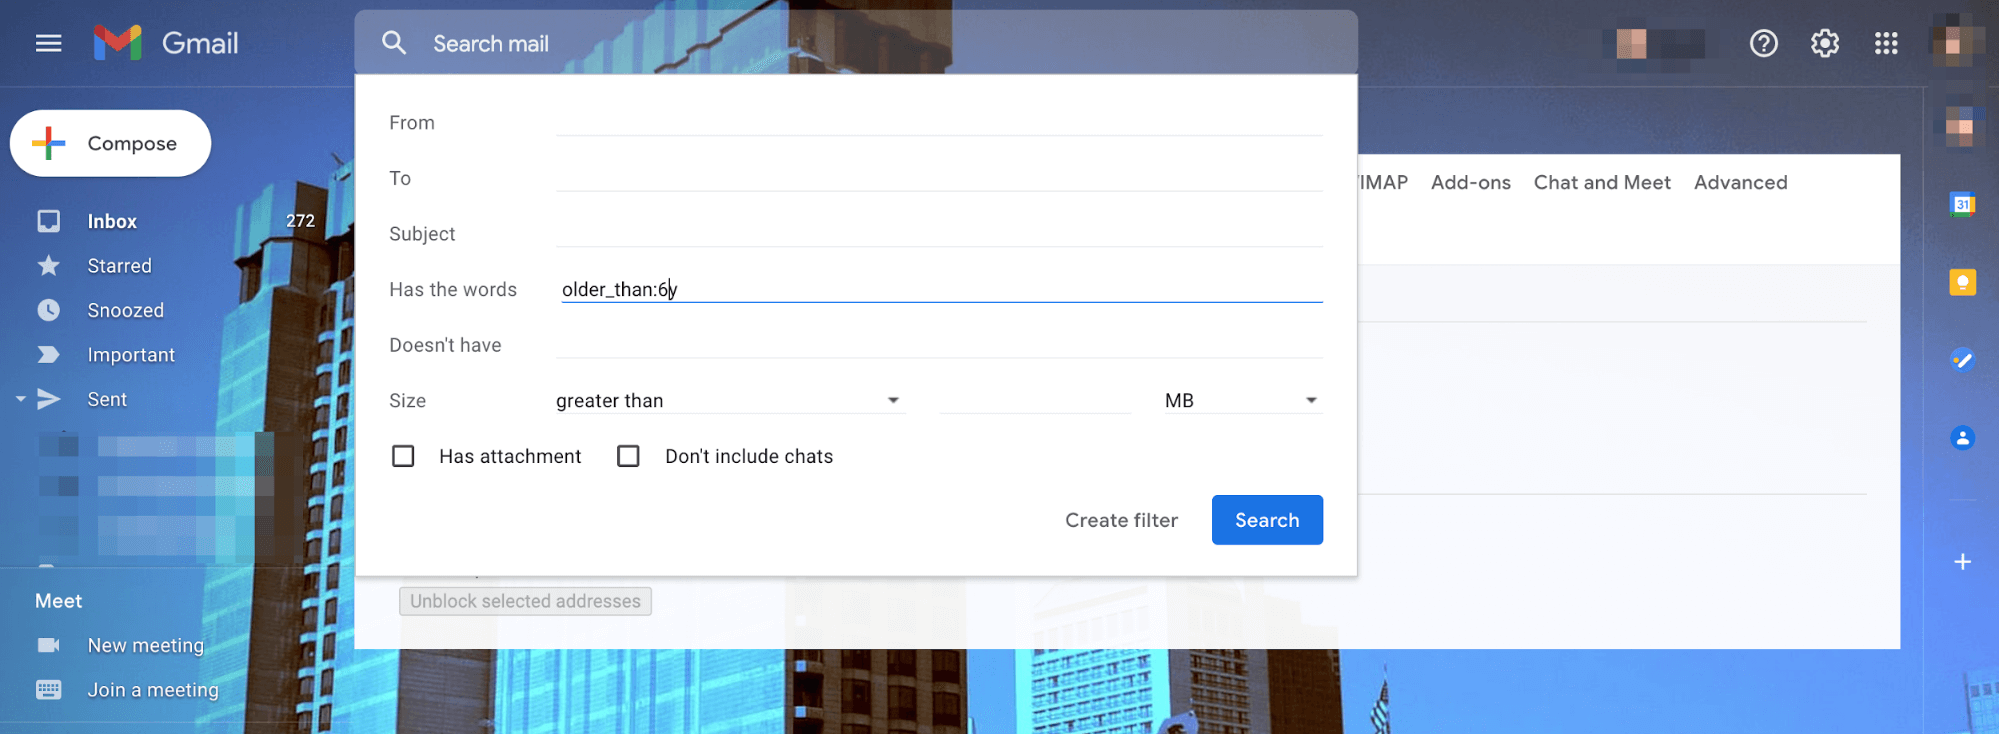
Step #4: Type the following in the Has the words field:
older_than:X
For the X, you should type in the timeframe you prefer for deleting old messages. You can also use d for days, w for weeks, m for months, and y for years.
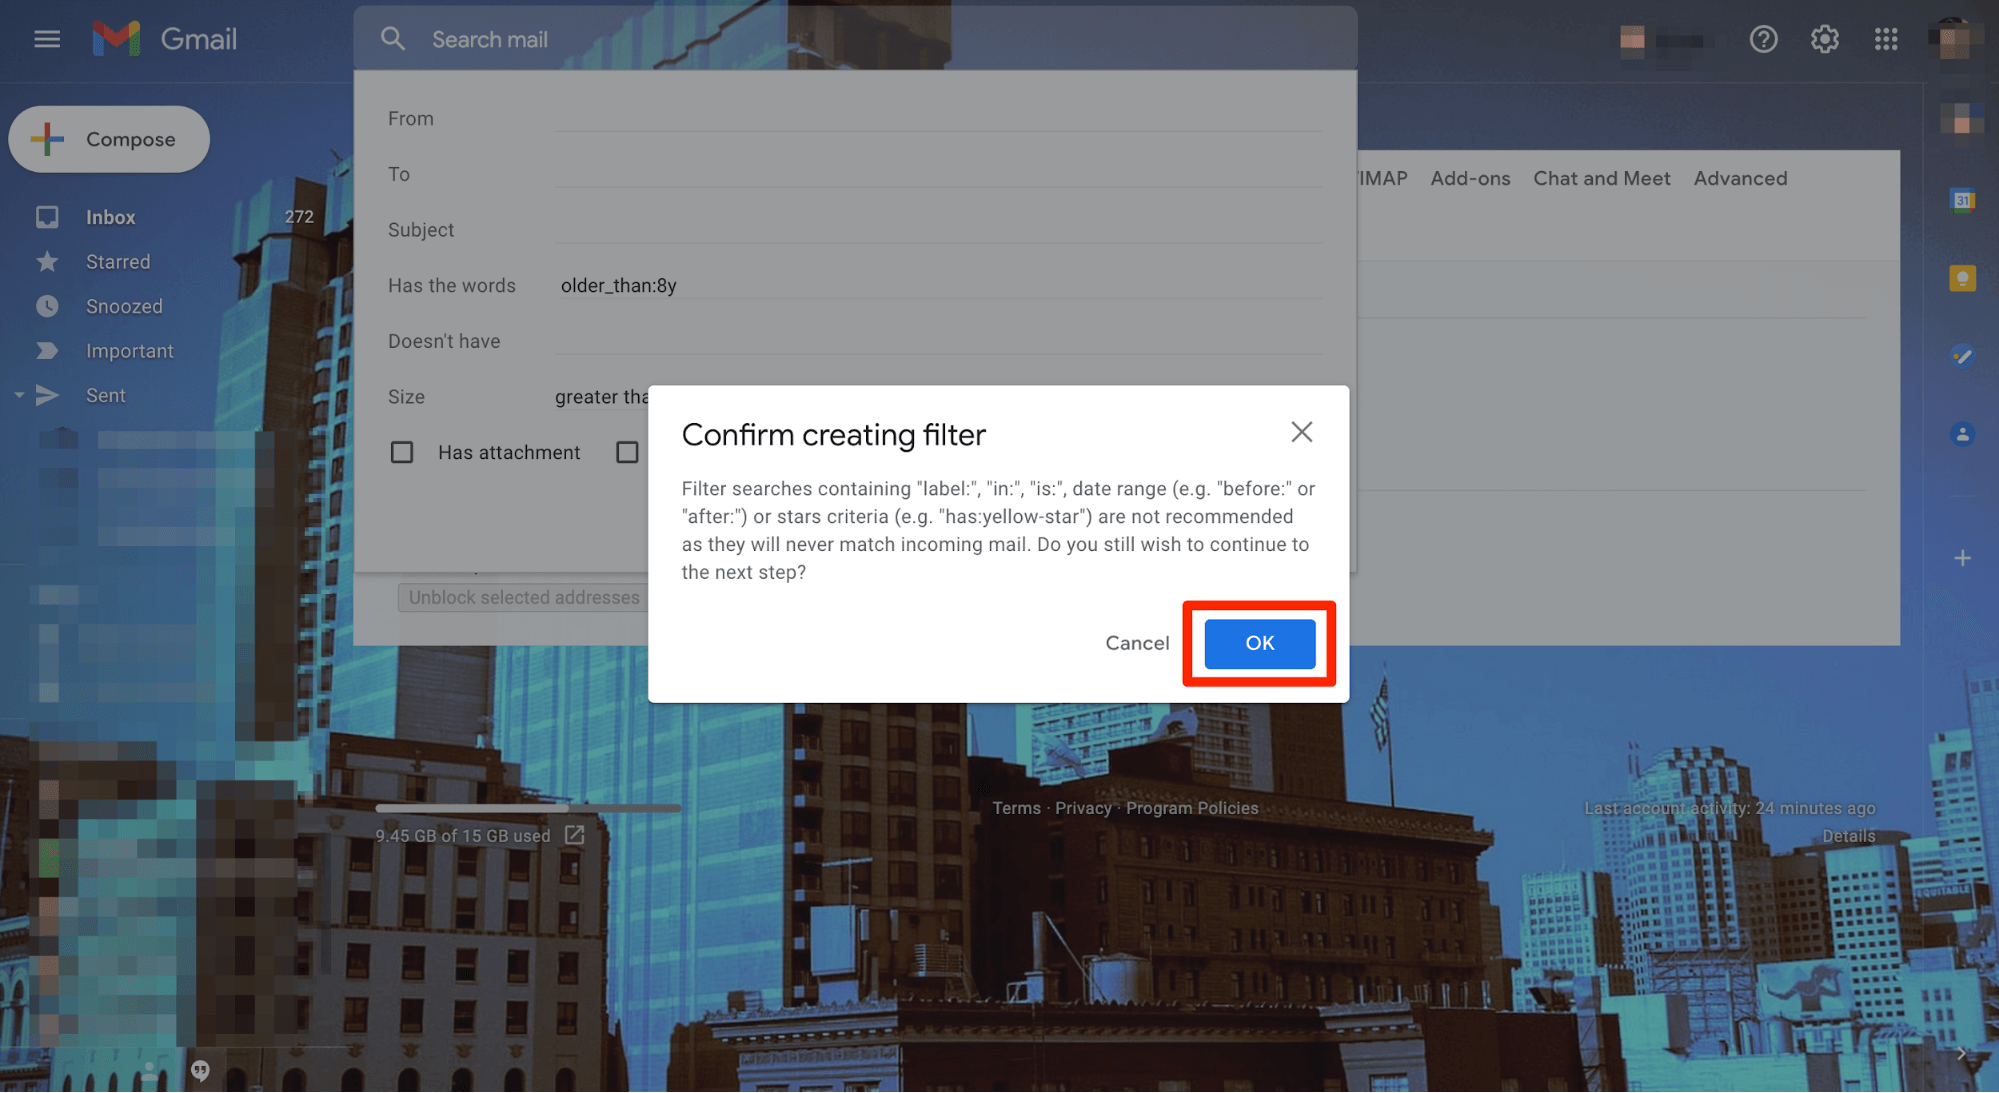
Step #5: Click on Create filter.
Step #6: You’ll then see a pop-up box asking you to confirm whether you want to to create the filter. Select OK.
Step #7: Tick the box right beside the option labeled Delete it and the box beside Also apply filter to.
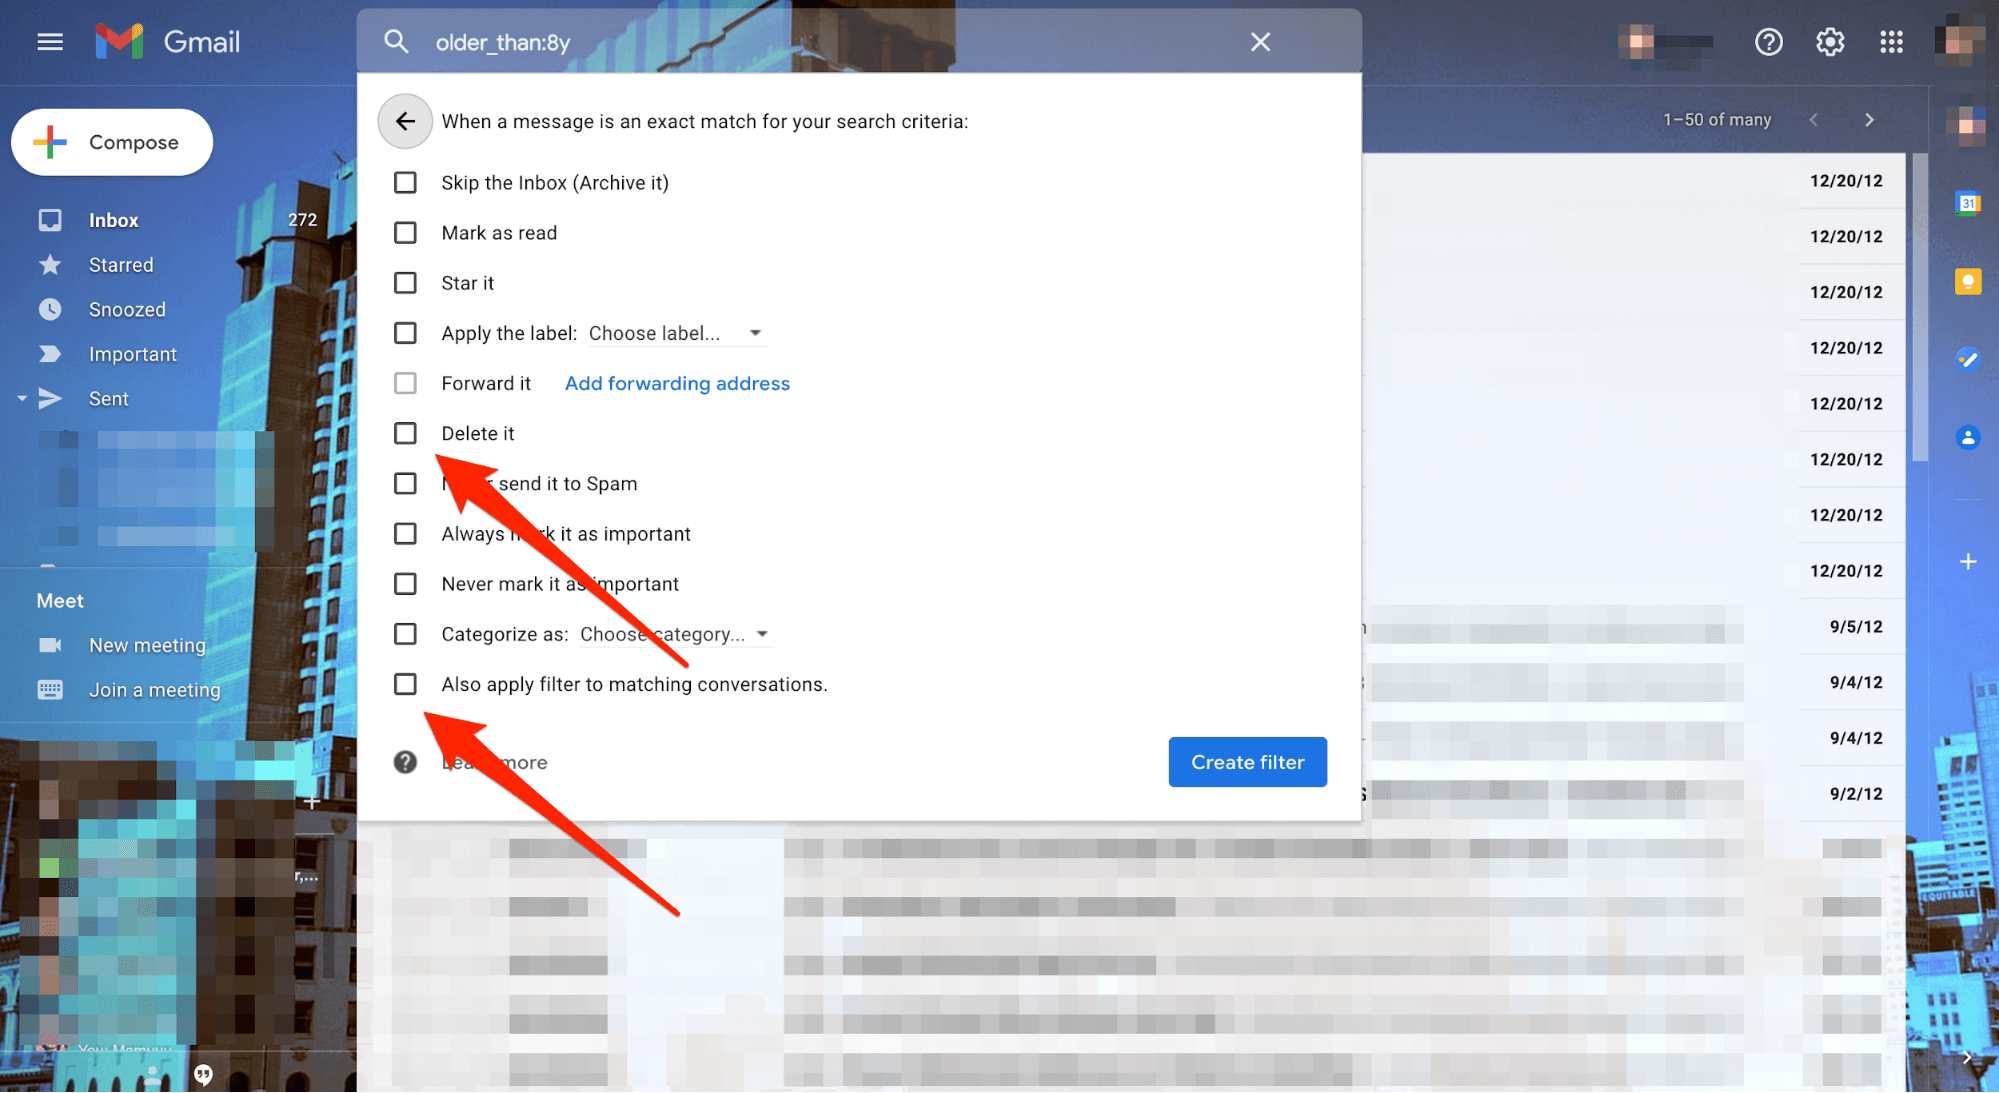
Step #8: Select Create filter.
All your emails older than the date you specified will be deleted automatically.
For Future Deletion:
Step #1: Go to the Filters and Blocked Addresses tab, and click on Edit beside the filter you created for deleting old messages.
Step #2: Click on Continue in the section that appears with your search criteria. The screen should look like the section that appeared when you had originally set up the filter.
Step #3: Tick off the box beside the option Also apply filter to.
Step #4: Select Update filter.
This will again delete all your messages earlier than the timeframe you specified.
3 Reasons to Delete Tons of Emails
You may wonder why you should take the pain to delete all your emails when you already have gigabytes of extra storage space courtesy of Google.
Well, there are solid reasons why you should keep your mailbox in top shape.
Most Emails Lose Their Value Over Time
The whole purpose of sending emails is to pass information. Now, when you have emails from six years ago, it’s likely that the message won’t hold any value right now.
Imagine you have emails from an employee who left your company three years ago. Just think about it: What good will keeping emails from an ex-employee be?
That said, it makes sense to have emails that contain important information. But if your emails are redundant, it’s better to click on Trash.
Human and Computer Search Speed
You may neatly organize all your emails into different folders pertaining to a specific client or a project. But no one can deny it’s much easier to visually scan through a list of 40 emails as opposed to 400.
In fact, even if you use Gmail’s filtering option to reduce the number of results, it still doesn’t beat the convenience of looking at a shorter list. And not only human beings, but even our computers take longer to sift through a dataset that contains more records.
In other words, having less is more in terms of performing a search.
Local System Performance
In addition to search speed, the more email your local email program has in memory, the less you’ll have for the rest of your operating system or OS. As a result, it’ll take longer for your email program to start up and sync with the server.
Even your backups will take longer, eventually growing to unacceptable sizes. Despite the prices of hard disk space becoming cheaper, it’s much better to have it more manageable.
In short, delete your old emails!

