How To Change Your Gmail Name
You may have had your email address for years.
But let’s imagine you want to change the name associated with it. Perhaps you’re getting married, or you’ve become this successful rapper and would prefer to add your stage name.
Whatever the reason, the good news is you certainly can change your Gmail name. Mind you your Gmail name isn’t the same as your email username, so don’t end up getting confused between the two.
In this article, we’ll tell you how you can change your Gmail name and nickname without having to create a new account. Additionally, we’ll cover different sections to help you change your display name based on the kind of device you use and the type of Gmail account you have.
Sounds good?
Let’s get to it!
How To Change Your Gmail Name
In this section, we’ll discuss how you can change your Gmail name directly from the web. Although it doesn’t matter which device you use, this should be your go-to method if you plan on changing your Gmail name on your computer.
Here’s a step-by-step of what you need to do:
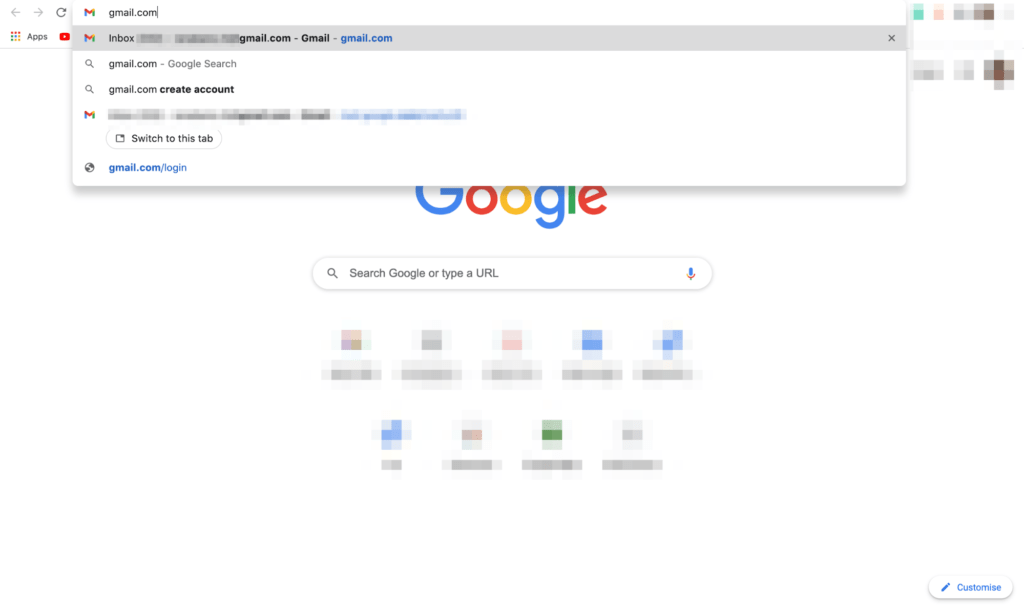
Step #1 Go to www.gmail.com. Log in to your account by typing in your Gmail username and password.
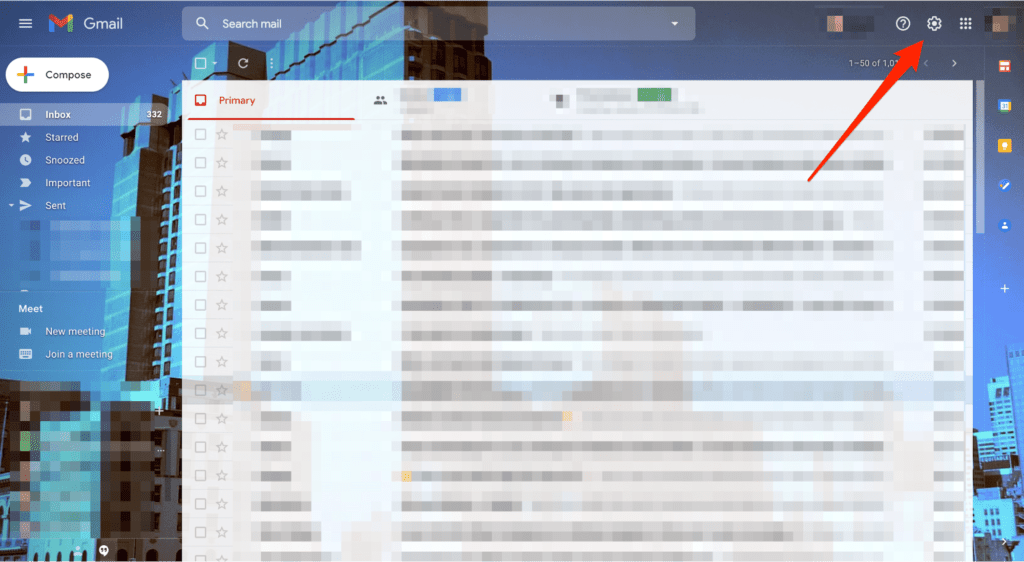
Step #2 Click on the Settings button on the top right-hand side of your screen. It’s the small cogwheel icon.
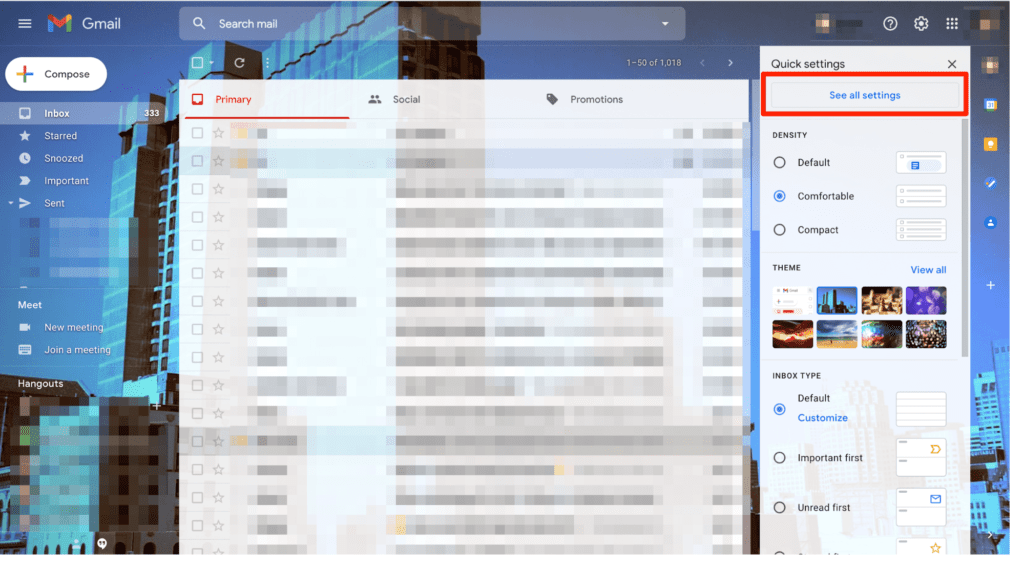
Step #3 From the dropdown menu on the right-hand side of your screen, click on See all settings.
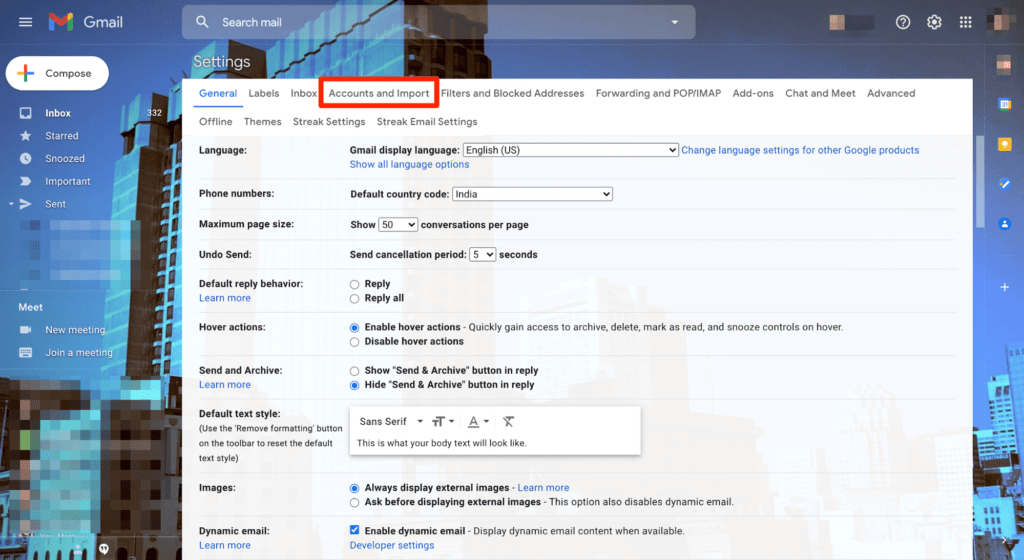
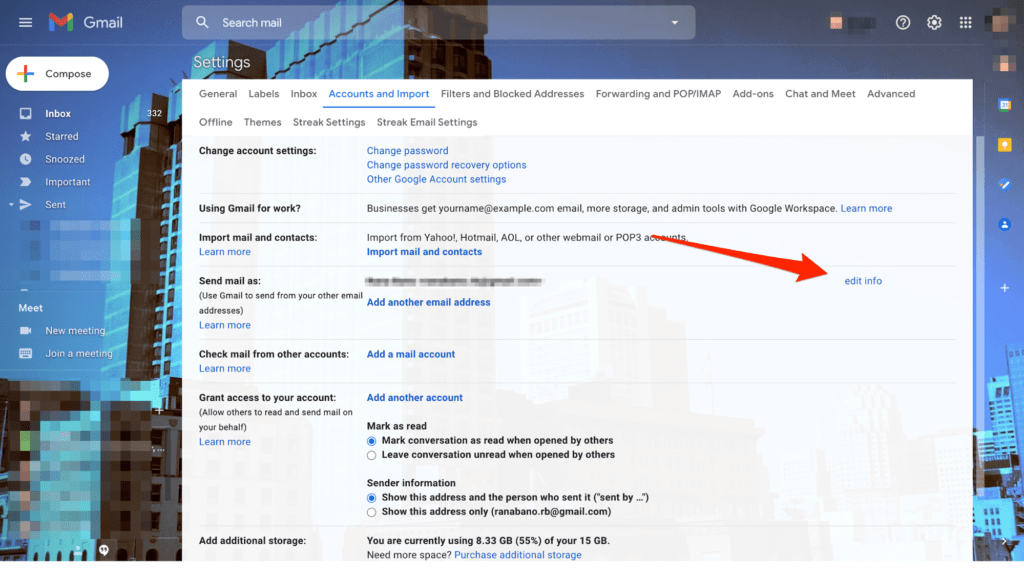
Step #4 Select the Accounts and Import option from the top menu bar. You’ll then see a new set of options displayed on your screen.
Step #5 Click on edit info that you’ll find in the Send mail as: field. A pop-up window will appear.
Step #6 Type in your new name in the name text box.
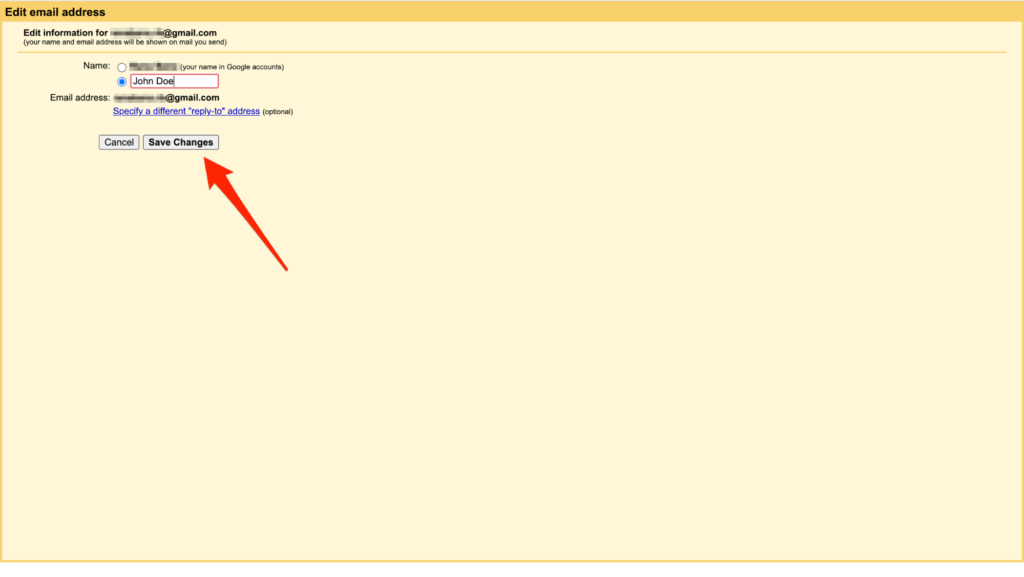
Step #7 Once done, select Save Changes to store the new name.
You now have a brand-new Gmail name. Congratulations!
As you can see, the steps are incredibly easy and straightforward. So if you want to make any changes to your Gmail name, now’s the time.
How to Change Your Name on Android
What we showed you above was how you can change your Gmail name on a computer.
If you don’t want to take the hassle of taking out your computer, you can simply get to work on your Android mobile phone or tablet. Here’s what you need to do:
Step #1 Open the Settings app on your Android device. It’s typically the gear icon on your home screen.
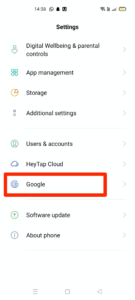
Step #2 Tap on Google from the list of shown options and then select Manage your Google Account.
Step #3 Tap the Personal info option you’ll find on the top menu bar.

Step #4 From the list of shown options, click on Name under the Basic info field. Or tap on the small arrowhead (>) beside it. You may be asked to sign and if you haven’t already.
Step #5 Enter your new name and then tap on Save.

As you can see from our screenshot below, our Gmail name is now John Doe. Voila!

How to Change Your Name on iOS
Don’t have an Android device? No worries, here’s a step-by-step to change your Gmail name on iOS devices like iPhones and iPads.
Just follow the below steps, and you’ll be able to change your display name within a couple of minutes:
Step #1 Open the Gmail app on your iOS device.

If you don’t already have the app installed on your phone, you’ll have to download it from the App Store. If that’s the case, make sure you log in to your Gmail account by typing in your credentials before proceeding to the next step.
Step #2 Tap on the Menu icon on the top left-hand side of the screen. This is denoted by three horizontal lines. A side menu bar will appear.

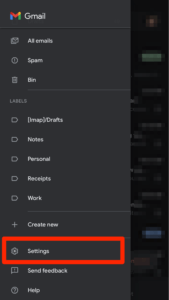
Step #3 Scroll down until you see the Settings option on the menu bar. Again, This will be denoted by the cog wheel icon. Tap on it.
Step #4 Tap on the email address associated with the Gmail account whose display name you want to change.
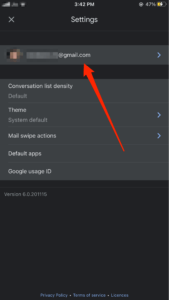
Step #5 Go to Manage your Google Account.
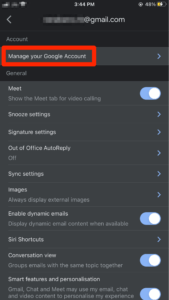
Step #6 Tap the Personal info tab that you’ll find on the top menu bar.
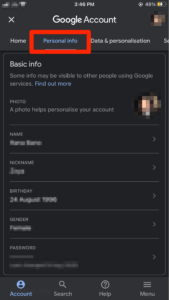
Step #7 Tap on Name under the Basic info field. You can also click on the small arrowhead (>) beside it.
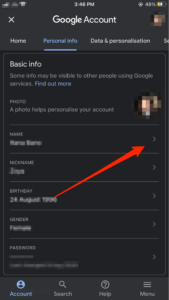
Step #8 Type in your new Gmail name that you want to save. Finally, click on the Save button to save changes.

And that’s all you need to do to change your Gmail name on your iOS devices. The steps are very easy and hassle-free, and will be done within minutes!
How to Change Your Gmail Name on a G Suite Account
Things change slightly when you’re a part of a G Suite account.
If your admin doesn’t permit you to change your name on your Google Workspace account, you’ll see an error message that says, “The setting can’t be changed for your account“ if you follow our above steps.
If so, you’ll have to contact your G suite admin to change it.
In this section, we’ll discuss two ways of changing your Gmail account:
- When you’re an individual who has the permission to change their Gmail name, and
- When you’re a G Suite administrator who has been directed by your team member to change their names.
1. For the Individual:
Step #1 Go to www.gmail.com. Log in to your account by typing in your Gmail username and password.

Step #2 Click on the Settings button on the top right-hand side of your screen. It’s the small cog wheel icon.

Step #3 From the dropdown menu, click on See all settings.

Step #4 Since you have a G Suite account, you’ll see the Accounts tab on the top menu. Click on it. You’ll then see a new set of options displayed on your screen.
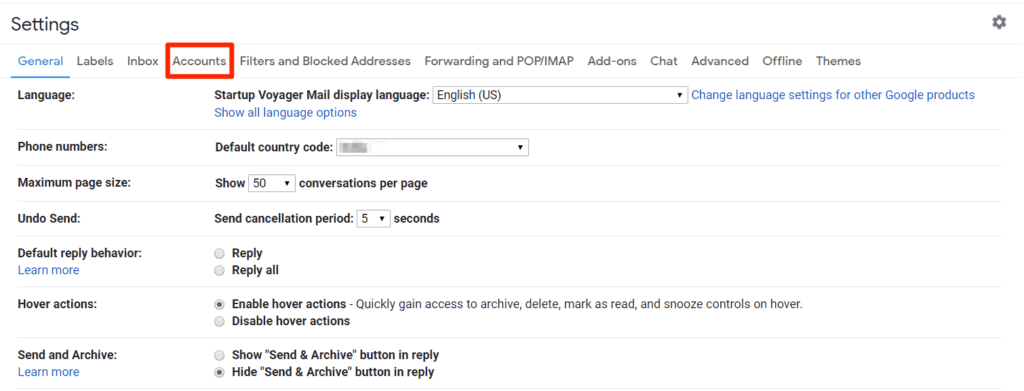
Step #5 Click on edit info that you’ll find in the Send mail as: field. A pop-up window will appear.

Step #6 Type in your new name in the name text box.

Step #7 Once done, select Save Changes to store the new name.
That’s all you have to do if you have the permission to edit your display name in the G Suite account. Otherwise, you have to contact your administrator and ask OK then to change your display name to your desired name.
If they don’t know how to proceed, simply show your admin the steps below.
2. For the G Suite Administrator:
If you haven’t given your team members permission to change the Gmail account, you‘ll have to do it for them.
Here’s what you should do if you want to change our users Gmail name
Step #1 Log in to G Suite with your administrator account.
Step #2 On the Users page, click on the pencil icon on your right side of the member whose Gmail name you want to change. It’s the Rename icon.

Image Source: WordPress
Step #3 Type in the new First Name and Last Name. Click on Rename when you’re done.
That’s it! The user will now have a new Gmail name to go by.
How to Add or Change Your Gmail Nickname
We just showed you how to change the first and last name of your Gmail account. But you also have the option to add or change your nickname, which can be used alongside your first and last name if that’s what you want.
For instance, if you want to keep your first and last name as “John Doe,” you can set your nickname to “Jon” to let people know that this is what you like to be called. This will also help keep conversations friendly instead of being overly formal.
Here’s how your name will be displayed after you add your nickname:
- John “Jon” Doe
- John Doe (Jon)
- John Doe (With no visible nickname)
You can choose between the three options. Keep in mind that the third nickname option is different from the nickname you set up separately to use with your Google Home app.
Let’s get started with these steps now.
Step #1 Navigate to aboutme.google.com. You may have to sign in to your Gmail account if you haven’t already logged in.
Step #2 Click on the People icon located on the right-hand side under the Basic info category.
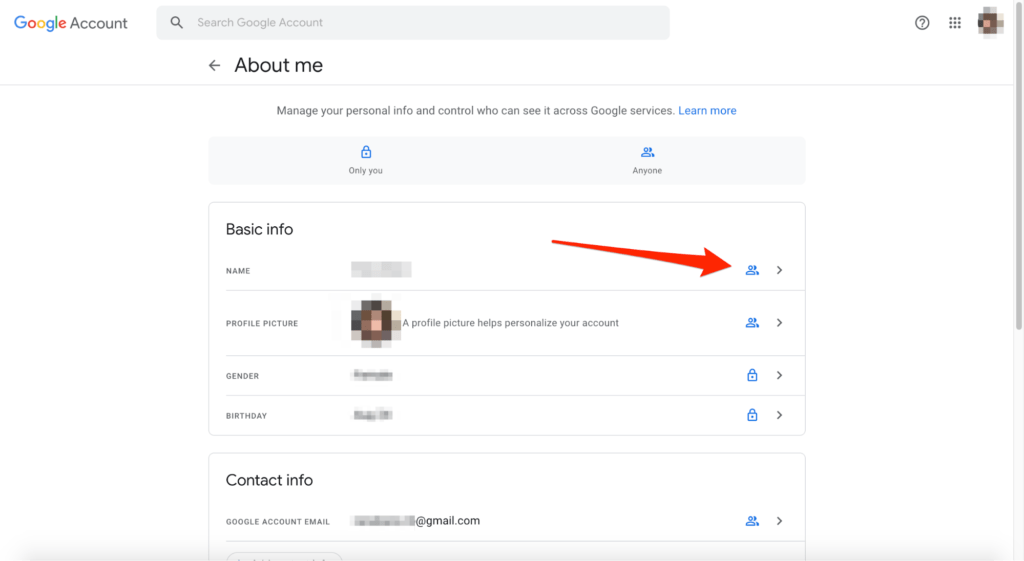
Step #3 Then select the pencil icon right next to the Nickname field.
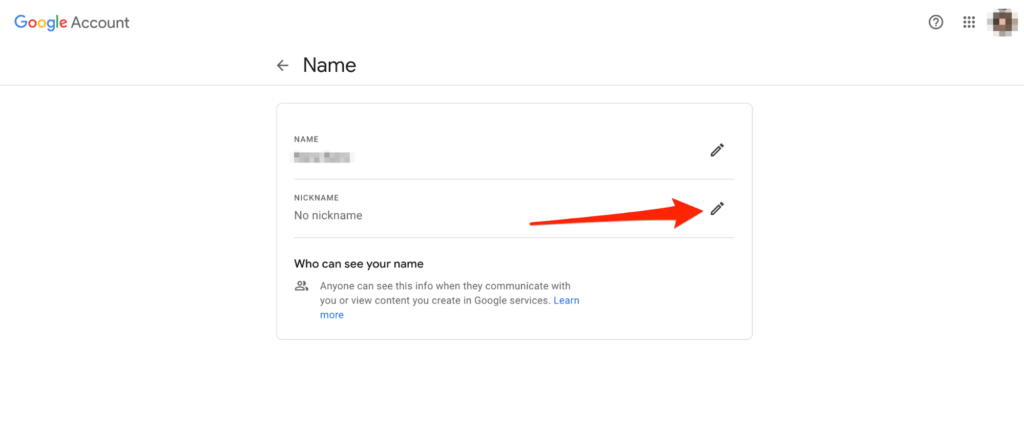
Step #4 Enter your desired nickname in the empty field.
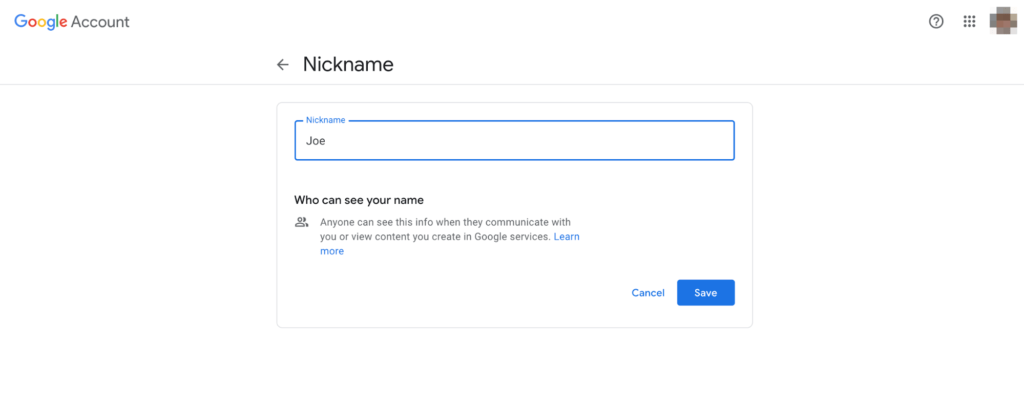
Step #5 You can choose how your display name looks by selecting the dropdown arrow beside the ‘Display my name as’ option.
Here are a few possible options for you to decide how your display name will be visible across your Google Account:
- First Last
- First “Nickname” Last
- First Last (Nickname)
Step #5 Select Save when you’re done.
So this is how you change your Gmail name (and add or change a nickname) on your computer and Android and iOS devices. In case you have a G Suite account, then too, the steps are just as simple and easy to follow.

