The 4 Ways to Change Your Gmail Address
You might’ve had your Gmail address forever, so it may not reflect who you are or what image you want to present to the world today.
In the corporate world especially your email address is just as important as your name – everyone knows it. It’s also why you must ensure it’s professional-sounding and doesn’t stick out like a sore thumb.
Think about it: What impression would a potential client have if they received an email from 2cool4uprincess@gmail.com?
That’s why we’re going to talk about how you can change your Gmail address in this guide.
Can I Change My Gmail Address?
Changing an email address is already a frustrating experience, but with Gmail, it becomes even trickier.
You see, Gmail doesn’t typically allow users to change their email ID if it ends in gmail.com. Sometimes it works, but more often than not it doesn’t. Gmail doesn’t specify the reason behind this. As you’ll see below, it’s much easier and more reliable to simply create a new account.
You might also find it easier to change your Gmail address if you have a G Suite account. You’ll have to talk to your G Suite administrator in this case and ask for help.
Let’s now look at the different ways in which you can change your Gmail address.
Method 1: How to Change Your Gmail Address Without Making a New Account
Although we’ve mentioned it before, we still want to clarify this again: This method may not work for every user, so beware.
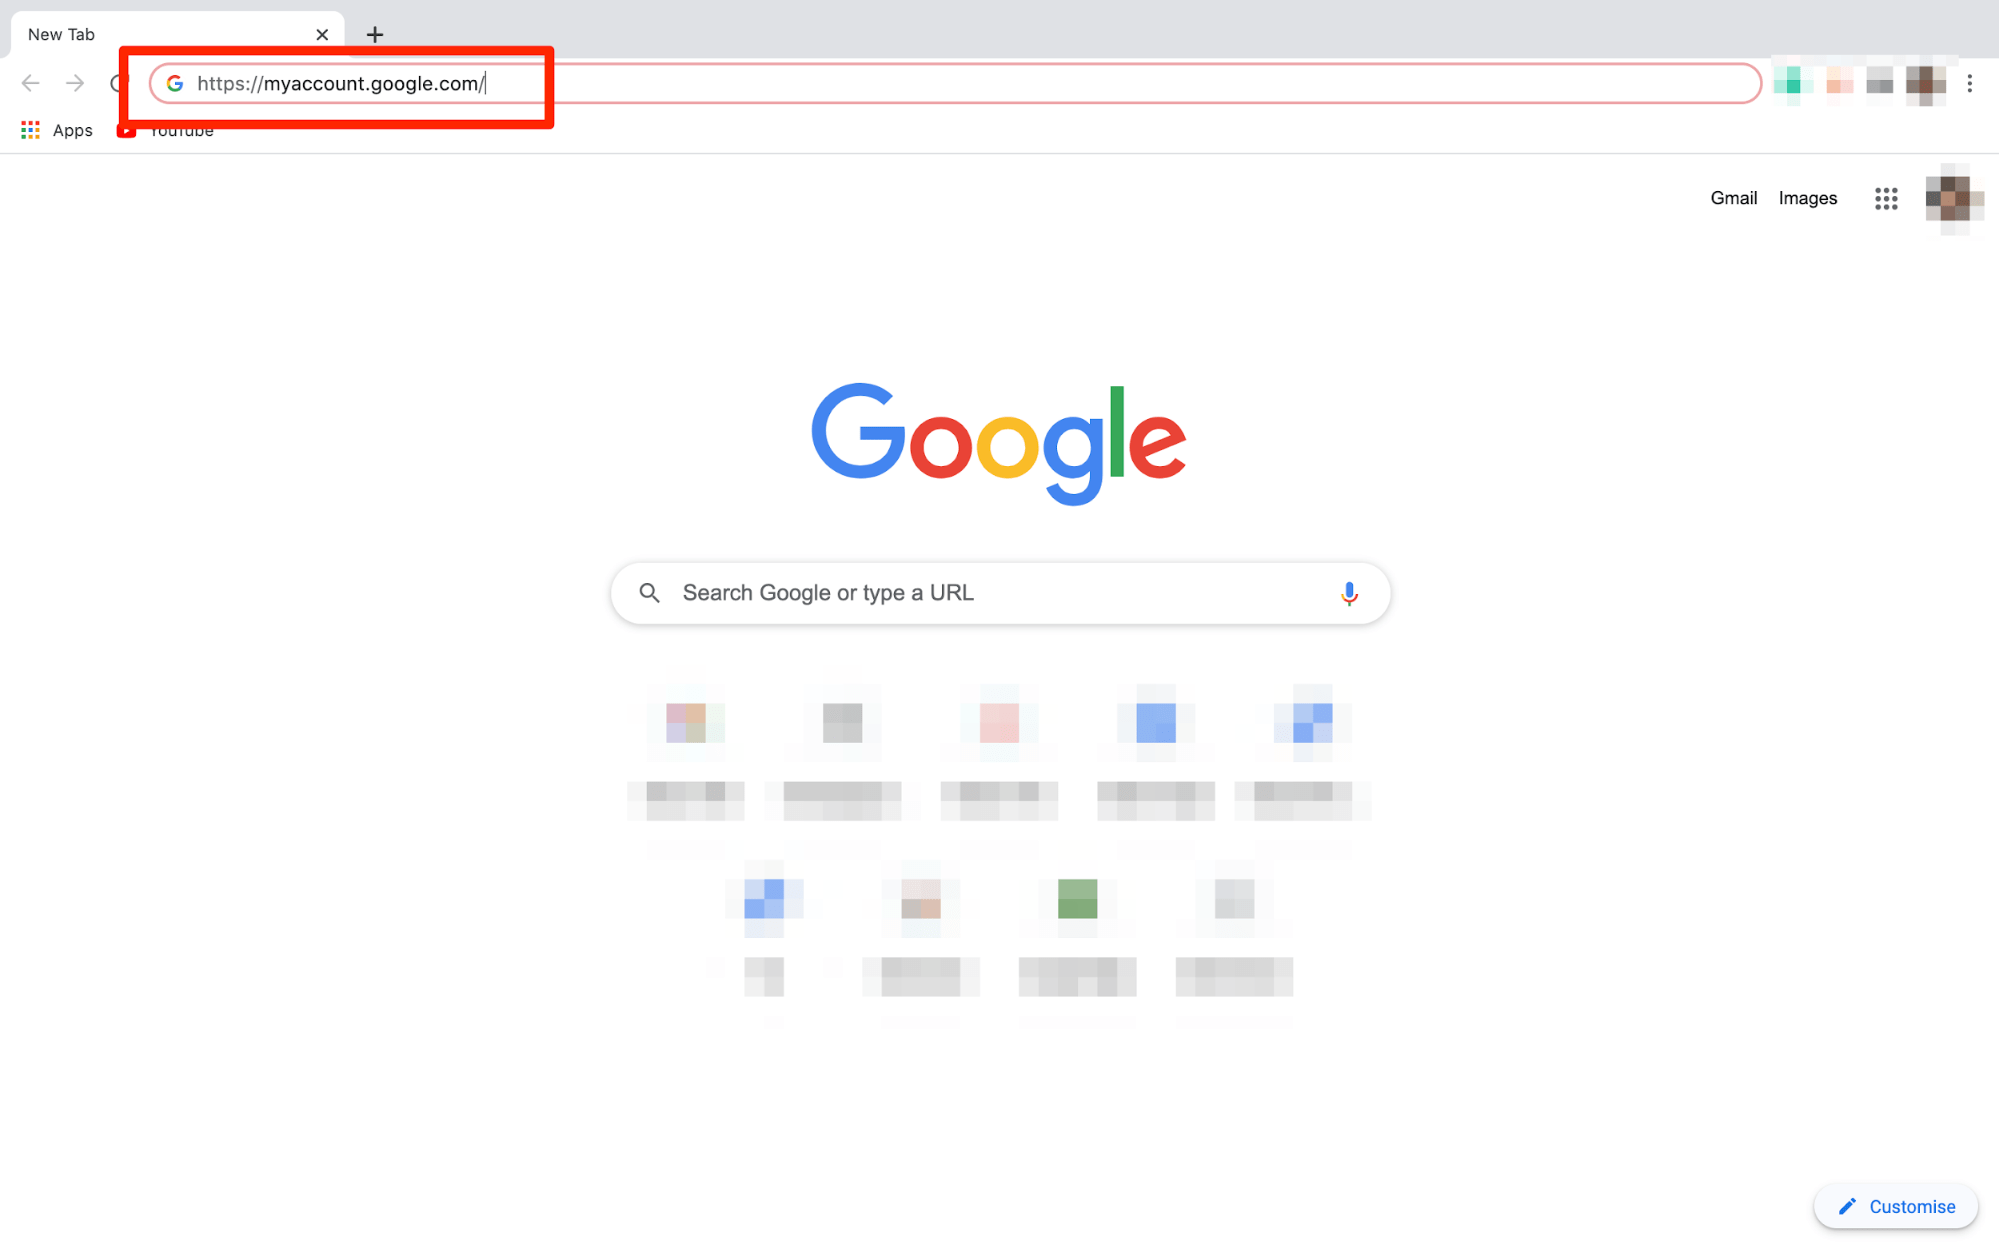
Step #1 Log in to your Google account. If you aren’t already logged in, you’ll have to type in your email address and password to gain access.
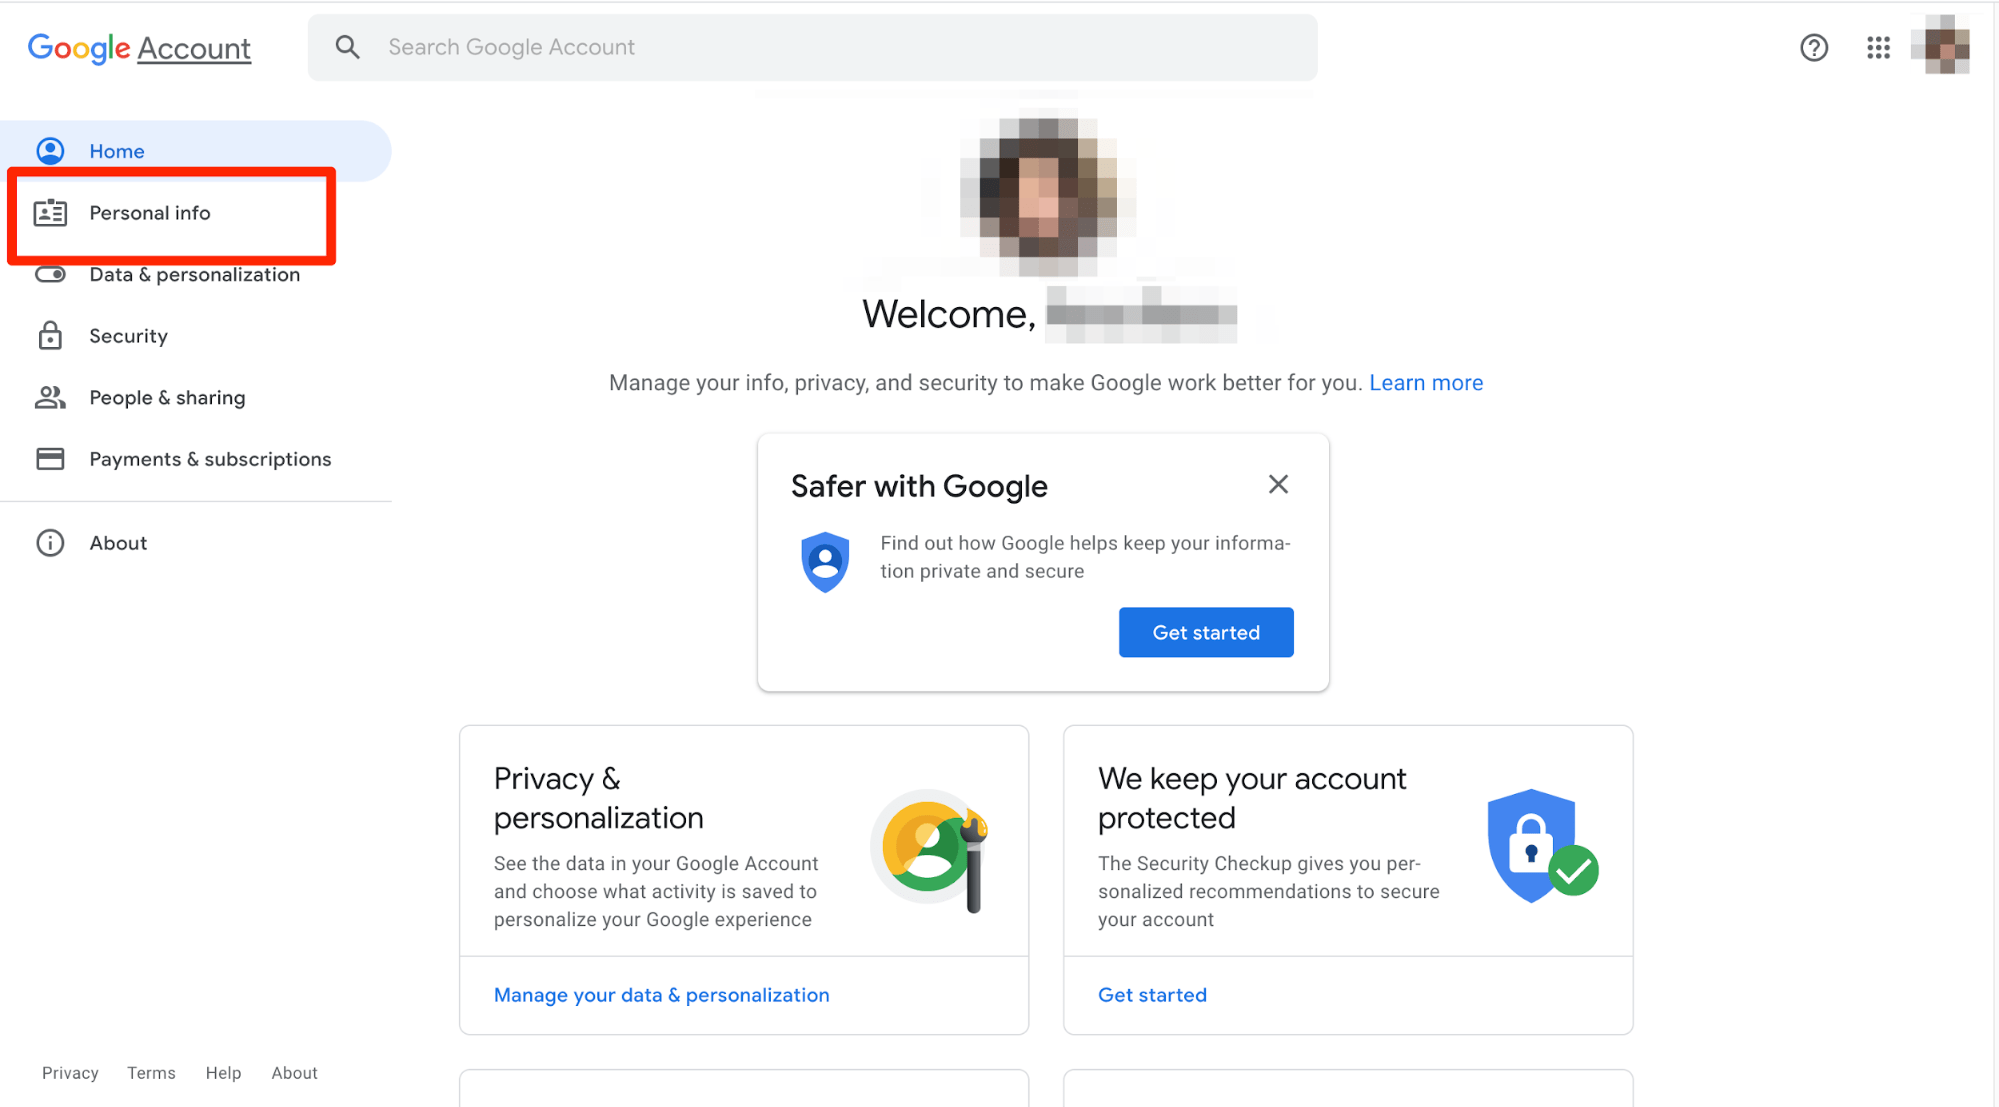
Step #2 Click on the Personal Info tab located on the left-hand side menu.
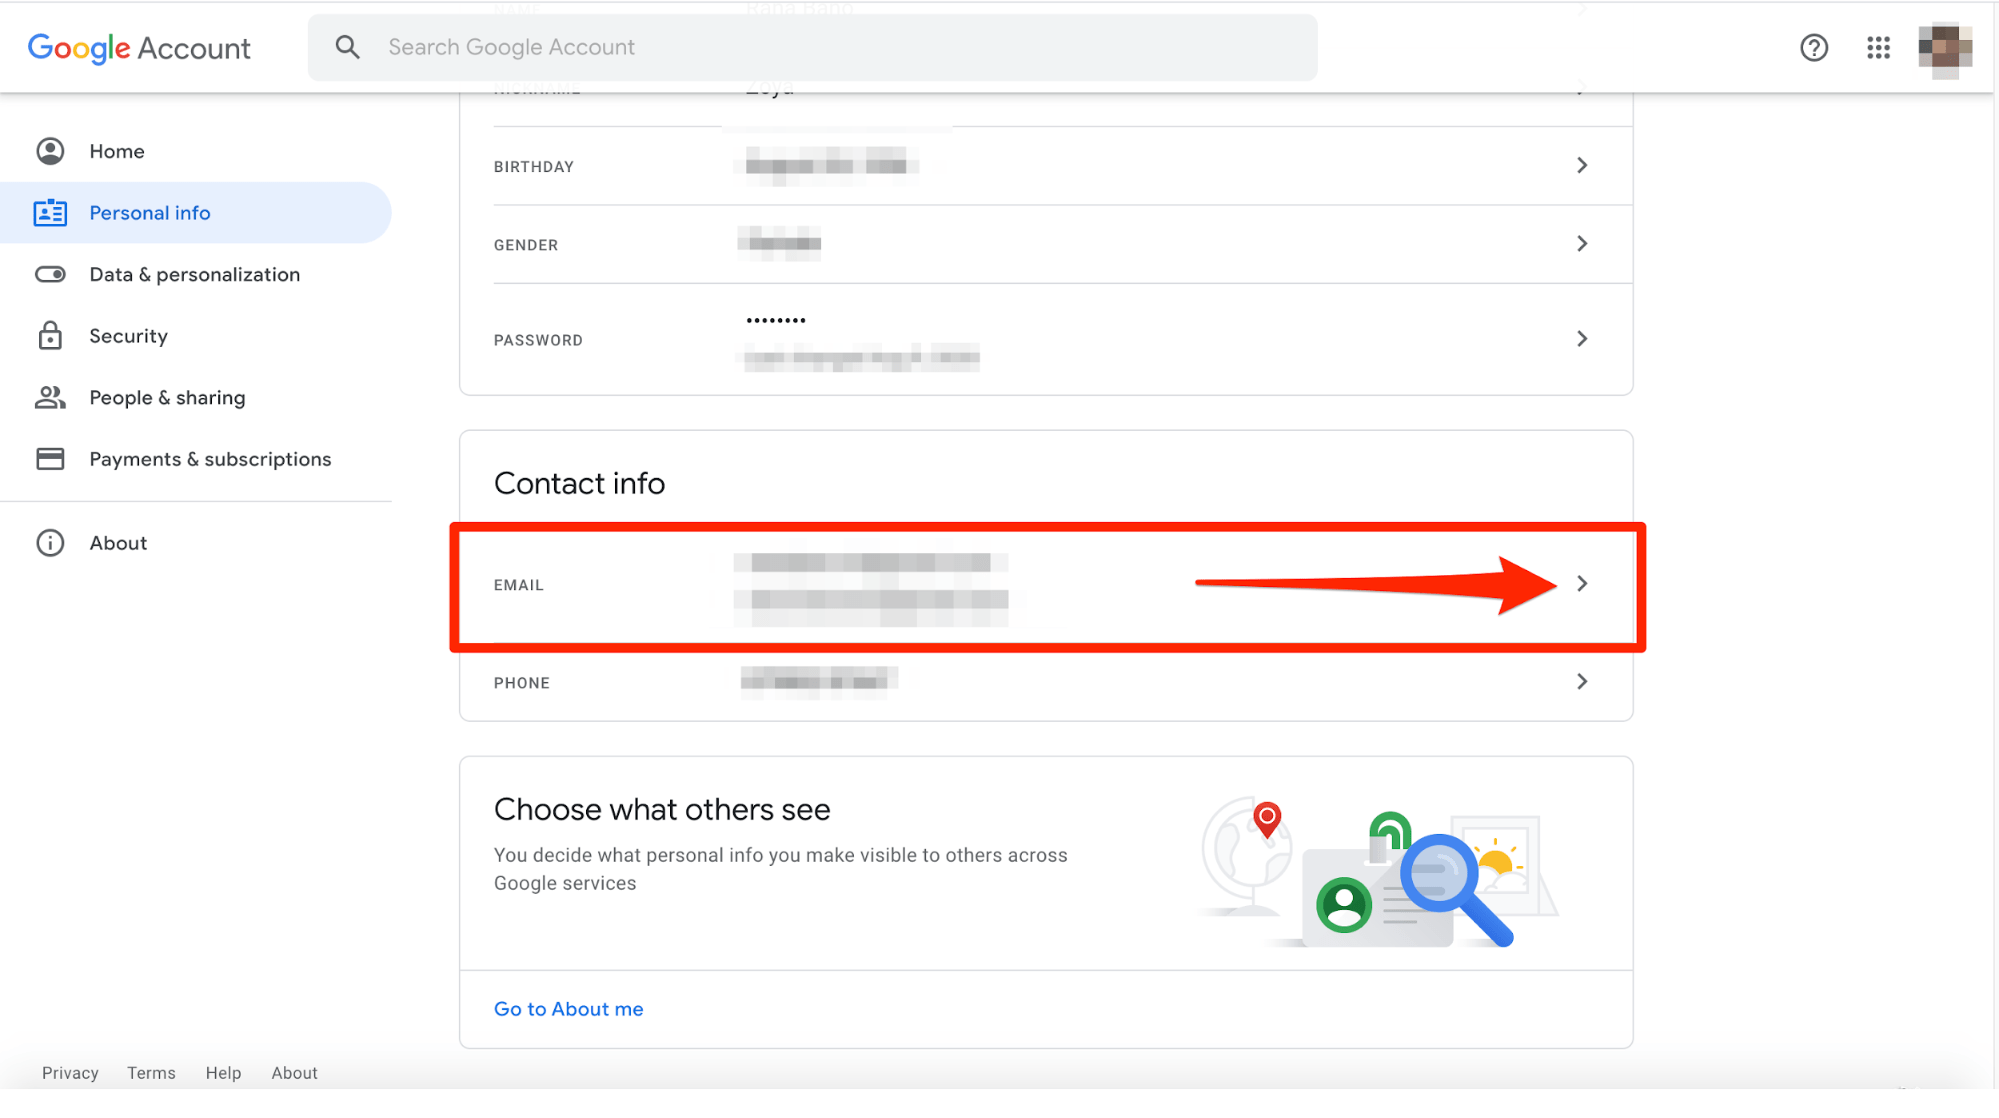
Step #3 Scroll your mouse below to see the Contact Info field. Click on the little arrowhead in the Email section.
Step #4 Click on Google Account email if you can change your ID. As you can see, in this instance Google doesn’t let us change our email ID.
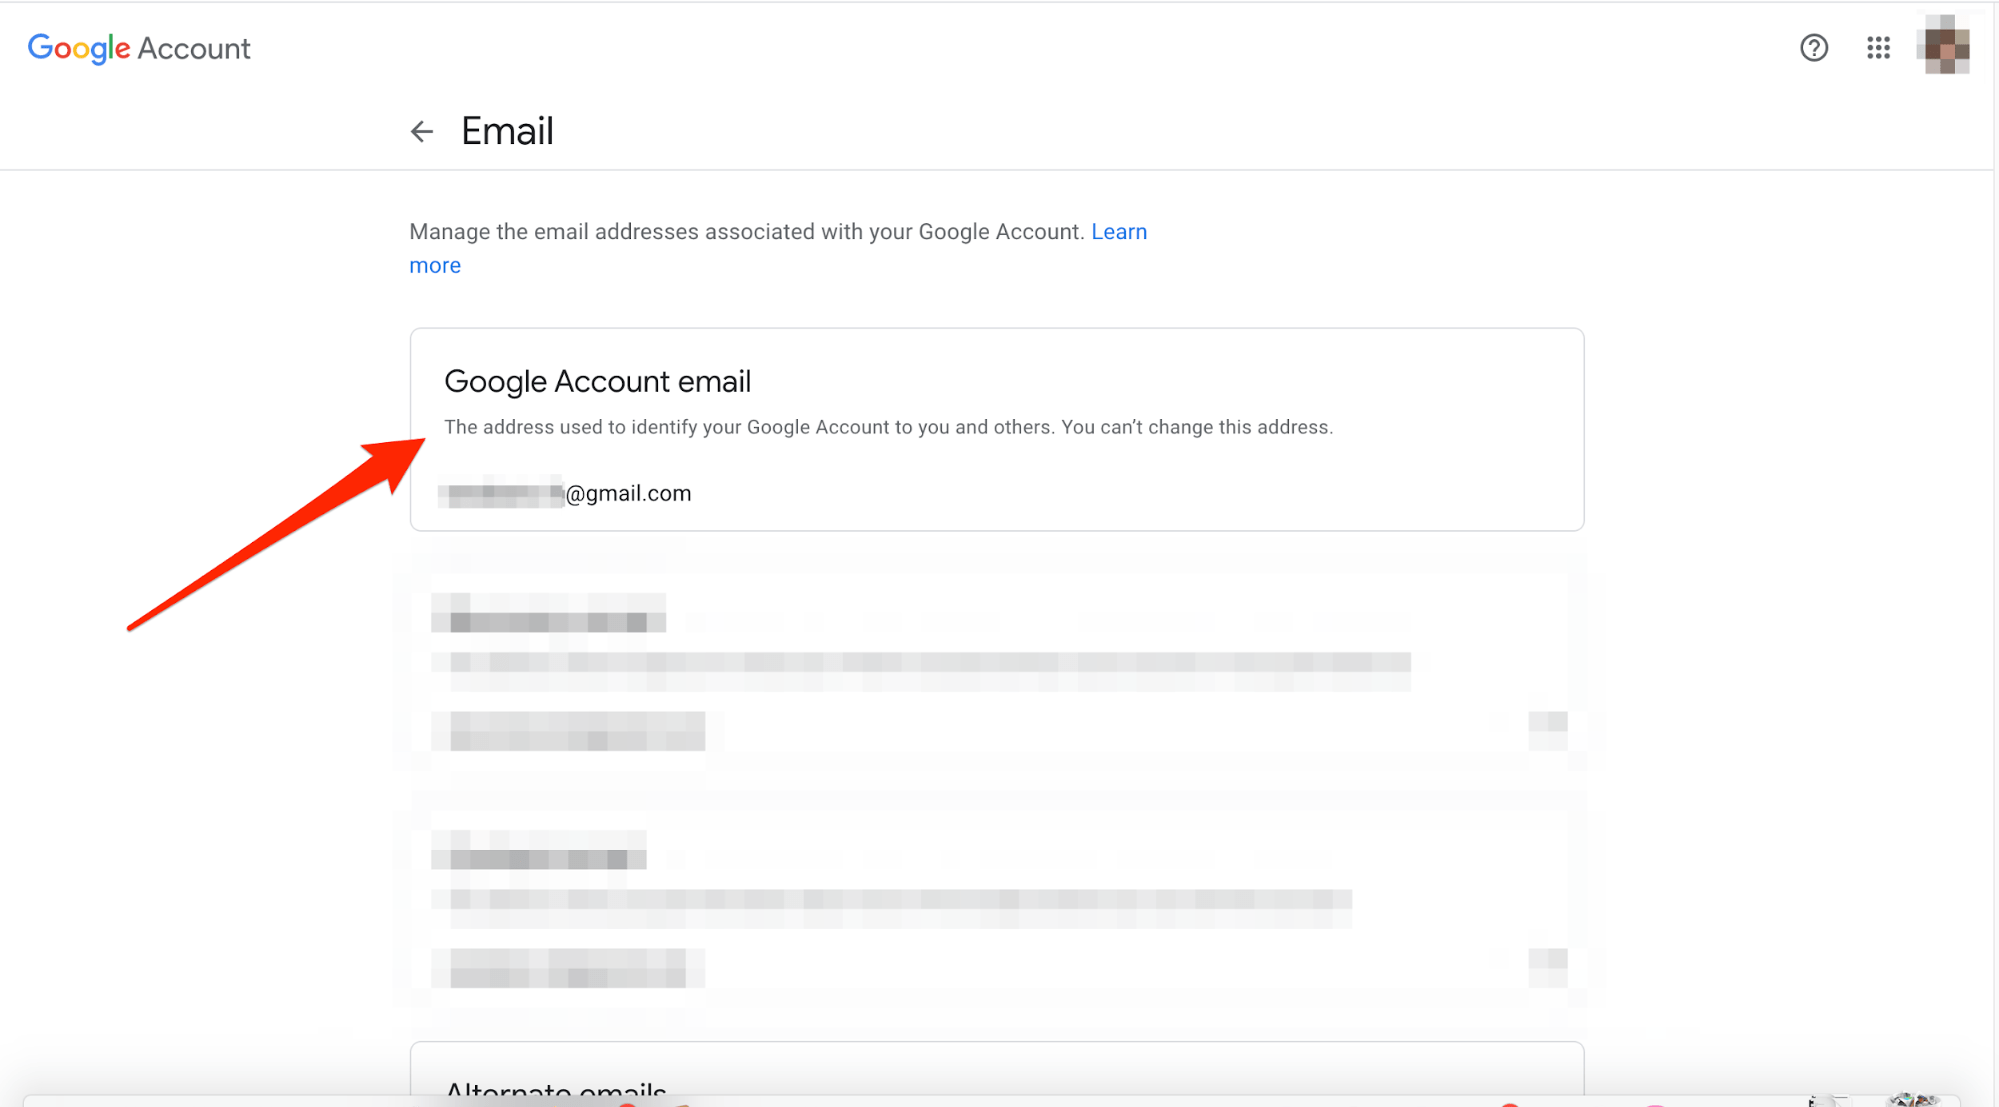
If you’re one of the few lucky ones and are able to open this, move on to the next step.
Step #5 Click on Edit, which is located next to the email address you want to change.
Enter the new email address for your account, and just keep following the on-screen prompts. Keep in mind that you’ll receive a verification email with a verification link for the new address. You have to click on the link to complete the address change.
Once you’ve clicked on the link, your email address will now have changed. Congratulations!
Method 2: Changing Your Gmail Address by Making a New Gmail Account
If Gmail doesn’t permit you to change your email address, your only way out is to create a new email account. You can follow this up by importing your existing data and then informing your colleagues, friends, and family about your new Gmail address.
Step #1 Make a new Gmail account.
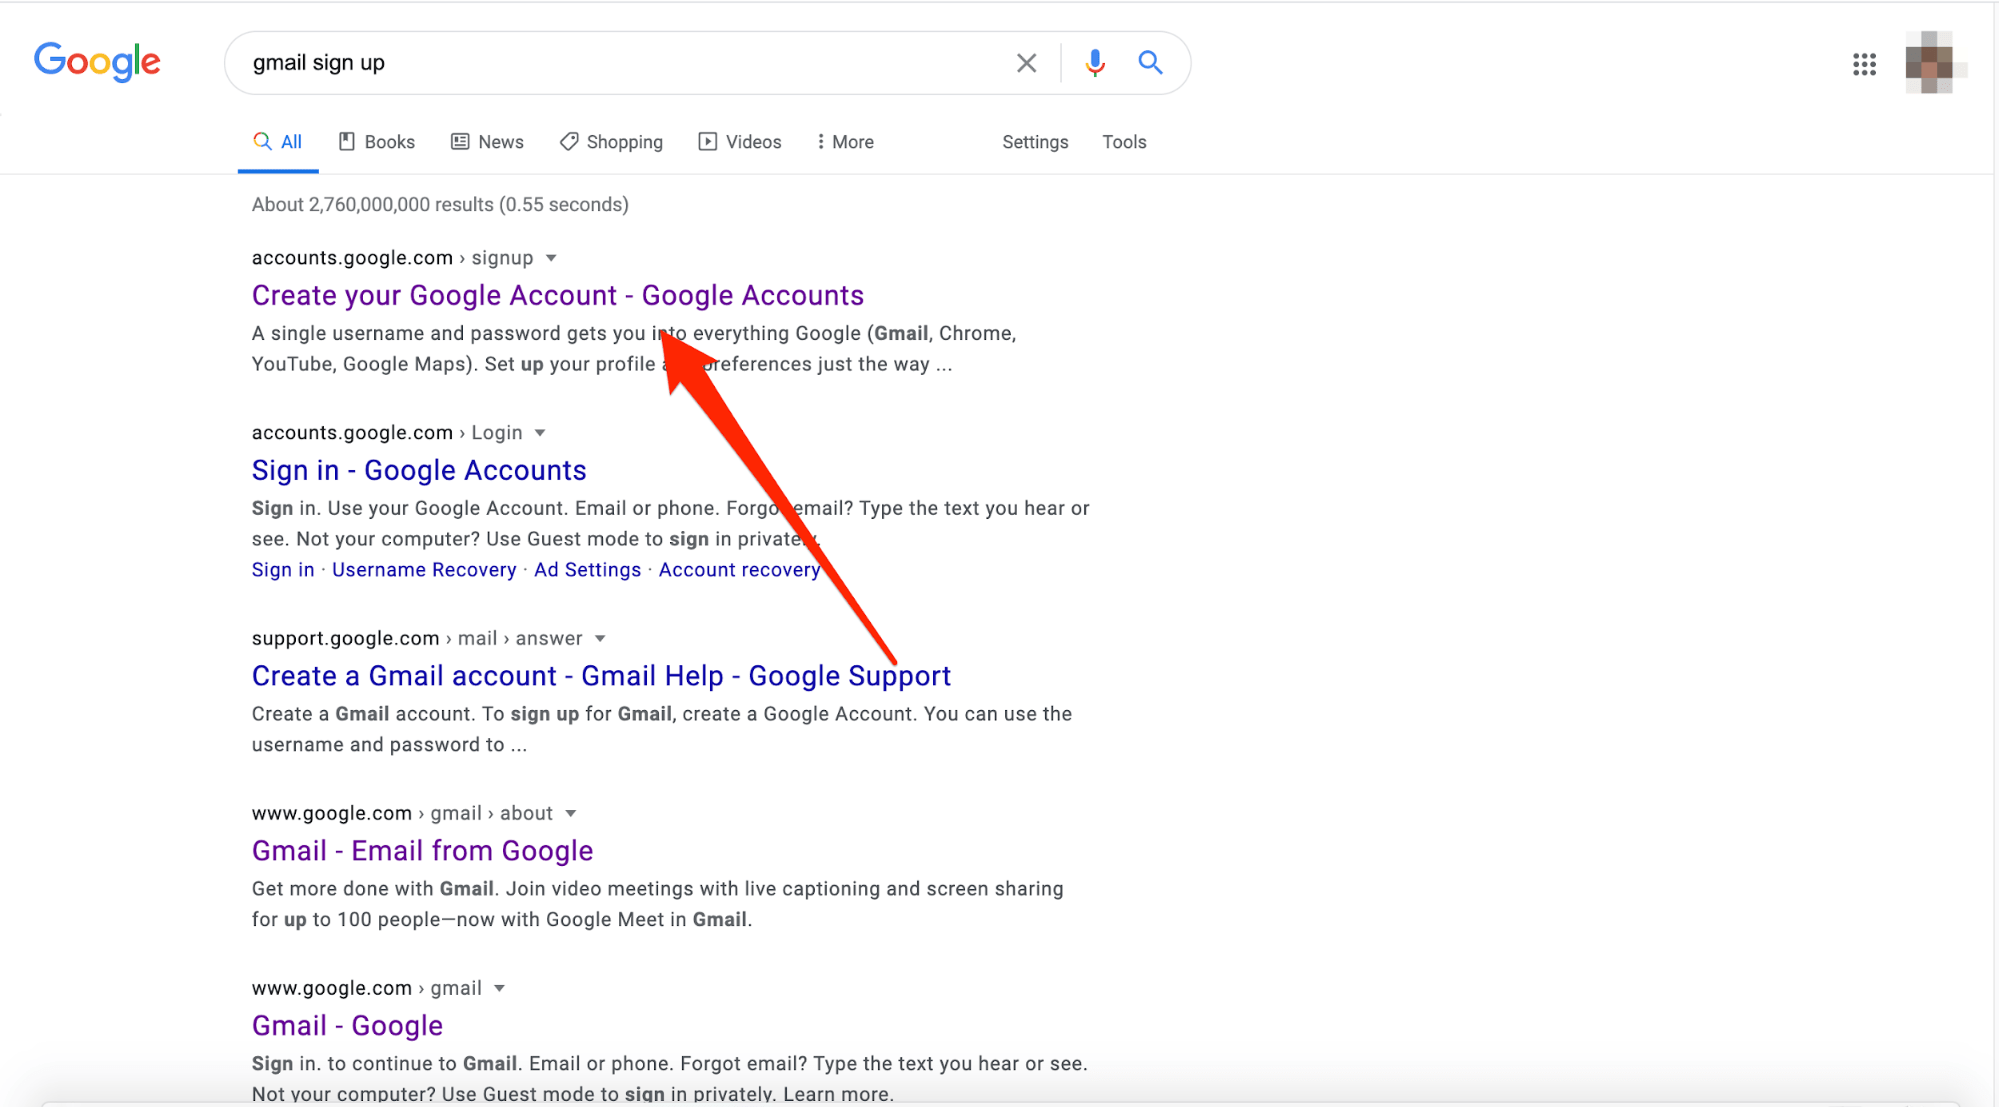
We’re going to assume you already know how to do this since you already have one. But, in case you‘ve forgotten, type in “Gmail signup” on your web browser, and click on the very first link (Create your Google Account).
Then you just have to fill in your details, and your account will be ready.
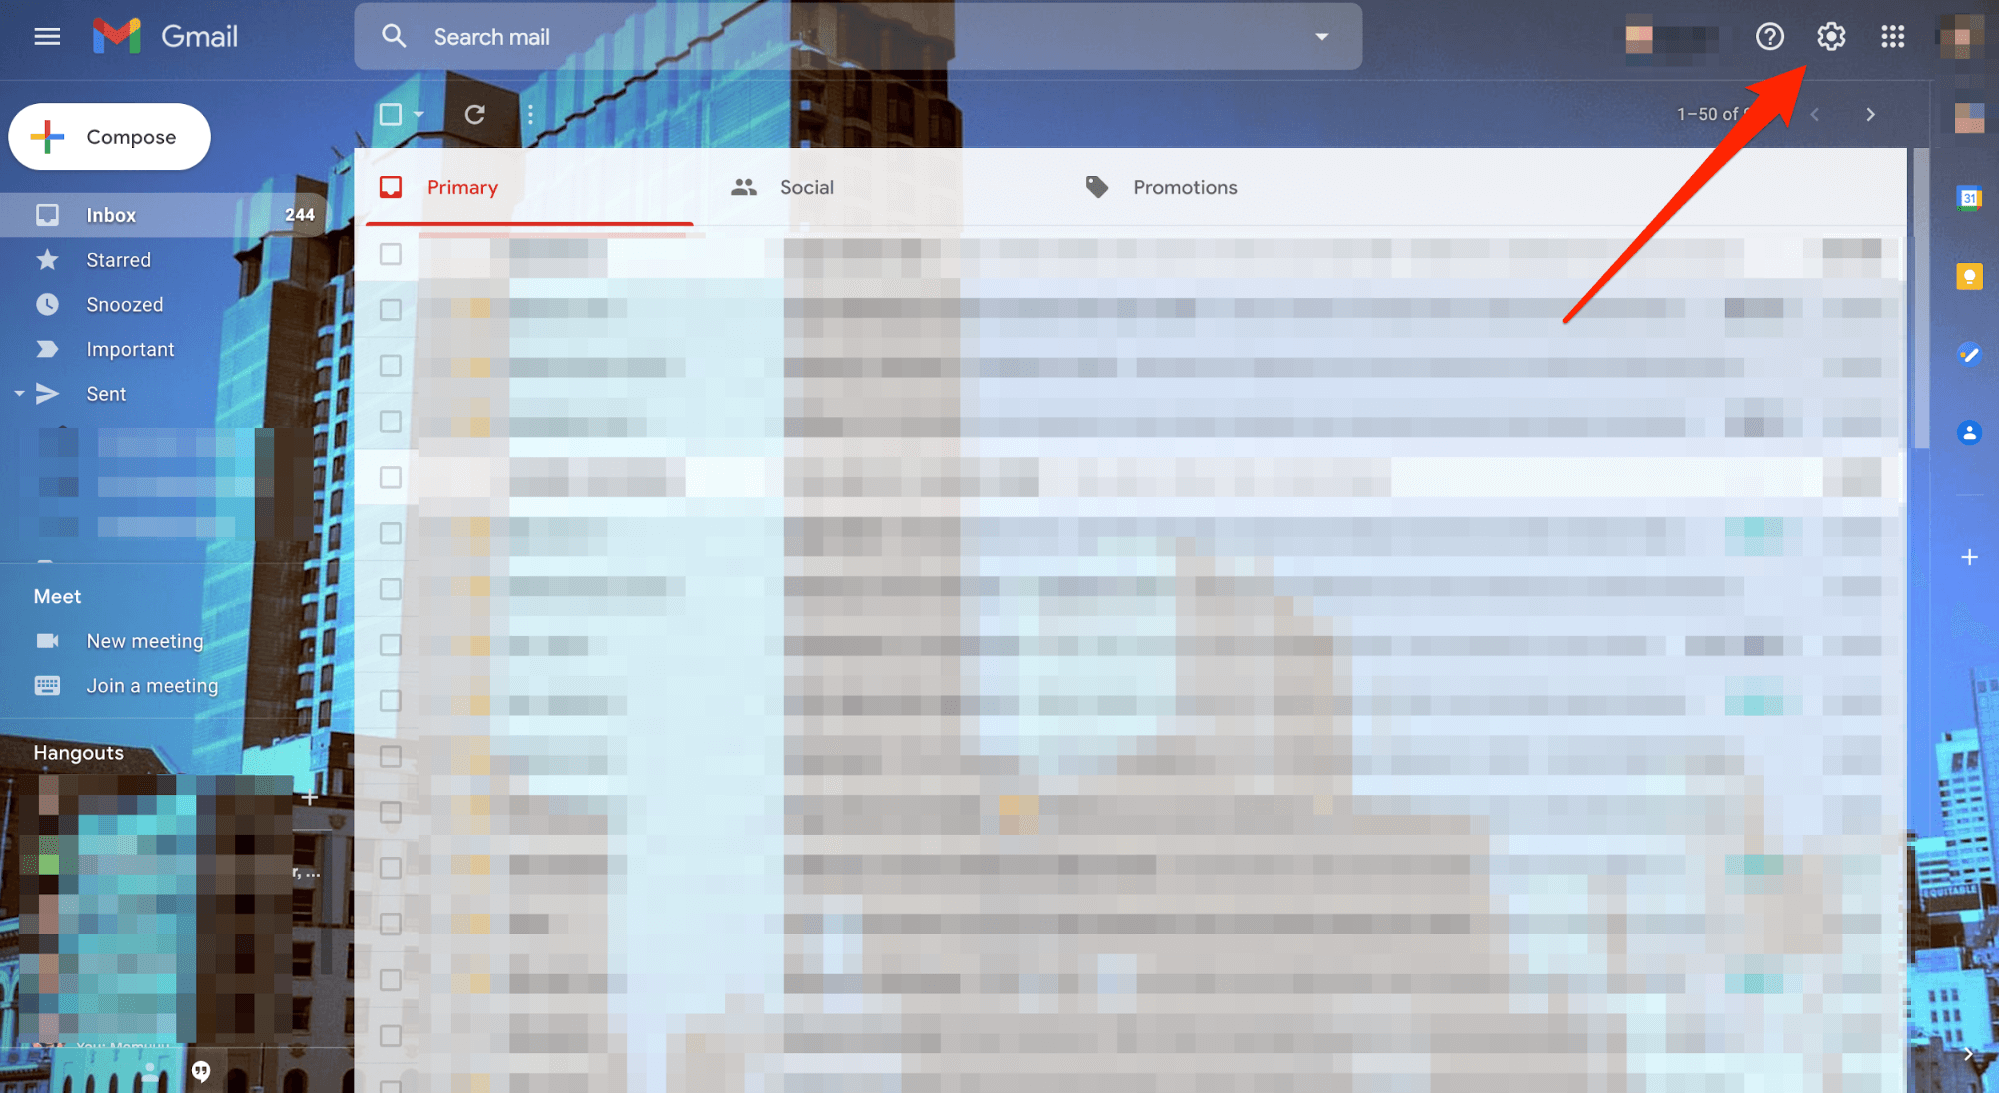
Step #2 Click on the cogwheel icon, which is your account Settings. A dropdown menu will appear.
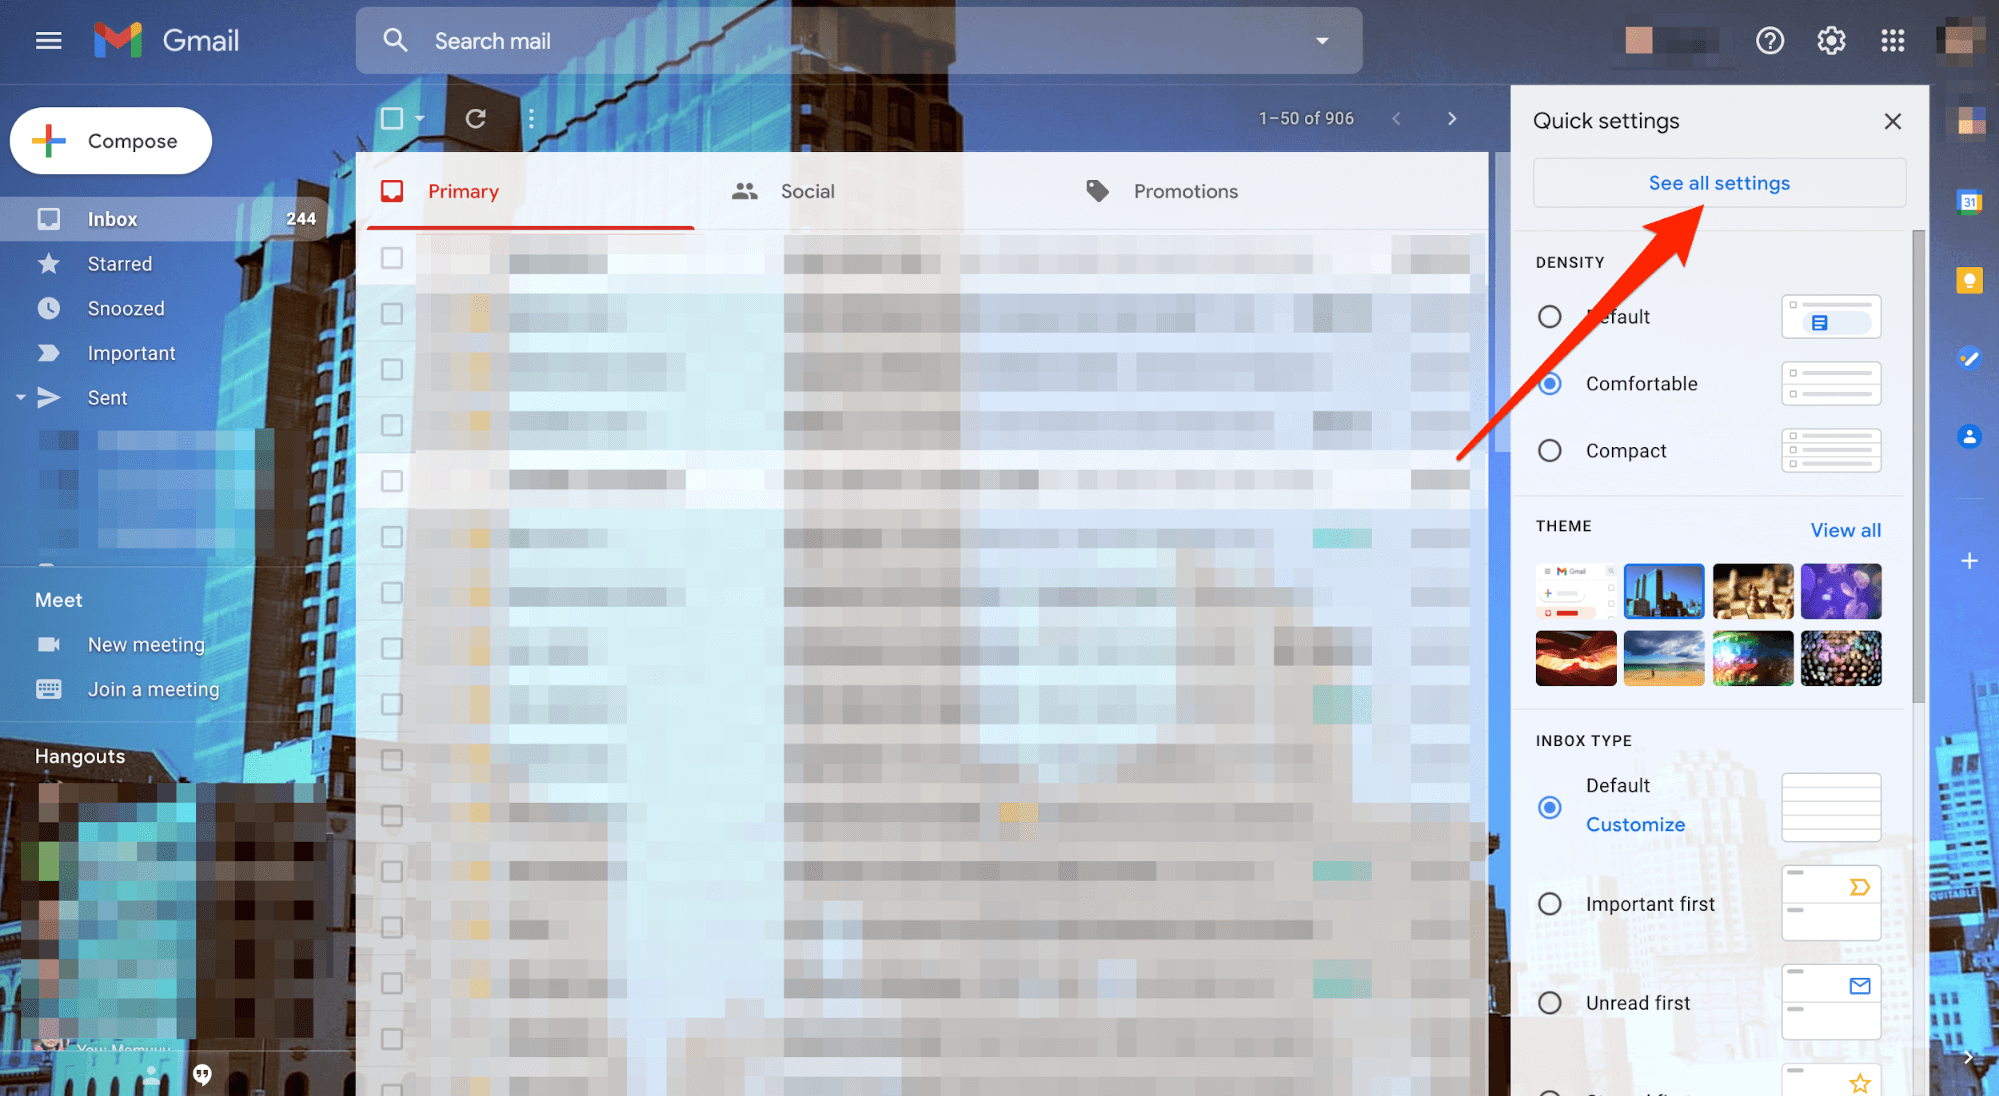
Step #3 Click on See all settings under the Quick Settings menu bar.
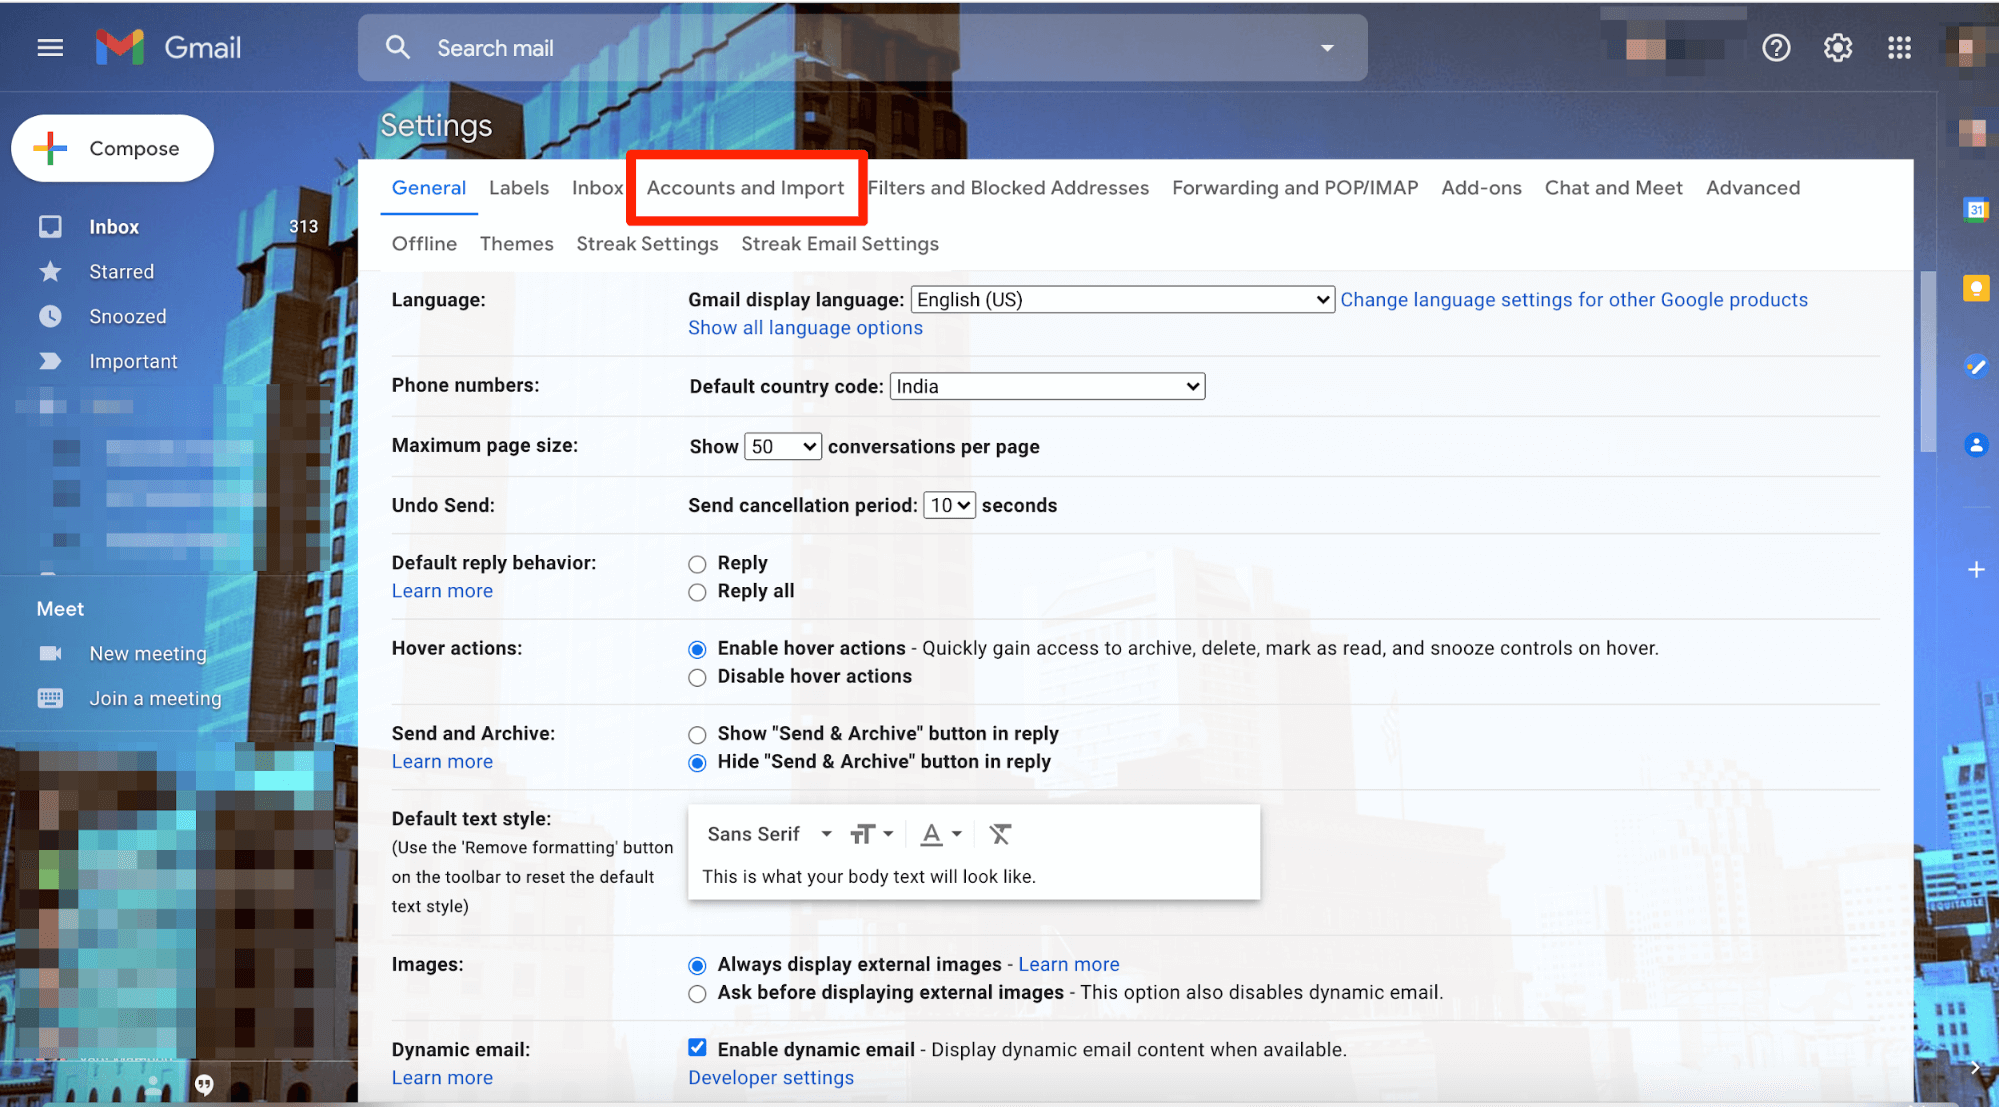
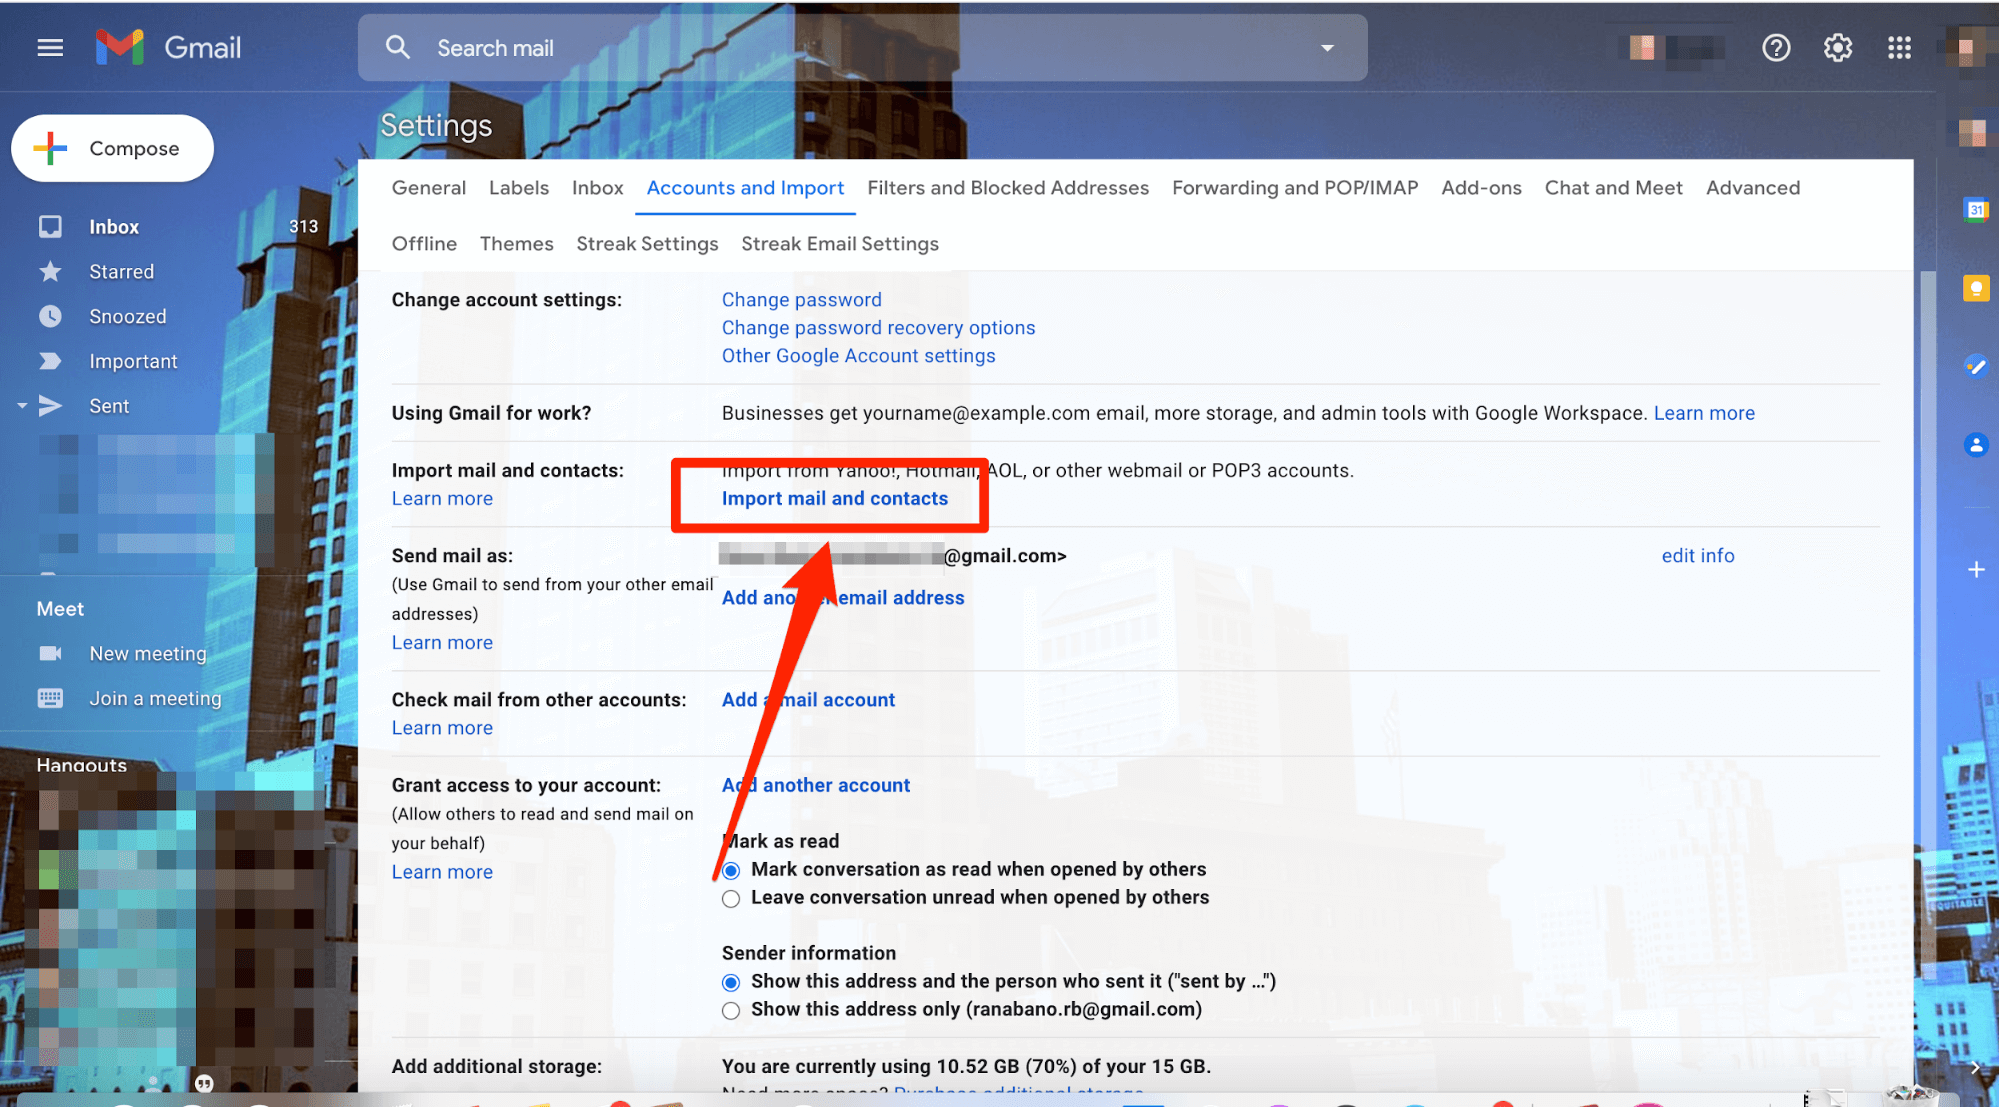
Step #4 If you’re using a regular Gmail account (one that ends in gmail.com), click on the Accounts and Import tab on the top menu.
For those using a G Suite account, click the Accounts tab.
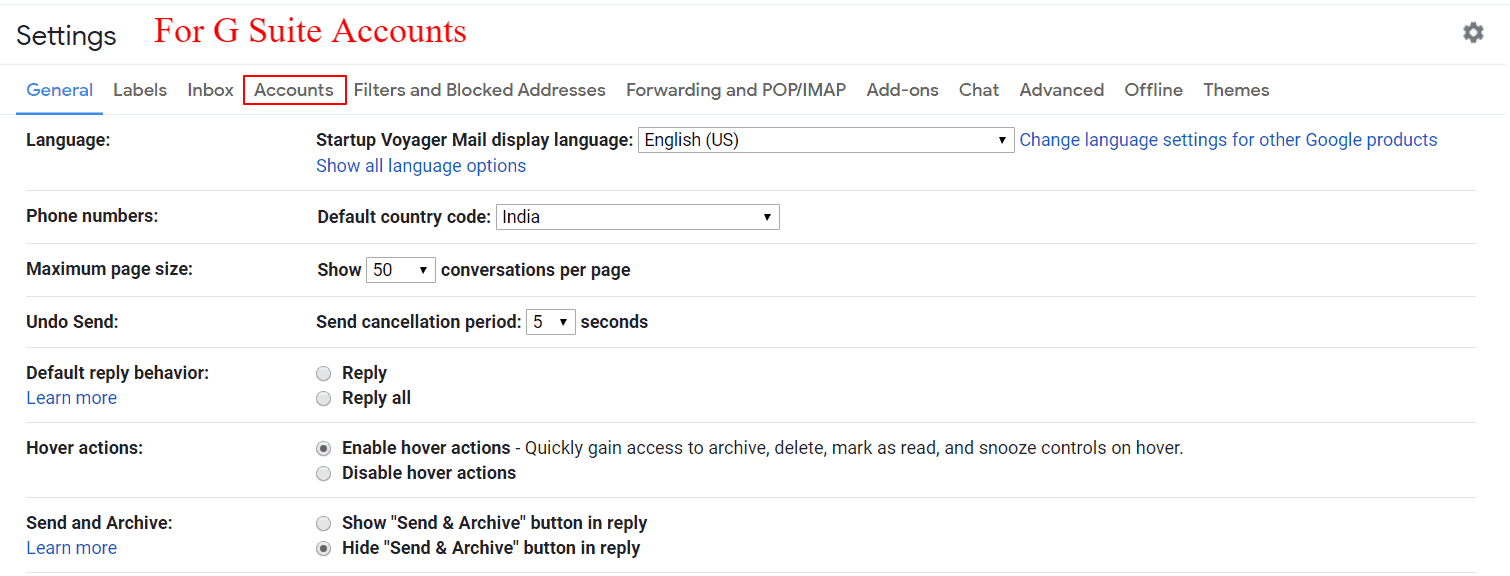
Step #5 You’ll see the Import mail and contacts field here. Over there, click on the Import mail and contacts option. A new window will open.
If you can’t find the Import mail and contacts tab in your G Suite account, you’ll have to contact your administrator.
Step #6 Enter your old email address in the field right below What account do you want to import from?
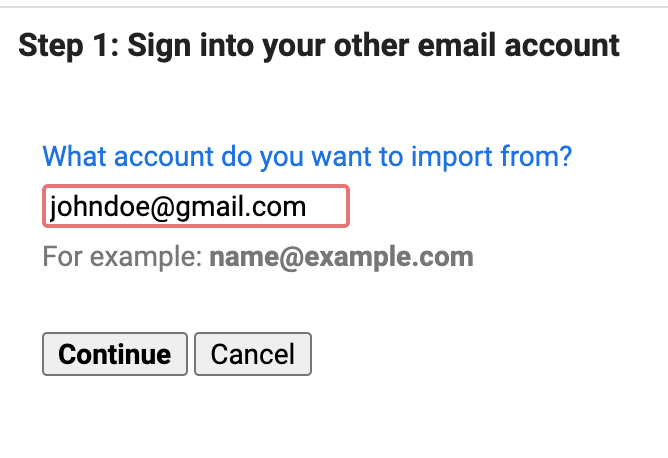
You’ll now be asked to sign in to your old email account. Open a new browser tab for this, and then continue to sign in to your old account.
At this stage, you should be signed into both your old and new email addresses.
Step #7 Once you signed in to your old account, click on Continue. This will open another window browser, asking you for access to your old email account. Grant access by clicking on Allow.
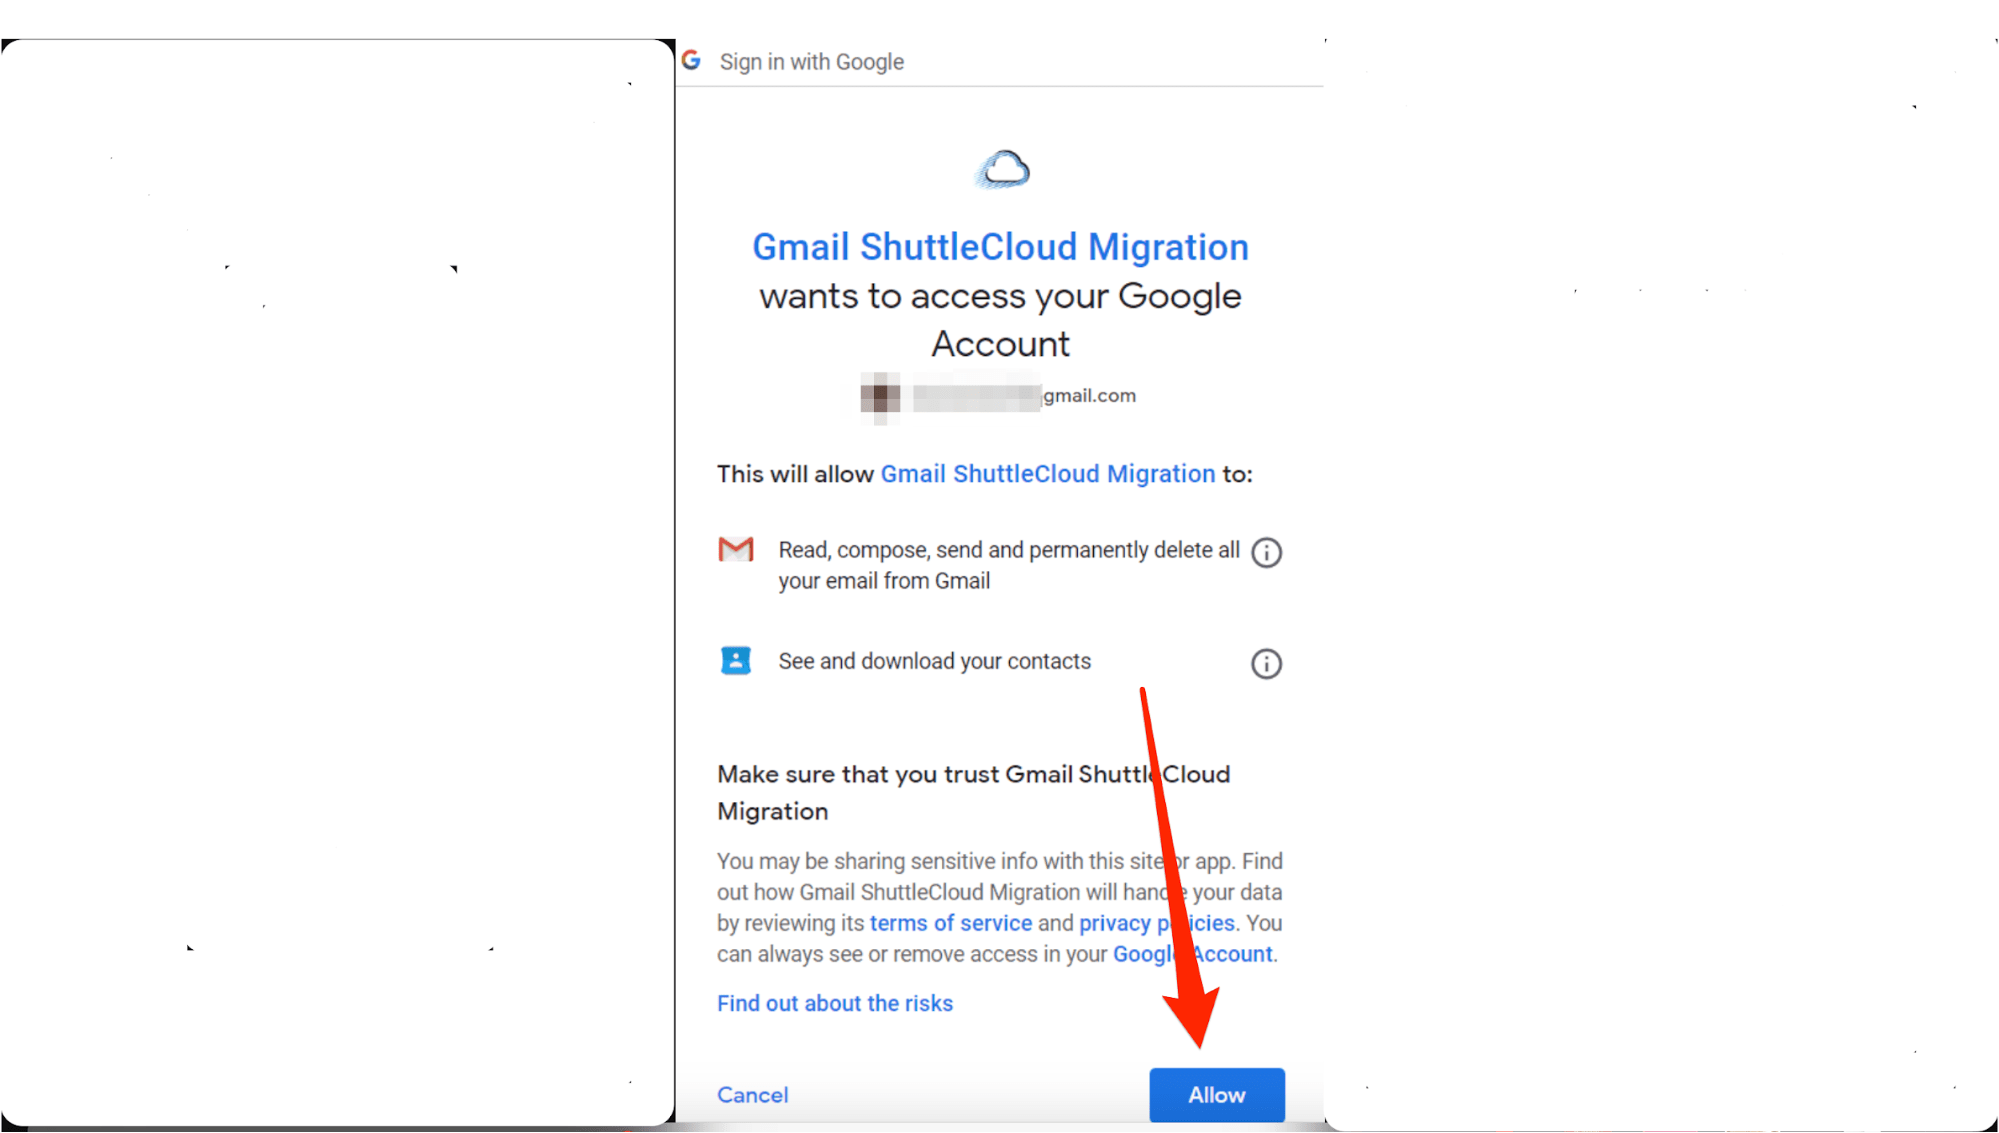
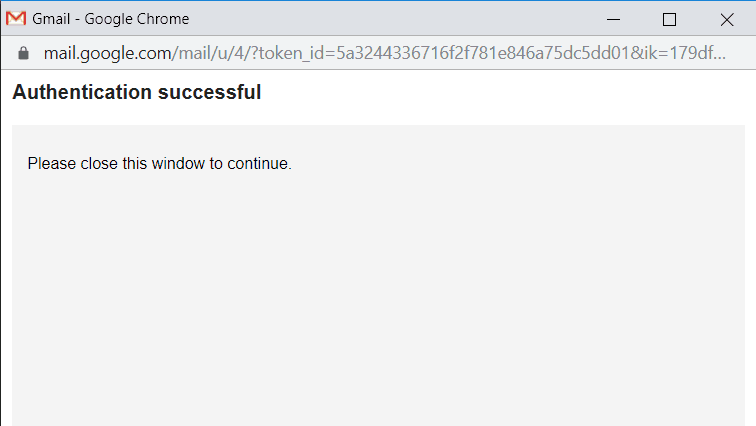
Step #8 After granting access, you’ll see a status message indicating that the authentication was successful. Close this window.
Step #9 Go to the previous pop-up window (the one with your new email account).
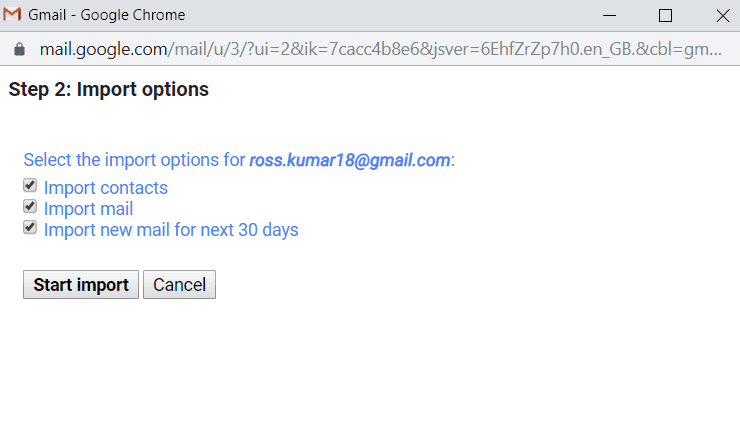
Select the import options for your old email account. You can import contacts and mail, as well as forward new emails received on your old Gmail address to your Gmail address for the next 30 days.
Check your desired options, and once you’re done, select Start Import.
Step #10 Once the import process is done, you’ll see a finished status message on your screen. Close this window.
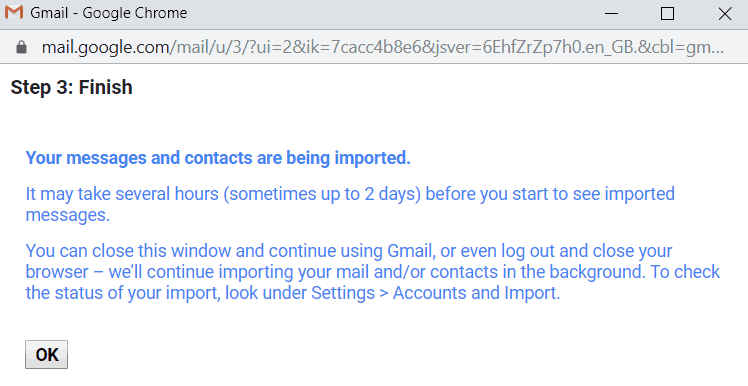
Now refresh your new Gmail address. You’ll find your old emails in your new account under the folder with your old account name.
If you suddenly decide to stop importing your old stuff, you can halt the process by clicking on Stop in the Import mail and contacts field.
Alternative Method:
You can simply add a mail account to your new Gmail account instead of using the Import mail and contacts tab. Here’s how you do it:
Step #1 Click on the Settings icon. A dropdown menu will appear.
Step #2 Select See all settings under the Quick Settings menu bar.
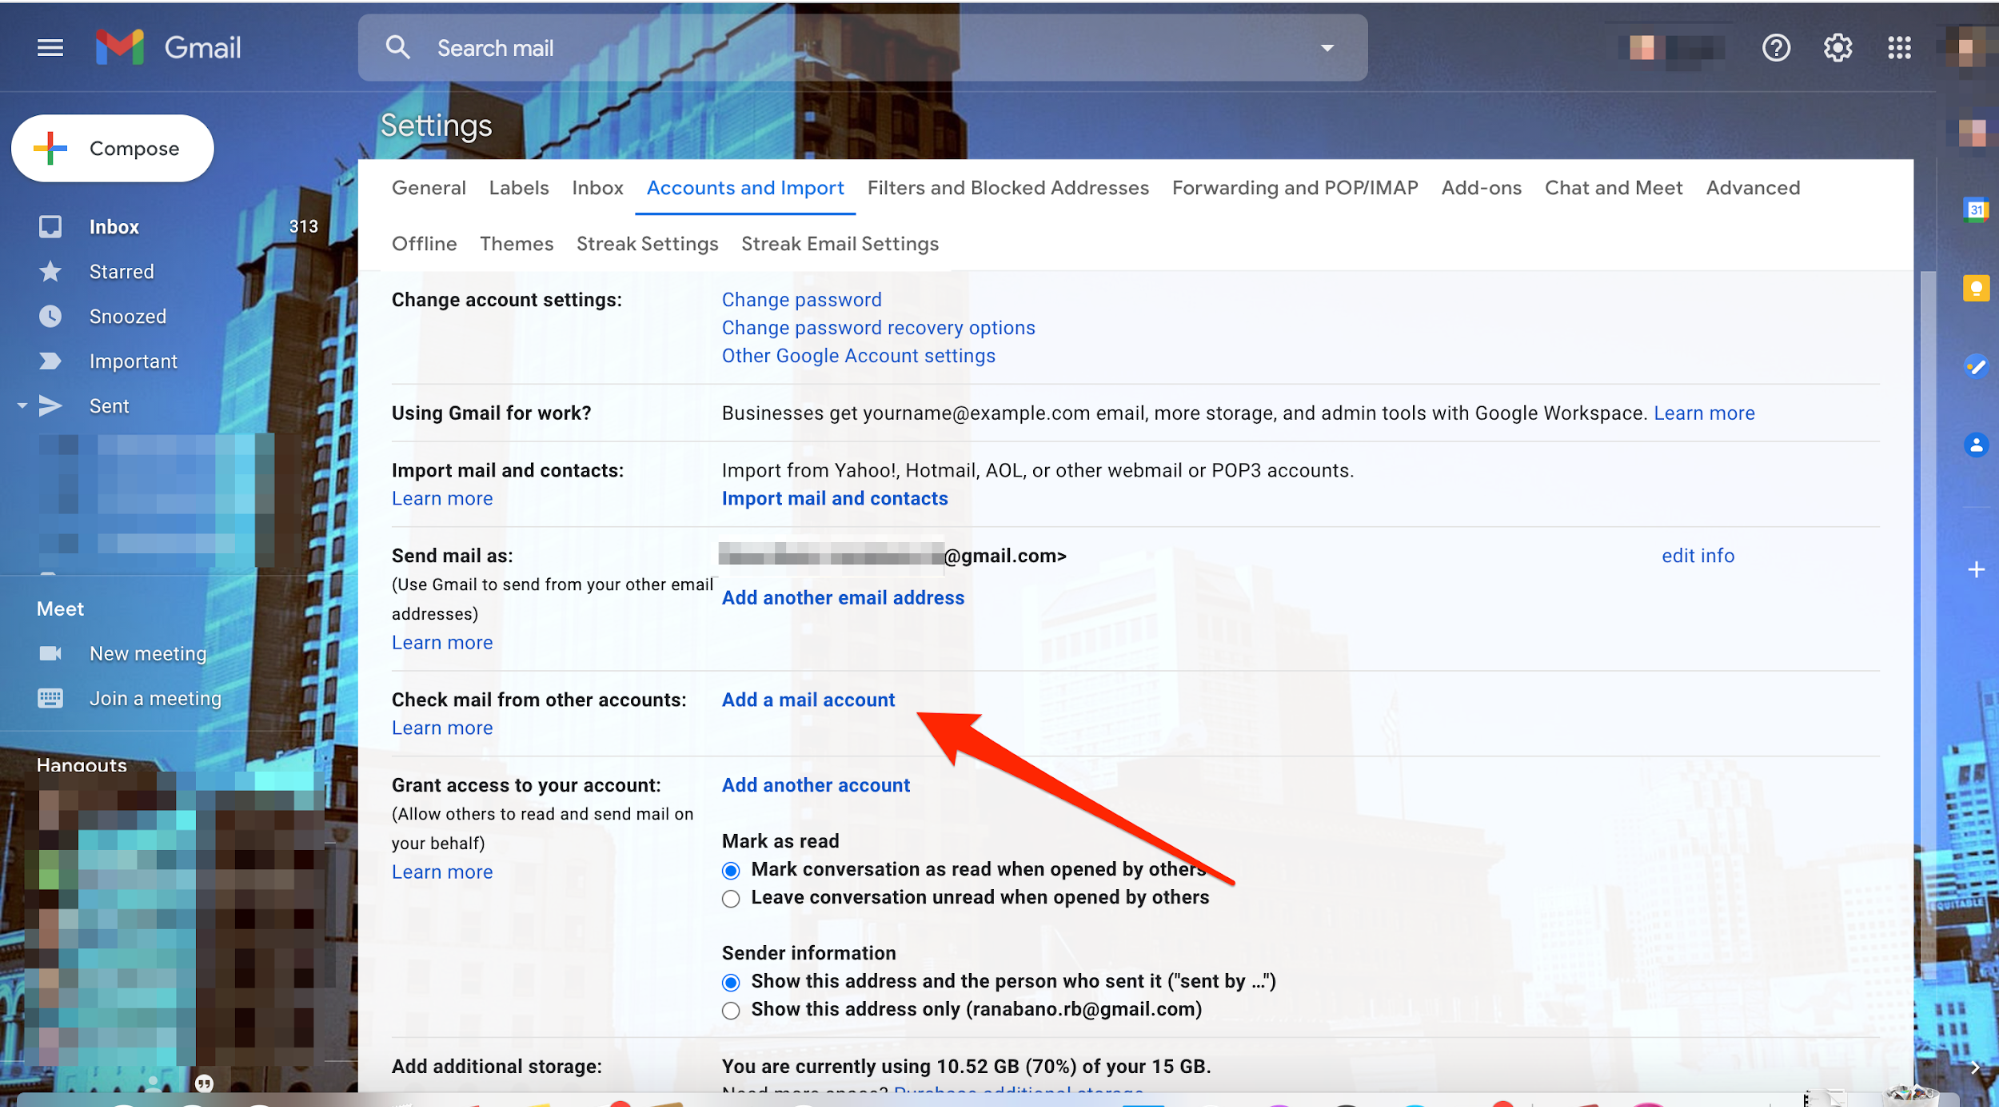
Step #3 Open the Accounts and Import tab on the top menu.
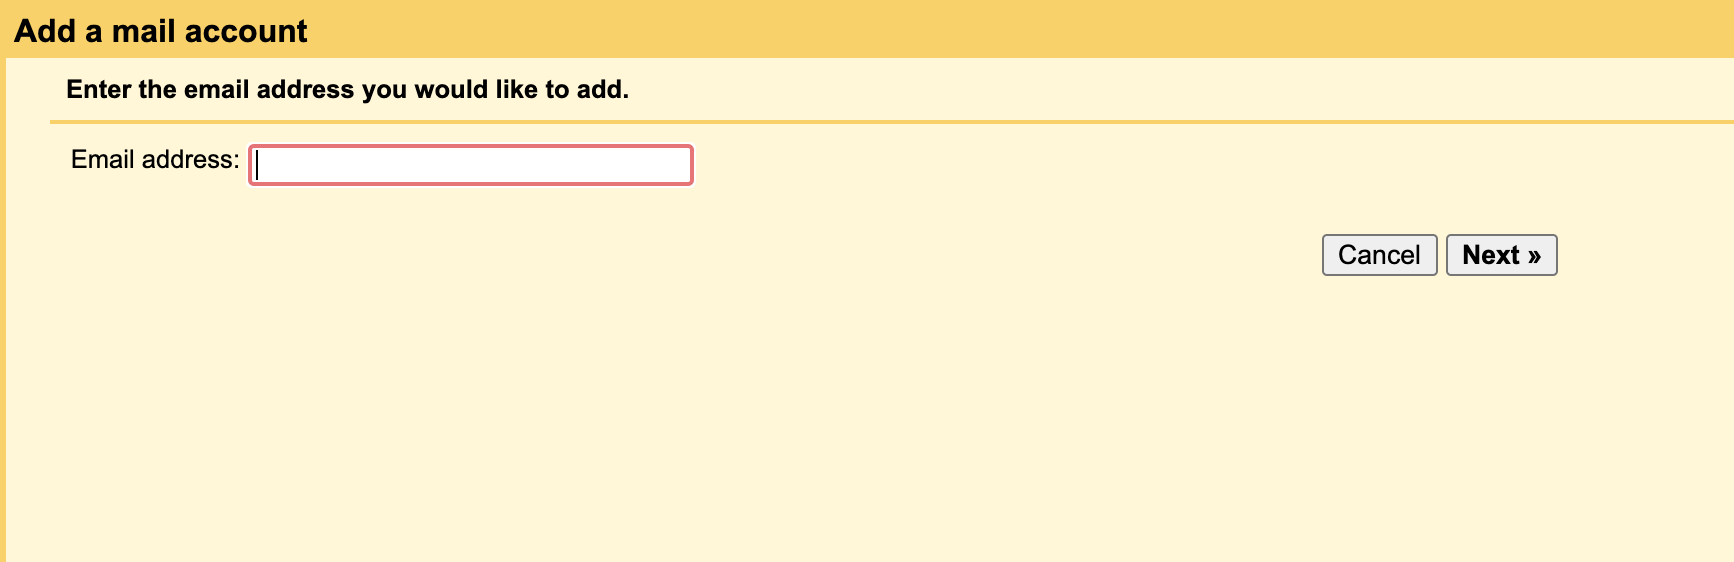
Step #4 In the Check mail from other accounts field, click on the Add a mail account option.
Step #5 Type in your old email address and then click on Next. Click on Next again after making a selection.
Step #6 Check the options you want based on your references.
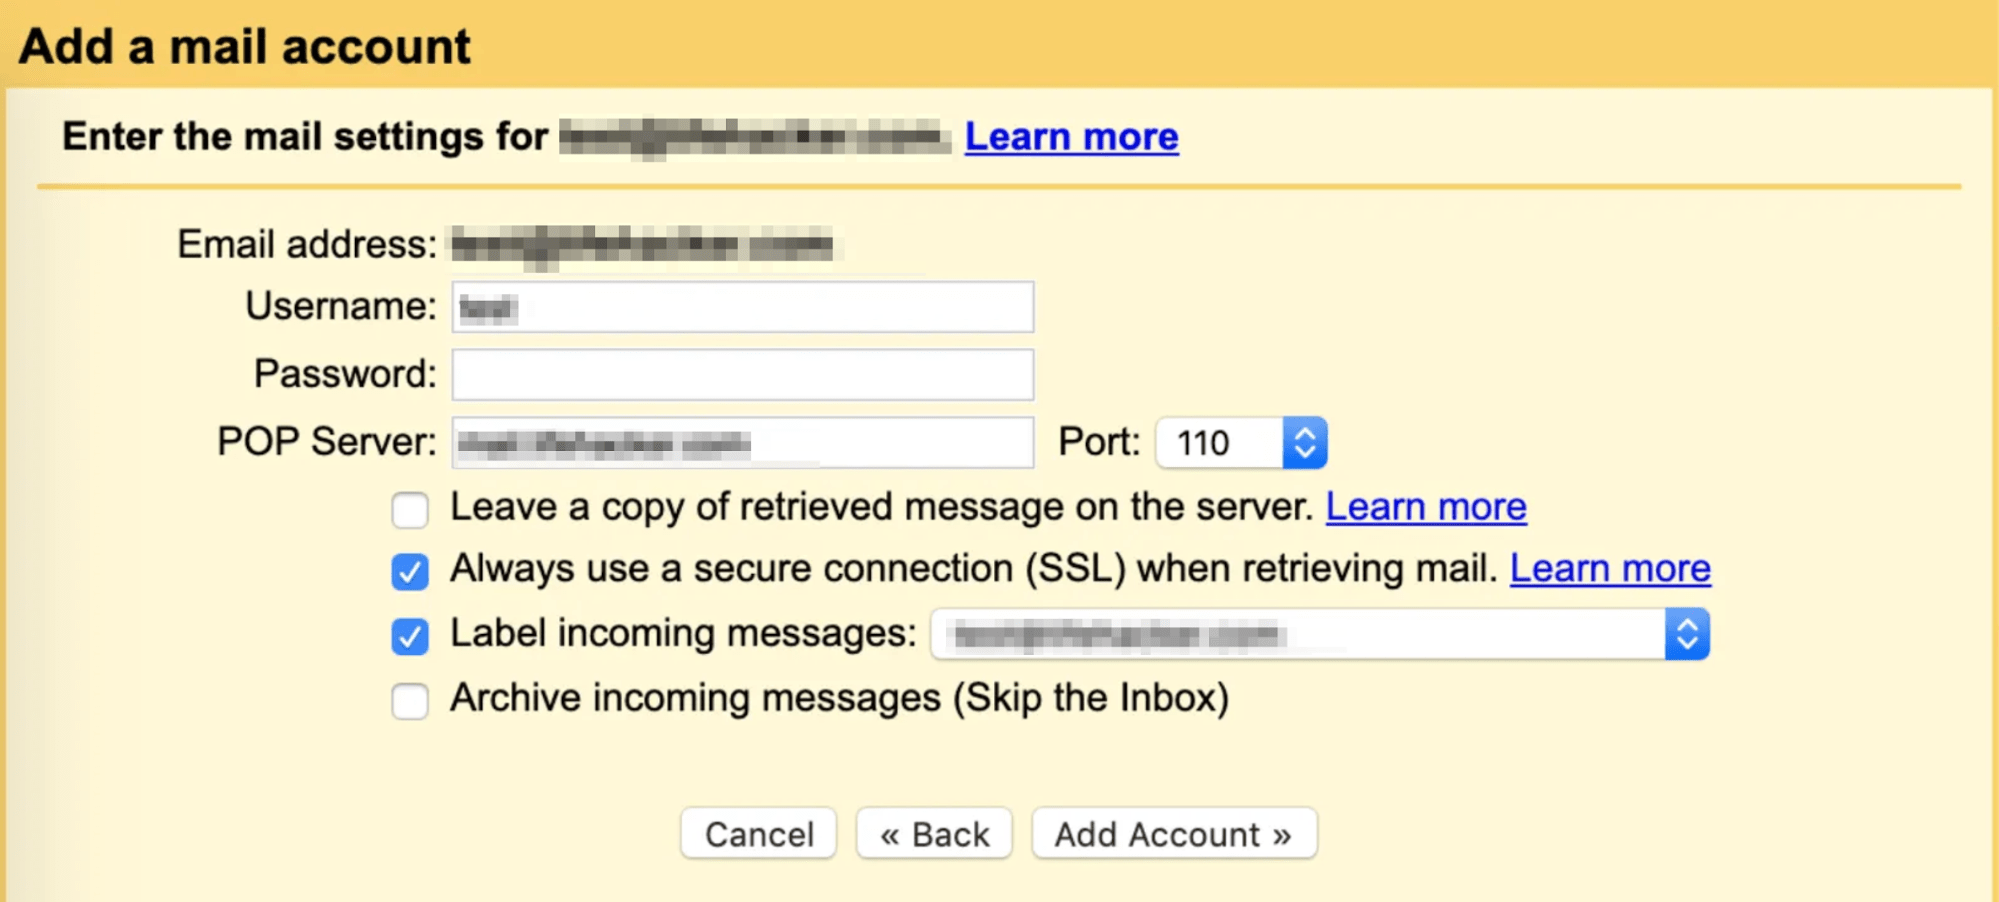
Step #7 Click on Add Account.
After this, you’ll receive all emails from your old email address to your new account. This will also allow you to receive every new email, so you don’t have to worry about email forwarding.
Method 3: Change Your Gmail Address By Setting Up an Email Forwarding System
You have to create a new Gmail account if Google doesn’t let you change your email address. There’s no other way.
However, you can set up an email forwarding system that lets you keep your old email alive. Inform people who email you about your new Gmail address, and eventually, everyone will forget your old Gmail account and only send emails to the new one.
Step #1 Click on the cogwheel icon, which is your account Settings. A dropdown menu will appear.
Step #2 Click on See all settings under the Quick Settings menu bar.
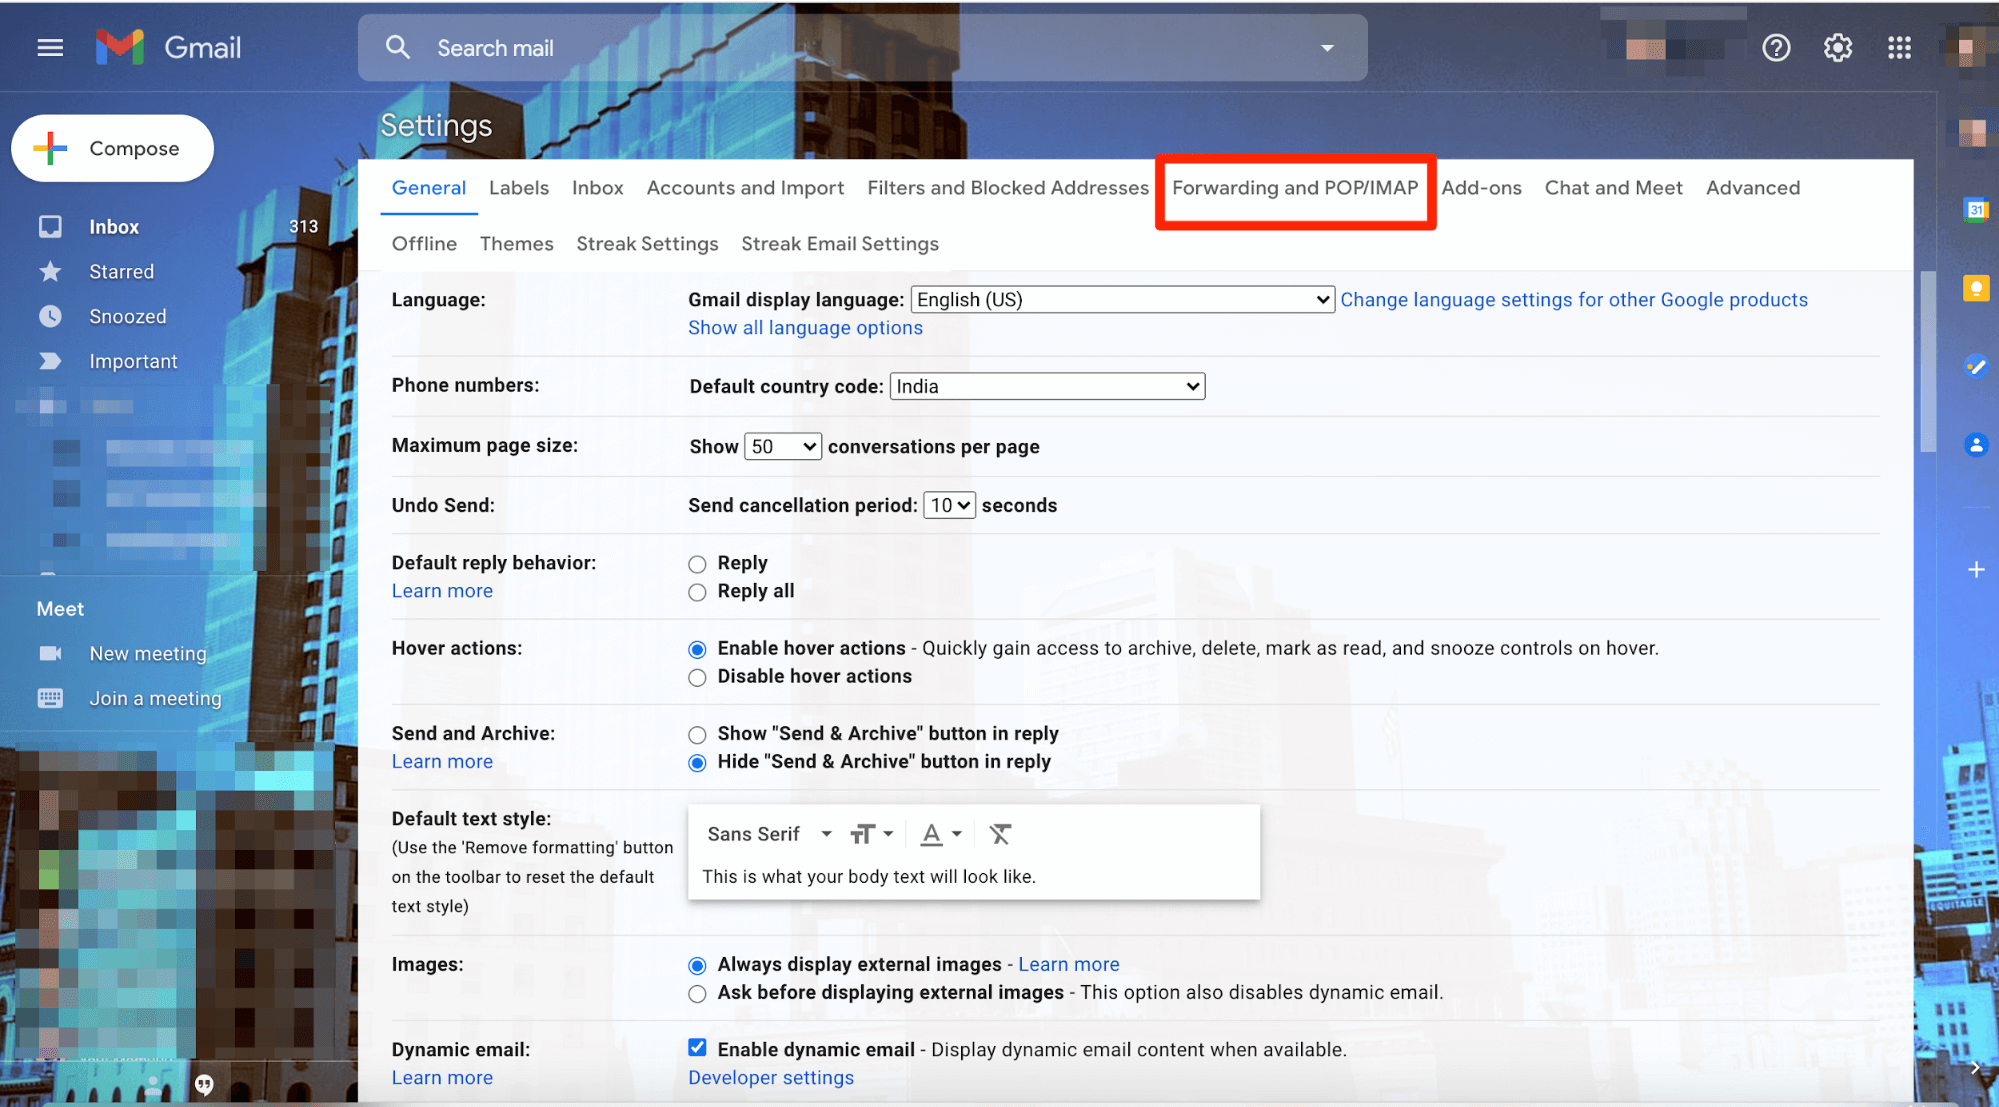
Step #3 Select the Forwarding and POP/IMAP tab on the top menu bar.
Step #4 In the Forwarding field, click on Add a forwarding address. A pop-up box will appear on your screen.

Step #5 Enter your new Gmail address.

Step #6 You’ll receive a verification email at your new Gmail address. Click on the verification link to confirm the change.
After this, whenever anyone emails you had your old Gmail account, you will receive that email in your new Gmail address.
If you wish to receive only a select few forwarded emails, you can also set up filter-specific email forwards to avoid junk or spam to your new email account.
Method 4: Changing Your Gmail Address by Adding or Removing ‘Dots’
We’ve already mentioned that you usually have to just create a new Gmail account if Method 1 doesn’t work for you. But there is one potential exception.
You can tweak your Gmail address slightly by adding or removing dots. For instance, if your email address is john.doe@gmail.com, and you want to make it johndoe@gmail.com, you can.
This works because Google doesn’t recognize dots in email addresses. Really. To Gmail, john.doe and johndoe are the same. Therefore, you can just start using the email address you prefer, and all your emails will still be delivered to your inbox.
You still have to add the other email to your account, though. Simply follow the below steps:
Step #1 Log in to your Gmail account as you usually would.
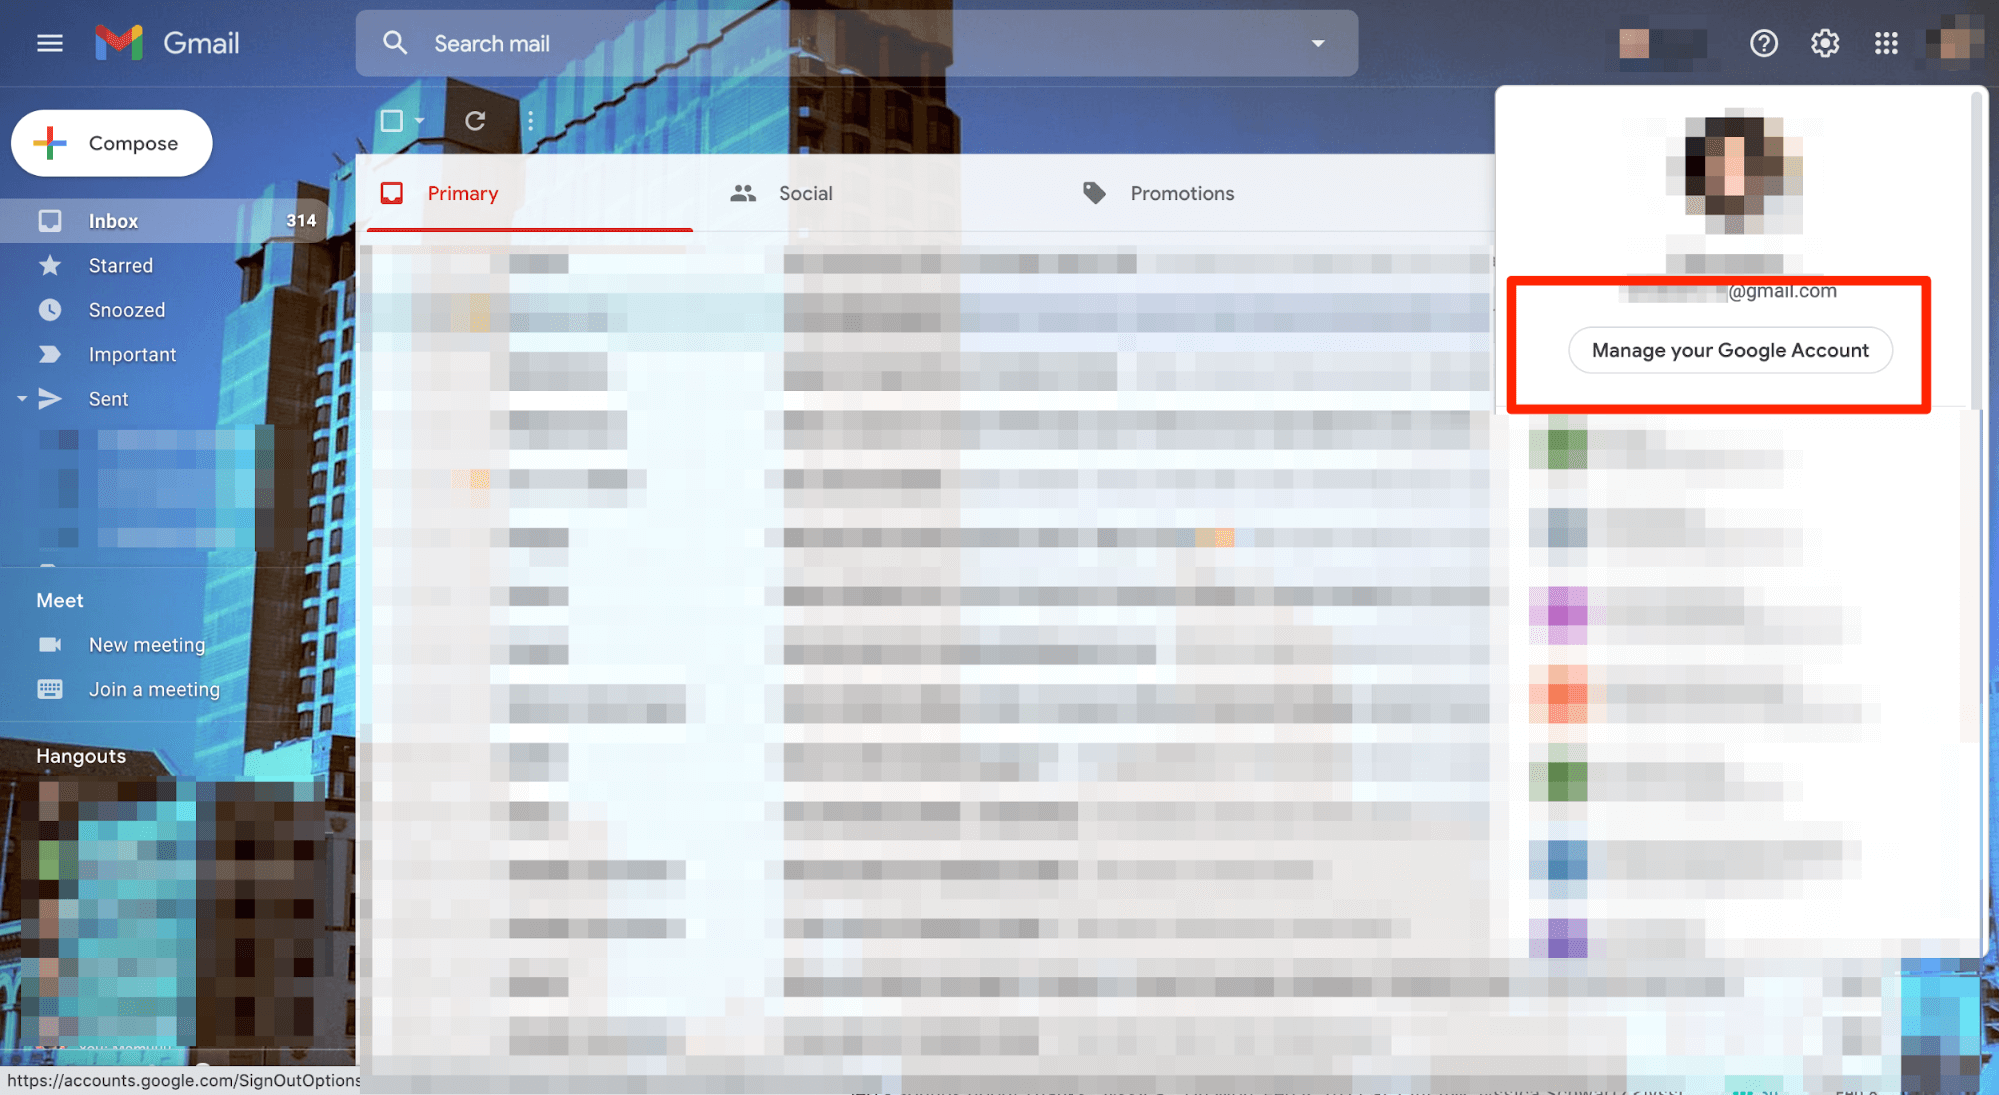
Step #2 Click on your profile picture icon located on the top right-hand side of your screen. And then click on Manage Your Google account.
Step #3 Click on the Personal Info tab located on the left-hand side menu.
Step #4 Scroll your mouse below to see the Contact Info field. Click on the little arrowhead in the Email section.
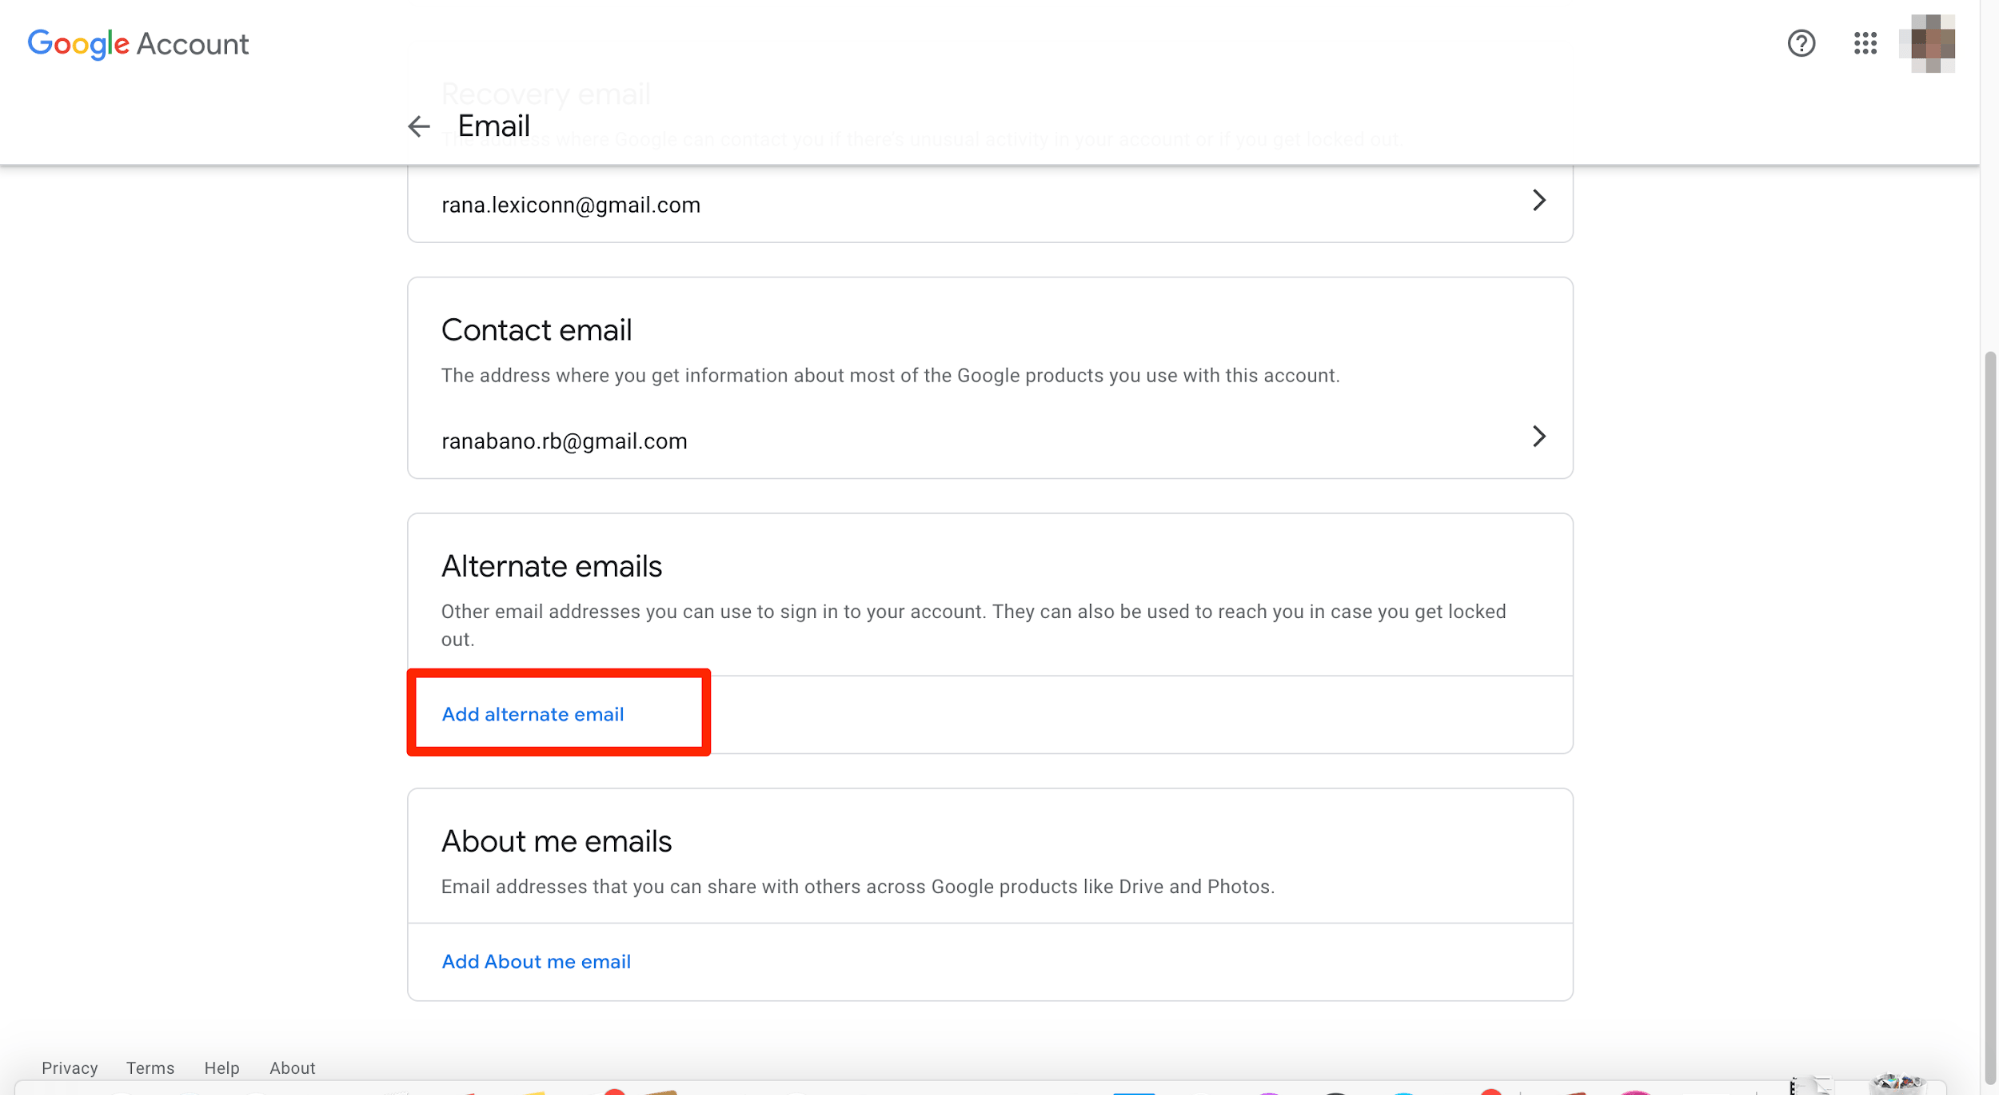
Step #5 Scroll your cursor down to see the Alternate emails field. Click on the Add alternate email option.
Step #6 Type in your alternative email and then select Add.
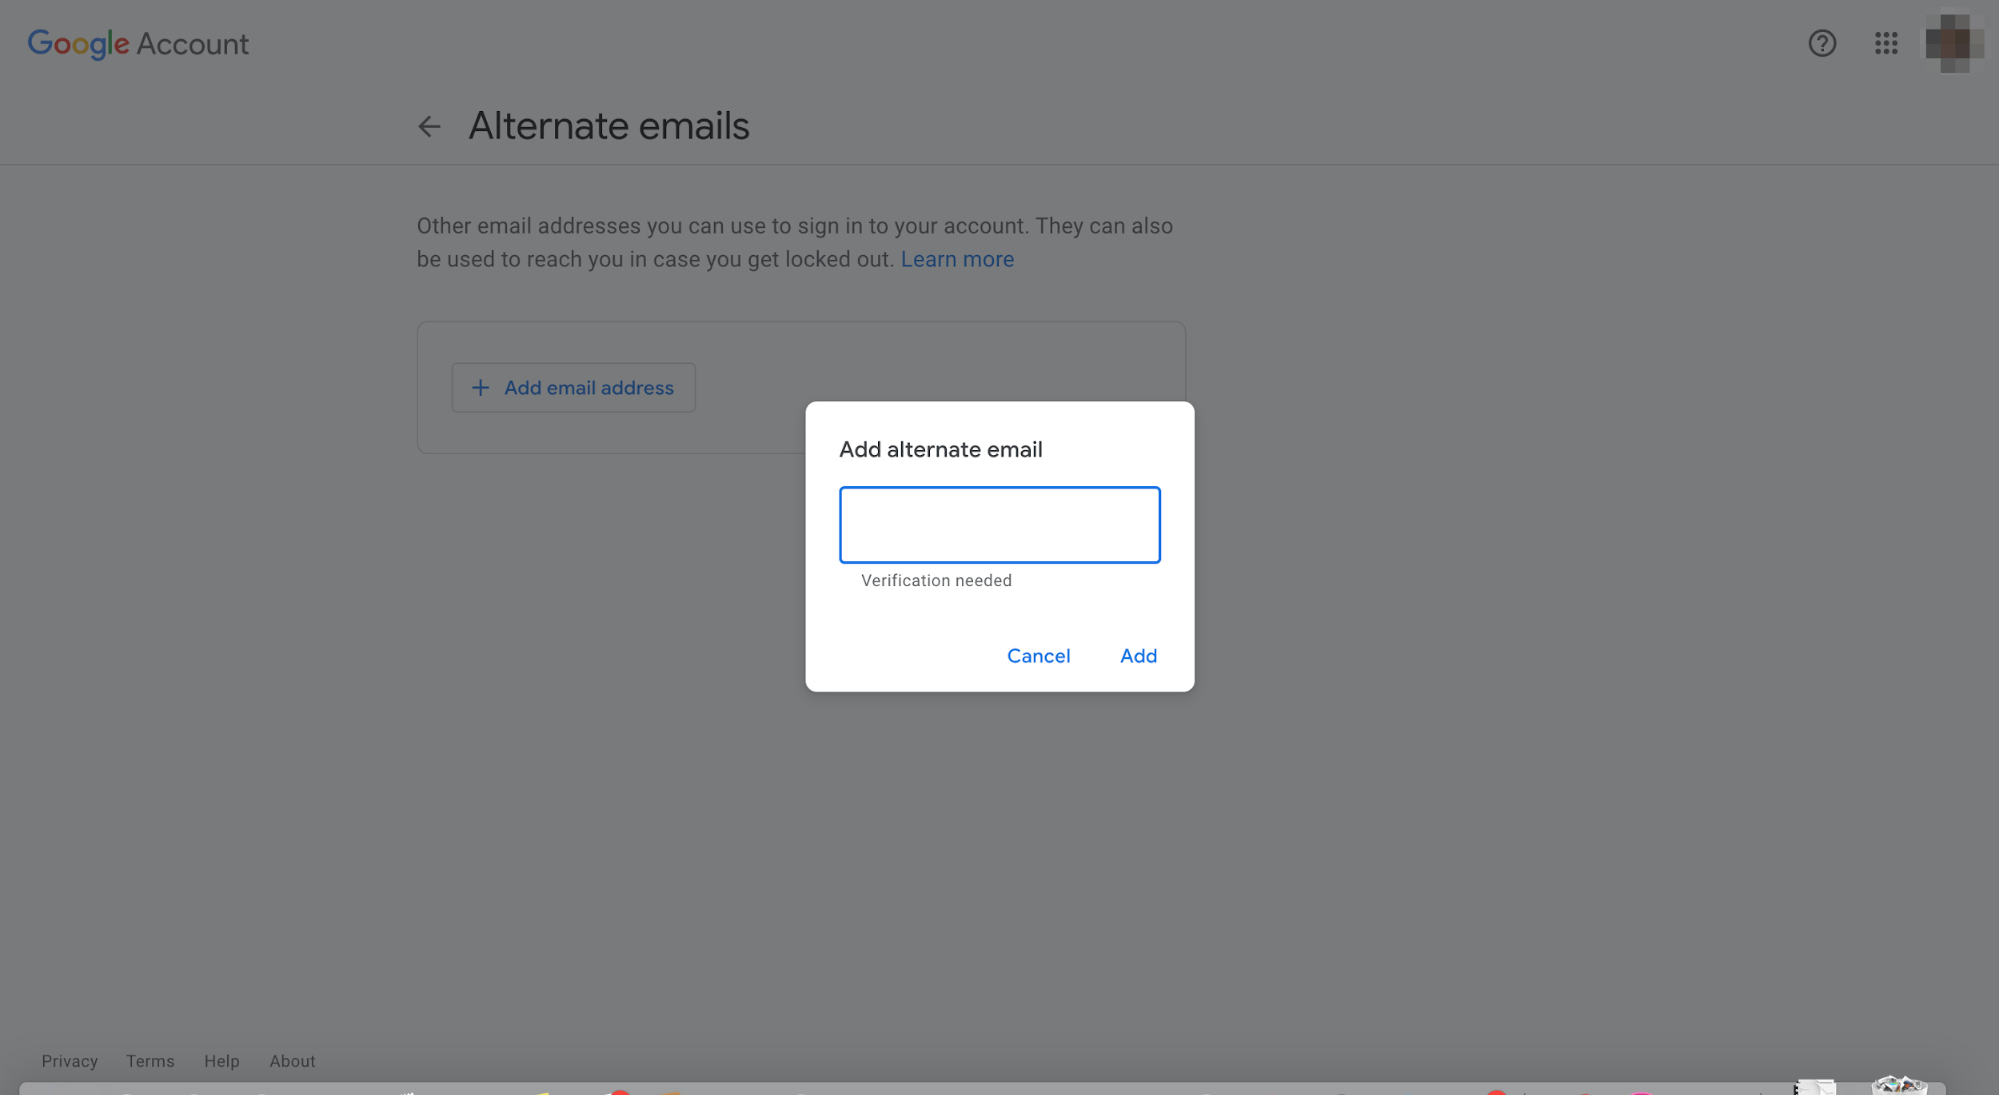
You may be asked to enter the password of your current email account for verification purposes. Simply fill in your password, and you’ll be directed to the page to add an alternate email.
That’s it! Go back to your inbox where you’ll receive a verification mail with the new changes. Click on the verification link to confirm the change, and it’ll be done.
The Bottom Line
In most cases, you’ll find that you’ll have to create a new Gmail account if you want to change your email address. This may sound daunting at first, but if you follow the above steps carefully, you’ll be done in no time.
Having said that, don’t forget to check whether you’re one of the lucky few who can change their email account before you proceed to create a new email ID.

