The Ultimate Manual To Box Relay
Box Relay is among the most valuable features inside your Box account that helps you improve your productivity by automating repetitive processes related to document and content management.
It takes manual work out of your everyday document management tasks, reducing human errors and increasing efficiency.
It also allows your teams to focus on the core business tasks that require their attention instead of wasting energy on non-productive activities.
In this detailed guide, we’ll cover the various aspects of Box Relay and show you how you can use it to create custom workflows to automate your document management.
Let’s dive in.
What is Box Relay Anyway?
Box Relay is an automation engine in your Box account that allows you to manage document handovers between individuals, departments, and organizations based on pre-defined conditions.
Using Box Relay, you can automate repetitive processes and mundane tasks that usually consume several hours of your time every week.
It allows you to create automation workflows based on various if-then-else conditions to perform different actions on your documents.
Its drag-and-drop interface and ready-to-use templates and conditions mean that users don’t need any coding skills to use it. As a result, any non-technical users in your marketing, sales, admin, finance, or any other department can easily create automation workflows with Box Relay without any technical assistance.
Suppose your company has a manual process in which the HR department sends a document package via email to every new employee on their first day.
Then, for the next seven days, all other departments of your company send their welcome packages one by one via email in a pre-defined sequence.
When this process happens manually, there are delays from different stakeholders in sending the documents.
With Box Relay, you can completely automate this process by developing an email workflow. The activation trigger of this workflow is when a new employee joins your team.
The workflow automatically sends the relevant document package to the employee and notifies the next department. On the following day, the workflow automatically sends out the next email and attachments.
This makes the whole process more efficient and allows your employees in different departments to focus on more productive tasks.
In short, Box Relay is an intelligent automation engine that significantly reduces your repetitive work and allows you to create smart automation workflows that save your time, reduce errors, and increase productivity.
How Box Relay Works
The primary goal of Box Relay is to go one step ahead of conventional document management by reducing manual work and automating repetitive tasks.
Box Relay does this by using automation workflows for various business goals, which we’ll explore later in the article.
In general, Box Relay resolves two kinds of business use cases:
- Document reviews and approvals
- Onboarding and offboarding
Using the features in Box Relay, you can automate the four following types of tasks.
Content-centric
You can automate the approval process of content-centric documents like marketing plans, presentations, budget spreadsheets, quarterly plans, etc.
Collaborative
Box Relay allows you to automate the document handover process from one person or department to another based on your pre-defined conditions. This means that as soon as a document is approved (manually or automatically), Box Relay hands it over to the next responsible person with the required tasks listed for them. This can be done for collaborations both inside and outside your organization. In addition, box Relay gives you complete user management and document access rights to ensure that your collaborations are secure.
Repetitive
Any document-related processes that follow repeatable steps can be easily automated with Box Relay. You can define each step of the process in Relay’s automation workflows and eliminate the need for any manual action.
Routine
Need to send a daily task list, end-of-day report, or weekly roundups? Box Relay can quickly gather all the information you need and send it to the person you want. You can use it to automate any routine tasks that follow a set pattern.
Understanding The Box Relay Automation Workflows
Box Relay’s automation sequences are performed using different workflows. A workflow is a set of events or steps that you want to perform automatically based on your defined conditions.
The workflows are based on if-this-then-that conditions that you define while setting up a workflow.
What are the components of a workflow? Every workflow you create has three components:
- Trigger: Some action on a file or folder that starts or “triggers” the workflow.
- Location: The folder where the triggering file is located or sent.
- Outcome: The action you want to perform on a file or folder as a result of the workflow.
A simple workflow is based on one trigger and one outcome. However, you can get creative with workflows and define multiple triggers and outcomes as well.
All your active and inactive workflows are listed in the Relay section of your Box account.

Let’s now understand the different components of a workflow in more detail.
Triggers
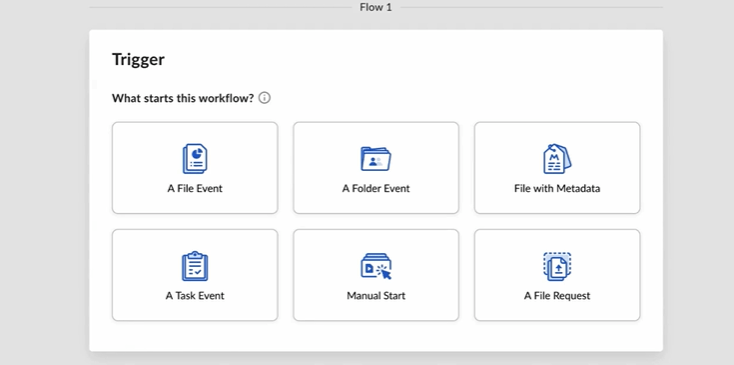
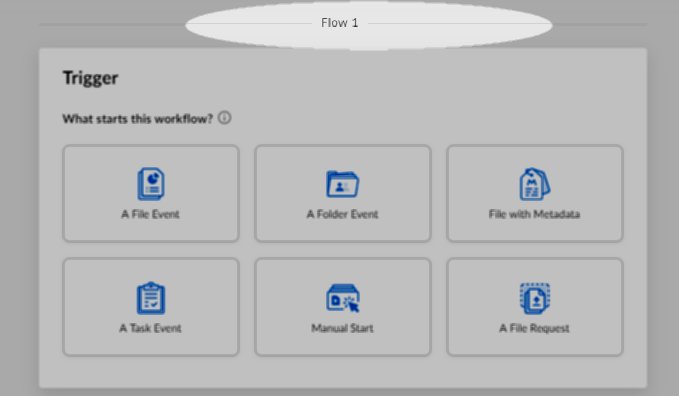
Triggers are events related to a file or folder that start a workflow. Box Relay gives you seven different triggers to start a workflow:
- File events
- Folder events
- Files with metadata
- Task events
- Manual start events
- File Request events
- Scheduled events
Every trigger comes with its own set of actions that you can perform when the workflow starts.
Let’s have a quick look at the actions for each trigger.
A File Event
A file event trigger specifies the action someone performs on a file that starts your workflow.
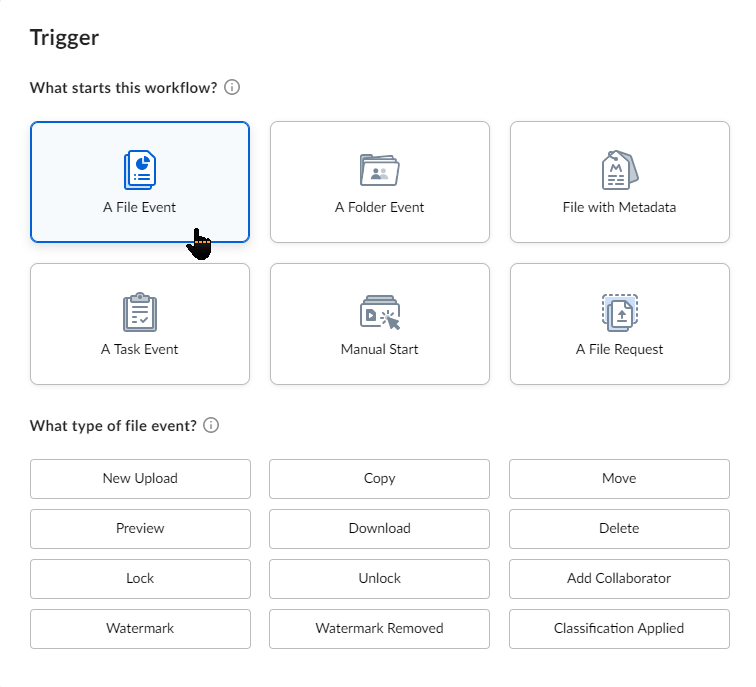
When you click on this trigger, Box Relay gives you several event types to qualify your trigger. For example, you can choose to trigger your workflow when a new file is uploaded, copied, or moved to a folder.
Similarly, your workflow can trigger if a specific file is downloaded, deleted, locked, or unlocked.
A Folder Event
In this trigger, you can choose an event that happens to a specific folder to start your workflow.
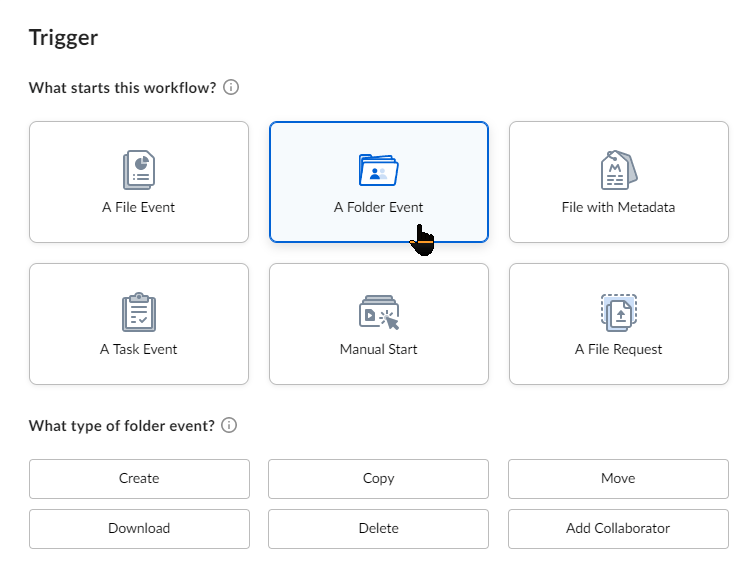
For example, you can trigger a workflow when a new folder is created, moved, deleted, etc.
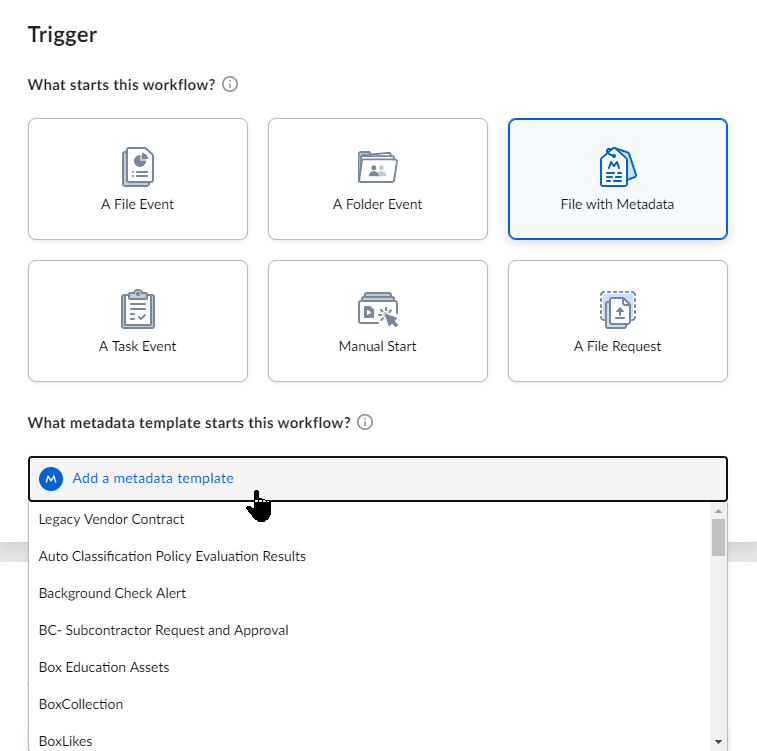
File with Metadata
When you select the file with metadata option, your workflow begins when a metadata template you specify is applied to a file.
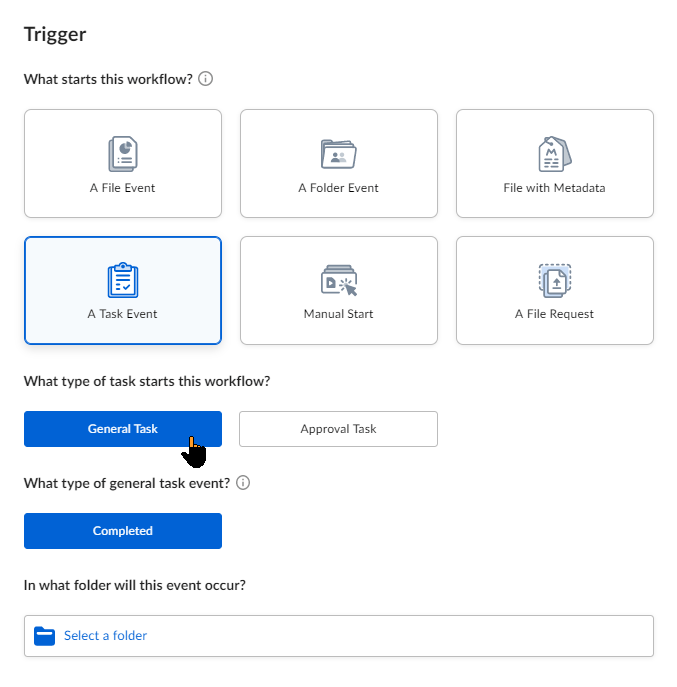
Task Event Options
In this case, you can trigger a workflow when someone performs an assigned task.
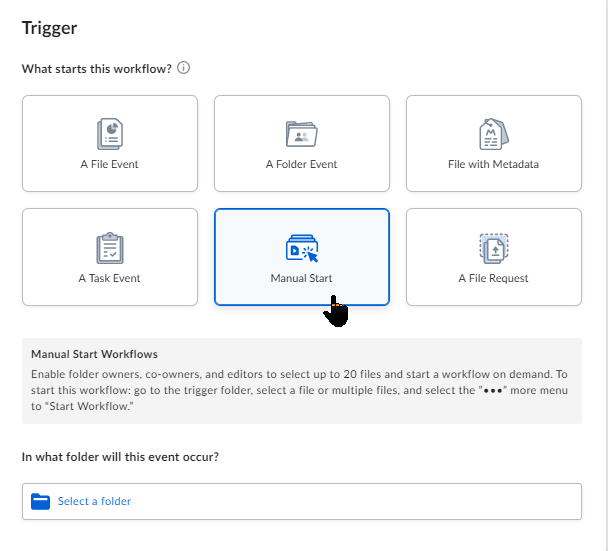
Manual Start Options
In a manual start trigger, your workflow doesn’t start automatically. Instead, it relies on the actions of another individual responsible for completing the incomplete steps of the workflow and manually initiating it.
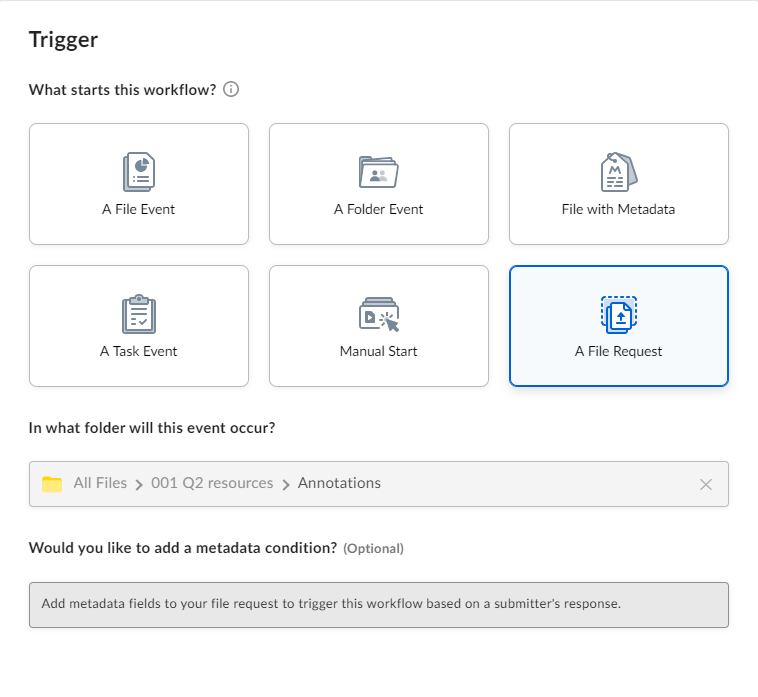
File Request Options
This trigger is available to Box Business Plan account (or higher) users. It allows you to create a form using which anyone can upload a file directly to your Box account. The workflow is triggered when a file is uploaded to your account.
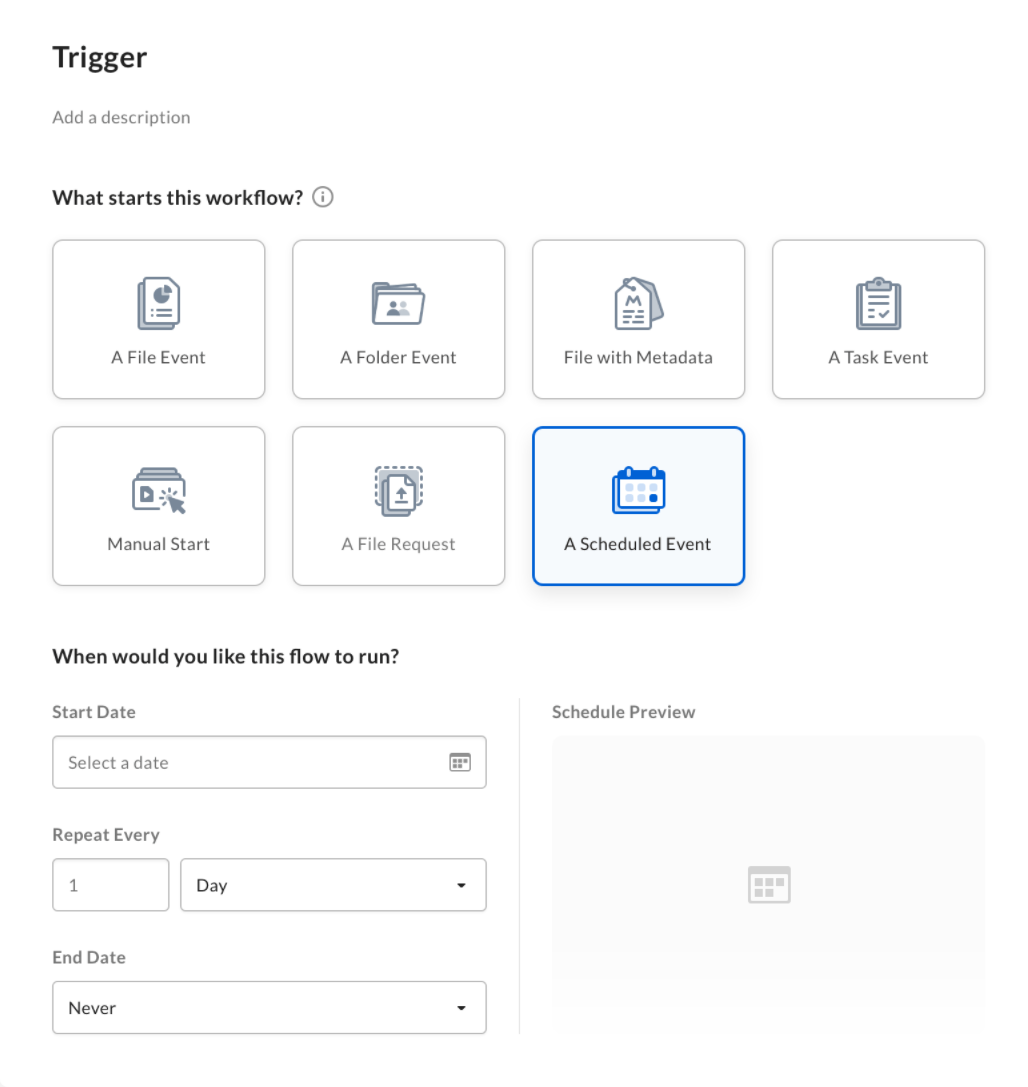
Scheduled Event Options
You can use this option to schedule workflows for a later date or on a recurring basis.
This completes the list of starting triggers Box Relay offers when you’re creating a new workflow. Let’s now move to the next component of a workflow.
Location
A location in a workflow is simply the folder where you want to upload, download, move, copy, or delete the event file. You can only create workflows involving locations (folders) you own, co-own or edit. If you don’t have sufficient rights for a location, the workflow won’t be configured properly.
Outcome
Outcomes are the resultant events of your workflow. The outcomes vary to a degree for different triggers.
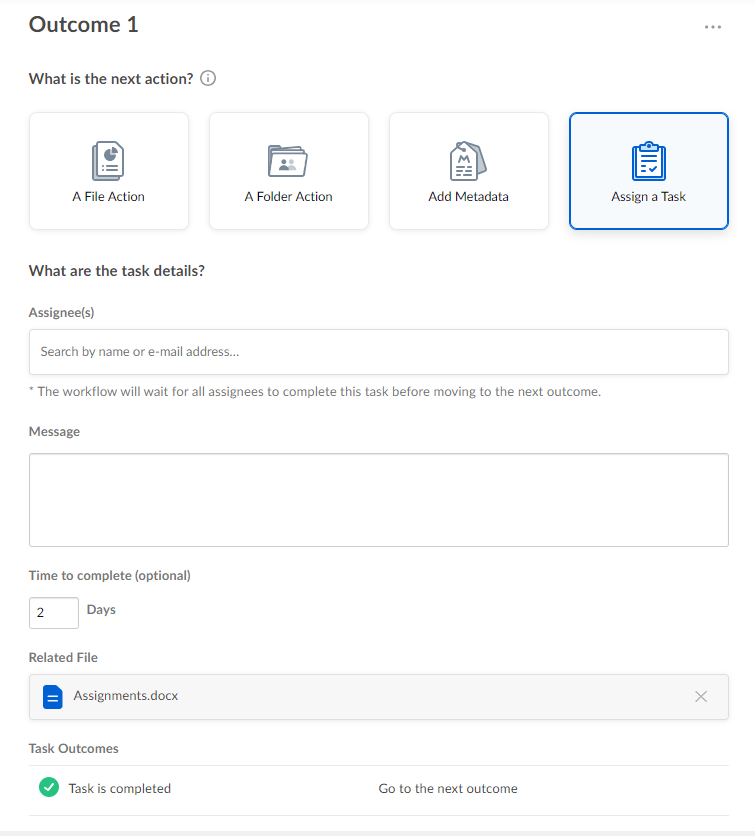
When you click on a trigger, Box Relay gives you the option to choose its outcome. For example, you can select the task outcome when a file is uploaded to a specific folder.
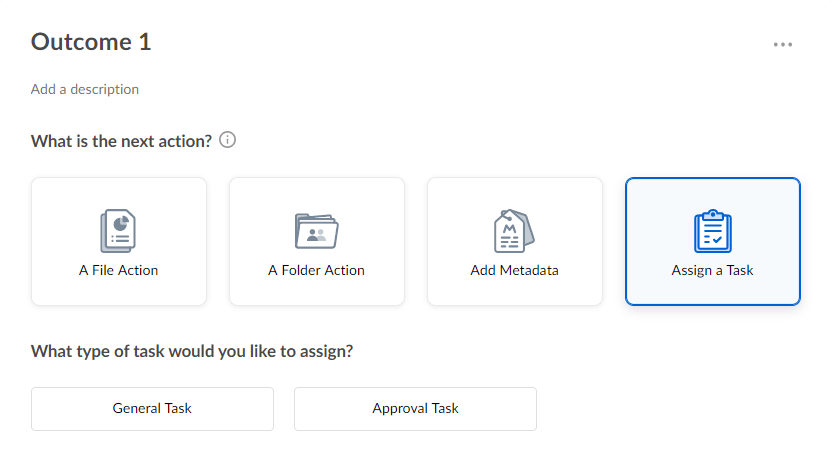
In this outcome, you can assign a task to one or more individuals. You can describe the task, assign it to the relevant persons by entering their email addresses (registered with Box), and set a deadline.
You can also choose multiple outcomes for a workflow. In such cases, the workflow is only completed when all the outcome conditions are fulfilled.
There are several other types of outcomes you can choose for your workflows, depending on your goals.
In short, you can automate almost any document or file-related task using the workflows in Box Relay.
Box Relay Automation Workflow Templates
You don’t always have to create a workflow from scratch. Box Relay provides you with a library of some of the most common automation workflows for different business goals.
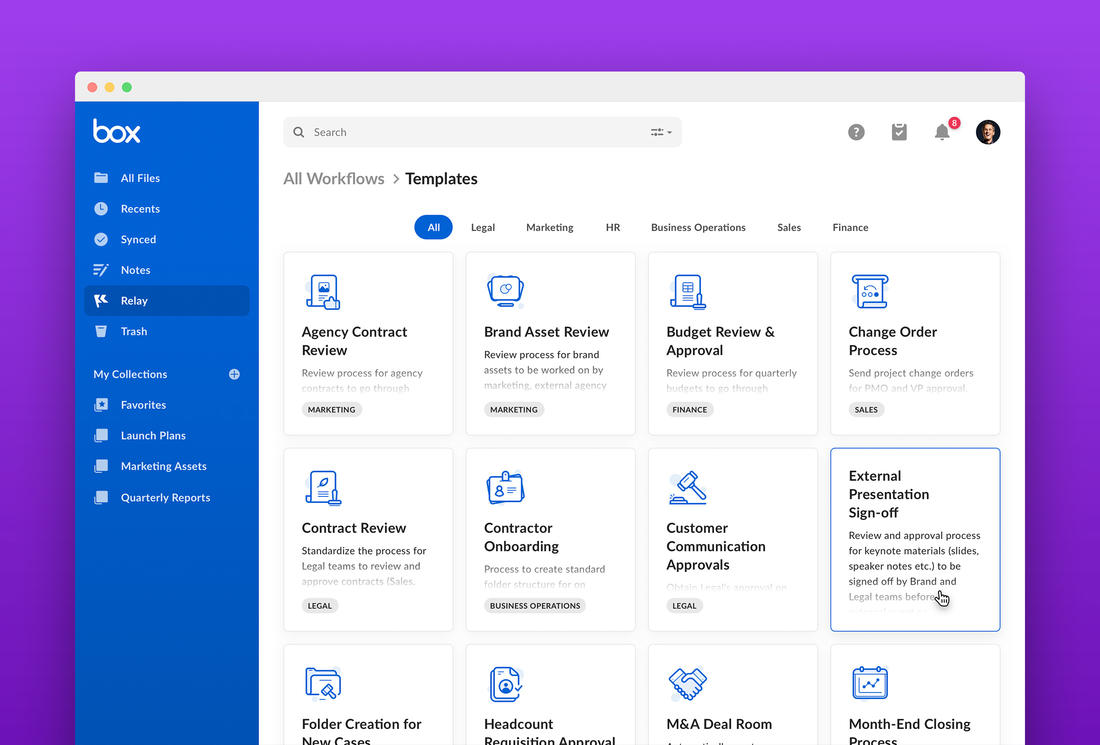
The template library includes workflows for agency contract reviews, budget approvals, contractor or employee onboarding, month-end closing report reviews, and various other recurring tasks that can be easily automated with Box Relay.
You can click on any template to view all the steps in the workflow.

If you like what you see, you can use the template as it is.
If not, you can either modify it according to your needs or create a custom workflow from scratch.
Example 1: Approving Marketing Collateral
Most marketing campaigns go through multiple approval cycles before moving into the execution phase.
If the process is not organized and streamlined, you’ll experience delays and miscommunication, ultimately impacting your business.
To avoid this, you can create a marketing approval workflow in Box Relay. Using Box, you can create a central document accessible to all the stakeholders. You can then use a workflow to automatically assign the document to relevant stakeholders for their input and approval.
In every step of the workflow, you can assign deadlines so that Relay can automatically follow up with the relevant person. As soon as the document is approved or rejected by the relevant stakeholder, Relay would perform the logical next step.
This would significantly reduce miscommunication and unnecessary delay and help you create your marketing collateral within the assigned deadline.
Example 2: Project Change Orders
Cross-functional projects in fast-paced organizations can be hard to manage because of frequent changes and long approval cycles.
You can simplify this process to a great extent by automating it using a workflow in Box Relay. For example, instead of manually creating change requests and following up with the relevant stakeholders for approval, you can create a workflow that is triggered when a new change request is made.
The workflow immediately assigns the approval task to the relevant stakeholders like your company’s PMO or VP engineering and keeps following up until it gets a response.
How to Get Started With Box Relay
Box Relay is visible in your Box account’s main dashboard in the left menu. However, if you can’t see it, you’ll need to contact your account admin to enable Box Relay access.
Once you have access, you can start creating automation workflows by performing the following steps.
Creating A Workflow
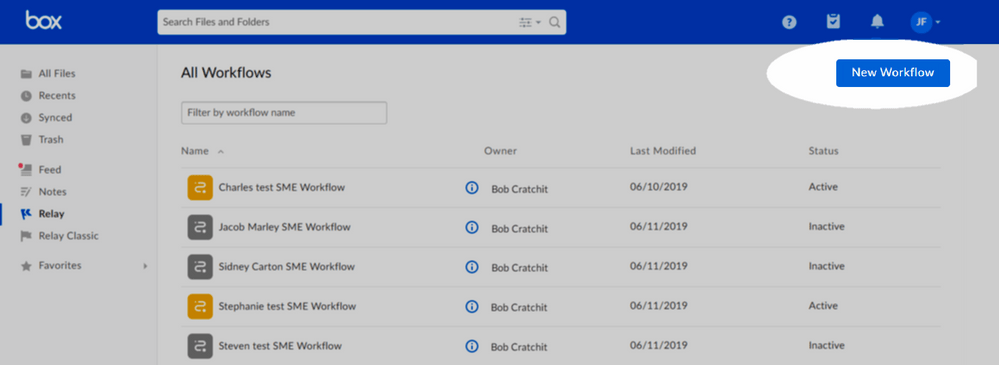
Step 1: In the lefthand navigation of your Box account, click Relay to open the All Workflows page.
Step 2: Click New Workflow to start creating a workflow.
Step 3: On the Workflow Builder page, click on the title in the top-left of your screen.
Step 4: Enter a new name for your workflow.

Below the workflow name, enter a brief and to-the-point description of your workflow and what it does.
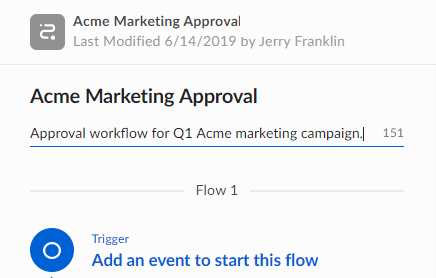
Step 5: To name the specific flow in your Workflow, click on Flow 1 (default text) above the trigger section.
And simply enter a new name for this specific flow.

You have successfully named your workflow.
Let’s now create the remaining steps to complete the workflow.
Creating A Trigger
Step 1: Choose one of the seven default triggers Box Relay offers.
Step 2: Depending on the trigger you choose, click on the specific qualifying event. For example, you can choose New Upload as the event that triggers the file event workflow.
Step 3: Under In what folder will this event occur? Click the Select a folder box.
Step 4: Click Select a folder from Box to open the Folder to act on the window.
Step 5: Choose the folder where the trigger will take place.
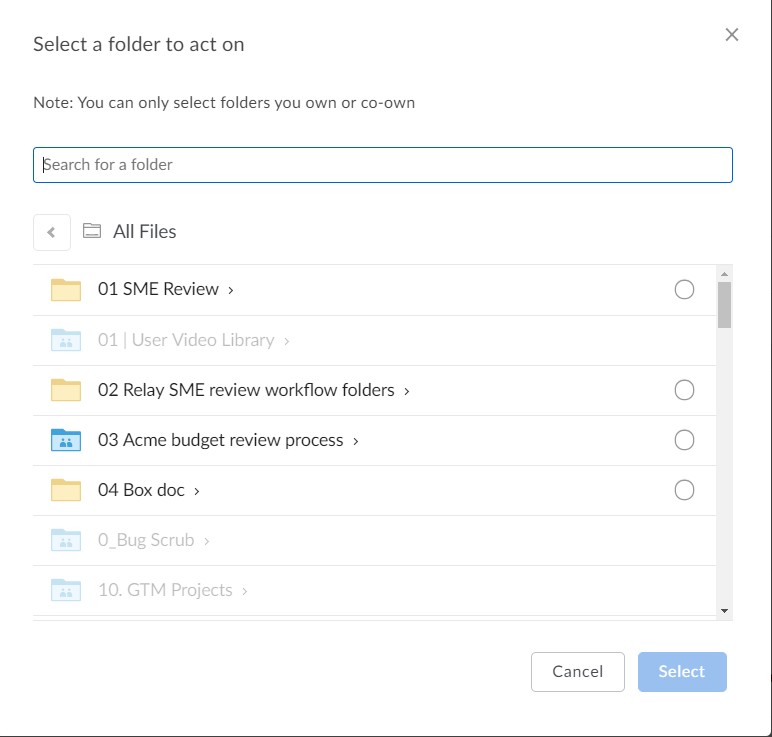
Step 6: Choose the relevant folder and click Select.
You have successfully created a trigger for your workflow. Now you only need to define an outcome to complete the workflow.
Creating An Outcome
Step 1: In the Outcome section, under What is the next action?, click the action you want to perform as a result of the trigger. Every trigger has a different set of outcomes.
Step 2: To notify all the relevant stakeholders when a workflow completes, click Send Notifications.
Step 3: Enter the email addresses of all the stakeholders you want to notify, the subject line, and your message to the recipients.
You have successfully configured the outcome of your workflow. But you must save and activate the workflow before using it.
Activating Your Workflow
To save a workflow without activating it, click Save Draft on the top of your screen. And to save and activate the workflow, click Activate on the top of your screen.
You can view all your active and inactive workflows on the All Workflows page.

