The Ultimate Manual to Bitbucket Commands
When using Bitbucket to manage Git coding products, you will run a series of commands to perform your work. Some Bitbucket commands are easy to understand and implement, while others require a bit of guidance to perform the desired tasks.
Understanding how to use Bitbucket commands will make your coding projects run smoother and faster.
What Are Bitbucket Commands Anyway?
Bitbucket commands are the commands developers issue while using Git, which is open-source software. Entering these commands allows developers to manage Git and to manage their coding projects.
In essence, Bitbucket commands are Git software commands that you will run inside the Bitbucket interface to use Git. If you are using an interface to manage Git other than Bitbucket, you can use these same commands in that other interface.
Bitbucket commands allow for making requests about the files stored in Bitbucket. Commands provide the ability to sync files as well. They work to simplify the workflow as a developer manages projects in Bitbucket.
What Is Git?
Git is an open-source software product that allows coders to manage the different versions of their code projects. Git is the most popular software system in the world made for coding version control.
The advantage of Git is that it allows developers to work on one section of their code while protecting the other sections. Git can help a developer maintain a copy of all previous version histories of a particular coding project as well. Should the developer need to discard changes made recently and migrate back to an older version of the copy, Git allows this to occur easily.
Through Git, developers are able to merge different versions or compare past versions of coding projects with ease. Git makes file comparisons based on the content of the coding in the file, rather than relying on file names to determine how the merger or comparison should occur, which improves accuracy.
Git simplifies the process of having multiple developers collaborate together on a coding project. Developers can ask others to make suggestions about certain lines of code, or they can invite others to make editing changes directly. The original version of the code remains separate from the edited version, so if you decide to reject the edited changes, you always have the original version protected through Git.
Git is free to download and use on its own. However, many Git users will subscribe to an interface software package, such as Bitbucket, which makes using Git far easier.
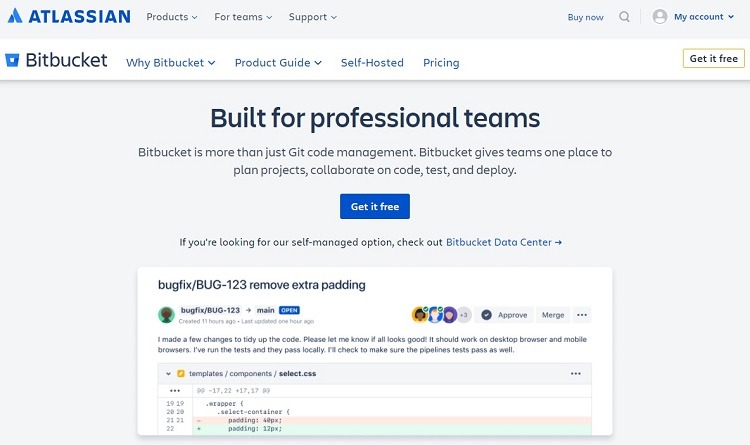
What Is Bitbucket?
Bitbucket is primarily a cloud-based tool that Git developers can use for code hosting and for managing collaborations about code. Bitbucket does have Server and Data Center on-premises products, but the company is phasing out the Server product. Most new subscribers must work with the cloud version, although large organizations may choose the Data Center product.
Bitbucket provides an interface that simplifies the process of using Git. Developers will set up either a free or a paid subscription account to Bitbucket to make use of the software.
Bitbucket’s features work best for professional development teams. Through the use of Bitbucket, developers will receive a number of advantages, including:
- Providing guidance during the development process
- Managing Git repositories
- Controlling and restricting who has access to code
- Controlling the workflow for a project
- Collaborating on coding projects, including in-line comments
- Integrating with other software packages related to software development
- Tracking, previewing, and promoting Git deployments
Atlassian is a software development company that offers a wide range of tools aimed at helping software developers and software development teams work more efficiently.
Atlassian owns Bitbucket, so the cloud version of Bitbucket exists on the Atlassian servers. Subscribers will access their cloud accounts through a URL address.
Because it is part of the Atlassian family, Bitbucket provides simple integrations with highly popular Atlassian tools like Jira and Trello. When integrating Bitbucket and Jira, for example, team members easily can determine where changes to software coding projects are occurring and can fix issues as they arise.
Bitbucket Pricing
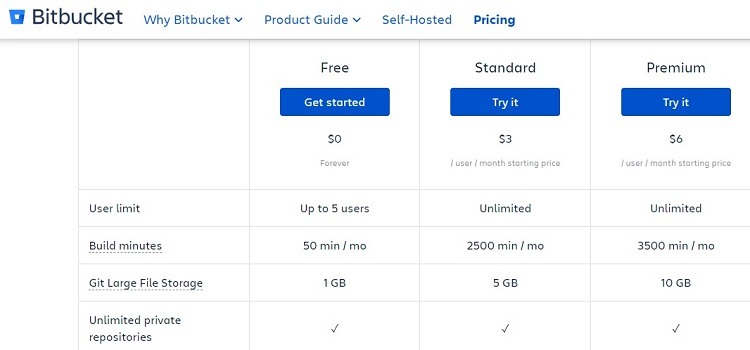
Although Git itself is free to use, you may need to pay to make use of the Bitbucket interface over the top of Git. Bitbucket has three subscription tiers available through the cloud. All three tiers allow users to make use of all Bitbucket commands. However, the tiers do offer different levels of processing power and features.
- Free: The Free version of Bitbucket is free to use forever, rather than being a free trial period. You can have up to five users on a single account in the Free tier. Bitbucket allows up to 50 build minutes per month in this subscription tier for building and testing pipelines. The Free tier allows integrations with both Jira and Trello. It only offers community support, rather than any official customer support from Atlassian or Bitbucket.
- Standard: The Standard tier for Bitbucket costs $3 per month per user on the account. It contains all of the features of the Free tier, along with several advanced features. The Standard tier does not have any limits on the number of users per account. You can run up to 2,500 build minutes per month in the Standard tier. It provides customer service during normal business hours.
- Premium: The Premium tier in Bitbucket costs $6 per month per user. It includes all of the features in the Standard tier, along with a few other advantages. Users have access to up to 3,500 build minutes per month in this tier. Premium subscribers will have access to some advanced security features, such as IP whitelisting and two-step verification.
Bitbucket does have self-managed, on-premises options through its Server and Data Center products. However, Atlassian announced recently that it no longer will sell new licenses for the self-managed Server product. It also will no longer support the self-managed Server option as of early 2024. This means all users will need to migrate to the cloud-based version or the Data Center product eventually.
The Data Center product starts at a cost of $2,300 per year for up to 25 users. Multiple other pricing tiers are available, based on the number of users on the account. To learn more about pricing options for the Data Center product, customers will need to contact the Atlassian Bitbucket sales team.
How Bitbucket Commands Work
The primary function of Bitbucket is providing version control for software or code developers, or what some coders call source control.
Through the use of version control in Bitbucket and Git, developers can easily track and manage any changes that occur within source code over the life of a project. By effectively managing these changes through Bitbucket commands, software development teams are able to complete their projects faster and more efficiently.
Subscribers to Bitbucket will make use of Bitbucket and Git commands in a few different ways, including:
- Creating a repository that will contain the files and code for a particular project
- Copying repositories
- Adding files to the repositories
- Changing coding within the files
- Saving changes to files and taking a snapshot of those changes, which Git and Bitbucket call performing a commit
- Pushing changes to your files, signaling to other members of the team that they need to review the code
- Copying repositories and new files from the cloud to a local machine
- Merging branches that contain changes into the main repository
- Making a proposal to suggest changes to the main repository
Many different commands are part of Git and Bitbucket. (Remember, Bitbucket commands are simply Git commands that you run inside the Bitbucket interface.) We’ll review some of the most useful and popular commands.
Example 1: Init

Use the init command to create, or initialize, a new repository in Git. Some people will run the init command because they need an empty repository for a project or because they are seeking to convert a current project stored outside of Bitbucket into a Git repository.
If using the init command inside an existing directory, it will create a subdirectory within the current directory. It will copy metadata into the subdirectory. Git will create the subdirectory in a default path, but developers can customize its path as desired.
When using the init command alone within Git, users do not have to create a repository separately. You do not need to have administrative privileges, either. The init command handles all of these processes to create the repository.
When you add a directory name after the init command, Git will add a subdirectory to the current directory.
Within the init command, users have the option of using the –bare flag after the init command. When planning to share the repository, you should include the –bare flag to simplify this process.
Example 2: Clone

Developers will use the clone command to create a copy, or a clone, of a target repository within Git and Bitbucket. You can use the clone command alone to simply create the copy of the repository, or you can add other flags with the clone command to gain additional features.
When targeting another repository for copying with the clone command, the original repository can be part of the local storage network or it can be in a remote location. The copy can exist anywhere too, although many developers will use the clone function to bring the contents of a remote repository to local storage.
A couple of flags frequently used with clone include:
- Repo: Replace repo inside the angle brackets to specify the location of the repository upon which the clone command will operate.
- Directory: Replace directory inside the angle brackets to select the folder on the local storage system where the contents of the target repository will appear.
The clone command also has a depth flag available to use that will determine how many commits (or historical changes) the clone command should carry from the target repository.
Should you be copying a repository that has a long list of commits in its history, you may not want all of these commits to be part of the new copy, as it may create additional complexity and clutter. Using the depth command can eliminate many of the historical commits from the file, leaving a cleaner copy from which to work.
Example 3: Config

The config command in Git sets the configuration values for Git to use at a local level, system level, or global level. When running the config command, you will be moderating the configuration text file stored in the repository.
Developers can specify the level using the –local, –system, or –global flags along with config. If you do not list a level command with config, Git will default the actions in the config command to the local level.
- Local: The –local command would store the config file in the repository’s .git directory
- Global: The –global command would store the config file in the user’s home directory.
- System: The –system command would apply the config file into the system root path, so its application would occur across the entire machine, covering all repositories.
Example 4: Commit

Developers use the Bitbucket and Git command of commit to create a snapshot of the current version for a particular project. Commit allows you to register the current configuration of a Git project, so you can go back to it later if desired.
Users can collect a large number of commits in the local repository. Users can organize the stored commits however they want.
To simply store the current version of the project, use the commit command alone. After running the commit command, the default settings will have the software open a text editor to create a commit message that explains the commit through notes stored with the commit.
You can use the -a flag to create a commit that only includes changes made to the files in the project after the last commit. By default, the commit command stores the entire snapshot of the file, rather than storing only the changes from one snapshot to the next, unless you use the -a flag.
You can use the -m flag to create an inline message inside quotation marks with the commit, rather than using the default of the commit command opening a text editor to enter a commit message.
How to Get Started With Bitbucket Commands
To provide a visual example of making use of Bitbucket commands, here is an example of moving a Git project from a different software package into Bitbucket.
For those who may have a Git project stored elsewhere, importing the project into your Bitbucket subscription is a smart option. Using Git commands in Bitbucket from the terminal window will take care of this process.
Step 1: Clone the Old Repository

You’ll use the clone command to make a copy of the remote repository. This is a temporary local repository that you only will use for the copy process.
Use the –bare flag with clone to make the copy without a working directory included. This allows the new repository to maintain the history of the old project.
Step 2: Create the New Repository

Then create a new repository to accept the copy of the remote repository. Log in to your Bitbucket account and click the Create Repository link.
You’ll see a series of instructions on the home page of the repository, explaining how you can use your new, empty repository. For this project, you can ignore these instructions, as we are copying an existing repository into this new repository.
Step 3: Set Up the New Repository

Find the URL address for the new repository. This should be visible through the left navigation panel within the home page for the repository within Bitbucket.
Copy this address and use it with the remote Bitbucket command, where you will be adding Bitbucket as a remote for the local repository.
Step 4: Push the Data to the New Repository

You can use the push command to copy everything from the old repository into the new Bitbucket repository.
Step 5: Delete the Temporary Repository

With the data copied into your new repository in Bitbucket, you can delete the temporary repository you created to move the data with a few final commands.

