The Ultimate Manual for the Asana-GitLab Integration
Asana is a project management tool that helps individuals and businesses manage projects, create and track tasks, assign responsibility, and set timelines. GitLab is a DevOps software package that offers developers the ability to develop, secure, and operate software in a single application.
When you integrate Asana and GitLab, your work can easily flow across tools and teams. In addition, the integration allows you to sync tasks, issues, projects, Asana custom fields, GitLab labels, comments, assignees, and do lots more to stay on top of your projects and ease collaboration.
Want to learn more? Let’s take a closer look.
What is the Asana-GitLab Integration Anyway?
When you Integrate any two apps, it allows them to communicate with each other. Technically, this is achieved using an API or in simpler words, a link that allows the transfer and exchange of information between the two apps.
Therefore, when you integrate Asana with GitLab, it becomes possible to sync your data across both platforms. More specifically, you can sync titles, descriptions, comments, tags as labels, due dates, and more automatically.
How the Asana-GitLab Integration Works
Generally, project managers don’t like to deal with developer platforms, whereas software development teams would rather focus on DevOps than project management tools.
How Does the Asana-GitLab Integration Help You?
The Asana-GitLab integration solves this problem for organizations by syncing both teams seamlessly. Consequently, any changes or updates made by the PMs on Asana would instantly reflect on GitLab for the developers to action or take note of.
Integration via Unito
The Asana-GitLab integration can take place with the help of many different third-party services such as Zapier, Zoho, and Unito. But to keep things simple, we’re going to use Unito in this article. Founded in 2016, the service allows you to establish deep integrations with over 30 different apps, making life easier for project managers and developers.
What Gets Synced, What Doesn’t
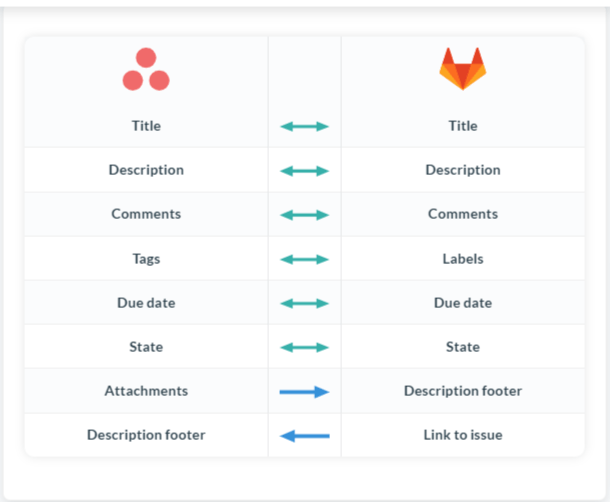
In the case of Asana and GitLab, the integration offers the syncing of multiple properties of each project on the two platforms. These properties or fields include title, description, comments, tags, due date, and more.
Depending on the field, it may be a two-way integration by default such as due date, a two-way integration that’s optional, a one-way integration such as attachments where data flows can only flow from one app to the other and not the other way round, or an optional one-way integration that you can enable from the app settings.
There are also properties that don’t get synced at the time of writing this article. These include Asana subtasks, Asana rich text formatting, user mentions, merge requests, and GitLab Priority.
Can You Customize How Asana Integrates With GitLab?
Yes, you can! There are several ways you can tweak the integration settings to make sure only the most relevant data flows between your apps and teams. Here are all the ways you can customize the flow of information.
Filter work items by tags
To help you hit the ground running, Unito syncs all the fields between Asana and GitLab by default. But if you’re an advanced user and are only looking to sync a particular set of fields, Unito would allow you to customize your workflow by syncing only some of the items with Asana’s tagging system.
One-way syncing
You can choose to sync only from one Asana project to another.
Map your Asana users
You can also map your teammates between Asana and GitLab such that the actions of individual users in Asana are represented by the same user in GitLab.
Sync closed items
The default setting in Unito is to only sync new open items. But if you want, you can also sync closed items.
Example 1: Open a New Issue in GitLab Through Asana
When you integrate Asana and GitLab, the flows created in Unito sync any two projects together. Opening a new task under a project in Asana would automatically open a new issue in GitLab with the synced project that flow is assigned to.
This allows project managers to track their projects like they normally would but at the same time, helps their developers stay on the same page by automatically opening new issues in GitLab by virtue of the Asana integration.
The data flow is bi-directional in this instance. That means an issue opened in GitLab would start a new task in Asana, while a task started in Asana would automatically open an issue in GitLab.
Example 2: Comment on a GitLab Issue Using Asana
The Asana-GitLab integration also syncs the comments posted under each task. Tasks in Asana become Issues in GitLab. Therefore, any comments within issues appear in Asana as comments under the related task.
Since these comments can often be posted quickly in real-time due to their chat-like nature, the integration helps teams stay on the same page while using their respective software for coordination.
How to Get Started With the Asana-GitLab Integration
Getting started with the Asana-GitLab integration is straightforward. The process involves signing up for Unito, choosing the app to integrate with, setting up the rules, and finalizing the integration.
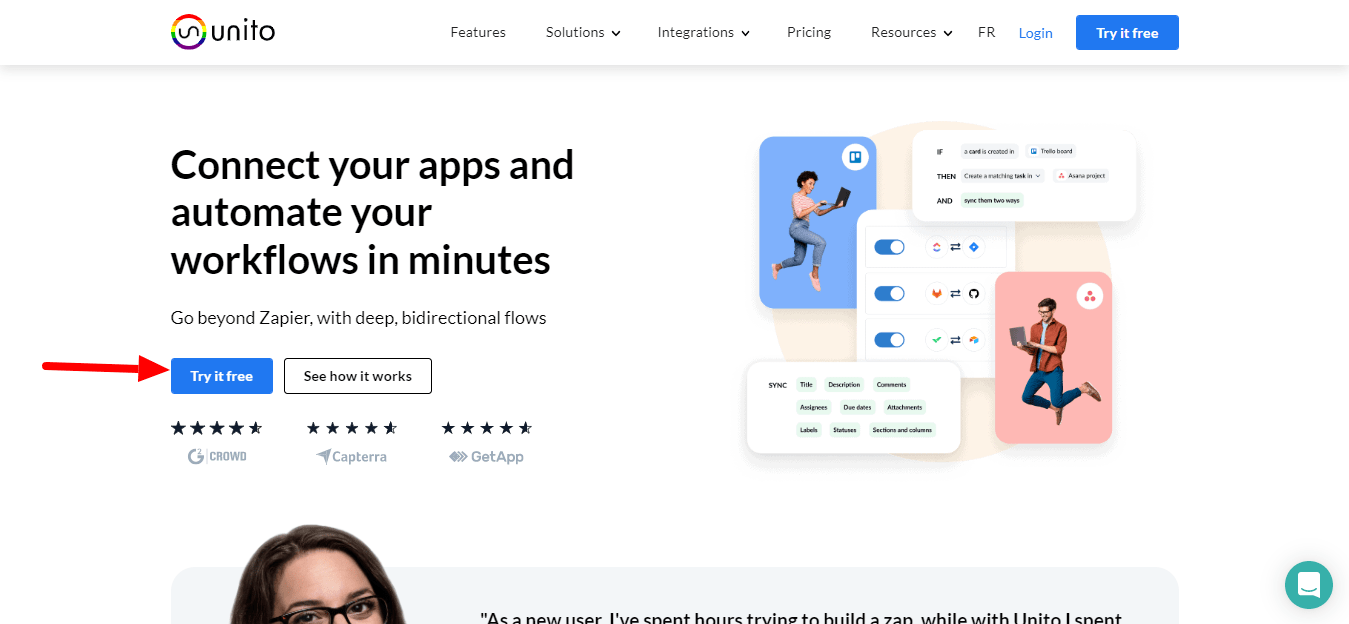
Step 1: Go to Unito.io
To kick start the process, go to https://www.unito.io and click the Try it Free button.
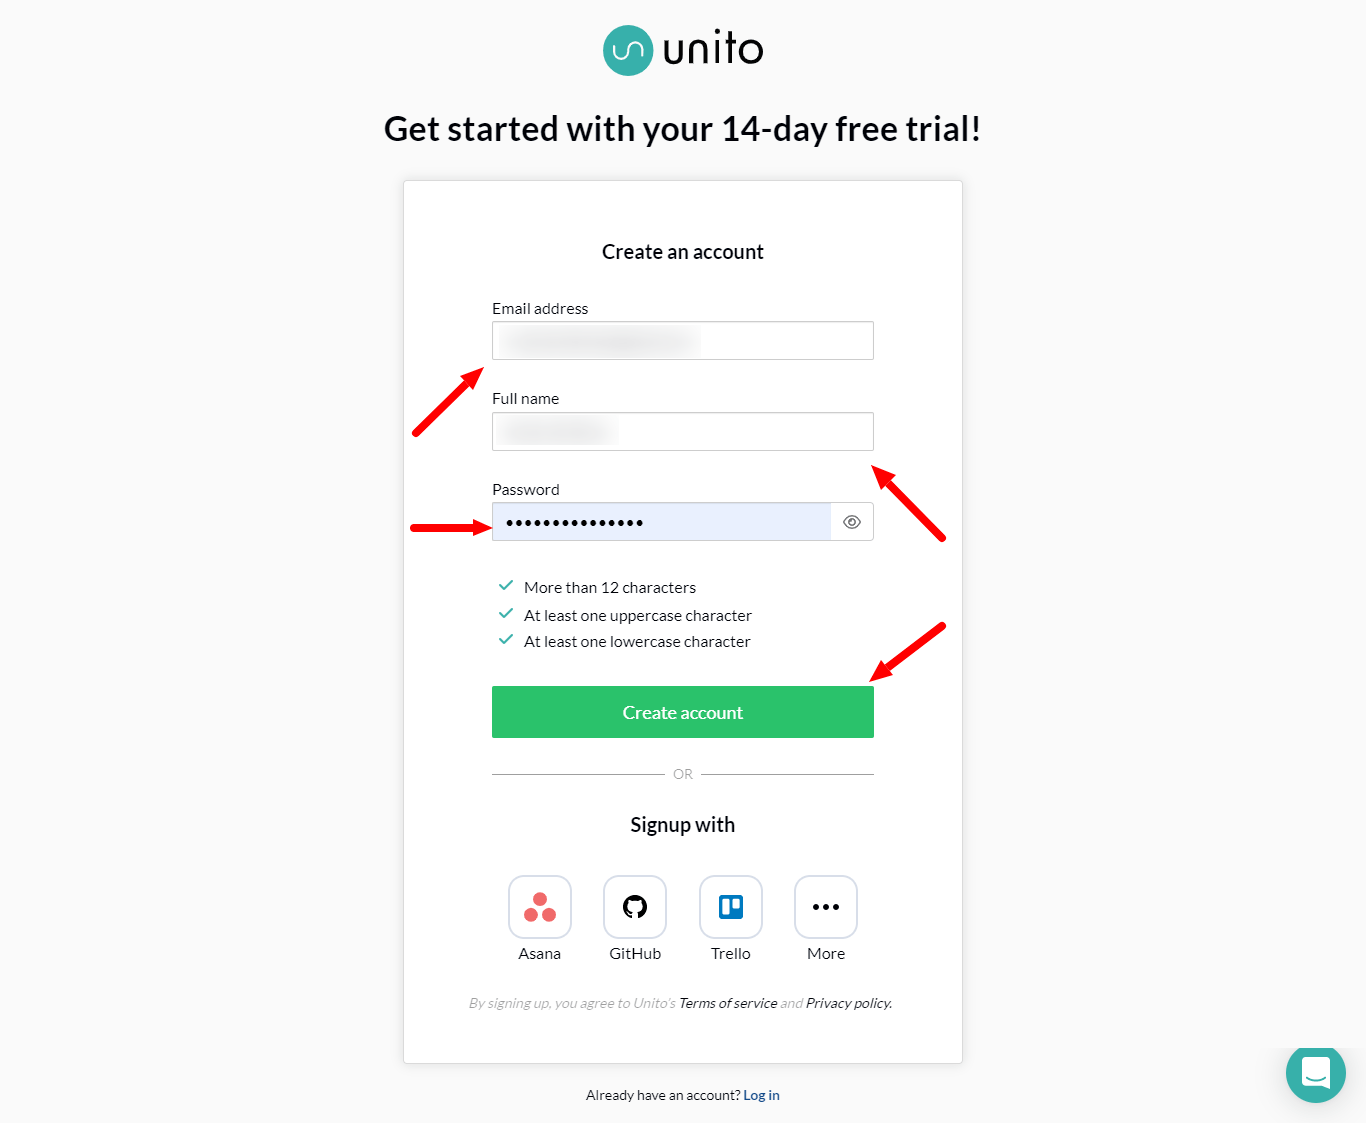
Step 2: Sign Up for the Free Trial
On the next screen, enter your email address, full name, and desired password, then click the Create account button. An alternative approach to this would be to sign up using Asana, GitHub, Trello, or some of the other options offered by the app. If you already have an Asana account, you can sign up through Asana for easier integration.
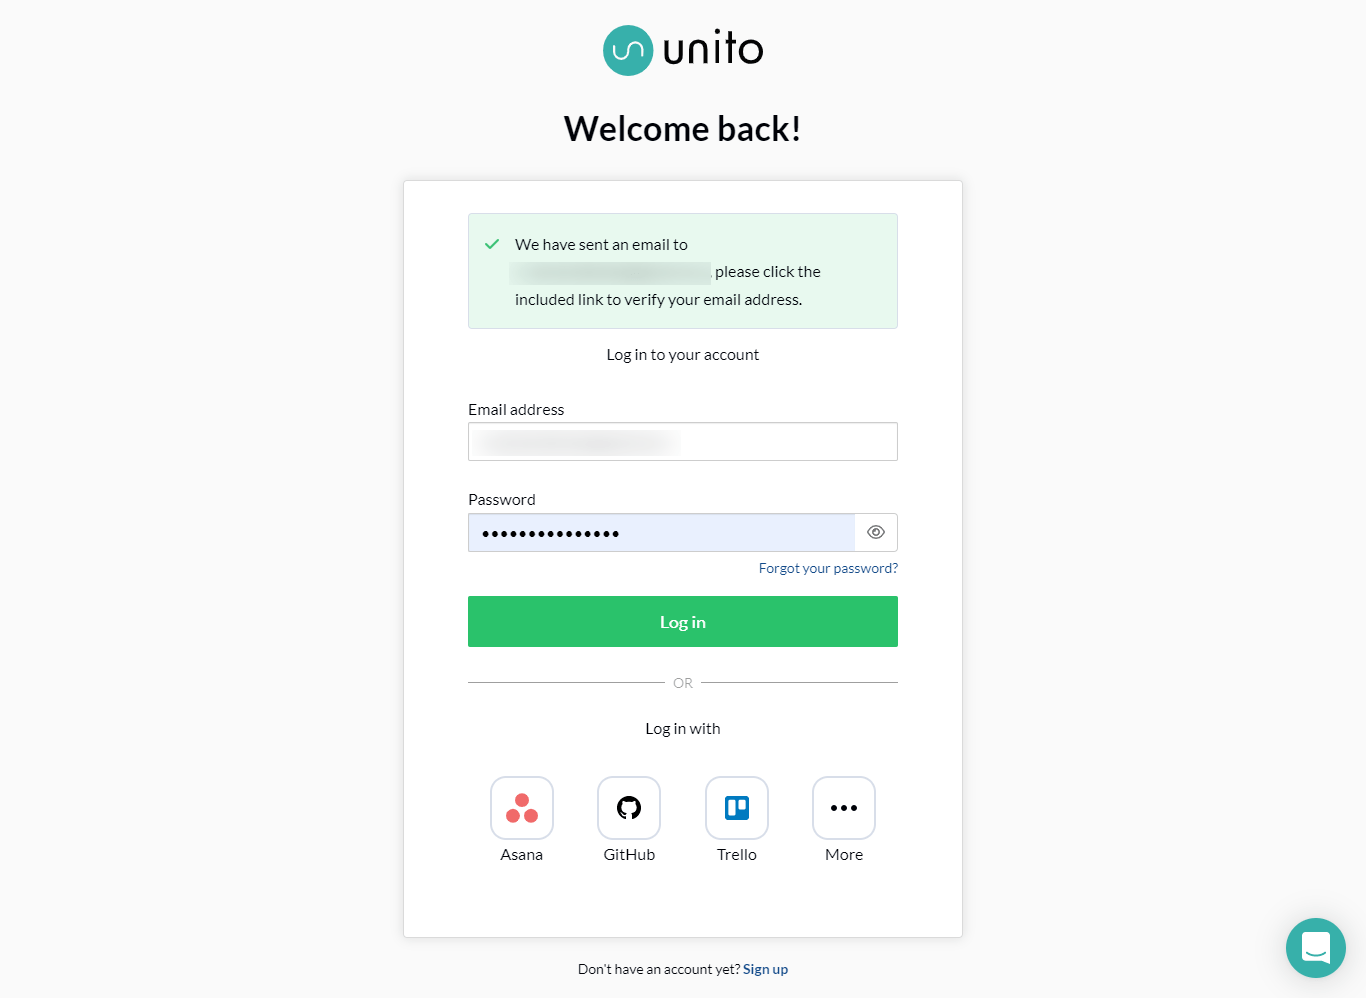
Step 2: Account Confirmation
At the end of completing the first step, the next screen is going to request you to confirm your email address through the confirmation link sent to you.
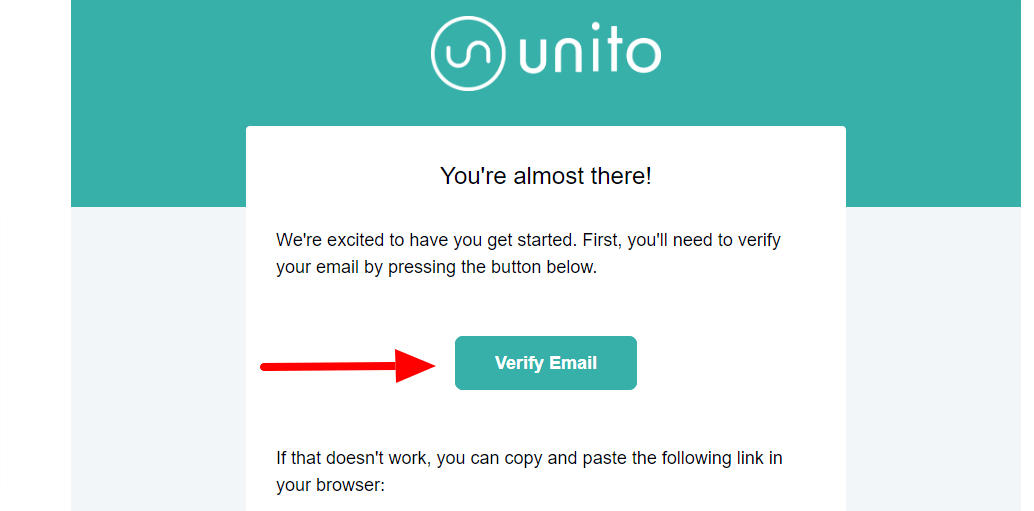
Check for Unito’s email in your inbox and click the Verify Email button as shown below.
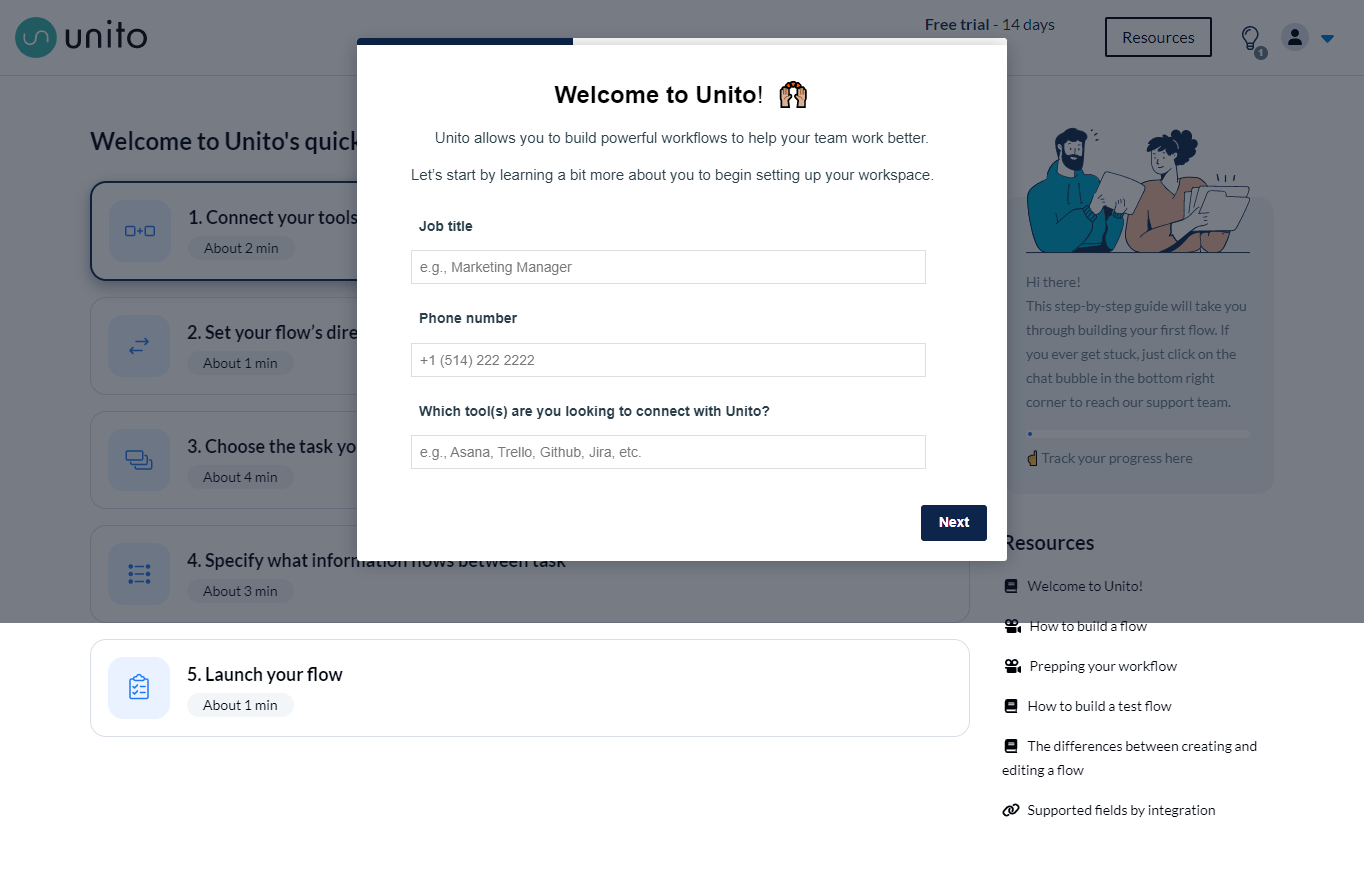
Step 3: Complete Unito Account Setup
Once you confirm your email and sign in, Unito is going to ask you a few basic questions to tailor your experience according to your preferences.
Step 4: Connect Asana and GitLab with Unito
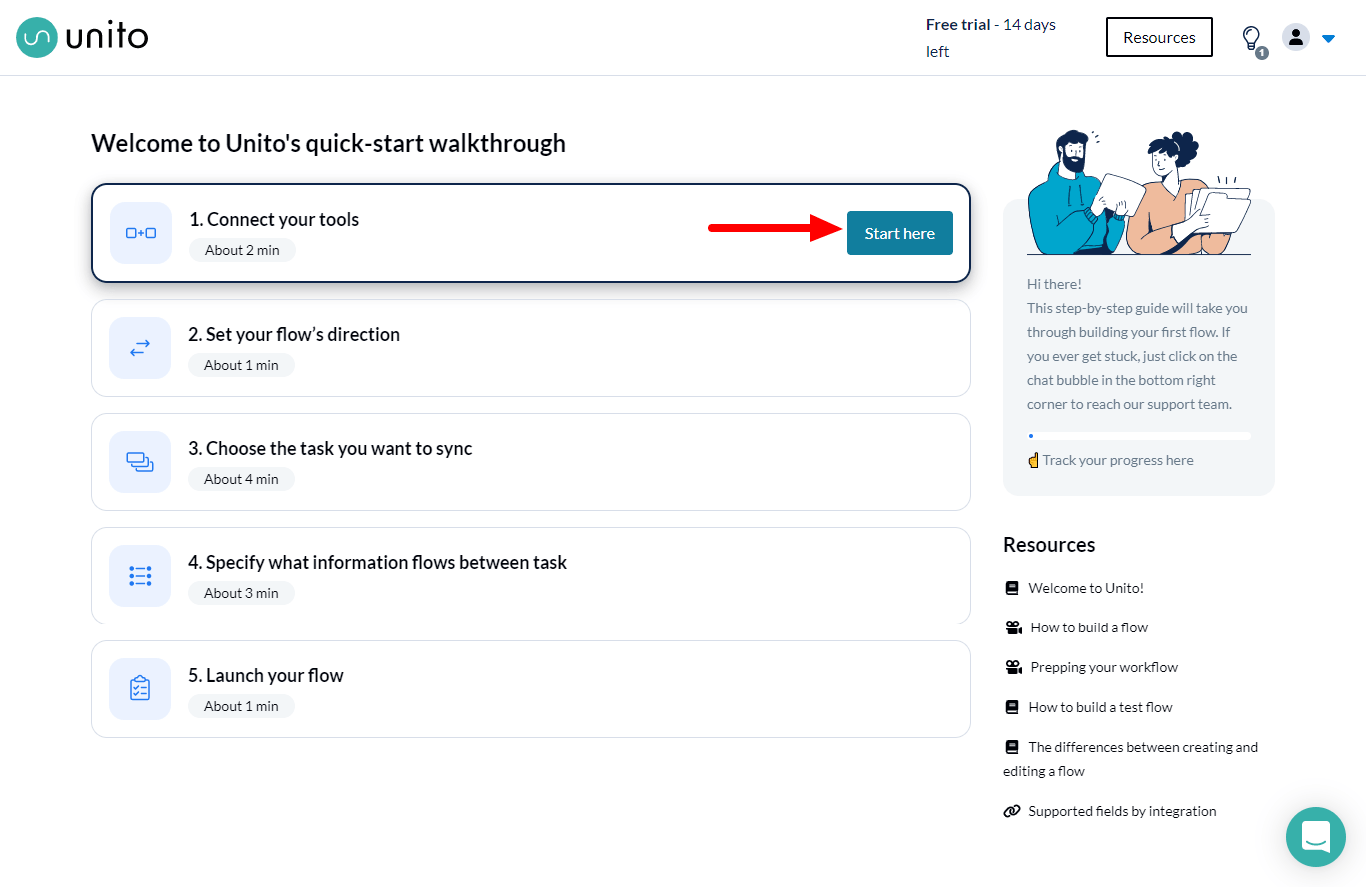
After completing the initial setup, it’s time to connect your tools with Unito. At the end of this five-step process, you’d have a functioning integration setup with a defined project or issue to sync and rules for its data flow.
Click Connect your tools to begin the process.
Here, you’ll be asked to select the tools you’d like to integrate. Select them from the lists as shown below.
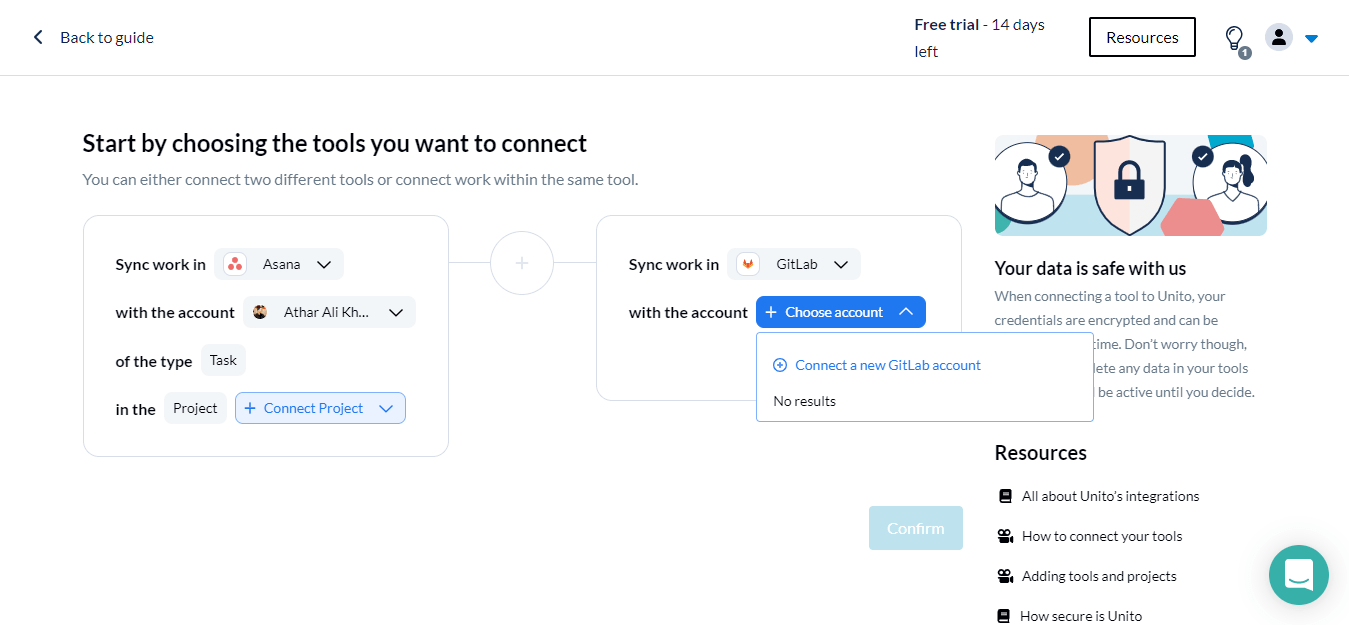
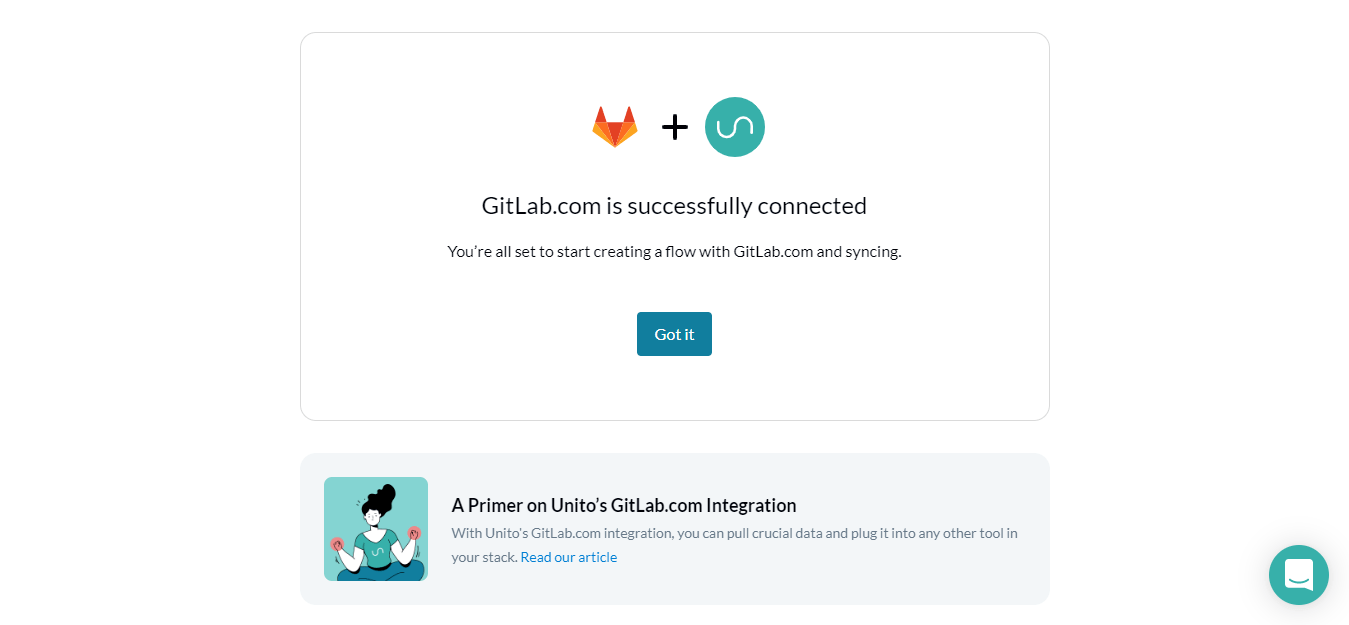
When you integrate a tool successfully, you’re going to receive a confirmation message from Unito as shown in the screenshot below.
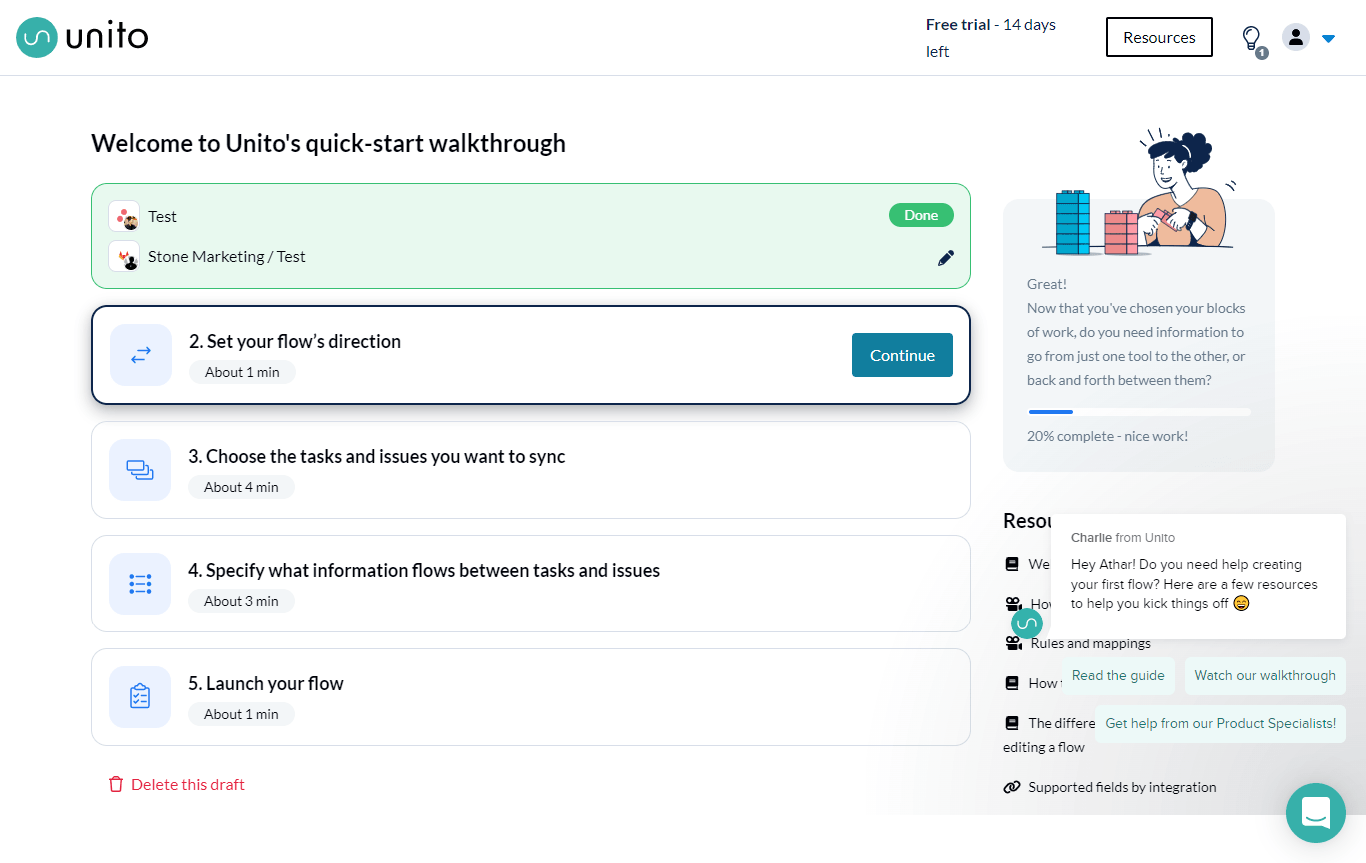
Step 5: Complete the Flow Setup
Now that your tools are integrated, you are all set to go ahead and complete your first flow. In the next steps, you can decide the direction of your data flow, choose the tasks and issues you’d like to sync, decide on what information flows between and issues, and then finally launch your flow.
For this demonstration, we have created a project in Asana called “Test” and a project by the same name in GitLab. You’re going to need a new flow in Unito for each new project you create.
Flow Direction
Tasks and Issues flow both ways between Asana and GitLab in the default arrangement. However, if you only want Tasks to be created in Asana or Issues to be created in GitLab, you can change the direction of the flow. Regardless of your choice at this stage, you’d still be able to change this setting later to suit your needs.
Select from the three directions indicated by the arrows visible here to set the direction of the flow.
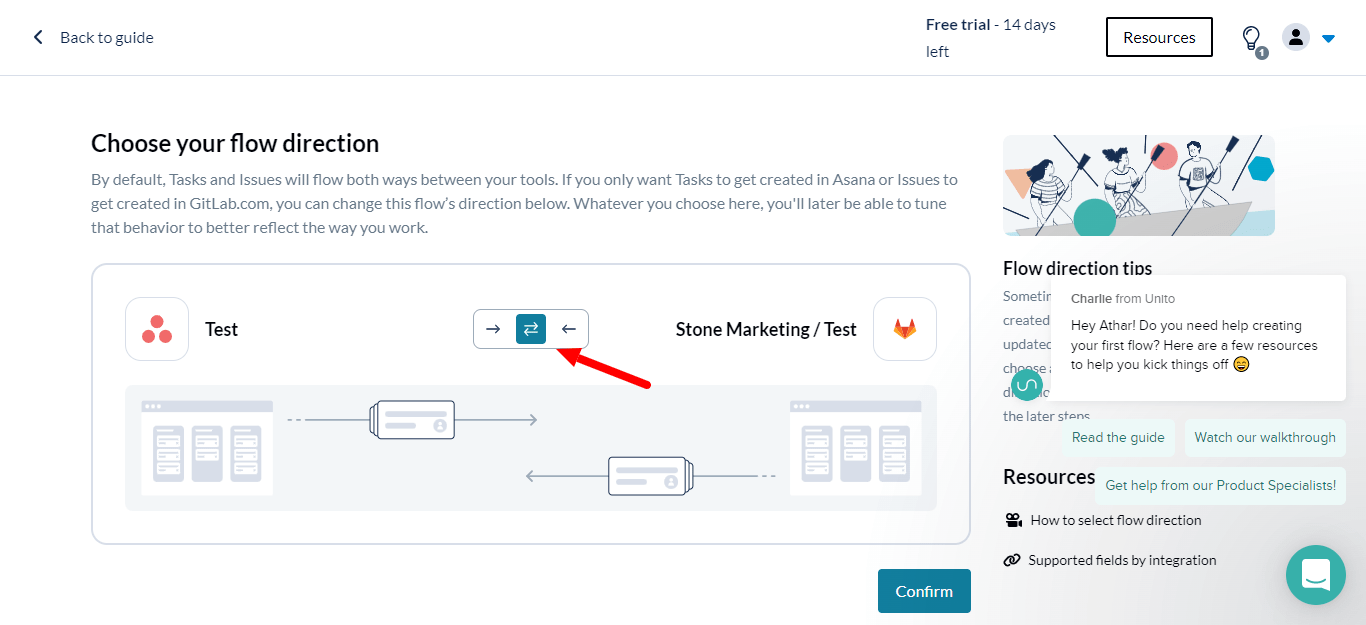
Click Confirm to set the flow direction and move to the next step.
Choose the Tasks and Issues You Want to Sync
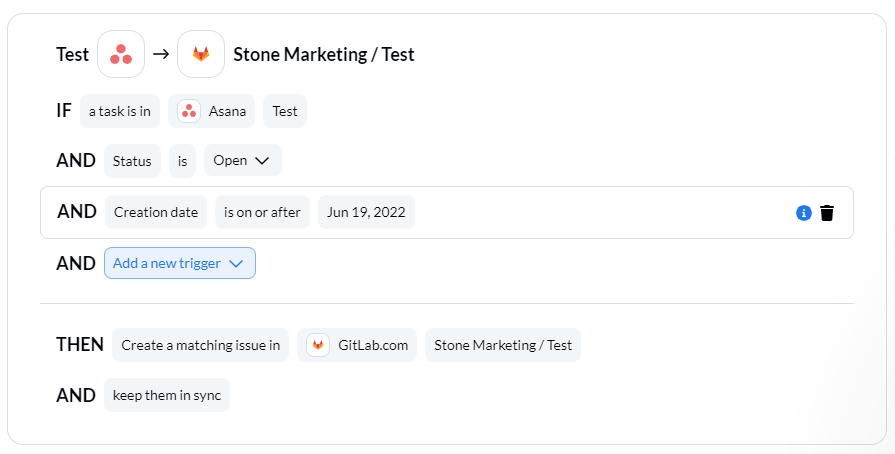
To help you get started, Unito has already set up a few rules for you to get a feel for how flows work. You can tweak these rules by adding or removing triggers to suit your needs.
The screenshot below shows how a project in Asana named Test works with a project with the same name on GitLab.
Specify What Information Flows Between the Tools
At this step, you have the choice of drilling down further by selecting the specific fields you’d like to sync based on what’s relevant to your work. You can also choose the direction of data flow for individual fields regardless of your earlier data flow setup.
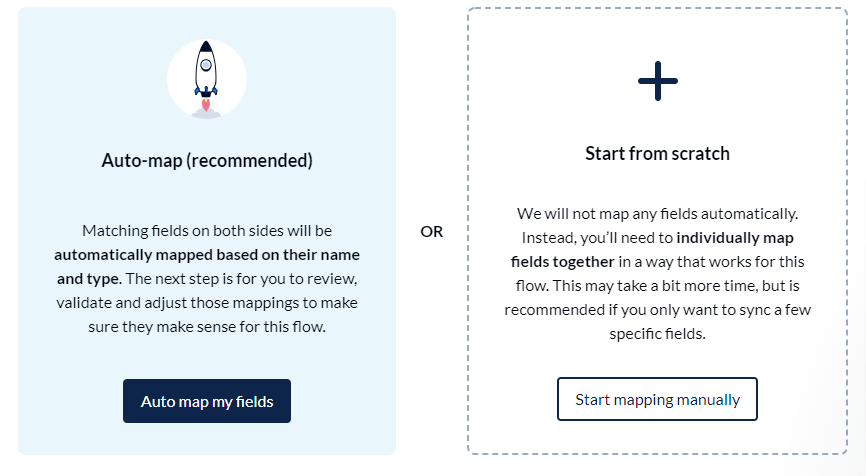
For quick results, you can allow Unito to auto-map the fields based on their name and type. You can review and confirm the auto-mapping setup before finalizing the flow.
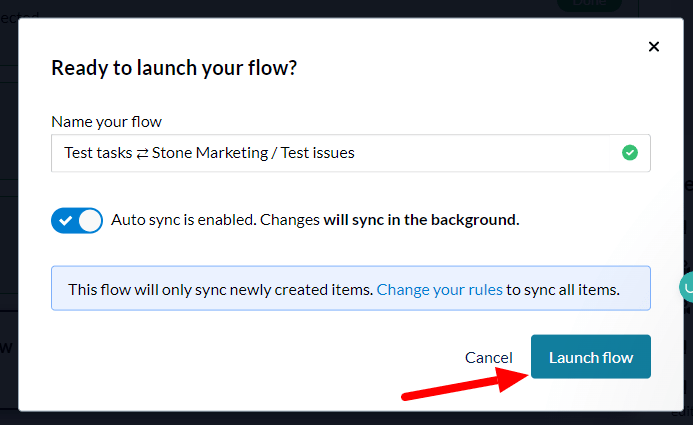
Launch Your Flow
Finally, Unito would ask you to name your flow and decide whether you’d like to enable or disable auto-sync. It also tells you whether the flow is syncing only newly created items or all of them. You can change this setting as well if you want.