The Ultimate Manual to Asana Calendar
One of the best reasons to use project management software like Asana is to track tasks and continue making progress toward deadlines. The calendar view built into Asana allows both teams and individuals to determine their upcoming workloads and deadlines at a glance.
What Is Asana Calendar Anyway?
Asana Calendar delivers the ability to view tasks for a project in a calendar format. It is one of the view options for Asana projects, along with Kanban boards, a list format, and Timeline.
Certain types of projects lend themselves to using a calendar view, such as projects with inflexible due dates. When planning a big event, such as a kickoff luncheon, seeing which tasks are upcoming and what’s most important can be helpful for a successful result.
Asana Calendar can provide a few different ways to help with keeping a project on task.
Individual Calendar View
Users can adjust the Asana Calendar to show only their personal tasks and due dates. This is a great way to see someone’s workload, so the team knows which individuals have the bandwidth to take on additional tasks or projects.
If deadlines seem to be piling up for an individual, the team administrator can adjust deadlines or shift tasks to other team members to help move the project along.
Project Calendar View
When team members want to see how the project is progressing compared to the estimated deadlines, switch the Asana Calendar view to project. It’s easy to see in this view when deadlines are approaching for the overall project.
The project view limits the view to a single project. For teams working on multiple projects simultaneously, this single project view is helpful to reduce the clutter in Asana Calendar.
Team Calendar View
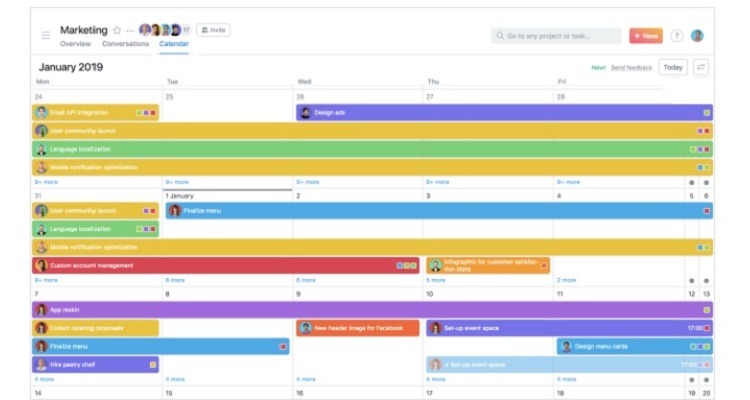
Asana offers a Team Page view, which allows team members and administrators to see all of the projects for the team in one place. Just click on the name of the team on the left side of the main Asana screen. The items on the Team Page include:
- Members of the team
- The purpose statement for the team
- Projects in progress for the team
Being able to see all of the projects the team is working on can be highly beneficial. For example, teams can determine when overlapping deadlines for projects are happening, leading to potential issues. Administrators can use the Team Page to figure out when they need to shift some resources from one project with a far-off deadline to a project with a closer deadline.
On the Team Page, team members can use either a conversations view or a calendar view. To switch to calendar view, click the Calendar text link at the upper left of the window.
The calendar view can seem a bit cluttered with all of the projects listed. But it provides a nice overview of how the team’s workload looks at a glance. Additionally, team members can click on any task or project listed in the calendar view on the Team Page to see its details.
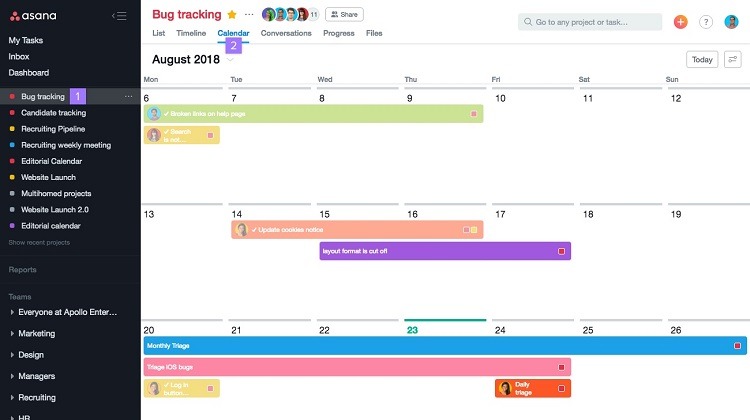
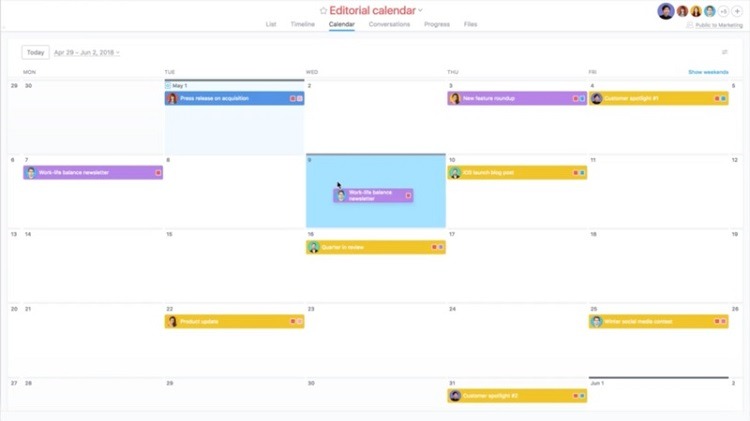
How Asana Calendar Works
For those familiar with other calendar apps, such as Google Calendar, the Asana Calendar view has a similar look. Its base design provides a view with columns or squares that represent individual days. Tasks and projects listed inside each column or square have an association with that date.
It offers the ability to view the information in a few different ways as well.
Color coding
Asana uses different colors to signify specific task categories in the calendar view. The colors help team members quickly decipher the information in the calendar.
Asana allows teams to copy the same color scheme that the team uses in other areas of Asana, such as on the Kanban board, for simplicity. It’s also possible to alter the colors in the calendar to make them unique to each user’s situation.
Date range
Users can select various date ranges in the Asana Calendar view, such as one week, two weeks, one month, or a custom date range.
Clicking on an individual date in the calendar view gives team members the ability to see all tasks related to that date.
Asana Pricing
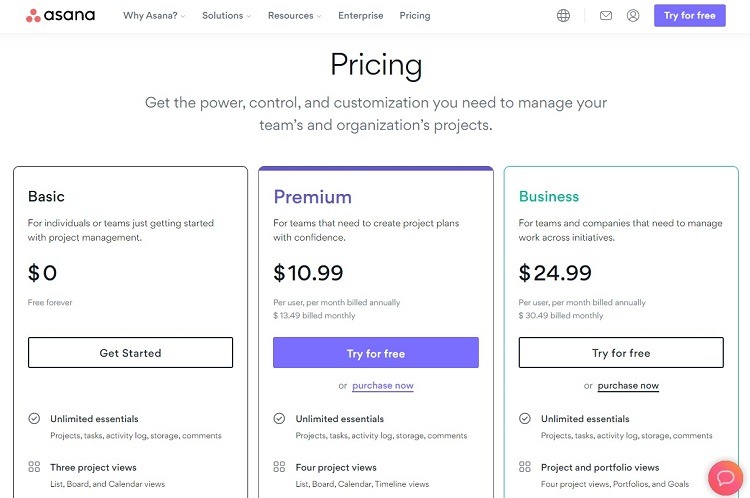
The Asana Calendar feature is part of all pricing tiers in Asana, including the Basic (or Free) tier.
- Basic: The Basic tier is free to use indefinitely. In other words, it’s not a free trial period. In this tier, users will have a 15-person limit on the account, though.
- Premium: Users pay $10.99 per user per month when billed annually and $13.49 per user per month when billed monthly with the Premium tier. There are no limits on the number of users in this tier.
- Business: Users pay $24.99 per user per month when billed annually and $30.49 per user per month when billed monthly with the Business tier. It also has no limitation on the number of users.
- Enterprise: For those interested in the Enterprise tier and who need its advanced features, contact Asana for a custom price quote.
Here are some of the different ways to use the Asana Calendar to enhance efficiency for team members tracking projects.
Example 1: Creating Tasks Directly in Asana Calendar
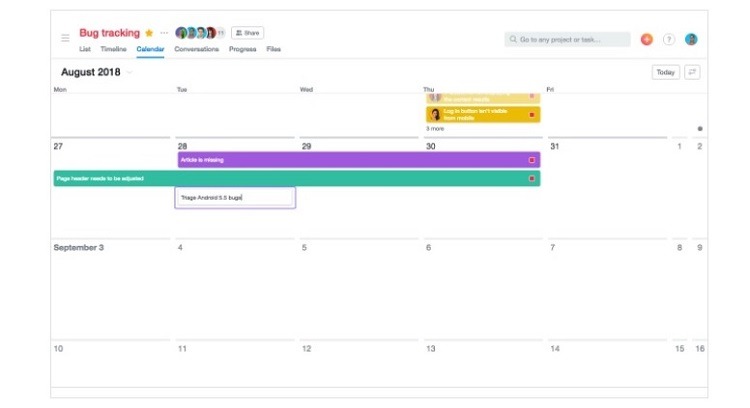
Rather than using the Kanban board view to create tasks and then going to the calendar view to see deadlines, team members can create task cards from inside the calendar view. This saves quite a bit of time, especially for team members who spend most of their time using the calendar view.
To set up a task within the calendar view, just click on a blank space inside one of the dates in the calendar. In the popup text box that appears, type the name of the task to create. Users can edit the task’s name later.
With the task created, simply click on it to open the task window and enter the details. Asana will fill in the due date based on the date the team member clicked. Should the team member want to use a different due date, it can be edited in the task window.
Other standard items users can add to the task window include the assignee, priority level, start date, end date, date range, and deadline time.
Example 2: Setting Up Recurring Tasks in Asana Calendar
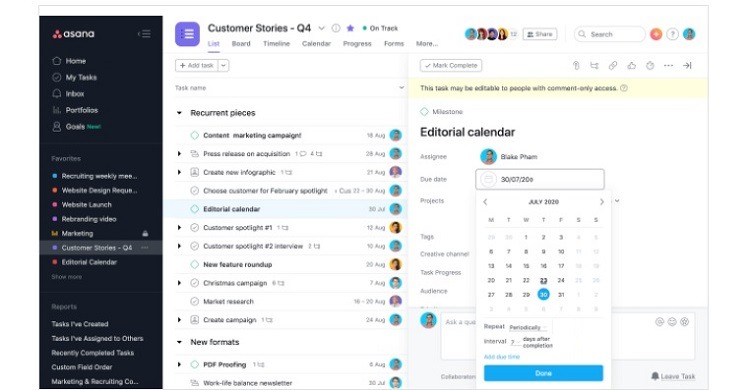
When working on a task that the team does for every project, Asana can automatically enter it. Having Asana enter it automatically ensures the team never forgets to add it to the project.
However, it’s also important that the recurring item doesn’t show up so often in the Asana Calendar that it clutters the view.
Asana handles this issue by only showing the recurring item once in the calendar view, helping to reduce clutter.
Once a team member marks the recurring task as complete, Asana copies the information from the task and pastes that information into the next task occurrence. Team members can edit the data later if desired.
To create a recurring task, look for the Set to repeat link toward the bottom of the due date section of the task window. Team members then can set up the repeating dates. Start by selecting the frequency of the repeat, such as daily, weekly, or monthly.
Example 3: Selecting Colors for Tasks in Asana Calendar
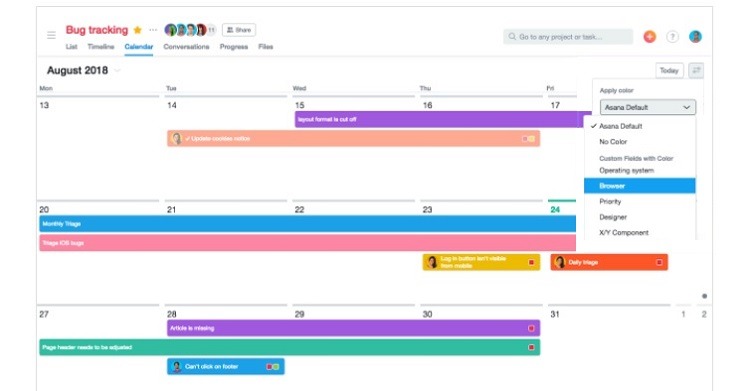
When viewing Asana Calendar, it can be helpful to color-code different types of tasks. This gives team members the ability to quickly decipher the progress of projects and tasks at a glance. Rather than reading the text labels to figure out the status of the project’s various tasks, colors will show information about the various types of tasks more clearly.
To select colors, click the Preferences button in the upper right corner of the Asana window. Select Apply Color from the menu to determine which color to use for different types of tasks.
The easiest option is to select Asana Default from the secondary menu. This allows Asana to pull its automated color designations that the team set in other views of the project management software. Having the same color coding in all views in Asana will simplify things for teams.
Users also can create specific colors for custom fields within Asana Calendar using the Apply Color menu.
Example 4: Adjusting Due Dates for Tasks in Asana Calendar
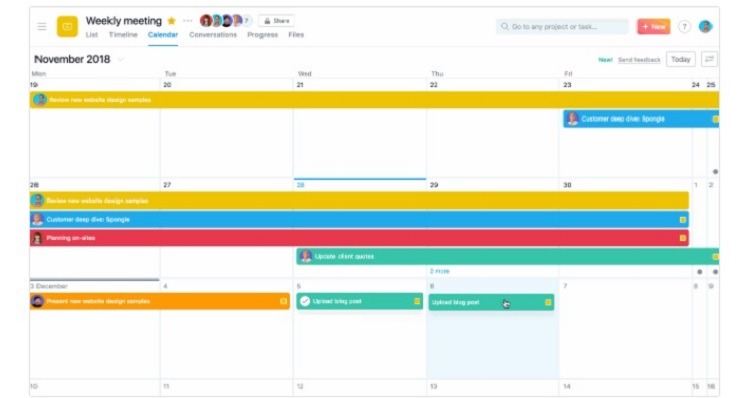
One of the best reasons to use the calendar view in Asana is to receive a graphical representation of upcoming due dates. Should the team face quite a few due dates in the next couple of weeks, administrators can adjust some of the due dates directly in the Asana Calendar.
Just click and hold onto the task that should have a new due date. Drag the task to the date on the calendar that should represent the new due date. Asana will automatically change the details of the task to reflect the new due date.
Selecting the new due date using the calendar view is beneficial because administrators clearly can see upcoming tasks for the team. They then can pick a new due date that makes sense considering the team’s upcoming workload.
Example 5: Using the My Tasks View in Asana Calendar
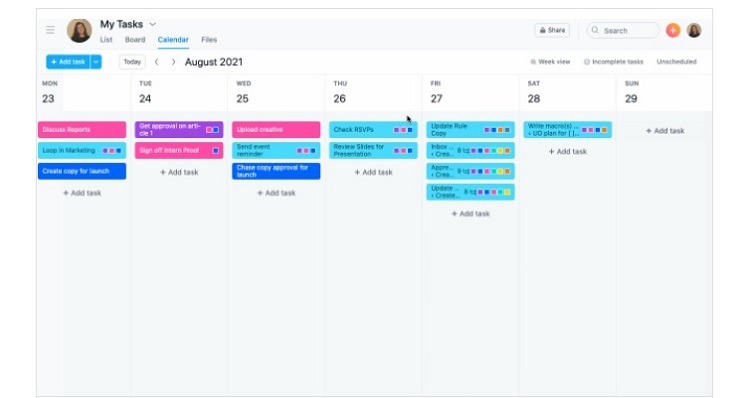
When a team member only wants to see their tasks, Asana Calendar provides the My Tasks view from within the calendar view. This gives individual team members an easy way to see the deadlines they face over the next week in a simple display format.
Within the one-week view, each day has its own column. Each task then appears in a color-coded list within the column for the day. Team members can drag and drop the items to rearrange the tasks within the day column. This ensures the most important tasks end up at the top of the column.
Asana offers a few different organization options in the My Tasks view, including:
- Long-running tasks: Users can toggle their long-running tasks on and off within the My Tasks view. Turning these tasks off makes it easier to see the ones due today by reducing clutter on the screen.
- Status of tasks: Team members can view all tasks, tasks marked as incomplete, and ones marked as complete through the My Tasks view.
- See unscheduled tasks: When a team member has a set of tasks that don’t yet have a due date, the My Tasks window can display these tasks. Users can assign a due date from this view if desired.
Example 6: Switching Between Timeline View and Asana Calendar
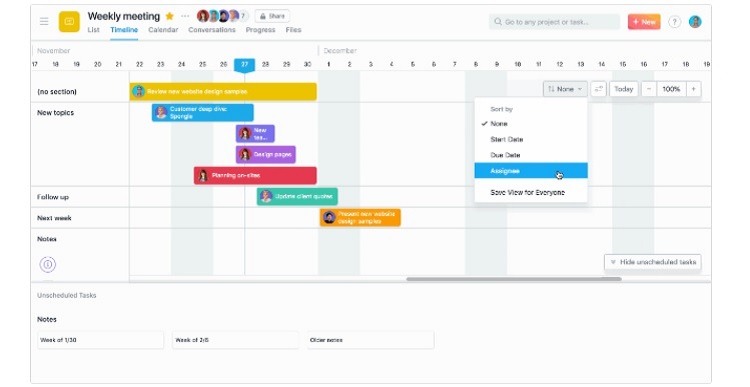
As a subset of the Asana Calendar, Asana offers the Timeline view. It provides more of a big picture view of the upcoming work for the team than the calendar view. It also can show the relations between various tasks a little more clearly than the calendar view. Asana calls these relations task dependencies.
As the team builds projects that have a time range with start dates and due dates, the Timeline view creates a block for the entire length of the project. Team members can see how these blocks for different projects overlap through the Timeline view. This makes it easier to determine exactly when the team will have free time available to take on a new project soon.
With the Timeline view, team members can view all projects in the queue or limit the Timeline view to a single project.
The Asana Calendar will work better for situations where deadlines are looming, and the team wants to see exactly which tasks need immediate attention. Switch to the Timeline view to see a better overall picture of the team’s upcoming work.
The timeline works better when the team has quite a few task dependencies, as these are easier to see in Timeline than in Asana Calendar.
How to Get Started With Asana Calendar
When a team is ready to use a calendar view to create a project in Asana, one of the easiest ways to start is using a template. Asana templates provide a starting framework for developing a project. Users then can switch the project over to the Asana Calendar view.
Step 1: Select a Template
Visit the Asana templates page to search through the available templates. Open the desired template and name the project.
With the project opened, because of a template, users often will see some suggested task cards and project columns pre-populated in the project.
Step 2: Add Due Dates
Start creating tasks in the new project. Within each task, users can add a due date and an assigned team member.
To use the Asana Calendar view efficiently later, it’s crucial to set due dates for the tasks.
Step 3: Switch to Calendar View
To switch to the Asana Calendar view, just click the Calendar text in the upper left corner of the project window.
This view makes it easy to see when tasks have upcoming due dates, allowing the team to focus first on the most important tasks.
Step 4: Set Calendar As the Default View
Setting this as the default view for teams that want to always use the calendar view in Asana is relatively easy.
With the calendar view on the screen, click on the three dots button in the upper right corner of the screen. Then click Save layout as default to create a default view for Asana Calendar.

