The Ultimate Manual to Shared Google Drives
If you’re a Google Workspace user and need a way for your team to collaborate on projects, Shared Google drives are your answer. Once you understand what they are and how they work, you’ll be able to use Shared Google drives regularly. To get started, all you need to do is create a Shared drive, add members, and set access levels.
What are Shared Google Drives Anyway?
Shared Google drives are places where multiple team members can store, search, and open files in collaboration. Unlike My Drive, files are owned by the entire team instead of one person. If someone leaves the Shared drive, its files and folders can still be worked on by other team members. They are perfect for projects that need attention from several individuals.

How Shared Google Drives Work
Shared Google drives allow team members to effortlessly collaborate on projects. It’s a simple way for a project manager to create a drive, invite team members, and set their access levels. Depending on their access level, team members can work together to edit documents, make comments, create new folders, and move files to the Trash.
Before we get into the details, it’s important to understand how this platform works. If you aren’t already familiar with Google Workspace, it’s a collection of collaboration and productivity tools, and it has four plans available. It includes apps like Google Drive, Gmail, Google Meet, Google Docs, Google Chat, Google Calendar, Google Sheets, Google Slides, and more.
Google Drive is a place where users can store, share, and synchronize files. Since it’s located in the cloud, a user’s files can be accessed from any of his or her devices. It is broken down into My Drive, Shared with me, and Shared drives.
Files on My Drive are private and can only be seen by the account owner. However, users can choose to share files and folders with other Google users if desired. They can do this by adding people’s names or email addresses or copying the file link and allowing others to access it.
The Shared with me section is where users can see files other users have shared with them. The search bar lets users quickly find relevant files, and the Priority function helps users categorize shared files. Users can add the shared file to an existing workspace or to a new workspace. My Drive and Shared with me work together seamlessly, but Shared drives work slightly differently.
Before we continue, please note that shared Google drives aren’t available on the Business Starter plan. Shared drives are available in Business Standard, Business Plus, and Business Enterprise.
With Business Standard, each user can upload two terabytes of data to the Shared drive. Business plus lets every user add up to five terabytes, and Business Enterprise has no limit. If you want the Shared drive feature, choose a plan that includes Shared drives or upgrade if you have Business Starter.
Unlike My Drive and Shared with me, no one owns the files in a Shared drive. Although individuals create files, they are owned by the drive once added to a Shared drive. This is helpful when a project collaborator is assigned to a different project or leaves your organization.
All Shared drive members see the same content. Once team members are added and assigned an access level, they can begin creating files and collaborating on a project. When contributions are made, changes are automatically transferred to the Shared drive domain.
Example 1: Content Marketing Campaign
Fire Safety Solutions is a SaaS company that creates industry-compliant software helping firefighters track fire trucks, respond to emergencies, and manage equipment inventory.
The company is struggling to attract new customers, so it decides to create a content marketing campaign to promote its software. It aims to create software guides, best practice articles, and fire safety blog posts to build traffic to its website. Within its content articles, it includes an option for readers to sign up for a free trial of its software.
The company’s content director, Jason, puts together a team of three editors and six in-house writers to build the campaign. He starts by signing up for Google Workspace’s Business Standard plan and creating a Shared drive titled, “Content Marketing Campaign”. He invites the nine team members to the campaign and gives them Content Manager access.
His goal is to publish 96 blog posts per month. He starts by assigning each writer four articles per week. The writers create the articles directly in the Shared Google Drive, and the editors proofread them upon completion. The three editors make comments and suggestions, and the writers then create a final draft. Jason reviews all the final articles and then posts them on the company website.
After six months, Fire Safety Solutions now has 576 helpful fire safety articles published online. The content marketing campaign attracted 35 new clients to its free trial. Of the 35 free trial users, 15 signed up for a full-time membership. With the help of shared Google drive collaboration, Fire Safety Solutions is now able to attract an average of 30 additional clients every year.
While this specific example applies to a fire safety software company, shared Google drives can help businesses of any type create effective content marketing campaigns through enhanced team collaboration.
Example 2: University English Curriculum
Riverdrive University is a small college located in upstate New York. Its disorganized English department includes two experienced professors and five struggling young teachers. The head of the department, Samantha, decides that encouraging teacher collaboration would help the new teachers learn from the experienced ones, and it would create a more organized structure.
The University already uses Google Workspace’s Business Enterprise plan, and all professors have a Google account. Samantha creates a Shared Google drive called “Level 1 English Curriculum” and adds all seven teachers. The two experienced professors are given Content Manager access, while the five young teachers are given Commenter access.
Through the Shared drive, the experienced teachers collaborate to create a Level 1 English curriculum for the school’s incoming freshmen. This includes a standard syllabus, weekly schedules, assignment templates, and a teacher best practices guide.
The five younger teachers can view the documents, learn the best practices, and comment on documents when they have questions. Once the semester begins, all teachers now have an organized guideline on how to conduct their classes.
After a couple of years, Samantha gives the remaining teachers Content Manager access, allowing them to upload their own documents and make edits to the syllabus. With the help of a shared Google drive, Riverdrive’s English department is more organized, and teachers can now collaborate more effectively.
This example is used to demonstrate how any organization can become more efficient and productive using this Google Workspace tool.
How to Get Started With Shared Google Drives
Create a Shared Drive
Get started by creating a Shared drive. This can be done by opening the main menu bar on the left or by selecting the grid icon in the top right corner. Next, select Drive and then Shared Drives on the left. Select New at the top and a pop-up box will appear. In it, type in a relevant drive title then select Create.
Add or Remove Members
To add or remove members, you must have Manager access level. To begin, select Shared Drives then double click on the specific drive on the left. Next, select Manage members at the top. From there, you can add email addresses, names, or a Google Group to the Shared drive.
All members must have a Google account to be added. To remove members, start by clicking the down arrow next to their name. Next, click Remove member and then Done.
Set Access Levels
You also need Manager access to set access levels for other team members. Access levels can be changed by selecting the down arrow next to a team member’s name. From there, you can select the access level and check the Notify people box if you want to alert them of the change. Leave the box blank if you’d prefer not to alert them. Finally, select Send.
There are five access levels called Viewer, Commenter, Contributor, Content Manager, and Manager. New members are set to the Content Manager access level by default. This level is fit for those who need to edit files in Google Drive for desktop.
The only thing Viewers can do is view folders and files. Commenters don’t have much access either, but they can create comments on Shared drive files.
Contributors can edit files, add files, create files, and create folders. They’re able to move files from My Drive to a Shared drive, restore files from Trash for up to 30 days, and add groups and people to files.
Content Managers can do everything a Contributor can, but they can also move folders and files within a Shared drive and move folders and files to Trash.
Managers have the highest level of access. They can change member access levels, add or remove members, and permanently delete Trash files. Managers can also add groups and people to specific Shared drive folders and move files between two different Shared drives.
Share Folders and Files
Folders and files can be shared with users outside of the Shared drive. You must have Manager access to share folders and at least Contributor access to share files. There are two ways to do this.
To share with groups or individuals, select an individual folder or file or hold Shift and select multiple. Next, select Share. A pop-up will then appear that says, “Share with people and groups”. There, you need to enter the email addresses of everyone you’d like to share with.

Before sharing, select the down arrow to edit each user’s access level. You can also check the Notify people box if you’d like users to receive an alert of the shared document. Leave this unchecked if you don’t want them to be notified. Finally, select Send or Share.
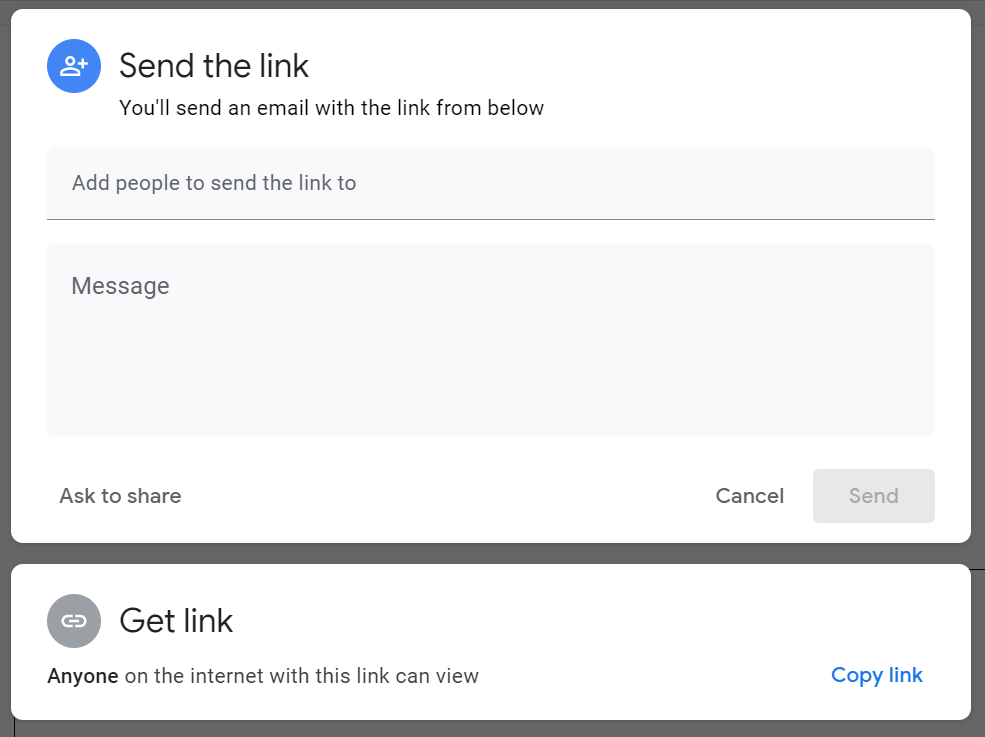
The second option is to share with anyone by copying the folder or file link. To begin, select the individual or group of folders and files. Then, select Share.
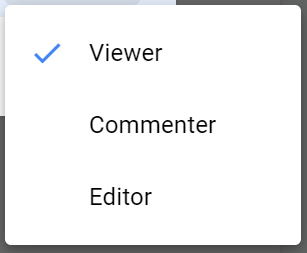
Next, you’ll want to set the access level of users who receive the link. To do this, select Change under your organization’s name. Then, click the down arrow to assign access. For folders, you can select Content Manager, Contributor, Commentor, or Viewer. For files, you can choose between Editor, Commentor, or Viewer.

If you want to share the folder or file with users outside of your organization, click the down arrow next to your organization’s name and select Public. Finally, select Copy link then Done. From there, you’re able to share the link via email, social media, or any way that you prefer.
Secure Folders and Files
Google gives users the ability to secure individual folders and files or all folders and files within a Shared drive. To do this, you must have Manager level access.
To secure individual folders and files, start by selecting a file. Next, select Share. At the bottom of the pop-up box, select Who Has Access. Select More, and then check the box next to Restrict download, print, & copy actions on this file for commentators and viewers. Finally, select Done.
To secure all folders and files within your Shared drive, begin by selecting the Shared drive on the left. Then, select the down arrow next to the Shared drive name. From there, select Shared drive settings. Select Edit, and you’ll be able to set three specific permissions.
You can choose whether Viewers or Commentators can print, download, and copy files. You can decide whether to share folders and files with organization members who are not members of the Shared drive. Finally, you can determine if folders and files can be shared with users outside your organization. Once these are complete, select Apply then Done.
Directly Email Shared Drive Members
While you can collaborate with team members within a Shared drive at some level, it can be easier to send everyone an email directly. There are no access level requirements needed to do this.
Begin by selecting the Share drive on the left. Then select the down arrow next to the Share drive name. From there, select Email members. You can then enter your message.

You also have the option to send the email to yourself or only send the email to users of a certain access level. You can decide this by selecting the appropriate boxes. Emails also automatically include a link to the Shared drive. When you’re ready, select Send.

